

Craftsman 358799701 Owner’s Manual
Operator's Manual
ICRAFTSMIIN°I
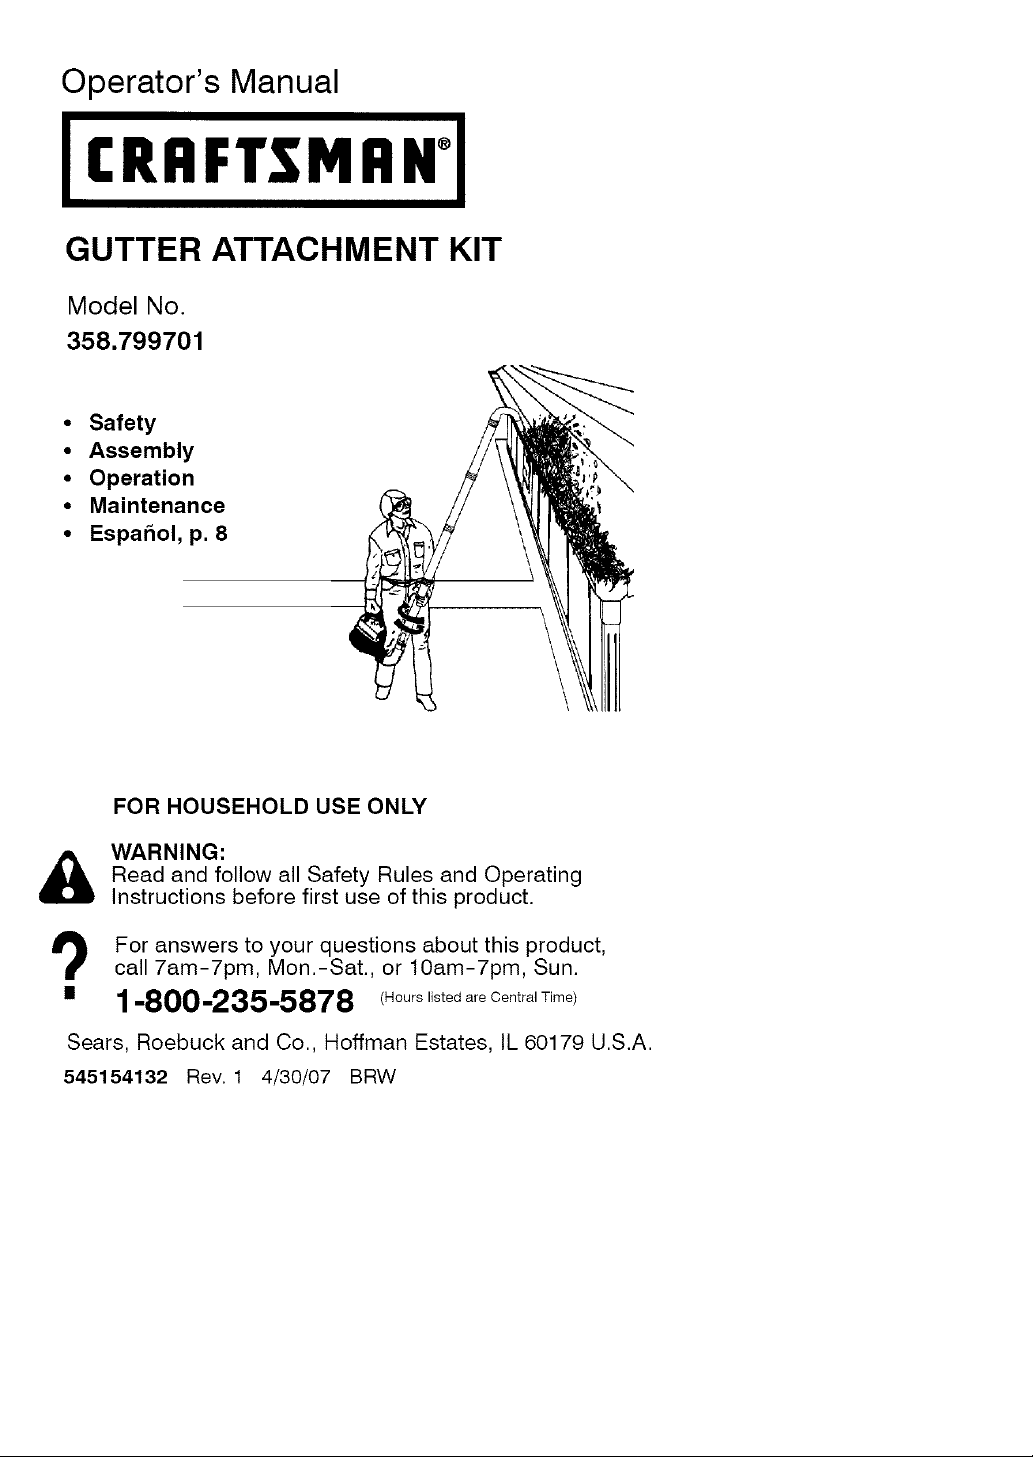
GUTTER ATTACHMENT KIT
Model No.
358.799701
• Safety
• Assembly
• Operation
• Maintenance
• Espar_ol, p. 8
\
\
FOR HOUSEHOLD USE ONLY
Read and follow all Safety Rules and Operating
WARNING:
Instructions before first use of this product.
1_ or answers to your questions about this product,
call 7am-7pm, Mon.-Sat., or lOam-7pm, Sun.
• 1-800-235-5878 (Hours listed are Central Time)
Sears, Roebuck and Co., Hoffman Estates, IL 60179 U.S.A.
545154132 Rev. 1 4/30/07 BRW
Safety Rules
Assembly
Operation
Maintenance
2
Storage 7
3
Spanish 8
6
Parts & Ordering Back Cover
7
z_
• llWARNING: Failure to follow all
Safety Rules and Precautions can re-
sult in serious injury.
KNOW YOUR UNIT
• Read your operator's manual for the
original tool. Make certain you com-
pletely understand and can follow all
warnings and safety rules in the manual
for the original tool and in this manual
before operating the tool with gutter at-
tachment installed.
• Restrict unit to users who understand
and will follow all warnings and safety
rules in the manual for the original tool
and in this manual.
_, WARNING: Inspect area before
starting unit. Remove all debris and
hard objects such as rocks, glass,
wire, etc. that can ricochet, be thrown,
or otherwise cause injury or damage
during operation.
PLAN AHEAD
• Always wear eye protection when oper-
ating, servicing or performing mainte-
nance on unit. Wearing eye protection
will help to prevent rocks or debris from
being blown or ricocheting into eyes and
face which can result in blindness orse-
rious injury. Eye protection should meet
the requirements of ANS! Z87.1.
• Always wear foot protection. Do not go
barefoot or wear short pants or sandals.
• Always wear a respirator or face mask
when working with the unit industy envi-
ronments.
• Secure hair above shoulder length. Se-
cure or remove loose clothing or cloth-
ing with loosely hanging straps, ties,
tassels, etc. They can be caught in
moving parts.
• Do not operate unit when you are tired,
ill, upset, or if you are under the influ-
ence of alcohol, drugs, or medication.
• Keep children, bystanders, and animals
away from work area a minimum of 30
feet (10 meters) when starting or operat-
ing unit. Do not point blower or gutter at-
tachment nozzle in the direction of
people or pets.
OPERATE YOUR UNIT SAFELY
• Inspect unit before each use for worn,
loose, missing or damaged parts. Do
not use until unit is in proper working or-
der.
• Do not set unit on any surface except a
clean, hard area while engine/motor is
running. Debris such as gravel, sand,
dust, grass, etc., could be picked up by
the air intake and thrown out through
discharge opening, damaging unit,
property, or causing serious injury to by-
standers or operator.
• Do not overreach or use from unstable
surfaces such as ladders, trees, steep
slopes, rooftops, etc. Keep firm footing
and balance at all times.
• Never place objects inside the tubes; al-
ways direct blowing debris away from
people, animals, glass, and solid ob-
jects such as trees, automobiles, walls,
etc. The force of air can cause rocks,
dirt, or sticks to be thrown or to ricochet
which can hurt people or animals, break
glass, or cause other damage.
• Never run unit without the proper equip-
ment attached. Always install all tubes
included in the gutter attachment kit.
• Check air intake opening and tubes fre-
quently, always with the engine/motor
stopped and spark plug/power supply
disconnected. Keep tubes free of debris
which can accumulate and restrict
proper air flow.
• Never place any object in air intake
opening as this could restrict proper air
flow and cause damage to the unit.
• Never use for spreading chemicals, fer-
tilizers, or other substances which may
contain toxic materials.
• To avoid spreading fires, do not use
near leaf or brush fires, fireplaces, bar-
becue pits, ashtrays, etc.
• Use only in daylight or good artificial
light.
• Use only for jobs explained in this
manual.
-2-
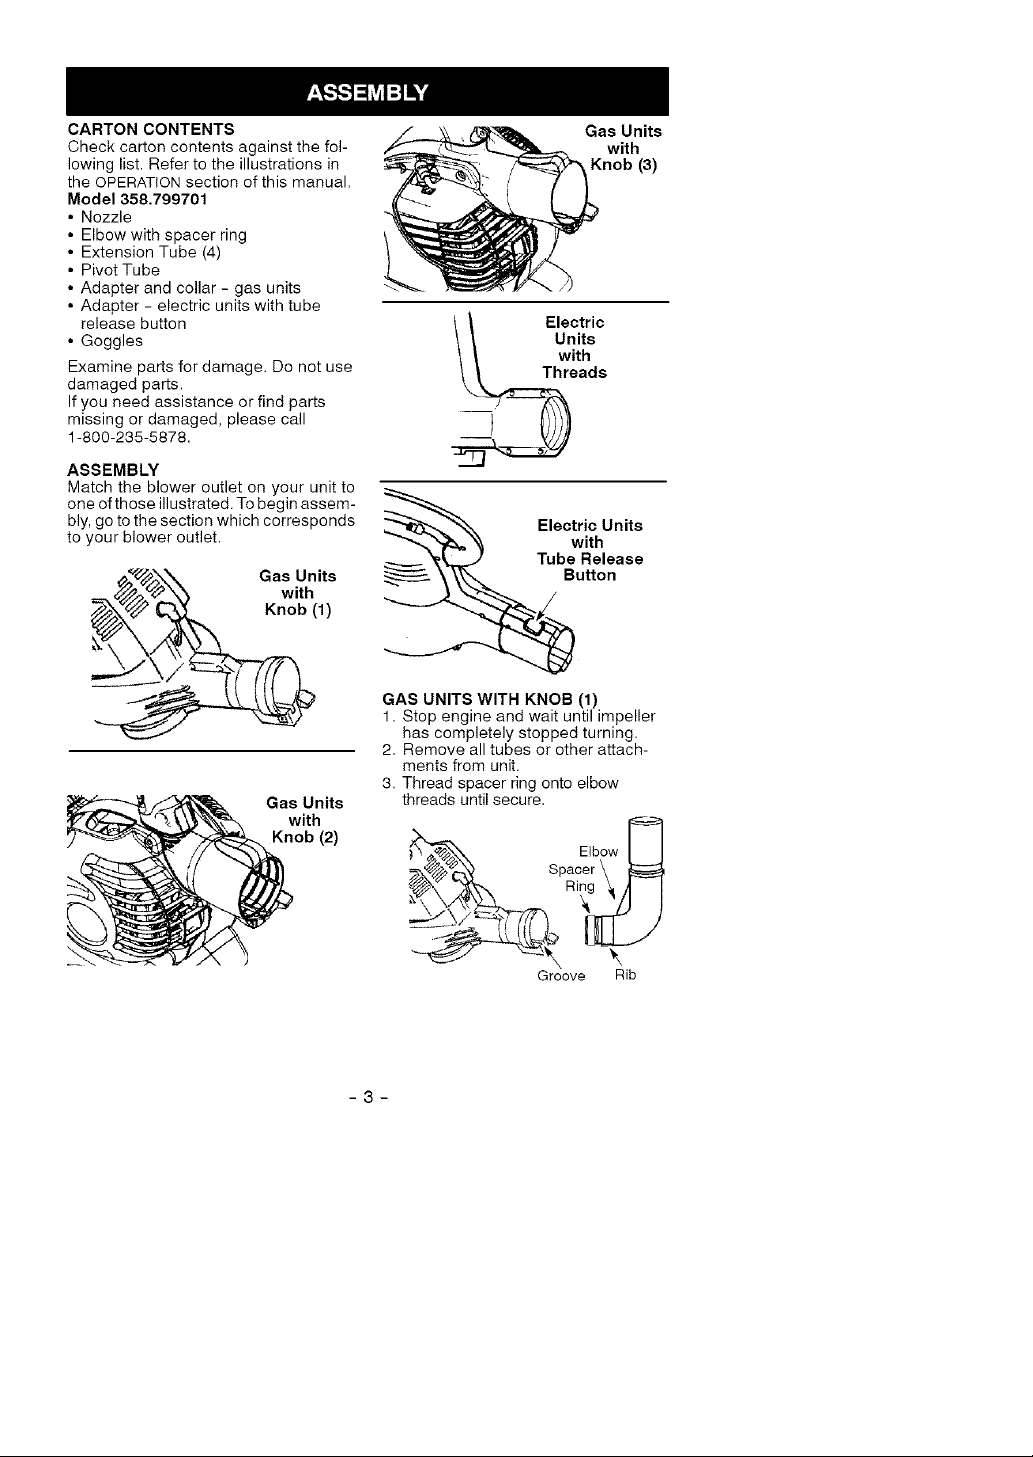
CARTON CONTENTS
Check carton contents against the fol-
lowing list. Refer to the illustrations in
the OPERATION section of this manual.
Model 358.799701
• Nozzle
• Elbow with spacer ring
• Extension Tube (4)
• Pivot Tube
• Adapter and collar - gas units
• Adapter - electric units with tube
release button
• Goggles
Examine parts for damage. Do not use
damaged parts.
If you need assistance or find parts
missing or damaged, please call
1-800-235-5878.
ASSEMBLY
Match the blower outlet on your unit to
one of those illustrated. To begin assem-
bly, go to the section which corresponds
to your blower outlet.
_'(._\\ Gas Units
"0
__ ,_._ 2_'_ with
/__ Knob (1)
Gas Units
with
Knob (2)
Gas Units
with
Knob (3)
Electric
Units
with
Threads
Electric Units
with
Tube Release
_._utton
GAS UNITS WITH KNOB (1)
1. Stop engine and wait until impeller
has completely stopped turning.
2. Remove all tubes or other attach-
meats from unit.
3. Thread spacer ring onto elbow
threads until secure.
Elbow
/=__'_..k_, Spacer \
_'X_ -_["_ Ring _ A I
-3-
Groove Rib
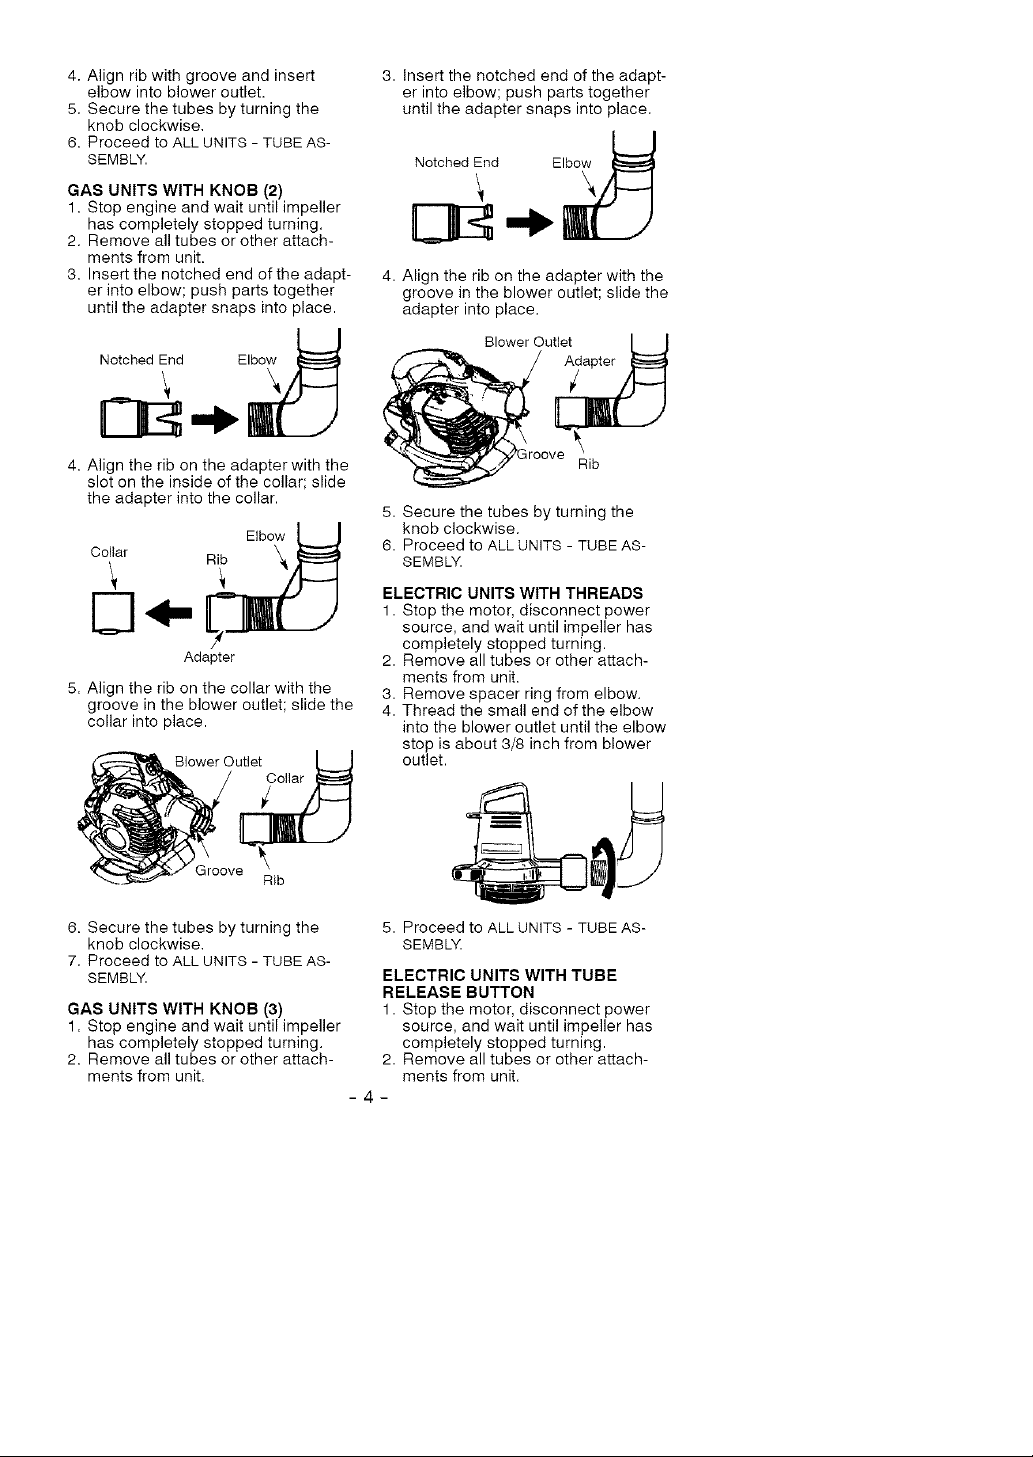
4. Align rib with groove and insert
elbow into blower outlet.
5. Secure the tubes by turning the
knob clockwise.
6. Proceed to ALL UNITS - TUBE AS-
SEMBLY.
GAS UNITS WITH KNOB (2)
1. Stop engine and wait until impeller
has completely stopped turning.
2. Remove all tubes or other attach-
ments from unit.
3. Insert the notched end of the adapt-
er into elbow; push parts together
until the adapter snaps into place.
Notched End Elbow
4. Align the rib on the adapter with the
slot on the inside of the collar; slide
the adapter into the collar.
Collar
Adapter
5. Align the rib on the collar with the
groove in the blower outlet; slide the
collar into place.
Blower Outlet
Elbow
Rib
Collar
/
3. Insert the notched end of the adapt-
er into elbow; push parts together
until the adapter snaps into place.
Notched End Elbow
4. Align the rib on the adapter with the
groove in the blower outlet; slide the
adapter into place.
Blower Outlet I I
.o:v
Rib
5. Secure the tubes by turning the
knob clockwise.
6. Proceed to ALL UNITS - TUBE AS-
SEMBL'Yt
ELECTRIC UNITS WITH THREADS
1. Stop the motor, disconnect power
source, and wait until impeller has
completely stopped turning.
2. Remove all tubes or other attach-
ments from unit.
3. Remove spacer ring from elbow.
4. Thread the small end of the elbow
into the blower outlet until the elbow
stop is about 3/8 inch from blower
outlet.
Rib
6. Secure the tubes by turning the
knob clockwise.
7. Proceed to ALL UNITS - TUBE AS-
SEMBLY.
GAS UNITS WITH KNOB (3)
1. Stop engine and wait until impeller
has completely stopped turning.
2. Remove all tubes or other attach-
ments from unit.
5. Proceed to ALL UNITS - TUBE AS-
SEMBL'Yt
ELECTRIC UNITS WITH TUBE
RELEASE BUTTON
1. Stop the motor, disconnect power
source, and wait until impeller has
completely stopped turning.
2. Remove all tubes or other attach-
ments from unit.
- 4 -
 Loading...