

Page 1
Operator’s Manual
CRRFTSMRN
25CC/1.5 cu.in. 2-Cycle
17 Inch Cutting Path / 0.080 Inch Line
GASOLINE WEEDWACKER®
Model No.
358.791031
• Safety
• Assembly
• Operation
• Maintenance
• Parts List
• Espanoi, p. 24
WARNiNG:
Read and follow all Safety Rules and Operating
A
9
Instructions before first use of this product.
For answers to your questions about this product:
Call 7 am-7 pm, Mon.-Sat., or 10 am-7 pm, Sun.
1 -800-235-5878 (Hours listed are Central Time)
Sears, Roebuck and Co., Hoffman Estates, IL 60179 U.S.A.
545167683 Rev. 1 1/18/08 BRW
Page 2
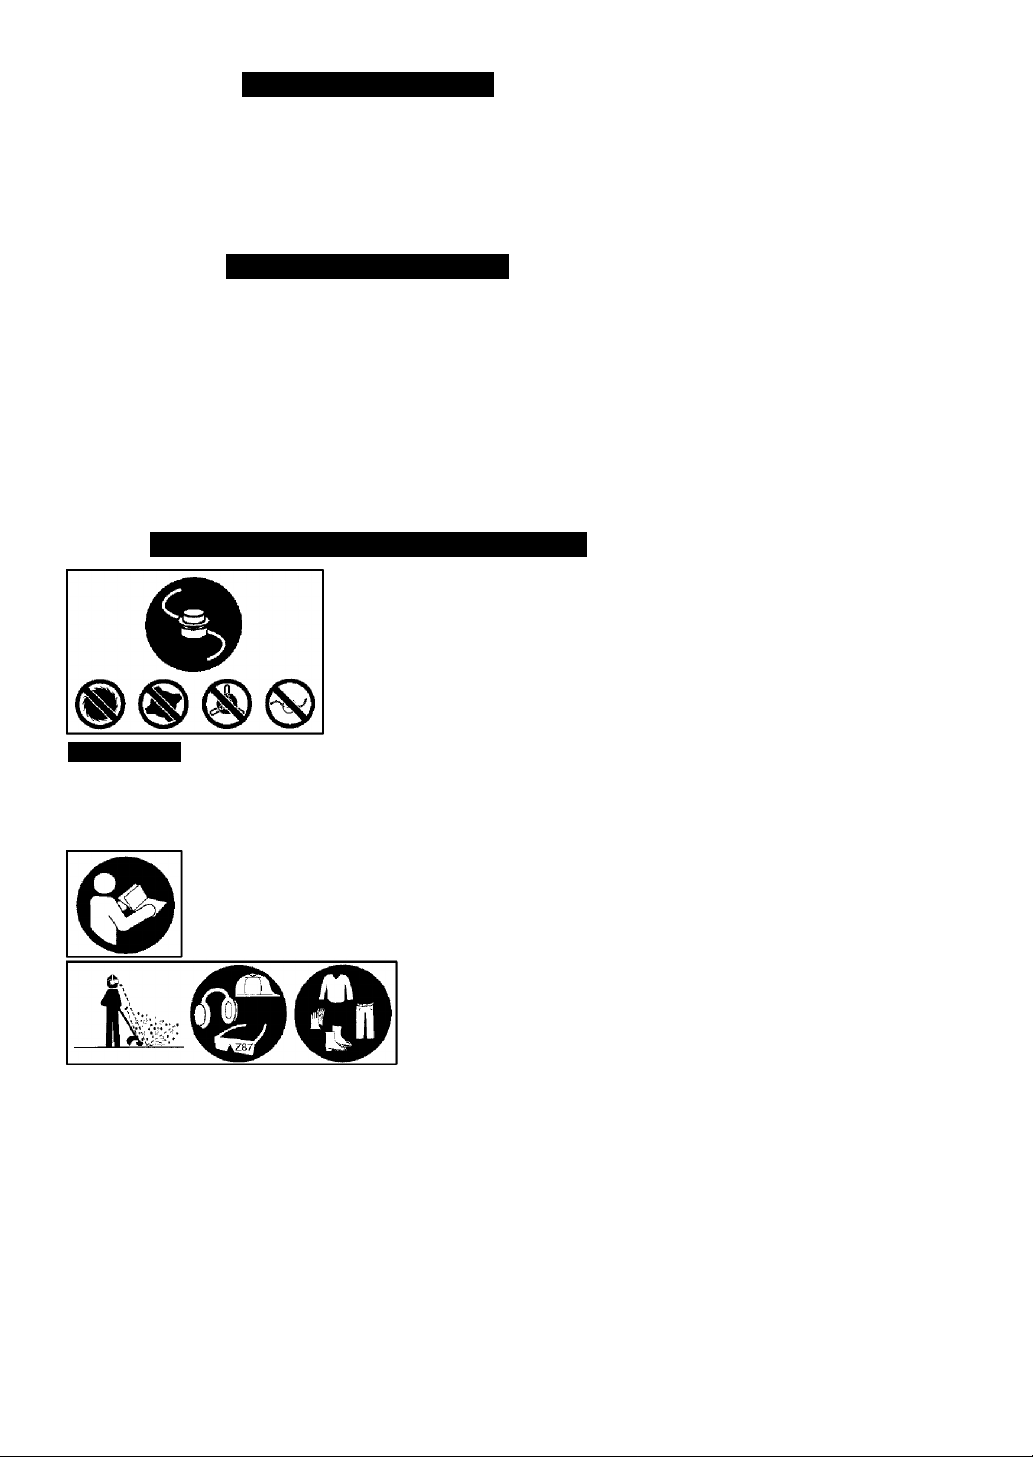
TABLE OF CONTENTS
Warranty Statement 2 Storage 18
Identification of Safety Symbols 2
Safety Rules 4
Assembly
Operation
Maintenance 15
Service & Adjustments 17 Parts and Ordering Back Cover
10
11
Troubleshooting Table 19
Emissions Statement 20
Parts List 22
Spanish 24
WARRANTY STATEMENT
ONE YEAR FULL WARRANTY ON CRAFTSMAN GAS WEEDWACKER
When used and maintained according to the operator’s manual, if this product fails due
to a defect in materia! or workmanship within one year from the date of purchase, return
it to any Sears store, Sears Service Center, or other Craftsman outlet in the United States
for free repair (or replacement if repair proves impossible).
This warranty excludes cutting line, spark plug and air filter, which are expendable
parts that can wear out from normal use in less than one year.
This warranty applies for only 90 days from purchase date if this product is ever used
for commercial or rental purposes.
This warranty gives you specific legal rights, and you may also have other rights
which vary from state to state.
Sears, Roebuck and Co., Hoffman Estates, IL 60179
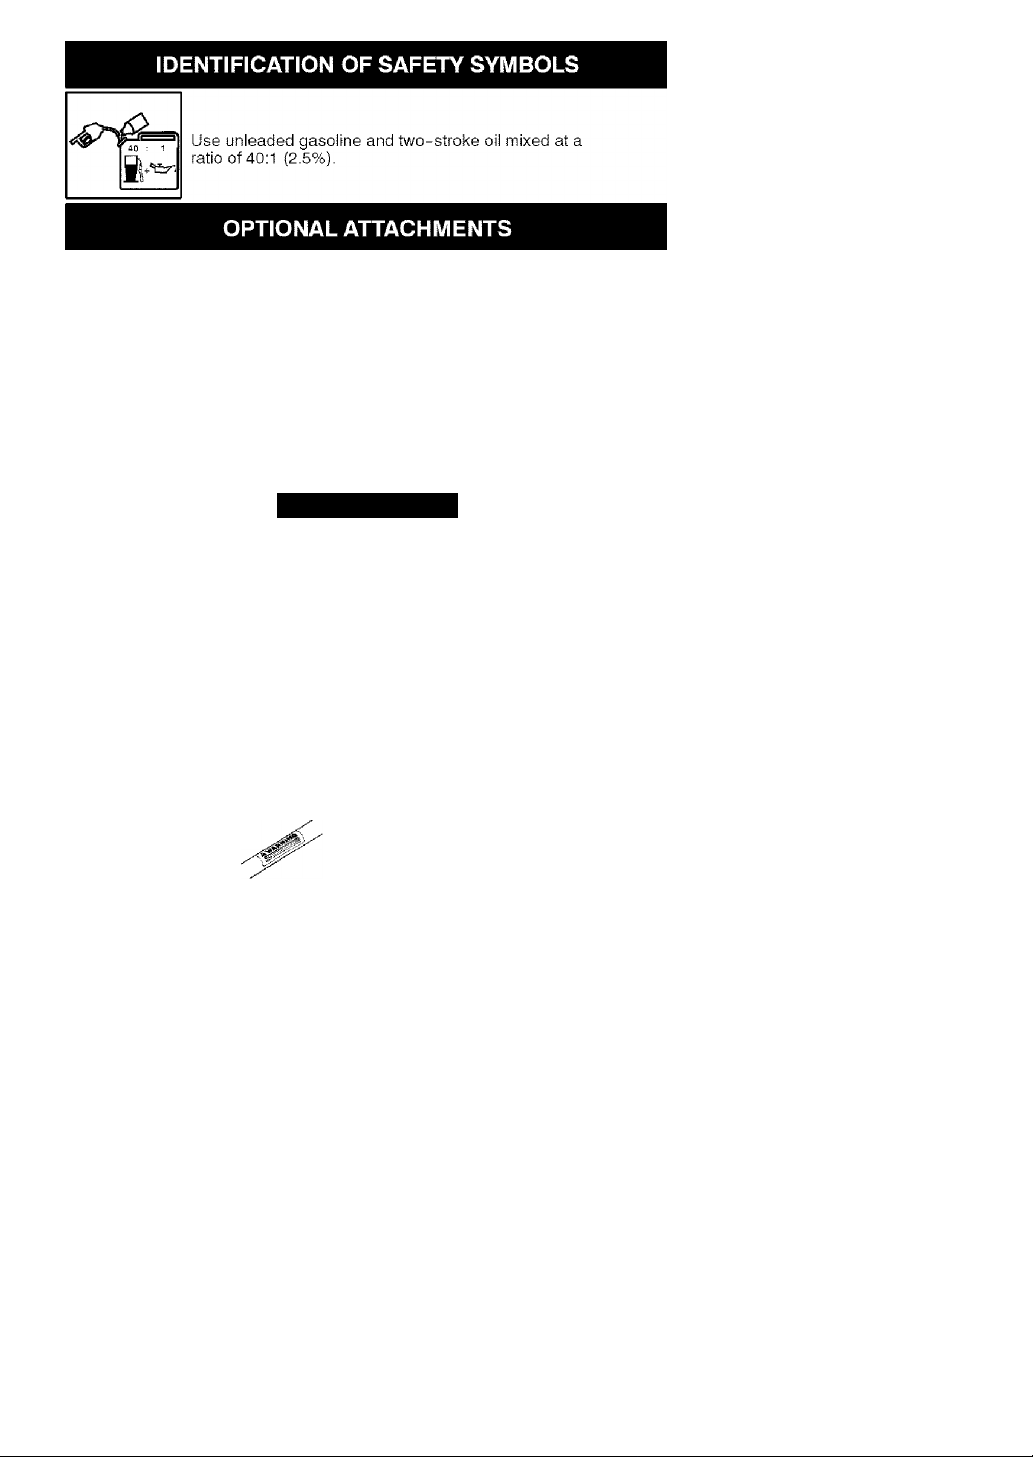
IDENTIFICATION OF SAFETY SYMBOLS
AdANGER; Use only specified trimmer
head, spool, and 0.080 inch (2 mm) recom
mended trimmer line. Never use blades, flail
ing devices, wire, rope, string, etc. This
attachment is designed for line trimmer use
only. Failure to follow these instructions may
result in serious injury.
AwARNING: This unit can be dangerous! Careless or
improper use can cause serious injury.
Read the operator’s manual before use. Failure to follow
instructions could result in serious injury. Save operator's
manual.
Trimmer line can throw objects vio
lently. You can be blinded or injured.
Always wear hearing protection and
safety glasses marked Z87. Always
wear head protection, heavy, long
pants, long sleeves, boots and
gloves.
Page 3
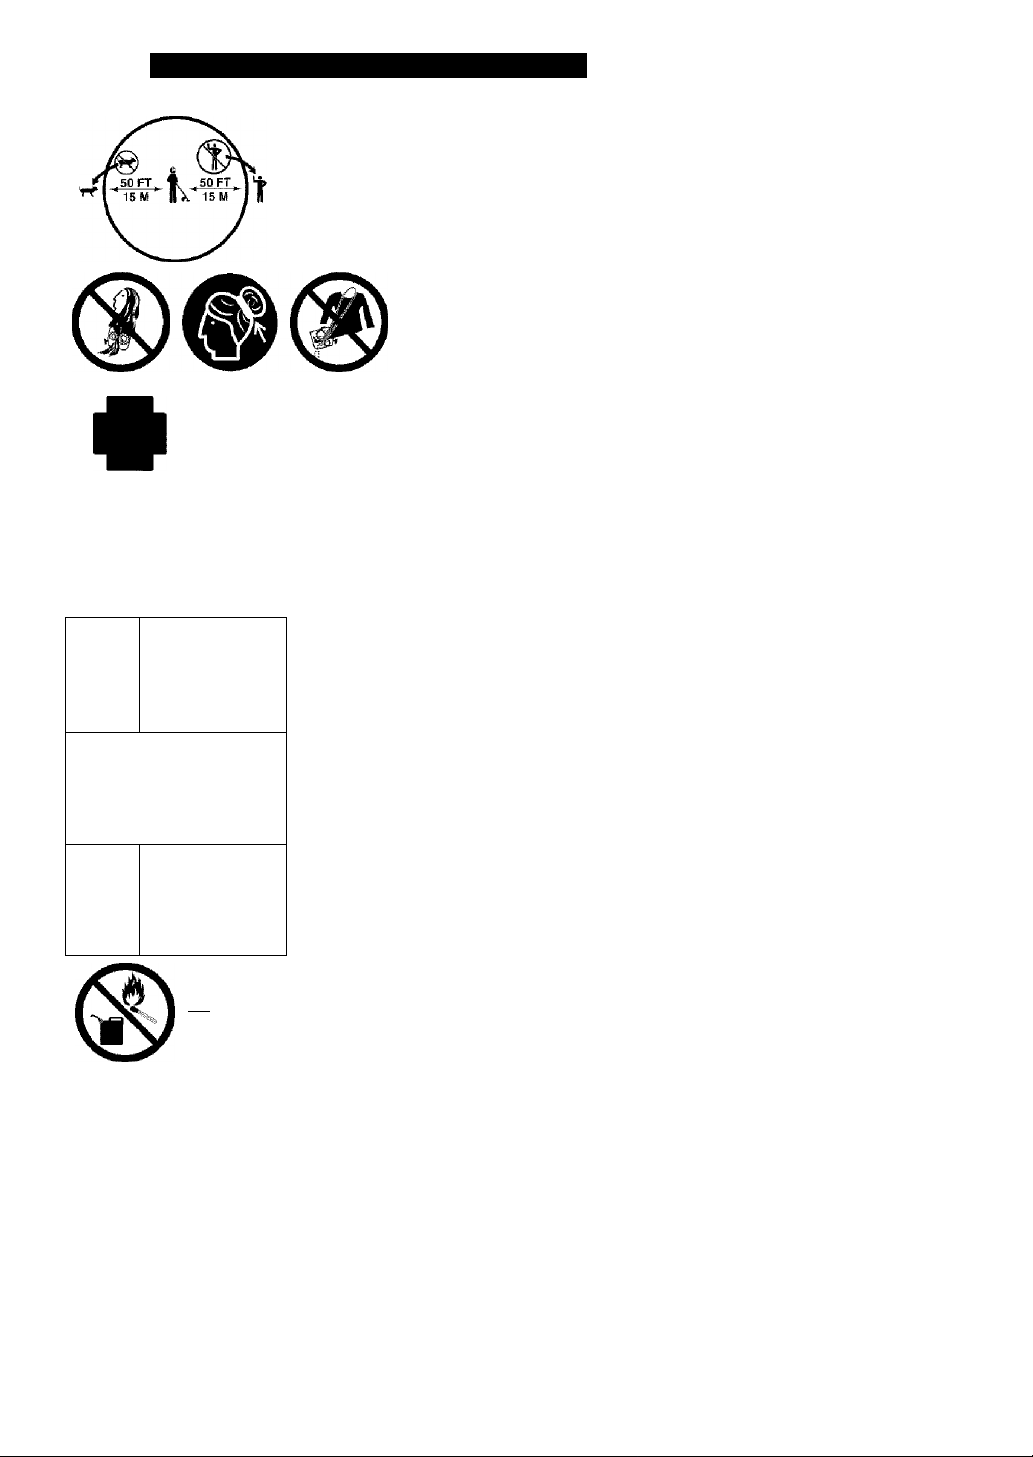
IDENTIFICATION OF SAFETY SYMBOLS
Hazard zone for thrown objects.
• Trimmer line throws objects violently.
• You and others can be blinded/injured.
• Keep children, bystanders, and animals
50 feet (15 meters) away.
Secure hair above shoulder length.
Do not wear jewelry, loose clothing,
or clothing with loosing hanging
straps, ties, tassels, etc. They can
be caught in moving parts.
Assist handle to be positioned only below
the arrow.
Never allow children to operate this unit.
Store unit indoors in a high, dry place out of the
reach of children. Store unit and fuel in area where
fuel vapors cannot reach sparks or open flames
from water heaters, electric motors or switches,
furnaces, etc.
When servicing unit, use only identical replace
ment parts.
Always stop unit and disconnect spark plug before
cleaning or servicing.
feisslj ^
A
WARNING: Fire hazard. Never mix, pour, or store gasoline
or use the unit near a flame or sparks (including smoking, open
flames, or work that can cause sparks).
Page 4
These attachments used in combination with the specified powerhead have been
evaluated to ANSI B175.3-2003, “Grass Trimmers and Brushcutters - Safety
Requirements”.
Powerhead including trimmer attachment
Brushcutter attachment
..........................................................................
.............................................
358.79103
358.79244
These attachments used in combination with the specified powerhead have been
evaluated to applicable ISO and EN safety requirement standards by the Swedish
Machinery Testing Institute:
Edger attachment................................................................................... 358.79240
Cultivator attachment.......................................................................... 358.79241
Blower attachment.............................................................................. 358.79242
Pruner attachment.................................................................................. 358.79245
SAFETY RULES
4a WARNING; When using gar
dening appliances, basic safety pre
cautions must always be followed to
reduce the risk of fire and serious
injury. Read and follow all instructions.
This power unit can be dangerous!
Operator is responsible for following
instructions and warnings on unit and in
manual. Read entire operator’s manual
before using uniti Be thoroughly familiar
with the controls and the proper use of
the unit. Restrict the use of this unit to
persons who have read, understand,
and will follow the instructions and
warnings on the unit and in the manual.
Never allow children to operate this unit.
OPERATOR’S
MANUAL
SAFETY INFORMATION
ON THE UNIT
in DANGER: Never use blades
with line trimmer attachment. Never
use flailing devices with any attach
ment. This unit (when used with sup
plied line trimmer attachment) is de
signed for line trimmer use only. Use
of any other accessories with line trim
mer attachment will increase the risk
of injury.
If situations occur which are not cov
ered in this manual, use care and
good judgment, if you need assis
tance, contact your Sears Service
Center or cal! 1 -800-235-5878.
OPERATOR SAFETY
• Dress properly. Always wear safety
glasses or similar eye protection
when operating, or performing main
tenance, on your unit {safety
glasses are available). Eye protec
tion should be marked Z87.
• Always wear face or dust mask if op
eration is dusty.
• Always wear heavy, long pants, long
sleeves, boots, and gloves. Wearing
safety leg guards is recommended.
• Always wear foot protection. Do not
go barefoot or wear sandals. Stay
clear of spinning line.
• Secure hair above shoulder length.
Secure or remove loose clothing or
clothing with loosely hanging ties,
straps, tassels, etc. They can be
caught in moving parts.
• Being fully covered also helps pro
tect you from debris and pieces of
toxic plants thrown by spinning line.
• Stay Alert. Do not operate this unit
when you are tired, ill, upset or un
der the influence of alcohol, drugs,
or medication. Watch what you are
doing; use common sense.
Page 5

• Wear hearing protection.
• Never start or run inside a closed
room or building. Breathing exhaust
fumes can kill.
• Keep handies free of oil and fuei.
• Always keep engine on the right
hand side of your body,
• Hold the unit firmly with both hands.
• Keep trimmer head (or other option
al attachment) below waist level and
away from all parts of your body. Do
not raise engine above your waist.
• Keep all parts of your body away
from muffler and spinning line (or
other optional attachment). A hot
muffler can cause serious burns.
• Keep firm footing and balance. Do
not overreach or use from unstable
surfaces such as ladders, trees,
steep slopes, rooftops, etc.
• Use only in dayiight or good artificial
light.
• Use only for jobs explained in this
manual (or manuals for optional at
tachments).
UNIT / MAINTENANCE SAFETY
A WARNING: Stop unit and dis
connect the spark plug before per
forming maintenance (except carbure
tor adjustments).
• Look for and replace damaged or
loose parts before each use. Look
for and repair fuel leaks before use.
Keep in good working condition.
• Repiace trimmer head parts that are
chipped, cracked, broken, or dam
aged in any other way before using
the unit.
• Maintain unit according to recom
mended procedures. Keep cutting
line at proper length.
• Use only 0.080 inch (2 mm) diameter
Craftsman® brand line. Never use
wire, rope, string, etc.
• install required shield properly before
using the unit. Use only specified
trimmer head; make sure it is properly
installed and securely fastened.
• Make sure unit is assembled cor
rectly as shown in this manual.
• Make carburetor adjustments with
lower end supported to prevent line
from contacting any object.
• Keep others away when making car
buretor adjustments.
• Use only recommended Craftsman
accessories and replacement parts.
• Have all maintenance and service
not explained in this manual per
formed by a Sears Service Center.
FUEL SAFETY
• Mix and pour fuel outdoors.
• Keep away from sparks or flames,
• Do not smoke or allow smoking near
fuel or the unit.
• Avoid spilling fuel or oil. Wipe up all
fuel spills.
• Move at least 10 feet (3 meters)
away from fueling site before start
ing engine. Stop engine and allow it
to cool before removing fuel cap.
• Empty the fuel tank before storing or
transporting the unit. Use up fuel left
in the carburetor by starting the en
gine and letting it run until it stops.
• Store unit and fuel in area where fuel
vapors cannot reach sparks or open
flames from water heaters, electric
motors or switches, furnaces, etc.
• Always store gasoline in a container
approved for flammable liquids.
TRANSPORTING AND STORAGE
• Stop the unit before carrying.
• Allow engine to cool before storing
or transporting in vehicle.
• Empty the fuel tank before storing or
transporting the unit. Use up fuel left
in the carburetor by starting the en
gine and letting it run until it stops.
• Store unit and fuel in area where fuei
vapors cannot reach sparks or open
flames from water heaters, electric
motors or switches, furnaces, etc.
• Store unit so line limiter blade can
not accidentally cause injury. The
unit can be hung by the shaft.
• Store unit out of reach of children.
This unit is not equipped with an anti
vibration system and is intended for
occasional use only.
SAFETY NOTICE: Exposure to vibra
tions through prolonged use of gaso
line powered hand tools could cause
blood vessel or nerve damage in the
fingers, hands, and joints of people
prone to circulation disorders or ab
normal swellings. Prolonged use in
cold weather has been linked to blood
vessel damage in otherwise healthy
people. If symptoms occur such as
numbness, pain, loss of strength,
change in skin color or texture, or loss
of feeling in the fingers, hands, or
joints, discontinue the use of this tool
and seek medical attention. An anti
vibration system does not guarantee
the avoidance of these problems. Us
ers who operate power tools on a con
tinual and regular basis must monitor
closely their physical condition and
the condition of this tool.
Page 6

SPECIAL NOTICE: This unit is
equipped with a temperature limiting
muffler and spark arresting screen
which meets the requirements of Cali
fornia Codes 4442 and 4443. All U.S.
forest land and the states of California,
Idaho, Maine, Minnesota, New Jersey,
Oregon, and Washington require by
law that many internal combustion en
gines be equipped with a spark arrest
ing screen, If you operate in a locale
where such regulations exist, you are
legally responsible for maintaining the
operating condition of these parts.
Failure to do so is a violation of the
law. For normal homeowner use, the
muffler and spark arresting screen will
not require any service. After 50 hours
of use, we recommend that your muf
fler be serviced or replaced by a
Sears Service Center.
LINE TRIMMER SAFETY
 WARNING: Inspect the area to
be trimmed before each use. Remove
objects (rocks, broken glass, nails,
wire, etc.) which can be thrown by or
become entangled in line. Hard ob
jects can damage the trimmer head
and be thrown causing serious injury.
• Only use the trimmer attachment for
trimming, scalping, mowing and
sweeping. Do not the trimmer attach
ment for edging, pruning or hedge
trimming.
• Cut only from your right to your left.
Cutting on left side of the shield will
throw debris away from the operator.
ADDITIONAL SAFETY RULES
FOR OPTIONAL ATTACHMENTS
 WARNING; For each optional
attachment used, read entire opera
tors manual before use and follow all
warnings and instructions in manual
and on attachment,
 WARNING; Ensure handlebar
is installed when using brushcutter
attachment. Attach handlebar above
arrow on safety label on the upper
shaft (engine end of unit). If your
brushcutter attachment does not
include a handlebar, a handlebar
accessory kit (#530071451) is avail
able from your Sears Service Center.
^WARNING: Inspect the area to
be edged before each use. Remove
objects (rocks, broken glass, nails,
wire, etc.) which can be thrown by the
blade or can wrap around the shaft.
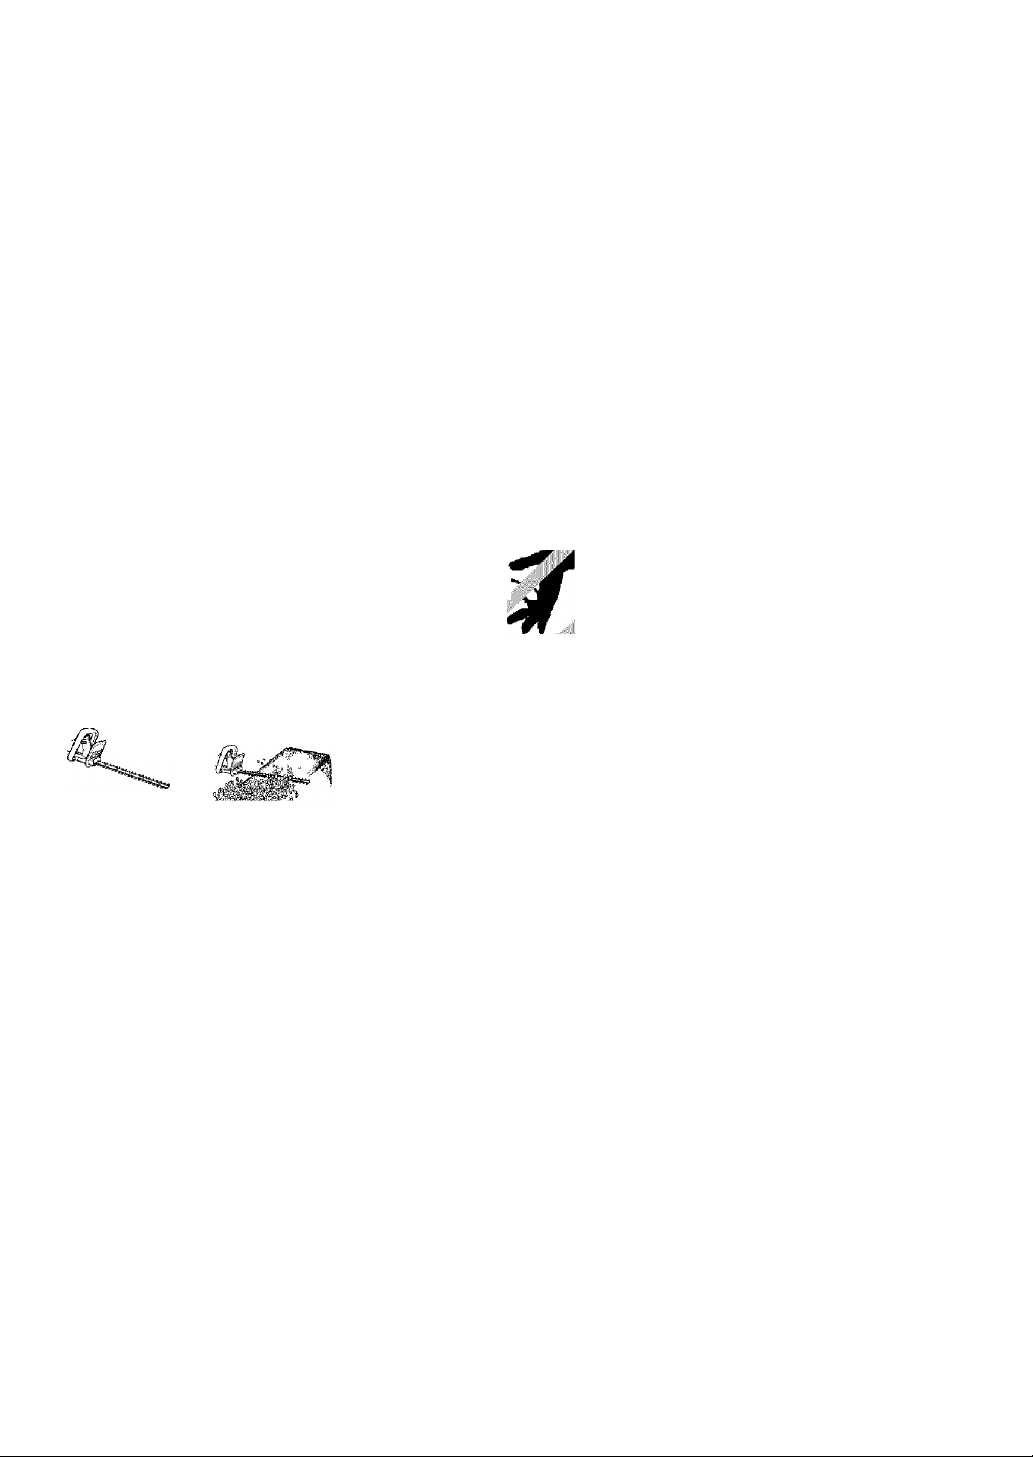
• Blade rotates momentarily after the
trigger is released. The blade can
seriously cut you or others.
• Allow blade to stop before removing
it from the cut.
Blade rotates
momentarily
after trie ‘
trigger Is
reJeasedj
Allow blade to stop
before removing it
from (fie cut
• Throw away blades that are bent,
warped, cracked, broken or dam
aged in any other way. Replace
parts that are cracked, chipped, or
damaged before using the unit.
• Do not attempt to remove cut materi
al nor hold material to be cut when
the engine is running or when cut
ting blade is moving.
• Always keep the wheel and depth
adjusting skid in contact with the
ground,
• Always push the unit slowly over the
ground. Stay alert for uneven side
walks, holes in the terrain, large
roots, etc.
BLOWER/VACUUM SAFETY
^WARNING: Inspect area before
starting unit. Remove all debris and
hard objects such as rocks, glass,
wire, etc. that can ricochet, be thrown,
or otherwise cause injury or damage
during operation.
• Do not set unit on any surface ex
cept a clean, hard area while engine
is running. Debris such as gravel,
sand, dust, grass, etc., could be
picked up by the air intake and
thrown out through discharge open
ing, damaging unit, property, or
causing serious injury to bystanders
or operator.
Page 7
• Never place objects inside the blow
er tubes, vacuum tubes or blower
outlet. Always direct the blowing de
bris away from people, animals,
glass, and solid objects such as
trees, automobiles, walls, etc. The
force of air can cause rocks, dirt, or
sticks to be thrown or to ricochet
which can hurt people or animals,
break glass, or cause other damage.
• Never run unit without the proper
equipment attached. When using
your unit as a blower, always install
blower tubes.
• Check air intake opening, blower
tubes or vacuum tubes frequently,
always with engine stopped and
spark plug disconnected. Keep
vents and discharge tubes free of
debris which can accumulate and
restrict proper air flow.
• Never place any object in air intake
opening as this could restrict proper
air flow and cause damage to the
unit.
• Never use for spreading chemicals,
fertilizers, or other substances which
may contain toxic materials.
• To avoid spreading fire, do not use
near leaf or brush fires, fireplaces,
barbecue pits, ashtrays, etc.
BRUSHCUTTER SAFETY
Jib WARNING: inspect the area to
be cut before each use. Remove ob
jects (rocks, broken glass, nails, wire,
etc.) which can be thrown or become
entangled in the blade or trimmer line.
• Throw away and replace blades that
are bent, warped, cracked, broken
or damaged in any other way.
• Install required shield properly be
fore using the unit. Use the metal
shield for all metal blade use.
WARNING: Only use brushcut-
ter attachments that provide a metal
shield with protruding nose.
 DANGER: Blade can thrust vio
lently away from material it does not out.
Blade thrust can cause amputation of
arms or legs.
WARNING; Do not use trimmer
head as a fastening device for the
blade.
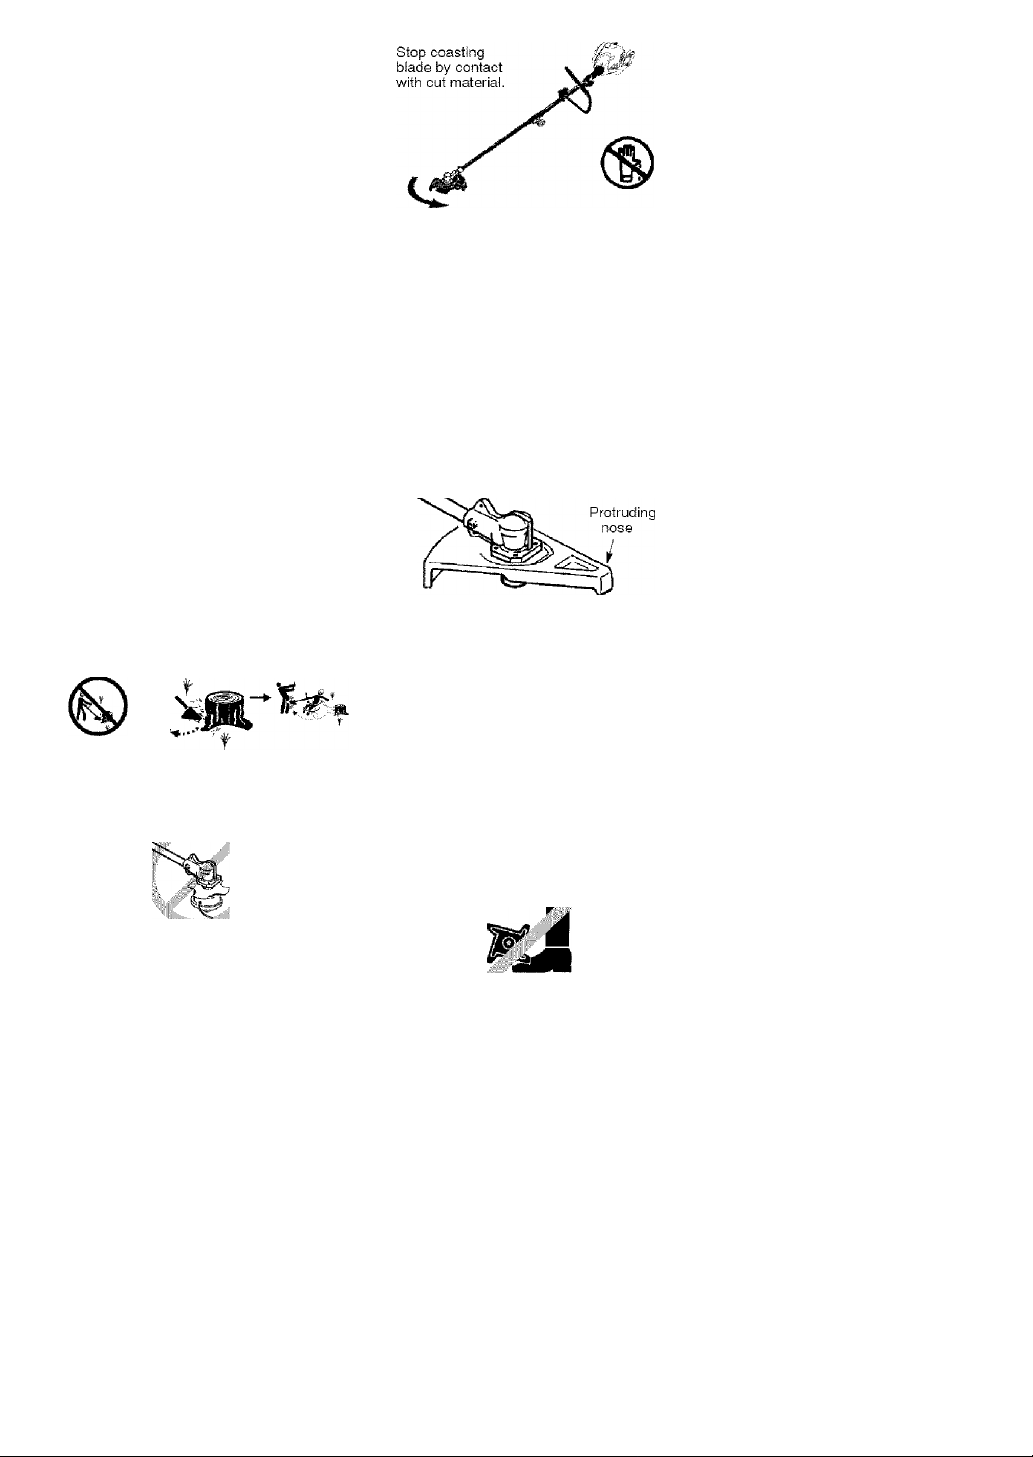
a WARNING: The blade contin
ues to spin after the throttle is re
leased or engine is turned off. The
coasting blade can throw objects or
seriously cut you if accidentally
touched. Stop the blade by contacting
the right hand side of the coasting
blade with material already cut.
• Use only specified blade and make
sure it is properly installed and se
curely fastened.
• Cut from your right to your left.
• Always use the handlebar and a
properly adjusted shoulder strap
with blade (see ASSEMBLY instruc
tions in brushcutter attachment oper
ator's manual).
CULTIVATOR SAFETY
^WARNING: Rotating tines can
cause serious injury. Keep away from
rotating tines. Stop the engine and
disconnect the spark plug before un
clogging tines or making repairs.
^WARNING: Inspect the area to
be cultivated before starting the unit.
Remove all debris and hard and sharp
Page 8
objects such as rocks, vines, branch
es, rope, string, etc.
• Avoid heavy contact with solid objects
that might stop the tines. If heavy con
tact occurs, stop the engine and in
spect the unit for damage.
• Never operate the cultivator without
the tine cover in place and properly
secured.
• Keep the tines and guard clear of
debris.
• After striking a foreign object, stop
the engine, disconnect the spark
plug and inspect the cultivator for
damage. Repair before restarting.
• Disconnect attachment from the
drive engine before cleaning the
tines with a hose and water to re
move any build-up. Oil the tines to
prevent rust.
• Always wear gloves when servicing
or cleaning the tines. The tines be
come very sharp from use.
• Do not run unit at high speed unless
cultivating.
HEDGE TRIMMER SAFETY
A DANGER: RISK of cut; keep
HANDS AWAY FROM BLADE - Blade
moves momentarily after the trigger is
released. Do not attempt to dear
away out material when the blade is in
motion. Make sure engine is stopped,
the spark plug wire is disconnected,
and the blade has stopped moving
before removing jammed material
from the cutting blade. Do not grab or
hold the unit by the cutting blade.
Blades move
momentarily
alter the
trigger is
released.
Allow blades to stop
before removing
them from the cut.
• Keep the cutting blade and air vents
clear of debris.
POLE PRUNER SAFETY
^WARNING: The reciprocating
blade/rotating chain can cause severe
injury, inspect the unit before use. Do
not operate unit with a bent, cracked
or dull blade or dull chain. Keep away
from the blade/chain.
^WARNING: The reciprocating
blade/rotating chain is sharp. Do not
touch. To prevent serious injury, always
stop engine and ensure blade/chain
has stopped moving, disconnect spark
plug, and wear gloves when changing
or handling the blade or chain.
WARNING: A coasting blade/ ro
tating chain can cause injury while it
continues to move after the engine is
stopped. Maintain proper control of the
unit until the blade/chain has completely
stopped moving. Keep hands, face and
feet at a distance from all moving parts.
Do not attempt to touch or stop the
blade or chain when it is moving.
^WARNING: Falling objects can
cause severe head injury. Wear head
protection when operating this unit
with a pole pruner attachment.
A WARNING: Inspect the area be
fore starting the unit. Remove all de
bris and hard objects such as rocks,
glass, wire, etc. that can ricochet, be
thrown, or otherwise cause injury or
damage during operation.
• Do not use a cutting blade that is
bent, warped, cracted, broken or
damaged in any other way. Have
worn or damaged parts replaced by
your Sears Service Center,
• Always keep unit in front of your
body. Keep all parts of your body
away from the cutting blade.
©
nWARNING: To prevent serious
injury, do not use more than one boom
extension with a pole pruner attach
ment.
AwARNING: Keep the pruner
away from power lines or electrical
wires.
• Only use for pruning limbs or
branches up to 6 inches (15 cm) in
diameter.
Page 9

• Do not operate the unit faster than
the speed needed to prune. Do not
run the unit at high speed when not
pruning,
• Always stop the unit when work is
delayed or when walking from one
cutting location to another.
• If you strike or become entangled
with a foreign object, stop the engine
immediately and check for damage.
Have any damage repaired by a
Sears Service Center before at
tempting further operations. Discard
blades that are bent, warped,
cracked or broken.
• Stop the unit immediately if you feel
excessive vibration. Vibration is a
sign of trouble. Inspect thoroughly
for loose nuts, bolts or damage be
fore continuing. Contact Sears Ser
vice for repair or replacement of af
fected parts as necessary.
SNOW THROWER SAFETY
A WARNING: Keep hands and
feet away from the rotor when starting
or running the engine. Never attempt
to clear the rotor with the engine/motor
running. Stop engine and disconnect
spark plug before unclogging snow or
debris from discharge chute or when
adjusting vanes.
a WARNING: Never lean over dis
charge chute. Rocks or debris could
be thrown into the eyes and face and
cause serious injury or blindness.
A WARNING: Inspect the area
where the unit is to be used. Remove
objects that could be thrown or dam
age the unit. Some objects may be
hidden by fallen snow - be alert for
the possibility.
Direct material discharge away from
glass enclosures, automobiles, etc.
Do not run engine at high speed
while not removing snow.
Be attentive when using the snowthrower, and stay alert for holes in the
terrain and other hidden hazards.
Make sure the rotor will spin freely
before attaching the snowthrower to
the powerhead.
If the rotor will not rotate freely due
to frozen ice, thaw the unit thorough
ly before attempting to operate
under power.
Keep the rotor clear of debris.
Do not throw snow near other
people. The snowthrower could
propel small objects at high speed
causing injury.
After striking a foreign object, stop
the engine, disconnect spark plug
and inspect the snowthrower for
damage and repair if necessary be
fore restarting unit.
Never operate the snowthrower near
glass enclosures, automobiles and
trucks.
Never attempt to use the snow
thrower on a roof.
Never operate the snowthrower near
window wells, dropoffs, etc.
Never discharge snow onto public
roads or near moving traffic.
Clear snow from slopes by going up
and down; never across. Use cau
tion when changing directions. Nev
er clear snow from steep slopes.
Let snowthrower run for a few min
utes after clearing snow so moving
parts do not freeze.
Look behind and use care when
backing up. Exercise caution to
avoid slipping or falling, especially
when operating in reverse.
Know how to stop quickly.
Page 10
ASSEMBLY
CARTON CONTENTS
Check carton contents against the fol
lowing list.
Model 358.791031
• Powerhead
• Trimmer attachment
• Shield
• Wing nut (screwed onto shield)
• Container of oil
Examine parts for damage. Do not
use damaged parts.
NOTE: If you need assistance or find
parts missing or damaged, call
1-800-235-5878.
It is normal for the fuel filter to rattle in
the empty fuel tank.
Finding fuel or oil residue on muffler is
normal due to carburetor adjustments
and testing done by the manufacturer.
ASSEMBLY
^WARNING; Always stop unit
and disconnect spark plug before per
forming any assembly procedures.
^WARNING: If received as
sembled, repeat all steps to ensure
your unit is properly assembled and all
fasteners are secure.
iNSTALLiNG TRIMMER ATTACH
MENT
CAUTION: When installing trimmer
attachment, place the unit on a flat
surface for stability.
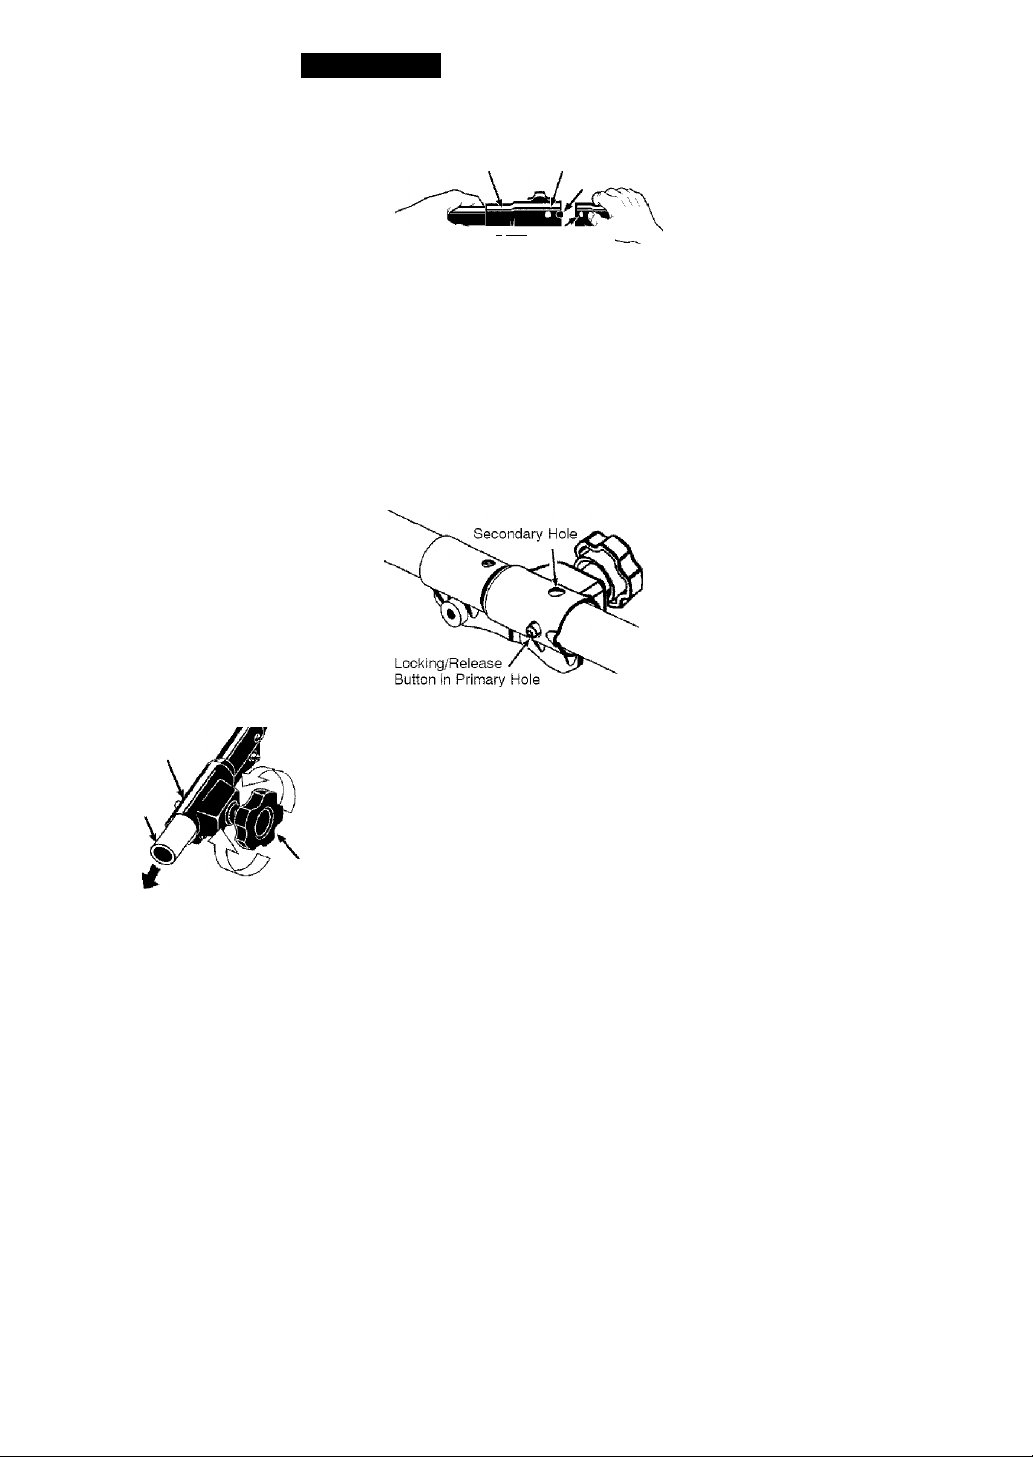
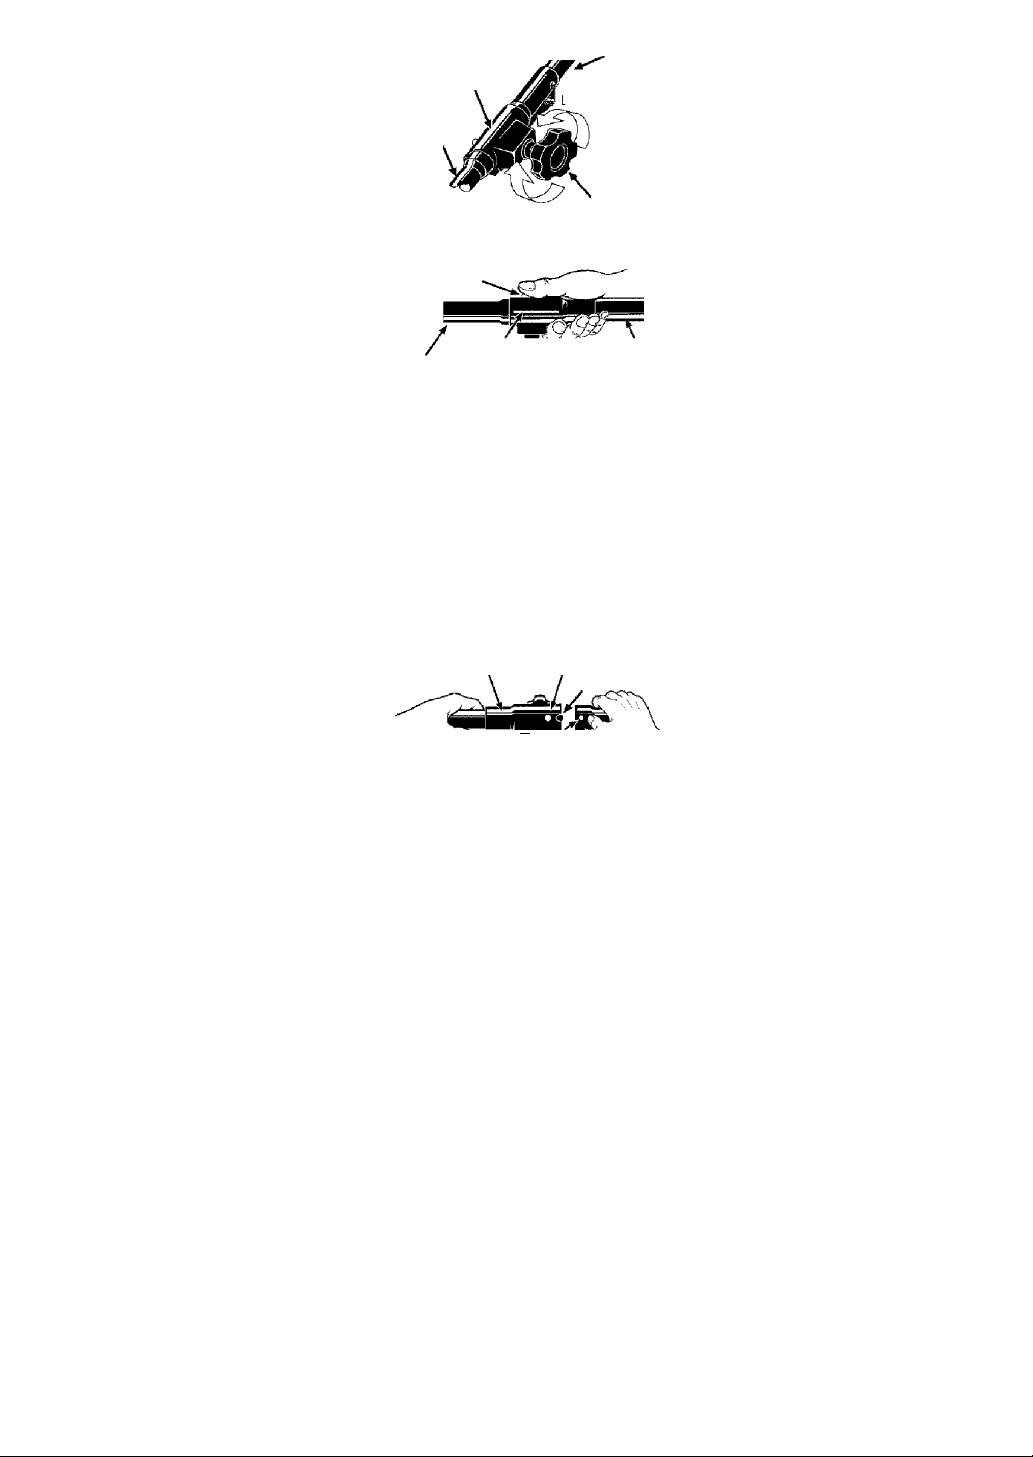
1. Loosen the coupler by turning the
knob counterclockwise.
Coupler
Shipping
protector
TIGHTEN
Remove shipping protector from
coupler.
Remove the shaft cap from the
trimmer attachment (if present).
Position locking/release button of
attachment into guide recess of
coupler.
Push the attachment into the cou
pler until the locking/release button
snaps into the primary hole.
LOOSEN
Knob
Before using the unit, tighten the
knob securely by turning clock
wise.
Coupler Primary Hole
11 ’'Ü8*
.......
Guide Recess
R°etease Attachment
Button
aWARNING: Make sure the lock
ing/release button is locked in the pri
mary hole and the knob is securely
tightened before operating the unit. All
attachments are designed to be used in
the primary hole unless otherwise
stated in the applicable attachment op
erator’s manual. Using the wrong hole
couid lead to serious injury or damage
to the unit.
For optional attachments, see the AS
SEMBLY section of the applicable at
tachment operator's manual.
ATTACHING SHIELD
^WARNING: The shield must be
properly installed. The shield provides
partial protection from the risk of thrown
objects to the operator and others and
is equipped with a line limiter blade
which cuts excess line to the proper
length. The line limiter blade (on under
side of shieid) is sharp and can cut you.
For proper orientation of shield, see
KNOW YOUR TRIMMER illustration in OP
ERATION section.
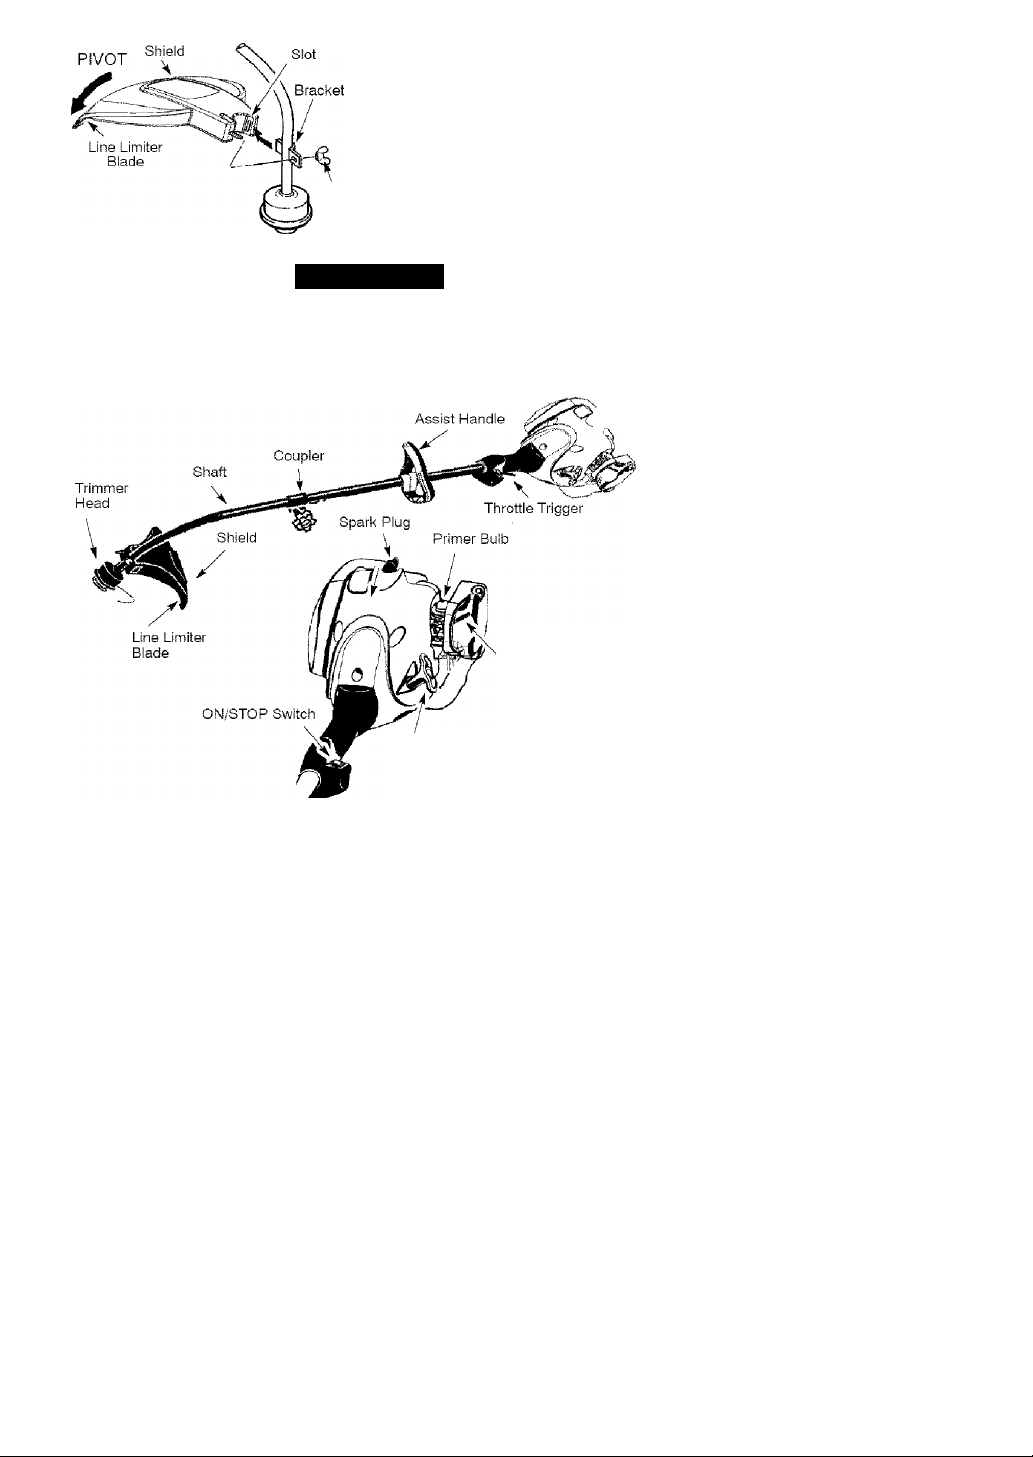
1. Remove wing nut from shield.
2. Insert bracket into slot as shown.
3. Pivot shield until bolt passes
through hole in bracket.
4. Securely tighten wing nut onto
bolt.
10
Page 11
ADJUSTING THE HANDLE
^WARNING: When adjusting the
handie, be sure it remains above the
safety label and below the mark or ar
row on the shaft.
1. Loosen wing nut on handle.
2. Rotate the handle on the shaft to an
Wing
Nut
upright position; retighten wing nut.
OPERATION
KNOW YOUR TRIMMER
READ THIS OPERATOR'S MANUAL AND SAFETY RULES BEFORE OPERATING YOUR
UNIT Compare the illustrations with your unit to familiarize yourself with the location of
the various controls and adjustments. Save this manual for future reference.
Muffler
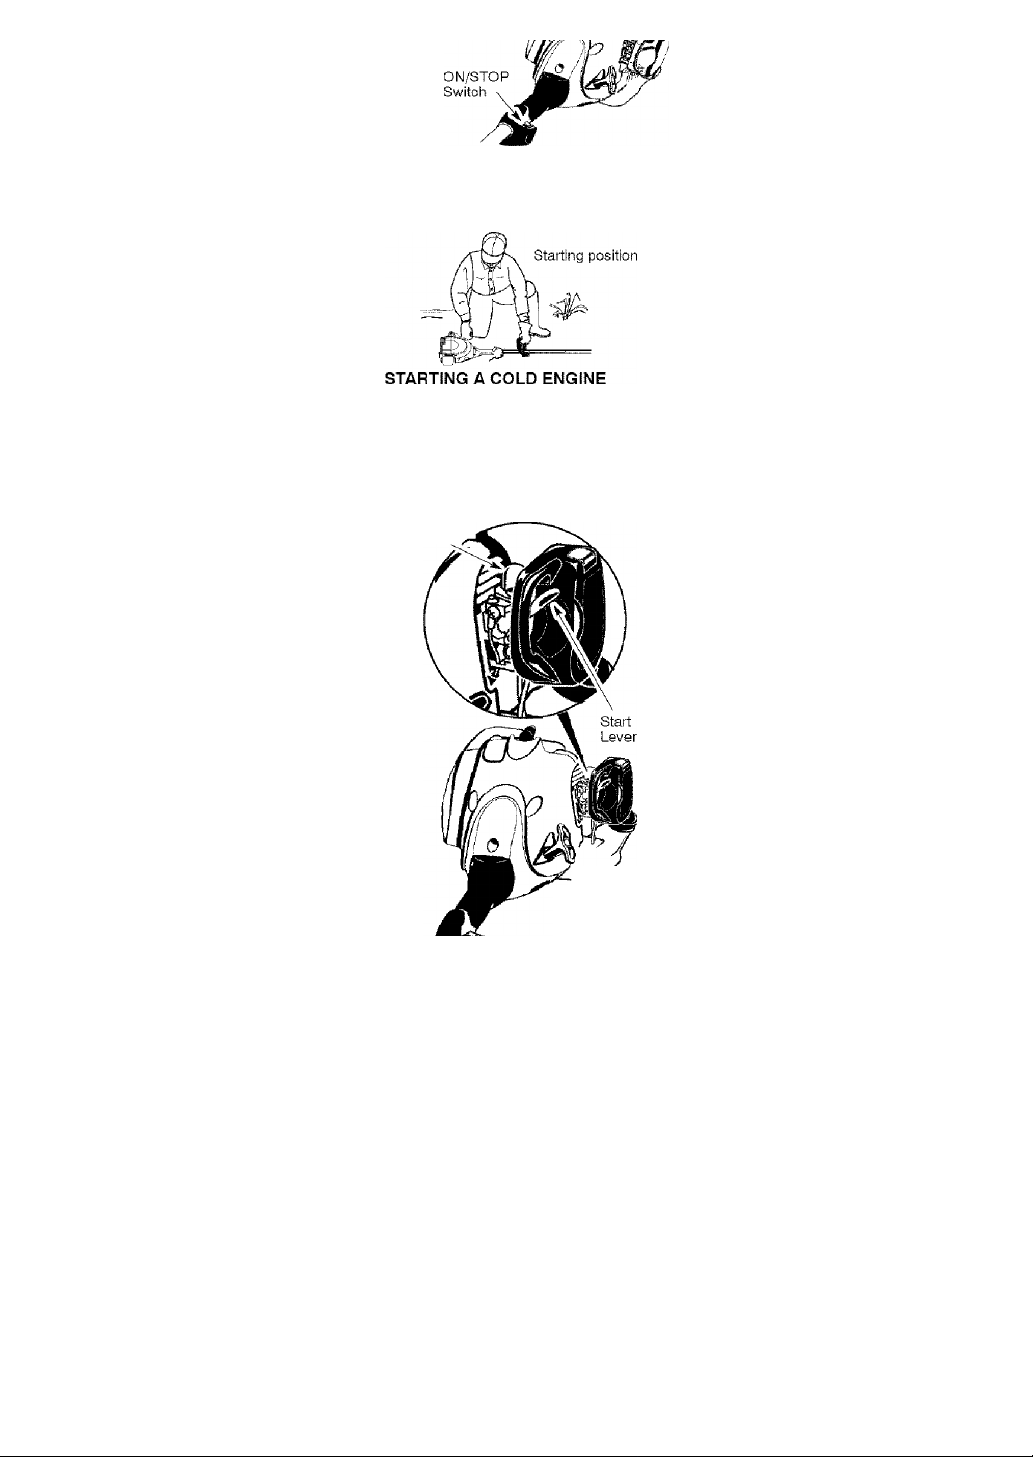
ON/STOP SWITCH
The ON/STOP switch is located on the
trigger handle and is used to stop the
engine. To stop the engine, push and
release the engine ON/STOP switch.
PRIMER BULB
The PRIMER BULB removes air from
the carburetor and fuel lines and fills
them with fuel. This allows you to start
the engine with fewer pulls on the
starter rope. Activate the primer bulb
by pressing it and allowing it to return
to its original form.
Start
Lever
Starter
Handle
START LEVER
The START LEVER helps to supply fuel
to the engine to aid in starting. Acti
vate the starting system by moving the
start lever to the START position. DO
NOT squeeze the throttle trigger until
the engine has started and runs. After
the engine starts, allow the engine to
warm-up 10-15 seconds, then fully
squeeze the throttle trigger to deacti
vate the starting system (start lever
returns to RUN position).
COUPLER
The COUPLER enables optional at
tachments to be installed on the unit.
11
Page 12
BEFORE STARTING ENGINE
A WARNING: Be sure to read
the fuel information in the safety rules
before you begin. If you do not under
stand the safety rules, do not attempt
to fuel your unit. Call 1 -800-235-5878.
FUELING ENGINE
A WARNING: Remove fuel cap
slowly when refueling.
This engine is certified to operate on
unleaded gasoline. Before operation,
gasoline must be mixed with a good
quality synthetic 2-cycle air-cooled
engine oil. We recommend Craftsman
brand synthetic oil. Mix gasoline and oil
at a ratio of 40:1. A 40:1 ratio is
obtained by mixing 3.2 ounces of oil
with 1 gallon of unleaded gasoline.
Included with this trimmer is a 3.2
ounce container of oil. Pour the entire
contents of this container into 1 gallon
of gasoline to achieve the proper fuel
mixture. DO NOT use automotive oil or
marine oil. These oils will cause engine
damage. When mixing fuel, follow
instructions printed on container.
Once oil is added to gasoline, shake
container momentarily to assure that the
fuel is thoroughly mixed. Always read
and follow the safety rules relating to
fuel before fueling your unit.
IMPORTANT
Experience indicates that alcohol
blended fuels (called gasohol or using
ethanol or methanol) can attract
moisture which leads to separation
and formation of acids during storage.
Acidic gas can damage the fuel
system of an engine while in storage.
To avoid engine problems, empty the
fuel system before storage for 30 days
or longer. Drain the gas tank, start the
engine and let it run until the fuel lines
and carburetor are empty. Use fresh
fuel next season. Never use engine or
carburetor cleaner products in the fuel
tank or permanent damage may
occur. See the STORAGE section for
additional information.
HOW TO STOP YOUR UNIT
• Release the throttle trigger.
• Push and release the engine ON/
STOP switch. The switch will auto
matically return to the ON position.
Wait 5 seconds before attempting to
restart unit to allow switch to reset.
HOWTO START YOUR UNIT
A WARNING: Avoid any contact
with the muffler. A hot muffler can
cause serious burns.
NOTE: DO NOT squeeze the throttle
trigger until the engine has started and
runs.
1. Set unit on a flat surface.
2. Slowly press the primer bulb 6
times.
3. Move the start lever to the START
position.
Primer Bulb.,
■ V
Starter Handle
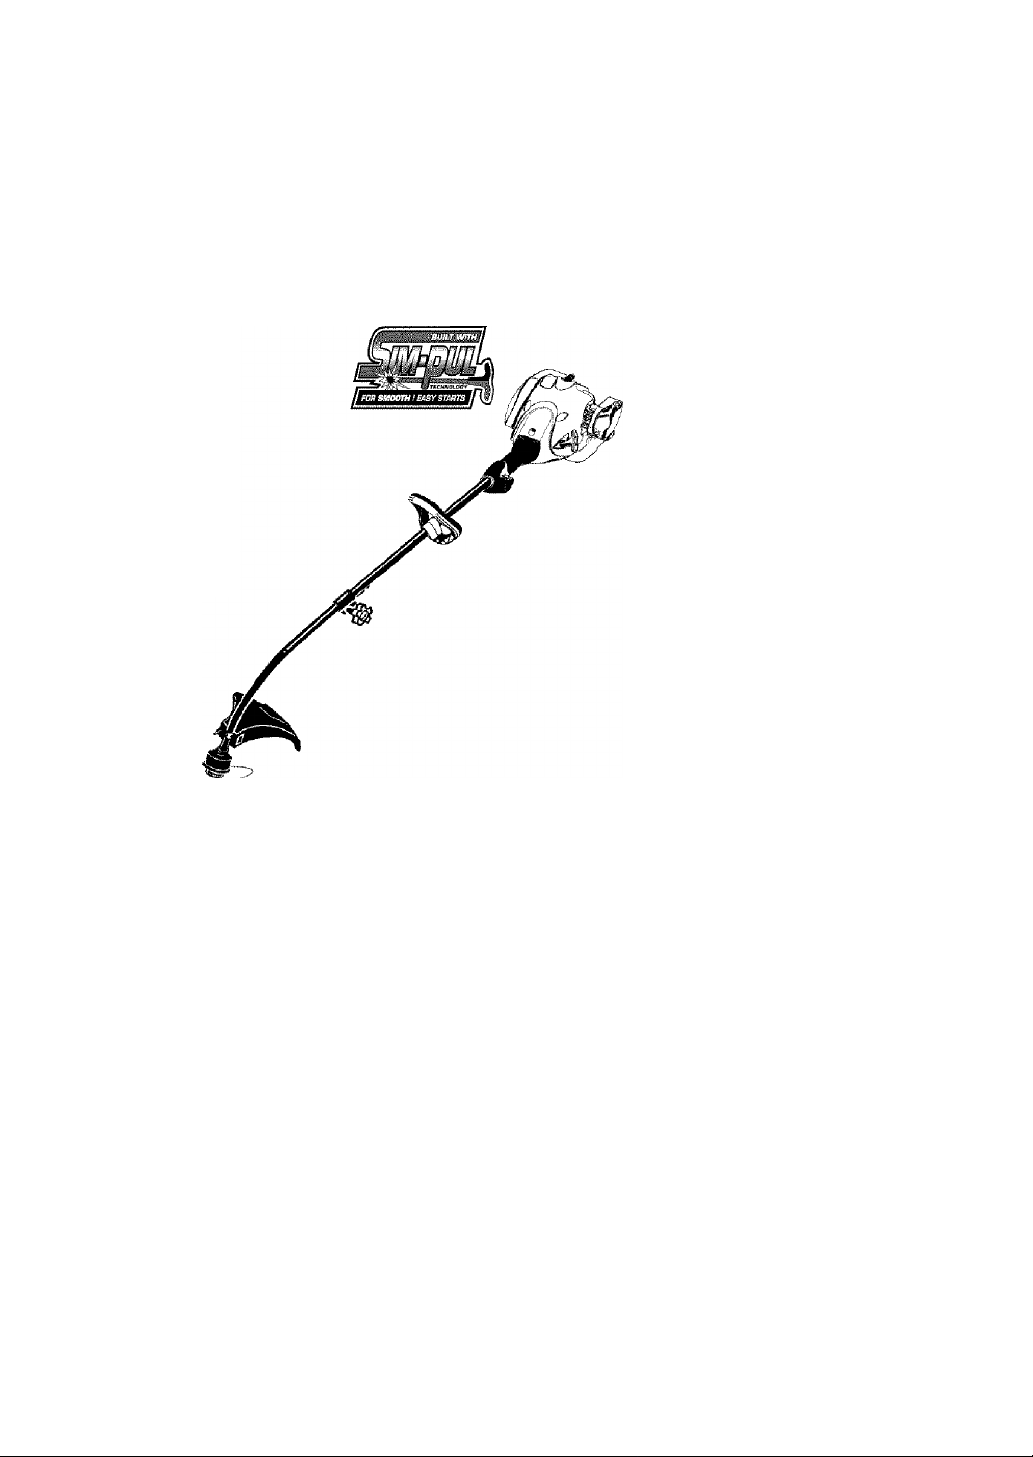
This unit has the Sim-pu!'“ starting
system. You do not have to pull the
starter rope handle sharply or brisk
ly Pull starter rope handle with a
controlled and steady motion until
engine starts and runs.
12
Page 13
5. Allow unit to run for 5 seconds, then
fully squeeze the throttle trigger to
disengage the starting system {start
lever returns to RUN position),
STARTING A WARM ENGINE
1. Squeeze and hold the throttle trig
ger.
2. Pull starter rope handle with a con
trolled and steady motion while
squeezing throttle trigger until en
gine starts and runs.
NOTE: Normally, the warm starting
procedure can be used within 5-10
minutes after the unit is turned off. If
the unit sits for more than 10 minutes
without being used, it will be neces
sary to start the unit by following the
steps under STARTING A COLD EN
GINE or following the starting instruc
tion steps shown on the unit.
STARTING A FLOODED ENGINE
Flooded engines can be started by
placing the start lever to the RUN posi
tion. Fully squeeze throttle trigger.
Puli the starter handle repeatedly
while squeezing throttle trigger until
engine starts and runs. This could re
quire pulling the starter handle many
times, depending on how badly the
unit is flooded.
if the unit still doesn’t start, refer to the
TROUBLESHOOTING TABLE or call
1-800-235-5878.
CRAFTSMAN®
CONVERTIBLE™ FEATURE
This model is equipped with a coupler
which enables optional attachments to
be installed. The optional attachments
are:
Edger................................. 358.79240
Cultivator
Blower
Brushcutter
Pruner
..........................
............. ................
........................
..............................
358.79241
358.79242
358.79244
358.79245
^WARNING: Always stop unit
and disconnect spark plug before re
moving or installing attachments.
REMOVING TRIMMER ATTACH
MENT (OR OTHER OPTIONAL AT
TACHMENTS)
CAUTION: When removing or instal
ling attachments, place the unit on a
flat surface for stability.
1. Loosen the coupler by turning the
knob counterclockwise.
Upper Shaft
Coupler
.OOSEN
Attachment
TIGHTEN Knob
2. Press and hold the locking/release
button.
Locking/Release
Button
Attachment
Coupler
Upper Shaft
3. While securely holding the engine
and upper shaft, pull the attach
ment straight out of the coupler.
INSTALLING OPTIONAL ATTACH
MENTS
1. Remove the shaft cap from the at
tachment (if present).
2. Position locking/release button of
attachment into guide recess of
coupler.
3. Push the attachment into the cou
pler until the locking/release button
snaps into the primary hole.
4. Before using the unit, tighten the
knob securely by turning clock
wise.
Coupler
Primary Hole
Guide Recess
^5S!P|
Upper Locking/ Attachment
Shaft Release
^WARNING: Make sure the lock
ing/release button is looked in the pri
mary hole and the knob is securely
tightened before operating the unit. All
attachments are designed to be used in
the primary hole unless otherwise
stated in the applicable attachment op
erator's manual. Using the wrong hole
could lead to serious injury or damage
to the unit.
Button
13
Page 14
OPERATING INSTRUCTIONS
To maximize operating efficiency, do
not run the engine for longer than 1
minute at a time at full throttle.
OPERATING POSITION
Cut only from your right to your left.
A WAR NIN G: Always wear eye
protection. Always use hearing protec
tion. Never lean over the trimmer head.
Rocks or debris can ricochet or be
thrown into eyes and face and cause
blindness or other serious injury.
When operating unit, stand as shown
and check for the following:
• Wear eye protection and heavy
clothing.
• Hold trigger handle with right hand
and assist handle with left hand.
• Hold unit so that engine is below
waist ievel.
• Cut only from your right to your left
to ensure debris is thrown away
from you. Without bending over,
keep line near and parallel to the
ground and not crowded into materi
al being cut.
Do not run the engine at a higher
speed than necessary. The cutting
line will cut efficiently when the engine
is run at less than full throttle. At lower
speeds, there is less engine noise and
vibration. The cutting line will last
longer and will be less likely to “weld”
onto the spool.
Always release the throttle trigger and
allow the engine to return to idle
speed when not cutting,
HOWTO STOP YOUR UNIT
• Release the throttle trigger.
• Push and release the engine ON/
STOP switch.
TRIMMER LINE ADVANCE
The trimmer line will advance approxi
mately 2 inches (5 cm) each time the
bottom of the trimmer head is tapped
on the ground with the engine running
at full throttle.
The most efficient line length is the
maximum length allowed by the line
limiter. Always keep the shield in place
when the tool is being operated.
To advance line:
• Operate the engine at full throttle.
• Hold the trimmer head parallel to
and above the grassy area.
• Tap the bottom of the trimmer head
lightly on the ground one time. Ap
proximately 2 inches (5 cm) of line
will be advanced with each tap.
Always tap the trimmer head on a
grassy area. Tapping on surfaces such
as concrete or asphait can cause ex
cessive wear to the trimmer head.
If the line is worn down to 2 inches (5
cm) or less, more than one tap will be
required to obtain the most efficient line
length.
WARNING: Use only 0.080 inch
(2 mm) diameter round line. Other
sizes and shapes of line will not ad
vance properly and will result in im
proper cutting head function or can
cause serious injury. Do not use other
materials such as wire, string, rope,
etc. Wire can break off during cutting
and become a dangerous missile that
can cause serious injury.
CUTTING METHODS
AwARNING: Use minimum
speed and do not crowd the line when
cutting around hard objects (rock,
gravel, fence posts, etc.), which can
damage the trimmer head, become
entangled in the line, or be thrown
causing a serious hazard.
• The tip of the line does the cutting.
You wiil achieve the best perform
ance and minimum line wear by not
crowding the line into the cutting
area. The right and wrong ways are
shown below.
14
Page 15
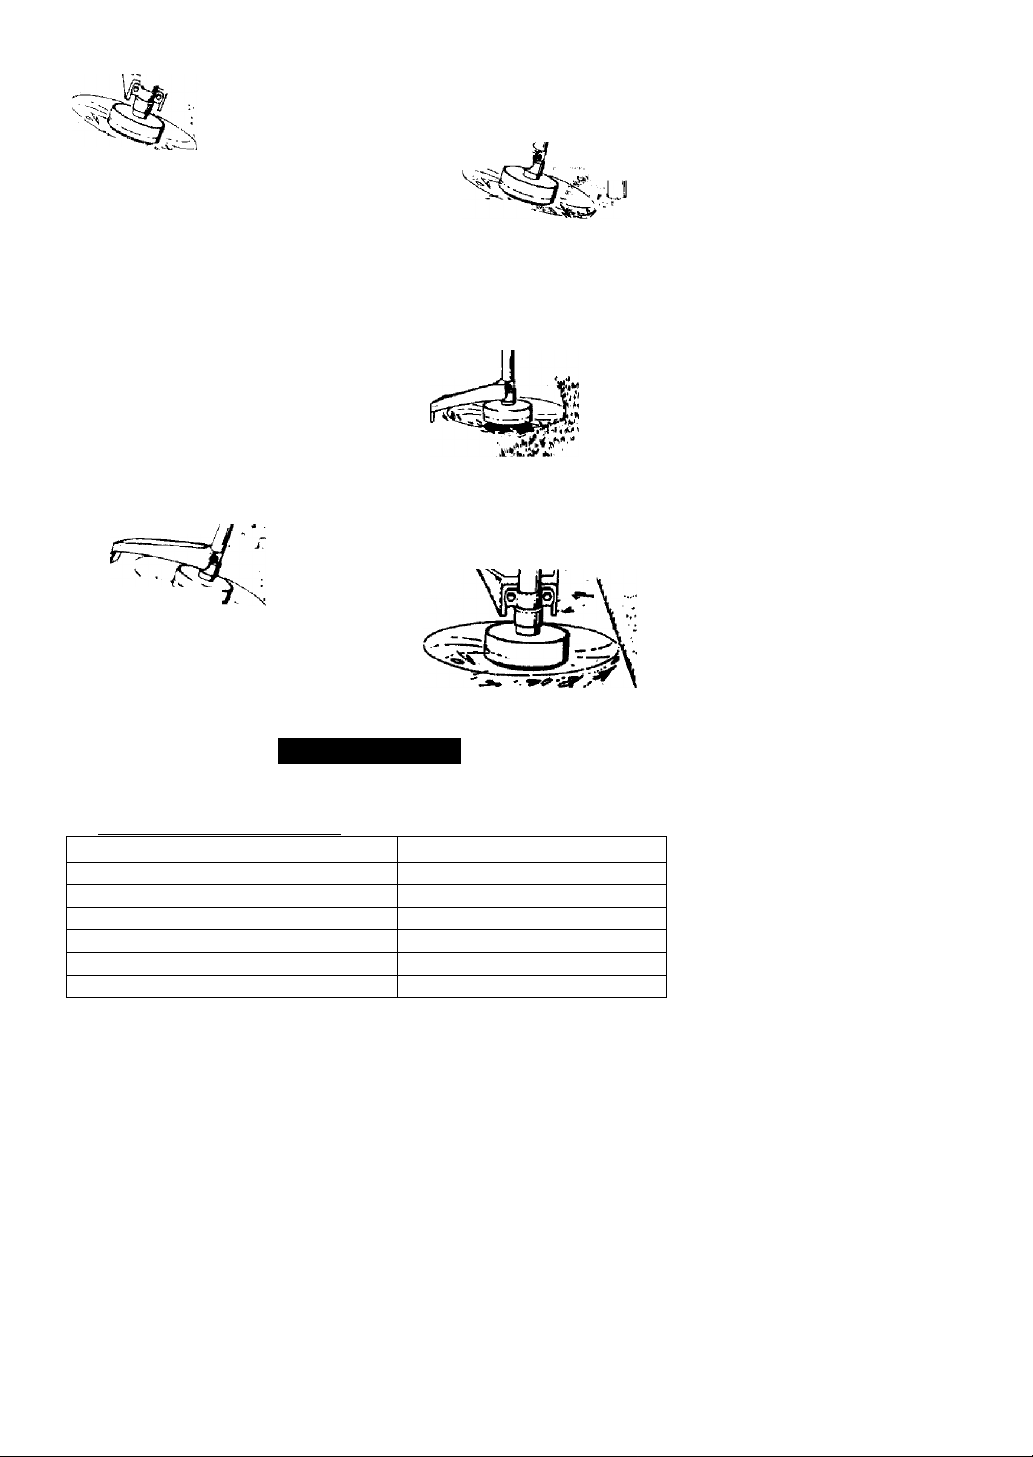
Tip of the Line
Does The Cutting
Line Crowded into
Work Area
■ s
^ V ‘
Right Wrong
• The line will easily remove grass
and weeds from around walls,
fences, trees and flower beds, but it
also can cut the tender bark of trees
or shrubs and scar fences.
• For trimming or scalping, use less
than full throttle to increase line life
and decrease head wear, especially:
• During light duty cutting.
• Near objects around which the line
can wrap such as small posts,
trees or fence wire.
• For mowing or sweeping, use full
throttle for a good clean job.
TRIMMING - Hold the bottom of the
trimmer head about 3 inches {8 cm)
above the ground and at an angle. Al
low only the tip of the line to make
contact with vegetation. Do not force
trimmer line into work area.
Trimming
3 inches (8 cm) i"
above ground | ^
SCALPING - The scalping technique
removes unwanted vegetation down
to the ground. Hold the bottom of the
trimmer head about 3 in. (8 cm) above
the ground and at an angle. Allow the
tip of the line to strike the ground
around trees, posts, monuments, etc.
This technique increases line wear.
Scalping^
A.itsJ iK
MOWING - Your trimmer is ideal for
mowing in places conventional lawn
mowers cannot reach. In the mowing
position, keep the line parallel to the
ground. Avoid pressing the head into
the ground as this can scalp the
ground and damage the tool.
Mowing
SWEEPING - The fanning action of
the rotating line can be used to blow
away loose debris from an area. Keep
the line parallel to and above the area
surface and swing the tool from side
to side.
Sweeping
MAINTENANCE
MAINTENANCE SCHEDULE
A WARNING: Disconnect the spark plug before performing maintenance
except for carburetor adjustments.
CARE & MAINTENANCE TASK WHEN TO PERFORM
Check for loose fasteners and parts Before each use
Check for damaged or worn parts Before each use
Inspect and clean unit and labels After each use
Clean air filter Every 5 hours of operation
Inspect muffler and spark arresting screen Every 50 hours of operation
Replace spark plug Yearly
15
Page 16

GENERAL RECOMMENDATIONS 3.
The warranty on this unit does not 4.
cover items that have been subjected 5.
to operator abuse or negligence. To
receive fuli value from the warranty, 6.
the operator must maintain unit as
instructed in this manual. Various ad
justments will need to be made peri
odically to properly maintain your unit.
CHECK FOR LOOSE
FASTENERS AND PARTS
• Spark Plug Boot
• Air Filter
• Housing Screws
• Assist Handle Screw
• Debris Shield
CHECK FOR DAMAGED OR
WORN PARTS
Contact Sears Service Center for re
placement of damaged or worn parts.
• ON/STOP Switch - Ensure on/stop
switch functions properly by pushing
and releasing the switch. Make sure
engine stops. Wait 5 seconds before
attempting to restart unit to allow
switch to reset. Restart engine and
continue.
• Fuel Tank - Discontinue use of unit
if fuel tank shows signs of damage
or leaks.
• Debris Shield - Discontinue use of
unit if debris shield is damaged.
INSPECT AND CLEAN UNIT AND LA
BELS
• After each use, inspect complete
unit for loose or damaged parts.
Clean the unit and labels using a
damp cloth with a mild detergent.
• Wipe off unit with a clean dry cloth.
CLEAN AIR FILTER
A dirty air filter decreases engine per
formance and increases fuel con
sumption and harmful emissions. Al
ways clean after every 5 hours of
operation.
1. Clean the cover and the area
around it to keep dirt from falling
into the carburetor chamber when
the cover is removed. f
2. Remove parts by pressing latch to 2.
release air filter cover.
NOTE: To avoid creating a fire hazard 3.
or producing harmful evaporative
emissions, do not clean filter in gaso
line or other flammable solvent. 4.
Wash the filter in soap and water.
Allow filter to dry.
Add a few drops of oil to the filter;
squeeze the filter to distribute oil.
Replace parts.
Button
INSPECT MUFFLER AND SPARK
ARRESTING SCREEN
Air Filter
Air Filter Cover
Á WARNING: The muffler on this
product contains chemicals known to
the State of California to cause cancer.
^WARNING: Muffler is very hot
during and after use. Do not touch the
muffler or allow combustible material
such as dry grass or fuel to do so.
As your unit is used, carbon deposits
build up on the muffler and spark ar
resting screen. For normal homeown
er use, however, the muffler and spark
arresting screen will not require any
service.
After 50 hours of use, we recommend
that your muffler be serviced or re
placed by your Sears Service Center.
REPLACE SPARK PLUG
Replace the spark plug each year to
ensure the engine starts easier and
runs better. Set spark plug gap at
0.025 inch. Ignition timing is fixed and
nonadjustable.
Twist, then pull off spark plug boot.
Remove spark plug from cylinder
and discard.
Replace with Champion RCJ-6Y
spark plug and tighten securely
with a 3/4 inch socket wrench.
Reinstall the spark plug boot.
16
Page 17

SERVICE AND ADJUSTMENTS
LINE REPLACEMENT
1. MovG the ON/OFF switch to the
OFF position.
2. Disconnect the spark plug wire.
3. Remove spool by firmly pulling on
tap button.
4. Clean entire surface of hub and
spoof.
5. Replace with a pre-wound spool
(#71 -85819), or cut two lengths of
12-1/2 feet (3.8 meters) of 0.080" (2
mm) diameter Craftsman® brand
line.
A WARNING: Never use wire,
rope, string, etc., which can break oft
and become a dangerous missile.
6. insert ends of line about 1/2 inch
(1 cm) into the small holes on the
inside of the spool.
Spool - .
II
Wind line evenly and tightly onto
spool. Wind in the direction of the
arrow on the spool.
8
Push the line into the notches, leav
ing 3 to 5 inches (7-12 cm) un
wound.
3. insert the line into the exit holes in
the hub as shown in the illustration.
Line exit holes Line in Notch
cautions. After making adjustments, the
trimmer head or any optional attach
ment must not move/spin at idle speed.
The carburetor has been carefully set
at the factory. Adjustments may be
necessary if you notice any of the fol
lowing conditions:
• Engine will not idle when the throttle is
released.
• The trimmer head or optional attach
ment moves/spins at idle.
Make adjustments with the unit sup
ported so the cutting attachment is off
the ground and will not make contact
with any object. Hold the unit by hand
while running and making adjustments.
Keep all parts of your body away from
the cutting attachment and muffler.
Idle Speed Adjustment
Allow engine to idle. Adjust speed until
engine runs without trimmer head or
optionaf attachment moving or spin
ning (idle too fast) or stalling (idle
speed too slow).
• Turn idle speed screw clockwise to
increase engine speed if engine
stalls or dies.
• Turn idle speed screw counterclock
wise to decrease engine speed if
trimmer head or optional attachment
moves or spins at idle.
A WARNING: Recheck the idle
speed after each adjustment. The
trimmer head or optional attachment
must not move or spin at idle speed to
avoid serious injury to the operator or
others.
10. Align the notches with the line exit
holes.
11. Push spool into hub until it snaps
into place.
12. Pull the lines extending outside of
the hub to release them from the
notches.
CARBURETOR ADJUSTMENT
A WAR NIN G; Keep others away
when making idle speed adjustments.
The trimmer head or any optional at
tachment will be spinning during most of
this procedure. Wear your protective
equipment and observe all safety pre
Idle Speed Screw
Air Filter Cover
If you require further assistance or are
unsure about performing this proce
dure, contact your Sears Service Cen
ter or call our customer assistance
help line at 1 -800-235-5878.
17
Page 18

STORAGE
A WARNING: Perform the follow
ing steps after each use:
• Allow engine to coo! before storing
or transporting,
• Store unit and fuel in a well venti
lated area where fuel vapors cannot
reach sparks or open flames from
water heaters, electric motors or
switches, furnaces, etc.
• Store unit with all guards in place.
Position unit so that any sharp ob
ject cannot accidentally cause injury.
• Store unit and fuel well out of the
reach of children.
SEASONAL STORAGE
Prepare unit for storage at end of sea
son or if it will not be used for 30 days
or more.
If your unit is to be stored for a period
of time:
• Clean the entire unit before lengthy
storage,
• Store in a clean dry area.
• Lightly oil external metal surfaces.
FUEL SYSTEM
Empty the fuel system before storage
for 30 days or longer. Drain the gas
tank, start the engine and let it run un
til the fuel lines and carburetor are
empty. Use fresh fuel next season.
Under FUELING ENGINE in the OPERA
TION section of this manual, see mes
sage labeled IMPORTANT regarding
the use of gasohol in your engine.
Fuel stabilizer is an acceptable alter
native in minimizing the formation of
fuel gum deposits during storage. Add
stabilizer to the gasoline in the fuel
tank or fuel storage container. Follow
the mix instructions found on stabilizer
container. Run engine at least 3 min
utes after adding stabilizer.
Craftsman 40:1,2-cycle engine oil (air
cooled) is already blended with fuel
stabilizer. If you do not use this Sears
oil, you can add a fuel stabilizer to
your fuel tank,
ENGINE
• Remove spark plug and pour 1 tea
spoon of 40:1, 2-cycle engine oil (air
cooled) through the spark plug
opening. Slowly puli the starter rope
8 to 10 times to distribute oil.
• Replace spark plug with new one of
recommended type and heat range.
• Clean air filter.
• Check entire unit for loose screws,
nuts, and bolts. Replace any dam
aged, broken, or worn parts.
• At the beginning of the next season,
use only fresh fuel having the proper
gasoline to oil ratio.
OTHER
• Do not store gasoline from one sea
son to another.
• Replace your gasoline can if it starts
to rust.
18
Page 19

TROUBLESHOOTING TABLE
A
WARN IN G: Always stop unit and disconnect spark plug before perform
ing ail of the recommended remedies below except remedies that require
unit to be operating.
TROUBLE CAUSE REMEDY
Engine wilf not
start.
Engine will
not idle
properly.
Engine wilt not
accelerate,
lacks power,
or dies under
a load.
Engine
smokes
excessively.
Engine runs
hot.
1. Engine fboded.
2. Fuel tank empty.
3. Spark plug not firing.
4. Fuel not reaching
carburetor.
5. Carburetor requires
adjustment.
1. Carburetor requires
adjustment.
2. Crankshaft seals worn.
3. Compression low.
1. Air filter dirty,
2. Spark plug fouled.
3. Carburetor requires
adjustment.
4. Carbon build-up on
muffler outlet screen.
5. Compression low.
1. Fuel mixture incorrect.
2. Air filter dirty.
3. Carburetor requires
adjustment.
1- Fuel mixture incorrect.
2. Spark plug incorrect.
3. Carburetor requires
adjustment.
4- Carbon build-up on
muffler outlet screen.
1. See '“Starting a Flooded Engine” in
Operation Section.
2. Fill tank with correct fuel mixture.
3. Install new spark plug.
4. Check for dirty fuel filter; replace.
Check for kinked or split fuel line;
repair or replace.
5. Contact Sears Service (see back cover).
1. See “Carburetor Adjustment” in
Service and Adjustments Section.
2. Contact Sears Service (see back cover).
3. Contact Sears Service (see back cover).
1. Clean or replace air filter.
2. Clean or replace plug
and regap.
3. Contact Sears Service (see back cover).
4. Contact Sears Service (see back cover).
5. Contact Sears Service (see back cover).
1. Empty fuel tank and refill with
correct fuel mixture,
2. Clean or replace air filter.
3. Contact Sears Service (see back cover).
1. See "Fueling Engine” in Operation
section.
2. Replace with correct spark plug.
3. Contact Sears Service (see back cover).
4- Contact Sears Service (see back cover).
19
Page 20

U.S. EPA/CALIFORNIA
EMISSION CONTROL WARRANTY STATEMENT
YOUR WARRANTY RIGHTS AND
OBLIGATIONS: The U.S. E nviron-
mental Protection Agency/California
Air Resources Board and Sears, Roe
buck and Co., U.S.A., are pleased to
explain the emissions control system
warranty on your year 2007 and later
small off-road engine, in California, all
small off-road engines must be de
signed, built, and equipped to meet
the State's stringent anti-smog stan
dards. Sears must warrant the emis
sion control system on your small off
road engine for the periods ottime
listed below provided there has been
no abuse, neglect, or improper main
tenance of your small off-road engine.
Your emission control system includes
parts such as the carburetor, the ignition
system and the fuel tank (California
only). Where a warrantable condition
exists, Sears will repair your small off
road engine at no cost to you. Ex
penses covered under warranty in
clude diagnosis, parts and labor.
MANUFACTURER’S WARRANTY
COVERAGE: If any emissions related
part on your engine (as listed under
Emissions Control Warranty Parts
List) is defective or a defect in the ma
terials or workmanship of the engine
causes the failure of such an emission
related part, the part will be repaired or
replaced by Sears.
OWNER’S WAR
RANTY RESPONSIBILITIES: As the
small off-road engine owner, you are
responsible for the performance of the
required maintenance listed in your
operator’s manual. Sears recom
mends that you retain all receipts cov
ering maintenance on your small off
road engine, but Sears cannot deny
warranty solely for the lack of receipts
or for your failure to ensure the perfor
mance of all scheduled maintenance.
As the small off-road engine owner,
you should be aware that Sears may
deny you warranty coverage if your
small off-road engine or a part of it
has failed due to abuse, neglect, im
proper maintenance, unapproved
modifications, or the use of parts not
made or approved by the original
equipment manufacturer. You are re
sponsible for presenting your small
off-road engine to a Sears authorized
repair center as soon as a problem
exists. Warranty repairs should be
completed in a reasonable amount of
time, not to exceed 30 days.
If you have any questions regarding
your warranty rights and responsibili
ties, you should contact your nearest
authorized service center or call Sears
at 1-800-469-4663, WARRANTY
COMMENCEMENT DATE: The war
ranty period begins on the date the
small off-road engine is purchased.
LENGTH OF COVERAGE: This war
ranty shall be for a period of two years
from the initial date of purchase.
WHAT IS COVERED: REPAIR OR
REPLACEMENT OF PARTS. Repair
or replacement of any warranted part
will be performed at no charge to the
owner at an approved Sears Service
Center. If you have any questions re
garding your warranty rights and re
sponsibilities, you should contact your
nearest authorized service center or
call Sears at 1-800-469-4663. WAR-
RA.NTY PERIOD: Any warranted part
which is not scheduled for replace
ment as required maintenance, or
which is scheduled only for regular in
spection to the effect of “repair or re
place as necessary’’ shall be war
ranted for 2 years. Any warranted part
which is scheduled for replacement as
required maintenance shall be war
ranted for the period of time up to the
first scheduled replacement point for
that part. DIAGNOSIS: The owner
shall not be charged for diagnostic la
bor which leads to the determination
that a warranted part is defective if the
diagnostic work is performed at an ap
proved Sears Service Center. CON
SEQUENTIAL DAMAGES: Sears
may be liable for damages to other
engine components caused by the
failure of a warranted part still under
warranty. WHAT IS NOT COVERED:
All failures caused by abuse, neglect,
or improper maintenance are not cov
ered. ADD-ON OR MODIFIED
PARTS: The use of add-on or modi
fied parts can be grounds for disallow
ing a warranty claim. Sears is not li
able to cover failures of warranted
parts caused by the use of add-on or
modified parts. HOW TO FILE A
CLAIM: If you have any questions re
garding your warranty rights and re
sponsibilities, you should contact your
20
Page 21

nearest authorized service center or
call Sears at 1-800-469-4663.
WHERE TO GET WARRANTY SER
VICE: Warranty services or repairs
shall be provided at all Sears Service
Centers. Gail 1-800-469-4663.
MAINTENANCE, REPLACEMENT
AND REPAIR OF EMISSION RE
LATED PARTS: Any Sears approved
replacement part used in the perfor
EMISSION CONTROL WARRANTY
PARTS LIST: Carburetor, Ignition Sys
tem: Spark Plug (covered up to main
tenance schedule), Ignition Module,
Muffler including catalyst, Fuel Tank
(California only). MAINTENANCE
STATEMENT: The owner is responsi
ble for the performance of all required
maintenance as defined in the opera
tor's manual.
mance of any warranty maintenance
or repair on emission related parts will
be provided without charge to the
owner if the part is under warranty.
The information on the product label indicates which standard your engine is certified.
Example: (Year) ERA Phase 1 or Phase 2 and/or CALIFORNIA,
IMPORTANT EMISSION INFORMATION
THIS ENGINE CONFORMS TO EXH, AND EVAP.
EMISSIONS REGULATIONS FOR SMALL OFF
FAMiLWISP,
SERIAL#
MODEL#
ROAD ENGINES
THE AIR INDEX OF THIS ENGINE IS 3
This engine is certified to be emissions compliant for the following use:
69 Moderate (50 hours)
□ Intermediate (125 hours)
□ Extended (300 hours)
21
Page 22

REPAIR PARTS
SEARS TRIMMER MODEL 358.791031
A WARNING
All repairs, adjustments and
maintenance not described in
the Operator’s Manual must
be performed by qualified
service personnel.
Ref. Part No. Description Ref. Part No, Description
1. 530059759 Assy-Throttie Cabie
2, 530057541 Throttle Hsg. (Right)
3. 530016406 Screw-Throttie Hsg.
4. 530015814 Screw
5, 545058602 Assy-Wire (incl. #7)
6. 530059760 Throttle Hsg. (Left)
7, 545049301 Assy-Sv^itch
S. 530049107 Trigger
9, 530058583 Assy-Handle (incl , 10,11)
10- 530016152 Wingnut
11. 530015786 Bolt
12, 530016319 Screw
13. 530071791 Kit-Upper Shaft (incl. 14}
14, 530016344 Screw
15. 530071788 Kit-Loviier Shaft
16, 530052286 Line Limiter
17. 530015814 Screw-Line Limiter
IS. 530071802 Kit-Shield Assy
(Inci, 16,17,19,20)
19, 530015820 Boit
20. 530016152 Wingnut
21, 545091301 Assy-Head TNG 6 ,080
22. 530095776 Hub
23, 530053241 Spring
24. 530401957 Retainer
25, 545091401 Assy-Wound Spool
Not S town
545167683 Operator Manual
530057296 Decal - Shaft Warning
530056220 Decal-Warning
(Incl. 22,23,24,25)
22
22—r'r-
Page 23

REPAIR PARTS
SEARS TRIMMER MODEL 358.791031
116 .
lk 18 20 21
J4
^7-o
Sh, WARNING
All repairs, adjustments and
maintenance not described in
the Operator’s Manual must be
performed by qualified service
personnel.
=44 I 42
■^3 -
/1
\ 35
X
^P\
\i\ \
f.;A
58
J X
Ref. Part No. Description Ref. Part No. Description Ref. Part No. Description
1. 530015880 Screw 22. 530039229 Ignition Module
2. 53005SDS2 Bolt-Muffier 23. 530016357 Screw
3. 530057863 Assy-Mufffer/Shield 24. 545054801 Assy-Wire
4. 530015953 Screw-Cylinder 26, 545015803 Assy.-Fan Hsg
5. Champion Spark Plug (RCJ 6Y) 27. 530016386 Screw
e. 530012541 Cylinder 28, 530054834 Handle-Starter
7. 530071750 Seal-Cylinder (kit 29. 545050409 Kit-Rope
8. 530071785 Kit-Piston/Rod Assy 30. 530055122 Assy-Clutch
9. 530069945 Assy-Conn. Rod 32. 530015772 Screw
10. 530055120 Piston Ring 33, 530015814 Screw
11. 530015162 Retainer-Piston Pin 34. 545050407 Kit-Pulley-Starter
12. 530071833 Kit-Piston{1nc!.10,11 35, 545080601 Baifle-Fan
13. 530071750 Seal-Cy!/Carb.(kit) 36. 530015880 Screw-Baffle
14. 530057547 Adapter-Carb. 37. 530059758 Spacer
15. 530016441 Screw 38, 530016463 Washer
10. 530071750 Gasket-Carb. (kit) 39. 530039243 Assy-Flywheel
17. 530071811
(Noxe: Heparr kiis are noi avallarne
for this carburetor')
18. 530059246 Air Box (Incl. 43,44,45)
19. 530016429 Screw 42, 530015941 Retain. Ring-C’shaf
20. 530036575 Foam-Air Filter 43, 530055728 Outer Bearing
21. 530057545 Cover-Air Box 44. 530019264 Seal-Cease
(Incl. 2) 25. 545054901 Spring-Starter
(Incf. 9 & 12) 31, 530094189 Washer-Clutch
Kit-Carb.iClU-W19
40, 530071951 Assy-C’case/C’shaf
41, 530012582 Assy-Crankcase
(Ind. 41,42,46)
45. 530032125 Inner Bearing
46. 530012579 Assy-Crankshaft
47. 530071750 0-Ring-C’case (kit)
48. 530057954 Assy-Plug (tncl.47)
49. 530016386 Screw
50. 530057539 Shroud-Rear
51. 530016445 Retainer-Tank
52. 530057974 Assy-Fuel Tank (incl.
53. 530057973 Assy-Fuel Cap
54. 530069247 Kit-Fuel Line (Small)
55. 530069216 Kit-Fuel Line (Large)
56. 530095646 Assy-Fuel Pickup
57, 530071750 Kit-Engine Gasket
58. 530150247 Assy-Clutch drum
59. 530059757 Assy-C!utch Cover
60 530015772
61. 530016381 Screw
62, 530016382 Nut-#12-24
530058709 Bulb-Purge
filter, lines & fuel cap)
(Incl. 7,13,16,47)
(Incl, 61,62)
Not S lown
23
Page 24

TABLA DE CONTENIDO
Declaración de Garantía
Identificación de los Símbolos
de Seguridad
Reglas de Seguridad
Montaje
Uso
Mantenimiento
24 Servicio y Ajustes 40
24
26
32
34
39 Repuesto y Encargos Contratapa
Almacenaje 42
Tabla Diagnóstica 43
Declaración de Emision 44
Lista de Piezas 22
DECLARACION DE GARANTIA
UN AÑO COMPLETO DE GARANTÍA PARA CORTADORA DE LÍNEA A
GASOLINA WEEDWACKER® DE CRAFTSMAN®
Si este producto falla por un defecto en el material o de mano de obra dentro del año
a partir de la fecha de compra y este se ha utilizado y mantenido de acuerdo al manu
al del usuario, envíelo a cualquier tienda Sears, Centro de Servicios Sears u otra
tienda Craftsman en los Estados Unidos para su reparación gratuita (o reemplazo si
no es posible repararlo).
Esta garantía excluye la línea de corte, ias bujías y el filtro de aire, que son partes
desechadles y pueden desgastarse ai usarlas normalmente en menos de un año.
Esta garantía es aplicable por sólo 90 días desde la fecha de compra si este produc
to se usa con fines comerciales o se usa para arriendo.
Esta garantía le otorga derechos legales específicos, y usted también puede tener
otros derechos que varían de estado a estado.
Sears, Roebuck and Co., Hoffman Estates, IL 60179
IDENTIFICACION DE LOS SIMBOLOS DE SEGURIDAD
PELIGRO: Use exclusivamente la ca
bezal de corte y la bobina especificada y la
línea de corte con diámetro de 2 mm (0,080
de pulgada) recomendado. Nunca use
cuchillas ni dispositivos desgrandores,
alambre, soga, hilo, etc. Este accesorio ha
sido diseñado exclusivamente como corta
dor a línea. El incumplimiento de cualquiera
de las instrucciones puede causar graves
heridas.
A
ADVERTENCIA: ¡Este aparato puede ser peligrosa! El
uso descuidado o indebido de esta herramienta puede causar
graves heridas.
Lea el manual de usuario antes de usar. No seguir las instruc
ciones podía causar graves heridas. Guarde el manual de
usuario.
La línea de corte arroja objetos vio
lentamente, Los objetos arrojados
pueden cegarlo o herirlo a usted y
a terceros. Use protección de oídos
y anteojos de seguridad marcar con
Z87. Use siempre pantalones pesa
dos y largos, mangas largas, botas y
guantes.
24
Page 25

IDENTIFICACION DE LOS SIMBOLOS DE SEGURIDAD
Zona de peligro por objetos arrojados al aire.
• La línea de corte arroja objetos violentamente.
• Los objetos arrojados pueden cegarlo o herirlo
a usted y a terceros.
• Mantenga a personas y animales 15 metros
(50 pies) alejados de la zona de trabajo.
Asegúrese de tener el cabello re
cogido por encima de los hombros.
No use joyería, ropa suelta ni ropa
con corbatas, tiras, borlas, etc. que
cuelgan libremente. Pueden enre
darse en las piezas en movimiento.
El mango auxiliar debe colocarse siempre por
debajo de la flecha.
No permita que los niños usen este aparato.
Guarde el aparato ai abrigo de la intemperie, desen
chufado, en un lugar alto, seco y fuera del alcance
de los niños. Guarde el aparato y el combustible en
un lugar donde ios vapores del combustible no pue
dan alcanzar chispas ni llamas provenientes de los
termotanques, ios motores o interruptores eléctricos,
los calefactores centrales, etc.
A! mantener este aparato, use solamente las
piezas de reemplazo idénticas.
Siempre apague el aparato y desconecte la bujía
antes de dar mantenimiento.
feissij ^
A ADVERTENCIA: Riesgo de incendios. Nunca mezcle,
vierta, o almacene el combustible o utilice el aparato cerca de
llamas o fuentes de chispas (inclusive los cigarrillos, las llamas
abiertas, y cualquier trabajo que cause chispas).
25
Page 26

IDENTIFICACION DE LOS SIMBOLOS DE SEGURIDAD
Utilice gasolina sin plomo y aceite para motores de dos
tiempos mezclado en proporción al 40:1 (2.5%).
ACCESORIOS OPCIONALES
Los accesorios usados en combinación con la cabeza de motor especificado
han sido evaluados con la standard de ANSI B175.3-2003, los “Recortadoras y
Desbrozadoras - Requisitos de Seguridad”.
Cabeza de motor con el accesorio de! cortadora
Accesorio opcional del cortadora de malezas........................................ 358.79244
Los accesorios usados en combinación con la cabeza de motor especificado han
sido evaluados a las normas ISO- y EN aplicables para los requisitos de seguri
dad por el Organismo acreditado, el instituto Sueco de Pruebas de Maquinaria
(SMP):
Accesorio opcional del cortadora de bordes
Accesorio opcional de! Cultivador.......................................................... 358.79241
Accesorio opcional de! propulsor de aire
Accesorio opcional del cortadora de ramas
.................................
.........................................
..............................................
...........................................
358.79103
358.79240
358.79242
358.79245
REGLAS DE SEGURIDAD
ü ADVERTENCIA: Al usar cualqui
er herramienta de fuerza de jardinería,
deberán observarse precauciones bási
cas de seguirdad en todo momento para
reducir el riesgo de incendio y graves heri
das. Lea y cumpla con todas las instruc
ciones.
¡Esta herramienta de fuerza puede ser
peligrosa! Cabe al usuario le responsa
bilidad de cumplir con todas las adver
tencias e instrucciones. ¡Lea el manual
del usuario en su totalidad antes de usar
el aparato! Esté completamente familia
rizado con los controles y con el uso cor
recto del aparato. Limite el uso de este
aparato a aquellas personas que hayan
leído y comprendido, y que vayan a ob
edecer, todas las advertencias e
instrucciones tanto en el aparato como
en el manual. No permita nunca a los
niños que usen este aparato.
MANUAL DEL
' 'M\USUARIO
INFORMACION DE SEGURIDAD
DEL APARATO
Apeligro; Nunca use cuchillas
con accesorio de! cortadora de línea.
Nunca use dispositivos desgranadoras
con accesorios. El aparato fue fiseñado
para ser usado exclusivamente como
cortodora de línea. El uso de cualquier
otro accesorios con accesorio de! corta
dora de línea incrementará el peligro de
heridas.
Si acontece alguna situación no prevista
en este manual, tenga cuidado y use
buen criterio. Si necesita ayuda, entre
en contacto con su Centro de Servicio
Sears o llame a! 1 -800-235-5878.
SEGURIDAD DEL USUARIO
• Vístase apropiadamente. Siempre
use anteojos de seguridad o similar
protección para los ojos cuando use
o dé mantenimiento a este aparato
(anteojos de seguridad están dispo
nibles). La protección para los ojos
se debe marcar con Z87.
• Siempre utilize mascarilla para la
cara o mascarilla a prueba de polvo
si se va a trabajar en condiciones
donde hay polvo.
• Siempre utilize pantalones pesados
y largos, mangas largas, botas y
guantes. Se recomienda el uso de
pantorrilleras de seguridad.
• Siempre utilize protección para los
pies. No trabaje descalzo ni en
sandalias. Evite la línea girante.
• Mantenga el cabello por encima de
los hombros, atándolo para tal efecto
si es necesario. No use ropa suelta ni
26
Page 27

ropa con corbatas, tiras, borlas, etc.
que cuelgan libremente. Pueden enre
darse en las piezas en movimiento.
• Si está completament tapado, estará
más protegido de los escombros y
pedazos de plantas tóxicos arroja
dos por la línea girante.
• Manténgase alerta. No haga uso del
aparato estando cansado, enfermo,
trastornado o bajo la influencia del
alcohol, de drogas o de remedios.
Vigile bien lo que está haciendo; use
del sentido común.
• Use protección de oídos.
• Nunca ponga el aparato en marcha
ni lo deje en marcha dentro de un
recinto cerrado. Respirar los vapores
del combustible lo puede matar.
• Mantenga las manijas libres de
aceite y de combustible.
• Mantenga siempre el motor junto al
lado derecho de su cuerpo.
• Sostenga siempre el aparato con
ambas manos mientras esté en fun
cionamiento.
• Mantenga ef cabezal de corte (o
otras accesorios opcional) por deba
jo de la cintura y lejos de todas las
partes de su cuerpo. No levante el
motor por encima de su cintura.
• Mantenga todas las partes del cuerpo
alejadas del silenciador y de la línea
girante (o otras accesorio opcional).
El silenciador puede causar graves
quemaduras cuando está caliente,
• Mantenga ei equilibrio, con los pies
en una superficie estable. No se ex
tienda demasiado o use el aparato
desde superficies inestables como
escaleras manuales, árboles,
cuestas empinadas, techos, etc.
• Use el aparato únicamente de día o
en luz artificial fuerte.
• Use exclusivemente para trabajos
descritos en este manual (o el manu
al para accesorios opcional).
SEGURIDAD DEL APARATO Y EN
EL MANTENIMIENTO
A ADVERTENCIA: Siempre de
tenga el aparato y desconecte la bujía
antes de hacer cualquier mantenimiento
menos los ajustes al carburador,
• Inspeccione el aparato y cambie las
piezas dañadas o flojas antes de
cada uso. Repare toda fuga de com
bustible antes de usar el aparato.
Mantenga eí aparato en buenas con
diciones de uso.
• Cambie todas las piezas del cabezal
que estén descantilladas, resquebra
jadas, quebradas o dañadas de
cualquier otro modo, antes de usar
el aparato.
• Haga el mantenimiento del aparato
de acuerdo a los procedimientos re
comendados. Mantenga la línea de
corte el largo aprodiado.
• Use solamente línea de diámetro 2
mm (0,080 de pulgada) de la marcha
Craftsman®. Nunca use alambre,
soga, hilo, etc.
• Instale la protector requerida antes
de usar su aparato. Use la bobina
especificada. Asegúrese que la bobi
na esté correctamente instalada y
esté bien fijo.
• Asegúrese que el aparato esté cor
rectamente armado como se mues
tra en el manual.
• Haga los ajustes al carburador con
el cabezal apoyado de modo que la
línea no pueda tocar nada.
• Mantenga alejadas a las demás per
sonas siempre que haga ajustes al
carburador.
• Use exclusivamente los accesorios y
repuestos Craftsman recomendados.
• Todo servicio y mantinimiento no ex
plicado en este manual deberá ser
efectuado por un Centro de Servicio
Sears.
SEGURIDAD CON EL COMBUSTIBLE
• Mezcle y vierta el combustible al aire
libre.
• Manténgalo alejado de las chispas y
de las llamas.
• No fume ni permita que se fume cer
ca del combustible ni del aparato ni
mientras éste esté en uso.
• Evite derramar el combustible o el
aceite. Limpie todo el combustible
derramado.
• Aléjese a por lo menos 3 metros (10
pies) del lugar de abastecimiento
antes de poner en marcha el motor.
Pare el motor y permita que se enfríe
el aparato antes de retirar la tapa del
tanque.
• Antes de guarder el aparato, vacíe el
depósito de combustible. Arranque
el motor y déjelo en marcha hasta
que se detenga con el fin de agotar
el combustible que pueda quedar en
el carburador.
• Guarde el aparato y el combustible
en un lugar donde los vapores del
combustible no puedan alcanzar
chispas ni llamas provenientes de
los termotanques, los motores o in
terruptores eléctricos, los calefac
tores centrales, etc.
27
Page 28

• AlmacénG siempre combustible en
un recipiente aprobado para los
líquidos inflamables.
TRANSPORTE Y ALMACENAMIENTO
• Antes de proceder a su transporte,
detenga el aparato.
• Espere que el motor se enfríe y fije
bien el aparato antes de guardarlo o
de transportarlo en un vehículo.
• Vacíe el tanque de combustible antes
de guardar el aparato o de transpor
tarlo. Consuma todo el combustible
restante en el carburador poniendo el
motor en marcha y dejándolo en mar
cha hasta que le motor se pare solo.
• Guarde el aparato y el combustible
en un lugar donde los vapores del
combustible no puedan alcanzar
chispas ni llamas provenientes de
los termotanques, los motores o in
terruptores eléctricos, los calefac
tores centrales, etc.
• Guarde el aparato de modo que el
cuchilla limitadora de línea no pueda
causar heridas accidentales. Se
puede colgar el aparato por la caja el
eje de propulsión.
• Guarde el aparato fuera de! alcance
de los niños.
Este aparato no esta equipado con un
sistema de anti-vibración y se diseña
si es usado ocasionalmente.
AVISO SPECIAL: El estar expuesto a
las vibraciones a través del uso pro
longado de herramientas de fuerza a
gasolina puede cuasar daños a los va
sos sanguíneos o a los nervios de los
dedos, las manos y las coyunturas en
aquellas personas que tienen propensidad a los trastornos de la circulación
o a las hinchazones anormales. El uso
prolongado en tiempo frío ha sido aso
ciado con daños a los vasos snaguíneos de personas que por otra
parte se encuentran en perfecto esta
do de salud. Si ocurren síntomas tales
como el entumecimiento, el dolor, la
falta de fuerza, los cambios en el color
o la textura de la piel o falta de sentido
en los dedos, las manos o las coyun
turas, deje de usar esta máquina in
mediatamente y procure atención
médica. Los sistemas de anti-vibración no garantizan que se eviten tales
problèmes. Los usuarios que hacen
uso continuo y prolongando de las
herramientas de fuerza deben fiscali
zar atentamente su estado físico y el
estado del aparato.
AVISO ESPECIAL: Su aparato viene
equipada con silenciador limitador de
temperatura y con rejilla antichispa que
cumpla los requisitos de los Códigos de
California 4442 y 4443. Todas las tierras
forestadas federales, más los estados
de California, Idaho, Maine, Minnesota,
Nueva Jersey, Washington y Oregón,
requieren por ley que muchos motores
de combustión interna estén equipados
con rejilla antichispa. Si usted el aparato
en un estado y otra localidad donde ex
isten tales reglamentos, usted tiene la
responsabilidad jurídica de mantener
estas piezas en correcto estado de fun
cionamiento. De lo contrario, estará en
infracción de la ley. Para el uso normal
del dueño de la casa, el silenciador y la
rejilla antichispa no requerirán ningún
servicio. Después de 50 horas de uso,
recomendamos que al silenciador se le
de servicio o sea substituido por un
Centro de Servicio Sears.
SEGURIDAD AL RECORTAR
A ADVERTENCIA: Inspeccione el
área antes de cada uso. Retire ios ob
jetos (piedras, vidrio roto, clavos,
alambre, etc.) que se puedan enredar
en la línea o que ésta pueda arrojar.
Los objetos duros pueden dañar el ca
bezal y éste los puede arrojar, causan
do graves heridas.
• Use el aparato exclusivamente para
recortar, para cortar césped y para
barrer. No lo use para cortar bordes,
para podar ni para recortar seto.
• Corte siempre de derecha a izquierda.
Si se corta con la línea del lado iz
quierdo del protector, los escombros
volarán en sentido opuesto al usuario.
REGLAS ADICIONALES DE SE
GURIDAD PARA ACCESORIOS
OPCIONAL
A ADVERTENCIA: Para cada ac
cesorio opcional usada, lea a manual
del usuario enteros antes de uso y
siga todas las advertencias e instruc
ciones en manual y en la accesorio.
A ADVERTENCIA: Asegúrese el
mango está instalado al usar las acce
sorio al cortadora de malezas. Instale
el mango sobre la flecha de la etiqueta
de seguridad del eje superior (extremo
con el motor del aparato). Si su acce
sorio del cortadora de malezas no in
cluye un mango, un kit de accesorios
del mango (#530071451) está dispon
ible de su Centro de Servicio Sears.
28
Page 29

Á ADVERTENCIA: Inspeccione el
área a ser cortada antes de cada uso.
Retire ios objetos {piedras, vicrio roto,
ciavos, aiambre, hilo, etc.) que puedan
ser arrojados por la cuchilla o que pue
dan enroscarse en el eje.
• La cuchilla continúa girando por un
instante después de que se suelte el
gatillo. La cuchilla puede herir gra
vemente al ususario o a terceras.
• Deje que la cuchilla se detenga
antes de sacarla del corte.
La cuchilla gira Deje que la cutíiilla
por un instante se detenga antes
después de t de sacaría del
que se haya ^
sollado
el gatillo.
• Deseche toda cuchilla doblada, torci
da, resquebrajada, quebrada o
dañada de cualquier otro modo.
Cambie todas las piezas resquebra
jadas, descantilladas o dañadas
antes de usar el aparato.
• No intente remover el material y cor
tado o sostenga el material a ser cor
tado mientras el motor se encuentre
en marcha o cuando el dispositivo
que corta se encuentre en movi
miento.
• Mantenga siempre las rueda y el cal
zo en contacto con el suelo.
• Siempre empuje el aparato lenta
mente sobre el terreno. Cuídese
constantemente contra las aceras
desniveladas, hoyos en el terreno,
raíces grandes, etc.
SEGURIDAD AL PROPULSOR DE
AIRE/ASPIRADORA
Á ADVERTENCIA: Inspeccione el
área antes de poner en matados los es
combros y objetos sólidos tales como
piedras, vidrio, alambre, etc., que el apa
rato pueda arrojar al aire o hacer rebotar
causando heridas de este o cualquier
otro modo durante el uso del mismo.
• No apoye el aparato con el motor en
marcha en ninguna superficie que
no esté limpia o que no sea sólida.
El aparato podría aspirar escombros
tales como gavilla, arena, polvo,
césped, etc. por la entrada de aspi
ración y arrojarlos por la salida de
propulsión, dañando el aparato y/u
otros objetos, o causando graves
heridas a espectadores o al usuario.
• Nunca coloque objetos dentro de los
tubos de propulsión, tubos de aspira
ción o salida de aire; siempre dirija
los escombros en dirección contraria
a donde personas, animales, vidrierasu otros objetos sólidos tales como
árboles, automóviles, paredes, etc.
se encuentran. La fuerza del aire
puede arrojar o hacer rebotar pie
dras, tierra o ramas, hiriendo a per
sonas o animales, rompiendo vidrier
as o causando otros daños.
• Nunca ponga el aparato en marcha
sin toner todo el equipo correspon
diente instalado. Al usar el aparato
como propulsor de aire, sirmpre
instale los tubos de propulsión.
• Inspeccione frecuentemente la aber
tura de entrada de aire, los tubos de
propulsión, y los tubos de aspiración
siempre con el motor detenido y la
bujía desconectada. Mantenga las
aberturas de ventilación y los tubos
de descarga libres de escombros
que se pueden acumular y limitar la
circulación debida de aire.
• Nunca coloque objeto alguno dentro
de la entrada de aire ya que de hacer
lo podría limitar la circulación d’aire y
dañar el aparato.
• Nunca use el aparato para esparcir
substancias químicas, fertilizantes u
otras substancias que puedan con
tener materiales tóxicos.
• Para evitar la propagación de incen
dios, no use el aparato cerca de ho
gueras de hogassecas o de mator
rales, de hogares de leña, de
parrillas, barbacoas, ceniceros, etc.
SEGURIDAD AL CORTADORA DE
MALEZAS
A PELIGRO: La cuchilla puede rebo
tar violentamente en materiales que no
puede cortar. Los rebotes de la cuchilla
pueden causar la amputación de brazos
o piernas.
A ADVERTENCIA: No utilice el
cabezal podador como dispositivo de
sujeción de la cuchilla.
29
Page 30

M.
«ADVERTENCIA: La cuchilla si
gue girando incluso después de soltar
el acelerador o de apagar el motor. In
cluso cuando está girando libremente,
la cuchilla puede despedir objetos o
causar cortes profundos si se toca ac
cidentalmente. Detenga la cuchilla po
niendo en contacto el lado derecho de
la misma con material ya cortado.
Para detener la cuchilla
cuando gire libremente,
póngala en contacto con
material previamente
cortado.
^ADVERTENCIA: Antes de cada
uso, inspeccione la zona de trabajo.
Retire todos los objetos (rocas, crista
les rotos, clavos, cables, hilos, etc.)
que puedan ser despedidos o quedar
enredados en la cuchilla o en el cabe
zal podador,
• Deseche y sustituya la cuchillas do
bladas, dentadas, partidas, rotas o
deterioradas de algún modo.
• Antes de utilizar el aparato, instale el
protector apropiada. Utilice el
protector metálica siempre que tra
baje con una cuchilla metálica.
A ADVERTENCIA: Utilice sola
mente las accesorios al cortadora de
malezas que proveen de un protector
metálica con la nariz acentuada.
Utilice exclusivamente la cuchilla es
pecificado y asegúrese de que esté
correctamente instalado y firmemen
te sujeto.
Corte siempre de derecha a izquierda.
Siempre que trabaje con cuchilla, uti
lice el mango y una correa al hombro
correctamente ajustada (vea las
instrucciones de MONTAJE en el
manual del usuario de la accesorio
del podadora).
SEGURIDAD AL CULTIVADOR
A ADVERTENCIA: Las púas gira
torias pueden causar graves heridas.
Manténgase alejado de las púas girato
rias. Apague el motor antes de desa
tascar las púas o hacer reparaciones.
«ADVERTENCIA: Inspeccione el
área a cultivar antes de arrancar el apa
rato. Retire todos los residuos y los ob
jetos duros y cortantes como rocas, en
redaderas, ramas, soga, cuerda, etc,
• Evite el contacto con objetos sólidos
que peudan detener las púas. SI
ocurre un contacto fuerte, pare el
motor e inspeccione el aparato para
ver si hay daños,
• No opere nunca el aparato sin la
protector de la púas en su lugar y
bien asegurada,
• Mantenga las púas y la protector
libre de residuos.
• Luego de golpear un objeto extraño,
pare el motor, inspeccione el cultiva
dor para ver si hay daños y repáre
los antes de volver a arrancar el
aparato.
• Desconecte el cultivador del en
samble del motor antes de limpiar la
púas con una manguera y agua para
retirar todo lo que se haya acumula
do. Luego lubrique las púas con
aceite para evitar la oxidación.
• Use siempre guantes cuando haga
reparaciones o limpie las púas ya
que se afilan mucho con el uso.
• No funcione el aparato en revolu
ciones altas a menos que cultive.
SEGURIDAD AL PODADORA DE
SETOS
A PELIGRO: riesgo de cortadu
ras; MANTENGA LAS MANOS ALEJADAS
DE LA CUCHILLA - La cuchilla continuará
girando momentáneamente al soltar el
gatillo acelerador. No intente limpiar ma
terial ya cortado mientras la cuchilla se
encuentre girando. Asegúrese de que
e! motor haya parada, el cable de la
30
Page 31

bujía desconectado, y la cuchilla deteni
da antes de remover ei material que se
haya atascado en la cuchilla. No sos
tenga o agarre el aparato por la cuchilla.
manos, la cara y los pies lejos de todas
las partes móviles. No intente tocar ni
detener la cuchilla o la cadena mientras
esté en movimiento.
La cuchilla conti
nuará girando mo
mentáneamente al
soltar el gatillo
' acelerador
Permita que las
cuchillas se de
tengan antes de
remover las del
área de corte.
«ADVERTENCIA: Inspeccione el
área de trabajo antes de comenzar.
Retire todos los desechos y materia!
sólido como rocas, vidrio roto,
alambre, etc. que puedan rebotar, ser
arrojados al aire o de otra manera
causar accidentes o daños durante el
uso del aparato.
• No use el aparato si la cuchilla se
encuentra doblada, torcida, astillada,
rota o dañada de cualquier manera.
Entre en contacto con el Centro de
Servicio Sears para el reemplazo de
piezas dañadas o desgastadas.
• Siempre mantenga el aparato en
frente suyo. Mantenga todas las
partes del cuerpo alejadas de la
cuchilla.
• Mantenga la cuchilla y los respira
deros de aire libres de desechos.
SEGURIDAD AL CORTADORA DE
RAMAS
A ADVERTENCIA: La cuchilla os-
cilante/cadena giratoria pueden causar
graves lesiones. Inspeccione el aparato
antes de usarla. No opere el aparato
con una cuchilla doblada, quebrada ni
desafilada o cadena desafilada. Man
téngase alejado de la cuchilla/cadena.
A ADVERTENCIA: La cuchilla os-
cilante/cadena giratoria está afilada. No
la toque. Para evitar graves lesiones,
siempre apague el aparato y asegúrese
de que la cuchilla/cadena se haya dete
nido completamente, desconecte la
bujía y use guantes cuando cambie o
maneje la cuchilla o la cadena.
A ADVERTENCIA: La cuchilla en
descenso/cadena giratoria puede cau
sar lesiones al continuar su movimiento
luego de apagar el aparato. Mantenga
un control adecuado de la aparato hasta
que la cuchilla/cadena haya dejado de
moverse por completo. Mantenga las
A ADVERTENCIA: Los objetos
que caen pueden causar graves le
siones en su cabeza. Use protección
en su cabeza mientras opere esta
aparato con una accesorio al cortado
ra de ramas.
i» ADVERTENCIA: Para evitar
graves iesiones, no use más de un bra
zo de extensión con el accesorio corta
dora de ramas.
A ADVERTENCIA: Mantenga el
cortadora de ramas lejos de líneas de
fuerza eléctrica y cables de electricidad.
• Solamente uso para podar las ramas
hasta 15 cm (6 pulgadas) de diámetro.
• No opere ei aparato a una velocidad
mayor que la necesaria para podar.
No haga funcionar ei aparato a alta
velocidad mientras no está podando.
• Apague siempre ei aparato cuando
se demore el trabajo y mientras ca
mina entre zonas de corte.
• Si golpea o se enreda con algún ab
jeto extraño, apague el motor de in
mediato e inspeccione si existen
daños. Haga cualquier daño reparar
por un Centro de Servicio Sears
antes de procurar otras operaciones.
Descarte las cuchillas que estén do
bladas, combadas, rajadas o rotas.
• Apague el aparato de inmediato si
siente una vibración excesiva. La vi
bración indica que hay problemas.
Inspeccione en detalle si existen tuer
cas o pernos flojos o daño antes de
continuar. Entre en contacto con el
Centro de Servicio Sears para el rem
plazo de piezas dañadas ei necesario.
31
Page 32

SEGURIDAD AL SOPLADOR DE
NIEVE
A ADVERTENCIA: Manténgalas
manos y pies alejadas del rotor al ar
rancar or funcionar el motor. Nunca
trate de limpiar el rotor cuando el mo
tor esté en marcha nuevamente. Apa
gue el motor Y desconecte la bujía
antes de limpiar la nieve o escombros
del dispositivo de descarga o cuando
ajuste los deflectores.
INADVERTENCIA: Nunca este
cerca de la apertura de la descarga.
Rocas o escombros se puedan lanzar
en los ojos y la oara, el resultado le
causarua kesuón o ceguera seria.
A ADVERTENCIA: Inspeccione el
área donde se utilizará el aparato. Re
tire todos los objectes que puedan ser
despedidos o puede haber daños en
la aparato. Algunos objetos se pueden
ocultar por la nieve caída - esté alerta
para la posibilidad.
• Nunca haga funcionar el soplador de
nieve cerca de recintos de vidrio, au
tomóviles, etc.
• No funcione el aparato en revolu
ciones altas a menos que remueva
nieve.
• Ponga atención cuando esté usando
el soplador de nieve y esté alerta si
hay hoyos en el terreno u otros ries
gos escondidos.
Asegúrese de que el rotor gira libre
ment antes de instalar el soplador de
nieve en el aparato motriz.
Si el motor no gira libramento debido
a hielo congelado, descongele la
herramienta antes de intentar usarla
bajo corriente.
Mantenga el rotor limpio de basuras.
No sople nieve cerca de otras perso
nas. El soplador de nieve puede
lanzar objetos pequeños a alta velo
cidad, causando lesiones.
Después de golpear un objeto extra
ño, pare el motor, desconecte la
bujía e inspeccione si el soplador de
nieve ha sufrido daño y repárelo
antes de volver a usarlo.
Nuna haga funcionar el soplador de
nieve cerca de recintos de vidrio, au
tomóviles y camiones.
Nunca utilice el soplador de nieve
sobre un techo.
Nunca haga funcionar el soplador de
nieve cerca de ventanas, bajadas, etc.
Nunca lance la nieve hacia caminos
públicos o cerca del tráfico.
Limpie la nieve de las pendientes
yendo hacia arriba y hacia abajo;
nunca de manera horizontal. Tenga
cuidado cuando cambie de direc
ción. Nunca limpie la nieve de pen
dientes demasiado empinadas.
Deje que el soplador de nieve fun
cione durante unos minutos antes de
comenzar a limpiar la nieve para que
las piezas móviles no se congelen.
Mire detrás suyo y tenga cuidado
cuando retroceda. Tenga cuicado
para evitar resbalarse o caerse.
Aprenda a detener la herramienta en
forma rápida.
MONTAJE
CONTENIDO DE LA CAJA
Use la siguiente lista para verificar que
todas la piezas hayan sido incluidas;
Modelo 358.791031
• Cabeza de Motor
• Accesorio del Cortadora
• Protector
• Tuerca Mariposa (atornillada en la
protector)
• Recipiente de aceite
Examine las piezas para verificar que
no haya daños. No use piezas daña
das.
AVISO: Si necesita ayuda, si faltan
piezas o si hay piezas dañadas, llame
al número 1-800-235-5878.
Es normal escuchar que el filtro de com
bustible golpetee en el tanque vacío.
Es normal encontrar residuos de aceite
o de gasolina en el silenciador, debido a
los ajustes al carburador y a las pruebas
efectuadas por el fabricante.
MONTAJE
A ADVERTENCIA: Siempre de
tenga el aparato y desconecte la bujía
antes de realizar procedimientos de
montaje.
A ADVERTENCIA: Si recibió el
aparato ya armado, repita todos los
pasos para asegurar que el mismo se
32
Page 33

encuentre correctamente armado y
que todos los fijadores se encuentren
bien ajustados.
INSTALACION DE LA ACCESORIO
DEL CORTADORA
PRECAUCION: Al instalar las acceso
rio del cortadora, ponga el aparato en
una superficie plana para estabilidad.
1. Afloje el acoplador dando vuelta a
la perilla a la izquierda.
Acoplador
Protector de
embarque
APRIETAN
AFLOJE
Remueva el protector de embar
que del acoplador.
Retire la tapa de eje del accesorio
del cortadora {si presente).
Coloque el botón de conexión/desconexión del accesorio en el aguj
ero de la guía del acoplador.
Empuje el accesorio en el acopla
dor hasta que el botón de conexión/desconexión se encaje en el
primer agujero.
Antes de usar el aparato, apriete la
perilla firmemente dando vuelta a
la derecha.
Acoplador
Eje Botón de Accesorio
Superior Conexión/
Primer Agujero de
Agujero igQuía
11
Desconexión
Botón de
Conexión/Desconexíón
en el Primer Agujero
Para las accesorios opcional, vea la
sección MONTAGE de la aplicables
manual del usuario de la accesorio.
INSTALACION DE LA PROTECTOR
A ADVERTENCIA: El protector
deberá ser instalado correctamente. El
protector provee protección parcial
contra el riesgo de los objetos arroja
dos hacia e! usuario y otras personas
y viene equipado con un cuchilla limi
tadora de línea que corta el exceso de
línea. El cuchilla limitadora de línea
(en la parte inferior del protector) es
filoso y puede cortar.
Para conseguir la orientación apropiada
para e! protector, vea la ilustración CON
OZCA SU APARATO que se encuentra en
la sección de USO.
1.
Remueva la tuerca mariposa de la
protector.
2.
Introduzca el soporte dentro de la
ranura como se muestra.
3.
Haga girar la protector hasta que el
tornillo pase a través del hueco en
el soporte.
4.
Apriete firmemente la tuerca mari
posa en el tornillo.
A ADVERTENCIA: Antes de oper
ar este aparato, asegúrese de que el
botón de conexión/desconexión esté
asegurado en el primer agujero y la per
illa esté bien ajustada antes de operar el
aparato. Todos los accesorios han sido
diseñados para ser utilizados en el prim
er agujero a menos que esté indicado
de otra manera en el manual de instruc
ción aplicable del accesorio. Usar el
agujero incorrecto podría causar graves
heridas o daños a el aparato.
33
Page 34

AJUSTE DEL MANGO
A ADVERTENCIA: Al ajustar la
manija auxiliar, asegúrese que éste se
mantenga sobre la etiqueta de seguri
dad y debajo la marca o la flecha en el
eje.
CONOZCA SU APARATO
LEA ESTE MANUAL DEL USUARIO Y LAS REGLAS DE SEGURIDAD ANTES DE PONER
ELAPARATO EN MARCHA. Compare las ilustraciones con su aparato para familiari
zarse con la ubicación de los diversos controles y ajustes. Guarde este manual
para uso futuro.
1. Afloje la tuerca mariposa en el
mango.
2. Gire el mango en posición vertical.
Vuelva a apretar la tuerca maripo
sa firmemente.
Mango Auxiliar
Palanca del
arrancador
í^üenciador
INTERRUPTOR ON/STOP
El interruptor ON/STOP está en la mango
del acelerador y se usa para detener el
motor. Para detener el motor, empuje y
suelte ef interruptor ON/STOP.
BOMBEADOR
El BOMBEADOR retira el aire de el car
burador y de las líneas de combustible
y las llena de mezcla de combustible,
permitiéndole poner el motor en mar
cha con menos tirones de la cuerda de
arranque. Accione el bombeador opri
miéndolo y luego dejando que este re
cobre su forma original.
Mango de la Cuerda
de Arranque
PALANCA DEL ARRANCADOR
La PALANCA DEL ARRANCADOR ayuda a
suministrar combustible al motor para
facilitar el arranque. Active el sistema
de arranque colocando la palanca en la
posición START, NO apriete el gatillo del
acelerador hasta que el motor arranque
y se ponga en marcha. Después de que
el motor se haya puesto en marcha,
permita que el motor este en marcha
por 10-15 segundos; luego, apriete el
gatillo acelerador para desactivar el sis
tema de arranque {la palanca del arran
cador vuelve a la posición RUN).
ACOPLADOR
El ACOPLADOR permite la instalación
de accesorios opcionales.
34
Page 35

ANTES DE PONER EN MARCHA EL
MOTOR
A ADVERTENCIA: Lea atenta
mente la información sobre el
combustible en laas reglas de
seguridad antes de comenzar. Si no
comprende las reglas de seguridad,
no intente abastecer el aparato de
combustible. Llame al número
1-800-235-5878.
ABASTECIMIENTO DEL MOTOR
A ADVERTENCIA: Remuévala
tapa del tanque de combustible lenta
mente al reabastecer combustible.
Este motor está habilitado para
funcionar con gasolina sin plomo. Antes
de comenzar con el uso, se deberá
mezclar la gasolina con un aceite de
sintético de buena calidad para motores
de 2 tiempos enfriados a aire.
Recomendamos el aceite de sintético
de la marca Craftsman. Mezcle la
gasolina con el aceite en la proporción
40:1. Se obtiene una proporción de 40:1
mezclando 3,2 onzas de aceite con
cada galón de gasolina sin plomo. Se
incluye con esta aparato un recipiente
de 3,2 onzas de aceite. Adiera el
contenido entero de este recipiente en 1
galón de gasolina para alcanzar la
mezcla apropiada del combustible. NO
USE aceite para automóviles ni para
barcas. Estos aceites dañarán el motor.
Al mezclar el combustible, siga las
instrucciones impresas en el recipiente.
Una vez haya añadido el aceite a la
gasolina, agite al recipiente brevemente
para asegurar que el combustible esté
completamente mezclado. Siempre lea
y siga las instrucciones de seguridad
que tienen que ver con el combustible
antes de abastecer el aparato.
IMPORTANTE
La experiencia indica que los combus
tible mezclados con alcohol (los llama
dos gasohol o los que contienen eta-
nol o metanol) pueden atraer la
humedad, lo que puede causar la se
paración y la formación de ácidos du
rante el almacenaje. La gasolina àcida
puede dañar el sistema de combus
tible del motor durante el almacenaje.
Para evitar problemas con el motor,
deberá vaciarse el sistema de com
bustible antes de almacenar el aparato
por 30 días o más. Vacíe el tanque de
combustible, ponga el motor en mar
cha y déjelo en marcha hasta que las
líneas de combustible y el carburador
queden vacíos. Use combustible fres
co para la próxima temporada.
Nunca use productos de limpieza de
motor o carburador en el tanque de
combustible ya que de hacerla puede
provocar daños permanentes.
Vea la sección de ALMACENAJE para
información adicional.
PARA DETENER EL MOTOR
• Suelte el gatillo acelerador.
• Para detener el motor, empuje y
suelte el interruptor ON/STOP. El in
terruptor volverá automáticamente a
la posición ON. Espere 5 segundos
antes de poner en marcha el motor
otra vez para permitir que el interrup
tor se reajuste.
Interruptor
ON/STOP
PARA PONER EN MARCHA EL
MOTOR
A ADVERTENCIA: Evite el hacer
ningún tipo de contacto con el silencia
dor. Un silenciador caliente podría pro
vocar quemaduras de qravedad si se
toca.
Posición de arranque
PARA ARRANCAR CON MOTOR
FRIO
AVISO: NO apriete el gatillo del aceler
ador hasta que el motor arranque y se
ponga en marcha
1. Ponga el aparato en una superficie
plana.
2. Oprima lentamente el bombeador
6 veces.
3. Mueva la palanca del arrancador a
la posición START.
35
Page 36

Bombeador
Mango de la
Cuerda de Arranque
4. Este aparato cuenta con un sistema
de arranque Sim-pul™. No tiene
que tirar brusca ni enérgicamente
del mango de la cuerda de arran
que. Tire del mango de la cuerda de
arranque con un movimiento contro
lado y firme hasta que el motor ar
ranque y se ponga en marcha.
5. Permita que el motor este en mar
cha por 5 segundos; luego, apriete
el gatillo acelerador para desactivar
el sistema del arranque (la palanca
del arrancador vuelve a la posición
RUN).
PARA ARRANCAR CON EL MOTOR
CALIENTE
1. Oprima y sostenga el gatillo aceler
ador.
2. Tire del mango de la cuerda de ar
ranque con un movimiento contro
lado y constante mientras usted
aprietan el gatillo acelerador hasta
que el motor arranque y se ponga
en marcha.
AVISO: Normalmente, el procedimiento
para arrancar con el motor caliente
puede ser utilizado dentro 5-10 minutos
después que el motor se para. Si el
aparato esta sin funcionar por más de
10 minutos, será necesario arrancar el
aparato siguiendo los pasos abajo PARA
ARRANCAR CON MOTOR FRIO O des
pués trate los pasos de las instruc
ciones de como arrancar el aparato.
ARRANQUE DE MOTOR AHOGADO
Los motores ahogados pueden ponerse
en marcha moviendo !a palanca del ar
rancador a la posición RUN. Oprima y
sostenga el gatillo acelerador. Tirando
de la cuerda repetidas veces mientras
que presiona el gatillo acelerador hasta
el motor arranque y se ponga en mar
cha. Esto podrá requerir que se tire de
la cuerda del mango repetidas veces
dependiendo que tan ahogado se en
cuentre el motor.
Si el aparato sigue sin ponerse en
marcha, vea la TABLA DIAGNOSTICA o
llame al número 1-800-235-5878.
FUNCIÓN DE CRAFTSMAN®
CONVERTIBLE™
Este modelo está equipado con un
acoplador, el cual permite la instala
ción de accesorios opcionales. Los
accesorios opcionales son:
Cortadora de Bordes .... 358.79240
Cultivador
Propulsor de Aíre
.........................
..............
358.79241
358.79242
Cortadora de Malezas . . , 358.79244
Cortadora de Ramas .... 358.79245
ADVERTENCIA: Siempre apa
gue el aparato y desconecte la bujía
antes de retirar o instalar los accesorios.
COMO REMOVER EL ACCESORIO
DEL CORTADORA (U OTRAS ACCE
SORIOS OPCIONAL)
PRECAUCION: A! retirar o instalar las
accesorios, ponga el aparato en una
superficie plana para estabilidad.
1. Afloje el acoplador dando vuelta a
la perilla a la izquierda.
Acoplador
APRIETAN Perilla
2. Oprima y sostenga el botón de
■ Eje
Superior
FLOJE
conexión/desconexión.
Botón de Conexión/
Desconexión
^ Acoplador,
Accesorio Inferior
Eje Superior
Mientras sostiene el motor y el eje
superior con firmeza, quite el acce
sorio inferior del acoplador en for
ma recta.
36
Page 37

INSTALACION DEL ACCESORIOS
OPCIONAL
1. Retire la tapa de eje del accesorio
(si presente).
2. Coloque el botón de conexión/desconexión del accesorio inferior en
el agujero de la guía del acoplador.
3. Empuje el accesorio inferior en el
acoplador hasta que el botón de
conexión/desconexión se encaje
en el primer agujero.
4. Antes de usar el aparato, apriete la
perilla firmemente dando vuelta a
la derecha.
Acoplador Agujero de
Eje Rotónde Accesorio
Superior Conexión/
^aujero |g
Desconexión
 ADVERTENCIA: Antes de oper
ar este aparato, asegúrese de que el
botón de conexión/desconexión esté
asegurado en el primer agujero y la per
illa esté bien ajustada antes de operar el
aparato. Todos los accesorios han sido
diseñados para ser utilizados en el prim
er agujero a menos que esté indicado
de otra manera en el manual de instruc
ción aplicable del accesorio. Usar el
agujero incorrecto podría causar graves
heridas o daños a el aparato.
INSTRUCCIONES DE USO
Para maximizar la eficacia operativa,
no haga funcionar el motor durante
más de 1 minuto en el momento a la
velocidad máxima.
POSICION DE USO
SIEMPRE USE:
Protección
de Oídos
Pantolones
Largos ’
Zapatos
Gruesos
Protección
para los
Ojos
Corte siempre de derecha a izquierda.
À ADVERTENCIA; Use siempre
protección para los ojos y protección de
oídos. Nunca se incline por encima del
cabezal. La línea puede arrojar o hacer
rebotar piedras o desechos hada los
ojos y la cara, pudiendo causar la pérdi
da de la vista u otras graves heridas.
Cuando aparato de funcionamiento,
párese como se vea en la figura y veri
fique lo siguiente:
• Usando anteojos de seguridad y ropa
gruesa como protección.
• Sostenga la manija del gatillo acelera
dor con la mano derecha y manija
auxiliar con la mano izquierda.
• Sostenga el aparato de modo que el
motor esté por debajo del nivel de la
cintura.
• Corte siempre desde la derecha ha
cia la izquierda para que los escom
bros sean arrojados en dirección
contraria a donde está parado. Sin
tener que inclinarse, mantenga la
línea cerca del suelo y paralela al
mismo, sin meterla dentro del materi
al que se está cortando.
No haga marchar el motor a revolu
ciones más altas que las necesarias.
La línea de corte cortará de una forma
más eficiente sin que el motor esté acel
erado a fondo. A revoluciones más ba
jas, habrá menos ruido y menor vibra
ción del motor. La línea de corte durará
más tiempo y tendrá menor probabilidad
de “fundirse” en la bobina.
Siempre que no se halle cortando,
suelte el gatillo acelerador y permita
que el motor vuelva a marcha lenta.
PARA DETENER EL MOTOR
• Suelte el gatillo acelerador.
• Empuje y suelte el interruptor ON/
STOP.
37
Page 38

AVANCE DE LA LINEA DE CORTE
La línea de corte avanza aproximada
mente 5 cm (2 pulgadas) cada vez
que se toca el cabezal contra el suelo
con el motor acelerado a fondo.
El largo más eficiente de la línea es el
largo máximo permitido por el limitador
de línea. Siempre mantenga la cubier
ta protectora en su lugar siempre que
el aparato esté en uso.
Para avanzar la línea:
• Acelere el motor a fondo.
• Sostenga el cabezal paralelo al suelo,
por encima de un área con césped.
• Toque el cabezal de corte contra el
suelo levemente una vez. Con cada
toque, la línea avanzará aproxima
damente 5 cm (2 pulgadas).
Toque el cabezal contra el suelo
siempre en un área con césped. Si se
hace tocar contra superficies como el
cemento o el asfalto, el cabezal podría
sufrir desgaste excesivo.
Si la línea se ha gastado y cuenta con
5 cm (2 pulgadas) o menos, hará falta
más de un toque para obtener el largo
de línea más eficiente.
A ADVERTENCIA: Si la línea se
ha gastado y cuenta con 5 cm (2 pulga
das) o menos, hará falta más de un
togue para obtener el largo de línea
más eficiente.Utilice exclusivamente
línea redonda de 2 mm (0,080 de pulga
da) de diámetro. Otro tipo de tamaños y
formas harán que la línea no gire de for
ma apropiada lo que resultará en el fun
cionamiento inadecuado del cabezal de
corte o en accidentes de seria grave
dad. No utilice otro tipo de materiales
tales como alambre, hilo, soga, etc. El
alambre puede romperse durante el
corte y convertirse en un misi! peligroso
lo que puede causar lesiones de seria
gravedad.
METODOS DE CORTE
A ADVERTENCIA: Use la veloci
dad mínima y no acerque el aparato
demasiado al cortar cerca de objetos
sólidos {piedra, gravilla, postes, etc.):
estos pueden dañar el cabezal, pue
den enredarse en la línea o la línea los
puede arrojar violentamente al aire,
causando serio peligro.
• La punta de la línea es la que corta.
Se conseguirá mejor rendimiento y
el mínimo desgaste si no se mete la
línea dentro del material que se está
cortando. La ilustración a continua
ción muestra la forma correcta e in
correcta de cortar.
La punta de la línea
es la que corta
La línea está meti
da dentro del ma
terial de trabajo
>
....
Incorrecto
• La línea retira fácilmente el césped y
las malas hierbas de alrededor de pa
redes, cercados, árboles y macizos de
flores; pero también es capaz de cor
tar la corteza tierna de árboles y ar
bustos y de marcar las cercas. Para
evitar daños, especialmente a !a vege
tación delicada o a los árboles con
corteza fina, acorte la línea a unos 10
a 13 cm (4 a 5 pulgadas) y use el
aparato sin acelerar a fondo.
• Para recortar o escalpar, use el apa
rato sin acelerar a fondo, para incre
mentar la vida útil de la línea y dismi
nuir el desgaste del cabezal,
especialmente:
• Al hacer trabajos livianos.
• Cerca de objetos con los cuales la
línea se puede enredar, como son
los postes o árboles de poco diáme
tro y e! alambre de las cercas.
• Para cortar césped y barrer, acelere
el motor a fondo para lograr un buen
trabajo de limpieza.
PARA RECORTAR - Sostenga el ca
bezal unos 8 cm (3 pulgadas) del suelo
y en ángulo. Unicamente la punta de la
línea deberá hacerel contacto con el
material a cortar. No meta la línea den
tro del área que se está cortando.
Para Recortar
8 cm (3 pulga
das) de! suelo
PARA ESCALPAR - La técnica del ascalpado retira la vegetación no desea
da abajo a la tierra. Sostenga el cabe
zal unos 8 cm (3 pulgadas) del suelo y
en ángulo. Deje que la punta de la
línea golpee contra el suelo cerca de
los árboles, los postes, los monumen
tos, etc. Esta técnica incrementa el
desgaste de fa línea.
38
Page 39

Para Escalpar
PARA BARRER - Se puede usar ¡a
acción ventiladora de la línea girante
para barrer rápida y fácilmente un área
determinada. Mantenga la línea para
lela al suelo directamente encima de
las superficies que se quiera barrer y
PARA CORTAR CESPED - Este parato
es ideal para cortar césped en lugares
donde las cortadoras convencionales no
meuva el aparato de un lado af otro
rápidamente.
Para Barrer
llegan. En posición de cortar césped,
mantenga la línea paralela al suelo.
Evite presionar el cabezal contra el sue
lo, ya que de hacerlo podría escalpar la
vegetación y dañar el aparato.
Para Cortar
Césped
MANTENIMIENTO
CRONOGRAMA DE MANTENIMIENTO
A ADVERTENCIA: Desconecte la bujía antes de hacer cualquier manten
imiento, con la excepción de los ajustes al carburador.
TAREA DE CUIDADO Y MANTENIMIENTO CUANDO HACER
Verificar que no haya piezas ni fijadores sueltos Antes de cada uso
Verificar que no haya piezas dañadas o gastadas Antes de cada uso
Inspeccione y limpie el aparato y sus placas Después de cada uso
Limpiar el filtro de aire Cada 5 horas de uso
Inspeccione el silenciador y la rejilla antichispa Cada 50 horas de uso
Cambiar la bujía Anualmente
RECOMENDACIONESGENERALES
La garantía de este aparato no cubre
los artículos que han sido sometidos al
abuso o a la negligencia por parte del
usuario. Para recibir el valor completo
de la garantía, el usuario deberá man
tener el aparato según las instrucciones
en este manual. Hará falta hacer varios
ajustes periódicamente para mantener
el aparato de forma debida.
VERIFIQUE QUE NO HAYA FIJA
DORES NI PIEZAS SUELTAS
• Cubierta de la Bujía
• Filtro de Aire
• Tornillos de la Caja
• Tornillo del Mango Auxiliar
• Protector
VERIFIQUE QUE NO HAYA PIEZAS
DAÑADAS O GASTADAS
Entre en contacto con el Centro de
Servicio Sears para el reemplazo de
piezas dañadas o desgastadas.
• Interruptor ON/STOP - Asegúrese de
que el interruptor ON/STOP esté funcio
nando correctamente empujando y
aflojamiento el interruptor. Asegúrese
de que el motor se haya detenido por
completo. Espere 5 segundos antes
de poner en marcha el motor otra vez
para permitir que el interruptor se rea
juste. Ponga el motor en marcha
nuevamente y continúe.
• Tanque de Combustible - Deje de
usar el aparato si hay señales de
daños o pérididas en el tanque de
combustible.
• Protector - Deje de usar el aparato
si el protector está dañado.
INSPECCIONE Y LIMPIE EL APARA
TO Y SUS PLACAS
• Después de que cada uso, inspec
cione la aparato completa para saber
si hay piezas flojas o dañadas. Limpie
el aparato y las placas usando un tra
po húmedo con un detergente suave.
39
Page 40

• SequG gì aparato usando un trapo
SGCO y limpio.
LIMPIE EL FILTRO DEL AIRE
Los filtros de aire sucios disminuyen la
vida útil y e! rendimiento del motor e
incrementan el consumo de combus
tible y de emiciones nocivas. Limpie
siempre el filtro de aire después de
cada 5 horas de uso.
1. Limpie la tapa y el área alrededor
de la tapa para evitar que caiga su
ciedad o desechos en el carbura
dor cuando se saque la tapa.
2. Remueva las piezas presionando el
cierre para aflojar la tapa del filtro de
aire.
AVISO: Para evitar peligro de incendio
y de emiciones evaporativas nocivas, no
limpie el filtro de aire con gasolina ni cu
alquier otro solvente inflamable.
3. Limpie el filtro con agua y jabón.
4. Permita que el filtro se seque.
5. Aplique varias gotas de aceite al
filtro; exprima el filtro para distribuir
el aceite.
6. Reponga las piezas.
Botón
Filtro de Aire
Tapa del Filtro
de Aire
INSPECCIONE EL SILENCIADOR Y
LA REJILLA ANTICHISPAS
A ADVERTENCIA: El silenciador
en este producto contiene las substan
cias químicas que el estado de Califor
nia reconoce como causantes de
cáncer.
A ADVERTENCIA: El silenciador
es extremadamente caliente durante
el uso y después de usar el aparato.
No toque el silenciador ni permita que
eí materia! combustible tal como gaso
lina o hierba seca hagan contacto.
A medida que se use el aparato, el si
lenciador y la rejilla antichispas se van
carbonizando. Para el uso normaf del
dueño de la casa, sin embargo, el
silenciador y la rejilla antichispa no
requerirán ningún servicio.
Después de 50 horas de uso,
recomendamos que al silenciador se le
de servicio o sea substituido por un
Centro de Servicio Sears.
CAMBIE LA BUJIA
Deberá cambiarse la bujía anualmente
para asegurar que el motor arranque
fácilmente y tenga un mejor rendimeinto. Ajusfe la separación de ios electro
dos a 0,025 de pulgada. El encendido
es fijo e inalterable.
1. Gire y saque la cubierta de la bujía.
2. Retire la bujía del cilindro y desé
chela.
3. Cámbiela por una bujía Champion
RCJ-6Y y ajuste firmemente la
bujía nueva con una llave de cubo
de 3/4 de pulgada.
4. Instale nuevamente la cubierta de
la bujía.
SERVICIO Y AJUSTES
REEMPLAZO DE LA LINEA
1. Mueva el interruptor ON/STOP a la
posición OFF,
2. Desconecte la alambre del bujía,
3. Retire la bobina tirando del botón
de toque firmemente.
4. Limpie por entero la superficie del
cubo y de la bobina.
5. Reemplace la bobina por una pre
viamente enrollada (#71 -85819), o
corte dos pedazos de 3,8 metros
(12-1/2 pies) de largo de linea de 2
mm (0,080 de pulgada) de la marca
Craftsman.
Л ADVERTENCIA: Nu nca use
alambre, cuerda, hilo, etc., los cuales
pueden romperse y convertirse en pro
yectiles peligrosos.
6. Introduzca las puntas de la línea, al
rededor de 1 cm (1/2 pulgada), den
tro del huecos pequeño que se en
cuentra en la parte interior de la
bobina.
Bobina
Huecos
pequeños
40
Page 41

Enrolle la línea en la bobina de for
ma pareja y ajustada. Enrolle la
línea en la dirección en que apunta
la flecha que se encuentra en la
bobina.
Introduzca la línea dentro de la
muescas, dejando de 7 a 12 cm
(3 a 5 pulgadas) sin enrollar,
introduzca la línea dentro del hue
cos de salida en el cubo como se
muestra en la ilustración.
de la línea
Línea dentroHuecos de salida
de la muesca
10. Alinee la muescas con el huecos
de salida de la línea.
11. Presione la bobina dentro del cubo
hasta que ésta encaje en su lugar.
12. Tire de la líneas que se extiende
fuera del cubo para soltarla de la
muescas.
AJUSTE AL CARBURADOR
 ADVERTENCIA: Mantenga a
otras personas alejadas de la zona en
donde se encuentre haciendo ajustes
de marcha lenta. El cabezal de corte o
cualquier opcional accesorio se encon
trarán girando durante la mayor parte de
este procedimiento. Use su equipo pro
tector y observe todas las precauciones
de seguridad. Después de finalizar con
el procedimiento de ajuste, el cabezal
de corte o cualquier opcional accesorio
deberán parar de moverse o de girar
mientras el motor se encuentra a la ve
locidad de marcha lenta.
El carburador ha sido ajustado cuida
dosamente en la fábrica. Posible
mente sea necesario hacer ajustes si
se nota cualquiera de las siguientes
condiciones:
• El motor no funciona en marcha len
ta cuando se suelta el acelerador.
• El cabezal de corte o cualquier op
cional accesorio continúan en movi
miento o girando en marcha lenta.
Haga los ajustes sosteniendo el equi
po de manera que el accesorio de
corte se encuentre alejado del suelo y
no haga contacto con ningún objeto.
Sostenga el aparato manualmente
mientras el motor se encuentre encendi
do y mientras usted se encuentre ha
ciendo los ajustes. Mantenga todas las
partes de su cuerpo alejadas de los ac
cesorios de corte y del silenciador.
Marcha Lenta
Deje el motor en marcha lenta. Ajuste
las revoluciones hasta que el motor se
mantenga en marcha sin que el cabe
zal de corte o cualquier opcional acce
sorio se muevan o continúen girando
(la marcha lenta es demasiado) o que
el motor se ahogue (la marcha lenta
es demasiado lenta).
• Gire el tornillo de marcha lenta hacia
la derecha para aumentar las revolu
ciones si el motor se ahoga o se para.
• Gire el tornillo de marcha lenta hacia
la izquierda para reducir las revolu
ciones si el cabezal de corte o cual
quier opcional accesorio perman
ecieran moviéndose o girando
mientras el motor se encuentra en
marcha lenta.
A ADVERTENCIA: Vuelva a verifi
car la marcha lenta después de cada
ajuste. El cabezal de corte o cualquier
opcional accesorio no deberán mov
erse o girar cuando el motor se en
cuentra en marcha lenta para así evi
tar graves heridas al usuario o a otras
personas.
Tomillo de Ajusfe de
la Marcha Lenta
Tapa del Filtro de Aire
Si requiriera ayuda adicional o no se
sintiera seguro al desempeñar este
procedimiento, entre en contacto con
el Centro de Servicio Sears o llame a!
número de ayuda al consumidor
1 -800-235-5878.
41
Page 42

ALMACENAJE
A ADVERTENCIA: Realice los
siguientes pasos después de cada uso:
• Permita que el motor se enfríe antes
de guardarlo o transportarlo.
• Guarde el aparato y el combustible
en un lugar bien ventilado donde los
vapores del combustible no puedan
entrar en contacto con chispas ni lla
mas abiertas provenientes de clentadores de agua, motores o interrputores eléctricos, calefactores
centrales, etc.
• Guarde el aparato con todos los pro
tectores en su lugar y coloquelo de
modo que las piezas cortantes no
puedan causar heridas por accidente.
• Guarde el aparato y el combustible
en un lugar completamente fuera del
alcance de los niños.
ESTACIONAL ALMACENAJE
Prepare el aparato para almacenarlo
al fina! de la temporada o si no lo va a
usar por más de 30 días.
Si va a almacenar el aparato durante
un periodo largo de tiempo:
• Limpie el aparato por completo antes
del almacenaje.
• Almacene en un área limpia y seca.
• Aplique una pequeña cantidad de
aceite a las superficies externas
metálicas.
SISTEMA DE COMBUSTIBLE
Deberá vaciarse el sistema de com
bustible antes de almacenar el aparato
por 30 días o más. Vacíe el tanque de
combustible, ponga el motor en mar
cha y déjelo en marcha hasta que las
líneas de combustible y el carburador
queden vacíos. Use combustible fres
co para la próxima temporada.
Vea el mensaje marcado como
IMPORTANTE, que se refiere al uso de
combustibles con mezcla de alcohol en
su aparato, en la sección de USO, bajo
ABASTECIMIENTO DEL MOTOR.
Los estabilizadores de combustible
son una alternativa aceptable para
minimizar la formación de depósitos
de goma durante el almacenaje. Aña
da estabilizador a la gasolina en el
tanque de combustible o en el reci
piente para almacenar el mismo. Siga
las instrucciones de mezcla que se en
cuentran impresas en el envase. Pon
ga el motor en marcha y déjelo en
marcha por unos 3 minutos después
de haberle puesto estabilizador.
El aceite Craftsman 40:1 para motores
a 2 tiempos (enfriados a aire) viene
mezclado con estabilizador de com
bustible. Si no usa este aceite de
Sears, usted podrá añadir estabiliza
dor al tanque de combustible.
MOTOR
• Retire la bujía y vierta una cucharadita de aceite 40:1 para motores a 2
tiempos (enfriados a aire) por la ab
ertura para la bujía. Lentamente, tire
de la cuerda de arranque de 8 a 10
veces para distribuir el aceite.
• Cambie la bujía por una nueva del
tipo y de la gama de calor recomen
dados.
• Limpie el filtro de aire.
• Examine todo el aparato para verificar
que no haya tornillos, tuercas ni per
nos sueltos. Cambie todas la piezas
dañadas, quebradas o gastadas.
• Al principio de la próxima temporada,
use exclusivamente combustible
fresco con la proporción correcta de
gasolina a aceite.
OTROS
• No guarde la gasolina de una tempo
rada a la próxima.
• Cambie el recipiente de gasolina si
se empieza a oxidar.
42
Page 43

TABLA DIAGNOSTICA
A ADVERTENCIA: Siempre apague ei aparato y desconecte ia bujía antes
de hacer cualquiera de las reparaciones recomendadas a continuación que
no requieran que el aparato funcionar.
SINTOMA CAUSA SOLUCION
El motor no
arranca,
Eí motor no
anda en
marcha lenta
como debe.
El motor no
acelera, le
falta
potencia 0
se para bajo
carga.
El motor
humea ex
cesiva
mente
El motor
marcha con
temperatura
elevada,
1. El motor está ahogado,
2. El tanque de combustible
está vacío.
3. La bujía no está haciendo
chispa.
4. El combustible no está
llegando al carburador.
5. El carburador requier
ajuste.
1. E! carburador requier
ajuste.
2. Las lunas del cigüeña!
están gastadas.
3. La compresión está baja.
1. El filtro de aire está sucio.
2. La bujía está carbonizada.
3. El carburador requiere
ajuste,
4. Acumulación de Carbón.
5. La compresión está baja.
1. La mezcla de combustible
se ha hecho incorrecta
mente.
2. El filtro de aire está sucb.
3. El carburador requiere
ajuste.
1. La mezcla de combustible
está se he hecho
incorrectamente.
2. Se ha instalado la bujía
incorrecta.
3. El carburador requiere
ajuste.
4. Acumulación de Carbón,
1. Vea “Arranque de Motor Ahogado”
en la sección Uso.
2. Llene el tanque con la mezcla
correcta de combustible.
3. Instale una bujía nueva.
4. Verifique si e! filtro de combustible no
esté sucio; cámbielo. Verifique si hay
dobleces en la línea de combustible
0 si está partida; repárela o cámbiela.
5. Entre en contacto con el Servicio
Sears (vea parte trasera del manual).
1. Vea "Ajuste al Carburador” en la
sección Servicio y Ajustes.
2. Entre en contacto con el Servicio
Sears (vea parte trasera del manual),
3. Entre en contacto con el Servicio
Sears (vea parte trasera del manual).
1. Limpie 0 cambie el filtro de aire.
2. Limpie o cambie la bujía y calibre
la separación.
3. Entre en contacto con el Servicio
Sears (vea parte trasera del manual),
4. Entre en contacto con el Centro de
Servicio Sears.
5. Entre en contacto con el Centro de
Servicia Sears.
1. Vacié el tanque de combustible y
llénelo de combustible con la mezcla
correcta.
2. Limpie o cambie el filtro de aire.
3. Entre en contacto con el Servicio
Sears (vea parte trasera del manual).
1. Vea “Abastecimiento del Motor” en la
sección Uso,
2. Cambie por la bujía correcta.
3. Entre en contacta con el Servicio
Sears (vea parte trasera del manual).
4. Entre en contacto con el Servicio
Sears (vea parte trasera del manual).
43
Page 44

DECLARACION DE GARANTIA DE CONTROL
DE EMISION U.S. EPA/CALIFORNIA
sus DERECHOS Y OBLIGACIONES
DE GARANTIA: La Agencia de Pro
tección Ambiental de los Estados Uni
dos, la Junta de Recursos Ambien
tales de California y Sears, Roebuck
and Co., U.S.A., se complacen en ex
plicar la garantía con la que cuenta el
sistema de control de emisión en su
motor pequeño, modelo 2007 y más
adelante, para uso fuera de carretera.
En California, todos los motores pe
queños para uso fuera de carretera
deben ser diseñados, construidos y
equipados para satisfacer ias riguro
sas normas antihumo que posee el es
tado. Sears deberá garantizar el siste
ma de control de emisión en su
máquina de motor pequeño para uso
fuera de carretera por los períodos de
tiempo que explicamos a continuación
y con la condición de que su máquina
de motor pequeño para uso fuera de
carretera no haya sufrido ningún tipo
de abuso, negligencia o mantenimien
to inapropiado. Su sistema de control
de emisión incluye piezas tales como ei
carburador, el sistema de ignición y el
tanque de combustible (solamente en
California). Donde exista una condición
que requiera reparación bajo garantía,
Sears reparará gratis su motor pe
queño para uso fuera de carretera.
Los gatos cubiertos bajo la garantía
incluyen el diagnóstico, las piezas y
labor. CUBIERTA DE GARANTIA DEL
FABRICANTE: Si cualquier pieza rela
cionada con el sistema de emisión de
su motor {como hemos enumerado en
la lista de piezas de control de emisión
bajo garantía) se encontrara defectuo
sa o defectos en el material o en la la
bor del motor causaran que tal pieza
comenzara a fallar, la pieza será repa
rada o reemplazada por Sears.
GARANTIA DE RESPONSABILIDAD
DE DEL DUEÑO: Como dueño de
una máquina de motor pequeño para
uso fuera de carretera, usted será re
sponsable por ei mantenimiento ade
cuado en los períodos previamente
programados y enumerados en su
manual del usuario. Sears recomien
da que guarde todos ios recibos que
indiquen que se ha desempeñado
mantenimiento en su máquina de mo
tor pequeño para uso fuera de carret
era, pero Sears no podrá negar el ser
vicio bajo garantía únicamente a
causa de la falta de recibos o por el
incumplimiento de su parte en asegu
rarse que el mantenimiento programa
do haya sido desempeñado. Como
dueño de una máquina de motor pe
queño para uso fuera de carretera,
usted deberá contar con el conoci
miento de que Sears puede negar la
cubierta bajo garantía si su máquina
de motor pequeño para uso fuera de
carretera o alguna pieza de la misma
ha dejado de funcionar debido al abu
so, negligencia, mantenimiento inapro
piado, modificaciones no aprobadas o
el uso de piezas que no hayan sido
fabricadas o aprobadas por el fabri
cante original del equipo. Es respon
sabilidad suya el llevar su máquina de
motor pequeño para uso fuera de car
retera aun centro de reparación auto
rizado Sears tan pronto como se pres
ente el problema. Las reparaciones
bajo garantía deberán ser completa
das en un período de tiempo razon
able, que no exceda los 30 días. Si
cuenta usted con alguna pregunta en
relación a sus derechos y responsabi
lidades de garantía, usted deberá
comunicarse con su centro de servicio
autorizado más cercano o llamar a
Sears al 1 -800-469-4663. FECHA
DEL COMIENZA DE LA GARANTIA:
El período de garantía comienza en la
fecha de compra de la máquina de
motor pequeño para uso fuera de car
retera. DURACION DE LA GARAN
TIA: Esta garantía cuenta con un per
íodo de duración de dos años
comenzando en la fecha inicial de
compra. QUE CUBRE LA GARAN
TIA: REPARACION O REEMPLAZO
DE PIEZAS. La reparación o eí reem
plazo de cualquier pieza garantizada
serán desempeñados y ofrecidos al
dueño sin costo alguno en un Centro
de Servicio Sears. Si cuenta usted
con alguna pregunta en relación a sus
derechos y responsabilidades de ga
rantía, usted deberá comunicarse con
su centro de servicio autorizado más
cercano o llamar a Sears al
1 -800-469-4663. PERIODO DE GA
RANTIA: Cualquier pieza garantizada
que no esté programada para ser re
emplazada como parte del mantenimi
ento requerido, o que esté programa
da únicamente para inspección regular
para efectos de “reparación o reempla
zo si fuera necesario" deberá garanti
zarse por un período de dos años,
44
Page 45

Cualquier pieza garantizada que esté
programada para ser reemplazada
como parte del mantenimiento requeri
do deberá estar garantizada por el
período de tiempo que comienza en la
fecha de compra inicial hasta la fecha
del primer reemplazo programado
para dicha pieza.
DIAGNOSTICO: No
se deberá cobrar al dueño ningún tipo
de cargos por la labor de diagnóstico
la cual determine que una pieza ga
rantizada se encuentra defectuosa si
el trabajo de diagnóstico ha sido de
sempeñado por un Centro de Servicio
Sears, DANOS POR CONSECUECIA:
Sears podrá ser responsable de
daños ocurridos a otras piezas del mo
tor causados por la falla de una pieza
garantizada que se encuentre bajo el
período de garantía. QUE NO CUBRE
LA GARANTIA: Todas las fallas cau
sadas por el abuso, negligencia o
mantenimiento inapropiado no están
cubiertas. PIEZAS AÑADIDAS O MO
DIFICADAS: El uso de piezas añadi
das o la modificación de piezas
podrán servir como base para que se
anule la reclamación de garantía. La
garantía de Sears no se responsabili
za por el mal funcionamiento debido al
uso de piezas añadidas o de piezas
modificadas.
COMO ENTABLAR UNA RECLAMA
CION: Si cuenta usted con alguna pre
gunta relacionada con sus derechos y
responsabilidades de garantía, usted
deberá entrar en contacto con su cen
tro de servicio autorizado más cercano
0 llamar a Sears a! 1 -800-469-4663.
DONDE OBTENER SERVICIO DE
GARANTIA: Servicio o reparaciones
bajo garantía deberán ser provistas en
todos los Centros de Servicio Sears.
Por favor comuniqúese al
1 -800-469-4663. MANTENIMIENTO,
REEMPLAZO Y REPARACION DE
PIEZAS RELACIONADAS CON LA
EMISION: Cualquier pieza de repues
to Sears aprobada y utilizada en el de
sempeño de cualquier servicio de
mantenimiento o servicio de repara
ción bajo garantía de piezas relaciona
das con la emisión será provisto sin
costo alguno al dueño si la pieza se
encuentra bajo garantía. LISTA SE
PIEZAS DE CONTROL DE EMISION
GARANTIZADAS: Carburador, Siste
ma de Ignición: Bujía (cubierta hasta la
fecha de mantenimiento programada),
Módulo de Ignición, Silenciador in
cluyendo el Catalizador, Tanque de
Combustible (solamente en California).
DECLARACION DE MANTENIMIEN
TO: El dueño es responsable de ad
quirir todo el mantenimiento requerido
como lo define en el manual del usua-
La información en la etiqueta del producto indica las normas de certificación de su motor.
Ejemplo: (Año) EPA Fase 1 o Fase 2 y/o CALIFORNIA.
Información Importante en relación
al motor. Este motor satisface las
regulaciones de emisión para mo
tores pequeños operados fuera de
la carretera.
Horas de la durabilidad del motor
Vea el manual de Instrucciones
para especificaciones de
mantenimiento y ajustes.
Familia
# De Serie
THE AlFt INDEX OF THIS ENGINE IS 3
THE LOWER THE AIR INDEX, THE LESS POLLUTION
REFER TO OWNER'S NIAHUAL FOR MAINTENANCE
SPECIFICATIONS AND ADJIISTNIENTS.
41 I 61 I
11
Se certifica este motor para satisfacer los requisitos de emisión para los uso
siguientes:
63 Moderado (50 horas)
□ Intermedio (125 horas)
I I Extendido (300 horas)
45
Page 46

Page 47

Page 48

Your Home
For expert troubleshooting and home solutions advice:
iTianage home
www.managernyhome.com
For repair - in your home - of all major brand appliances,
lawn and garden equipment, or heating and cooling systems,
no matter who made it, no matter who sold it!
For the replacement parts, accessories and
owner’s manuals that you need to do-it-yourself.
For Sears professional installation of home appliances
and items like garage door openers and water heaters.
1-800-4-MY-HOME® Call anytime, day or night
(1-800-469-4663) {U.S.A. and Canada)
www.sears.comwww.sears.ca
Our Home
For repair of carry-in items like vacuums, lawn equipment,
and electronics, cal! anytime for the location of the nearest
Sears Parts & Repair Service Center
1 -800-488-1222 (U.S.A.) 1 -800-469-4663 (Canada)
www.sears.com www.sears.ca
To purchase a protection agreement on a product serviced by Sears:
1 -800-827-6655 (U.S.A.) 1 -800-361 -6665 (Canada)
Para pedir servicio de reparación
a domicilio, y para ordenar piezas:
1-888-SU-HOGAR®
(1-888-784-6427)
© Sears Brands, LLC
® Registered Trademark / ™ Trademark / Service Mark of Sears Brands, LLC
® Marca Registrada i ™ Marca de Fábrica / Marca de Servicio de Sears Brands, LLC
Marque de commerce I Marque déposée de Sears Brands, LLC
Au Canada pour service en français:
1-800-LE-FOYER“^
(1-800-533-6937)
www.sears.ca
 Loading...