

Craftsman 358354871, 358354831 Owner’s Manual

I i
owner's
manual
: i_ • •
• Assembly
• Operation
• Maintenance
•e_ Repair Parts .......
r. ,
MODEL NO.
358,354831-3.7118"
358.354871-3.7/18"PS
WARNING:
Carefully read and follow
Safety • Rules, Precautions
and Operating Instructions.
Failure to =do so can result
in serious personal injury.-:-__-
C RRFTSM R,N
3.7/18"_ ,,3.7/18PS
,Jn
• CHAIN SAWS
Record in the space provided below the Model No. and Serial No. of
,your saw. These numbers are located on the starting instruction
decal.
Serial No.
Retain these numbers for future reference.
ii •
Sears, Roebuck and Co., Chicago, Ill. 60684 U.S.A.
r i rn
64983-3-24483-1-24483 PRINTED IN U. S. A.

FULL ONE YEAR WARRANTY ON GASOLINE CHAIN SAW
(Excluding Bar, Chain, Spark Plug, Air Filter and Starter Rope)
For one year from date of purchase, when you maintain, lubricate, and tune up this chain saw according tothe operating
and maintenance instructions in the owner's manual, Sears wilt repair defects in material or workmanship in this gasoline
chain saw.0at no charge.
This warranty excludes the bar, chain, spark plug, air filter, and starter rope which are expendable parts and become worn
during normal use. ,. _ :4 .... r " _
If this chain saw is used for commercial Or:l_entalpurposes, this warranty applies for only 30 days from date of purchase.
WARRANTY SERVICE IS AVAILABLE By RETURNING THE CHAIN SAW TO THE NEAREST SEARS STORE OR.SERVICE
CENTER IN THE UNITED STATES. .:,
This warranty gives you specific legal rights, and you: ma-y-_so have other rights which vary from state to state.
..... : • rSears,:,Roebuck and Co., Sears Tower, Dept. 698/731A, Chicago, IL 60684
TABLE OF CONTENTS ,
Specifications ............................... 2 Using The Power Sharp System ........ , ......... 11
Safety Rulesand Precautions ........... .. _... 3 Types of Cutting. _ 13
Know Your Chain Saw . . . . ................... \. ,_. 4. - A. Basic Cutting Technique _.;:. . ..... ' ....... .:13
A. Introduction ......... . ........ .... ;......-...... 4 B. TreeFellingTechniques_. :_.;,%_..,.;;;..,_-..... 13
B. State and Locai Ordinances ..: .... ._::_.ii4: C: Bucking... ;..;..: ..... ::.'.. ..... :.:... 14
C. carton _ntents.. ,-............... :.: ,:_;:::_ 4 • :: :_ D. Debranching and Pruning ................. 15
Preparing YourSawFor Use _;, ... ....... :;. !=:_i.:::_:_::5 Maintenance ...... :......................... 16
A. Getting Ready,,.:;.:_:,..:.. : ......... , 5::: ::A, Guide Bar and Chain .................... 16
B. Attaching the HandgiJard ,: ;.:,.. ...... 5 ::: B. Ignition, Cooling, and Exhaust Systems .... 18
C. Attaching the Spur. : 5 C. Starter Rope Repair and Replacement ...... 19
D. Attaching the Barand Chain ..... :-:.. .... .. 6
E. Chain Tension ............ ............... 7
F. Engine Fuel Mixture ..................... 7
G. Barand Chain Oil ....................... 8
UsingYour Saw ............................. 9
A. Control Devices ........................ 9
B. Starting instructions .................... 9
C. Controlling Kickback .................... 10
D. :Clutch, Drumand Sprocket ....... •.......... 20
IF_ Carburetor Adjustments 21
F. Air Filter ............................... 22
G: Counter-Vibe TMVibration System ...... -. ; .. 22
H. Storage .................................. 22 _
I. Maintenance Accessories ..... 22
J. Trouble Shooting Chart.. :...... ,:.. ;.... :.. 23
PartsList .................. _.,..,. ..... .... 24
QulckReference Page..! ...... :..... ......... , 31
POWER SHARP ADJUSTING
KNOB (MODEL .354871)
AIR FILTER
COVER KNOB_
THROTFLE:=_
LOCKOUT
CHOKE"
SPECIFICATIONS
MODEL ' .... " 358.354831 :(3.7118_) :'358.354871,,,(3.7118" P.S.)
CU; 1N.:DtSPLACEMENT : 3.7 cu. in360 cu. cm_::; _ :, .........3:.7 ,¢u, inl60 cu. cr_
GUIDE BAR":: LO-KICK", 18". ,Sp_:ket N_e' __' : 18" Sprocket NOSe ,
CHAIN ' 3/8 Extended Pitch ...................._............ 3/8 Extended Pitch
:---:i:;'::_,.,i_ '_ _:,:i_ _,\' ,_"'_ ..:_,' _:Chrome cutters-66 Drive.Unks ...... '.-Chrome'Cutters_66 Drive'Links
SPARK PLUG " • ........ _ _ : ": Champion CJ-8Y
IGNITION •:
MODULE AIR GAP
FUEL MIX
MUFFLER
OILER SYSTEM
FUEL TANK CAPACITY
,,r
OIL TANK CAPACITY
:: ; Oregon e" Xtra- Guard TM Link., OregOn ® PowerSharp e /°
.023 to .027:,SPARK PLUG GAP ,
• Solid State
,008 to .014
Gasoline/Oil Mixture 16:1
Spark Arrestin 9 Temperature Limiting
Automatic Manual
19 oz, 562 cu. cm.
. 12 o7- 355 cu. cm.
HANDGUARD _ _ ,
STARTER HANDLE
_UARD
CHAIN THROTTLE
,=.: ........................
..........I
LATCH
lSWITCH
REAR
CATCHER
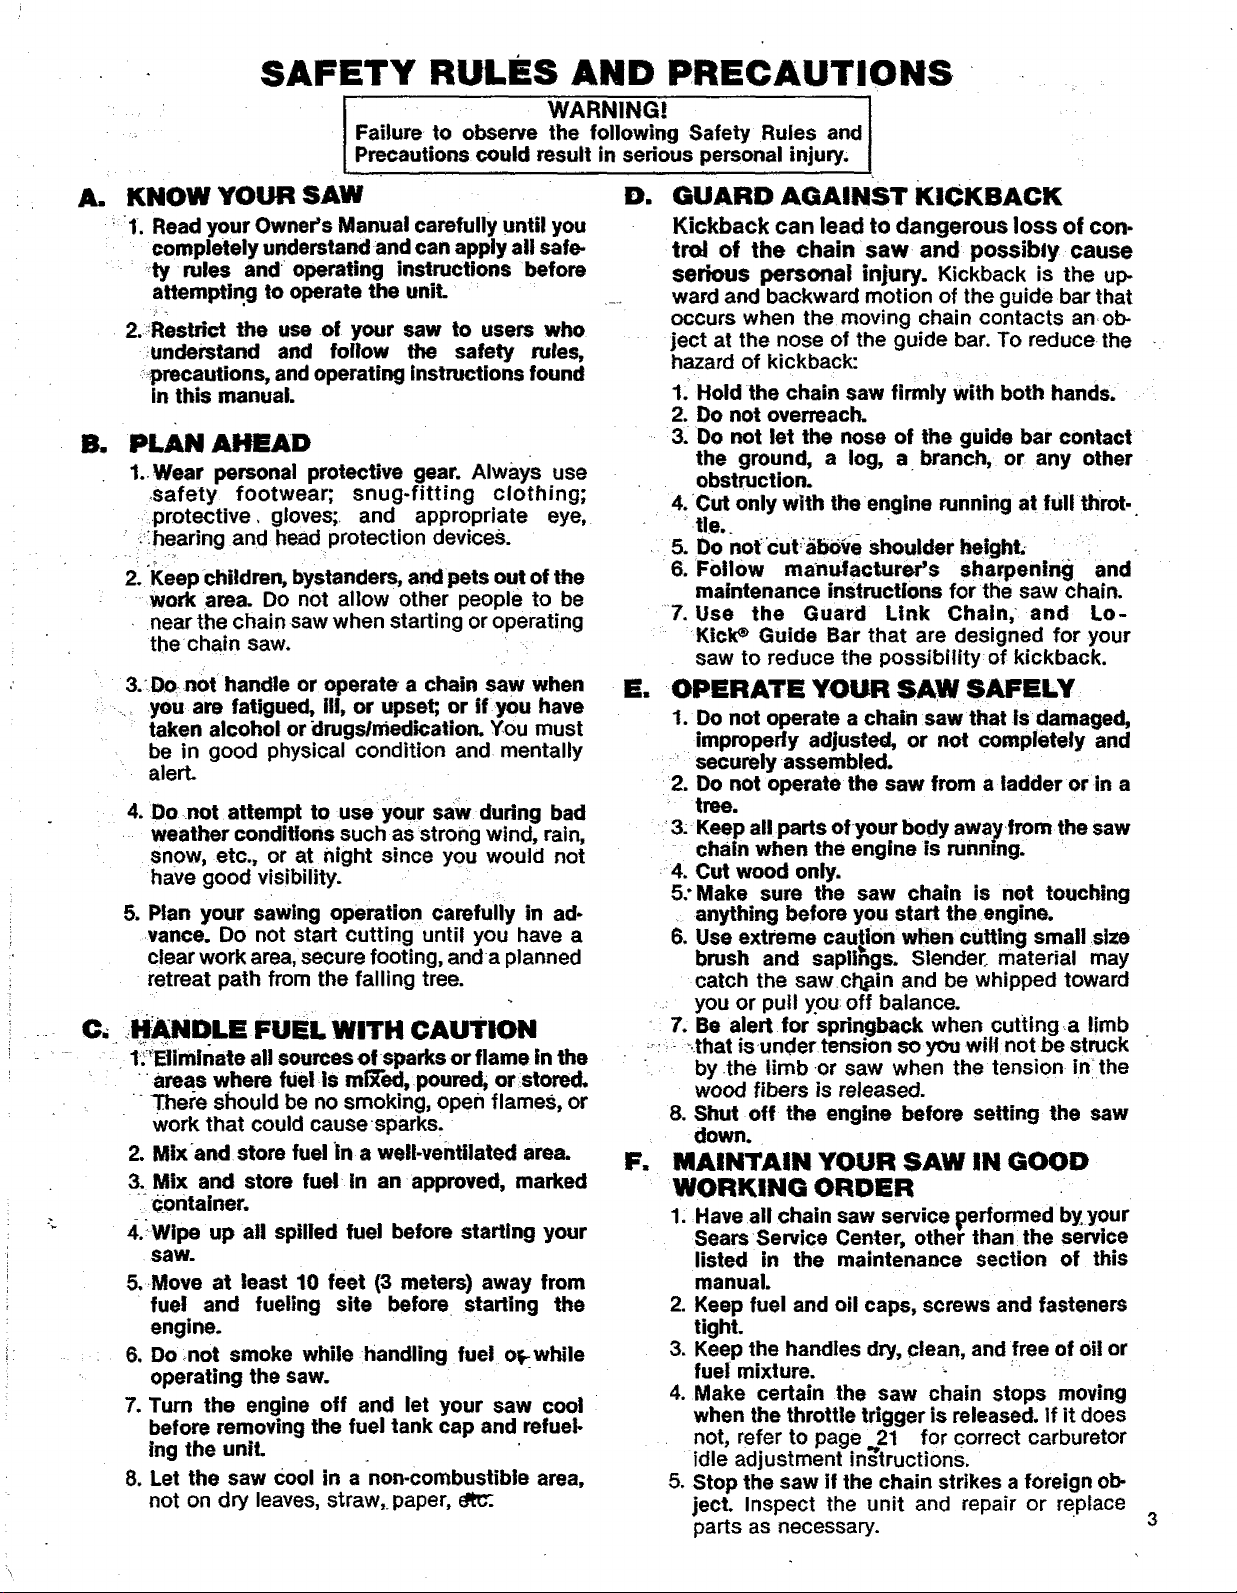
SAFETY RULES AND PRECAUTIONS
I WARNING!
Failure r to observe the following Safety Rules and
Precautions could result in serious personal injury;
A. KNOW YOUR SAW
_1. Read your Owner's Manual carefully until you
completely understand and can apply all safe.
ty rules and operating instructions before
attempting to operate the uniL
2.Restrict the use of your saw to users who
;understand and follow the safety rules,
_;_precautions, and operating instructions found
in this manual.
B. PLAN AHEAD
1..Wear personal protective gear. AlwaYs use
safety footwear; snug-fitting clothing;
_protective, gloves;_ and appropriate eye,
i?ihearing and head protection devices.
2. Keep children, bystanders, and pets out of the
work area. Do not allow other people to be
near the chain saw when starting or operating
thechain saw. i
• 3.DOrnOt handle or operate a chain saw when
_ you are fatigued, III, or upset;, or if you have
taken alcohol or drugsirnedication. You must
be in good physical condition and mentally
alert.
4. Do not attempt to useyour saw during bad
weather conditions such as strong wind, rain,
snow, etc., or at night since you would not
have good visibility. •
5. Plan your sawing operation carefully in ad-
vance. Do not start cutting until you have a
clear work area, secure footing, anda planned
retreat path from the falling tree.
C, HANDLE FUEL WITH CAUTION
1;_Elirninate all sources of sparks or flame in the
• " areas where fuel is mi'X'ed, poured, or stored.
There should be no smoking, open flameS, or
work that could cause =sparks.
2. Mixand store fuel in a well-ventilated area.
3. Mix and store fuel in an appreved, marked
_ container.
4._Wlpe up all spilled fuel before starting your
saw.
5.Move at least 10 feet (3 meters) away from
fuel and fueling site before, starting the
engine.
_ 6. Do ;not smoke while handling fuel orrwhile
operating the saw.
7. Turn the engine off and let your saw cool
before removing the fuel tank cap and refuel-
lng the unit.
8. Let the saw Cool in a non-combustible area,
not on dry leaves, straw,, paper,
D. GUARD AGAINST KICKBACK
Kickback can lead to dangerous loss of con.
trol of the chain saw and possibly cause
serious personal injury. Kickback is the up-
ward and backward motion of the guide bar that
occurs when the moving chain contacts anot>
ject at the nose of the guide bar. To reduce the
hazard of kickback:
1_Hold the chain saw firmly with both hands,
2. Do not overreach.
3. Do not let the nose of the guide bar contact
the ground, a log, a branch, or any other
obstruction.
4. Cut only with the engine running at lull throt..
tie,.
. 5. Do not cut;_ab0_e shoulder height.- .... i
6
.Follow manufacturer's sharpening and
maintenance instructions for the saw chain.
7. Use the Guard Link Chain; and Lo-
KiciP Guide Bar that are designed for your
saw to reduce the possibility of kickback.
E, OPERATE YOUR SAW SAFELY
1. Do not operate a chain saw that isdamaged,
improperly adjusted, or not completely and
. _' securely assembled.
2. Do not operate the saw from a ladder orin a
tree.
_;3: Keep all parts ofyour body awayfrom the saw
chain when the engine is running.
4. Cut wood only.
5:Make sure the saw chain is not touching
anything before you start the engine.
6. Use extreme caution when cutting small size
brush and saplings. Slender.. material may
catch the sawci'Lain and be whipped toward
you or pull you: off balance.
: 7. Be alert for spdngback when cuttinga limb
...._ _.that isunder tension soyou wilt notbe struck
" by the limb-or saw when the tension inthe
wood fibers is released.
8. Shut off the engine before setting the saw
down.
F, MAINTAIN YOUR SAW IN GOOD
WORKING ORDER
1. Have all chain saw service E)erformed by.your
Sears Service Center, other than the service
listed in the maintenance section of this
manual.
2. Keep fuel and oil caps, screws and fasteners
tight.
3. Keep the handles dry, clean, and free of oil or
fuel mixture. -_ • - _ :
4. Make certain the saw chain stops moving
when the throttle trigger is released, if it does
not, refer to page 21 for correct carburetor
idle adjustment mstruchons.
5. Stop the saw if the chain strikes a foreign ob-
ject. Inspect the unit and repair or replace
parts as necessary.

CARRY AND STORE YOUR SAW
Gm
SAFELY
1. Never carry your saw while climbing. Both
hands are needed for safe climbing.
2. Carry the unit with the engine stopped, the
Guide Bar and Chain to the rear, and the Muf-
fler away from your body.
3. Carry the saw with Guide Bar and Chain
covered, preferably with an appropriate scab-
bard.
KNOW YOUR CHAIN SAW
A.
INTRODUCTION
,The information found in this manual will help
you -i_roperly prepare your chain saw for use,
Understand how to operate your san-safely, and
perform maintena'nce reqbire_dto keep your unit
in go0dworking condition.
Your saw has been designed with safety in mind
and includes the following safety features as
standard equipment:
_ Handguard
Lo-Kick ® Guide Bar
Guard Link Chain
The chain saw should never be Operated unless
these devices are properly installed on the uniL
The Lo-Kick ® Guide Bar and Guard Link Chain
have been designed to reduce the incident of
kickbaCk.You should thoroughly read and
understand the section,"Controlling Kickback,"
on page 10.
STATE AND LOCAL ORDINANCE
as
REQUIREMENTS
4. Allow your saw tocool completely before
transporting inany vehicle or storing in any
enclosure.
5. Drain oil and fuel tank before storing for more
than 30 days,
6. Store in a dry area out of the reach of children
and away from where fuel vapors can reach
an open flame from hot water heaters, fur-
nances, etc.
!
Your saw is equipped with a temperature
limiting muffler and spark arresting-screen
which meets the requirements of_Califomia
_.;CodesA442 and 4443. All U.S: forest.land and :the-_
states of California, Ma_ne, Washington and
Oregon require many internal combustion
engines to be equipped with a spark arrestor
screen and a temperature limiting muffler by
law.
tf you operate a chain saw in a state or locale
where such regulations exist, you are legally
responsible for maintaining the operating condi-
tion of these parts. Failure to do so could sub-
ject youto liability or to a fine. Muffler and spark
arrestor maintenance is found on page18.
C. CARTON CONTENTS
After you unpack me barton:
1. Check the contents against the list below.
2. Examine the items for damage.
3. Notify your Sears Store immediately if a part is
missing or damaged.
,
KEY NO.
1
2
3
m
4
5
6
8
9
10
CARTON CONTENTS:
Power Head
Guide Bar
8 oz. can, 2-Cycle Engine Oil
Loose Parts Bag (not shown)
LOOSE PARTS BAG C(JNTENTS:
Owners' Manual-(not shown)
Handguard
Cap-Handguard
Screws-Handguard
Spur-:* • ......... • "
Screw-Spur
Chain
Scrench
QTY.
1
1
1
1
1
1
1
3
1
2
1
1
PREPARING YOUR SAW
A. GETTING READY
FOR USE
READ YOUR OWNER, S MANUAL CARE.
FULLY.
Your Owner's Manual has been developed to
help you prepare your saw for use and to-
understand, its safe operation. It is important
that you read your manual completely to
become •familiar with the unit .before you
begin assembly.
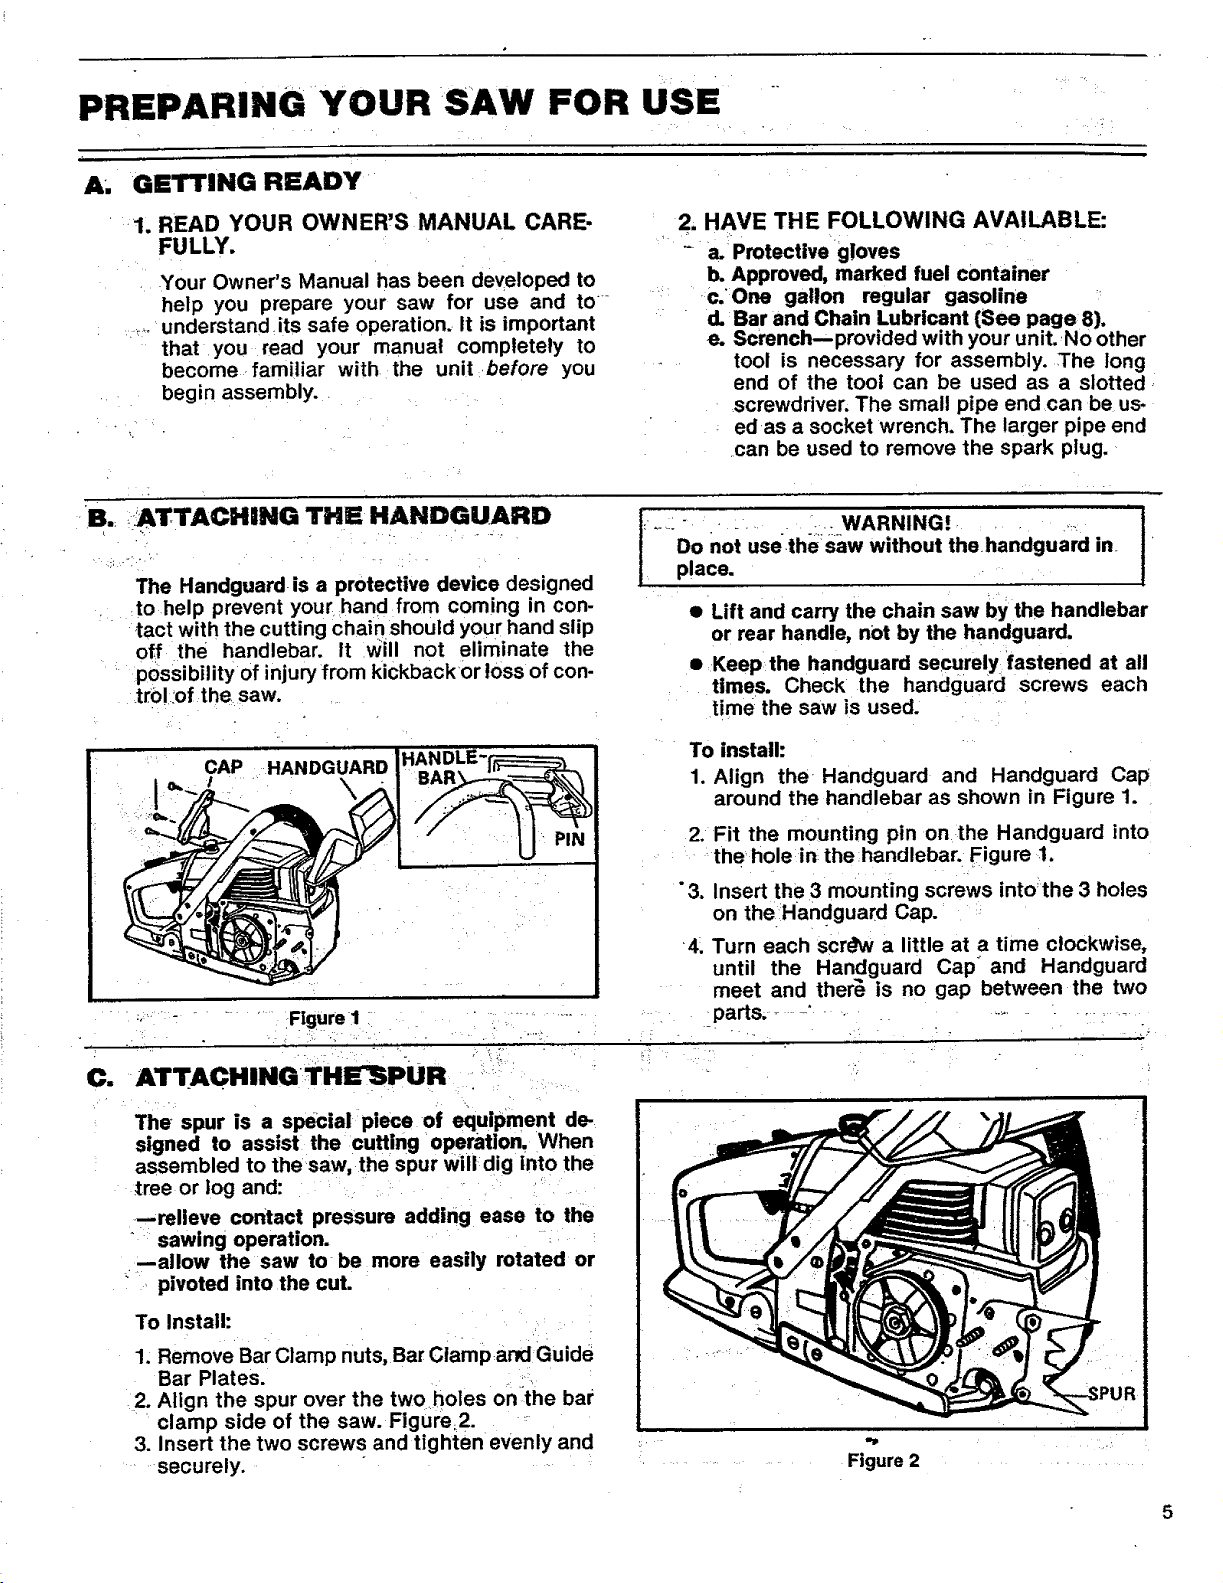
B.: _ATTACHING THE HANDGUARD
The Handguard is a protective device designed
to help prevent your hand from coming in con-
tact with the cutting chain should your hand slip
off the handlebar. It Will not eliminate the
possibility of injury from kickbackor loss of con-
tro!:of the saw.
CAP HANDGUARD
• :, _ L • Figure I
2, HAVE THE FOLLOWING AVAILABLE:
-a, Protectivegloves
b. Approved, marked fuel container
: c.'One gallon regular gasoline
d.Bar and Chain Lubricant {See pageS).
e. Scrench--provided with your unit.No other
.... tool is necessary for assembly. The long
end of the tool can be used as a slotted,
screwdriver. The small pipe end can be us.
edras a socket wrench. The larger pipe end
can be used to remove the spark plug, •
J:..:: • -. ..... _.... WARNING!. : .... ,:._ I
Do not use the•:saw without the handguard in I
place. •
• Lift and carry the chain saw by the handlebar
or rear handle, not by the handguard.
• :Keep:the handguard securelY.: fastened at all
times. Check the handguard screws each
' time rthe saw is used..
To install:
1. Align the Handguard and Handguard Cap
around the handlebar as shown in Figure 1. •
2. Fit the mounting pin onthe Handguard into
....... the hole:in the ;handlebar. Figure 1.
"3. Insert th e 3 mounting screws into the 3 holes
on the Handguard Cap. ::
4_ Turn each scr_hv a little at a time clockwise,
until the Handguard Cap" and Handguard
meet and ther_ is no gap between the two
•.... parts, _ -" ..... _. _...... :_,.......
C. ATTACHINGTHE_PUR
The spur is a special piece of equipment de-
signed to assist the cutting operation. When
assembled to the saw, the spur will dig into the
_ree or log and:
--relieve contact pressure adding ease to the
sawing operation.
--allow the saw to be more easily rotated or
" pivoted into the cut.
To Install:
1. Remove Bar Clamp nuts, Bar Clamp and Guide
Bar Plates.
2. Align the spur over the two holes on the bar
clamp side of the saw. Figure_2.
3. Insert the two screws and tighten evenly and
securely.
UR
............ Figure 2 ..........
5

D. ATTACHING THE BAR AND CHAIN
H •
ICAUTION:]Wear protective gloves when han-
....dling or operating your saw. The chain is sharp. " "
and can cut you even when it is not moving!
• Your saw is equipped with a Lo-Klck® Guide
Bar and a Low.Kick chain designed to help
reduce kickback.
e.Always use the Lo-KiclP Guide Bar and Low-
:Kick Chain specified for your chain saw
_model, when replacing these parts.
. L
_ WARNING!
Donot start engine without guide bar and chain
completely assembled. Otherwise the clutch
can come off and sedous personal injury could-
resulL
a, Install theJnner, Guicle Pla-te Over the'bar-,
' .;n_;Gbnting studs. Figur_ 3;, : ,, .....i r :_ _:
.... NO_ Be sure the Inner Guide Plate curves
o!_flanges toward the saw frame away from
' the Guide Bar. Figure 4.
,,b, Mount the Guide Bar with the slotted end
over thebar mounting studs.: Figure 5.
NOTE: Be sure the Guide Bar is positioned
with the round hole below the large slot.
c. Hold Chain with cutters facing as shown in ,
....Figure 6.
d. Place chain over and behind the clutch
'_ drum onto the sprocket.
e. Slide Guide Bar to the rear of the saw as far
as possible.
f. Fit the bottom of the drive links between
the teeth in the sprocket.
g. Start at the top of the bar and fit the chain
drive links into the groove around the Guide
Bar. Figure 6.
h. Pull the Guide-Bar forward until the chain is
, .:snug in the guide bar groove. Figure 7.
i. Install the Outer guide plate.
NOTE: Be sure both the inner and outer
guide bar plates curve or flange outward
from the Guide Bar. Figure 4.
j. Install the Bar Clamp by sliding the bar
clamp over the mounting studs and ,fitting
.... -_the bar adjusting, pin into tlTe round hole_on -......
• the Guide Bar. Figure 8.
k. Replace the Bar Mounting Nuts and tighten
finger tight only.
NOTE: The Bar Clamp nuts must be slightly
loose to tension the chain correctly.
1. Follow "Chain Tension" instructions, page 7.
Figure 6
ADJUSTING PIN HOLE
Figure 7
BAR ADJUSTING PIN
Figure 5
Figure 8
6

CHAIN TENSION
mw
• Correct chain tension is very important:
--a loose chain will wear the bar and itself.
--a loose chain can jump off the bar while
you are cutting.
--a tight chain can damage the saw and/or
break.
--a chain, either too loose Ortoo rtight, can
cause injury.
e Chain tension is correct when the chain:
--can be lifted about 1/8" from the Guide Bar
at a point near the middle of the bar, and
--will move freely around the bar.
2. Check the tension by lifting the chain from
the Guide Bar at the center of the bar. Figure
10.
3. Continue turning the Adjusting Screw until
the tension is correct.
4. Idoid the tip of the Guide Bar up and tighten
the Bar Clamp Nuts with. theScrench.
5. Recheck tension.
TURN
TO LOOSEN
TENSION
TURN
• The chain stretches during use, especially
when new.. Check tension:.
--each time ,the saw, is used
..... _._m0re_frequentlywhen the chain: is;:new
_e
The Bar Clamp Nuts must be slightly loose to
tension the chain correctly.
.
H01d the tip of the Guide Bar up and turn the
Adjusting Screw just until the chain does not
sagbeneath theGuide Bar. Figure 9.
NOTE: Turn screw clockwise to tighten ten-
sion. Turn screw counterclockwise to loosen
tension.
F. ENGINE FUEL MIXTURE
• Your chain saw is powered by a two-cycle
engine which requires a fuel mixture of
=regular gasoline and a high quality engine oil
specially made for 2-cycle, air-cooled
engines. The internal design of the 2-cycle
engin_ requires lubrication of moving" parts.
Lubi:icatlon is provided whenyouuse the
Tecomrnended mixture of gasoline and oi1.
• Gasoline-must be clean and not over two
months• old. After a short period of • time,
gasoline begins to chemically break down
and will form compounds that can cause hard
starting and damage in 2-cycle engines.
• The correct measure of gasoline to oil is very
important.
--:Too much oil in the mixture will foul the
spark plug.
--Too little oil will cause the engine to over-
heat resulting in damage.
• Mix the fuel thoroughly in a container since
gasoline and oil do not readily combine. Do
not try to mix fuel directly in the fuel tank.
r •
Fiaure 9-
Figure 10
1. USE THE FOLLOWING FUEL MIXTURES:
. SEARS #32-36555
'o,
1r_u.o" ENGINE OIL -
I "'
• _ = ANYGOOD GRADE --
2. DO NOT USE THE FOLLOWING IN FUEL
MIXTURES:
_ AUTOMOTI VE
GASOHOL
. __OR__ _
AIR-COOLED, 2-CYCLE
ENGINE OIL
Does not have properaddi-
tives for 2;cycteengines and
OIL
could cause damage.
Burnstoo hot for 2-cycle
engines;will shorten
spark plug life and could •
damage your engine.
Alcoholabsorbs moisture
causing acids to form
_hich will damage metal
and rubber parts.
TIGHTEN
TENSION

3. HOW TO MIX FUEL
4. IMPORTANT POINTS
a. Pour one-half of the gasoline into an ap-
proved, marked container. Do not try to mix
oil and gasoline directly in the fuel tank.
b. Add entire measure of 2-cycleEngine Oil.
c_ Mix.
d. Add remainder of gasoline.
e. Mix'thoroughly for one minute.
_- Figure 11
G. BARAND CHAIN OIL
,e_The guide bar and cutting chain require con-
tinuous lubrication in order to remain in oper-
i:ating condition. Lubrication is provided by
the automatic oiler system when the oil tank
iskept filled.
--Lack of oil will quickly ruin the bar and
chain.
--Too little oil will cause overheating shown
..... by smoke coming from the chain and/or
discoloration of the guide bar rails.
• Use Sears Bar and Chain Lubdcant #36554
or clean SAE 30W oil.
• in freezing weather oil will thicken, making it
necessary to thin bar and chain oi! with a
small:amount of Diesel Fuel #1 or Kerosene.
Bar and chain oil mustbe free flowing for the
i`= ';::_:_6ili_:sY_stemtO'puml_ ie_0ugh"oit 'for adequate
lubd'_tion.
i
FI1.L THE OIL TANK
EACH TIME THE
FUEL TANK 1_
FILLED
Figure 12
a. Use only recommended fuel mixtures.
b. Eliminate all sources of sparks Or flame in
the areas where fuel is mixed, poured, or
stored. There should be no smoking, open
flames or work that could cause sparks.
c. Mix and store fuel in an approved, marked
container.
d. 'Mix and pour fuel in a well.ventilated area.
Gasoline vapors are harmful to your health
and are a serious fire hazard.
e. Avoid over lilling the fuel tank, Allow 3/4
inch for expansion. Tighten Fuel Cap
securely. Figure 11.
f. Wipe up all fuel spills. Wipe off any fuel
spilled on the saw. Completely dry the saw
before using.
g. Move at least 10 feet(3, meters) away from .....
_fuel andfuelihg sitebefore starting,the
engine.
1. USE THE FOLLOWING:
30°F or above -- Lubricant -_ undiluted.
30OF - 0°F 95% lubricant to 5% Diesel
Fuel #1 or Kerosene.
Below 0°F 90% lubricant to 10%
Diesel Fuel #1 or Kerosene.
2. HOW TO FILL THE OIL TANK
a. Stopthe engine.
b. Turn saw on its side with oil cap up. Figure
!.2.
c. Loosen cap slowly and wait for pressure in
the tank to be released before removing the
o
......cap ..... : ....
d: Filiith_e :oil, tank: , . ::_i: -:...... .....
e. Replace the oil cap securely.
' 3. IMPORTANT POINTS TO REMEMBER
a. Fill the oil tank each time you refill the fuel
tank to ensure there will, be sufficient oil for
the chain whenever you start and run the
saw.
b. The saw will use about 112 tank of chain oil
for each tank of fuel mixture. If less oil is
used, check for a plugged oil hole in the
...._ : c. it is normal for a small amountofoil to ap
guide bar.
pear under the saw after the engine stops.
This is due to oil draining from the bar and
chain when not in use.
,

USING YOUR SAW
A. CONTROL OEVICES
Understanding the control dev_es on your saw
is an important part of learning how .to properly
and safely operate the unit. Figure 13.
1;'!The Ignition Switch is a toggle switch which
is moved up for the "Start" position and mov-
ed down for the "Stop" position.
2;-!The two-position Choke helps to start the
:saw by controlling the air flow to the fuel
system.
..... 3; The Trigger accelerates and controls the
speed of the engine and is designed to be
used with the Throttle Lock.
4.The Throttle Lock is a control feature which
_ ,_prevents the Trigger from becoming accident-
ly engaged, The Throttle Lock must be press-
ed before the Trigger can be activated,
5. The Throttle Detent Button holds the Throttle
Lock and Trigger in position while the engine
is being started. Release the Throttle Detent
Button afterthe engine is started by lightly
squeezing the trigger.
B. iiSTARTING iNSTRUCTIONS
1. IMPORTANT POINTS
a.Hold saw firmly with the saw chain free to
turn without contacting any object. Figure
_,_14.
b. Pull starter rope quickly, using no more
than 15-18 'inches of rope per pull. Using,
the full length of the starter rope, may
cause it to break. Do notlet the starter rope
snap back. Hold the handle and let the rope
rewind slowly.
THROTTLE
DETENT
BUTTON
.., START
•, SWITCH
TRIGGER
_ CHOKE
Figure 13 •
6. The Manual Oiler is placed to be operated by
your r!ght-thumb._ Use the manual OHer_tosup-
plement the automatic oilen.
during a long felling cut
when cutting into a log or tree which is
greater in diameter than the length of the
guide bar.
--anytime an additional supply of oil is de-
sired.
WARNING!
Always wear gloves; safety footwear;, .snug-
fitting clothing; and appropriate eye, hearing,
and head protection devices when operating a
Chain saw.
TO START -- HOLD FRONT HANDLE-
BAR AND PLACE RIGHT
FOOT THROUGH. HANDLE.
:: _-_i_i_ic,°!Pull starter rope .no more:than 3-5 times.
Otherwise the eng_e mayflood.
d. Release the throttle detent button after
engine starts, allowing the engine to idle.
The chain must not move when the engine
runs at idle speed. If correction is required,
refer to"Carburetor Adjustments," page 21.
_:e. Stop engine by moving the ignition switch
to the "STOP" position (Figure 13). ,_
Avoid bodily contact with the muffler when Starting
a warm engine. The muffler car become very hot I
and can cause serious bums. ..... J
Figure 14
WARNING. = !
' 2. STARTING PROCEDURE
MovoTgn_*_n Pull choke knob Prsssthroms Press tisrottto PuRst;sKi_tope Push chokil kr_otiPua s'_" rope Squeezet]rl_
"_" gine r
a. Cold En x
b. Warm Engine x
c. Refueled Engine after running x x x x 3-Stimes x x x
out of gas .,
d. Flooded Engine x chokeo, X x X X
e. Cold Weather starting x x x x _t_== ,=_fc,o,s- x x
* Allow engine to warm-ul_ thoroughly on half-choke, then move choke to the "Off" position. Do not cut with the
choke at the "On" or "Half" position. Figure 13. 9
to I_t choke lockand delent T)utton untJ engfnefires " in unW _glM m_ to _m
L squee,-_'_igg_' ralezze trigger tt_t_l _d
X X X 3-5 times X X X
choke Off X X 1-2 times X
(out of cut)

CONTROLLING KICKBACK
Kickback is a dangerous chain saw reaction that
can cause sedous personal injury. Carefully
study this section before you make the first cut
with your new saw. You must understand what
causes kickback, how :you can reduce the
chance of kickback, and how you can remain in
the best control of the saw it kickback does
Occur.
•.1. WHAT CAUSES KICKBACK ....
Kickback can happen when the moving chain
contacts an object at the tip of the guide bar
while the saw is beingoperated. This contact
causes the chain to dig into the object and
stops the chain for an instant. The result is a
lightning fast, reverse reaction which kicks
the saw.tip up and back at the operator. The
operator can lose control of the saw and the
cutting chain can cause serious injury if it
,_co._t'aats anypart:of thebody._ .,
2. HOW YOU 'CAN REDUCE THE:CHANCE
OFr_KICKBACK .
a. Recognize that Kickback can happen. By
understanding and knowing about kick-
back, you eliminate the element of sur-
prise.
b. Avoid letting the moving Chain at the tip of
" • •the guide bar:contact any object. Figure15.
. c. Keep the working area free from obstruc-
tions suchas other trees, branches, recks,
fences, stumps, etc. Figure 16. Eliminate or
avoid any Obstruction that your saw chain
could hit while you are cutting through :a
particular 10g or branch.
,- d..Keep yoursaw chain sharp and properly
tensioned. A loose or dull chain can in-
crease the chance of kickback.
K! CKBACK PATH
e. Operate the engine at full throttle for all
cutting. If the chain is moving at a slower
speed, there is greater chance for kick-
back to occur..
Use the Lo-Kick ® Guide Bar' and Guard
f.
Link Chain specified for your particular
saw. These devices have been designed to
reduce the possibility of kickback.
g: Use extra caution if yoursaw is equipped
with the Power Sharp ® System. The Power
Sharp ® saw isequipped with a Lo-Kick ®
....Guide Bar and a Guard Link Chain. How-
ever, due to the chain requirements of the
built-in sharpening mechanism, the kick-
back force from the Power Sharp ® chain
may be greater than that from other Guard
Link chains.
: " 3: HOW YOU_ CAN - MAINTAIN" THE BEST '
.,r...........CONTROL/ .... ....
a. Keep a good firm grip on the saw with both
hands. Figure 17. A firm grip can neutralize
kickback and help you maintain control of
the saw. Keep the fingers of your left hand
encircling and your left thumb under the
front handlebar: Keep your right hand com-
pletely around the rear handle. Keep your
left arm straight with the elbow locked.
b. Position your left hand on the front
handlebar so it is in a straight line with your
right hand on the rear handle, Figure 18.
Never reverse right and left hand positions
on the saw handles.
c. Stand with your weight evenly balanced on
both feet,
d. Stand slightly to the left side of the saw, to
keep your bqdy from being in a direct line
with the cutting chain. Figure 17.
e. Do not overreach. You could be drawn or
thrown off balance and lose control of the
saw.
•_.;",:;:-"_.;L_Do_notcut,:above_shbulderheight, It is too
difficult to maintain control of the saw if
you try to cut above •shoulder height.
CLEAR WORKING AREA
t0 ¸
Figure 15
Figure 16
AVOID OBSTRUCTIONS
OF
BAR
\
t
:r
Figure 17 Figure 18
 Loading...