

Craftsman 358352070, 358352060, 358352030 Owner’s Manual
lsears I
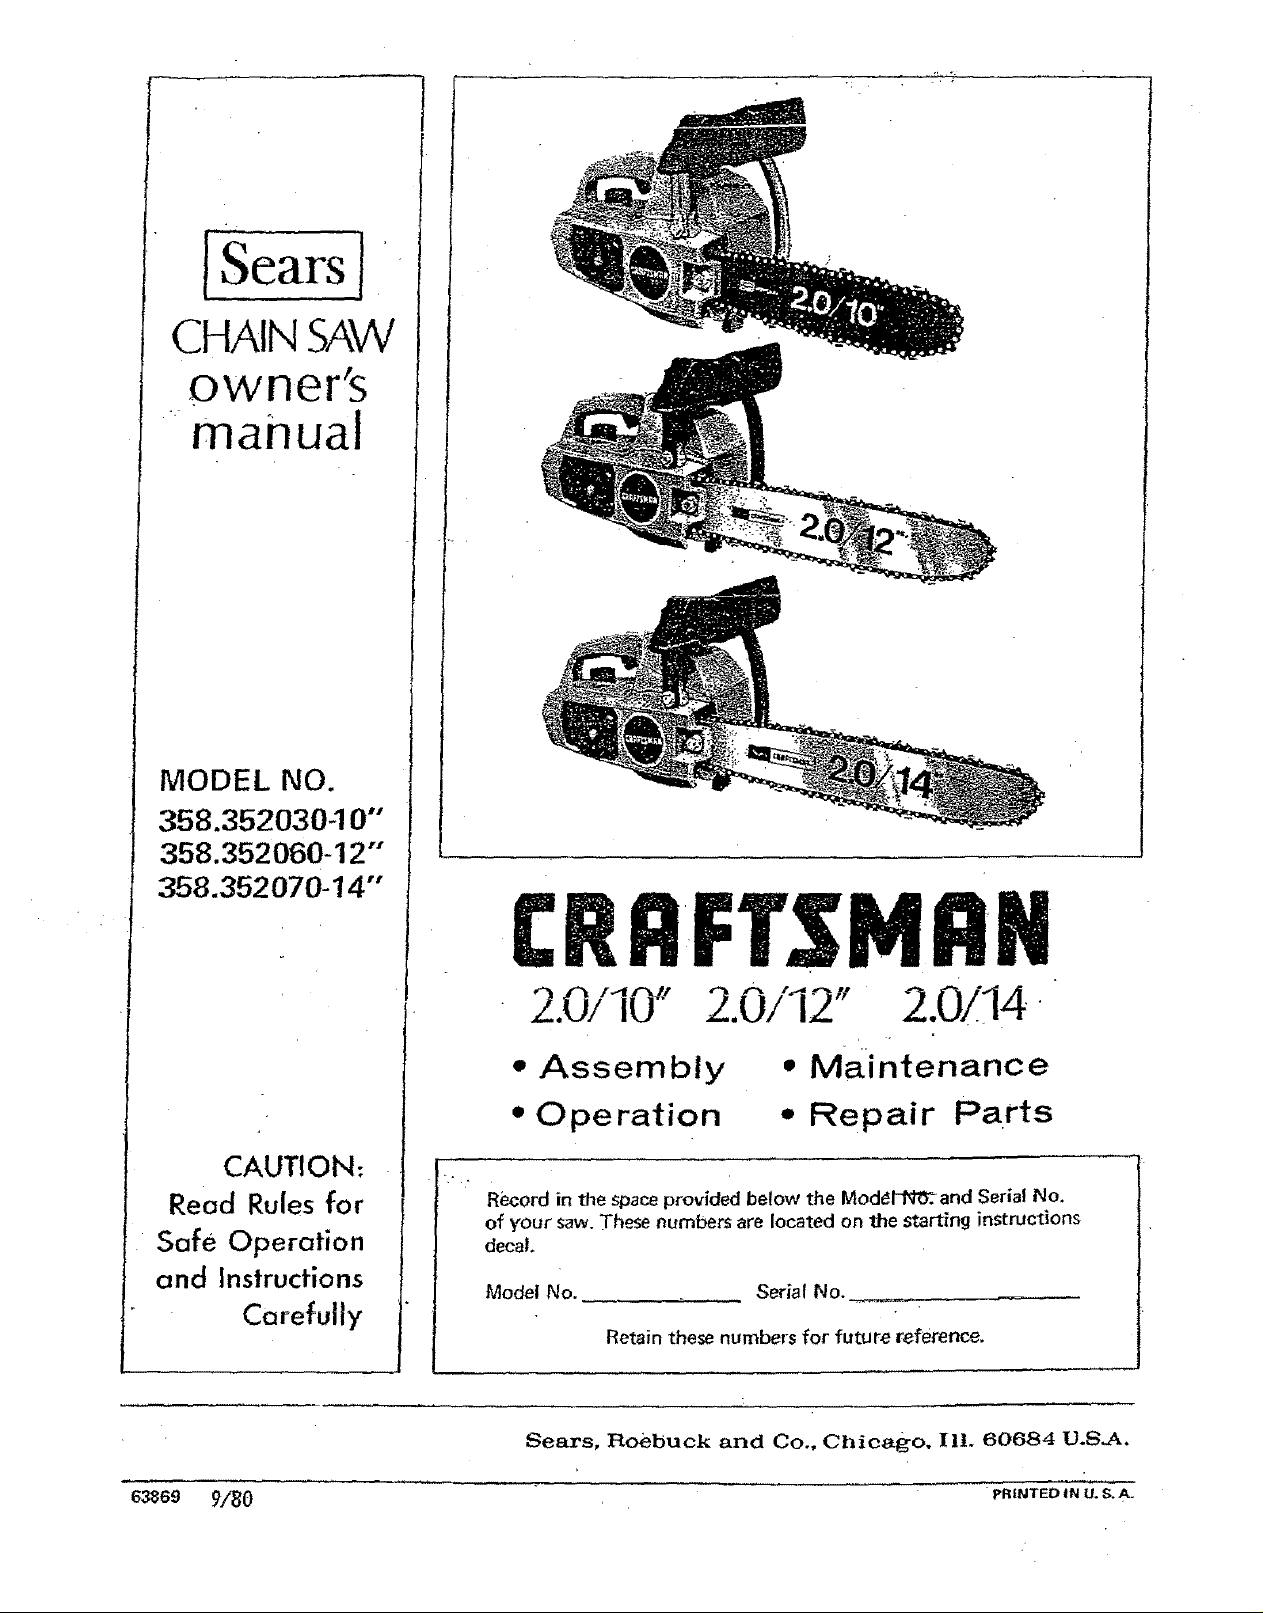
CHAIN SAW
owner's
manual
MODEL NO.
358.352030-10""
358.352060-12"
358.352070-14"
CRRFTSMRtl
2.0/'i0" 2.0/'I2" 2.0/14
• Assembly • Maintenance
* Operation * Repair Parts
CAUTION:
Read Rules for
Safe Operation
and Instructions
Carefully
63869 9/_0 pRiNTED iN U. _. A-
i
Record in the space provided below the Made--and Serial No.
of your saw. These numbers are located on the starting instructions
decal.
Model No. Serial No.
Retain these numbers for future reference.
Sears, Roebuck and Co., Chicago, Il!. 60684 U.SJ_.
-SAFETY RRST
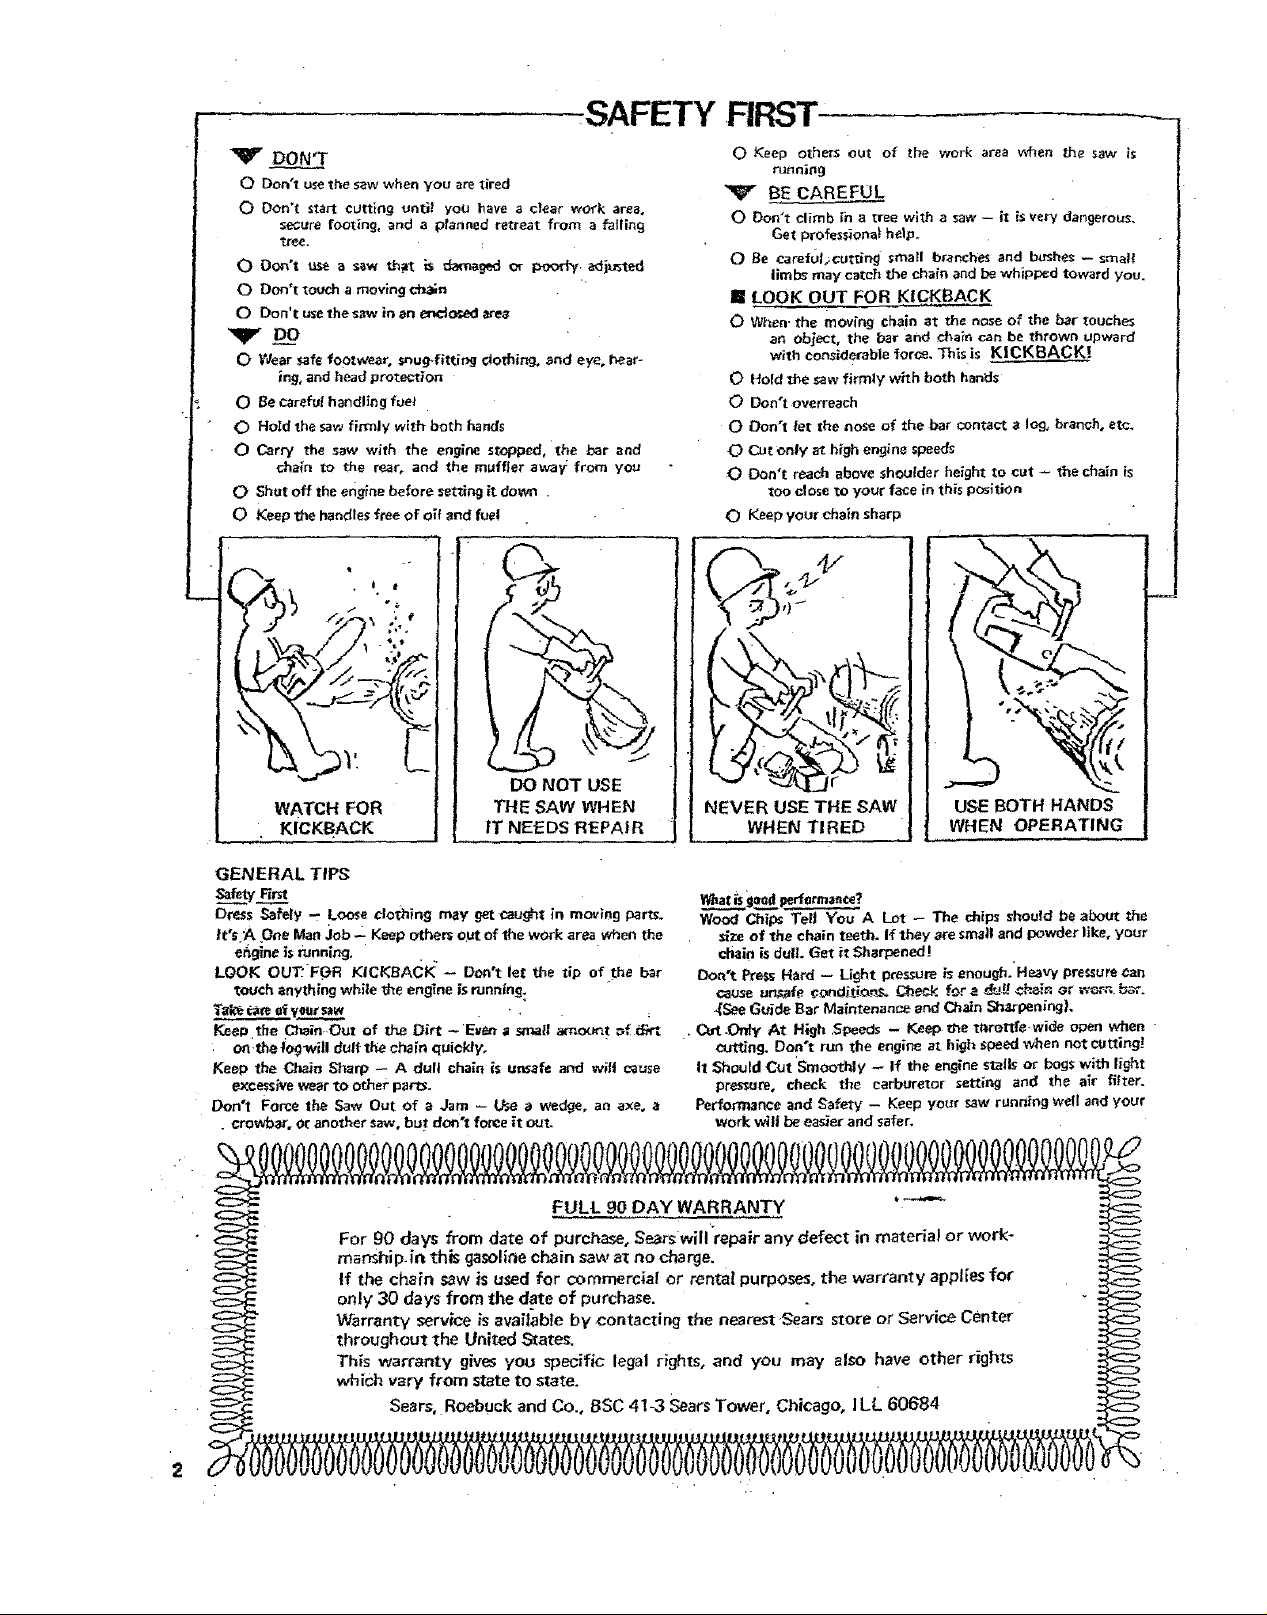
Y DON'T
O Don't use the saw when you are tired
O Don't start cutting until you llave a clear work area,
secure tooting, and a planned retreat from a falling
tree.
O Don't tL_ a saw t.hat is damaged or poorly, adjssted
O Don't touch a moving _-t=a_n
O Don't use the s_w in an er_lor, ed _ea
_VD_O
O Wear safe footwear, sr_ug_fitting ClOthing, and eye, hear-
ing, and head protection
0 Be careful handling fuel
O Hold the saw firmly with both hands
O Carry the saw with the engine stopped, the bar and
_haln to the rear, and the muffler away/from you
0 Shat off the engine before setting it down .
0 Keep the handles free of oil and rue!
0 Keep others out of the work area when the saw is
running
V BE CAREFUL
O Oon't climb in a tree with a saw - it is very dangerous.
Get professional help.
0 Be caref_l.;¢utting small braneh_s end b_hes -- smelt
limbs may catch the chain and be whipped toward you.
II LOOK OUT FOR KICKBACK
O When. the moving cha!n at the nose of the bar touches
an object, the bar and _ain can be thrown Upward
with considerable for_'e. This is KICKBACK!
0 Hold the saw firmly with both han_ls
O Don't overreach
O Don't _et the nose of the bar _ontact a log, brar_h, etc.
O Cut Only at h_gh engine speeds
O Don't reach above shoulder height to cut -- the chain is
too close to your face in this position
O Keep your chain sharp
THE SAW WHEN NEVER USE THE SAW | USE BOTH HANDS
IT NEEDS REPAIR WHEN TIRED | WHEN OPERATING
GENERAL TIPS
Dress Safely -- Loose clothing may get caught in moving parts. Woo_ Chil_ Tell You A Lot -- The dl[ps should be about the
it's_ One Man Job -_ Keep others out of the work area when the size of the chain teeth. If they are small and powder like, your
er_gine is P.Jnn[r_j. chain is dull. Get it Sharpened !
LOOK OUT"F_R KICKBACK" -- Don*t let the tip of the bar Don't Press Hard -- Light pressure is ervaugh.'Heavy pressure ¢an
touch anything while l_e engine is running: cause un,_afe _ondi_iom% Check for a &-.a'g¢_ai_ Gr w_. _.
T_ _ Ofyear saw . . , _Sea Guide Bar Maintenance and Chain _arpen_ngt,
I_ep the (T_ain. Out of the Dirt -'E_ a small _oo_t _f I_r-_rt . Out .Ol_ At H_gh .SPeeds -- Keep t/le tttrettfe-wi_e open when
on-the !'og_/iil dull the chain quickly, cutting. Don't run the engine at high speed when not cutting!
Keep the _J_air_ Sharp -- A dull chain is unsafe and wilt c_use It _hould Cut Smoothly -- If the engine stalls or bogs with light
excessive weartootherpart_, pressure, check the carburetor setting and the a_r filter.
Don't Force the Saw Out of a Jam - Use a wedge, an axe, a Performance and Safety -- Keep your saw running well and your
. crowbar. Oranother saw but don't force it out. WOrk wlti be easier and safer.
= FULL 90 DAY WARRANTY _-
_ For 90 days from date of purchase, Se,ars will "repair any defect in material or work-
manship-in this ga_oliniechain saw a_no charge.
If the chain saw is used for commercial or renta! purposes, the warranty applies for _
o only 30 days from the date of purchase.
Warranty service is available by contacting the nearest Sears store or Service Center
throughout the United _ates.
This warranty gives you specific legal rights, and you may also have other rights <:_
which vary from state to state.
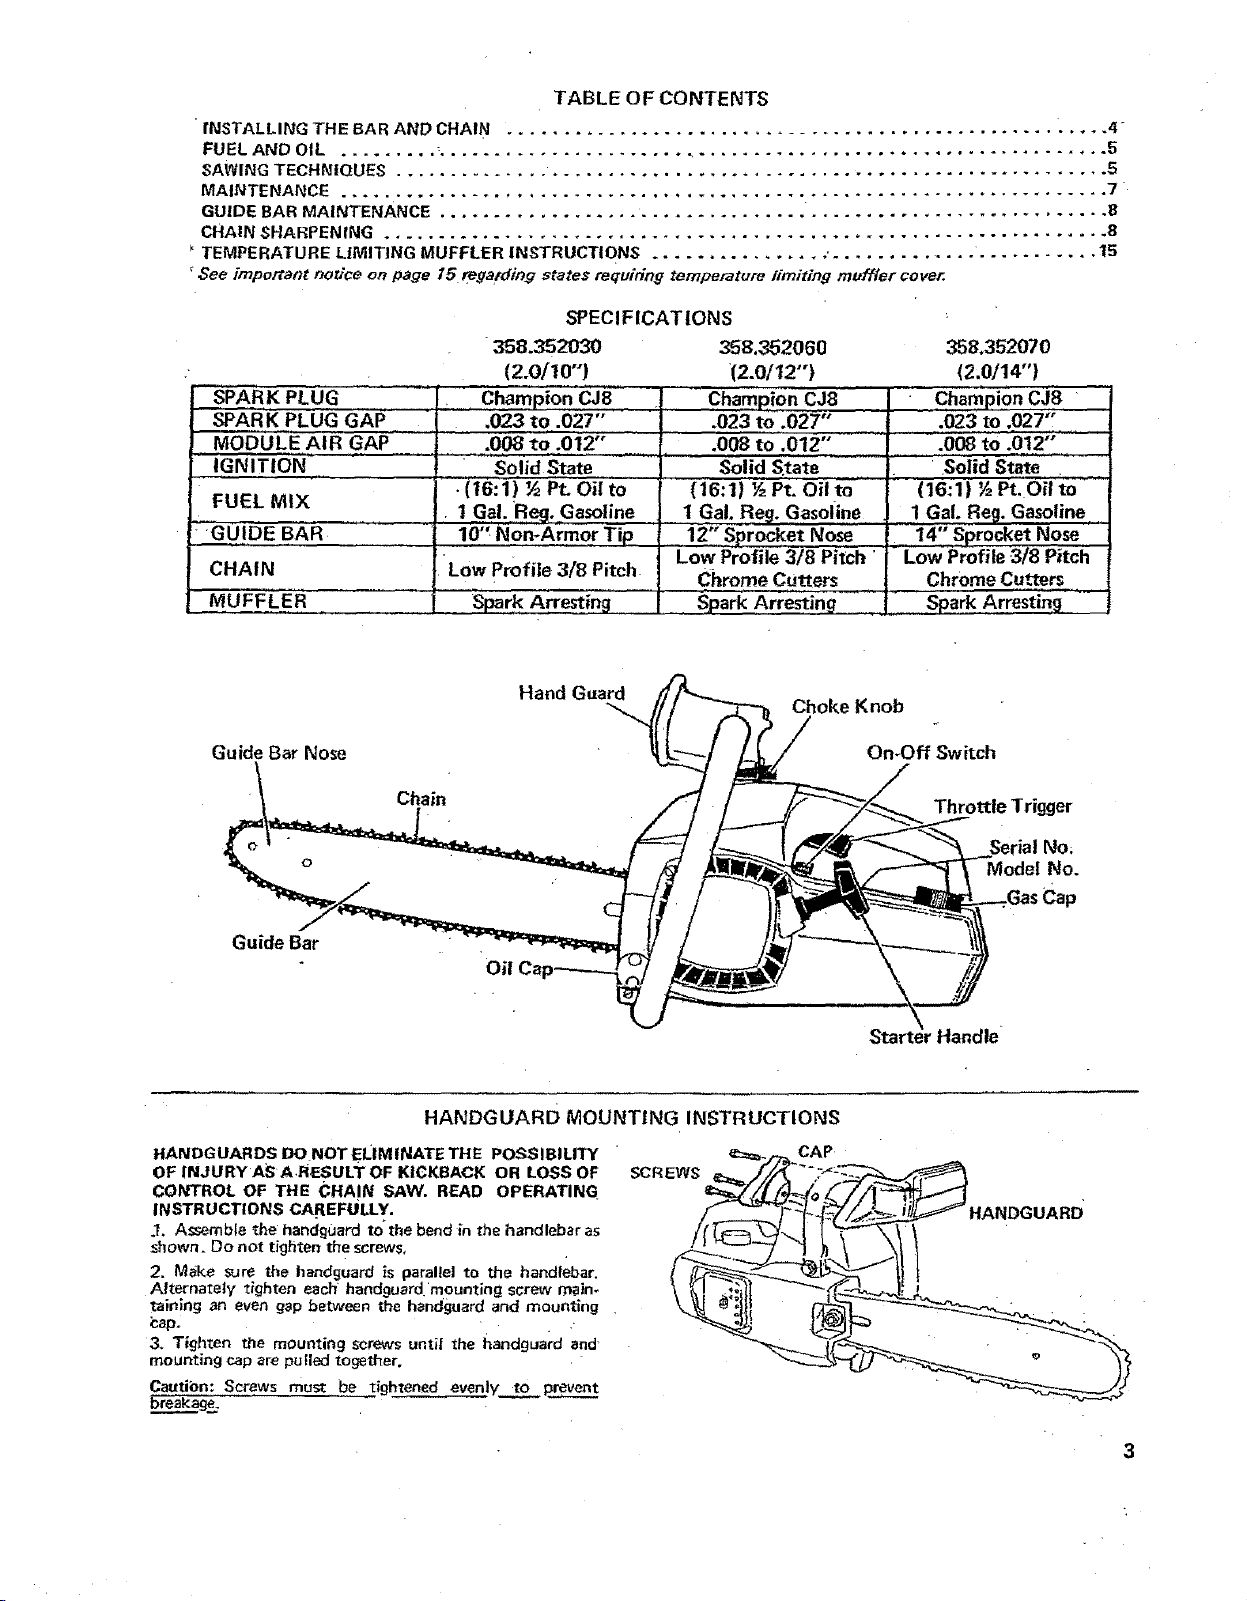
TABLE OF CONTENTS
• I'NSTALLING THE BAR AND CHA! N ...................................................... 4
FUEL AND OIL ......... ;............................................................ 5
SAWING TECHNIQUES ................................................................ 5
MAINTENANCE ..................................................................... 7
GUIDE BAR MAINTENANCE ............................................................ 8
CHAIN SHARPENING ................................................................. 8
TEMPERATURE LIMITING MUFFLER INSTRUCTIONS ................ ............. ........... 15
_ee [mpo/taf)t /_orJce on page 15 _egatding states [equili[l_q temperature I/miring ml_{e/" ¢ovsr,
SPECIFICATIONS
358.352030 358,352060 358.352070
(2.0/10") (2.0/12") (2,0/14")
SPARK PLUG
SPARK PLUG GAP
MODULE AIR GAP
IGNITIONS,
FUEL MIX
GUIDE BAR
CHAIN
MUFFLE R ..............{
Champion CJ8 -Champ!on CJ8 Champion CJ8
.023 to .027" .023 to .027" .023 to ,027"
......... ,,,,.008to .012" .008 to .012'" - '.008'{o .b12';" '
Solid State Solid State ...........,,, ,: " .Solid State' ''"."
. (16:1) _ Pt_ Oil to (16:1) ½ Pt. Oil to (16:1) ½ Pt. Oil to .......
1 Gel. Reg. Gasoline I GaL Re_. Gasoline 1 Gal. Reg. Gasoline
10'_Non-Armor Tip 12" Sprocket Nose I4" Sprocket Nose
• Low Profile 3/8 Pitch" _Low Profile 3/8 Pitch
Low Profile 3/8 Pitch• Chrome Cutters Chrome Cutters
• _rk Arresting Spark Arresting ....... Spark Arrestin_ .........
Hand Guard
Guide Bar Nose
Chain
Guide Bar
HAIkIDGUARD MOUNTING INSTRUCTIONS
HANDGUARDS I}O NOTELIMINATE THE POSSIBIUTY
OF INJURY AS A.RF..SULT OF KICKBACK OR LOSS OF
CONTROL OF THE CHA!N SAW. HEAD OPERATING
INSTRUCTIONS CA.REFULLY.
.1. A_mb[e _he handguard to the bend _n the handlebar as
shown= Do not tighten the screws,
2. Make sure the handguard {s parallel to the handlebar.
Alternately tighten each handguard'mounting screw main-
raining an even gap between the handguard and mounting
;cap.
3. Tighten the mounting screws until the handguard and"
mounting cap are puFled together.
Caution: Screws must be tightened evenly to prevent
breakage.
Choke Knob
OmOff Swhch
Throttle Trigger
NO;
Model No.
Cap
Handle
CAP
HANDGUARD"
Rear Bar Clamp_
Screw J
Figure I
Figure 2
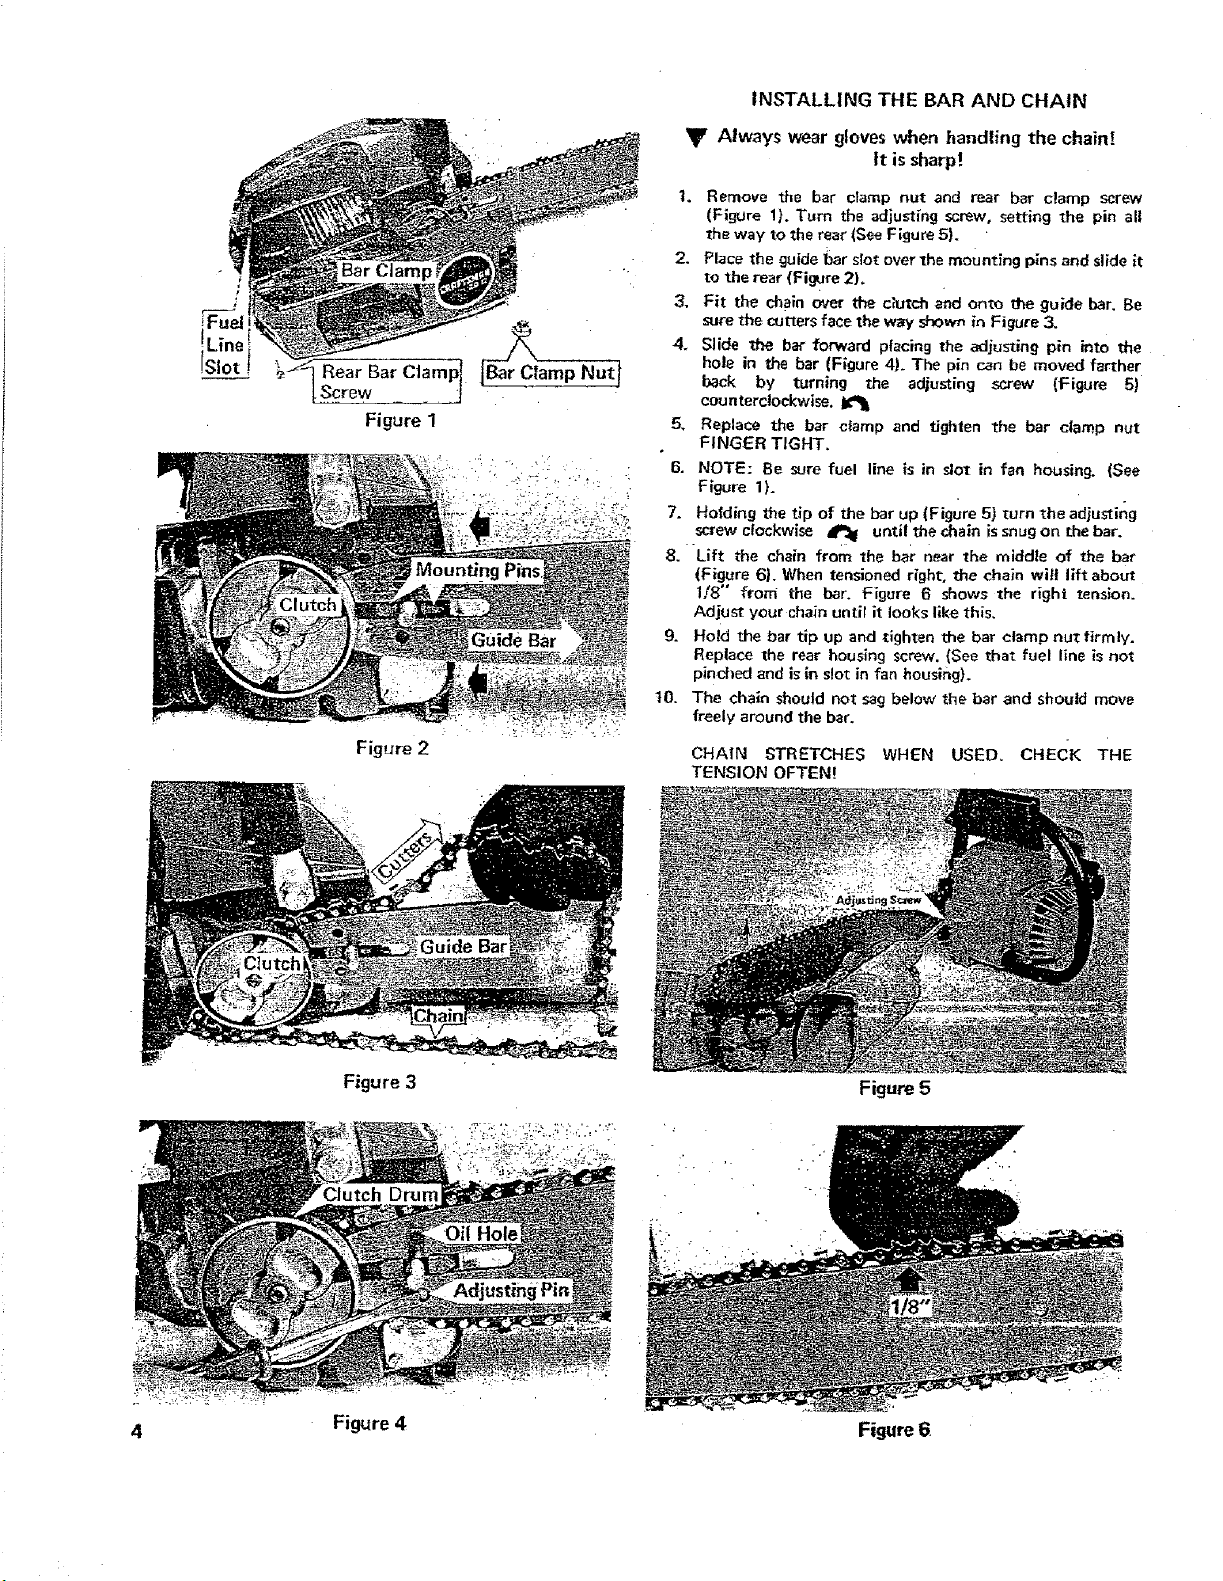
INSTALLING THE BAR AND CHAIN
_r Always wear gloves when handling the chain!
It issharp!
1. Remove the bar clamp nut and rear bar clamp screw
(FigUre !}. Turn the adjusting screw, setting the pin all
the way to the rear (See Figure 5).
2. Place the guide bar slot over the mounting pins and slide it
to the rear (Figure 2).
3. Fit the chain over the clutch aod onto the guide bar. Be
sure the cutters face the way shown in Figure 3.
4. Slide the bar forward placing the adjusting pin into the
hole in the bar (Figure 4). The pin can be moved farther
back by turning the adjusting screw (Figure 5)
counterclockwise,
5. Replace the bar clamp and tighten the bar clamp nut
FINGER TIGHT.
• 6. NOTE: Be sure fuel line is in slot in fan housing. (See
Figure 1).
7. Holding the tip of the bar up (Figure 5) turn the adjusting
screw clockwise 41_ until the chain is snug on the bar.
8. Lift the chain from the bar near the middle of the bar
(Figure 6}. When tensioned right, the chain wilt lift about
1/8" from the bar. Figure 6 shows the right tension.
Adjust y<_ur chain until it looks like this.
g. Hold the bar tip up and _ighten the bar clamp nutfirmly.
Replace the rear housing screw. (See that fuel line is not
pind_ed and is in slot in fan housing).
10. The chain should not sag below the bar and should move
freely around the bar.
CHAIN STRETCHES WHEN USED. CHEdK THE
TENSION OFTEN!
Figure 3
Figure 4
Figure 5
Figure 6
OPERATINGINSTRUCTIONS
Before Starting
O Check the chain tension. Is the chain sharp?
O Are the handles clean of gasand oil?
O D_d you fill the fuel AND oil tan_.s?
FUEL and OIL
Fuel Mix: T6 parts gasoline to I part oil (T/2 pint oi! to one
gallon gasoline). Use air cooled two cycle engine oil for fuel
mix.
When preparing fuel mixture, mix only the amount needed for
the job you are to do. Do not use fuel mixture that has been
stored longer than two (2) months. Fuel mixture stored longer
than this wilt cause hard starting and poor performance of
your saw. If fuel mix has been stored in your saw longer than
this _ime it should also be removed and filled with a fresh
mixture before using•
Chain Oil: For cold weatl_er operation, above 30 ° F, use
straight Craftsman Bar and (;hain Lubricant. 30 ° to 0°, use 5%
diesel fuel #1 or kerosene and 95% Lubricant; below 0°F,
use 10% diesel fuel #1 or kerosene and 90% LubdcanL If Bar
and Chain Lubricant is not diluted adequately, the oil system
of the chain saw will not pump enough oil for adequate lu-
brication of Bar and _'-_=ain .
A WORD ABOUT CHAIN OILING
1• Fill the oil tank each time you fill the fuel tank. Lack of
oil onthe chain will quickly ruin the bar and chain.
2. You will use at least 1/3 tank of oil for each tank of gas. If
you use less, check for a plugged oil hole in the guide bar.
•Use clean oil. Do not let sawdust or dirt into the oil tank.
Clean the oil cap and the area around it before removing.
The oil tank is pressurized for pump operation• A little oil
will pump out after the engine stops. Oil on the bar and
chain will drip off after use. Let the saw stand and cool
off:Wipe the bottom clean before storing•
Move bystanders and obstructions welt out of reach! Release
the trigger after the engine starts.
1. Move the choke knob as far asitwil] go in the direction of
the arrow.
2. Turn the switch On (to the left|,
CAUTION:
STARTING
3. Hold the rear handle in your right hand and squeeze the
trigger.
4. Hold the starter handle in your left hand,
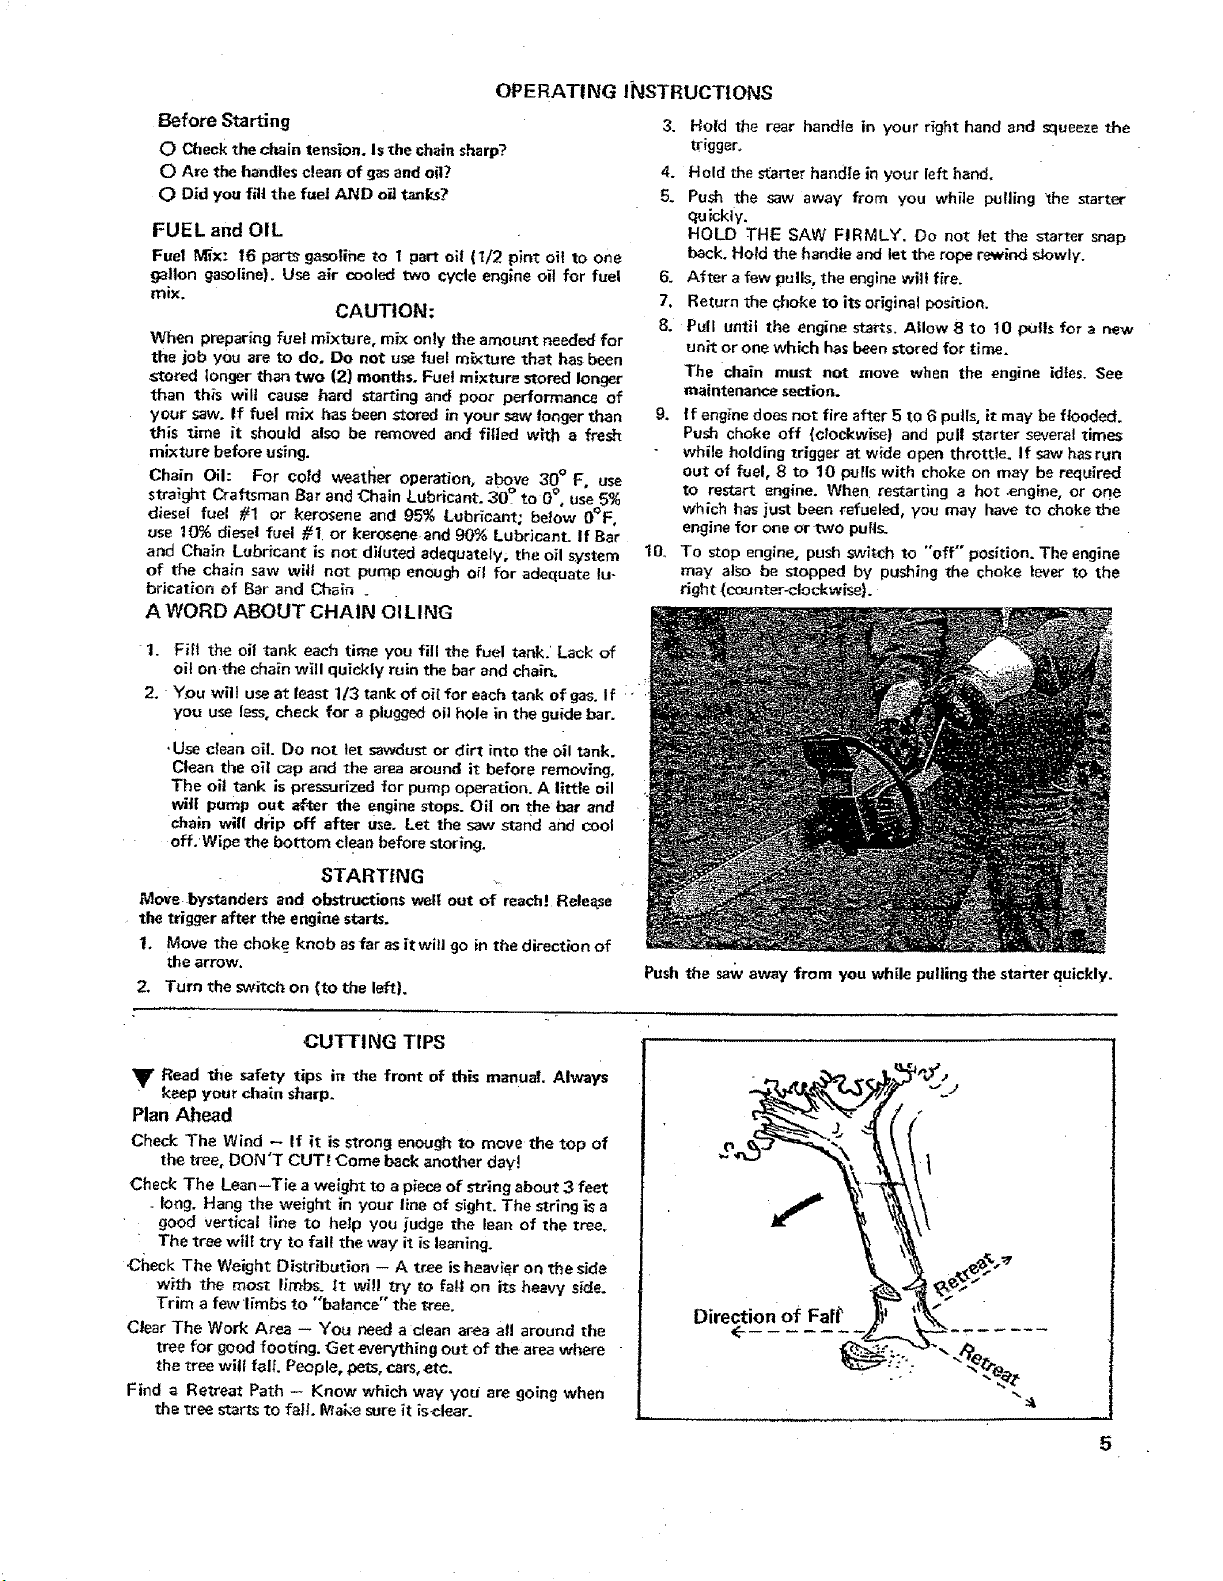
5. Push the saw away from you while pulling the starter
quickly.
HOLD THE SAW FIRMLY'. Do not let the starter snap
back. Hold the handle end let the rope r_owindslowly.
6. After a few pulls, the engine wilt fire.
7. Return the choke to its original position.
8. Pull until the engine star_s• Allow 8 to 10 pulls for a new
unit or one which has been stored for time.
The chain must not move when the engine idles• See
maintenance section.
9. ff engine does not fire after 5 to 6 pulls, it may be flooded.
Push choke off (clockwise| and pull starter several times
while holding trigger at wide open throttle. If saw has run
out of fuel, 8 to 10 pulls with choke on may be required
to restart engine. When restarting a hot ,engine, or one
which has just been refueled, you may have to choke the
engine for one or two pufl_
10.
To stop engine, push switch to "off" position. The engine
may also be stopped by pushing the choke lever to the
right (COu_ter-clockwise).
Push the saw away from you while puUin9 the starter quickly•
CUTTING TIPS
_1r Read the safety tips in the front of this manual. Always
keep your chain sharp.
Plan Ahead
Check The Wind -- If it is strong enough to move the top of
the tree, DON T CUT. Come back another day!
Check The Lean-Tie a weight to a piece of string about 3 feet
. tong. Hang the weight in your line of sight. The string is a
good Verticat llne to help you judge the lean of the tree.
The tree wilt try to fall the way it is leaning.
Check The Weight Distribution -- A tr_e is heavier on the side
with the most limbs, tt wil! try to f_l.l on its heavy side.
Trim a few limbs to "balance" the t#ee.
Clear The Work Area -- You need a clean ar_a at! around the
tree for good footing. Get everything out of the area where
the tree will fall People, pets, cars, e_tc.
Find a Retreat Path - Know which way you are going when
the tree starts to fail. I_ake sure it is€lear.
• 1
2
Direction of Fall
5
 Loading...