

Craftsman 358351060, 358351140 Owner’s Manual
iMPORTANT MANUAL
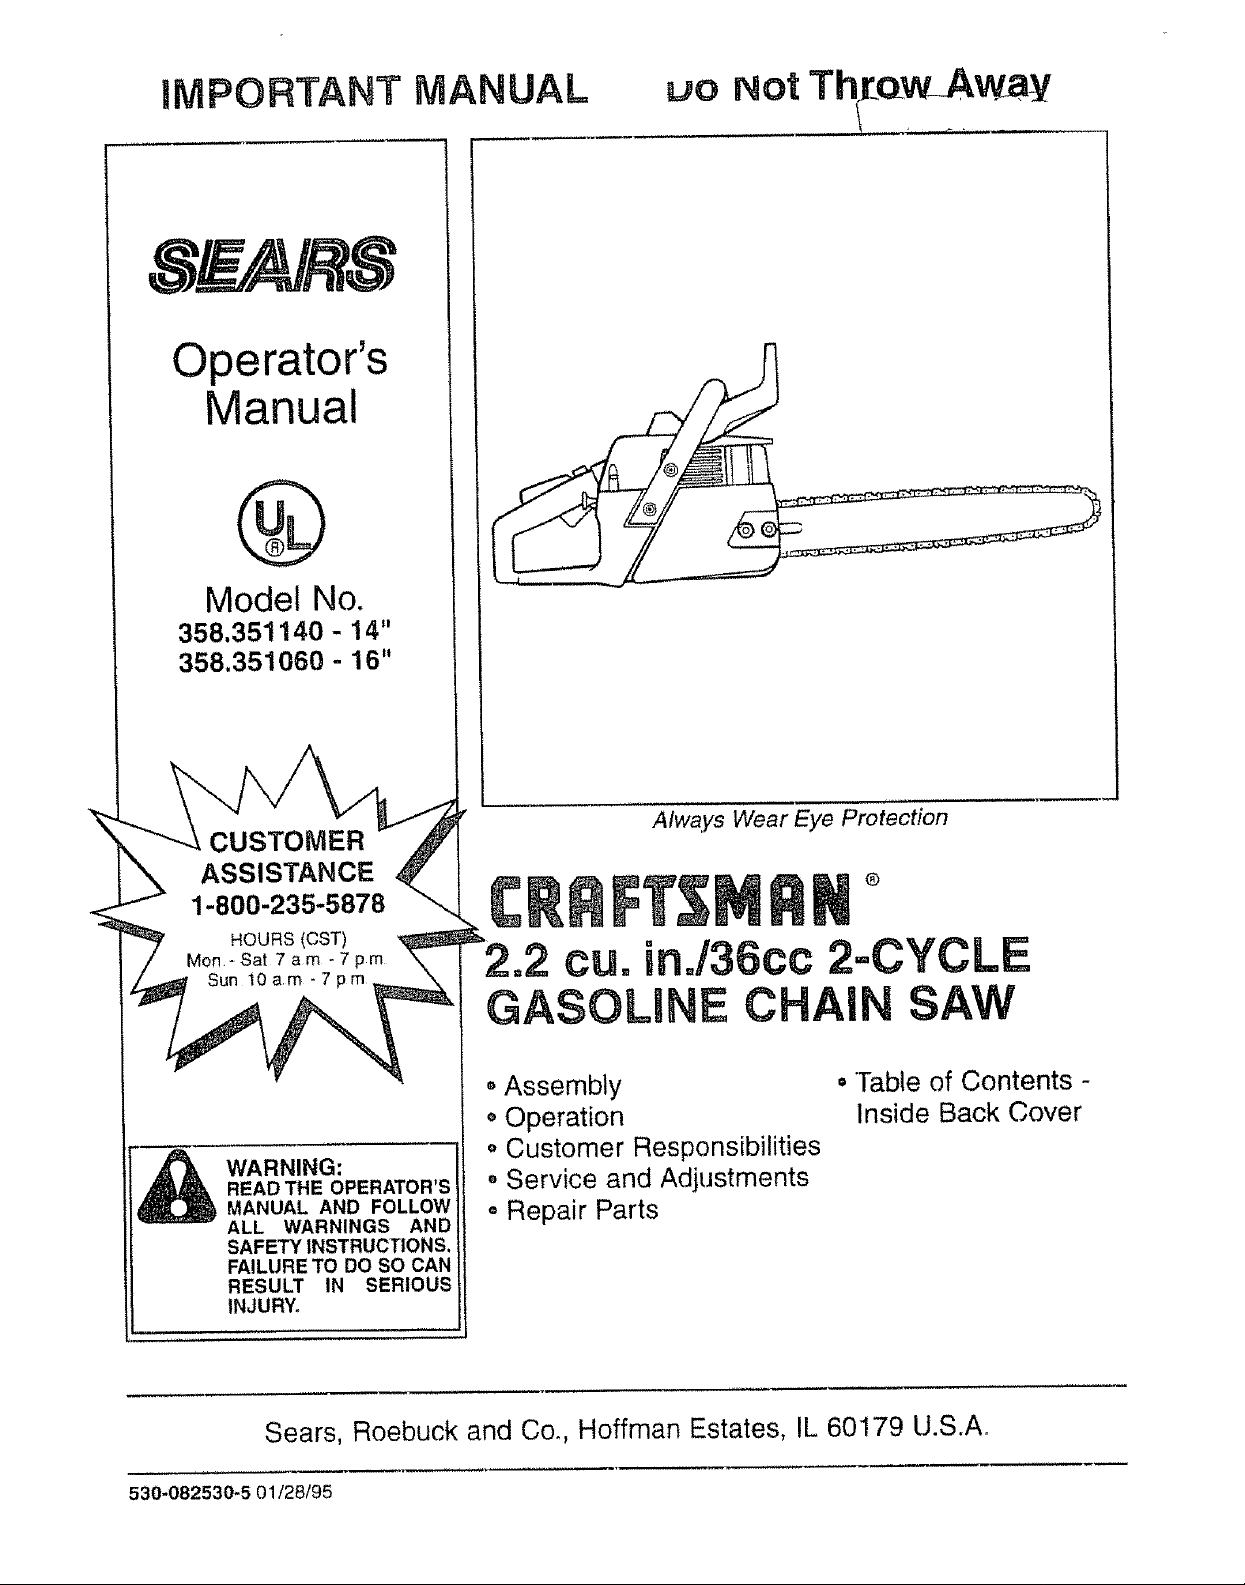
Operator's
Manual
Model No.
358,351140 - 14"
358.351060 - 16"
,=,o.or
CUSTOMER
ASSISTANCE
1-800-235-5878
WARNING:
READ THE OPERATOR'S
MANUAL AND FOLLOW
ALL WARNINGS AND
SAFETY INSTRUCTIONS.
FA LURE TO DO SO CAN
RESULT IN SERIOUS i
1NJURY_
Always Wear Eye Protection
®
2.2 cuo in,/36cc 2oCYCLE
GASOLi CHAI SAW
oAssembly =Table of Contents -
oOperation Inside Back Cover
o Customer Responsibilities
o Service and Adjustments
o Repair Parts
I
Sears, Roebuck and Co., Hoffman Estates, IL 60179 U.S.Ao
530-082530-5 01/28/95
SAFETY RULES
WARNING:
ALWAYS DISCONNECT SPARK PLUG WIRE AND PLACE WIRE WHERE IT CANNOT CONTACT SPARK
PLUG TO PREVENT ACCIDENTAL STARTING WHEN SETTING UP, TRANSPORTING, ADJUSTING OR
MAKING REPAIRS EXCEPT CARBURETOR ADJUSTMENTS.
BECAUSE A CHAIN SAW IS A HIGH-SPEED WOOD-CUTTING TOOL, SPECIAL SAFETY
IMPROPER USE OF THIS TOOL CAN CAUSE SERIOUS INJURY.
PRECAUTIONS MUST BE OBSERVED TO REDUCE THE RISK OF ACCIDENTS_ CARELESS OR
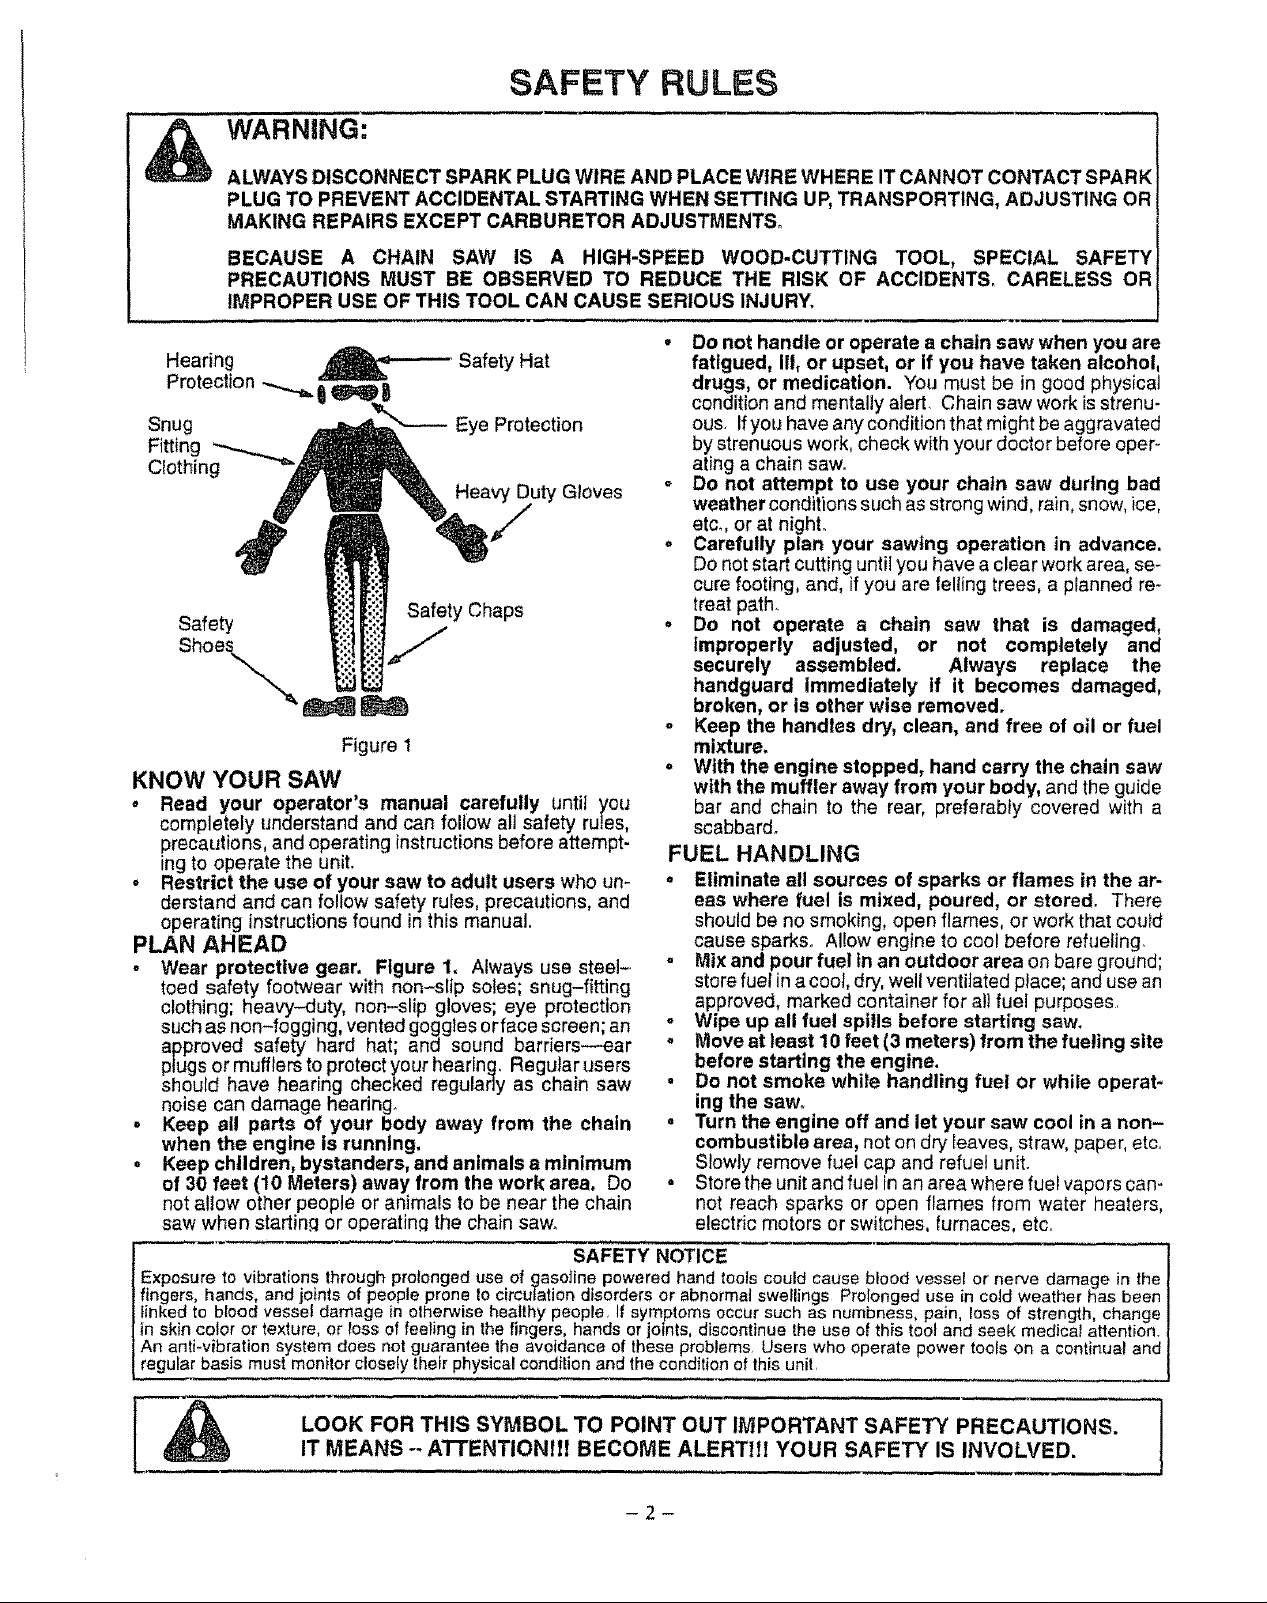
Hearing Safety Hat
Protection ....=_.._j
Snug Eye Protection
Fitting
Clothing
Heavy Gloves
Safety
Shoe_,,_
Figure I
Safety Chaps
KNOW YOUR SAW
, Read your operator's manual carefully until you
completely understand and can follow all safety rules,
precautions, and operating instructions before attempt-
ingto operate the unit.
o Restrict the use of your saw to adult users who un-
derstand and can follow safety rules, precautions, and
operating instructionsfound in this manual,
PLAN AHEAD
. Wear protective gear. Figure 1. Always use steel-
toed safety footwear with non-slip soles; snug-fitting
clothing; heavy-duty, non-slip gloves; eye protection
such as non-fogging, ventedgoggles orface screen; an
approved safety hard hat; and sound barriers--ear
plugs or mufflers to protect your hearing, Regular users
should have hearing checked regularly as chain saw
noise can damage hearing.
o Keep all parts of your body away from the chain
when the engine is runntng.
° Keep children, bystanders, and animals a minimum
of 30 feet (10 Meters) away from the work area. Do
not allow other people or animals to be near the chain
saw when starting or operating the chain saw,
. Do not handle or operate a chain saw when you are
fatigued, Iit, or upset, or if you have taken alcohol,
drugs, or medication. You must be in good physical
condition and mentally alert. Chain saw work isstrenu-
ous. Ifyou have any condition that might be aggravated
by strenuous work, check with your doctor before oper-
ating a chain saw,
- Do not attempt to use your chain saw during bad
weather conditions such as strong wind, rain,snow, ice,
etco,or at night°
o Carefully plan your sawing operation in advance.
Do notstart cuttinguntil you have a clear workarea, se-
cure footing, and, if you are felling trees, a planned re-
treat path.
. Do not operate a chain saw that is damaged,
Improperly adjusted, or not completely and
securely assembled. Always replace the
handguard Immediately if it becomes damaged,
broken, or is other wise removed.
o Keep the handles dry, clean, and free of oil or fuel
mixture.
o With the engine stopped, hand carry the chain saw
with the muffler away from your body, and the guide
bar and chain to the rear, preferably covered with a
scabbard.
FUEL HANDLING
o Eliminate all sources of sparks or flames in the ar-
eas where fuel is mixed, poured, or stored. There
should be no smoking, open flames, or work that couid
cause sparks. Al!ow engine to cool before refueling
. Mix and pour fuel in an outdoor area on bare ground;
store fuel in a coot, dry, well ventilated place; anduse an
approved, marked containerfor all fuel purposes,
- Wipe up all fuel spills before starting saw.
o Move at least 10 feet (3 meters) from the fueling site
before starting the engine.
• Do not smoke while handling fuel or while operat-
ing the saw.
• Turn the engine off and let your saw cool in a non-
combustible area, not on dry feaves, straw, paper,etc_
Slowly remove fuel cap and refuel unit.
- Store the unit and fuel in an area where fuel vapors can-
not reach sparks or open flames from water heaters,
electric motors or switches, furnaces, etc
........... SAFETY NOTICE J
re to vibrations through prolonged use of gasoJine powered hand tools could cause blood vessel or nerve damage in the t
J linked to blood vessel damage in olherwise healthy people, If symptoms occur such as numbness pain loss of strength, change J
Jinskin color or texture, or loss of feelinginthe fingers, hands orjoints,discontinuethe use el this toot and seek medical attention, l
j An anti-vibrationsystem does net guarantee theavoidance of these problems, Users who operate power tools on a continual and J
Lregularbasis mustmonitorcloselytheirphysicalcondition and the conditionof thisunit, ]
hands, and joints of people prone to circulation disorders or abnormal swellings Prolonged use in cotd weather has been J
LOOK FOR THIS SYMBOL TO POINT OUT IMPORTANT SAFETY PRECAUTIONS.
-- l
IT MEANS--ATTENTION!tl BECOME ALERTIrt YOUR SAFETY IS INVOLVED.
.......... :_U,HH,,, IH,,
.......................... i HIll,, =u=l
SAFETY RULES
,,H, =
.... MAINTAIN YOUR SAW tN GOOD WORKING
. Do not operate a chain saw with one hand. Serious ORDER
injuryto the operator, helpers, bystanders or any corn- • Have all chain saw service performed by your Sears
bination ofthese persons may result from one-handed Service Center with the exception ofthe items listed in
operation, A chain saw is intended for two-handed use,, the maintenance section of this manual For example, if
• Operate the chain saw only In well.ventilated out- improper tools are used to remove or hotd the flywheel
door areas, when servicing the clutch, structural damage to the fly-
° Do not operate saw from a ladder or in a tree, unless wheel can occur and cause the flywheel to burst.
specifically trained to do so_ • Make certain the chain stops moving when the
° Position all parts of your body to the left of cut and throttle trigger Is released. For correction, refer to
away from the chain when the engine is running. "Carburetor Adjustments."
• Cut wood only. Do not use your saw to pry or shove • Stop the saw if the chain strikes a foreign object,
away limbs, roots,or other objects. Inspect unit and repair or replace parts as necessary,
• Make sure the chain will not make contact with any ° Disconnect the spark plug before performing any
object while starting the engine. Never tryto start the
maintenance except for carburetor adjustments,,
saw when the guide bar is in a cut or keff_ o Never modify your saw in any way, Use only attach-
. Use extreme caution when cutting small size brush ments supplied or specifically recommended by the
and saplings. Slender material can catch the chain manufacturer.
and be whipped toward you or puli you off balance. TRANSPORTING AND STORAGE
o Be alert for sprtngbackwhen cutting a limbthat is un- - Stop the unit before transporting.
der tension so you will not be struck by the limb or saw o Aitow engine to cool, cover the guide bar and chain, and
when the tension in the wood fibers is released, secure the unit before storing or transporting in a ve-
- Do not put pressure on the saw at the end of a cut. hicle.
Applying pressure can cause you to Iose control when • Empty fuet tank before storing or transportingthe unit,,
the cut is completed. Use upany fuel left in the carburetor by starting the en-
• Stop the engine before setting the saw down. gine and lettingthe engine run until itstops_
• Keep fuel and oil caps, screws, and fasteners se- • Store unit and fuel in an area where fuel vapors cannot
curely tightened, reach sparks or open flames from water heaters, elec-
tric motors or switches, furnaces, etc
o Store unit sothe chain cannotaccidentally cause injury.
o Store the unit out of the reach of children_
,H =,HJ,,,,,,,,h,LI. H , =l H= = =,l, = =,,= i, i i , = ,,,i i=
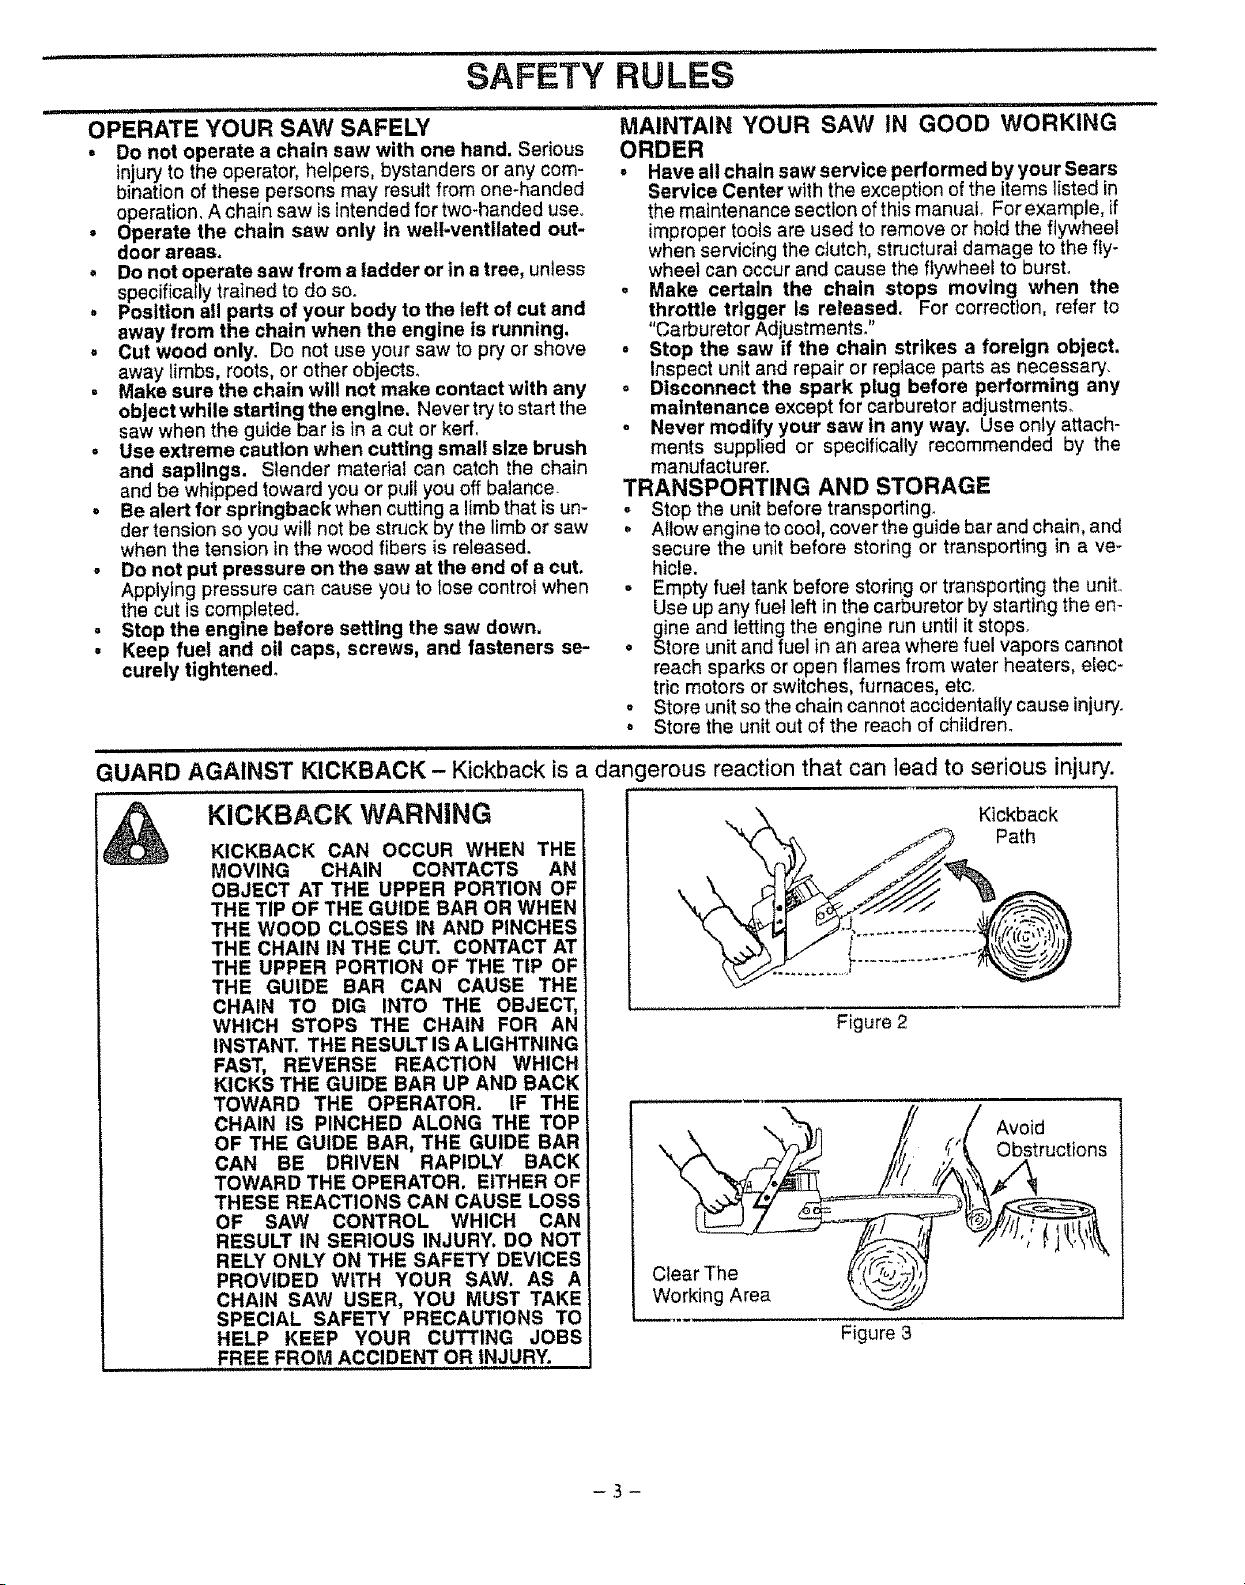
GUARD AGAINST KICKBACK - Kickback is a dangerous reaction that can lead to serious injury.
....... =, =, =,H
KICKBACK WARNING
KICKBACK CAN OCCUR WHEN THE
MOVING CHAIN CONTACTS AN
OBJECT AT THE UPPER PORTION OF
THE TIP OF THE GUIDE BAR OR WHEN
THE WOOD CLOSES tN AND PINCHES
THE CHAIN IN THE CUT. CONTACT AT
THE UPPER PORTION OF THE TIP OF
THE GUIDE BAR CAN CAUSE THE
CHAIN TO DIG INTO THE OBJECT,
WHICH STOPS THE CHAIN FOR AN
INSTANT. THE RESULT IS A LIGHTNING
FAST, REVERSE REACTION WHICH
KICKS THE GUIDE BAR UP AND BACK !
TOWARD THE OPERATOR. IF THE
CHAIN IS PINCHED ALONG THE TOP
OF THE GUIDE BAR, THE GUIDE BAR
CAN BE DRIVEN RAPIDLY BACK
TOWARD THE OPERATOR, EITHER OF
THESE REACTIONS CAN CAUSE LOSS
OF SAW CONTROL WHICH CAN
RESULT IN SERIOUS INJURY. DO NOT
RELY ONLY ON THE SAFETY DEVICES
PROVIDED WITH YOUR SAW. AS A
CHAIN SAW USER, YOU MUST TAKE
SPECIAL SAFETY PRECAUTIONS TO
HELP KEEP YOUR CUTTING JOBS
FREE FROM ACCIDENT OR INJURY.
Kickback
Path
Figure 2
Avoid
Obstructions
Clear The
Working Area
Figure 3
SAFETY RULES
,i,Ji,J,i
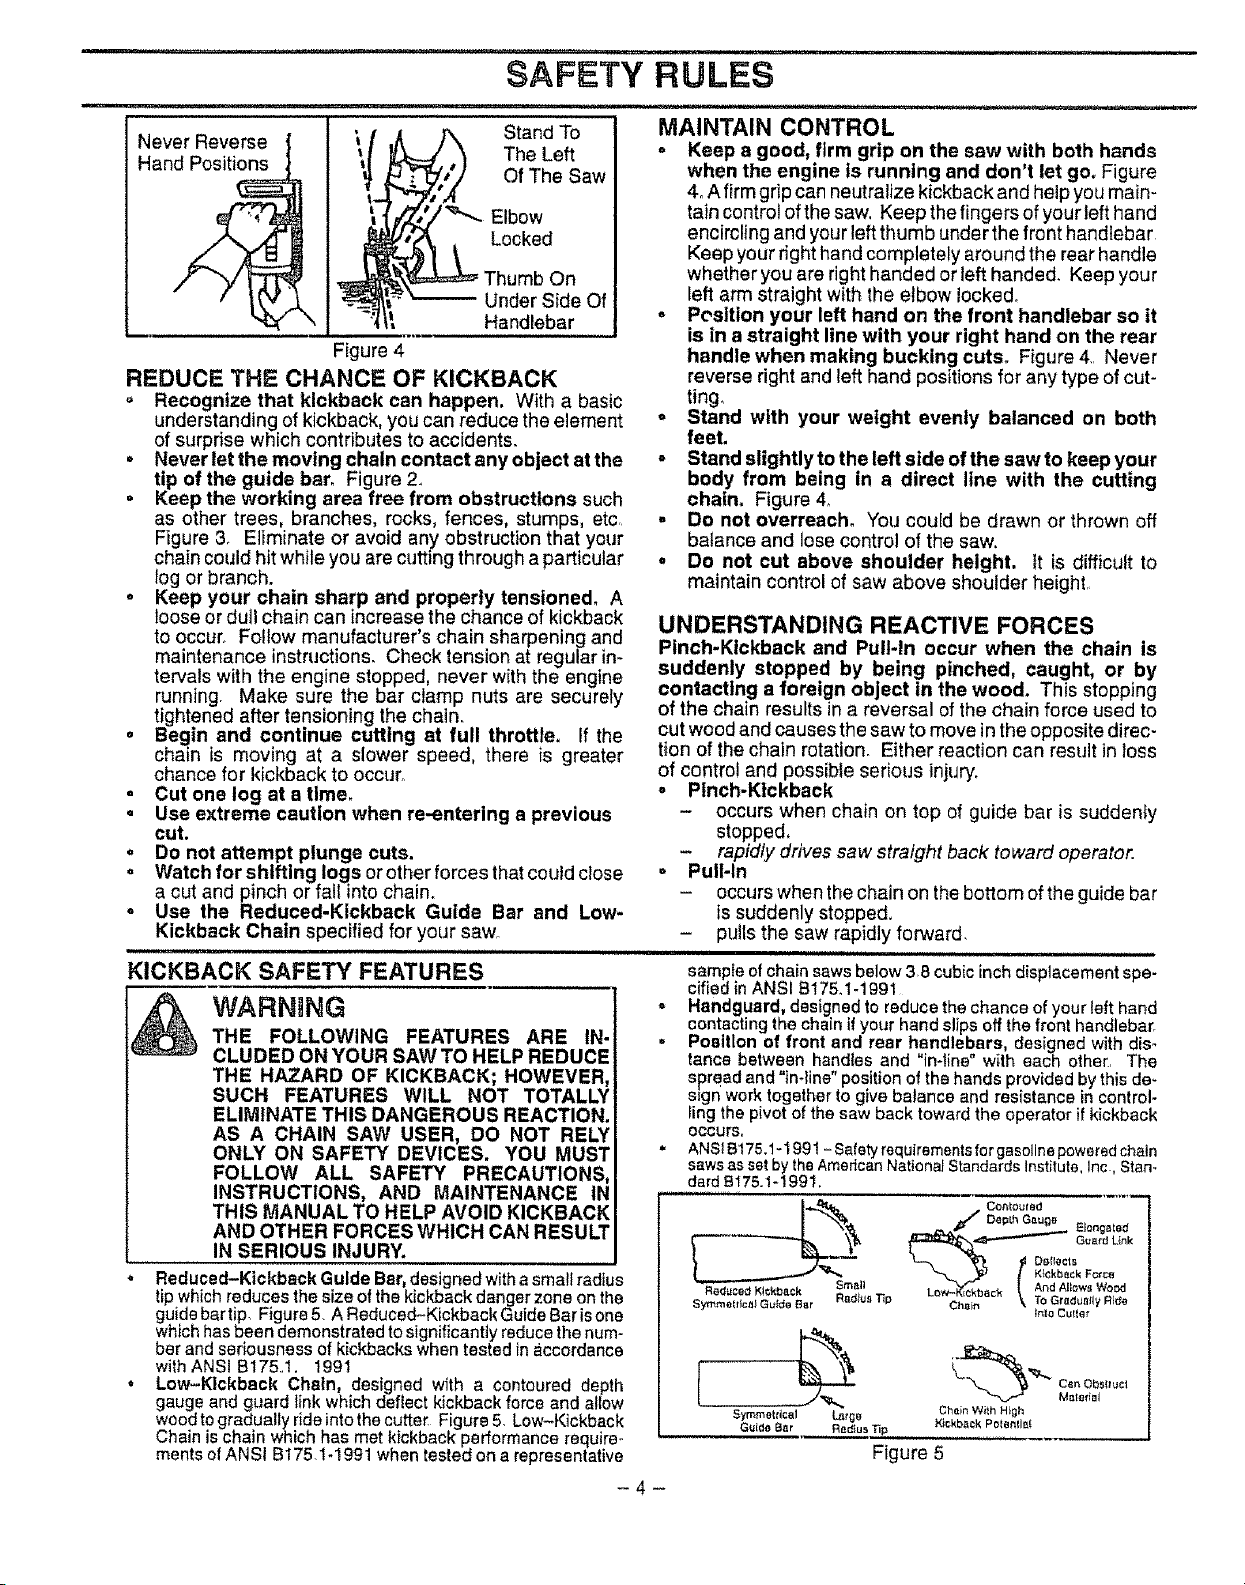
Never Reverse
Hand Positions
t
t
!
Figure 4
REDUCE THE CHANCE OF KICKBACK
. Recognize that kickback can happen, With a basic
understanding of kickback, you can reduce the element
of surprise which contributes to accidents.
* Never let the moving chain contact any object at the
tip of the guide bar. Figure 2.
, Keep the working area free from obstructions such
as other trees, branches, rocks, fences, stumps, etc
Figure 3. Eliminate or avoid any obstruction that your
chain could hit while you are cutting through a particular
fog or branch.
, Keep your chain sharp and properly tensioned. A
tooseor dut! chaincan increase the chance of kickback
to occur. Follow manufacturer's chain sharpening and
maintenance instructions° Check tension at regular in-
tervals with the engine stopped, never with the engine
running. Make sure the bar clamp nuts are securely
tightened after tensioning the chain°
o Begin and continue cutting at full throttle. If the
chain is moving at a slower speed, there is greater
chance for kickback to occur,
, Cut one log at a time.
o Use extreme caution when re-entering a previous
cut.
Do not attempt plunge cuts.
. Watch for shifting logs or other forces that could close
a cut and pinch or fall into chain.
* Use the Reduced-Kickback Guide Bar and Low-
Kickback Chain specified for your saw°
Stand To
The Left
Of The Saw
Elbow
Locked
Thumb On
Under Side Of
Handlebar
MAINTAIN CONTROL
- Keep a good, firm grip on the saw with both hands
when the engine is running and don't let go. Figure
4oA firm grip can neutralize kickback and help youmain-
tain control of the saw. Keep the fingers ofyour left hand
encircling and your left thumb under the front handlebar
Keep your right hand completely around the rear handle
whether you are right handed or left handed, Keep your
left arm straight with the elbow locked°
- Position your left hand on the front handlebar so it
is in a straight line with your right hand on the rear
handle when making bucking cuts° Figure 4 Never
reverse right and left hand positions for any type of cut_
ting.
o Stand with your weight evenly balanced on both
feet.
* Stand slightly to the left side of the saw to keep your
body from being in e direct line with the cutting
chain. Figure 4_
- Do not overreach. You could be drawn or thrown off
balance and lose control of the saw,
, Do not cut above shoulder height. It is difficult to
maintain control of saw above shoulder height,
UNDERSTANDING REACTIVE FORCES
Pinch-Kickback and Pull-In occur when the chain is
suddenly stopped by being pinched, caught, or by
contacting a foreign object in the wood. This stopping
of the chain resultsina reversal of the chain force used to
cut wood and causesthesaw to move in the opposite direc-
tion of the chain rotation, Either reaction can result in Ioss
of control and possible serious injtJry.
o Ptnch-Klckback
- occurs when chain on top of guide bar is suddenly
stopped,
- rapidly drives saw straight back toward operator.
, Pull-In
- occurs whenthe chain on the bottom of the guide bar
issuddenly stopped.
- pulls the saw rapidly forward.
KICKBACK SAFETY FEATURES
& WARNgNGTHE FOLLOWING FEATURES ARE IN-
CLUDED ON YOUR SAW TO HELP REDUCE
THE HAZARD OF KICKBACK; HOWEVER,
SUCH FEATURES WILL NOT TOTALLY
ELIMINATE THIS DANGEROUS REACTION.
AS A CHAIN SAW USER, DO NOT RELY
ONLY ON SAFETY DEVICES. YOU MUST
FOLLOW ALL SAFETY PRECAUTIONS,
INSTRUCTIONS, AND MAINTENANCE IN
THIS MANUAL TO HELP AVOID KICKBACK
AND OTHER FORCES WHICH CAN RESULT
IN SERIOUS INJURY.
Reduced-KickbackGuide Bar,designedwithasmall radius
tipwhich reducesthe size ofthe kickbackdangerzone onthe
guidebartip, Figure5. A Reduced-KickbackGuideBar isone
whichhasbeen demonstratedto significantlyreducethenum-
ber and seriousnessof kickbackswhen testedinaccordance
withANSl B175,1, 1991
• Low-Kickback Chain, designed with a contoured depth
gauge and guard linkwhichdeflect kickbackforceand allow
woodto graduallyrideintothecutter Figure5. Low-Kickback
Chainis chain whichhas metkickback performancerequire-
mentsof ANSI B175.1-!991 when testedon a representative
sample ofchain sawsbelow 3,8cubic inch displacementspe-
cified in ANSI S17&I-1991
,, Handguard, designedto reducethechance ofyourleft hand
contactingthe chain ifyour hand slips offthefronthandlebar,
• Position of front and rear handlebars designed with dis_
tance between handes and "in*line" with each other., The
spreadand "in-line"positionof the handsprov dad bythis de-
sign work togetherto give balanceand resistance incontrol-
lingthepivot of the saw back toward the operatorif kickback
OCCURS,
• ANSI B175.1-1991 - Safety requirements for gasoline powered chain
saws as set by the American National Standards Institute, Inc, Stan-
dard ei75.1-1991.
Cohtogfed
,_* Depth G4_uge _,
._" _ _ongstQe
__ G*Jerd L_tlk
Kl_kb_¢k Fot_
Reduced K_ckbeck Smelt
Symmetrical Guide BBr Red}_J_ _p
Symmetrical t_tr_e
G_Ido Bar Red,us Tip
Ch_irt \ TO Gradually Rllfe
Chrtirl Wi_h H$£h
Kickback P otetllle$
l°°'°°"
ck And Allr_ws Wood
Snto Cu{_er
'_"'_ on Obsltucl
Mste_tal
Figure 5
-4-
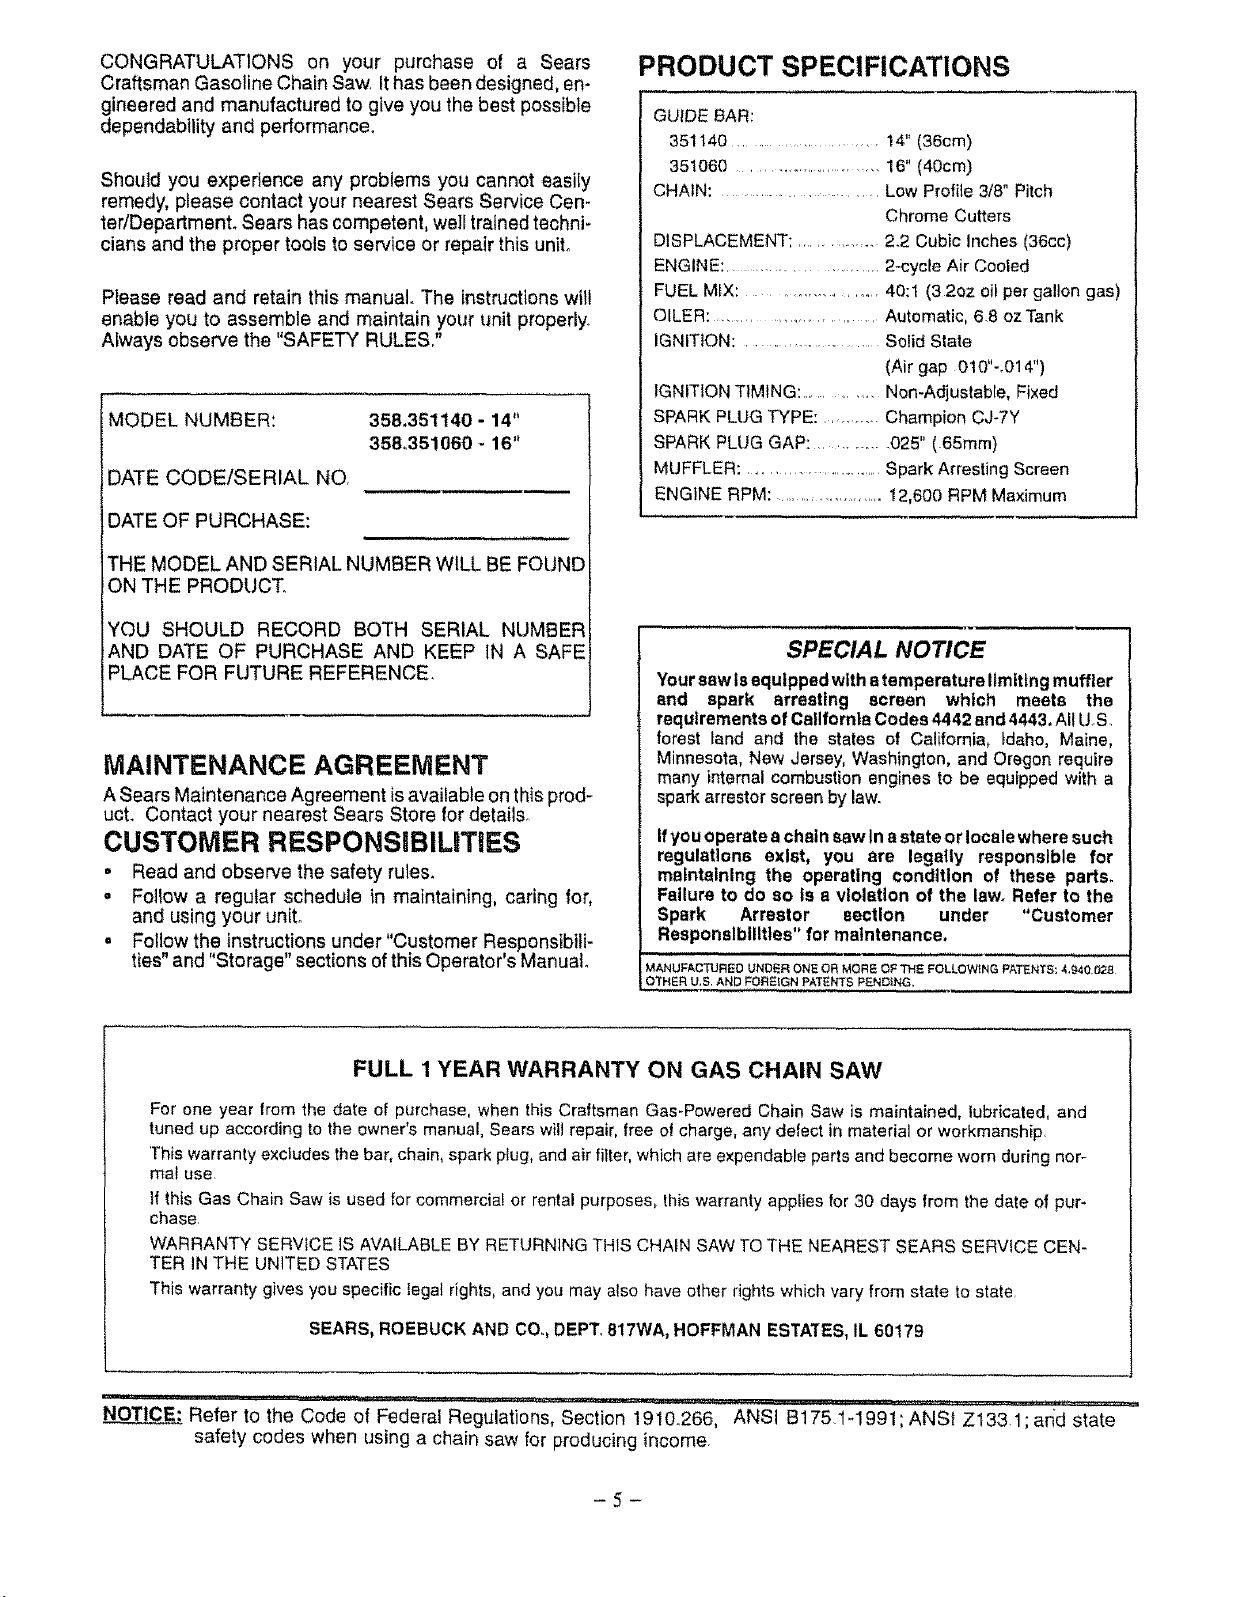
CONGRATULATIONS on your purchase of a Sears
Craftsman Gasoline Chain Saw. It has been designed, en-
gineered and manufactured to give you the best possible
dependability and performance.
Should you experience any problems you cannot easily
remedy, please contact your nearest Sears Service Cen-
ter/Department. Sears has competent, well trained techni-
cians and the proper tools to service or repair this unit°
Please read and retain this manual., The instructions wilt
enable you to assemble and maintain your unit properly.
Always observe the "SAFETY RULES,"
r
i MODEL NUMBER:
35&351140- 14"
358,351060- 16"
DATE CODE/SERIAL NO,
DATE OF PURCHASE:
THE MODEL AND SERIAL NUMBER WILL BE FOUND
ON THE PRODUCT°
YOU SHOULD RECORD BOTH SERIAL NUMBER
AND DATE OF PURCHASE AND KEEP IN A SAFE
PLACE FOR FUTURE REFERENCE.
MAINTENANCE AGREEMENT
A Sears Maintenance Agreement is available on this prod-
ucL Contact your nearest Sears Store for details°
CUSTOMER RESPONSIBILmES
• Read and observe the safety rules,
• Follow a regular schedule in maintaining, caring for,
and using your uniL
= Fellow the instructions under "Customer Responsibili-
ties" and "Storage' sections of this Operator's Manual°
PRODUCT SPECIFICATIONS
GUIDE BAR:
351140 ...................... 14" (36cm)
351060 ........................... 16" (40cm)
CHAIN: ............................... Low Profile 3/8" Pitch
Chrome Cutters
DISPLACEMENT: ................ 2.2 Cubic Inches (36cc)
ENGINE: ......................... 2-cycle Air Cooled
FUEL MiX: ....................... 40:1 (3 2oz oil per gallon gas)
OILER: ................................ Automatic, 6.8 oz Tank
IGNITION: ....................... Solid State
(Air gap 0t0"-.014")
IGNiTiON TIMING: ............. Non-Adjustable, Fixed
SPARK PLUG TYPE: ......... Champion CJ-7Y
SPARK PLUG GAP: ............. 025" (65ram)
MUFFLER: ........................... Spark Arresting Screen
ENGINE RPM: ...................... 12,600 RPM Maximum
SPECIAL NOTICE
Your sew is equlppedwlth a temperature limiting muffler
end spark arresting screen which meets the
requirements of California Codes 4442 and 4443. All US,
forest land and the states of California, Idaho, Maine,
Minnesota, New Jersey, Washington, and Oregon require
many internal combustion engines to be equipped with a
spark arrestor screen by law.
If you operate a chain saw In a state or locale where such
regulations exist, you are legatty responsible for
maintaining the operating condition of these parts.
Failure to do so Is a violation of the law. Refer to the
Spark Arrestor section under "Customer
Responslblllt|es" for maintenance,
MANUFACTURED UNDER ONE OR MORE OF THE FOLLOWING PATENTS: 4,_40,02B
OTHER U.$,AND FOREIGN PATENTS PENDING,
FULL 1 YEAR WARRANTY ON GAS CHAIN SAW
For one year from the date of purchase, when this Craftsman Gas-Powered Chain Saw is maintained, lubricated, and
tuned up according to the owner's manual Sears willrepair, free of charge, any defect in material or workmanship.
']'his warranty excludes the bar, chain, spark plug, and air filter,which are expendable parts and become worn during nor-
mal use.
If this Gas Chain Saw is used for commercial or rental purposes, this warranty applies for 30 days from the date of pur-
chase
WARRANTY SERVICE IS AVAILABLE BY RETURNING THIS CHAIN SAW TO THE NEAREST SEARS SERVICE CEN-
TER iN THE UNITED STATES
This warranty gives you specific tegat rights, and you may also have other rights which vary from state to state,
SEARS, ROEBUCK AND CO., DEPT. 817WA, HOFFMAN ESTATES, tL 60179
NOTICE_ : Refer to the Code of Federal Regulations, Section 1910.266, ANSi B175.i-1991;ANSt Z133.1;an'd state
safety cedes when using a chain saw for producing income.
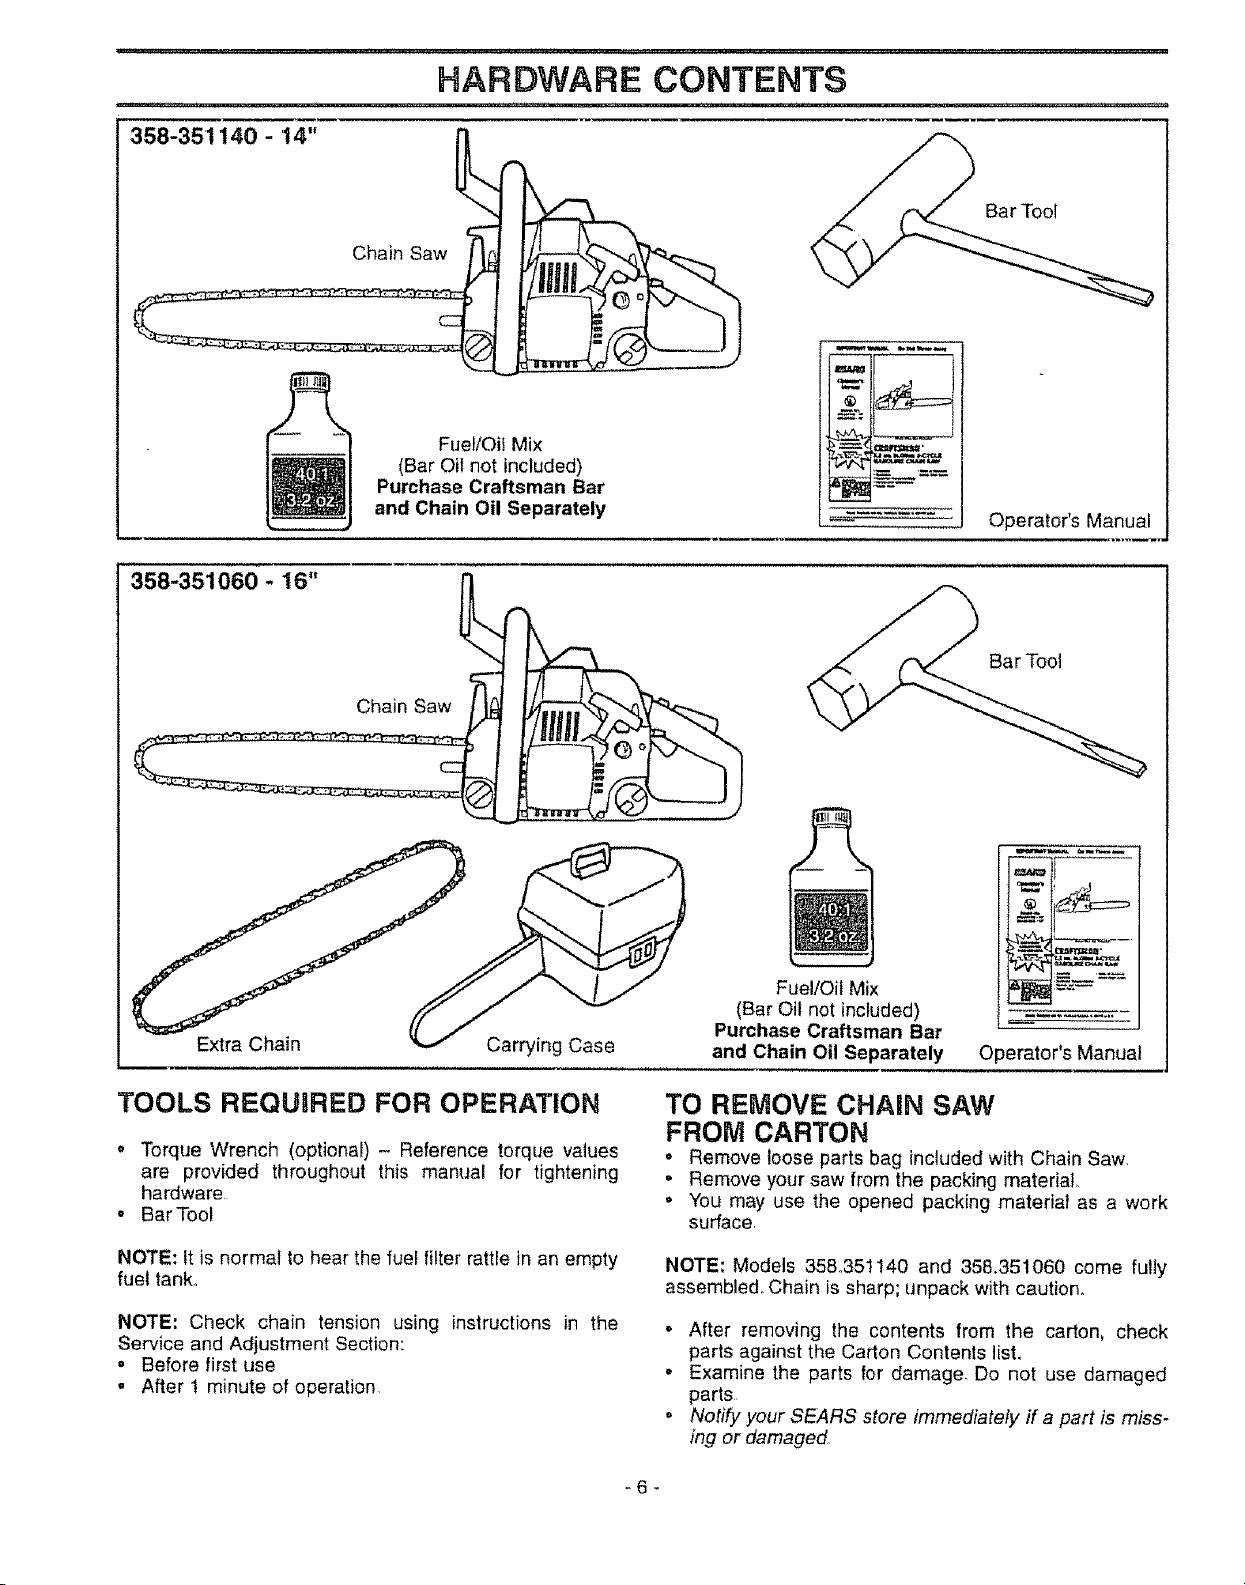
358-351060 - 16"
FueVOi! Mix
(Bar Oil not included)
Purchase Craftsman Bar
and Chain Oil Separately
Chain Saw
Bar Toot
Operator's Manual
Bar Tool
Extra Chain
Carrying Case
TOOLS REQUIRED FOR OPERATION
. Torque Wrench (optional) - Reference torque values
are provided throughout this manual for tightening
hardware
, Bar Too!
NOTE: tt is normal to hear the fuel filter rattle in an empty
fuel tank,,
NOTE: Check chain tension using instructions in the
Service and Adjustment Section:
= Before first use
. After t minute of operation,
Fuel/Oil Mix
(Bar Oil not included)
Purchase Craftsman Bar
and Chain Oil Separately Operator's Manual
TO REMOVE CHAIN SAW
FROM CARTON
• Remove loose parts bag included with Chain Saw,
• Remove your saw from the packing material
• You may use the opened packing material as a work
surface
NOTE: Models 358,351140 and 358.351060 come fully
assembled, Chain is sharp; unpack with caution.
, After removing the contents from the carton, check
parts against the Carton Contents list.
* Examine the parts for damage Do not use damaged
parts,
. Notify your SEARS store immediately ff a part is miss-
ing or damaged
_6_
i , ,i i, , i i i i,uu_,,lUJ i i,t ii1,1 ,11 i .......... :-:: u,,
OPERATION
' EL I,II,lllrll[ I '11 lilt lU,,I II II I II1' II II I'
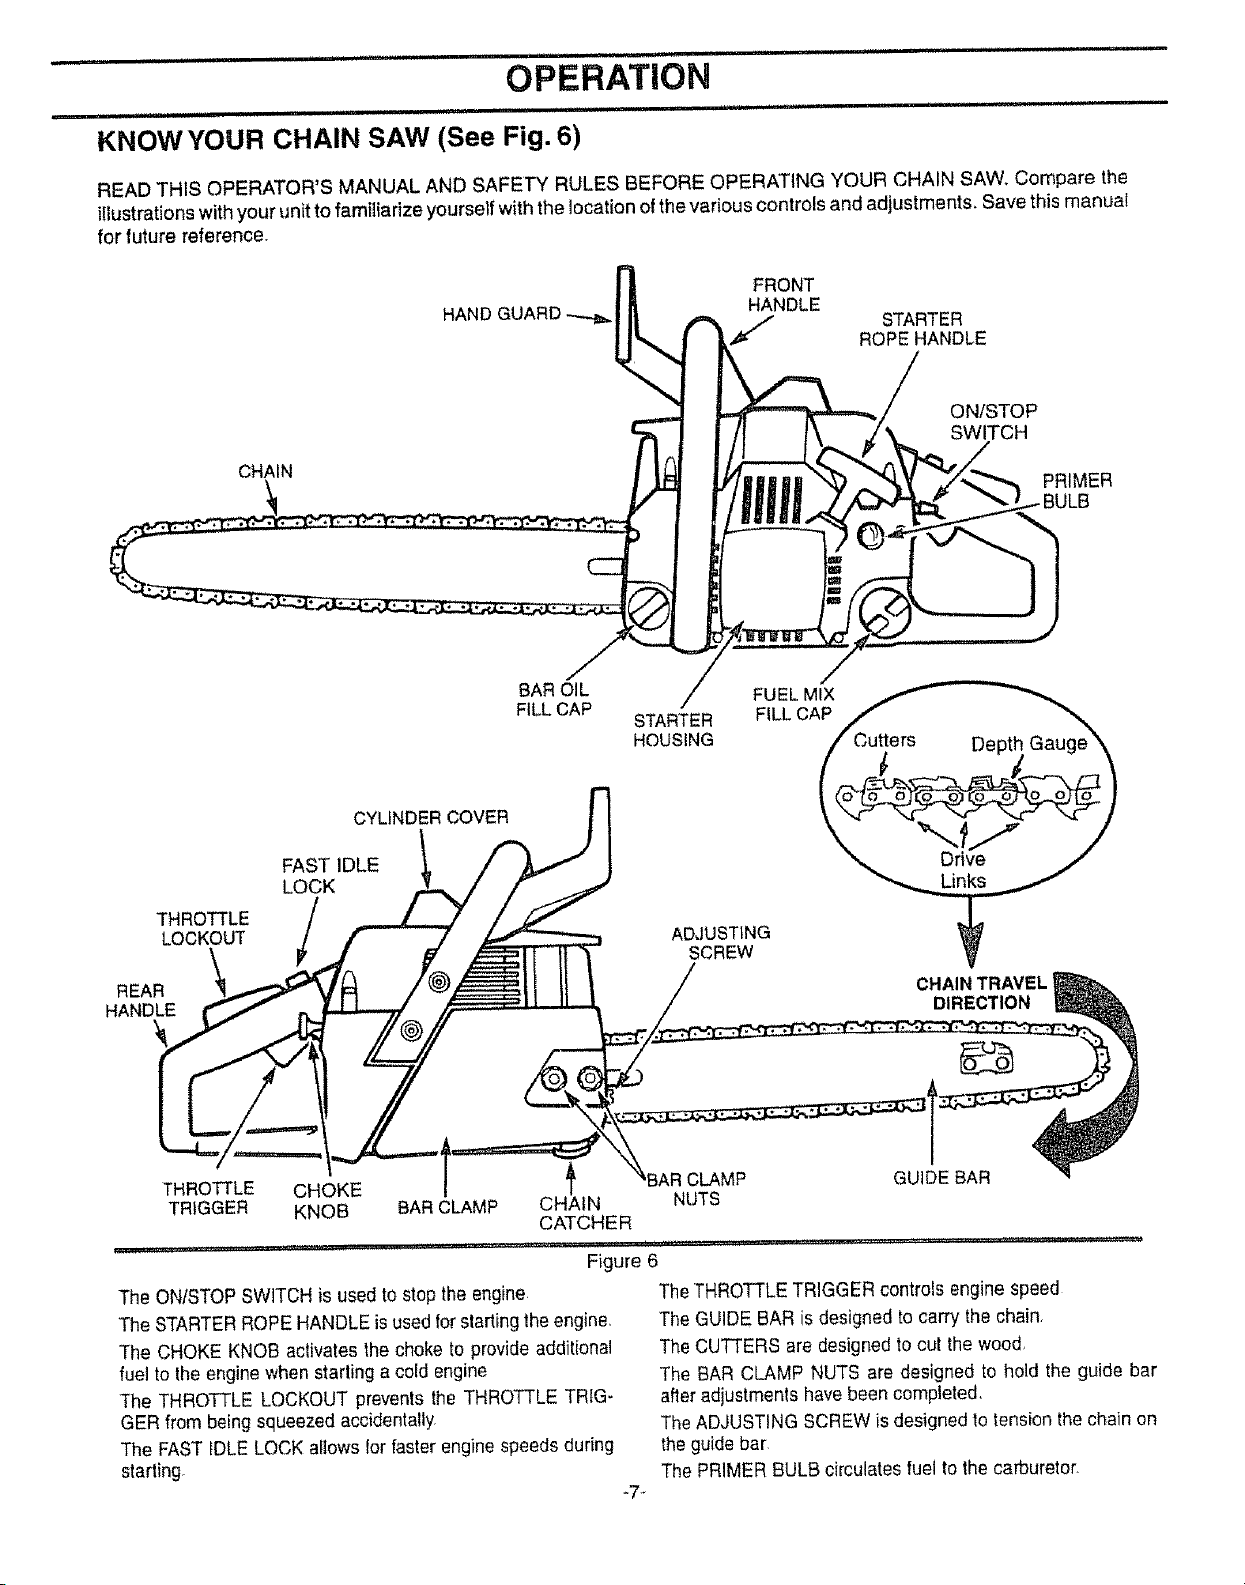
KNOW YOUR CHAIN SAW (See Fig. 6)
READ THIS OPERATOR'S MANUAL AND SAFETY RULES BEFORE OPERATING YOUR CHAIN SAW. Compare the
illustrations with your unit to familiarize yourself with the location of the various controls and adjustments, Save this manual
for future reference.
1 FRONT
HANDGUARD _!_ _' ,H,,ANDLE STARTER
ARoO,L / FUELM,X
LL P STARTER FILL CAP'f
FAST IDLE "_... Drive /
LOCK
THROTTLE
LOCKOUT ADJUSTING
SCREW
REAR CHAINTRAVEL
HANDLE DIRECTION
THROTTLE CHOKE 1' GUIDE BAR
TRIGGER KNOB BARCLAMP CHAIN NUTS
The ON/STOP SWITCH is used to stop the engine,
The STARTERROPEHANDLE isused forstarling theengine,
The CHOKE KNOB activates thechoke to provide additional
fuel to the engine when starling a cold engine
The THROTTLE LOCKOUT prevents the THROTTLE TRIG-
GER from being squeezed accidentally
The FAST _DLELOCK a_lowsfor _aslerenginespeeds during
starting.
CATCHER
Figure 6
TheTHROTTLE TRIGGER controls engine speed
The GUIDE BAR is designed to carry the chain,
TheCUTTERS are designed to cut the wood,
The BAR CLAMP NUTS are designed to hold the guide bar
afteradjuslmenls have been completed,
The ADJUSTING SCREW is designed to tension the chain on
theguide bar,
The PRIMER BULB circulates fuel to the carburetor,
*7"
OPERATION
HOW TO USE YOUR CHAIN SAW
STOPPING YOUR ENGINE
, Move on/stop switch to the "STOP" position,
o If engine does not stop, pull blue choke knob out fully.
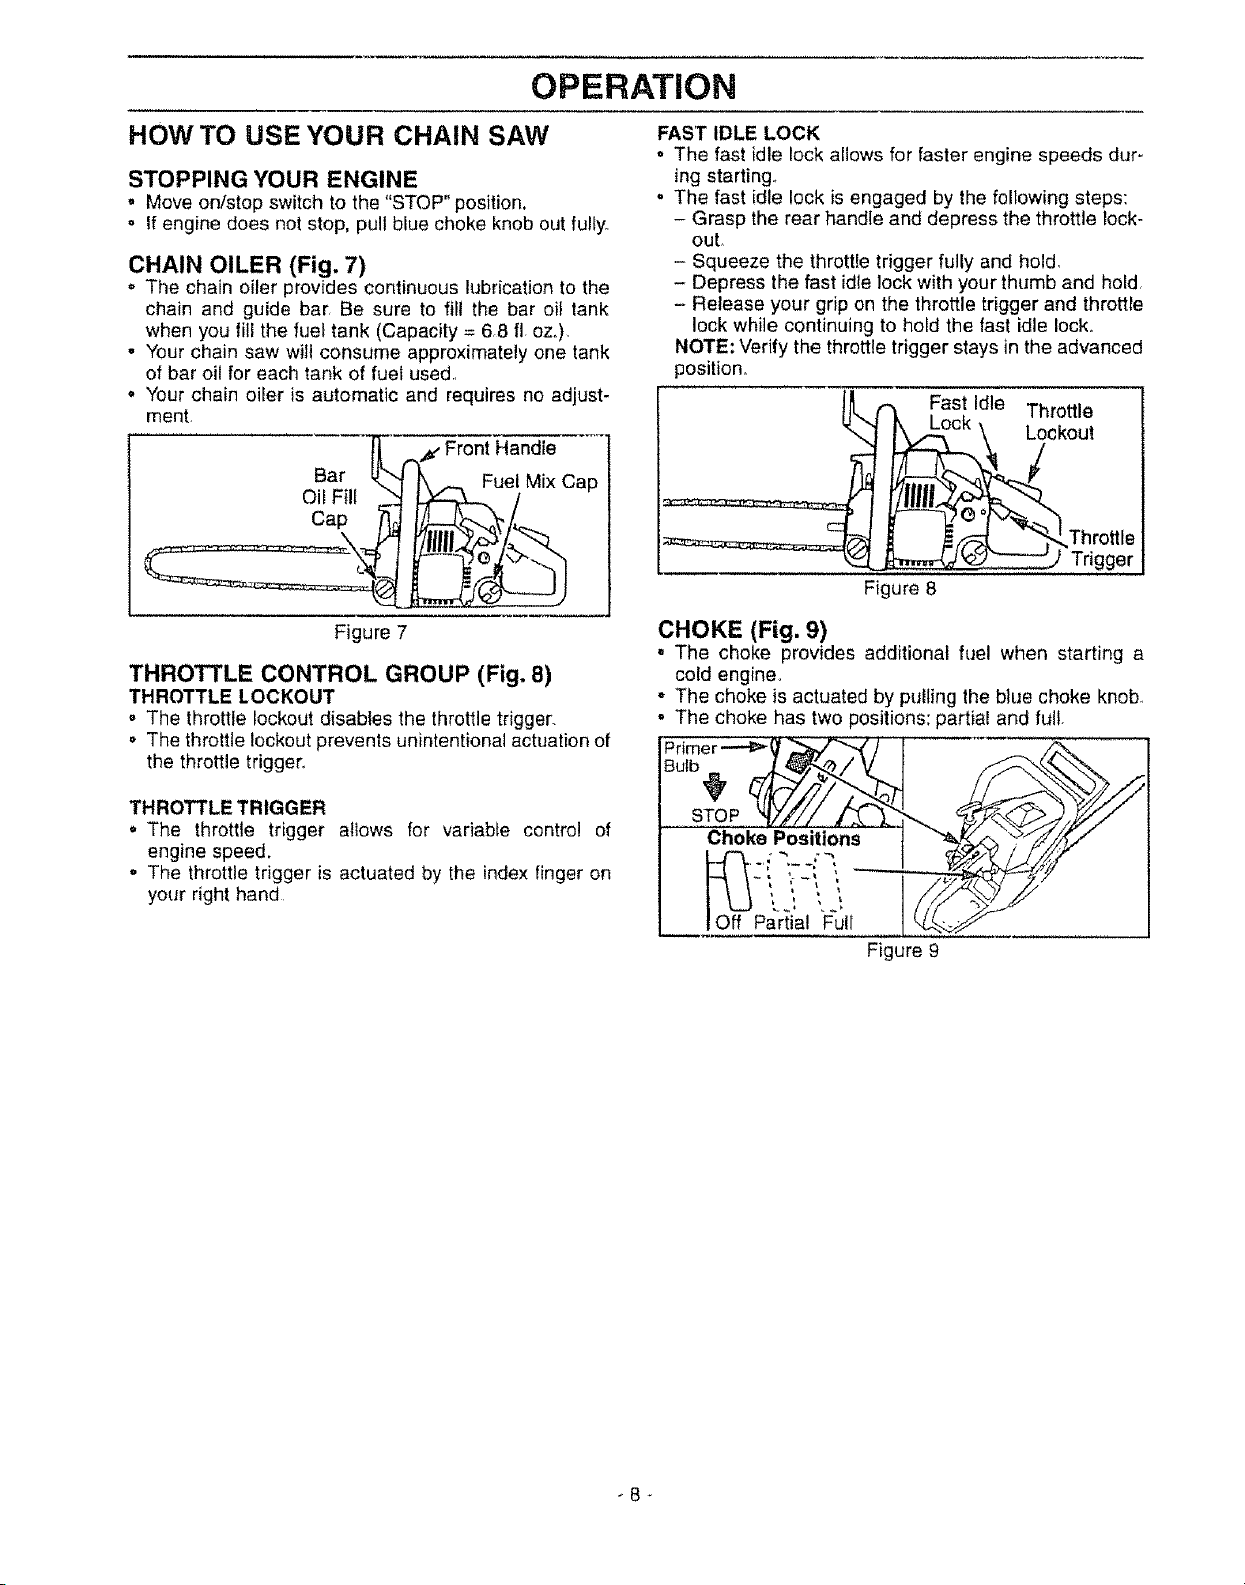
CHAIN OILER (Fig. 7)
= The chain oiler provides continuouslubrication to the
chain and guide bar Be sure to fill the bar oii tank
when you fill the fuel tank (Capacity = 6,8 fl oz°),
- Your chain saw wilt consume approximately one tank
of bar oil for each tank of fuel used,,
° Your chain oiler is automatic and requires no adjust-
mont.
Bar _
Oil Fill
Cap
Figure 7
THROTTLE CONTROL GROUP (Fig. 8)
THROTTLE LOCKOUT
o The throttle lockout disables the throttle trigger.
o The throttle lockout prevents unintentional actuation of
the throttle trigger°
Front Handle
"_.,_., Fuel Mix Cap
FAST IDLE LOCK
= The fast idle lock allows for faster engine speeds dur-
ing starting°
, The fast idle lock is engaged by the following steps:
- Grasp the rear handle and depress the throttle lock-
out,
- Squeeze the throttle trigger fully and hold,
- Depress the fast idle lock with your thumb and hold,
- Release your grip on the throttle trigger and throttle
lock while continuing to hold the fast idle lock,,
NOTE: Verify the throttle trigger stays in the advanced
position,
tJ[. t'_ Fast Idle Throttle
Lookout
..... 'q_ _ Trigge r
Figure 8
CHOKE (Fig. 9)
° The choke provides additional fuel when starting a
cold engine,
o The choke isactuated by pulling the blue choke knob,
, The choke has two positions: partial and full,
Primer_
Bulb
THROTTLE TRIGGER
o The throttle trigger atlows for variable control of
engine speed.
= The throttle trigger is actuated by the index finger on
your right hand
STOP
Choke Positions
t
Off Partial Full
Figure 9
-8 _
OPERATION
BEFORE STARTING ENGINE:
WARNING: 1
&
GUIDE BAR AND CHAIN OIL
For maximum guide bar and chain life, we recommend
you use Craftsman chain saw bar oif, If Craftsman bar oil
is not available, you may use a good grade SAE30 oil
until you are able to obtain Craftsman brand The oil out-
put is automatically metered during operation.Your saw
will use approximately one tank of bar oil for every tank
of fuel mix_ Always fill the bar oil tank when you fill
the fuel tank.
BE SURE TO READ THE FUEL HANDLING|
INFORMATION IN THE SAFETY RULES|
SECTION ON PAGE 2 OF THIS MANUAL|
BEFORE YOU BEGIN.
IF YOU DO NOT UNDERSTAND THE FUEL
HANDLING SECTION DO NOT ATTEMPT
TO FUEL YOUR UNIT; SEEK HELP FROM
SOMEONE THAT DOES UNDERSTAND THE
FUEL HANDLING SECTION OR CALL THE
CUSTOMER ASSISTANCE HOTLINE AT
1-800-235-5878_
FUEL STABILIZER
Fuel stabilizer isan acceptable alternative in minimizing the
formation offuel gum deposits during storage. Add stabilizer
to gasoline in fuel tank or storage container. Always follow
the fuel mix ratio found on the stabilizer container Run
engine at least 5 minutes after adding stabilizer to allow the
stabilizer to reach the carburetor, You do not have to drain
the fuel tank for storage if you are using fuel stabilizer.
CRAFTSMAN 40:1 2-cycte engine oil (AIR*COOLED) is
specially blended with fuel stabilizers. If you do not use this
Sears oil, you can add a fuel stabilizer (such as Craftsman
No. 33500) to your fuel tank.
2-CYCLE OIL:
CRAFTSrv_AN 40:1 2-cycte engine oil (AIR_COOLED) is
specialty blended with fuel stabilizers if you do not use
this Sears oil, you can add a fuel stabilizer (such as
Craftsman No. 33500) to your fue! mix See "Gasoline
and oil mixture" instructions below..
if CRAFTSMAN 40:1 2-cycle engine oil (AIR-COOLED)
is not available, use a good quality 40:1 2-cycle engine oil
(AIR-COOLED) that has a recommended fuet mix ratio
40:1.
IMPORTANTt Do not use:
o AUTOMOTIVE OIL
• BOAT OILS (NMMA, BIA. etc.)
These oils do not have proper additives for 2-cycle (AIR-
COOLED) engines and can cause engine damage.
GASOLINE
The two-cycle engine on this product requires afuel mixture
of regular unleaded gasoline and a high quality 40:t 2-cycle
engine oil (AIR-COOLED) for lubrication of the bearings and
other moving parts. The correct fue!!oil mixture is40:1 (see
Fuel Mixture Chart)° Too little oil or the incorrectoil type will
cause poor performance and may cause the engine to over-
heat and seize.
Gasoline and oil must be premixed in a clean approved fuel
container Always use fresh regular unleaded gasoline.
This engine is certified to operate on unleaded gasoline,
IMPORTANT: Experience indicates that alcohol
blended fuels called gasohot (or using ethanol or metha-
nol) can attract moisture, which leads to oil/gas separa-
tion and formation of acids during storage. Acidic gas
can damage the fuel system of an engine while in stor_
age. To avoid engine problems, the fuel system should
be emptied before storage for 30 days or longer. Drain
the gas tank, then run the fuel out of the carburetor and
fuel lines by starting the engine and letting it run until it
stops. Use fresh fuel next season See STORAGE
instructions for additional information. Never use engine
or carburetor cleaner products in the fuel tank or perma-
nent damage may occur1
GASOLINE AND OIL MIXTURE
MIX GASOLINE AND OIL AS FOLLOWS:
° Consult chart for correct quantities.
o Do not mix gasoline and oil directly in the fuel tank.
FOR ONE GALLON:
. Pour 3.2 ounces of high quality, 2-cycle engine oil
(AIR-COOLED) into an empty, approved one gallon
gasoline container°
= Add one gallon of regular unleaded gasoline to the
gallon container, then securely replace the cap.
Shake the container momentarily.
° The mixture isnow ready for use. Fuel stabilizer can
be added at this time if desired; follow mixing instruc-
tions on the label
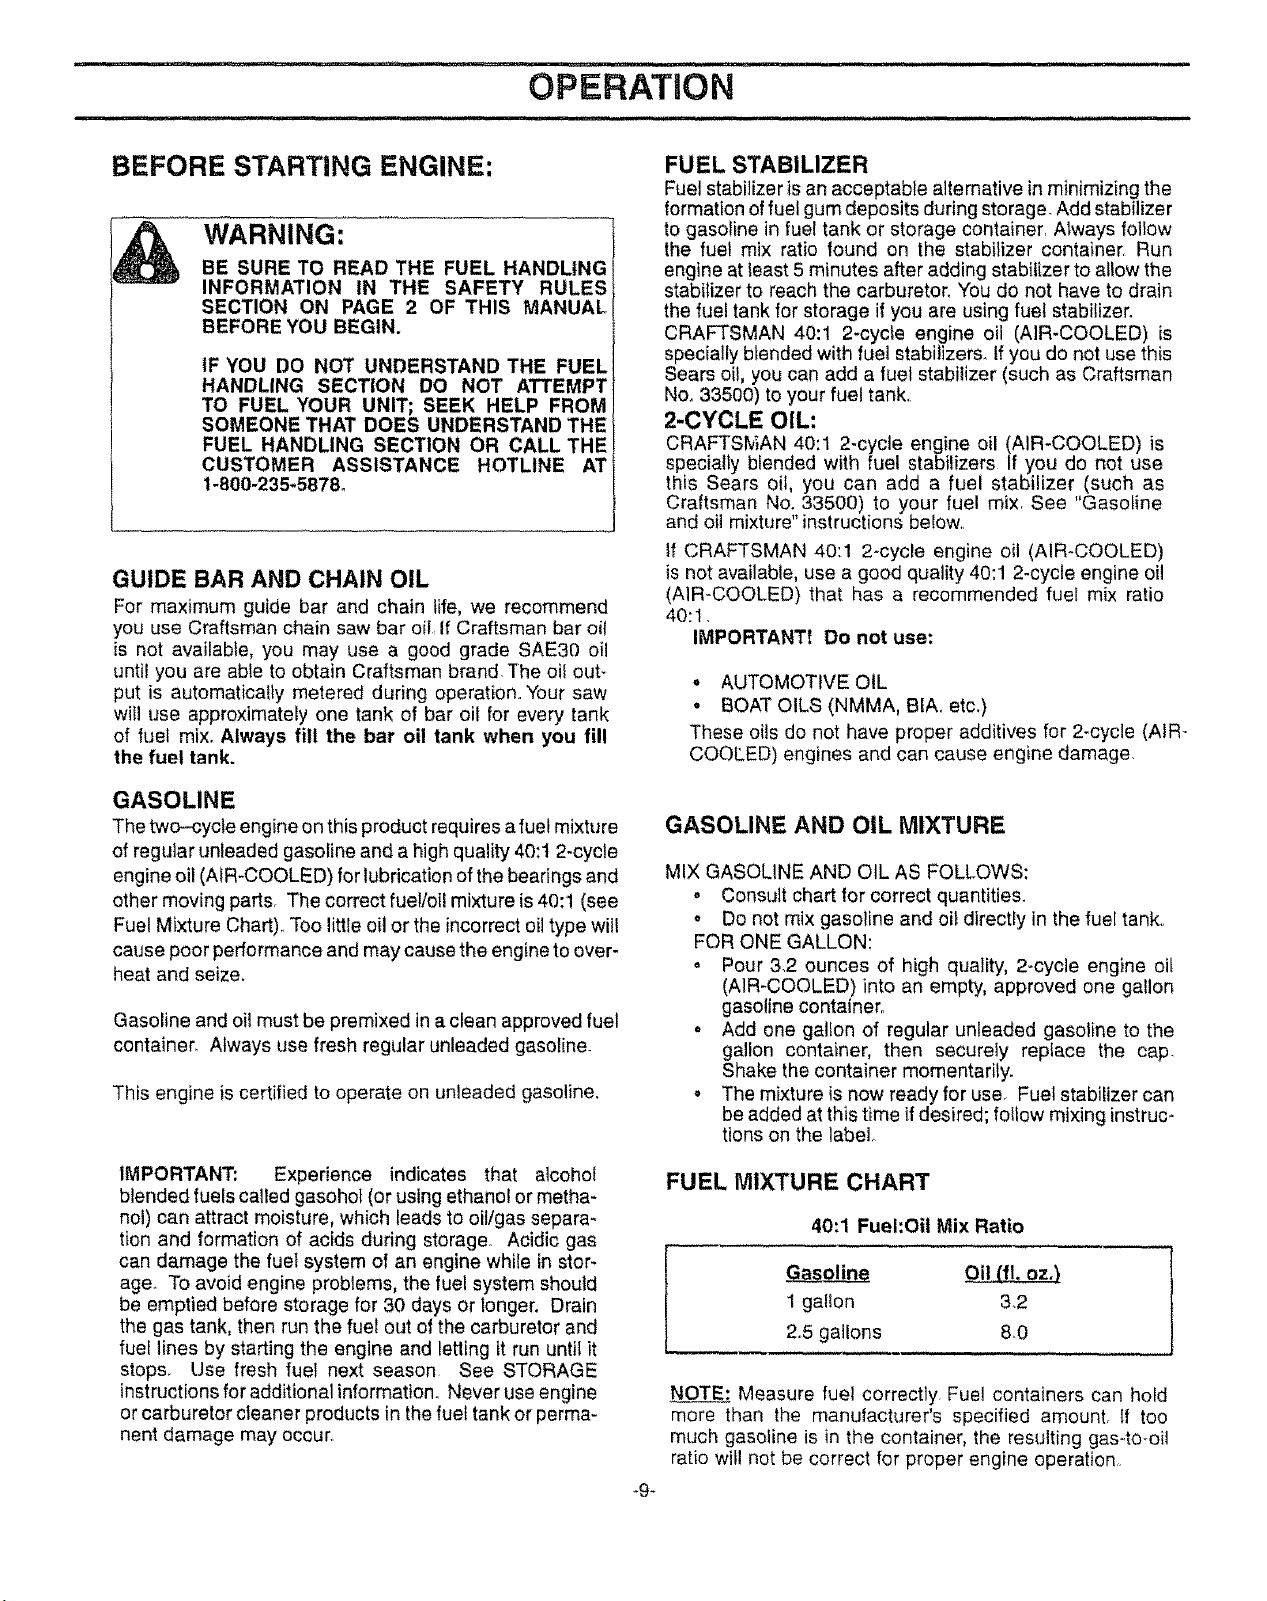
FUEL MIXTURE CHART
40:1 Fuel:Oil Mix Ratio
1 gal!on 3.2
2°5 gallons 80
NOTE; Measure fuel correctly Fuel containers can hold
more than the manufacturer's specified amount, tf too
much gasoline is in the container, the resulting gas-to-oil
ratio will not be correct for proper engine operation
_9-
OPERATION
STOPPING YOUR ENGINE
- Move on/stop switch to the "STOP" position.
* if engine does not stop, pull blue choke knob out fully
WARNING:
ALWAYSWEAR GLOVES; SAFETY FOOT-
WEAR, SNUG-FITTING CLOTHING; AND
EYE, HEARING, AND HEAD PROTECTION
DEVICES WHEN OPERATING A CHAIN
SAWo
THE CHAIN MUST NOT MOVE WHEN THE
ENGINE RUNS AT IDLE SPEED. REFER
TOTHE "CARBURETOR ADJUSTMENTS"
SECTION FOR CORRECTION.
NOTE: Check chain tension using instructions in the
Service and Adjustment Section:
, Before first use.
o After 1 minute of operation_
BASIC STARTING PROCEDURE
(Fig.10 & 11)
COLD ENGINE/WARM ENGINE AFTER
RUNNING OUT OF FUEL
', Fuel engine with 40:1 fuei mix.
, Fill bar oil tank with bar oil.Your saw will use approxi-
mately one tank of bar oil for each tank of fue! mix
o Prime engine by pressing primer bulb six times.
= Turn on ignitionby moving on/stop switch to the "ON"
position.
° Actuate choke by pulling blue choke knob fully out.
Then set the saw on the ground Grip the front handle
with your left hand and place your right foot through
the opening in the rear handle.
o Set fast idle by depressing the throttle lock with your
right hand. Then squeeze throttle trigger and hold
With your thumb, press the fast idle lock down and
hold. Next, release the throttle trigger.
o IF THROTTLE TRIGGER IS SQUEEZED ACCIDEN-
TALLY DURING STARTING IT WILL BE NECES-
SARY TO RESET THE FAST IDLE LOCK.
NOTE: When pulling the starter rope, do not use the full
extent of the rope as this can cause the rope to break
Do not let the starter snap back hold the handle and let
the rope rewind slowly.
° Pull starter rope handle with your right hand until the
engine attempts to start Then push the blue choke
knob in to the partial position. Resume pulling handle
until engine starts.
° Above 40 degrees, allow engine to run for approxi-
mately 5 seconds, push the choke knob in to the OFF
position, then squeeze and release throttle trigger to
allow engine to idle.
° Below 40 degrees, allow engine to warm up 30 sec-
onds - 1 minute with choke at partial position, Push
choke knob in to the OFF position, then squeeze and
release throttle trigger to allow engine to idle.
• To stop engine, move onfstop switch to the "STOP"
position
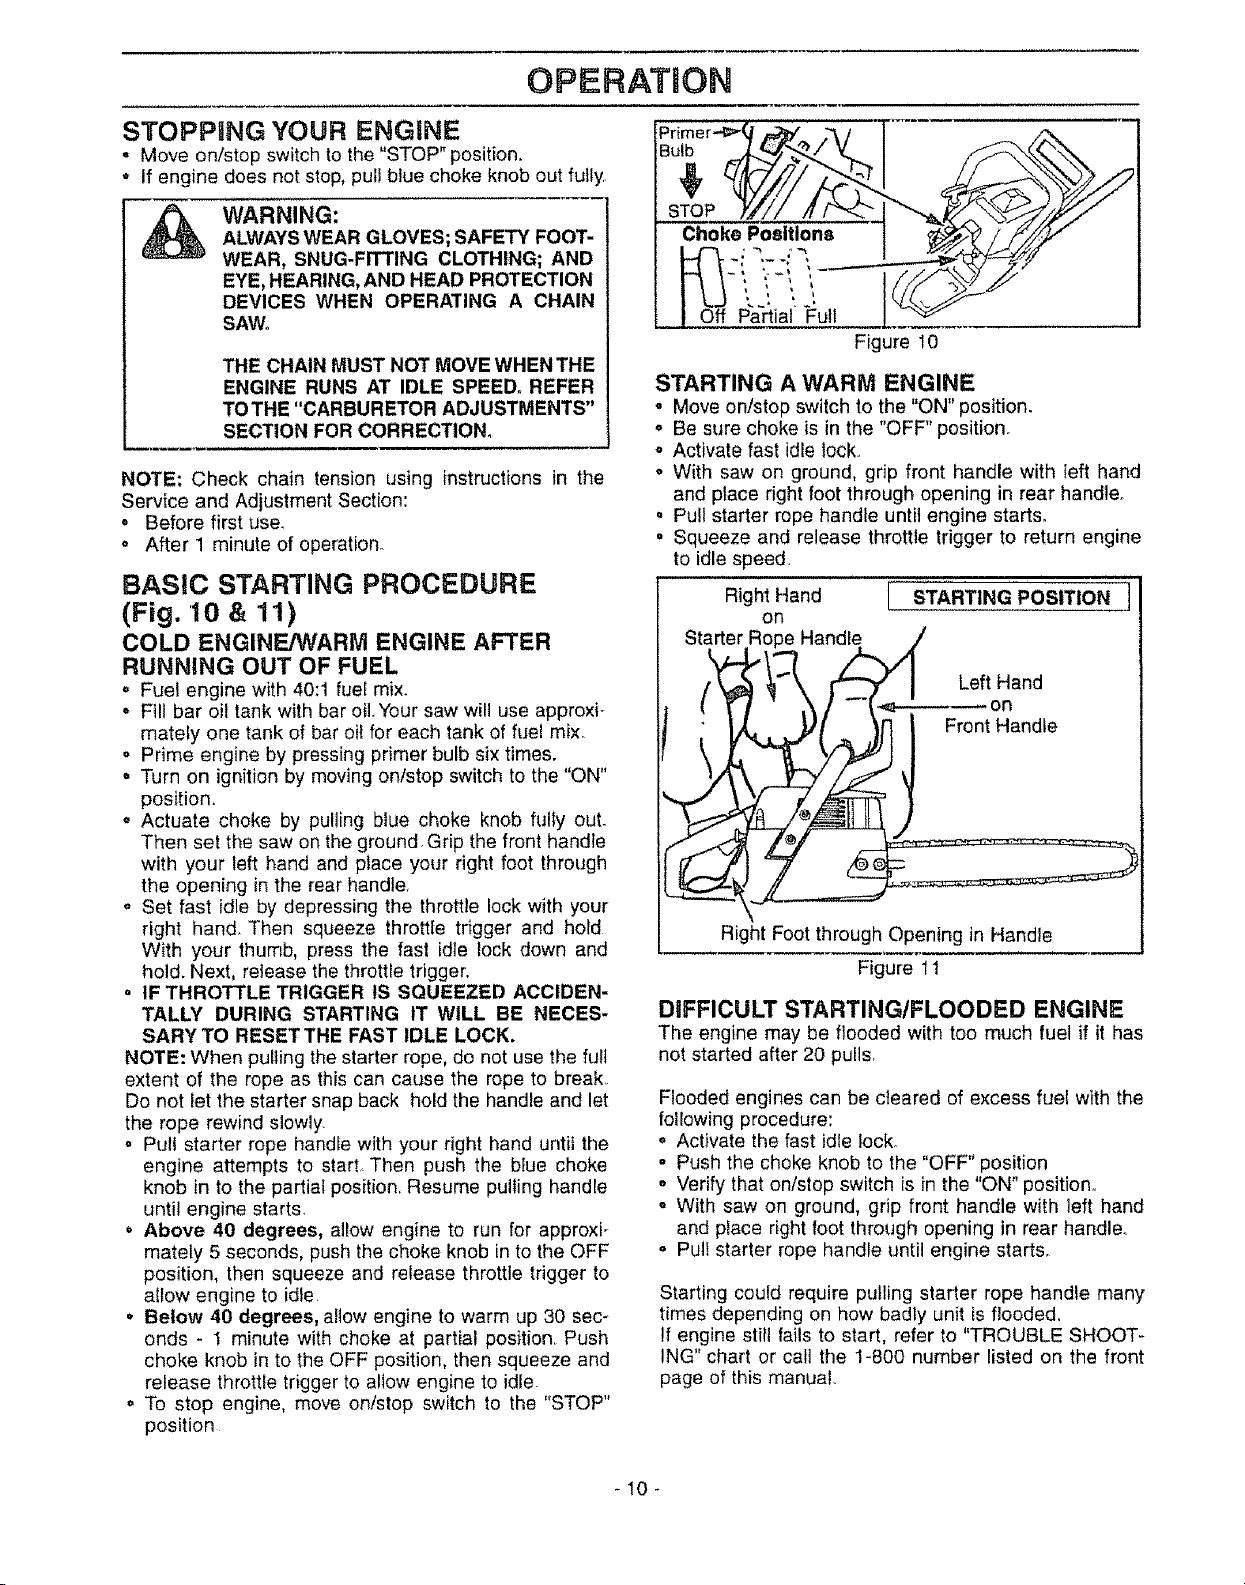
STOP
Choke .....
Positions
Y,,f/ / .,1/"'<_-___"_',.,_
Pa_ial Cull
Fi ure 10
STARTING A WARM ENGINE
, Move on/stop switch to the "ON" position.
o Be sure choke is in the "OFF" position.
° Activate fast idle lock=.
o With saw on ground, grip front handle with Ieft hand
and place right foot through opening in rear handle.
o Pull starter rope handle until engine starts.
. Squeeze and release throttle trigger to return engine
to idle speed
Right Hand
on
Starter Rope Handle
t
Right Foot through Opening in Handle
STARTING POSITION I
Left Hand
on
Front Handle
Figure 11
DIFFICULT STARTING/FLOODED ENGINE
The engine may be flooded with too much fuel if it has
not started after 20 pulls,
Flooded engines can be cleared of excess fuel with the
following procedure:
o Activate the fast idle lock.
o Push the choke knob to the "OFF" position
,, Verify that ontstop switch is in the "ON" position..
o With saw on ground, grip front handle with left hand
and place right foot through opening in rear handle°
,, Pull starter rope handle until engine starts.
Starting could require pulling starter rope handle many
times depending on how badly unit is flooded,
If engine stilt fails to start, refer to "TROUBLE SHOOT-
ING" chart or call the 1-800 number listed on the front
page of this manual
-10-
 Loading...