

Craftsman 316350840 User Manual

Operator’s Manual
55cc 2-Cycle
GASOLINE CHAIN SAW
Model No. 316.350840
with
CAUTION: Before using this
product, read this manual and
follow all safety rules and operating instructions.
Sears, Roebuck and Co., Hoffman Estates, IL 60179, U.S.A.
Visit our website: www.sears.com/craftsman
• SAFETY
• ASSEMBLY
• OPERATION
• MAINTENANCE
• PARTS LIST
9096-31B202 date(12/04)
TABLE OF CONTENTS
Warranty Page 2
Safety Rules Pages 3 - 8
Oil and Fuel Information Page 9
Starting/Stopping Instructions Pages 10-12
Maintenance and Repair Pages 15 - 21
Troubleshooting Page 22
Specifications Page 23
Repair Parts Pages 24
Operation Pages 13 - 14
WARRANTY STATEMENT
ONE YEAR LIMITED WARRANTY ON CRAFTSMAN GAS CHAIN SAW
For one year from the date of purchase, when this Chain Saw is used and maintained according to the
operator’s manual, Sears will repair any defect in material or workmanship free of charge.
This warranty excludes the bar, chain, spark plug and air filter, which are expendable parts that can
wear out from normal use in less than two years.
If this Chain Saw is used for commercial or rental purposes, this warranty applies for only 30 days
from the date of purchase.
WARRANTY SERVICE IS AVAILABLE BY RETURNING THIS CHAIN SAW TO THE NEAREST
SEARS STORE OR SEARS PARTS & SERVICE CENTER IN THE UNITED STATES.
This warranty gives you specific legal rights, and you may also have other rights which vary from state
to state.
Sears, Roebuck and Co., Dept. 817WA, Hoffman Estates, IL 60179
CALIFORNIA PROPOSITION 65 WARNING
WARNING
THE ENGINE EXHAUST FROM THIS
PRODUCT CONTAINS CHEMICALS
KNOWN TO THE STATE OF CALIFORNIA
TO CAUSE CANCER, BIRTH DEFECTS
OR OTHER REPRODUCTIVE HARM.
SPARK ARRESTOR NOTE
NOTE: For users on U.S. Forest Land and in the
states of California, Maine, Oregon and Washington.
All U.S. Forest Land and the state of California (Public
Resources Codes 4442 and 4443), Oregon and
Washington require, by law that certain internal combustion engines operated on forest brush and/or grass-covered areas be equipped with a spark arrestor, maintained in effective working order, or the engine be constructed, equipped and maintained for the prevention of
fire. Check with your state or local authorities for regulations pertaining to these requirements. Failure to follow
these requirements could subject you to liability or a
fine. This unit is factory equipped with a spark
arrestor. If it requires replacement, ask a Sears or other
qualified service dealer to install the Spark Arrestor Kit.
2
RULES FOR SAFE OPERATION
The purpose of safety symbols is to attract your attention to possible dangers. The safety symbols, and their
explanations, deserve your careful attention and understanding. The safety warnings do not by themselves
eliminate any danger. The instructions or warnings they
give are not substitutes for proper accident prevention
measures.
SYMBOL MEANING
SAFETY ALERT:
warning or caution. Attention is required in
order to avoid serious personal injury. May
be used in conjunction with other symbols
or pictographs.
NOTE: Advises you of information or instructions vital to
the operation or maintenance of the equipment.
Read the Operator’s Manual(s) and follow all warnings
and safety instructions.
Failure to do so can result in serious injury to the operator and/or bystanders.
Indicates
danger,
• IMPORTANT SAFETY INSTRUCTIONS •
SYMBOL MEANING
DANGER:
serious injury to yourself or to others. Always
follow the safety precautions to reduce the
risk of fire, electric shock and personal injury.
WARNING:
result in injury to yourself and others. Always
follow the safety precautions to reduce the
risk of fire, electric shock and personal
injury.
CAUTION:
in property damage or personal injury to
yourself or to others. Always follow the safety precautions to reduce the risk of fire, electric shock and personal injury.
Failure to obey a safety
warning will result in
Failure to obey a
safety warning can
Failure to obey a safety warning may result
READ ALL INSTRUCTIONS
PLAN AHEAD
WARNING:
quick, easy to handle and efficient tool; if
used improperly or without the due precautions it could become a dangerous tool. For
pleasant and safe work,always strictly comply with the safety rules that are contained in
this manual.
• Read the instructions carefully. Be familiar with the controls and proper use of the unit.
• Do not operate this unit when tired, ill or under the influence of alcohol, drugs or medication.
• Children must not operate the unit. Teens must be
accompanied and guided by an adult.
• Only responsible individuals who are familiar with the
instructions may operate the chain saw (no one under
the age of 16). Provide parental supervision at all times.
• Secure hair above shoulder length. Do not wear loose
clothing or jewelry; they can get caught in moving parts.
• Inspect the unit before use. Replace all damaged parts
prior to starting. Make sure the unit is in original operating condition before starting.
• Know the controls and know how to stop the chain saw
quickly.
If correctly used, the
chain saw is a
• Carry the chain saw with the engine stopped, the guide
bar and saw chain to the rear, and the muffler away
from your body.
• When transporting your chain saw, use the appropriate
guide-bar scabbard (sheath).
• Wear protective gear. Always use steel-toed safety
footwear with non-slip soles; snug-fitting clothing;
heavy-duty non-slip gloves; eye protection such as
non-fogging, vented goggles or face screen; an
approved safety hard hat; and hearing protection.
Regular users should have hearing checked regularly as
chain saw noise can damage hearing.
OPERATE YOUR SAW SAFELY
• Do not operate a chain saw that is damaged, not calibrated properly or not fully assembled. Always replace
chain, bar, chain brake, and other parts immediately if
damage occurs.
• Do not apply excess force to the chain saw at the end
of the cut. You may lose control of the unit when the cut
has been completed.
• Keep all parts of your body away from the chain when
the engine is running.
• Never start or run the unit inside a closed room or
building. Operate this unit only in a well ventilated outdoor area.
• Use the unit only in daylight or good artificial light.
3
RULES FOR SAFE OPERATION
• Avoid accidental starting. Be in the starting position
whenever pulling the starter rope. The operator and unit
must be in a stable position while starting. See
Starting/Stopping Instructions.
• Before you start the engine, make sure the area around
the saw is clear. Never try to start the saw when the
guide bar is engaged in a cut.
• Do not start cutting until you have a clear work area,
secure footing, and a planned retreat path from the
falling tree.
• Do not operate a chain saw that is damaged, improperly
adjusted, or not completely and securely assembled. Be
sure that the saw’s chain stops moving when the throttle
control trigger is released.
• Shut off the engine before setting the chain saw down.
• Use extreme caution when cutting small-sized brush
and saplings because slender material may catch the
chain saw and whip towards you or cause you to lose
control.
• When cutting a limb that is under tension, be alert for
springback so that you will not be struck when the tension in the wood fibers is released.
• Do not cut through nails, rods in the tree, railroad ties or
pallets. Inspect a tree that you are going to cut for foreign objects that could cause injury or damage to your
chain saw.
• After striking a foreign object, stop the engine and thoroughly inspect for damage. Repair as necessary.
• Keep the handles dry, clean and free of the oil/fuel mixture.
• We do not recommend using the chain saw in a tree or
on a ladder.
MAINTAIN YOUR SAW IN GOOD WORKING ORDER
• All chain saw service, other than the items listed in this
instruction manual maintenance instructions, should be
performed by a Sears or other qualified service dealer.
• Make sure all fasteners are in place and secure.
• Unauthorized replacement parts or the removal of safety
devices may cause damage to the unit and possible
injury to the operator or bystanders. Use only Craftsman
accessories and replacement parts as recommended.
Never modify your saw.
• When not in use, saw should be stored in a dry, highly
secure location away from children.
• When storing saw use a scabbard or carrying case.
HANDLE FUEL WITH CAUTION
• Do not smoke while handling fuel or while operating the
saw.
• Always eliminate all sources of sparks or flame in areas
where fuel is mixed or poured.
• Always mix and pour fuel in an outdoor area and use an
approved, marked container for all fuels. Always wipe
up all fuel spills before starting saw.
• When a chain saw is being used, a fire extinguisher
should be available.
• Always move at least 10 feet (3 meters) from fueling site
before starting saw.
• When re-fueling, turn the engine off and allow the saw to
cool in a non-combustible area, do not place on dry
leaves, straw, paper, etc. Slowly remove fuel cap and
refuel unit.
• Always store the unit and fuel in a cool, dry, well-ventilated space where fuel vapors cannot reach sparks or
open flames from water heaters, electric motors or
switches, furnaces, etc.
• All chain saw service, other that the items listed in this
instruction manual maintenance instructions, should be
performed by a Sears or other qualified service dealer.
• Use the right tool. Only use this chain saw for its intended purpose, to cut wood.
• Never touch the chain or attempt to service the saw
while the engine is running. Make sure all moving parts
have stopped. Allow the chain saw to cool, as the chain
can be hot.
• Check the bar and chain at frequent intervals for proper
adjustment. Make sure the bar and chain are properly
tightened and sharpened. Visually inspect for damage.
Repair any damage before restarting or operating the
chain saw.
WARNING:
KICKBACK may
occur when the
nose or tip of the guide bar touches an
object, or when the wood closes in and
pinches the saw chain in the cut. Tip contact in some cases may cause a lightningfast reverse reaction, kicking the guide bar
up and back towards the operator. Pinching
the saw chain along the top of the guide bar
may push the guide bar rapidly back toward
the operator. Either of these reactions may
cause you to lose control of the saw, which
could result in serious personal injury. Do
not rely exclusively upon the safety devices
built into your saw. As a chain saw user,
you should take several steps to keep your
cutting jobs free from accident or injury.
KICKBACK SAFETY PRECAUTIONS
• With a basic understanding of kickback, you can reduce
or eliminate the element of surprise. Sudden surprise
contributes to accidents. Be alert to the potential for
kickback at all times.
• Keep a good firm grip on the saw with both hands, the
right hand on the rear handle and the left hand on the
front handle, when the engine is running. Use a firm grip
with thumbs and fingers encircling the chain saw handles.
A firm grip will help you reduce kickback and maintain
control of the saw. Don’t let go.
4
RULES FOR SAFE OPERATION
• Make sure that the area in which you are cutting is free
from obstructions. Do not let the nose of the guide bar
contact a log, branch, fence, or any other obstruction
that could be hit while you are operating the saw.
• Always cut with the engine running at full speed. Fully
squeeze the throttle trigger and maintain a steady cutting speed.
• Use only the correct original equipment manufacturer
replacement bars, chains and other parts and accessories. These are available from a Sears or other qualified service dealer. Use of any unauthorized parts or
accessories could lead to serious injury to the user, or
damage to the unit, and will void your warranty.
• Follow the manufacturer’s sharpening and maintenance
instructions for the saw chain.
• Use only the replacement guide bars and low kickback
chains specified for your saw to avoid injury.
• Watch for shifting logs or other forces that could pinch
or fall into chain.
• Always have saw at full speed when entering a previous
cut. Always use caution when entering a previous cut.
• Do not start a cut using the tip of the saw.
OTHER SAFETY PRECAUTIONS
• Do not operate a chain saw with one hand! Serious
injury to the operator, helpers, bystanders, or any combination of these persons may result from one-handed
operation. A chain saw is intended for two-handed use.
• Do not operate a chain saw if you are fatigued.
• Use safety footwear; snug-fitting clothing; protective
gloves; and eye, hearing, and head protection devices.
• Do not allow other persons to be near the chain saw
when starting or cutting with the chain saw. Keep
bystanders and animals out of the work area.
• Do not remove, damage or de-activate any of the safety
devices. Never use a damaged, modified, or improperly
repaired or assembled chain saw. Check their proper
operation regularly. Only use bars and chains of the
length indicated in the table herein.
• Never carry out operations or repairs on your own that
are other than routine maintenance as listed in this
manual.
• Use caution when felling a tree. Make sure you have
planned an escape path when felling, and keep all
bystanders away.
• Be alert; stop the machine if anyone enters the cutting
area, which is usually 3 to 4 feet around the operator.
• Use caution when working in a crew to avoid injury to a
fellow worker who may enter the cutting area.
• Only loan your saw to experienced users who are completely familiar with saw operation and correct use. Give
other users this manual, which they should read before
using the saw.
• Shut off the engine before setting down the saw. Do not
leave the engine running unattended.
• Never store the unit, with fuel in the tank, inside a building where fumes may reach an open flame or spark.
• Allow the engine to cool before storing or transporting
the chain saw over long distances. For example, let the
engine cool before placing the chain saw in an automobile. Also, be sure to secure the unit while transporting.
• Store the unit in a dry area, locked up, located up high
and located out of the reach of children to prevent
unauthorized use or damage.
• Never douse or squirt the unit with water or any other
liquid. Keep handles dry, clean and free from debris.
Clean after each use.
• Keep these instructions. Refer to them often and use
them to instruct other users. If you loan someone this
unit, also loan them the instructions.
• Do not use the unit in the rain, in a storm or in inclement
weather.
FUEL SAFETY
• Store fuel only in containers specifically designed and
approved for the storage of such materials.
• Always stop the engine and allow it to cool before
filling the fuel tank. Never remove the cap of the fuel
tank, or add fuel, when the engine is hot. Never operate
the unit without the fuel cap securely in place. Loosen
the fuel tank cap slowly to relieve any pressure in the
tank.
• Add fuel in a clean, well-ventilated outdoor area where
there are no sparks or flames. Slowly remove the fuel
cap only after stopping engine. Do not smoke while fueling or mixing fuel. Wipe up any spilled fuel from the unit
immediately.
WARNING:
vapors can explode if ignited. Take the following precautions:
• Avoid creating a source of ignition for spilled fuel. Do
not start the engine until fuel vapors dissipate.
• Move the unit at least 30 feet (9.1 m) from the fueling
source and site before starting the engine. Do not
smoke. Keep sparks and open flames away from the
area while adding fuel or operating the unit.
Gasoline is highly
flammable, and its
SAVE THESE INSTRUC-
TIONS
5
RULES FOR SAFE OPERATION
SAFETY AND INTERNATIONAL SYMBOLS
This operator's manual describes safety and international symbols and pictographs that may appear on this product.
Read the operator's manual for complete safety, assembly, operating and maintenance and repair information.
SYMBOL MEANING
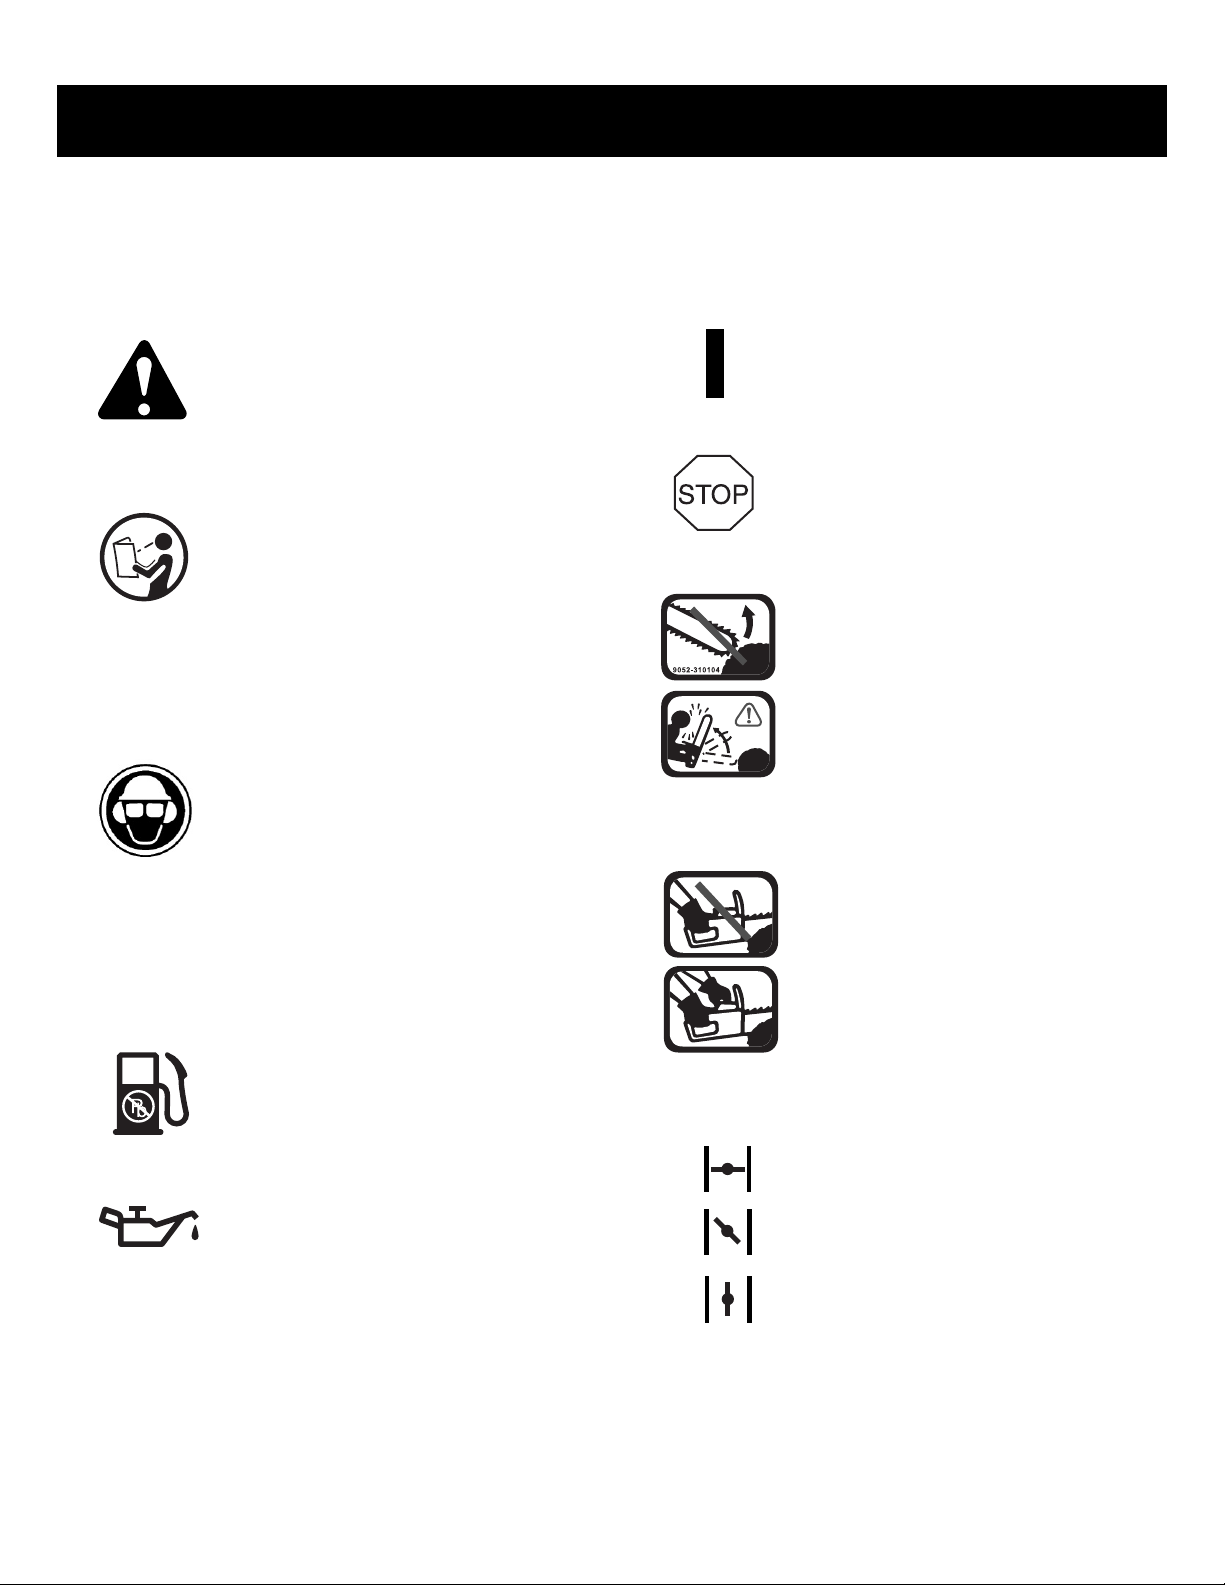
• SAFETY ALERT SYMBOL
Indicates danger, warning, or caution.
May be used in conjunction with other
symbols or pictographs.
• READ OPERATOR'S MANUAL
WARNING: Read the
Operator’s Manual(s) and follow all
warnings and safety instructions.
Failure to do so can result in serious
injury to the operator and/or
bystanders.
• WEAR EYE, HEARING AND
HARDHAT PROTECTION
WARNING: Thrown objects
and loud noise can cause severe eye
injury and hearing loss. Wear eye protection meeting ANSI
Z87.1-1989 standards and ear protection when operating this unit.
Wear a hard hat.
when needed.
Use a full face shield
SYMBOL MEANING
• ON/OFF CONTROL
ON / START / RUN
• ON/OFF CONTROL
OFF OR STOP
• GUIDE BAR
WARNING: Contact of the
guide bar tip with any object should
be avoided. Tip contact may cause
the guide bar to move suddenly
upward and backward, which may
cause serious injury.
• USE BOTH HANDS
Always use both hands while operating the chain saw. Never use only one
hand to operate the saw.
• UNLEADED FUEL
Always use clean, fresh unleaded fuel.
• OIL
Refer to operator's manual for the
proper type of oil.
1
2
3
• RED CHOKE LEVER POSITIONS
1 • FULL Choke Position
2 • PARTIAL Choke Position
3 • RUN Position
6
RULES FOR SAFE OPERATION
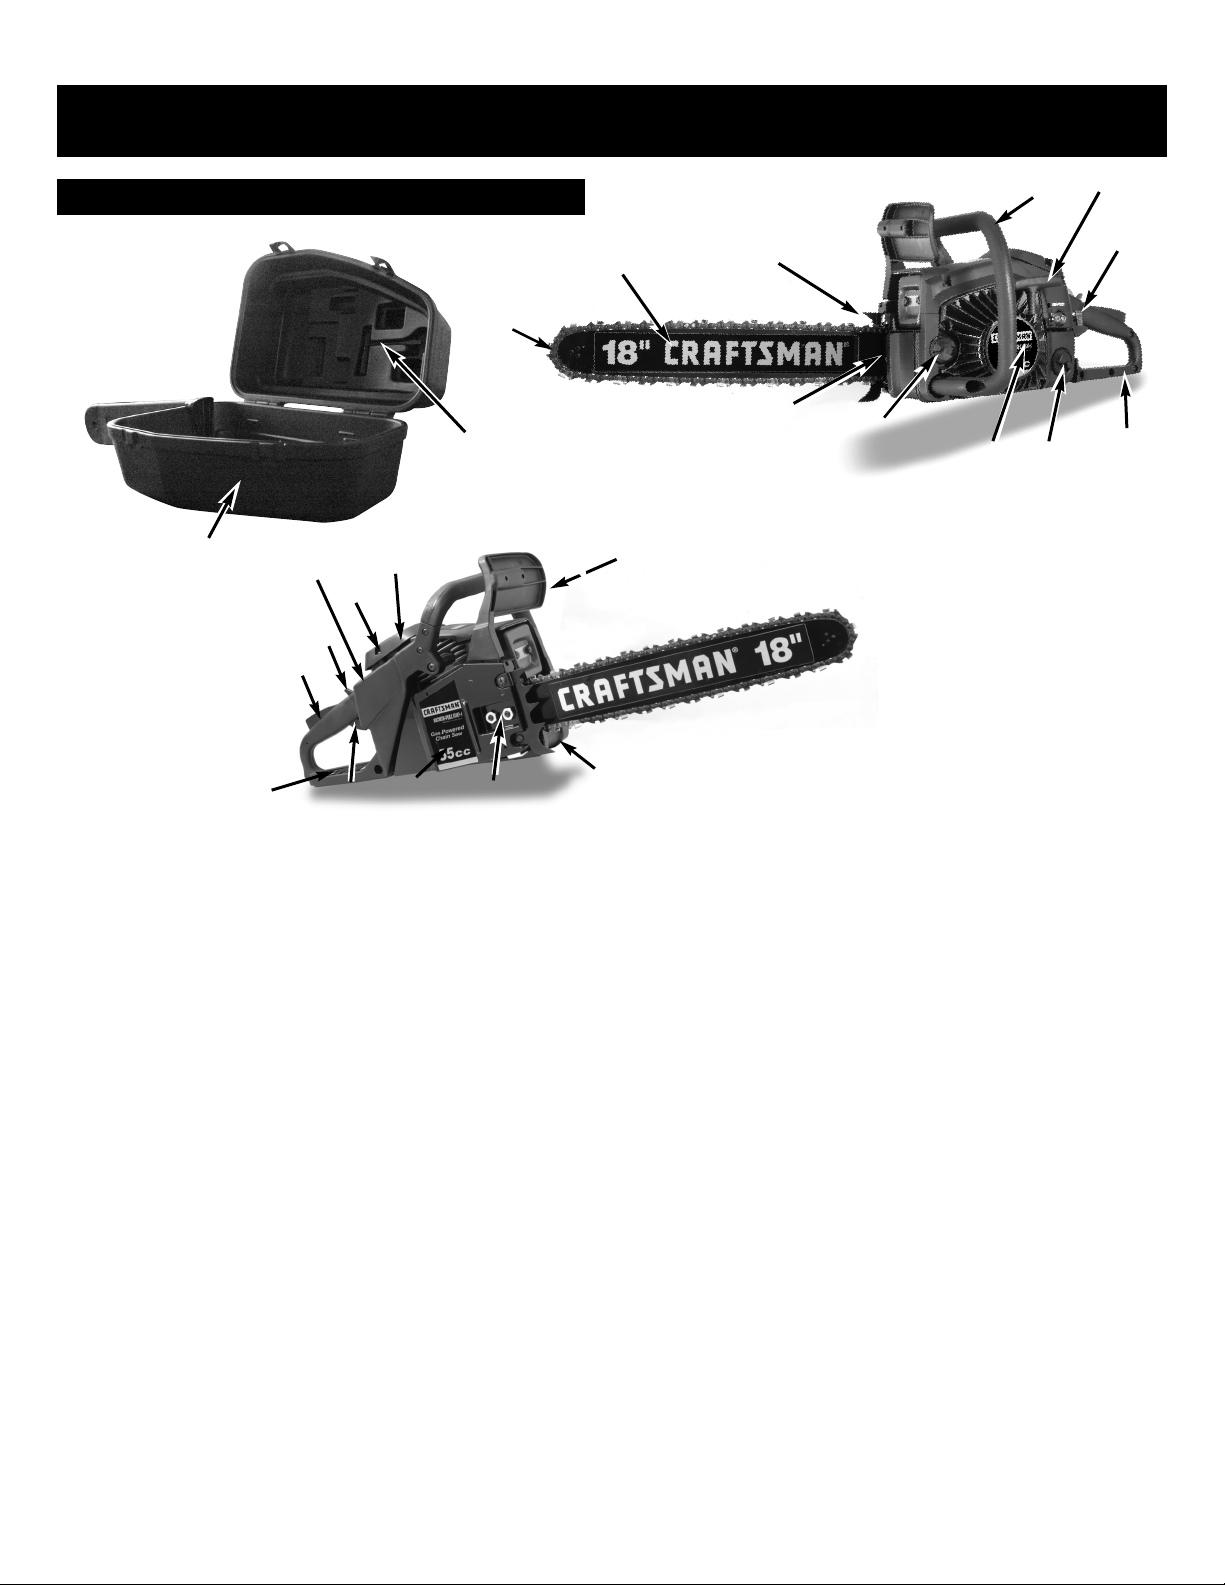
KNOW YOUR SAW
23
11
10
16
6
1
2
22
8
9
5
4
3
12
13
14
7
17
15
15
19
21
CHAIN SAW COMPONENTS
1. GUIDE BAR
2. SAW CHAIN
3. SAW CHAIN ADJUSTMENT SCREW
4. SPARK ARRESTER SCREEN
5. CHAIN BRAKE®LEVER /HAND GUARD
6. FRONT HANDLE
7. STARTER HANDLE
8. SPARK PLUG
9. AIR CLEANER COVER
10. STOP SWITCH
11. SAFETY TRIGGER
12. BAR OIL RESEVOIR CAP
13. STARTER COVER
14. FUEL TANK CAP
15. REAR HANDLE / BOOT LOOP
16. THROTTLE LATCH
17. RED CHOKE LEVER
18. BAR RETAINING NUTS
19. THROTTLE / TRIGGER
20. CHAIN CATCHER
21. CHAIN BRAKE
22. MULTI-PURPOSE TOOL
23. CARRY CASE
®
COVER
18
20
SAFETY FEATURES
10. STOP SWITCH immediately stops the engine
when pushed up. Stop switch must be pushed
down to start or restart engine.
19. THROTTLE TRIGGER controls engine speed.
11. SAFETY TRIGGER prevents accidental
acceleration of the engine. Throttle trigger (19)
cannot be squeezed unless the safety latch is
depressed.
17. RED CHOKE LEVER aids in starting the engine.
5. CHAIN BRAKE® LEVER / HAND GUARD
protects the operator’s left hand in the event it
slips off the front handle while saw is running.
CHAIN BRAKE® is a safety feature designed to
reduce the possibility of injury due to kickback
by stopping a moving saw chain in milliseconds.
It is activated by the CHAIN BRAKE® lever
2. LOW KICKBACK SAW CHAIN helps significantly
reduce kickback, or the intensity of kickback,
due to specially designed depth gauges and
guard links.
20. CHAIN CATCHER reduces the danger of injury in
the event saw chain breaks or derails during oper
ation. The chain catcher is designed to intercept a
whipping chain.
3. CHAIN SAW ADJUSTMENT SCREW It is normal
for a new chain saw chain to stretch after the first
30 minutes of use. Check the tension of the chain
regularly to ensure the best performance, see
SAW CHAIN ADJUSTMENT under MAINTENANCE
7
AND REPAIR INSTRUCTIONS.
RULES FOR SAFE OPERATION
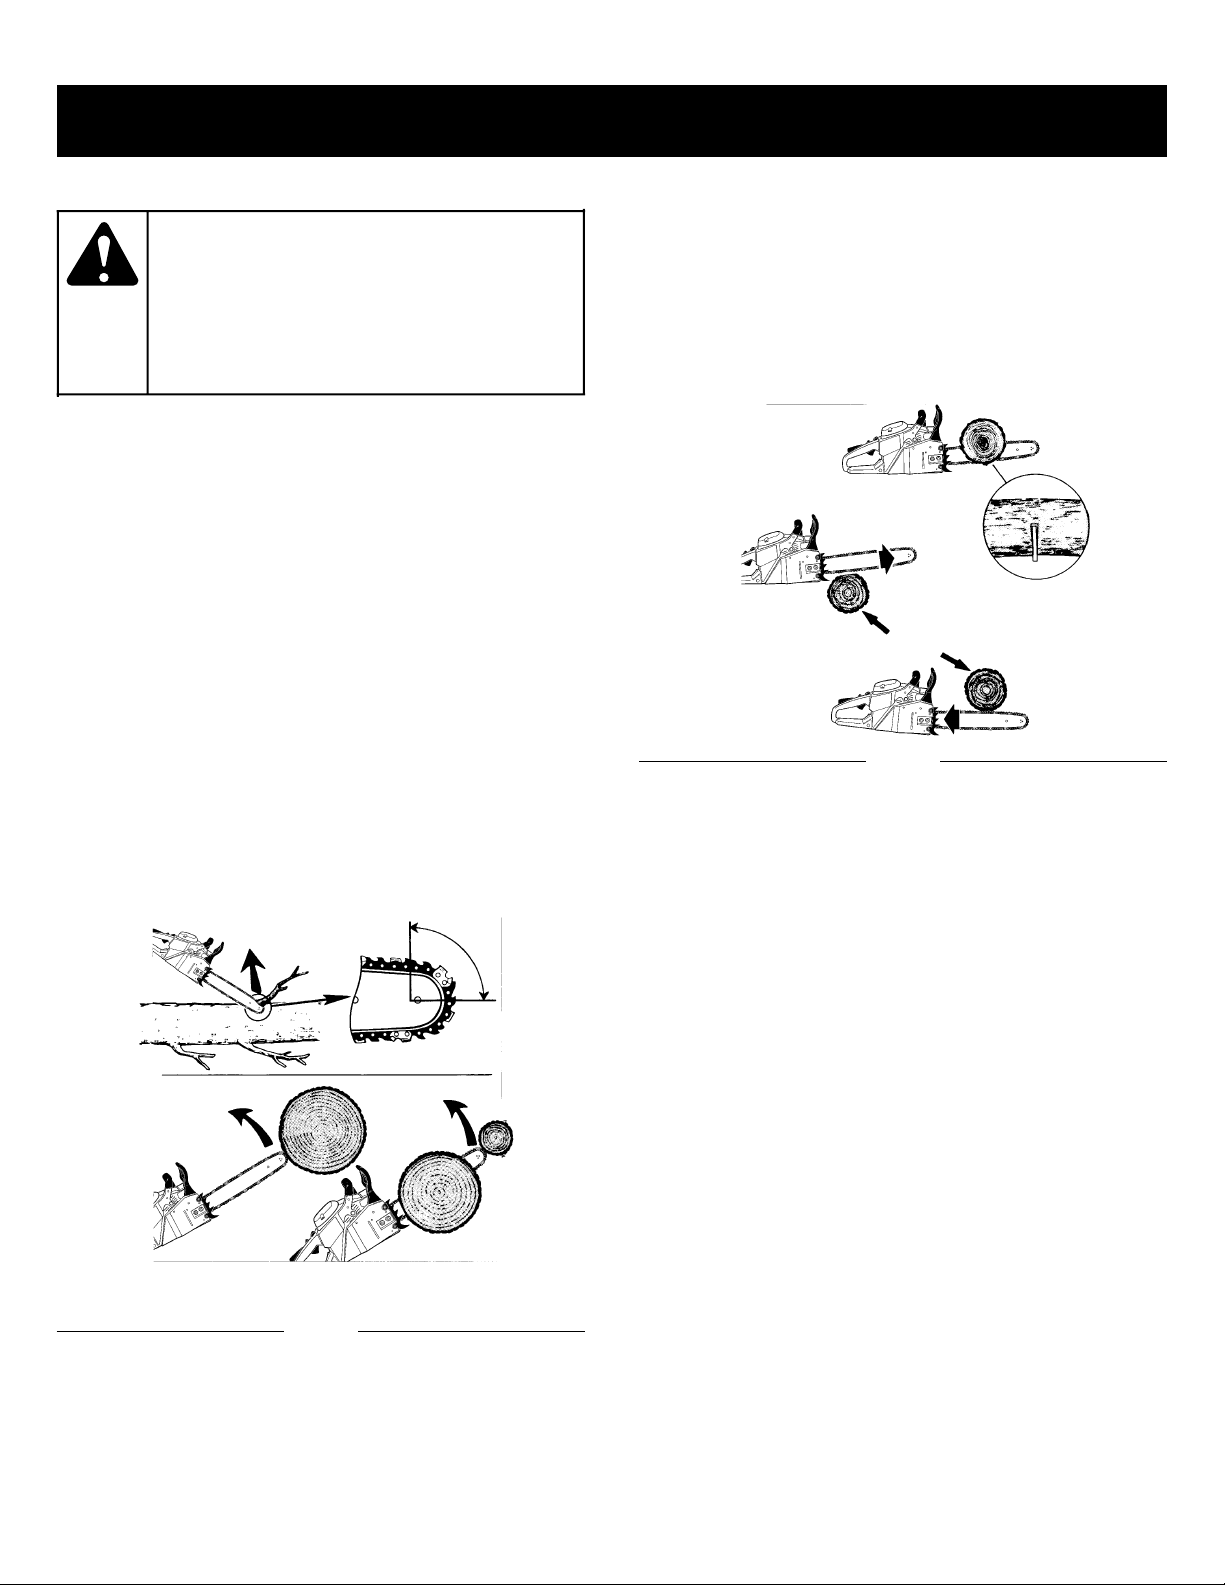
KICKBACK SPECIFICS
WARNING:
control of the chain saw and result in serious
or fatal injury to the saw operator or to anyone standing close by. Always be alert.
Rotational kickback and pinch-kickback are
major chain saw operational dangers and the
leading cause of most accidents.
KICKBACK may occur when the NOSE or TIP of the
guide bar touches an object, or when wood closes in and
pinches the saw chain in the cut.
Tip contact in some cases may cause a lightning-fast
reverse reaction, kicking the guide bar up and back
toward the operator.
Any of these reactions may cause you to lose control of
the saw, which could result in serious personal injury.
Kickback can lead to
dangerous loss of
Rotational Kickback
Rotational Kickback can occur when the moving
chain contacts an object at the upper tip of the guide
bar. This contact can cause the chain to dig into the
object, which stops the chain for an instant. The
result is a lightning fast, reverse reaction which kicks
the guide bar up and back toward the operator.
KICKBACK SPECIFICS
Pinch Kickback
Pinch kickback can occur when the saw chain is pinched
along the bottom or top of the guide bar.
When pinched on the bottom of the guide bar, it may pull
the saw forward, away from the operator
When pinched along he top of the guide bar, it may push
the guide bar rapidly back toward the operator.
A
A = Pull
B = Solid objects
C = Push
B
Fig. 2
B
C
A
A
A = Kickback path
B = Kickback reaction zone
Fig. 1
B
A
8
OIL AND FUEL INFORMATION
OIL AND FUEL MIXING INSTRUCTIONS
Old and/or improperly mixed fuel are the main reasons for
the unit not running properly. Be sure to use fresh (less
than 60 days old) clean unleaded fuel. Follow the instructions carefully for the proper fuel/oil mixture.
Definition of Blended Fuels
Today's fuels are often a blend of gasoline and oxygenates such as ethanol, methanol, or MTBE (ether).
Alcohol-blended fuel absorbs water. As little as 1% water
in the fuel can make fuel and oil separate and lead to formation of acids during storage. When using alcoholblended fuel, use fresh fuel.
Using Blended Fuels
If you choose to use a blended fuel, or its use is unavoidable, follow recommended precautions:
• Always use the fresh fuel mix explained in your operator's manual
• Always shake the fuel mix before fueling the unit
• Drain the tank and run the engine dry before storing the
unit
Using Fuel Additives
The bottle of 2-cycle oil that came with your unit contains
a fuel additive which will help inhibit corrosion and minimize the formation of gum deposits. It is recommended
that you use our 2-cycle oil with this unit.
If unavailable, use a good 2-cycle oil designed for
air-cooled engines along with a fuel additive, such as
STA-BIL®Gas Stabilizer or an equivalent. Add 0.8 oz.
(23 ml.) of fuel additive per gallon of fuel according to the
instructions on the container. NEVER add fuel additives
directly to the unit's fuel tank.
CAUTION:
mum reliability, pay strict attention to the oil
and fuel mixing instructions on the 2-cycle
oil container. Using improperly mixed fuel
can severely damage the engine.
For proper engine
operation and maxi-
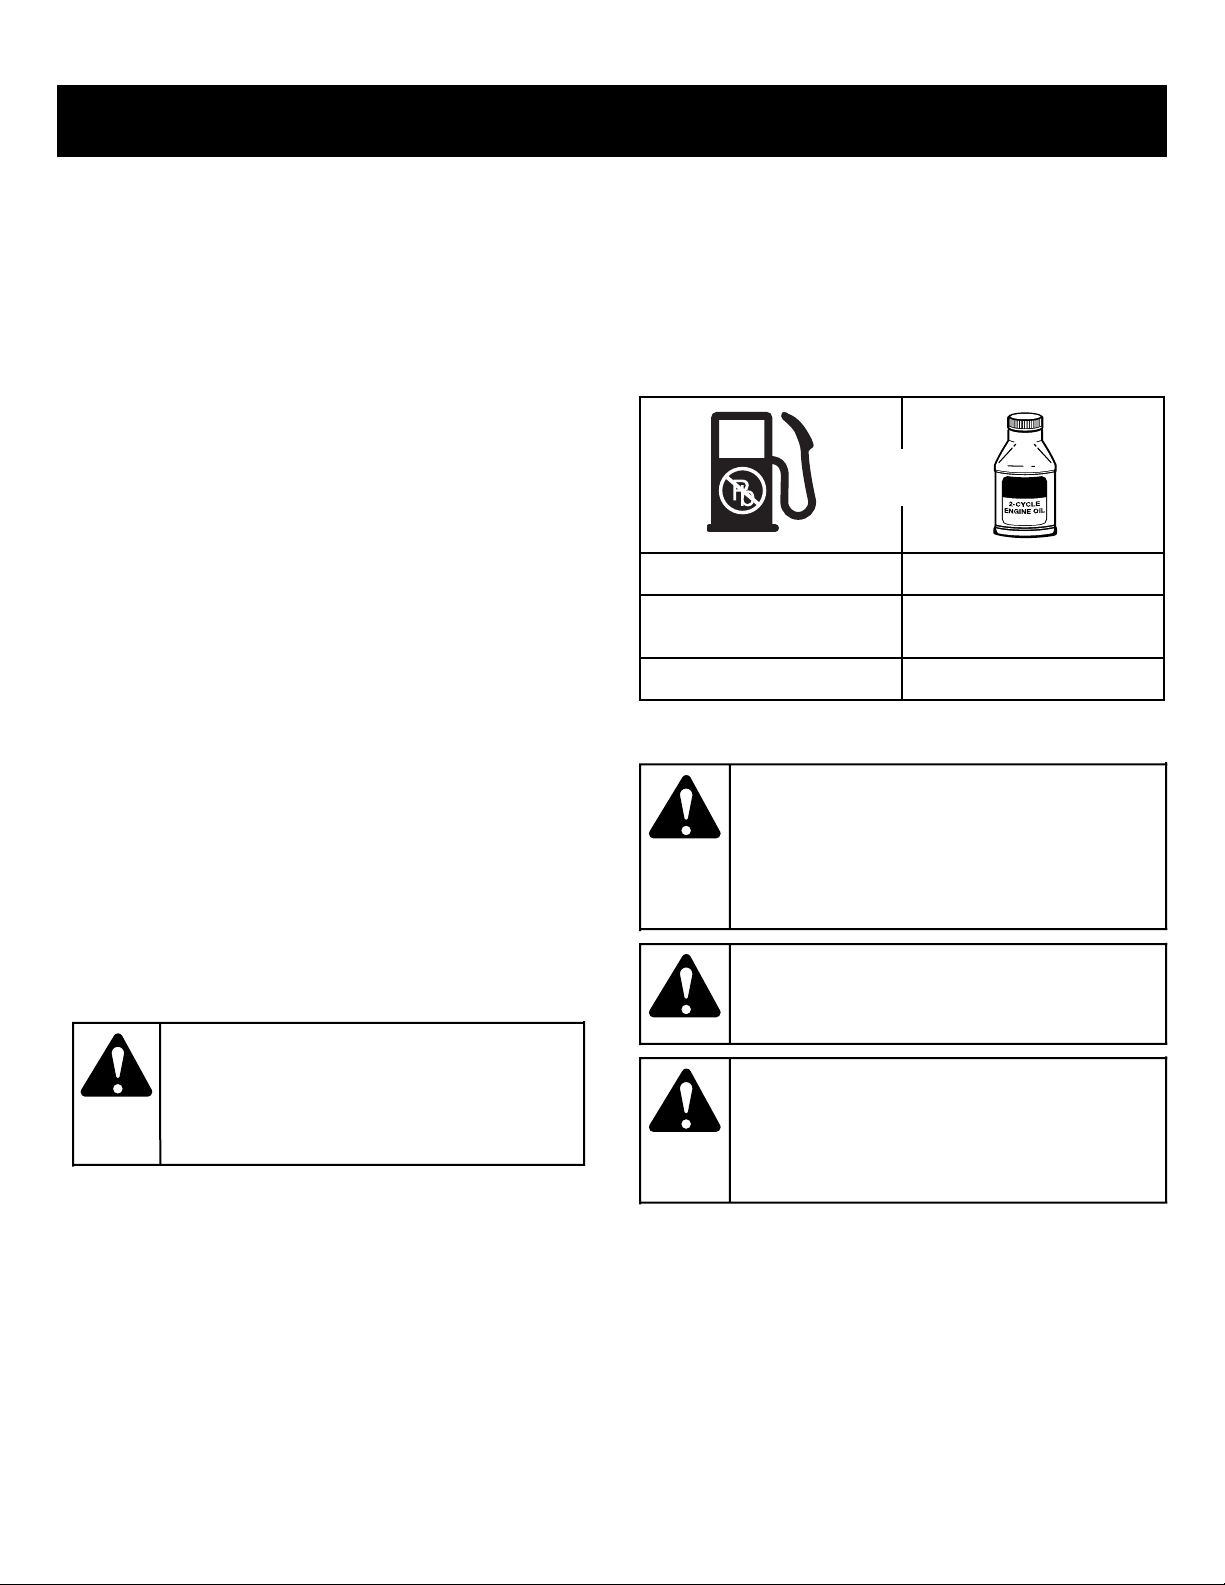
To Obtain Correct Fuel Mix:
Thoroughly mix the proper ratio of 2-cycle engine oil with
unleaded gasoline in a separate fuel can. Use a 40:1
fuel/oil ratio. Do not mix them directly in the engine fuel
tank. See the table below for specific gas and oil mixing
ratios.
NOTE: One gallon (3.8 liters) of unleaded gasoline mixed
with one 3.2 oz. (95 ml.) bottle of
2-cycle oil makes a 40:1 fuel/oil ratio.
+
UNLEADED GAS 2 CYCLE OIL
1 GALLON US
(3.8 LITERS)
1 LITER 25 ml
MIXING RATIO - 40:1
WARNING:
Vapors may explode. Always stop the engine
and allow it to cool before filling the fuel
tank. Do not smoke while filling the tank.
Keep sparks and open flames at a distance
from the area.
WARNING:
from fuel spray. Never operate the unit without
the fuel cap securely in place
WARNING:
door area. Wipe up any spilled fuel immediately. Avoid creating a source of ignition for
spilled fuel. Do not start the engine until fuel
vapors dissipate.
3.2 FL. OZ.
(95 ml)
Gasoline is extremely flammable. Ignited
Remove fuel cap
slowly to avoid injury
.
Add fuel in a clean,
well ventilated out-
NOTE: Dispose of the old fuel/oil mix in accordance to
Federal, State and Local regulations.
9
 Loading...