

Craftsman 31511782 Owner’s Manual

OWNERS
MANUAL
MODEL NO.
315.11782
CAUTION:
Read Rules for
Safe Operation
and instructions
Carefully
,@
4 INCH ELTSANDER
WRTH DUST PICK-UP
DOUBLE INSULATED
Introduction
Operation
Maintenance
Repair Parts
SEARS, ROEBUCK AND CO_, Chica.qo, IL 60684 U.S.A. and SIMPSONS-SEARS LIMITED, Toronto, Canada
2-620263-965
7-78 PRIt.IT[,D IN L__,_,
Designed exclusively for and sold onfy by

FULL ONE YEAR WARRANTY ON CRAFTSMAN BELT SANDER
If this Craftsman Belt Sander fails to give complete satisfaction within one year from the date of
purchase, RETURN IT TO THE NEAREST SEARS STORE THROUGHOUT THE UNITED STATES and
Sears will replace it, free of charge.
If this belt sander is used for commercial or rental purposes this warranty applies for only 90 days
from the date of purchase.
This warranty gives you specific legal rights, and you may also have other rights which vary from
state to state.
SEARS, ROEBUCK AND CO.
BSC 41 _ 3
SEARS TOWER
CHICAGO, 1L 60684
gNTRODUCTION
DOUBLE INSULATION is a concept in safety, in
etectric power tools, which eliminates the need for
the usual three wire grounded power cord and
grounded supply system. Wherever there is electric
current in the tool there are two complete sets of
insulation to protect the user_ All exposed metal
parts are isolated from the internal metal motor
components with protecting insulation..
IMPORl'ANT_Servicing of a tool with double in-
sulation requires extreme care and knowledge of the
system and should be performed only by a qualified
service technician.. For service we suggest you
return the tool to your nearest Sears Store for repair.
Always use original factory replacement parts when
servicing.
RULES FOR SAFE OPERATION
1. KNOW YOUR POWER TOOL _ Read owner's manual carefulty,_ Learn its applications and limitations
as well as the specific potential hazards peculiar to this tool.
2, GROUND ALL TOOLS -- UNLESS DOUBLE-INSULATED. If tool is equipped with three-prong
plug, it should be plugged into a three-hole electrical receptacle, tf adapter is used to accommodate
two-prong receptacle, the adapter wire must be attached to a known ground. (Usually the screw
securing receptacle cover plate)_ Never remove third prong.
3. KEEP GUARDS IN PLACE and in working order.
4 KEEP WORK AREA CLEAN. Cluttered areas and benches invite accidents.
5. AVOID DANGEROUS ENVIRONMENT° Don't use power toot in damp or wet locations or expose to
r&in. Keep work area well tit.
6 KEEP CHILDREN AWAY. Al! visitors should be kept safe distance from work area.
7. STORE IDLE TOOLS. When not in use, tools should be stored ;n dry, high or-locked-up place_out of
reach of children_
8_ DON'T FORCE TOOL. it will do the job better and safer at the rate for which it was designed.
9. USE RIGHT TOOL. Don't force small tool or attachment to do the job of a heavy duty toot..
10 WEAR PROPER APPAREL. No loose clothing or jewetry to get caught in moving parts_ Rubber gloves
and footwear are recommended when working outdoors,
11 USE SAFETY GLASSES with most tools. Also face or dust mask if cutting operation is dusty_
12 DON'T ABUSE CORD. Never carry toot by cord or yank it to disconnect from receptacle. Keep cord
from heat, oil and sharp edges°
!3. SECURE WORK. Use clamps or a vise to hold work it's safer than using your hand and it frees both
hands to operate tool
14 DON'T OVERREACH. 'Keep proper footing and balance at all times..
15 MAINTAIN TOOLS WITH CARE. Keep tools sharp at all times, and clean for best and safest per-
formance. Follow instructions for lubricating and changing accessories.
16 DISCONNECT TOOLS. When not in use, before servicing; when changing attachments, blades, bits,
cutters, etc.
17 REMOVE ADJUSTING KEYS AND WRENCHES, Form habit of checking to see that keys and ad-
justing wrenches are removecf from tool before turning it on
!8 AVOID ACCIDENTAL STARTING. Don't carry plugged-in tools with finger on switch Be sure switch
is off when plugging in.
19 OUTDOOR USE EXTENSION CORDS. When tool is used outdoors, use only extension cords suitable
for use outdoors and so marked
Your Craftsman 4-inch Dustless Belt Sander is suitable
for coarse, medium and fine sanding of wood, metals,
plastics and other materials. It is ideal when used for
smoothing rough boards, chamfering, rounding edges
and many other general sanding applications. It is ideal
for refinishing large pieces of furniture, stairs and
other large surfaces. Its balanced design makes it easy
to use.
The built-in dust collection system will remove most of
the sanding dust from the work and eliminate the dust
in the air -- usually associated with power sanding°
SWITCH
A trigger switch controls operation of the Sander',
The trigger switch can be locked on for continuous
operatiom To lock, pull trigger, press lock button
inward, and release trigger, Pull trigger and release
to stop°
Page 2
OPERATION
PREPARING FOR OPERATION
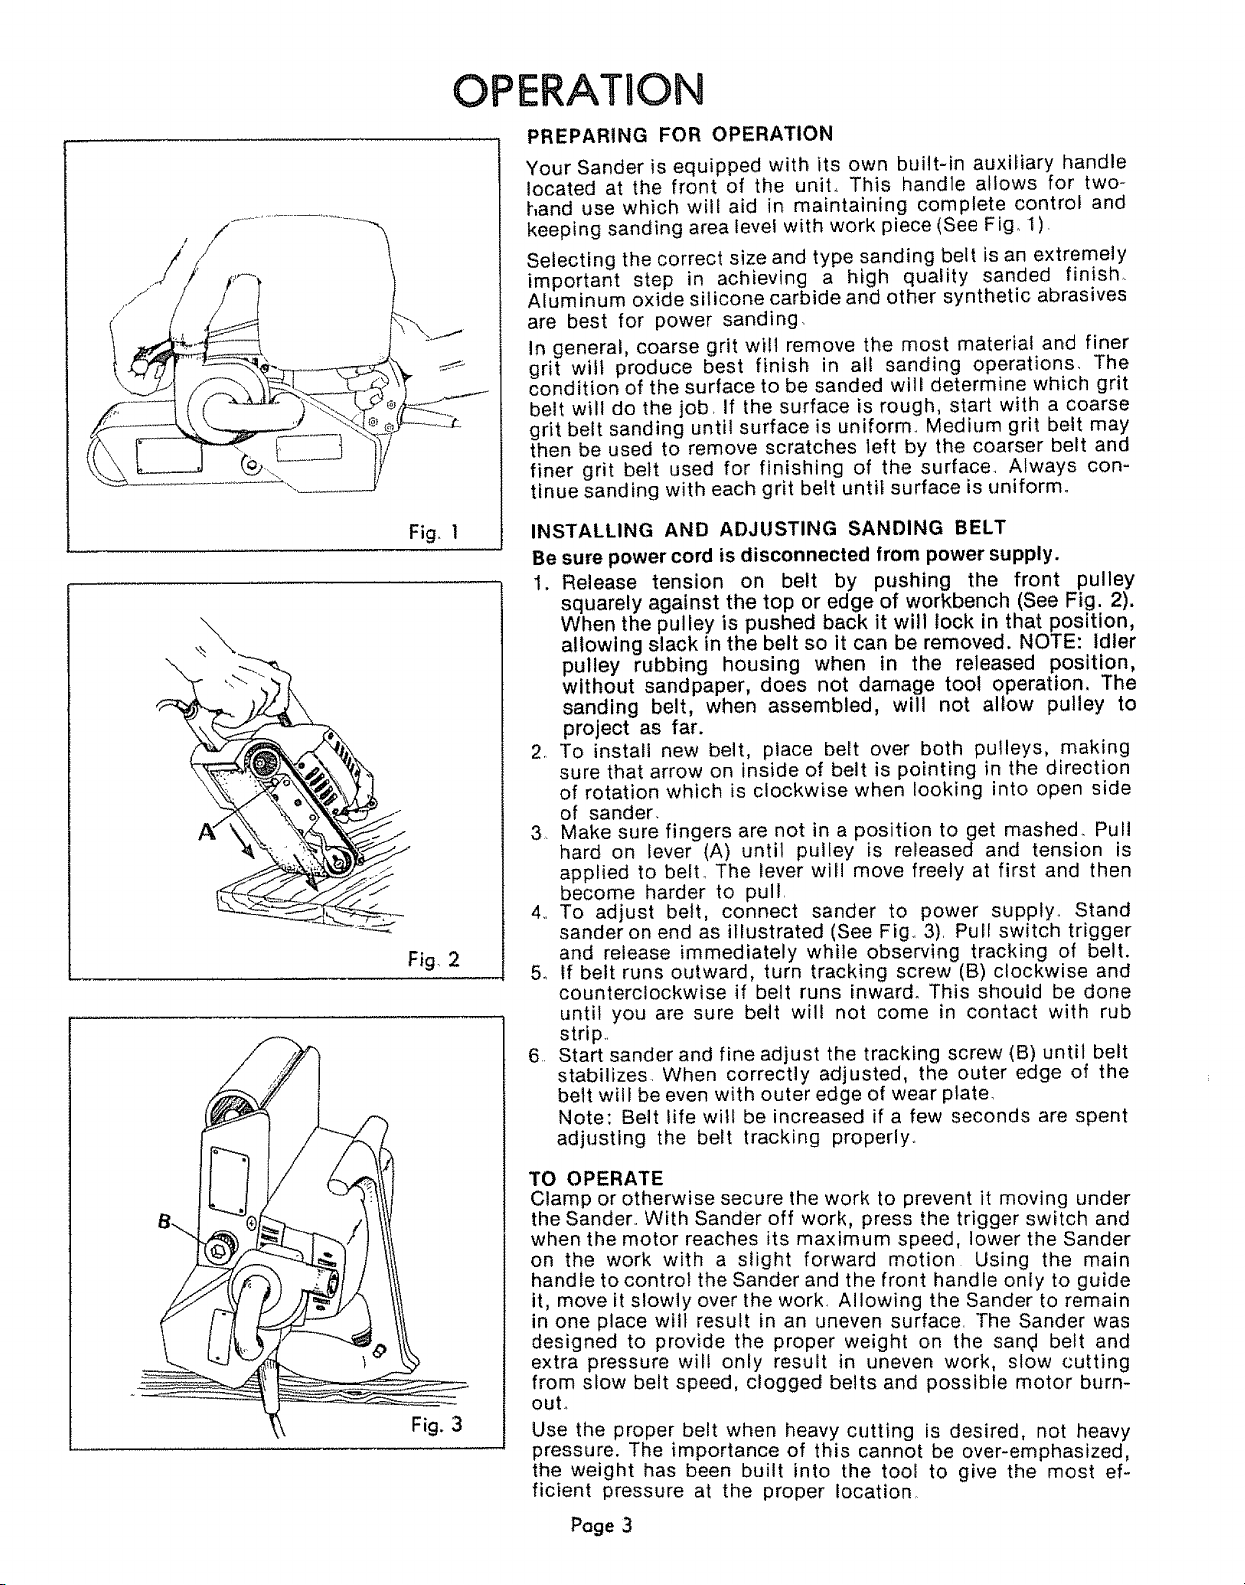
Your Sander is equipped with its own built-in auxiliary handle
located at the front of the unit, This handle allows for two-
hand use which wilt aid in maintaining complete control and
keeping sanding area level with work piece (See Fig, 1),
Selecting the correct size and type sanding belt is an extremely
important step in achieving a high quality sanded finish,.
Aluminum oxide silicone carbide and other synthetic abrasives
are best for power sanding.
In general, coarse grit will remove the most material and finer
grit will produce best finish in all sanding operations, The
condition of the surface to be sanded will determine which grit
belt will do the job, If the surface is rough, start with a coarse
grit belt sanding until surface is uniform., Medium grit belt may
then be used to remove scratches left by the coarser belt and
,\
finer grit belt used for finishing of the surface. Always con-
tinue sanding with each grit belt until surface is uniform°
Fig, I
Fig, 2
INSTALLING AND ADJUSTING SANDING BELT
Be sure power cord is disconnected from power supply.
1. Release tension on belt by pushing the front pulley
squarely against the top or edge of workbench (See Fig. 2).
When the pulley is pushed back it will lock in that position,
allowing slack in the belt so it can be removed. NOTE: Idler
pulley rubbing housing when in the released position,
without sandpaper, does not damage toot operation. The
sanding belt, when assembled, will not allow pulley to
project as far.
2, To install new belt, place belt over both pulleys, making
sure that arrow on inside of belt is pointing in the direction
of rotation which is clockwise when looking into open side
of sander.
3,. Make sure fingers are not in a position to get mashed. Pull
hard on lever (A) until pulley is released and tension is
applied to bett. The lever will move freely at first and then
become harder to pull
4,, To adjust belt, connect sander to power supply,, Stand
sander on end as illustrated (See Fig,, 3), Pull switch trigger
and release immediately while observing tracking of belt.
5o tf belt runs outward, turn tracking screw (B) clockwise and
counterclockwise if belt runs inward. This should be done
until you are sure belt will not come in contact with rub
strip,
6 Start sander and fine adjust the tracking screw (B) until belt
stabilizes. When correctly adjusted, the outer edge of the
belt will be even with outer edge of wear plate,
Note: Belt life will be increased if a few seconds are spent
adjusting the belt tracking properly°
TO OPERATE
Clamp or otherwise secure the work to prevent it moving under
the Sander., With Sander off work, press the trigger switch and
when the motor reaches its maximum speed, lower the Sander
on the work with a slight forward motion Using the main
handle to control the Sander and the front handle only to guide
it, move it slowly over the work, Allowing the Sander to remain
in one place will result in an uneven surface, The Sander was
designed to provide the proper weight on the sand belt and
extra pressure wil! only result in uneven work, stow cutting
from slow belt speed, clogged belts and possible motor burn-
ouL
Use the proper belt when heavy cutting is desired, not heavy
pressure. The importance of this cannot be over-emphasized,
the weight has been built into the tool to give the most ef-
ficient pressure at the proper location.
Poge 3
 Loading...