

Page 1
'S MANUAL
19.2 VOLT CORDLESS J_G SAW
Variable Speed / Orbital
Model No.
315.114280
WARNING: To reduce the risk of injury,
the user must read and understand the
operator's manual before using this
product.
Customer Help Line: 1-800-932-3188
Sears, Roebuck and Co., 3333 Beverly Rd., Hoffman Estates, IL 60179 USA
Visit the Craftsman web page: www.sears.comicraftsman
983000-488
8-04
Save this manuaJ for future reference
Use jig saw only with recommended
Craftsman battery pack and charger
(both sold separately)
US
Page 2
ONE YEAR FULL WARRANTY ON CRAFTSMAN TOOL
(f th(s Craftsman too( fails to g(ve complete satisfaction w(thin one year from date of purchase, RETURN (T TO THE
NEAREST SEARS STORE OR SEARS PARTS & REPAIR CENTER (N TNE UNITED STATES, and Sears wi(( replace it,
free of charge.
(f this Craftsman too( is used for commercia( or rental purposes, this warranty app(ies for only 90 days from the date of
purchase.
This warranty gives you specific (ega( rights, and you may a(so have other rights which vary from state to state.
Sears, Roebuck and 0o., Dept. 817WA, Noffrnan Estates, (L 60179
This tool has many features for making its use more pleasant and enjoyable. Safety, performance, and dependability
have been given top priority in the design of this product making it easy to maintain and operate.
Page 3
_ WARNING!READANDUNDERSTANDALL
INSTRUCTIONS.Failuretofollowallinstructions
listedbelow,mayresultinelectricshock,fireand/or
seriouspersonalinjury.
SAVE THESE mNSTRUOTmONS
WORK AREA
[] Keep your work area clean and well lit. Cluttered
benches and dark areas invite accidents.
[] Do not operate power tools in explosive atmo-
spheres, such as in the presence of flammable
liquids, gases, or dust. Power tools create sparks
which may ignke the dust or fumes.
[] Keep bystanders, children, and visitors away while
operating a power tool. Distractions can cause you to
lose control.
ELECTRmCAL SAFETY
[] A battery operated tool with integral batteries or a
separate battery pack must be recharged only with
the specified charger for the battery. A charger that
may be suitable for one type of battery may create a
risk of fire when used with another battery.
[] Use battery operated tool only with specifically
designated battery pack. Use of any other batteries
may create a risk of fire.
[] Use battery only with charger listed.
MODEL BATTERY PACK CHARGER
3t5.114280 ITEM NO. 9 11375 ITEM NO. 9 11041
(130139020} (t425301}
[] Do not abuse the cord. Never use the cord to carry
the charger. Keep cord away from heat, oil, sharp
edges, or moving parts. Replace damaged cords
immediately. Damaged cords may create a fire.
PERSONAL SAFETY
[] Stay alert, watch what you are doing and use
common sense when operating a power tool. Do
not use tool while tired or under the influence of
drugs, alcohol, or medication. A moment of inatten-
tion while operating power tools may result in serious
personal injury.
[] Dress properly. Do not wear loose clothing or
jewelry. Contain long hair. Keep your hair, clothing,
and gloves away from moving parts. Loose clothes,
jewelry, or long hair can be caught in moving parts.
[] Avoid accidental starting. Be sure switch is in the
locked or off position before inserting battery pack.
Carrying tools with your finger on the switch or insert=
ingthe battery pack into a too! with the switch on
invites accidents.
[] Remove adjusting keys or wrenches before turning
the tool on. A wrench or a key that is left attached to a
rotating part of the tool may result in personal injury.
[] Do not overreach. Keep proper footing and balance
at all times. Proper footing and balance enable better
control of the tool in unexpected situations.
[] Use safety equipment. Always wear eye protection.
Dust mask, non-skid safety shoes, hard hat, or hearing
protection must be used for appropriate conditions.
[] Do not wear loose clothing or jewelry. Contain long
hair. Loose clothes, jewelry, or long hair can be drawn
into air vents.
[] Do not use on a ladder or unstable support. Stable
footing on a solid surface enables better control of the
tool in unexpected situations.
TOOL USE AND CARE
[] Use clamps or other practical way to secure and
support the workpiece to a stable platform. Holding
the work by hand or against your body is unstable and
may lead to loss of control.
[] Do not force tool. Use the correct tool for your
application. The correct tool will do the job better and
safer at the rate for which it is designed.
[] Do not use tool if switch does not turn it on or off. A
tool that cannot be controlled with the switch is
dangerous and must be repaired.
[] Disconnect battery pack from tool or place the
switch in the locked or off position before making
any adjustments, changing accessories, or storing
the tool. Such preventive safety measures reduce the
risk of starting the tool accidenta!iy.
[] Store idle tools out of reach of children and other
untrained persons. Tools are dangerous inthe hands
of untrained users.
[] When battery pack is not in use, keep it away from
other metal objects like: paper clips, coins, keys,
nails, screws, or other small metal objects that can
make a connection from one terminal to another.
Shorting the battery terminals together may cause
sparks, burns, or a fire.
[] Maintain tools with care. Keep cutting tools sharp
and clean. Propedy maintained tools with sharp
cutting edges are less likely to bind and are easier to
control.
[] Check for misalignment or binding of moving parts,
breakage of parts, and any other condition that
may affect the tool's operation, if damaged, have
the tool serviced before using. Many accidents are
caused by poorly maintained tools.
[] Use only accessories that are recommended by the
manufacturer for your model. Accessories that may
be suitable for one tool may create a risk of injury when
used on another tool.
[] Keep the tool and its handle dry, clean and free
from oil and grease. Always use a clean cloth when
cleaning. Never use brake fluids, gasoline, petroleum-
based products, or any strong solvents to clean your
tool. Following this rule will reduce the risk of loss of
control and deterioration of the enclosure plastic.
Page 4
SERVmCE
[] Tool service must be performed only by qualified
repair personnel. Service or maintenance performed
by unqualified personne! may result in a risk of injury.
[] When servicing a tool, use only identical replace-
ment parts. Follow instructions in the Maintenance
section of this manual. Use of unauthorized parts or
failure to follow Maintenance hstructions may create a
risk of shock or injury.
[] Homdtoom by insumatedgripping surfaces when
performing an operation where the cutting toommay
contact hidden wiring. Contact with a "live" wire will
also make exposed metal parts of the tool "live" and
shock the operator.
[] Know your power tool. Read operator's manual
carefully. Learn its applications and limitations, as
well as the specific potential hazards related to this
tool. Following this rule will reduce the risk of electric
shock, fire, or serious injury.
[] Always wear safety glasses with side shields.
Everyday glasses have only impact resistant lenses.
They are NOT safety glasses. Following this rule wil!
reduce the risk of eye injury.
[] Protect your lungs. Wear a face or dust mask if the
operation is dusty. Fol!owing this rule wil! reduce the
risk of serious personal injury.
[] Protect your hearing. Wear hearing protection dur-
ing extended periods of operation. Following this rule
wil! reduce the risk of serious personal injury.
[] Battery tools do not have to be plugged into an
electrical outlet; therefore, they are always in
operating condition. Be aware of possible hazards
when not using your battery tool or when changing
accessories. Following this rule will reduce the risk of
electric shock, fire, or serious personal injury.
[] Do not place battery tools or their batteries near
fire or heat. This wil! reduce the risk of explosion and
possibly injury.
[] Never use a battery that has been dropped or
received a sharp blow. A damaged battery is subject
to explosion. Properly dispose of a dropped or dam-
aged battery immediately.
[] Batteries vent hydrogen gas and can expmode in
the presence of a source of ignition, such as a pilot
light. To reduce the risk of serious personal injury,
never use any cordless product in the presence of
open flame. An exploded battery can propel debris and
chemicals. If exposed, flush with water immediately.
[] Do not charge battery tool in a damp or wet
location. Following this rule will reduce the risk of
electric shock.
[] For best results, your battery tool should be
charged in s location where the temperature is
more than 50°F but less than 100°F. Do not store
outside or in vehicles.
[] Under extreme usage or temperature condi-
tions, battery leakage may occur. If liquid comes
in contact with your skin, wash immediately with
soap and water, then neutralize with lemon juice
or vinegar. If liquid gets into your eyes, flush them
with clean water for at least 10 minutes, then seek
immediate medical attention. Following this rule will
reduce the risk of serious personal injury.
Page 5
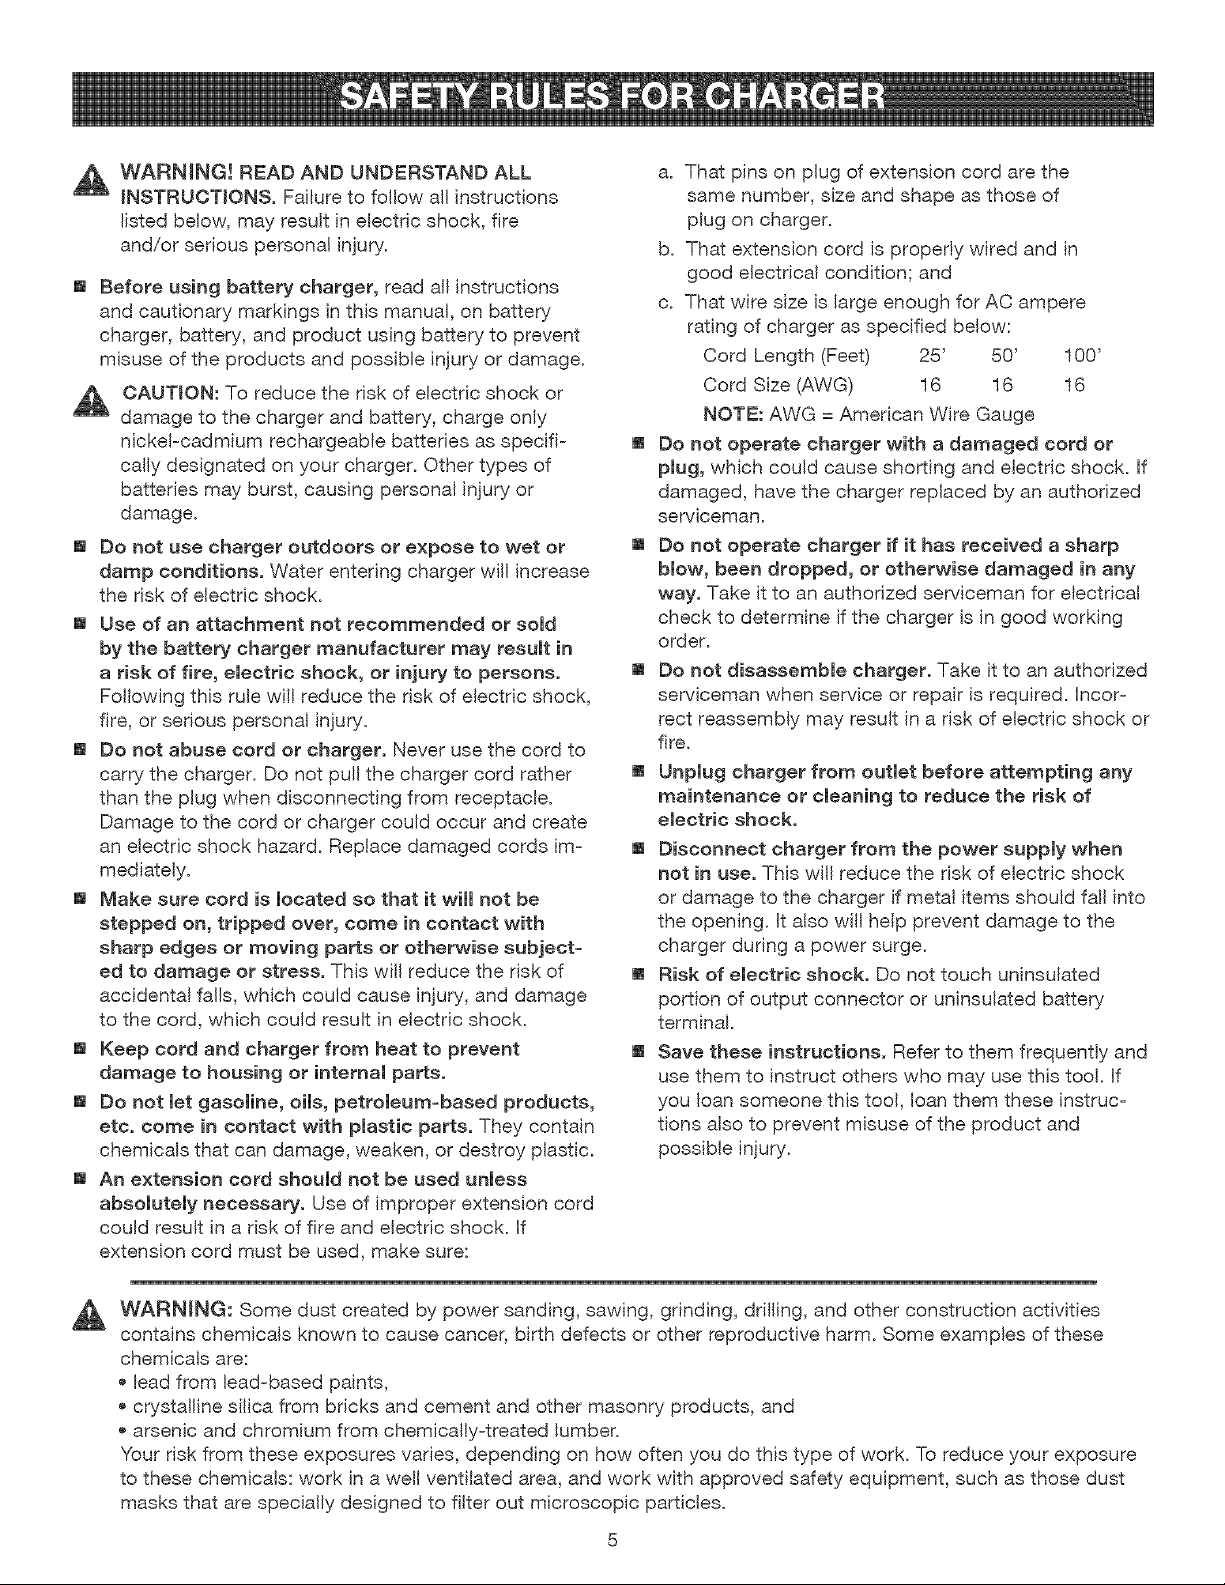
_ WARNING! READ AND UNDERSTAND ALL
INSTRUCTIONS. Failure to follow all instructions
listed below, may result in electric shock, fire
and/or serious personal injury.
[] Before using battery charger, read all instructions
and cautionary markings inthis manual, on battery
charger, battery, and product using battery to prevent
misuse of the products and possible injuryor damage.
CAUTION: To reduce the risk of electric shock or
damage to the charger and battery, charge only
nickel=cadmium rechargeable batteries as specifi=
cally designated on your charger. Other types of
batteries may burst, causing personal injuryor
damage.
[] Do not use charger outdoors or expose to wet or
damp conditions. Water entering charger wil! increase
the risk of electric shock.
[] Use of an attachment not recommended or sold
by the battery charger manufacturer may result in
a risk of fire, electric shock, or injury to persons.
Following this rule will reduce the risk of electric shock,
fire, or serious personal injury.
[] Do not abuse cord or charger. Never use the cord to
carry the charger. Do not pull the charger cord rather
than the plug when disconnecting from receptacle.
Damage to the cord or charger could occur and create
an electric shock hazard. Replace damaged cords ira=
mediately.
[] Make sure cord is located so that it will not be
stepped on, tripped over, come in contact with
sharp edges or moving parts or otherwise subject=
ed to damage or stress. This will reduce the risk of
accidental fails, which could cause injury, and damage
to the cord, which could result in electric shock.
[] Keep cord and charger from heat to prevent
damage to housing or internal parts.
[] Do not let gasoline, oils, petroleum-based products,
etc. come in contact with plastic parts. They contain
chemicals that can damage, weaken, or destroy plastic.
[] An extension cord should not be used unless
absolutely necessary. Use of improper extension cord
could result in a risk of fire and electric shock. If
extension cord must be used, make sure:
a. That pins on plug of extension cord are the
same number, size and shape as those of
plug on charger.
b. That extension cord is properly wired and in
good electrical condition; and
c. That wire size is large enough for AC ampere
rating of charger as specified below:
Cord Length (Feet) 25' 50' 100'
Cord Size (AWG) 16 16 16
NOTE: AWG = American Wire Gauge
[] Do not operate charger with a damaged cord or
plug, which could cause shorting and electric shock. If
damaged, have the charger replaced by an authorized
serviceman.
[] Do not operate charger if it has received a sharp
blow, been dropped, or otherwise damaged in any
way. Take it to an authorized serviceman for electrical
check to determine if the charger is in good working
order.
[] Do not disassemble charger. Take it to an authorized
serviceman when service or repair is required. Incor-
rect reassembly may result in a risk of electric shock or
fire.
[] Unplug charger from outlet before attempting any
maintenance or cleaning to reduce the risk of
electric shock.
[] Disconnect charger from the power supply when
not in use. This wil! reduce the risk of electdc shock
or damage to the charger if metal items should fan into
the opening. It also will help prevent damage to the
charger during a power surge.
[] Risk of electric shock. Do not touch uninsulated
portion of output connector or uninsulated battery
terminal.
[] Save these instructions. Refer to them frequently and
use them to instruct others who may use this tool. If
you loan someone this tool, loan them these instruc-
tions also to prevent misuse of the product and
possible injury.
WARNING: Some dust created by power sanding, sawing, grinding, drilling, and other construction activities
A
contains chemicals known to cause cancer, birth defects or other reproductive harm. Some examples of these
chemicals are:
lead from lead=based paints,
crystalline silica from bricks and cement and other masonry products, and
arsenic and chromium from chemically-treated lumber.
Your risk from these exposures varies, depending on how often you do this type of work. To reduce your exposure
to these chemicals: work in a well ventilated area, and work with approved safety equipment, such as those dust
masks that are specially designed to filter out microscopic particles.
Page 6
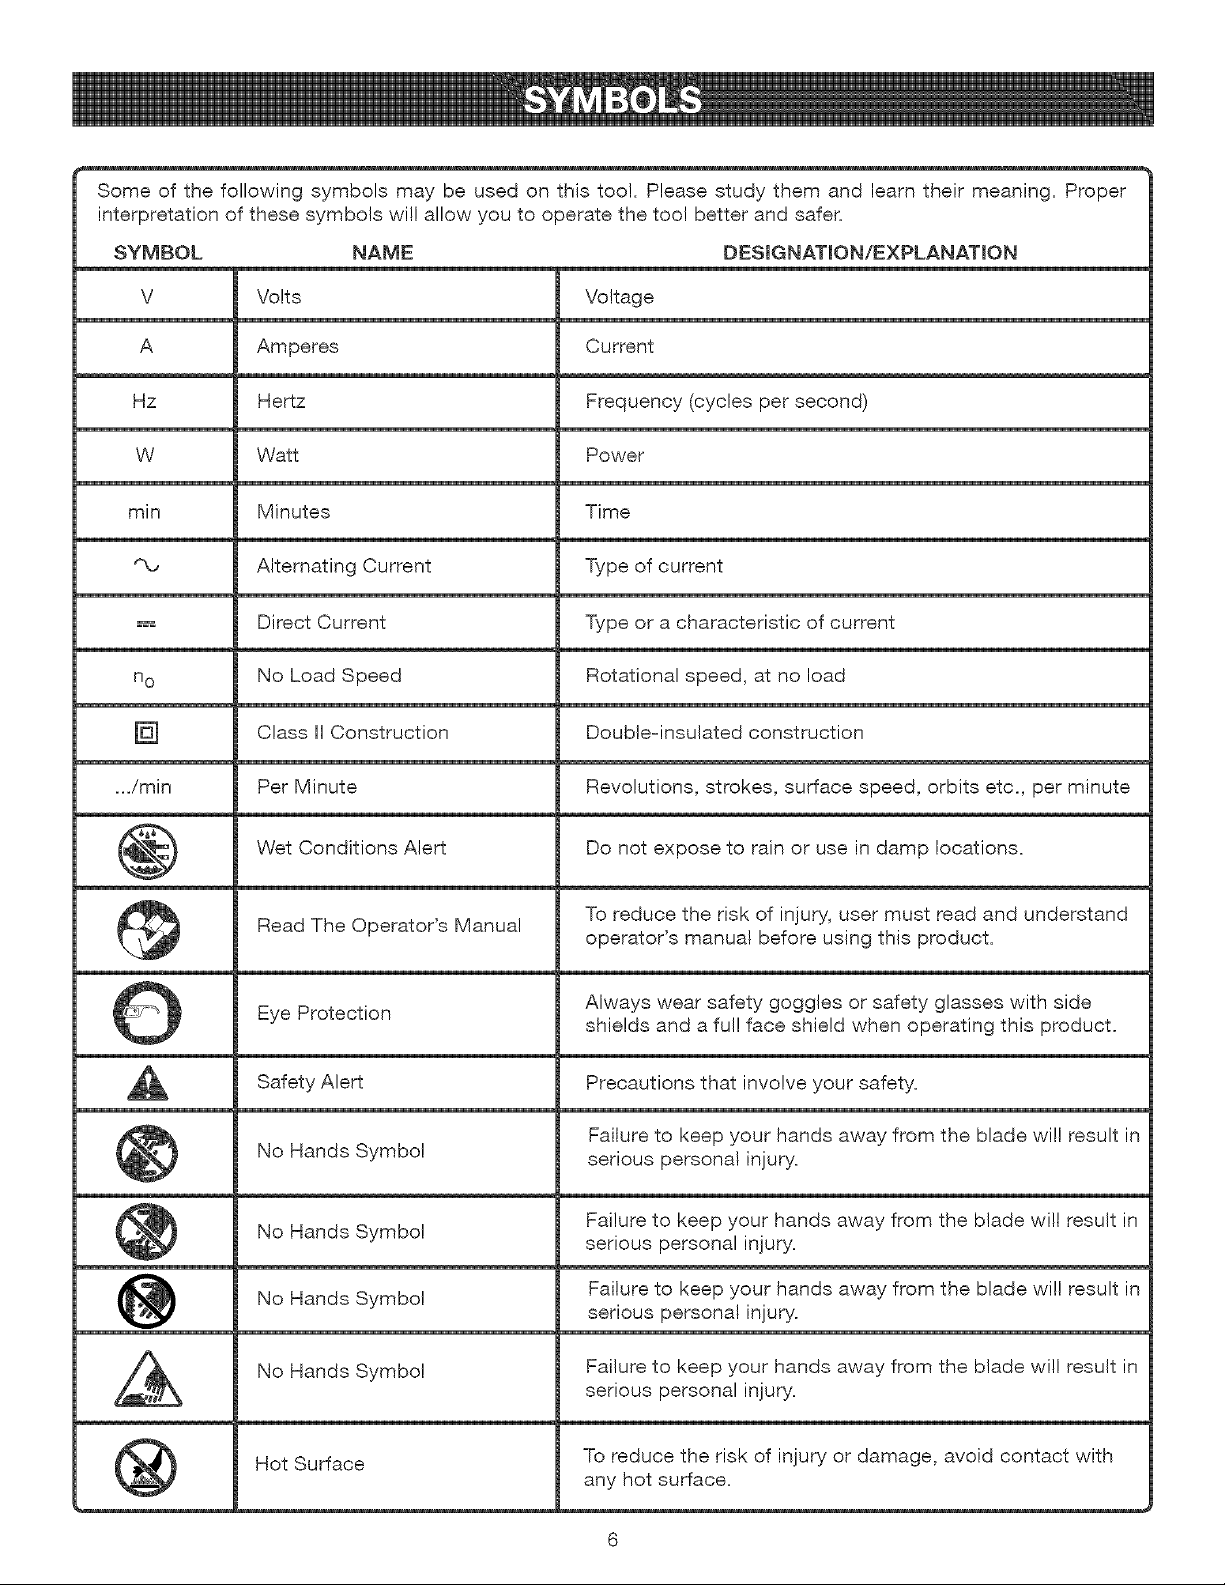
Someofthe followingsymbolsmaybe usedon thistoo!.Pleasestudythemandlearntheirmeaning.Proper
interpretationofthesesymbolswillallowyoutooperatethetoo!betterandsafer.
SYMBOL NAME DESIGNATION/EXPLANATmON
V Volts Voltage
A Amperes Current
Hz Hertz Frequency(cyclespersecond)
W Watt Power
min Minutes Time
Q, AlternatingCurrent Typeofcurrent
H_ DirectCurrent Typeoracharacteristicofcurrent
no NoLoadSpeed Rotationalspeed,atnoload
ClassIIConstruction Doubleqnsulatedconstruction
.../rain Per Minute Revolutions, strokes, surface speed, orbits etc., per minute
Wet Conditions Alert Do not expose to rain or use in damp locations.
Read The Operator's Manual
Eye Protection Always wear safety goggles or safety glasses with side
Safety Alert Precautions that involve your safety.
No Hands Symbol serious personal injury.
No Hands Symbol
To reduce the risk of injury, user must read and understand
operator's manual before using this product.
shields and a ful! face shield when operating this product.
Failure to keep your hands away from the blade will result in
Failure to keep your hands away from the blade will result inNo Hands Symbol serious personal injury.
Failure to keep your hands away from the blade will result in
serious personal injury.
@
No Hands Symbol Failure to keep your hands away from the blade will result in
serious personal injury.
Hot Surface
To reduce the risk of injury or damage, avoid contact with
any hot surface.
Page 7

Thefollowingsignalwordsandmeaningsareintendedtoexplainthelevelsofriskassociatedwiththisproduct.
SYMBOL SIGNAL MEANING
DANGER: hdicates an imminently hazardous situation, which, if not avoided, will
result in death or serious injury.
WARNING: hdicates a potentially hazardous situation, which, if not avoided, could
result in death or serious injury.
CAUTmON: hdicates a potentially hazardous situation, which, if not avoided, may
result in minor or moderate injury.
CAUTmON: (Without Safety Alert Symbol) hdicates a situation that may result in
property damage.
SERVICE
Servicing requires extreme care and knowledge and
should be performed only by a qualified service tech-
nician. For service we suggest you return the product to
your nearest AUTHORIZED SERWOE CENTER for
repair. When servicing, use only identical replacement
parts.
WARNING:
The operation of any power too! can result inforeign objects being thrown into your eyes, which
can result in severe eye damage. Before beginning power tool operation, always wear safety
goggles or safety glasses with side shields and a full face shield when needed. We
recommend Wide Vision Safety Mask for use over eyeglasses or standard safety glasses with side
shields. Always use eye protection which is marked to comply with ANSI Z87.!.
SAVE THESE INSTRUCTIONS
WARNING: To avoid serious personal injury,
do not attempt to use this product until you read
thoroughly and understand completely the
operator's manual. Save this operator's manual
and review frequently for continuing safe opera-
tion and instructing others who may use this
product.
Page 8

PRODUCT SPECmFmCATmONS
Length of Stroke ............................................................................................................................................................... 1 in.
Strokes Per Minute .............................................................................................................................................. 0-2,1 O0/min
Switch .............................................................................................................................................................. Vanable Speed
Blade Clamp .............................................................................................................................................................. Toolqess
Cutting Angle ............................................................................................................................. 0° to 45° both Left and Right
©rbital Motion ........................................................................................................................................................ 4 Positions
TRIGGER
LOCK-OFF
BUTTON
SWITCH
TOOL-LESS
BLADECLAMP
SAWBLADE
HEXKEY
REXKEY
STORAGE
SAWBASE
ORBITAL
ADJUSTMENTKNOB
Fig, 1
Page 9

KNOWTHISTOOL
See Figure 1.
Before attempting to use this tool, familiarize yourself with
all operating features and safety requirements.
TOOL-LESS BLADE CLAMP
Your saw has a blade clamp design that does not require
the use of a tool (blade wrench) when installing or
removing the blade. Simply lift blade clamp lock / release
!ever, located on front of saw, insert blade between blade
clamp and saw bar as far as possible, then release !ever to
lock position.
BLADE SELECTION
To obtain the best performance from your saw it is
important to select a specific blade for the particular
application and type of material you wish to cut. By doing
this you will get a smoother, faster cut and prolong blade
life. Replacement blades for this saw are available from
your nearest Sears dealer. Sears recommends the use of
a T-shank blade, if a T-shank blade is not available, a high
quality U-shank may be used.
LOCK-OFF BUTTON
Your saw is equipped with a "lock-off" button which
reduces the possibility of accidental starting. The lock-off
button is located on the handle above the switch trigger.
You must depress the lock-off button in order to pul! the
switch trigger. The lock resets each time the trigger is
released.
NOTE: You can depress the lock-off button from either the
left or right side.
SWITCH
To turn your saw ON, depress the lock-off button and pull
switch trigger. Release switch trigger to turn your saw OFF.
VARIABLE SPEED
This tool has a variable speed switch that delivers higher
speed with increased trigger pressure. Speed is controlled
by the amount of switch trigger depression.
BLADE STORAGE
When not in use, you can place the blades provided with
your orbital jig saw in the storage area !ocated on the back
of the saw.
ORBITAL ADJUSTMENT KNOB
Four position orbital adjustment for fine to aggressive
cutting.
ERGONOMIC DESIGN
The design of the orbital jig saw provides for easy han-
dling. It is designed for comfort and ease of grasp when
operating in different positions and at different angles.
UNPACKING
Your jig saw has been shipped completely assembled.
[] Make sure that all items listed in the packing list are
included.
[] Inspect the tool carefully to make sure no breakage or
damage occurred during shipping.
[] Do not discard the packing matedal until you have
carefully inspected and satisfactorily operated the
too!.
[] If any parts are damaged or missing, please call
1-800-932-3188.
PACKING LiST
Orbital Jig Saw
Blades (2)
Operator's Manual
WARNING: If any parts are missing do not operate
this too! until the missing parts are replaced. Failure
to do so could result in possible serious personal
injury.
WARNING: Do not attempt to modify this tool
or create accessories not recommended for use
with this tool. Any such alteration or modification is
misuse and could result in a hazardous condition
leading to possible serious personal injury.
WARNING: To prevent accidental starting that
could cause serious personal injury, always remove
the battery pack from the too! when assembling
parts.
Page 10

_ WARNING:Donotallowfamiliaritywithtoolsto
makeyoucareless.Rememberthatacareless
fractionofasecondissufficientto inflictserious
injury.
,_ WARNING: Always wear safety goggles or safety
glasses with side sMelds when operating tools.
Failure to do so could result in objects being thrown
into your eyes, resulting in possible serious injury.
APPUCATmONS
You may use this tool for the following purposes:
[] Sawing non-ferrous metal, sheet steel, wood, plastic,
and similar materials.
[] Cutting wood surfaces.
[] Cutting thin sheet metal.
[] Cutting plastics and laminates.
CAUTION: To prevent damage to the battery pack,
remove the battery pack from the charger immedi-
ately if no LED comes on. Return the battery pack
and charger to your nearest service center for check-
ing or replacing. Also, if you are removing the battery
pack from the charger and no LEDs are on, return
both the battery pack and the charger to your near-
est service center. Do not insert another battery pack
into the charger. A damaged charger may
damage a battery pack.
BATTERYPACK
LED FUNCTmONS OF CHARGER
LED WILL BE ON TO mNDmCATE STATUS OF
CHARGER AND BATTERY PACK:
[] Red LED on = Fast charging mode.
[] Green LED on = Fully charged and in trickle charge
mode.
[] Green LED on = When battery pack is inserted into
charger, indicates hot battery pack or that battery pack
is out of or below normal temperature range.
[] Yellow and Green LEDs on = Deeply discharged or
defective battery pack.
[] No LED on = Defective charger or battery pack.
CHARGmNG THE BATTERY PACK
Battery packs for this tool have been shipped in a low
charge condition to prevent possible problems. Therefore,
you should charge it until the green LED on the front of the
charger comes on.
NOTE: Batteries wil! not reach full charge the first time
they are charged. Allow several cycles (operation followed
by recharging) for them to become fully charged.
CHARGmNG A COOL BATTERY PACK
See Figure 2.
If battery pack is below normal temperature range, the
green LED on charger wil! come on. Allow battery pack to
reach normal temperature, then the red LED will come on.
NOT'E: Ifthe charger does not charge the battery pack
under normal circumstances, return both the battery pack
and charger to your nearest Sears Repair Center for
electrical check.
[] Charge the battery pack only with the charger provided.
[] Make sure the power supply is normal household
voltage, 120 volts, 60 Hz, AO only.
[] Connect the charger to the power supply.
[] Place the battery pack in the charger aligning raised rib
on the battery pack with the groove in the charger.
CHARGER
REDLEOONINDICATES
FASTCHARGINGMODE
GREENLEOONAFTERFAST
CHARGINGCYCLE,INDICATESFULLY
CHARGED BATTERYPACK AND IN
TRICKLECHARGEMODE
YELLOWAND GREENLEDSON
INDtCATE$DEEPLYDISCHARGED
OR DEFECTIVEBATTERYPACK
10
BACKStOEOFCHARGER
Fig. 2
Page 11

[] Pressdownonthebatterypackto besurecontactson
thebatterypackengageproperlywithcontactsinthe
charger.
[] NormallytheredLEDonchargerwit!comeon.This
indicatesthechargerisinfastchargingmode.
[] RedLEDshouldremainonforapproximately1hour
thenthegreenLEDwillcomeon.GreenLEDon
indicatesbatterypackisfullychargedandchargeris
inmaintenancechargemode.
NOTE:ThegreenLEDwillremainonuntilthebattery
packisremovedfromthechargerorchargeris
disconnectedfromthepowersupply.
[] HfbothyellowandgreenLEDscomeon,thisindicates
adeeplydischargedordefectivebatterypack.Allow
thebatterypackto remaininthechargerfor15to30
minutes.Whenthebatterypackreachesnormal
voltagerange,theredLEDshouldcomeon.Hfthered
LEDdoesnotcomeonafter30minutes,thismay
indicateadefectivebatterypackandshouldbe
replaced.
[] Afternormalusage,a minimumof1hourofcharging
timeisrequiredtofullyrechargebatterypack.
[] Thebatterypackwillbecomeslightlywarmtothe
touchwhilecharging.Thisisnormalanddoesnot
indicatea problem.
[] Donotplacethechargerandbatterypackinanarea
ofextremeheatorcold.Theywillworkbestatnormal
roomtemperature.
NOTE:Thechargerandbatterypackshouldbeplaced
inalocationwherethetemperatureismorethan50°F
butlessthan100°F.
[] Whenbatteriesbecomefullycharged,unplugthe
chargerfrompowersupplyandremovethebattery
pack.
CHARGING A HOT BATTERY PACK
When using the tool continuously, the batteries inthe
battery pack wil! become hot. You should let a hot bat-
tery pack cool down for approximately 30 minutes before
attempting to recharge. When the battery pack becomes
discharged and is hot, this will cause the green LED to
come on instead of the red LED. After 30 minutes, reinsert
the battery pack in the charger. If the green LED continues
to remain on, return battery pack to your nearest Sears
Repair Center for checking or replacing.
NOTE: This situation only occurs when continuous use of
the tool causes the batteries to become hot. It does not
occur under normal circumstances. Refer to "CHARG-
ING A COOL BATTERY PACK" for normal recharging
of batteries. If the charger does not charge your battery
pack under normal circumstances, return both the battery
pack and charger to your nearest Sears Repair Center for
electrical check.
TO iNSTALL BATTERY PACK
See Figure 3.
Follow these steps to install the battery pack.
[] Lock the trigger switch by placing the rotation selector
in the center position,
[] Place the battery pack on the tool,
[] Make sure the latches on each side of the battery pack
snap into place and the battery pack is secured on the
toot before beginning operation,
CAUTION: When placing the battery pack in the
tool, be sure raised rib on battery pack aligns with
the groove in the too! and that the latches snap into
place properly. Improper assembly of the battery
pack can cause damage to internal components.
TO REMOVE BATTERY PACK
See Figure 3.
Follow these steps to remove the battery pack.
[] Lock the trigger switch by placing the rotation selector
in the center position,
[] Depress the latches on the side of battery pack,
[] Remove the battery pack from the tooi,
DEPRESSLATCHESTO
RELEASEBATTERYPACK
TOINSTALL
r
TO REMOVE
LATCHES
BATTERYPACK
Fig. 3
11
Page 12

_, WARNING:Batterytoolsarealwaysinoperating
condition.Therefore,switchshouldalwaysbelocked
whennotinuseorcarryingatyourside.
TOiNSTALLBLADES
See Figure 4.
[] Remove battery pack, See Figure 3.
[] Lift blade clamp lock / release }ever located on front of
saw.
[] Insert saw blade between blade clamp and saw bar,
[] Release and !ock blade clamp }ever,
[] Replace battery pack,
HEX KEY STORAGE
See Figure 5.
[] Secure supplied hex key on the saw base behind the
rubber covered tab, Push into place,
[] Make sure the hex key is secured before performing
any sawing operation,
[] Remove by pulling on the hex key,
BLADECLAMP
LOCK/ RELEASELEVER
SAWBLADE
UFT
BLADECLAMP
BLADECLAMP
Fig. 4
HEXKEY,
HE×KEY
STORAGEAREA
Fig. 5
12
Page 13

GENERALCUTTING
See Figure 6.
Rest the front of the saw base on the workpiece and align
cutting edge of the blade with the line on your workpiece.
Start your saw and move it forward on the work surface.
Apply downward pressure to keep the saw steady and
only enough forward pressure to keep the blade cutting.
DO NOT FORCE YOUR SAW
Forcing your saw may overheat the motor and break saw
blades. Broken saw blades must be discarded. Remove
the broken portion of the saw blade from the clamp and
install a new saw blade.
ORBITAL MOTION
See Figure 6.
The blade of your saw cuts in orbital motion. This feature
is adjustable and provides faster more efficient cutting.
The blade cuts through your work in the upstroke but
does not drag across your work in the downstroke. The
higher settings should be used when fast cutting in soft
material is desired. The lower settings should be used
when cutting materials with more resistance.
STRAIGHT CUT
See Figure 6.
A straight cut can be made by clamping a piece of wood
or straightedge to the workpiece and guiding the edge of
your saw against it. Make the cut from one direction only.
Don't cut halfway and complete the cut from the opposite
end.
SCROLL CUTTING
See Figure 7.
Scroll cuts can be made with your jig saw by guiding the
direction of the cut with applied pressure on the handle as
shown in figure 7.
TOINCREASE
ORBITALSETTING
ORBITAL
TODECREASE
ORBITALSETTING
KNOB
Fig. 6
,_ WARNING: Excessive side pressure to the blade
could result in broken blades or damage to the
material being cut.
Fig. 7
13
Page 14

ANGLE CUTTING (BEVEL OUTT(NG)
See Figures 8 - 9.
Beve( cutting angles may be adjusted from 0° to 45 ° right
or (eft, Ang(es for cuts from 0 ° to 45 ° in 15° increments
are marked on a sca(e on both the (eft and right side of
the base, Notches on the rear of the base provide posi-
tive stops at each of the above mentioned 15 ° increments,
A protractor is recommended when accurate cuts are
required.
[] Using the 1/8 (n. hex key provided, (oosen the base
p(vot screws until the base can be move&
[] Slide base forward unti( base pivot screws can move
free(y in slots in base.
[] A(ign the mark, on the base, of the des(red ang(e with
the edge of the motor hous(ng.
[] Once the desired ang(e is reached, s(ide base back unti(
tab on motor housing a(igns w(th the appropriate notch
on rear of base.
NOTE: When making a set-up for accurate cuts w(th a
protractor, or for ang(es other than the preset 15 ° incre-
ments, the positive stop notches on the rear of the base
are not used.
[] Tighten the base p(vot screws secure(y.
[] Return hex key to storage compartmenL
NOTE: The w(de s(ot in the base must be used when mak-
ing beve( cuts, scro(( cuts, p(unge cuts, and when cutting
metal
BASE
P(VOTSCREWS
o ,o ...Z....................................°
SAWBASE _ _ NEXKEY
4
Fig. 8
PLUNGE CUTTING
See Figures 10 - 11.
_, WARNING: To avoid loss of control, broken
or damage to the material being cut, always use
extreme caution when making p(unge cuts. We do
not recommend p(unge cutting on mateda(s other
than wood.
TO MAKE A PLUNGE CUT:
[] Mark the (ine of cut dearly on the workp(ece.
[] Set the cutting ang(e at 0°.
[] Set the orbital adjustment knob to 0.
[] Tilt your saw forward so that it rests on the front edge
of the base and Made will not come in contact with the
workpiece when the saw is turned on.
[] Make sure the b)ade is inside the area to be cut.
[] Using high speed, start your saw and slowly lower the
Made into the workp(ece until the blade cuts through the
wood.
[] Do not move the base forward until the blade cuts en-
tire(y through the workpiece and the base is in comp(ete
contact with the workp(ece.
[] Move the saw forward to comp(ete the opening.
[] Use on(y the 7 teeth per inch b)ade for this type of cut.
b(ades,
PLUNGECUT
Fig. 11
14
Page 15

SPLmNTERoFREECUTTING
See Figures 12 ° 13.
The base of your jig saw has a narrow slot to permit
splinter=free cutting, It is especially useful when cutting
plywood, This feature should only be used when mak=
ing straight cuts or circle cuts, it is not for bevel cutting or
plunge cutting,
NOTB: The non=orbital setting also helps reduce splin=
tering when cutting plywood,
HOW TO POSITION BASE mNTHE SPLINTER-
FREE CUTTING POSITION:
[] Remove battery pack,
[] Using the 1/8 in, hex key provided, loosen base pivot
screws and slide base forward,
[] Always set the cutting angle at 0° for splinter=free cut=
ting, To set cutting angle at 0°, align the 0° mark on the
scale with the edge of the motor housing,
NOTE: When setting angle at 0° for splinter-free cutting,
the positive stop notches on the rear of the base are not
used,
[] Tighten base pivot screws securely,
[] Remove hex key and return it to storage compartment,
[] Replace battery pack,
OPTIONAL EDGE GUIDE
See Figure 14.
An optional edge guide is available for use with your saw, it
can be used for making crosscuts and rip cuts,
[] Remove battery pack.
[] Loosen edge guide screw,
[] insert the arm through the two s!ots in the base of your
saw as shown.
[] Adjust edge guide to the desired width and lock in ptace
with the edge guide screw,
[] Replace battery pack,
PIVOTSCREWS
SAWBASE
BASE
SETSCALEAT 0° FOR
SPLINTER-FREECUTTING
Fig. 12
Fig. 13
15
SAWBASE
EDGE
GUIDESCREW
SLOT
EDGEGUIDE
Fig. 14
Page 16

_ WARNING:Whenservicing,useonlyidentical
Craftsmanreplacementparts.Useofanyotherpart
maycreateahazardorcauseproductdamage.
_ WARNING:Alwayswearsafetygogglesorsafety
glasseswithsideshieldswhenusingcompressedair
tocleantools.Hftheoperationisdusty,alsoweara
dustmask.
_ WARNING:Toavoidseriouspersonalinjury,always
removethebatterypackfromthetoolwhencleaning
orperforminganymaintenance.
GENERAL MAmNTENANCE
Avoid using solvents when cleaning plastic parts. Most
plastics are susceptible to damage from various types of
commercial solvents and may be damaged by their use.
Use clean cloths to remove dirt, dust, oi!, grease, etc.
The battery pack for this tool is equipped with nickel-cad-
mium rechargeable batteries. Length of service from each
charging will depend on the type of work you are doing.
The batteries in this too! have been designed to provide
maximum trouble-free life. However, like all batteries, they
will eventually wear out. Do not disassemble battery pack
and attempt to replace the batteries. Handling of these
batteries, especially when wearing rings and jewelry, could
result in a serious burn.
To obtain the longest possible battery life, we suggest the
fo!!owing:
[] Remove the battery pack from the charger once it is
fully charged and ready for use.
For battery pack storage longer than 30 days:
[] Store the battery pack where the temperature is below
80°F.
[] Store battery packs in a "discharged" condition.
_ WARMNG: Do not at any time let brake fluids,
gasoline, petroleum-based products, penetrating
oils, etc. come in contact with plastic parts. Chemi-
cals can damage, weaken or destroy plastic which
may result in serious personal injury.
Only the parts shown on the parts list are intended to be
repaired or replaced by the customer. Al! other parts
should be replaced at a Sears Service Center.
BATTERY PACK REMOVAL AND
PREPARATION FOR RECYCUNG
To preserve natural resources, please
recycle or dispose of batteries
properly.
This product contains nickeFcadmium
batteries. Local, state or federal
laws may prohibit disposal of nickeF
cadmium batteries in ordinary trash.
Consult your local waste authority for information
regarding available recycling and/or disposal options.
WARMNG: Upon removal, cover the battery pack's
terminals with heavy-duty adhesive tape. Do not
attempt to destroy or disassemble battery pack or
remove any of its components. Nicke!-cadmium
batteries must be recycled or disposed of properly.
Also, never touch both terminals with metal objects
and/or body parts as short circuit may result. Keep
away from children. Failure to comply with these
warnings could result in fire and/or serious injury.
WARNING: Current attachments and accessories available for use with this tool are listed above. Do not use any
attachments or accessories not recommended by the manufacturer of this too!. The use of attachments or acces-
sories not recommended can result in serious personal injury.
16
Page 17

17
Page 18

CRAFTSMAN 19.2 VOLT CORDLESS JiG SAW - MODEL NO. 315.114280 -_
number in all correspondence regarding your CORDLESS JiG SAW or when ordering repair parts.
I he model number will be found on a plate attached to the motor housing, Always mention the model ]
SEE BACK PAGE FOR PARTS ORDERING INSTRUCTIONS
J
PARTS UST
Key Part Key Part
No. Number Description Qty. No, Number
1 690227036 Metal Cutting Blade ........................... 1 6 680907001
1 690227035 Wood Cutting Blade .......................... 1 7 550432001
2 660302002 Screw ................................................ 2 8 671314002
3 630847003 Plate .................................................. 1 130139020
4 660302001 Screw ................................................ 1 1425301
5 630846007 Base .................................................. 1 983000-488
* Can Be Purchased Thru RSOS (Retail Special Order System) J
18
Description Qty.
Hex Key ............................................. 1
Rubber Tube ...................................... 1
Blade Guard ...................................... 1
Battery Pack (9 11375) ...................... 0
Charger _ 11041) .............................. 0
Operator's Manual
 Loading...