

Page 1
Operator's Manual
3/8 in. 9.6 VOLT
CORDLESS DRILL-DRIVER
Variable Speed / Reversible
Model No.
315.114050
Save this manual for
future reference
WARNING: Toreducethe risk of Injury, the
usermustread and understandthe operator's
manualbefore usingthis product.
Customer Help Line: 1-800-932-3188
Sears, Roebuck and Co., 3333 Beverly Rd., Hoffman Estates, IL 60179 USA
Visit the Craftsman web page: www,sears.com/craftsman
983000-329
8-o3
Page 2
• Warranty......................................................................................................................................................................... 2
• Introducton..................................................................................................................................................................... 2
• General Safety Rules ............................................................................................................................................... 3-4
• SpeciflcSafety Rules .............................................................................................................................................. 4-5
• Symbols.......................................................................................................................................................................... 6
• ProductSpecifications.................................................................................................................................................... 7
• Unpacking....................................................................................................................................................................... 7
• Features ..................................................................................................................................................................... 7-8
• Operation.................................................................................................................................................................. 9-14
• Maintenance................................................................................................................................................................. 15
• Accesserles.................................................................................................................................................................. 15
• ExplodedView and Repelr Parts List........................................................................................................................... 16
• PartsOrdering/ Service ............................................................................................................................................... 18
FULL ONE YEAR WARRANTY ON CRAFTSMAN 3/8 In. CORDLESS DRILL-DRIVER
Ifthis CRRFTSMAN 3/8 In. Cordless DdlI-Ddver falls to give complete satisfaction within one year from the date of pur-
chase, RETURN rrTo THE NEAREST SEARS STORE OR SEARS SERVICE CENTER IN THE UNITED STATES, and
Sears wilt replace it,free of charge,
Ifthis €ItRFt'$NRN3/8 In, CordlessDdU-Ddver Is usedfor commercialor rental purposes, thiswarranty appliesfor oniy
90 daysfromthe date of purchase.
Thiswarranty givesyou specificlegal rights,and youmayalsohaveother dghts whichvary from stateto state.
Sears, Roebu-'k and Co., Dept. 817WA, Hoffman Estates, IL 60179
Yourdrill-driverhasmany features for makingyourddlllng
operationsmore pleasantand enjoyable.Safety,
performanceand dapendabllltyhave been giventop
priorityInthe designof thisdrill-drivermakingiteasy to
maintainand operate.
_, WARNING: Do notattempt to usethis product until
youread thoroughly and understandcomplatelythe
operator'smanual.Pay close attentiontothe safety
rulesincludingDangers,Warningsand Cautions. If
youuse this productproperlyand only as Intended,
youwillenjoyyears of safe, reliable service.
Look for this symbol to point out Important safety precautions. It means
attention!!! Your safety Is Involved.
_1= WARNING:
The operationofany powertool can resultInforeignobjectsbeing thrownintoyoureyes, which can
resultIn severe eye damage. Before beginning powertcol operation, always wear safety gogglesor
safetyglasseswith sideshieldsand a full face shieldwhen needed. We recommendWide Vision
O
Safety Mask for useovereyeglassesorstandardsafetyglasseswithsideshields,availableat Sears
RetailStores. Alwayswear eye protectionwhich Is markedto complywithANSI Z87.1.
2
Page 3
• 1,WARNING: Reed and understand all Instructions.
Failureto followall Instructionslistedbelow,may
msuk inelectricshock,fire and/orseriouspersonal
Injury.
SAVE THESE INSTRUCTIONS
Work Area
• Keep your work area clean and well lit, Cluttered
benchesand dark areas inviteaccidents.
Do not operate power tools inera(plosiveatmo-
spheres, such as inthe presence of flammable
liquids, gases, or dust. Powertoolscreate sparks
whichmay ignitethe dust or fumes.
• Keep bystanders, children, and visitors away while
operating a power tool. Distractions cancauseyou
to losecontrol.
Eie=tdcal Safety
• A battery operaterl tool with integral batteries or a
separate battery pack must be recharged only with
the specified chargm for the battery. A chargerthat
may be suitableforone type ofbatterymaycreatea
riskoffire when used withanotherbattery.Use b_ttery
only with chargerlisted.
MODEL BATTERY PACK CHARGER
315.114050 ITEMNO.911074 ITEMNO.S11070
(976965-001) (976790-001)
Use battery operated tool only with specifically
designated batter/peck. Use ofany otherbatteries
maycreate a risk of fire. Useonly withbatterypack
listed.
Do not abuse the cord. Never use the cord to carry
the charger. Keep cord away from heat, oil,sharp
edges, or moving parts. Replace damaged cords
Immediately. Damaged cordsmay createa fire,
Personal Safety
• Stay alert, watch what you are doing and use
common sense when operating a power tool. Do
not use tool while Urad or under the Influence of
dregs, alcohol, or medication. A momentof inatten-
tionwhile operatingpowertools may resultin serious
personal injury.
• Dress properly. Do not wear loose clothing or
jewelry. Contain long heir. Keepyour heir, clothing,
and gloves away from moving parts. Looseclothes,
Jewelry.orlonghair can be caught in movingparts.
• Avoid accidental starting. Be sure switch is in the
locked or off position before inserting battery
pack. Canylngtoolswithyour fingeron the switchor
insertingthebattery pack intoa tool w_hthe switch on,
invites acclder_s.
• Remove adjusting keys or wrenches before turn-
ing the tool on.Awrench ore keythat isle_ attached
to a rotatingpartof the toolmay resultIn personal
Injury.
• Do not overreach. Keep proper footing and bat-
ance at all times. Properfootingand balanceenables
better controlof thetool Inunexpectedsituations.Do
not useona ladderorunstablesupport.
• Use safety equipment. Always wear eye protection.
Dust mask,nonskidsafetyshoes,hard hat,or hearing
protectionmustbe usedfor approprfateoondltlons.
Page 4
Tool Use and Care
• Use clamps or other practical way to secure end
support the workpisee to a stable platform. Holding
the work by hand or againstyour body is unstable and
may lead to loss of control.
• Do not force tool. Use the correct tool for your
application. The correct tool will dothe job better and
safer at the rete for which it is designed.
• Do not use tool if switch dose nof turn It on or off.A
tool that cannot be controlledwith the switch isd_ngsr-
ous and must be repaired:Tool Use and Care
• Disoseneot battew pack from toot or place the mltch In
the locked or otf pesRIon hefora maldng any adJustmmts,
ofta@ng acoessede_ or stedng the toot.Such praventlve
s_oty mes_umsreduceriskofstarlingtheted acddertally,
• Store Idle tools out of reach of children and other
untrained psmons. Tools are dangerous inthe hands of
untrained users.
• When battery pack Is not In use, keep it away from
other metal objects like: paper clips, coins, keys,
nails, screws, or other small metal objects that can
make a connection frem one terminal to another.
Shortingthe battery terminals together may cause
sparks, bums, or a fire.
• Maintain tools with cam. Keep cutting tools sharp
and clean. Properly maintained tools,with sharp cutting
edges am less likelyto bind end are easier to control.
• Check for mlsalignment or binding of moving parts,
breakage of parts, and any other condlUen thot may
alfeot the toore ogerstlon. If damaged, have the tool
servlcad before using. Many acoidents are caused by
poorlynaintair_d teals.
Use only accessories that are recommended by the
manufacturer for your model. Accessories that may be
su_ablefor one tool, may create a riskof injury when used
on another tool,
• Keep the tool end its handle dry, clean end free from
all and grease. Always use s clean clothwhen cleaning.
Never use broke fluids, gasoline, petroleum-bssed
products,or any strong solvents todean your tool
Selvlce
• Tool seralca must be performed only by qualified
repair personnel. Service or maintenance performed by
unqualifiedpersonnel oould result in a risk of injury,
• When servicing a tool, use only identical replacement
parts. Follow Instructions In the Malntenanca section
of this manual Use of unauthorized parts or f_lum to
follow Maintenance Instructionsmay create a dsk of shock
or injuly,
Hold tool by Insulated gripping surfaces when performing an operation where the cutting tool may contact
hidden wiring. Contactwitha "live" wirewill make exposedmetal partsof thetool "live= and shockthe operator.
Additional Safety Rttles
Know your power tool. Read operator's manual
carefully. Learn Its applications and limitations,
as well as the specific pofeatial hazards misted to
this tool. Followingthis rule willreducethe risk of
electricshock,fire, or seflous Injury.
Additional Cordless Tool Rules
• WARNING: Never use a batterythat has been
dropped or receiveda sharpblow, A damaged
battery Is subjectto explosion.Properlydisposeof a •
droppedbatteryImmediately. Failureto heed this
wamlng can resultinsedouspersonal Injury.
• Battery tools do not have to be plugged Into an
electrical outlet; therefore, they are always In
operating condition. Be aware of possible haz- •
ards when not using your battery tool or when
changing accessories. Followingthis rule will
reducethe dskof electric shook,fire, or serious
personalInjury.
• DOnot place battery tools or their batteries near
fire or heat. This willreducethe riskofexplosionand
possibleInjury,
Batteries vent hydrogen gas and can explode In
the presence of a source of Ignition, such as a pilot
light. To reduce the dsk of sedous persona] Injury,
never use any cordless product in the presence of
open flame. An exploded battery can propel debris
and chemicals, If exposed, flush with water immedi-
ately.
i
Do not charge battery tool In a damp or wet loca-
tion. Following this rule will reduce the rtsk of a]eotflc
shock.
For best results, your battery tool should be
charged in a location when) the temperature Is
more than 50°F but less than IO0°F. Do not store
outside or In vehicles.
Under extreme usage or temperature conditions,
battery leakage may occur. If liquid comes In
contact with your skin, wash Immediately with
soap and water, than neutralize with lemon juice or
vinegar. If liquid gets Into your eyes, flush them
with clean water for el least 10 minutes, then seek
immediate medical attention. Followingthis rulewill
reclusethe dsk of serious personalinjury.
4
Page 5
_,WARNING: Never usa a batterythat has been
droppedor receiveda sharpblow.A damaged bakery
Is subjecttoexplosion. Properlydisposeof a dropped
battery Immedla[ely.Failureto heedthiswarning can
resultin sedous personalInjury.
• Before using battery charger, read all instructions
and caofionew markings Inthis manual, on
battery charger, and product using battew
charger. Followingthisrulewill reducethe riskof
electric shock,fire, or seriouspersonal injury.
• TO reduce risk of inJuw, charge only nickel-
cadmium type rechargsuble batterlce. Other types
of batteries may burst causing personal Injury and
damage. Follow]ngthis ru]ewill reduce the risk of
electdc shock,fire, or sadous persanal Injury.
• Do not expose charger to wet or damp conditions.
Followingthis rulewillreducethe flskof electflc
shock,fire, or seriouspersonal Injury.
• Use of an attachment not recommended or sold
by the battery charger manufacturer may result in
a risk of fire, electric shock, or Injury to persons.
Followingthis rule will reducethe riskof electric
shock,fire, or seriouspersonal injury.
• To reduce riM( of damage to charger body and
cord, pull by charger plug rather then cord when
disconnecting chargez. Followingthisrule will
reducethe riskof electric shock,fire, or serious
personal Injury.
• Make sure cord is located sc that It will not be
stepped on, tripped over, or otherwise subjected
to damage or stress. Followingthis rulewill reduce
Lherisk of seriouspersonalInlury.
• An extension cord should not be used unless
absolutely necessary. Use of improperextension
cordcould resultIna riskof fire and electric shock.If
extension cord mustbe used, make sure:
• That pins on plugof extensioncord are the
same number,size and shapeas those of
plugon charger.
• That extension cord Is properly wired and In
good electrical condition; and
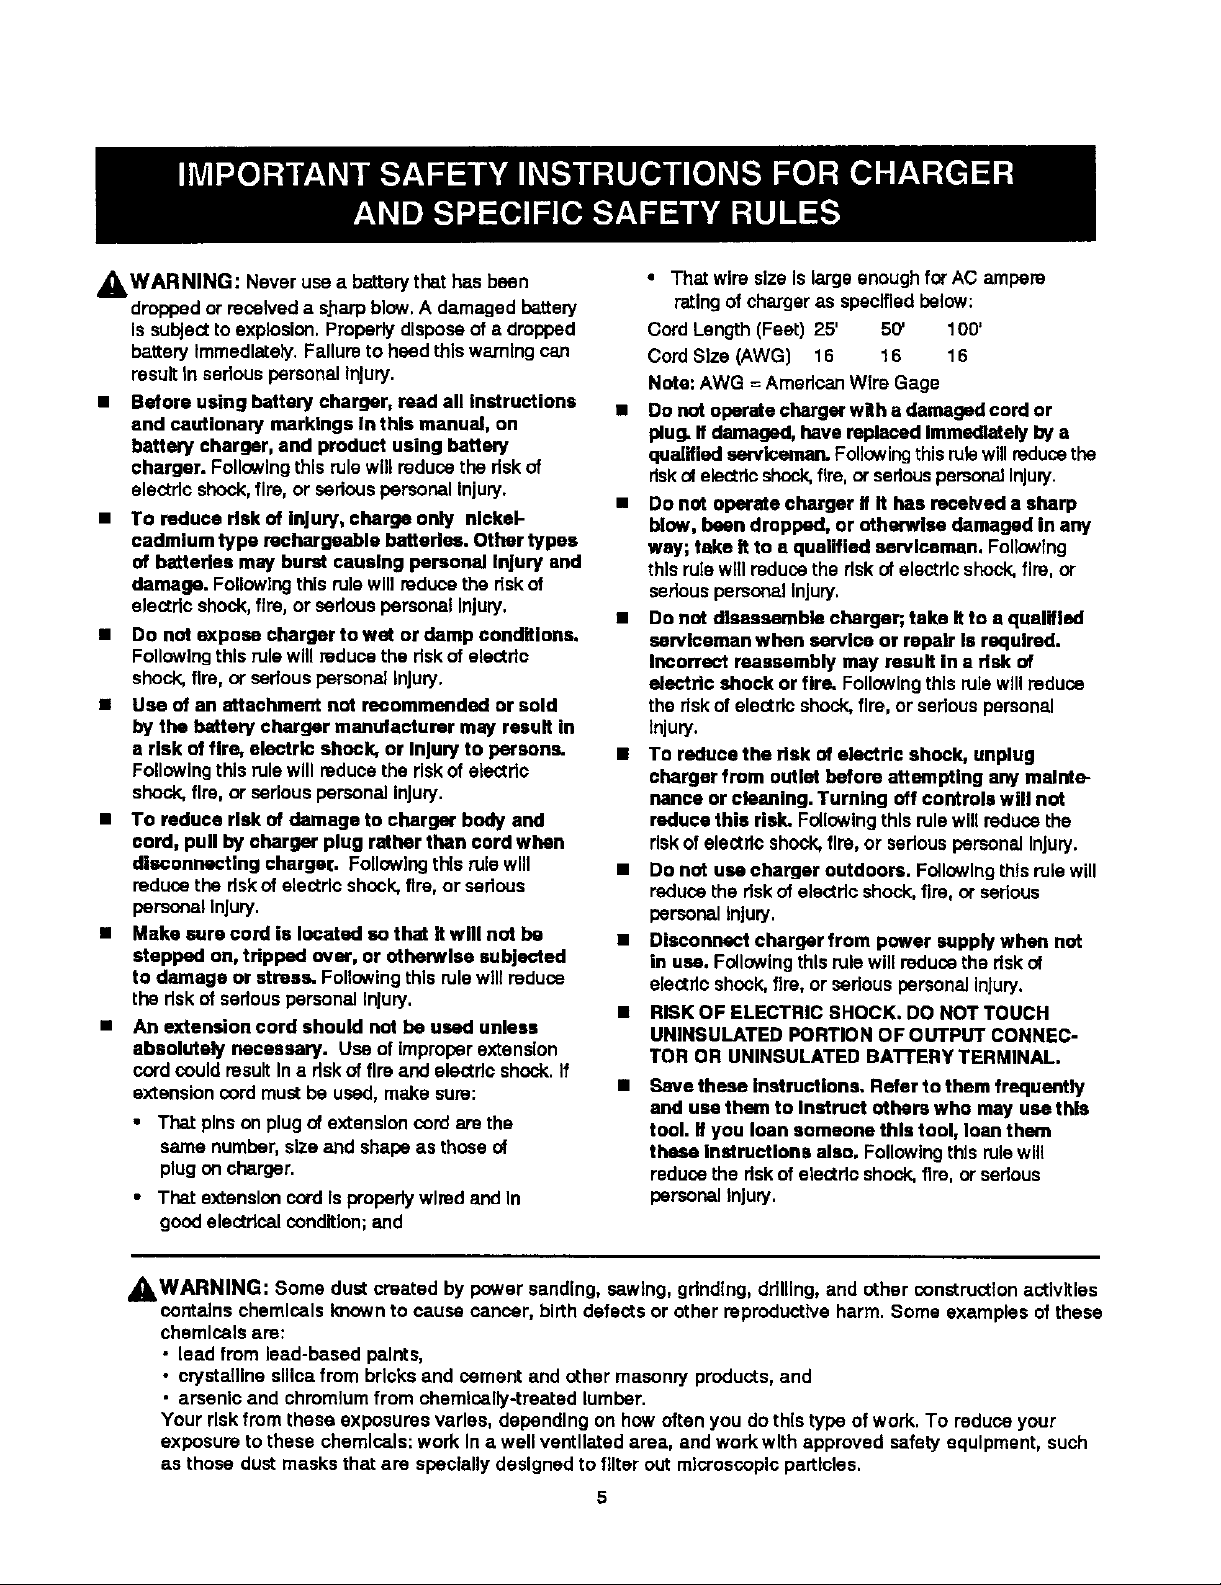
• ThZ wire size Is large enough forAC ampere
ral:lngof chargeras specifiedbelow:
Cord Length (FeeL) 25' 50' 100"
CordSize (AWG) 16 16 16
Note: AWG = AmericanWire Gage
• no not operatecharger with a damaged cord or
plug. If damaged, have replaced Immediately by a
qualified serviceman. Followingthisrule willreducethe
risk_ electricshock,fire,or sadouspemor_JInjury.
• Do not operate charger If It has received a sharp
blow, been dropped, or otherwise damaged in any
way; take if to a qualified serviceman. FolloWing
this rulewillreduce the dsk of electric shock,fire, or
seriouspersonalinjury.
• Do not disassemble charger; take it to a qualified
surviceman when sundca or repair Is required.
Incorrect reassembly may result in a risk of
efectdc shock or fire. Followingthis rule willreduce
the rlskof electricshock,fire,or seriouspersonal
Injury.
• To reduce the dak of alectdc shock, unplug
charger from outlet before attempting any msinte-
nanse or cleaning. Turning off controls will not
reduce this risk. Followingthis rulewill reducethe
riskof electricshock,fire, or seriouspersonal Injury.
• Do not use charger outdoors. FollowingLhtsrulewill
reducethe riskof electricshock,fire, or serious
personal injury,
• Disconnect charger from power supply when not
in use. Followingthlsrulewill reducethe riskof
electricshock,fire, or seriouspersonalInjury.
• RISK OF ELECTRIC SHOCK. DO NOT TOUCH
UNINSULATED PORTION OF OUTPUT CONNEC-
TOR OR UNINSULATI=D BA'ITERY TERMINAL.
• love these Instruction,,. Refer to them frequently
and use them to Instruct others who may use this
tool. If you loan someone this tool, loan them
these Instructions also. Followingthis rulewill
reducethe dskof electricshock,fire, or serious
personal injury.
_WARNING: Some dust created by power sanding, sawing, gdndtng, drilling, and other construct(on activities
contains chemicals known to cause cancer, birthdefects or other reproductive harm. Some examples of these
chemicals are:
• lead from lead-based points,
• crystallinesilica from bricksand cement and other masonry products,and
• arsanlc and chromiumfrom chemically-treated lumber.
Your risk from these exposures varies, depending on how often you do this type of work. To reduce your
exposure to these chemicals:work In a well ventll_ed area, andwork with approved safety equipment, such
as those dust masks that are speciallydesigned to filter out microscopic particles.
5
Page 6
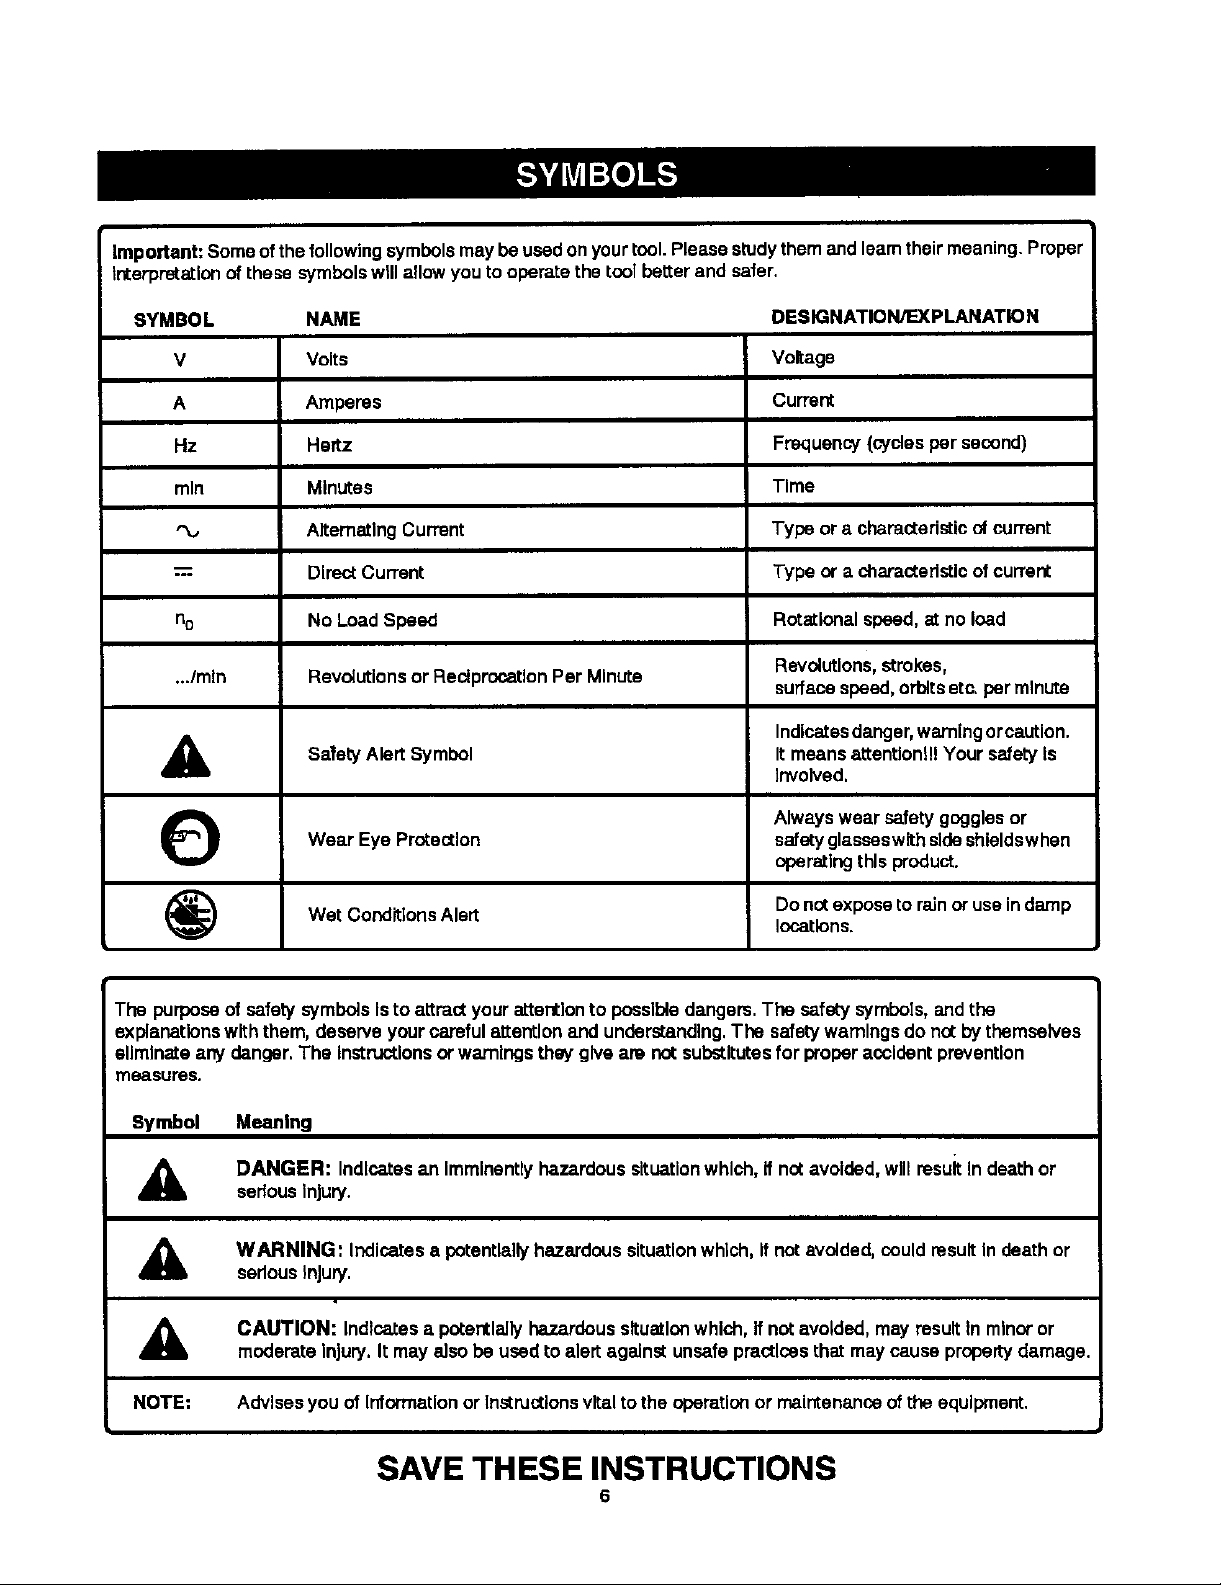
Important: Some ofthe followingsymbolsmay beusedonyourtool.Please studythem andleamtheir meaning.Proper
interpretationofthese symbolswill allowyou to operate the toolbetterand safer.
SYMBOL NAME
V Volts
A Amperes
Hz Hertz
mln Minutes
AlternatingCurrent
= DireotCurrent
no No LoadSpeed
.../mln RevolutionsorReciprocationPer Minute
&
O
SafetyAlert Symbol
Wear Eye Protection
DESIGNATION/EXPLANATION
Voltage
Current
Frequency(cyclesper second)
Time
Type ora characteristicnf current
Type or a characteristicofcurrent
Rotationalspeed,at no load
Revolutloos, strokes,
surfacespeed,orbitsetc. per minute
Indicatesdanger,warningorcaution.
Itmeans attention!!! Your safetyis
involved.
Alwayswear safetygogglesor
safetyglasseswithsideshleldswhen
operatingthis produot.
Wet ConditionsAlert
The purposeof safetysymbolsIs to attract your attention to possibledangers.The safety symbols,and the
explanationswith them, deserve yourcareful attention and understanding.The safetywarnings do nntbythemselves
eliminateany danger.The Instructionsorwarningsthey give are not substitutesfor properaccident prevention
neasures,
SymbolAMeaning
DANGER: Indicatesan Immlnantlyhazardoussituationwhich,If notavoided, will resuitin death or
seriousinjury.
A
A
NOTE:
WARNING: Indicatesa potentiallyhazardoussituationwhich, If notavoided,could result Indeath or
serlousInjury.
CAUTION: Indicatesa potentiallyhazardoussituationwhich,If notavoided, may result in minoror
moderate Injury. Itmayalsobe used toalert against unsafepractices that maycause property damage.
Advises you of Information orInstructions vitalto the operationor maintenanceofthe equipment.
Donotexposetorainor useindamp
Iocetlons.
SAVE THESE INSTRUCTIONS
6
Page 7

Chuck 3/8In. Key'less MaximumTorque
Motor DC 9.6 Volt CHARGER
Gear Train One Speed
Switch VadableSpeed Rating
No LoadSpeed O-600/min Charge Rate
BATTERY PACK Item No. J11074
(976965-001)
Clutch
90 In.lb.
Item No, =11070
(976790-001)
120 V, 60 Hz,AC only
3-6 Hour
6 Positions
instructions
Yourdrillhas beenshippedcompletelyassembled.
• Carefullyremovethe tooland accessehes from the
box.
• Make surethat all Items listed Inthe peckinglistare
Included.
m Inspectthe tool carefullyto make sureno breakageor
damage ocouredduringshipping,
= Donotdiscardthe p=_cldngmaterialuntilyou have
carefully Inspected and satisfactorilyoperatedthetool.
• If any perts are damaged or missing,pleasecall
1-800-932o3188.
KNOW YOUR DRILL-DRIVER
See Figure1.
BeforealtemlXIng to useyour drill-driver,farnllladze
yourselfwithall operatingfeaturesand safety
requirements.
KEYLESS CHUCK
Yourdrill-driverhasa keyles#chuckthat allowsyoutohand
tightenor releasedrillbitInthe chuck Jaws.
SWITCH
To turnyour ddll-ddverON, depressthe switchtdgger.
Release switch tdgger to turnyour ddU-ddverOFF.
SWITCH LOCK
The switch tdgger can be lockedin the OFF position.This
feature helps reducethe possibilityof ,_ccldentaist-rtTng
when not In use,
VARIABLE SPEED
This tool has a varlab{e speed switch that delivershigher
speedwith Increased tdggerpressure.Speed Is contmnod
bythe amount of switch tdgger depression.
Pacldng List
DHII
BatteryPack
Charger
Double-anded ScrewdriverBIt (2)
40 pceBItSet
CarryBag
Operator's Manual
_WARNING: Ifany partsare missing do notoperate
yourtoof untilthe missingpartsare replaced. Failure
todo socould resulttn possibleseriousInjury.
J_ WARNING: The ddll shouldneverbe connected to a
powersupplywhen you are assemblingparts,making
adjustments,cleaning,performingmaintenance,or
when thetool IsnotIn use, Dlsoonnectlngthe toolwill
preventacctdentaistartingthat could cause sedous
Injury.
FORWARD/REVERSE SELECTOR
(DIRECTION OF ROTATION SELECTOR)
Yourddn-ddverhas a forward/reverseselector locked
above the switchtrigger,
WRIST STRAP
Awriststrap Is providedto reducethe chances of drepplng
yourdrill-driver.Place one hand through the wdststrap
when carryingtool.
BIT STORAGE
When not in use, bit(s) providedwithyour drill-drivercan
be placed Inthe storage area located onthe top ofthe
motor housing.
A WARNING: Ifanypartsam missing,do notoperate
yourdrill-driveruntilthe missingparts are replaced.
Failuretodo socould resultInpossibleserious
personal injury.
Page 8

CHARGING
STAND
ADJUSTMENTRING
KEYLESS
CHUCK
TORQUE
BITSTORAGE
SCREWDRIVER
BITS
ROTATIONSELECTOR
UGHT
CHARGER
See Figure I.
BATrERY
CHARGER
BATI'ERYPACK
SHOWNINTOOL
Fig. 1
S
Page 9

WARNING: Do not aJtowfamiliaritywithyourdrill-
driverto make you careless. Rememberthat a
carelessfraction ofa secondIssufficientto Inflict
severeInjury.
CHARGING BATTERY PACK
See Figure1.
The battery peck for thistoolhas been shippedIn a low
chargeconditionto prevent possibleproblems.Therefore,
you shouldcharge itat least3 hourspriorto use.
Note: Batterieswillnot reachfullcharge the firsttimethey
are charged. Allowseveralcy-cles(ddllingfollowedby
recharging)for them to become fullycharged.
TO CHARGE
• Charge batterypack only with the charger and
chargingstand provided.
• Make sure power supply Is normal house voltage,
120 volts, 60 Hz, AC only.
• Connect charger to power supply.
• Placebatterypack Incharging stand.Alignraiseddbon
batten/peck with grooveIn chargingstand. See Figure
1.
• Pressdownon batterypeckto be surecontactson
batterypeck engage properlywithcontactsIn charging
stand.
• When properlyconnected,the red lighton charging
stand willturnon.
• Note: Ifcbargerdsesnctcbargebetterypack,mtumbaJ_ery
pack,chargingstand,andchargertoyourneatsstSeam
RepekCenterforelectdcaJcheck.
• Afternorma_usage,3 hcursol chargingtimeIsrequiredto be
fullycharged.A minimumchargetimeof 3 hoursIsreqdmd
torechargea co_ely dschargedtool.
• The batterypeck will become sllghtlywarmto thetouch
whilecharging.Thls is normaland does notIndicatea
problem.
• Do not place charger inan area of extremeheat or
cold.it will workbestat temper=_turesbetween 50_F-
100°F.
• When batteriesbecomefully charged,unplugcharger
from powersupplyand removethe batterypeck.
IMPORTANT INFORMATION FOR RECHARGING
HOT BATTERY PACK
When usingyourddl[_dver continuously, the batteries in
yourbatterypackwill become hot. You shouldlet a hot
bakery pack cooldown for approximately30 minutes
before attempting to recharge.
Note; This situationonlyoccurswhen continuous useof
yourdrillcausesthe batteriesto become hot.It does nct
occurunder normalcircumstances.Referto"CHARGING
BATrERY PACK_ for normalrechargingof bakeries. If
the charger does not chargeyour battery peck under
normalcircumstances,returnboth tha battery pack and
charger toyour nearestSears Repair Center for electdcaJ
check.
9
Page 10

SWITCH
See Figure 2.
To turnyour drillON, depress the switchtrigger.To turn it
OFF, releasethe switchtrigger.
FORWARD/REVERSE
SELECTOR
VARIABLESPEED
SWITCHTPJGGER Fig.2
VARIABLE SPEED
Thistool has a variable speed switch that delivers higher
speedand torquewithIncreased triggerpressure.Speed Is
controlledbythe amountof switchtriggerdepression,
Note: You might hear a whistlingor dnglngnoisefrom the
switch duringuse, Do not be concerned,this Isa normal
part ofthe switch function,
TO INSTALL BATTERY PACK
• Lockswitchtriggeronyourdrillby placingthe direction
of rotationselectorIn center position.See Figure 3,
• Placebatterypack InyourddlLAlign raiseddb on
batterypackwith grooveinsideddlLSee Figure3.
BATI'ERY PACK
LATCHES
_ DEPRE_ LATCHESTO
RELEASEBA'rrERY PACK
Fig. 3
• Make surethe latches on each s{deofyour battery
pack snap In place and batterypack Is securedIn drill
beforebeginningoperation,
A CAUTION: When placingbatterypackInyour dd[I,
be sure raised ribon batterypack aligns w_thgroove
Insideddlland latchessnap intoplacepmpady.
Improperassembly ofbattery pack cancause
damage to internalcomponents,
TO REMOVE BAI"rERY PACK
• Lock switch tdggeron your drillby placing the direction
ofrotationselector in center position, See Figure3.
• Locatetatohes on side of batterypack and depressto
release batterypack from your drill.See Figure3.
• Remove batterypack fromyour drill
10
Page 11

SWITCH LOCK
See Figure 4,
The switchtdgger can be lockedInthe OFF position.This
feature can be used to prevent the possibilityofaccldental
startingwhen notin use.To lock switchtrigger,placethe
directionof rotationselector(Forward/ReverSeSelector)
incenter position.
SELECTORWITH
REVERSE
CENTERLOCKPOSITION
KEYLESS CHUCK
See Figure5.
Yourdrillhasa k_=ylesschuck.As the name Impites,you can
handtightenor releasedrillbitsinthe chuck J;tws.Graspand
holdthecollarofthechuck withone hand.Rotatethechuck
bodywithyourotherhand.The arrowsonthechuck
Indicatewhichdirectionto rotatethe chuck bodyinorderto
LOCK (tighten)or UNLOCK (release)the ddllbiL
DI_LLBIT (RELEASE)
UNLOCK CHUCKCOLLAR
°
FORWARD
SWITCHTRIGGER Fig. 4
_lh WARNING: Batterytoolsare always in operating
condition.Therefore, switchshouldalwaysbe locked
when not in useorcanylng atyour side.
REVERSIBLE
See Figure 4.
Thistool has the feature ofbeing reversible, The direction
of rotationis controlled bya selector locatedabovethe
switchtrigger,With the drill heldIn normaloperating
position,the directionof rotationselector shouldbe
positionedtothe left ofthe switchfor ddlllng.The drilling
direction[s reversedwhen the selector Isto the rightof
the switch.When the selector Is Incenter position, the
switch triggerislocked,
CAUTION: To prevent gear damage, always allow
chuck to come to a complete stop before changing
the direction of rotation.
To stop,releaseswitch triggerand allowthechuckto come
toa complete stop.
CHUCKJAW8
LOCK
('nGNTEN)
CHUCKBODY
Fig. 5
_h= WARNING: Do not holdchuck bodywith one hand
and usepowerof the drillto tightenchuck Jawson
drillbit. Chuckbodycould slipInyour hand or your
handcould slipand come Incontact with rotatingdrill
bit.This couldcausean accidentresultingInserious
persona]Injury.
11
Page 12

INSTALLING BITS
See Figure 6.
• Lockthe switchtdgger by placing the directionof
rotation selectorIn centerposition.See Figure5,
• Open orclose chuckJawsto a pointwhere the open-
Ing Isslightlylargerthanthe bit size you Intend to use.
Also, raisethefront of your drillslightlyto keep the bit
fromfalling outof the chuckjaws,
• Insert ddll bit straightinto chuck the full length of the
jaws as shown In Figure 6.
• Tighten the chuck Jawson ddll bt.
UNLOCK
DRILLBIT (RELEASE) CHUCKCOLLAR
CHUCKJAWS
LOCK
(TIGHTEN)
CHUCKBODY
RK_HT Fig.6
• To tighten the chuckJawsonddllbit;grasp and hold
the cofla.rofthe chuck with one hand,while rotating
the chuckbodywithyour otherhand,
Note: Rotatethe chuck bodyInthe directionof the
arrow marked LOCK to tightenchuckJaws.
• Do not use awrenchto tighten or loosenchuck laws.
REMOVING BITS
See Figum 6.
• Loekthe swltchtrigger byptaolngthedirectionof
rotation selectorIncenterposition.See Figure 4,
• LoosenthechuckJawsfromddllbit.
• To loosen:grasp and heldthe collarof the chuckwith
one hand,whUerotatingchuckbodywithyourother
hand.Note: Rotate chuckbodyinthe directionofthe
arrowmarked UNLOCK to loosenchuckJaws.
• Do not use a wrenchto tightenor loosenthe chuck
JSWS,
• Remove ddllbitfrem chuckjaws.
ADJUSTABLE TORQUE CLUTCH
Your ddlt Isequipped with an adjustable torque clutchfor
drivingdifferent types of screws Into different materials.
The propersettingdependson the type of mateflaland the
size of screwyou are using,
TO ADJUST TORQUE
• Identifythesix position torqueIndicator settings located
onthe front ofyour ddU.See Figure8.
• Rotateadjustingringtothe desiredsetting.
• 1 For drivingsmallscrews.
• 2 Fordrivingscrews intosoft
materiel.
• 3 For ddvlngscrewsIntosoftand hard
materials.
• 4 For drivingscrewsIn hard wood.
• 5 For drivinglarge screws.
• 41.,'l For heavy drilling.
ADJUSTING
TODECREASE
RING
TORQUE
_IL WARNING: Make sureto Insert ddllbit straightInto
chuck Jaws.Do not Insert drill bitInto chuckJawsat
an angle then tighten, as shownIn Figure7. Thls
couldcause drill bit to be thrown from ddU,resulting
In possible sedous personalInjuryordamageto the
chuck.
Fig. 7
TOINCREASE
TORQUE Fig. 8
12
Page 13

BIT STORAGE
See Figure 9,
When notIn use, bitsprovided withyour drill can be
placedIn the storagearealocatedonthe bottomofyour
ddll as shownin Figure9.
SCREWDRIVERBITS BITSTORAGEAREA
DRILLING
See Figure10.
When drillinghard smoothsurfacesusea center punch to
mark desiredhole location. This wlifpreventthe ddll bit
from slippingoff center as the holeIs started.However,
the low speedfeature allows staltlngholeswithoutcenter
punchingIfdesired.To accomplish this,simplyoperate
yourdrill at a low speed untifthe hole Isstaked,
The matedal to be ddlledshould be securedIn a vise or
with clampsto keep itfromturning as the drill bitrotates.
Holdtool firmly and place the bitat the pointto be ddUed.
Depress the switchtdgger to starttool.
Move the ddllbit Into the workpleseapplying only enough
preessureto keep the bitcutting. Do nat forceor apply side
pressureto elongate e hole.
_ WARNING: Be preparedfor bindingor bit
breakthrough.When these situationsoccur,ddllhas
a tendencyto graba.ndkick oppositeto thedirection
of rotationand could cs.uselossof controlwhen
breakingthroughmaterial. If no(prepared,thisloss
of control can result In possible sedous injury.
When ddlllngmetals,use a light oll on the drillbitto keep
Itfromoverheating.The oil willprolongthe life ofthe bit
_mdIncreasethe drillingastlon.
Ifthe bitJamsInworkpleseor Ifthe drillstalls, release
switchtdgger Immediately.Removethe bitfromthe
workpleceand determinethe reason forJamming.
13
Fig. lO
Page 14

CHUCK REMOVAL
See Figures11,12, end 13.
The chuckmustbe removedIn orderto use some
accessodes.To remove:
• Lockthe switchtdgger by placingthe directionof
rotationselectorIn center position.See Figure4,
• Inserta 5/16 In. orlarger hex key Irto the chuck ofyour
drilland tighten the chuckJawssecurely,
• Tap the hex key sharplywith a mallet in a clockwise
direction,See Figure12.Thiswill loosen the screwIn
the chuckforeasy removal
MALLET
CHUCKJAWS
HEXKEY KEYLESS
CHUCK
• Open chuckJawsand remove hex key. Removethe
chuck screwby turningit In a clockwisedlrectlcxl,See
Figure12.
Note: The screwhas left handthreads,
SCREWDRIVER
• Insert hex key In chuck and tightenchuckjaws se-
curely.Tap sharplywitha malletin a counterclockwise
direction,Thiswillloosen chuck on the spindle.It can
nowbe unscrewedby hand, See Figure 13,
MALLEI"
TO RETIGHTEN A LOOSE CHUCK
The chuck may become looseon spindleand developa
wobble.Periodicallycheckchuckscrewfortightness.
To tighten,followthese steps:
• Lockthe switch trigger by placingthe directionof
rotationselector In center position,See Figure4,
• Open the chuckJaws.
• Inserthex key IntochuckandtightenchuckJaws
securely.Tap hex key sharplywith a malletIn a
ck_,,kwlsedirection.This will tightenchuck onthe
spindle.
• Open the chucklaws and remove hex key.
• Tighten the chuck screw.
[
Note: The chuck screw haslelt handthreads.
Fig. 13
Fig, 12
14
Page 15

_i WARNING: When selvlclng, us=,only Identical
Craftsman replacement parts. Use ofany other
pert may create a hazardorcause productdamage.
Avoidusingsolventswhen cleaning plasticparts, Most
plasticsare susceptibleto damage fromvadoustypesof
commercialsolventsand may bedamaged bytheir use.
Use clean cloths to remove dirt,dust,oil, grease, etc.
,_ WARNING: Do not at a.nytimelet brakefluids,
gasoline,petroleum-besedproducts,penetratingoils,
etc. come Incontactwith plasticparts.They contain
chemicalsthat can damage,weaken or destroy
plastio.
BATTERIES
Your ddll'sbattery pack is _:lUlpbed with nickel-cadmium
rechargeablepettedes. Length ofservice from each
charging will depend on the type of workyou are doing.
The battehes Inthis tool have been designed to provide
maximumtroublefree life.However,likeall batteries,they
willeventuallywear out. DO"not disassemblebatterypeck
andattemptto replacethe batteries.Handlingofthese
batteries,especially whenweadng dngsandjewelry,
could result Ine serious bum.
To obtain the longestpossiblebattery life,we suggestthe
following:
Do not abuse powertools. Abusivepracticescan damage
tod as well as workplece.
Only the partsshownon partslist, page 16, are Intended
to be repairedorreplacedbythe customer.Allother parts
shouldbe replacedat a Sears Service Center,
,_k WARNING: Do not attemptto modify this tool or
create accessories not recommendedfor usewith
thistool. Any suchaiteretion ormoditlcatlonIs
misuse and couldresult in a hazardouscondition
leadingto possiblesedouspersonalInjury.
• Store and chargeyourbatteriesin a coolarea.
Temperaturesabove or belownormalroom
temperature will shortenbatterylife.
• Never storebatteries Ina dischargedcondition.
Rechargethem Immediatelyafter they are
discharged.
• All ba_edesgraduallylosetheir charge.The higher
thetemperature the quickerthey losetheir charge, if
you store yourtool for longbedods of time without
usingit. rechargethe baZtedesevery monthor two.
Thispracticewill prolongbatterylife.
To preserve naturei resources, please
recycle or dispose d hattedes properly.
This product contains nlckel-sadmlum
batteries. Local, state or federal laws
may prohibit dlsposal of niokel-cadmlum
bettedes in ordinary trash.
Consultyour localwaste authorityfor Information
regardingavailable recyclingand/or disposaloptions,
BATTERY PACK REMOVAL AND PREPARATION
FOR RECYCLING
WARNING: Upon removal,coverthe battery pack's
terminalswith heaW dutyadhesive tape. Do cot
attemptto destroyordisassemblebattew packor
remove any ofIts components,Nickel-cadmium
batteriesmustbe recycled or disposedof properly.
Also, nevertouchbothterminals withmetal objects
and/or bodypartsas shortc_rcuitmay result. Keep
away from children.Failureto comply withthese
warningscould result in fire and/or serious Injury.
The followingrecommendedaccessoriesare currentlyavailable at Sears RetailStores.
• 6-Pc. ExtraLength Magnite Power BitSet • 17-Pc. Power Screwdriver/NutdrlverSet and Case
• 30-Pc. Power Screwddver/NutdrlverSet and Case • HighSpeed Bits(ForWood or Metal)..3/4 In. Max.
,_IL WARNING: The use of attachments oraccessories not listed mightbe hazardous,
15
Page 16

CRAFTSMAN3/8in.,9.6VOLTCORDLESSDRILL-DRIVER- MODELNO.315.114050
Inall correspondenceregardingyour318In., 9.6VOLT CORDLESS DRILL-DRIVER orwhenorderingrepair
The modelnumberwillbefound ona plateattached tothe motorhousing.Alwaysrnentlonthe modelnumber
parts.
SEE BACK PAGE FOR PARTS ORDERING INSTRUCTIONS
2
\
1
\
4
\
Key Part
No. Number
1 660120002
2 690033001
3 * Item No._ 11074
4 * ItemNo,J_11070
5 900211007
983OOO-329
PARTS UST
Descd_lon Qty.
Screw(Special) ...................................................................... 1
Chuck..................................................................................... 1
BatteryPack (976965-001) .................................................... 1
Charger(976790-001) ........................................................... 1
Tool Bag - Not Shown........................................................... 1
Operator's Manual
* Can Be Purchased Thru RSOS (Retail Speclai Order System)
16
Page 17

II II
IIII
17
Page 18

Your Home
For repair-in your home-of all major brand appliances,
lawn and garden equipment, or heating and cooling systems,
no matter who made it, no matter who sold it!
For the replacement parts, accessories and
owner's manuals thatyou need to do-it-yourself.
For Sears professional installationof home appliances
and items like garage dooropeners and water heaters.
1-800-4-MY-HOME ® (1-800.469-4663)
Call anytime, day or night(U.S.A, and Canada)
www.sears.com www.sears.ca
Our Home
For repair of carry-in items like vacuums, lawn equipment,
and electronics,call or go on-line for the IocaUonof your nearest
Sears Parts & Repair Center.
1-800-488-1222
Call anytime, day or night(U.S.A. only)
WWW.sears.com
To purchase a protectionagreement (U.S.A.)
or maintenance agreement (Canada) on a productserviced by Sears:
1-800-827-6655 (U.S.A.)
Para pedir.servicio de reparacibn
a domicilio, y para ordenar piezas:
1-888-SU-HOGAR _
(1-888-784-6427)
|
6E/ G
® Regist ered Tradem ark I T ademm'k I Sendce M ark d Sears, Rodouck md Co.
® M arca Regts_Kla I "n_Marca de F_tbdca / =MMarca de Sen_do de _eara. Roebudc _ _.
Mc MO
Marque de oomrneroe / M zrque d6po,s_mde Sears, Roebud_ md Co. © Seam, Roebud_ and Co,
TM r SU
1-800-361-6665 (Canada)
Au Canada pourservice en fran;ais:
1-800-LE-FOYER _c
(1-800-533-8937)
www.sears,ca
 Loading...