

Craftsman 257857240 Owner’s Manual
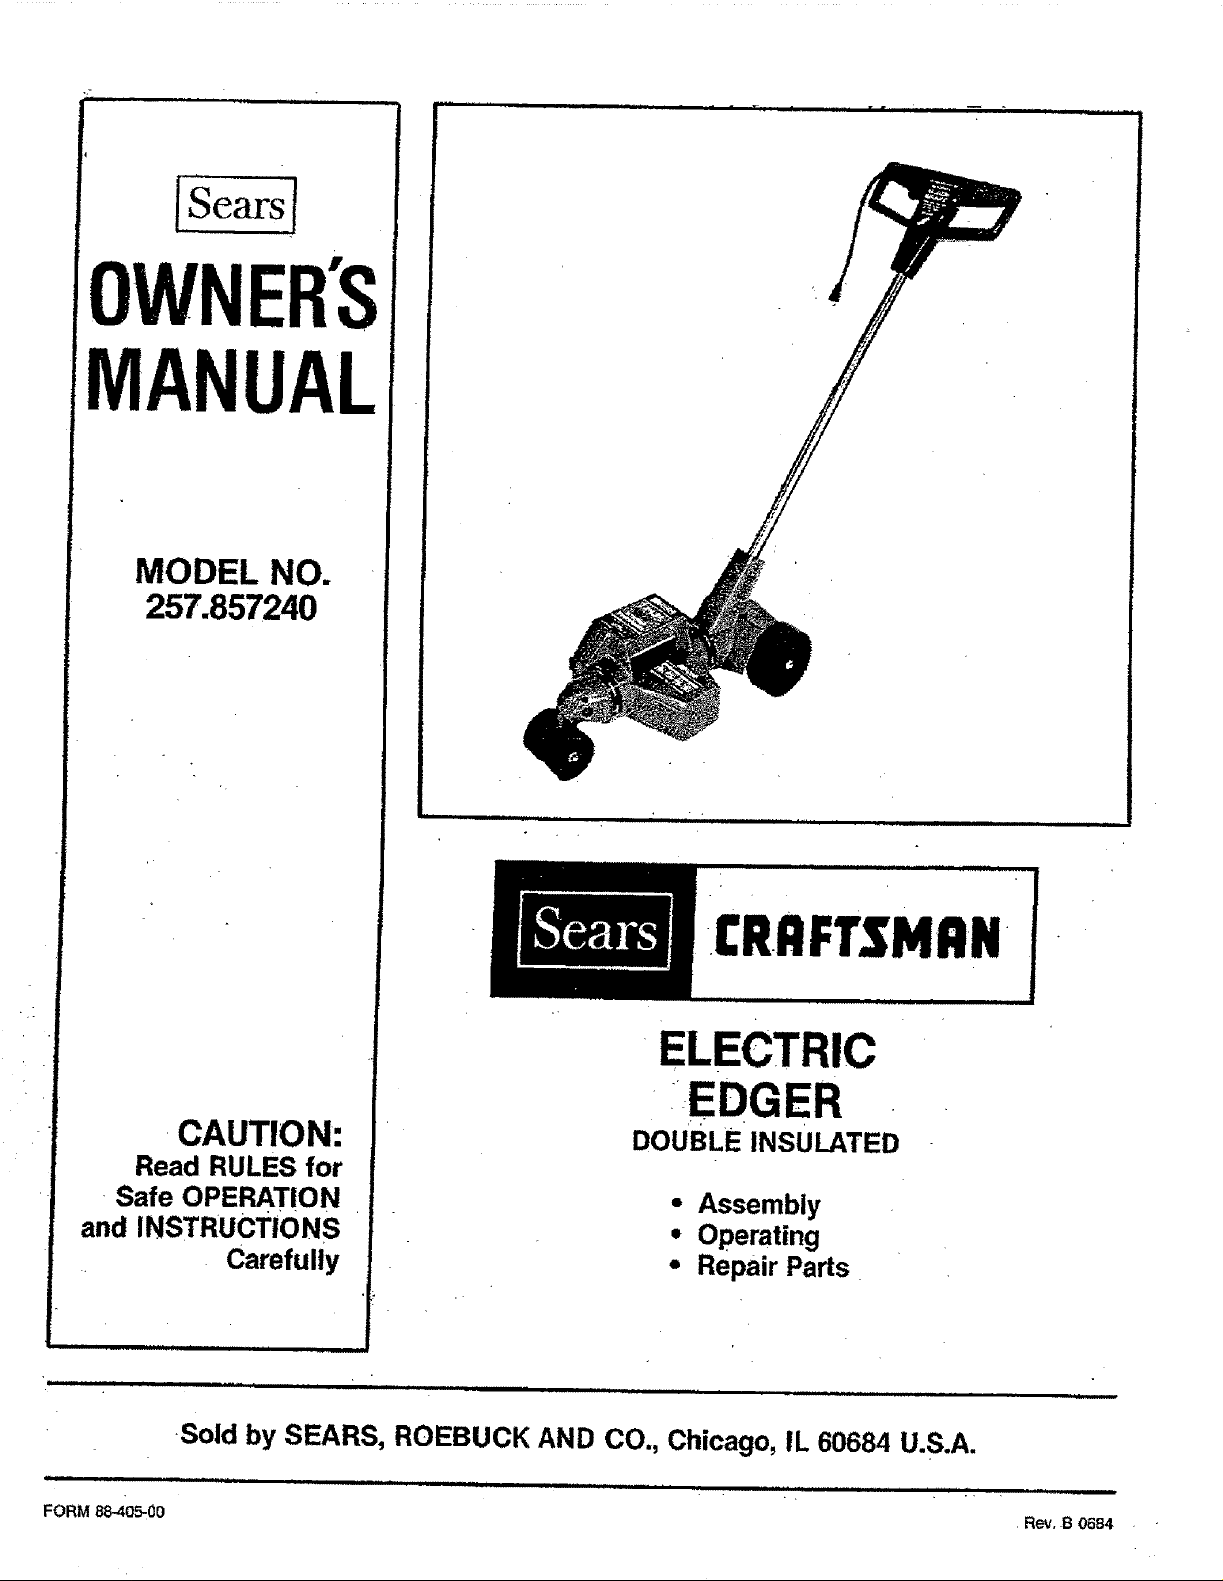
MODEL NO.
257.857240
CAUTION:
Read RULES for
ii ill • ], • ,........................,,,,,,,,,,, ,,
£RnFTrSMI:IN
ELECTRIC
EDGER
r• r"
DOUBLE INSULATED
. Safe OPERATION .
and INSTRUCTIONS
Carefully
....... i i i,ii,...................................................
Sold by SEARS, ROEBUCK AND CO., Chicago, IL 60684 U.S.A.
ii ii1,111 i w, J viii llll i illl, ii L i ,,i................................... ,..... _ _, ,
FORM 88-4O5-0O
• Assembly
• Operating
• Repair Parts
Rev. B 0684 . •
FULL ONE-YEAR WARRANTY ON CRAFTSMAN- ELECTRIC EDGER _:_
c=_ If this Craftsumn Electric Edger fails to perform properly due to a defect in inatefial or workmanship within one year
_<
_x from the date of purchase, Sears will repair it free of charge.
If this Craftsman Electric Edger is used for commerdal and rental purposes, this warranty covexag_ applie s for only
90 days from the ,date of purchase, This warranty applies only while this product is in use in the United States.
WARRANTY SERVICE IS AVAILABLE BY CONWACTING THE NEAREST SEARS STORE OR SERVICE
_:_ CENTER THROUGHOUT THE LrNIT!3DSTATES.
<:_ This warranty gives you specific legal fights and you may also have other rights which vary from state to state.
=._ARS, ROEBUCK AND CO., DEPT. 698/731A, Sears Tower, Chicago, IL 60684
IMPORTANT: rules for safe operation
DOUBLE INSULATION
Double Insulationisa conceptinsafety,replacingthestandard
grounded supplysystem inelectricpower tcols.Theconstrue-
tion of a double insttlated tool affords comparable pret_etion to a
properly grounded tool without the necessity for usiug a ground-
ed conductor.The double insulationsystemeliminatesthe need
fortheusualthree-wiregroundedpower cordandgroundsupply
systenLWherever thereiselee_c currentinthetoolthereare
two complete se_s of insulation to protect the user. All exposed
metal parts are isolated from the internal metal motor eom_
ponents with proteetfng instthtion: The lead wires, switch, etc_
with their functional insulation liave the added prote_ion of non-
conductivesleevingor housingtocompletethedoubleinsulation.
system.
SERVICING OF A TOOL WITH-DOUBLE INSULATION lqF__
QUIRES EXTREME CARE AND. KNOWLEDGE OF.THE
SYSTEM AND SHOULD BE PERFORMED ONLY BY A
QUALIFIED SERVICE TECHNICIAN. FOR SERVICE WE
SUGGEST YOU RETURN THE TOOL TO YOUR NEAREST
SEARS STORE FOR REPAIR WHICH WILL BE DONE WITH
ORIGINAL FACTORY REPLACEMENT PARTS.
SAFETY RULES FOR POWER TOOLS
CAUTION
!. Keep hands,feet,and facedear ofrotatingblade.
2. Use SafetyGoggles.Wear ata_ timeswhen usingtoo!`
3. Dress properly.Always wear shoes.Do not operatetool
while barefootor when wearing sandals,canvas or open-
toed shoes.Use of rubber glovesand safetyfootwearis
recommended when workingoutdoors.Wear longpantsto
protectyour legs.
4. Keep childrenaway. Keep spectatorsat a safedistance.
5. WARNING: To preventelectricshockhazarduseonlywith
an extension cord suitable for outdoor use. A two-wire e_rd
withouta ground connectionmay be used sincethetoolis
double insulated. Cord should be !8 gauge or heavier to pre-
vent overheating and loss of power, U.L. listed extension
cords are available at your nearest Sears store.
6. Toprevent disconnection of power supply cord from the ez-
tension cord during operation see hstructions v_h Fig. 4.
7. _Avoid Dangerous Environment-- Do not use unit in damp or
8. Don't force this too!. It wi!l work begter and safer at the rate
R was designed.Ifmotor slowsdown too much,pullaway
and allowunitto bbta_nfullspee&
9. Do not use toolfor any job exceptthat _orwhich itis
intended.
10. Do not immerse tool in water or operate in rai_
1i. Don't overreach--Keep proper footing and balance at all
ti_es.
t2. Don't abuse cord--Never e_rr_tool by Cord o_ yank cord
from receptacle.Keep cordaway from heat,oiiand sharp
edges.Replacedamaged cordimmediately.
13. Nevercarry pluggedintoo!with fingeron switch,
14= Disconnecttoolfrom thepower.supplywhen notinuse and
when making any repairsor inspections.
I5. Maintain tool withcare. Keep air ventsclearof debris. Keep
guards in place arm in working orderand follow instructions
forreplacingblade.
16. _tore indoorsina high,dry,lock-upplaceoutofreathof
children.
Page2
BOX CONTENTS
This box should contain:
1 257.857240 Electric Edger
1 Loose Parts Kit containin_
2 Ea. 3933-1 Screw
2 Ea. 3935 Locknut
1 Ea. 88-4054)0Owner'sManual
NOTE: Your Edger comes packaged wfth protective clips inserted in the .handle tubes. These plastic clips
must be discarded before assembly of the unit,
= === ,_ll,,lll i i i i =l =
ASSEMBLY INSTRUCTIONS
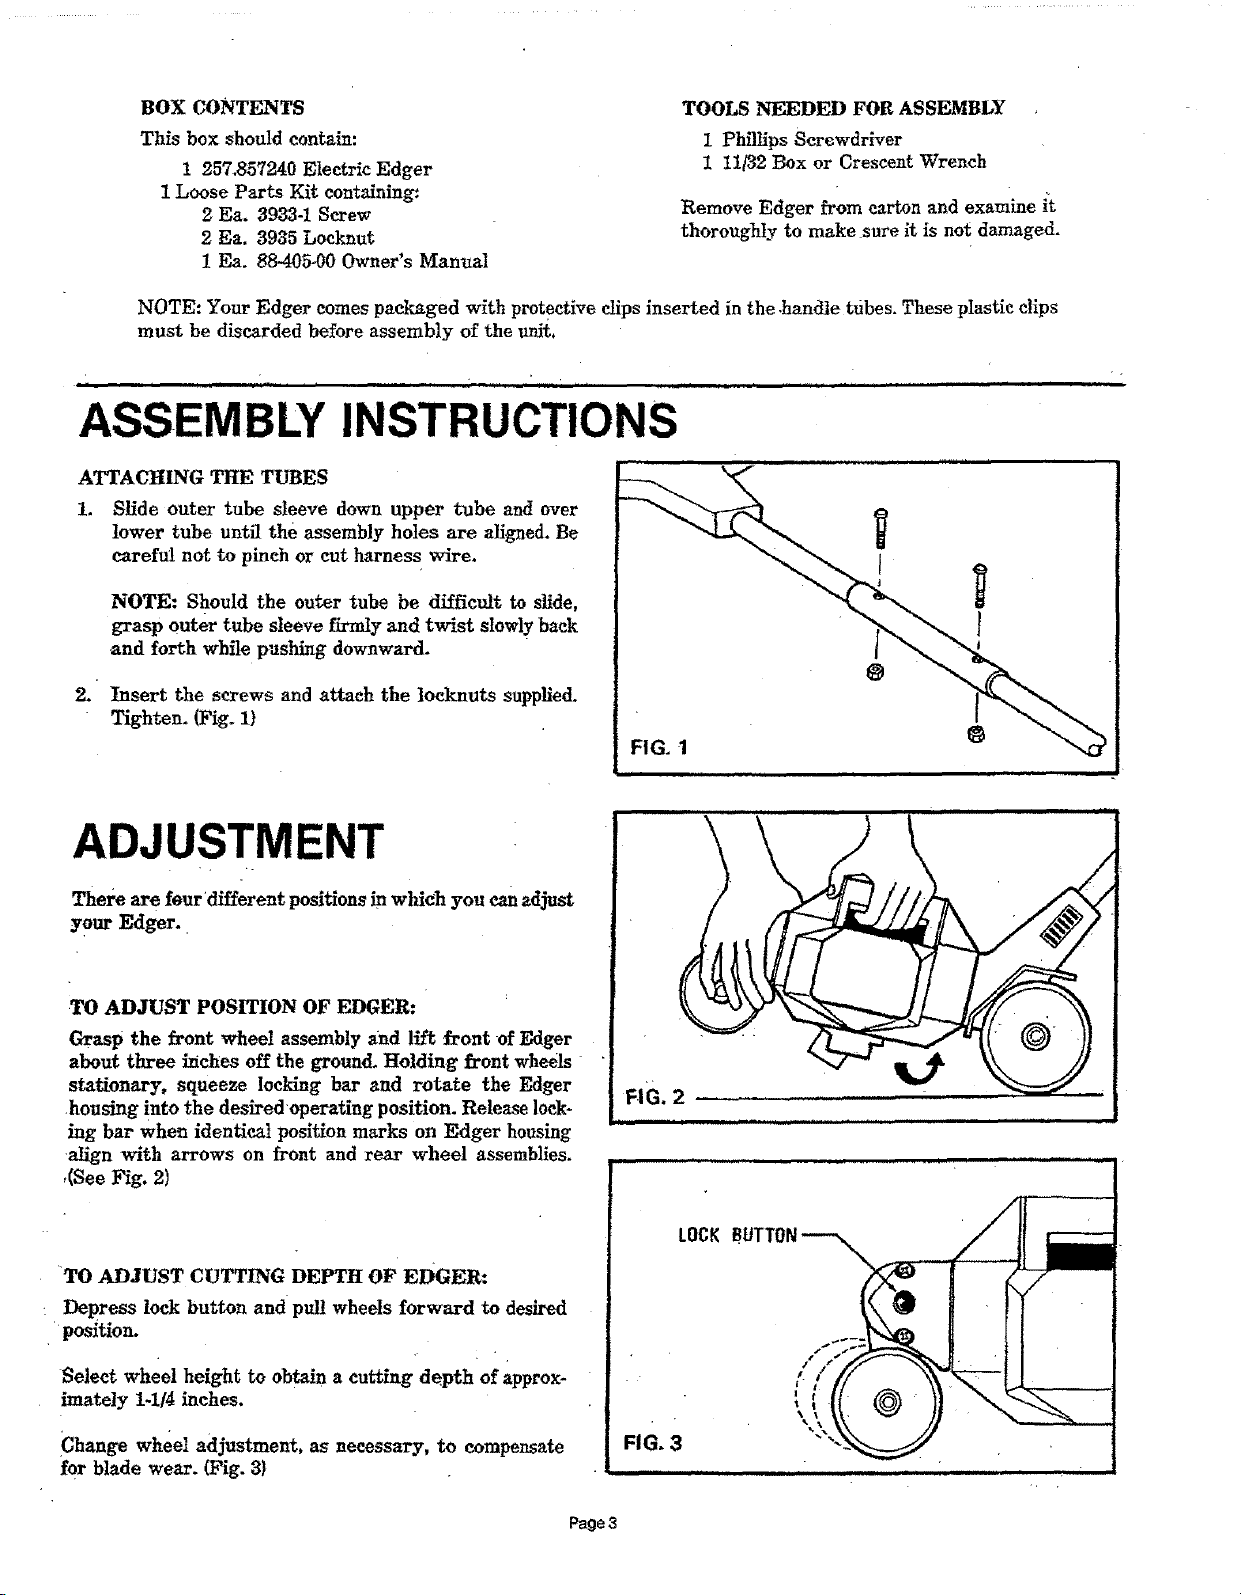
ATTACHING THE TUBES
1. Slide outer tube sleeve down upper tube and over
lower tube until the assembly holes are aligned. Be
careful not to pinch or cut harness wire.
NOTE: Should the outer tube be difficult to slide,
grasp outer tube sleeve firmly and twist slowly back
and forth while pushing downward.
2. Insertthe screws and attachthe locknutssupplied.
Tighten. (Fig. I)
TOOLS NEEDED FOR ASSEMBLY
1 Phillips Screwdriver
1 11/32 Box or Crescent Wrench
Remove Edger from carton and examine it
thoroughly to make sure it is not damaged.
@
ADJUSTMENT
There arefourdifferentpositionsinwhich you canadjust
your Edger.
.TO ADJUST POSITION OF EDGER:
Grasp the frontwheel assemblyand llftfrontofEdger
about threeinchesoffthe ground.Holding frontwheels
stationary,squeeze lockingbar and rotate the Edger
housing intothedesiredoperatingposition.Release10ck-
ing bar when identicalpositionmarks on Edger housing
alignwith arrows on frontand rearwheel assemblies.
,(See Fig. 2)
TO ADJUST CUTTING DEPTH OF EDGER:
: Depress lock button and pul! wheels forward to desired
position.
Selectwheel heighttoobtaina cuttingdepth of approx-
imately1-1/4inches.
iChange wheel adjustment, as necessary, to compensate
for blade wear. (Fig. 3}
Page3
 Loading...