

Craftsman 17226672 Owner’s Manual
Owner's Manual
ICRAFTSMRNI
IPR Q FEa I I0 N AL
Reciprocating Saw
Vafriable Speed
Double Insulated
Model No.
172.26672
,,SAFETY
CAUTION: Read, understand and follow
all Safety Rules and Operating Instructions
inthis manual before using this product,
Sears, Roebuck and Co., Hoffman Estates, IL 60179 U.S.A.
• OPERATION
• MAINTENANCE
• ESPAI;IOL
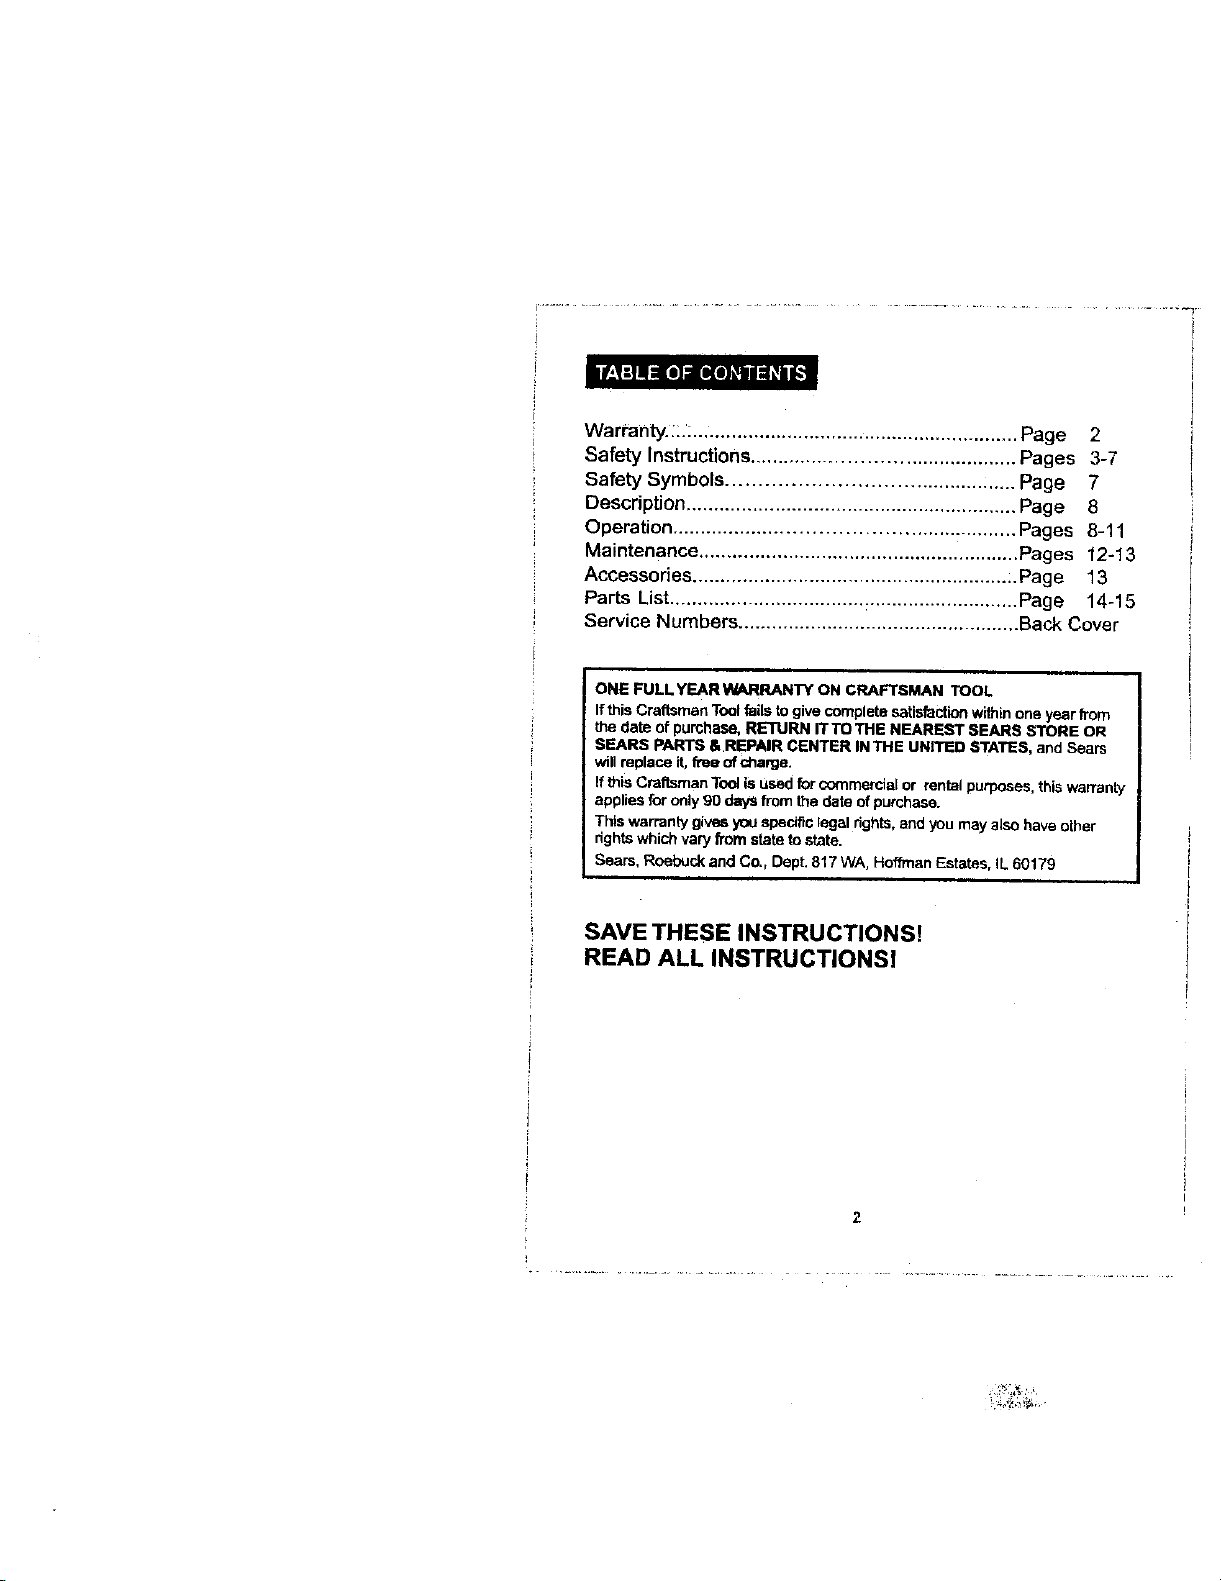
Warranty.::.: ........................................................... Page 2
Safety Instructions .............................................. Pages 3-7
Safety Symbols ............................................... Page 7
Description ............................................................ Page 8
Operation .......................................................... Pages 8-11
Maintenance .......................................................... Pages t2-13
Accessories ......................................................... :.Page 13
Parts List ................................... :........................... Page 14-15
Service Numbers ................................................... Back Cover
ONE FULLYEARWARRANTY ON CRAFTSMAN TOOL
If thisCraftsman Tool fails to give complete satisfaction within one year horn
the date of purchase, RETURN IT TO THE NEAREST SEARS STORE OR
SEARS PARTS &REPAIR CENTER tNTHE UNTIED STATES, and Sears
will replace it, free of charge.
If this Craftsman Tool is usedfor commercial or rental purposes, this warranty
applies far only 90 days from the date of purchase.
This warranty gives you specificlegal rights, andyou may also have other
rights which vary from state to state.
Sears, Roebuck and Co., Dept. 817 WA, Hoffman Estates, IL 60179
SAVE THESE INSTRUCTIONS!
READ ALL INSTRUCTIONSI
FaiFurs to follow all instructions Fisted below may result in electric
I /_ WARNING: BE SURE to read and understand all instructions.
shock, fire and/or serious personal injury.
WORK AREA SAFETY
1. ALWAYS keep your work area clean and well IlL Cluttered benches and
dark areas invite accidents.
2. DO NOT operate power tools in explosive atmospheres, such as in the
presence of flammable liquids, gases, or dust. Power tools create sparks
which may ignite the dust or fumes•
3. ALWAYS keep bystanders, ehUdran, and visitors away while operating a
power tool. Distractions can cause you to lose control.
ELECTRICAL SAFETY
1. Doubts insulated tools are equipped with a polarized plug (one blade is
wider than the other.) This plug wilFf'd in a polarized outlet only one way.
i
i
J
if the plug does not fit fully In the outlet, reverse the plug. if it still does
not fit, contact a qualified electrician to install a polarized outlet.
Do not change the plug in any way.
2. Double insulation [] eliminates the need for the three wire grounded power
cord and grounded power supply system. Applicable only to Class II
(doubre insulated) tools.
3. Before plugging in the tool, BE SURE that the outlet voltage supplied is
within the voltage marked on the tool's data plate, DO NOT use "AC only"
rated tools with a DC power supply.
4. ALWAYS avoid body contact with grounded surfaces, such as pipes,
radiators, ranges and refrigerators. There isan increased risk of electric
shock ifyour body is grounded.
5. If operating the power tool In damp locations Is unavoidable,
/ ALWAYS use a Ground Fault Circuit Interrupter to supply power to
your tool. ALWAYS wear electrician's rubber gloves and footwear
in damp conditions,
6, DO NOT expose power tools to rain or wet conditions. Water entering
a power tool will increase the risk of electric shock.
7. DO NOT abuse the cord. NEVER use the cord to carry the tools or pull
the plug from the outlet. Keep cord away from heat, off, sharp edges or
moving parts. Replace damaged cords immediately. Damaged cords
increase the risk of electric shock.
3
ELECTRICALSAFETYcont.
8.Whenoperating a power tool outside, ALWAYS use an outdoor extension
cord marked '_JV-A"or 'W." These cords are rated for outdoor use and
reduce the risk of electhc shock.
NOTE: The extension cord must have adequate wire size AWG (American Wire
Gauge) for safe, efficient use. Smaller gauge wires, have greater capacity
(16 gauge wire has more capacity than 18 gauge wire).
PERSONAL SAFETY
1. ALWAYS stay alert, watch what you are doing and use common sense
when operating a power tool. DO NOT use tool while tired or under the
influence of drugs, alcohol, or medication. A moment of inattention while
operating power tools may result in serious personal injury.
2. ALWAYS dress properly. DO Nor wear loose clothing or Jowelry. Pull
back long hair. Keep your hair, clothing, and gloves away from moving
parts. Loose clothes, jewelry, or long hair can be caught in moving parts.
3. ALWAYS avoid accidental starting. BE SURE switch is in the "Off"
posttion before plugging in. DO NOT carry tools with your finger on the
switch. Carrying tools w_thyour finger on the switch or plugging in tools that
have the switch in the "On" posif_oninvites accidents.
4. ALWAYS remove adjusting keys or wrenches before turning the toot on.
A wrench or a key that is left attached to a rotating part of the tool may result
in personal injury.
5. DO NOT overreach. ALWAYS keep proper footing and balance at all
times. Proper footing and balance enables better control of the tool in
unexpected situations.
6, ALWAYS use safety equipment. Always wear eye protection,
Dust mask, non-skid safety shoes, hard hat, or hearing protection must be
used for appropriate conditions
TOOLUSEANDCARESAFETY
1.ALWAYSuseclampsorother practical ways to secure and support the
workptace to a stable platform. Holding the work by hand or against your
body is unstable and may lead to loss of control.
2. DO NOT force tool. Use the correct tool and blade for your application.
The correct tool and blade wilt do thejob better and safer at the rate for
which it isdesigned.
3. DO NOT use tool If switch does not turn it"On" or"Off". Any tool that
cannot be controlled with the switch is dangerous and must be repaired.
4. ALWAYS disconnect the plug from the power source before making any
adjustments, changing accessories,or storing the tool. Such preventive
safety measures reduce the risk of starting the tool accidentally.
5, ALWAYS store Idle tools out of reach of children and other untrained
persons.Tools are dangerous in the hands of untrained users.
6. ALWAYS maintain tools with care. Keep cutting tools sharp and clean.
Properly maintained tools with sharp cutting edges are less likelyto bind
and are easier to control.
7. ALWAYS check for mlsalignment or binding of moving par_s, breakage
of parts, and any other condition that may affect the tool's operation.
If damaged, have the tool serviced before using. Many accidents are
caused by poorly maintained too;s,
RECOMMENDED FOR USE WITH THIS TOOL MAY CREATE
[ Ak WARNING: USEOFACCESSORIESTHATARENOT
A HAZARDOUS CONDITION.
8. ALWAYS use only accessories that are recommended for this tool.
Accessories that may be suitable forone tool can become hazardous
when used on another tool.
5
SERV1CE SAFETY
1. If any part of this saw Is missing or should break, bend, or fail in any
way; or should any electrical component fail to perform properly:
ALWAYS shut off the power switchand remove the saw plug from the power
source and have the missing, damaged or fei(ed parts replaced BEFORE
resuming operation.
2.Toot service must be performed only at a Sears Service Center. Service
or maintenance performed by unqualified pemonnel could result in a risk
of injuP!.
ADDITIONAL SPECIFIC SAFETY RULES
t. Know your power tool. Read operator's manual carefully. Learn the
applications and limitations, as wed as the specific potential hazards
related to this tool. Fo_owing this rule 'Nil[reduce the r_skof electric shock,
fire or sedous i_ury.
2. ALWAYS hold tool by insulated gdpp|ng surfaces when pet_corming an
operation where the cutting tool may contact hidden wiring or Its own
cord, Contact with a 'live _wire wilt make the exposed metal parts of the tool
"_ive"end shock the operator.
3. ALWAYS keep your hands away from cutting at_)a. DO NOT reach under
the matedal being cutbecause the nesmess of the blade to your hand is
hidden from your sight.
4. DO NOT use dull or damaged bisdes. Bent blades can break easily,
or cause kickback,
5, ALWAYS wear safety glasses or eye shields when using this saw.
ALWAYS wear a dust mask or respirator for applications which
generate duel
g. ALWAYS protect your lungs.Wear a face mask or dust mask if the
operation is dusty. Following this rule will reduce the dsk of serious
personal injury.
7. ALWAYS protect your hearing,wear hearing protection during extended
periods of operation. Following this rule will reduce the risk ofsadous
personal injury.
8. ALWAYS inspect and remove all nails from lumber before sawing.
Following this rule will reduce the risk of serious personal injury.
g. SAVE THESE INSTRUCTIONS. Rofer to them frequently and use them to
instruct others who may use this tool. If someone borrows this tool,
make sure they have these InntrucUons also.
ti
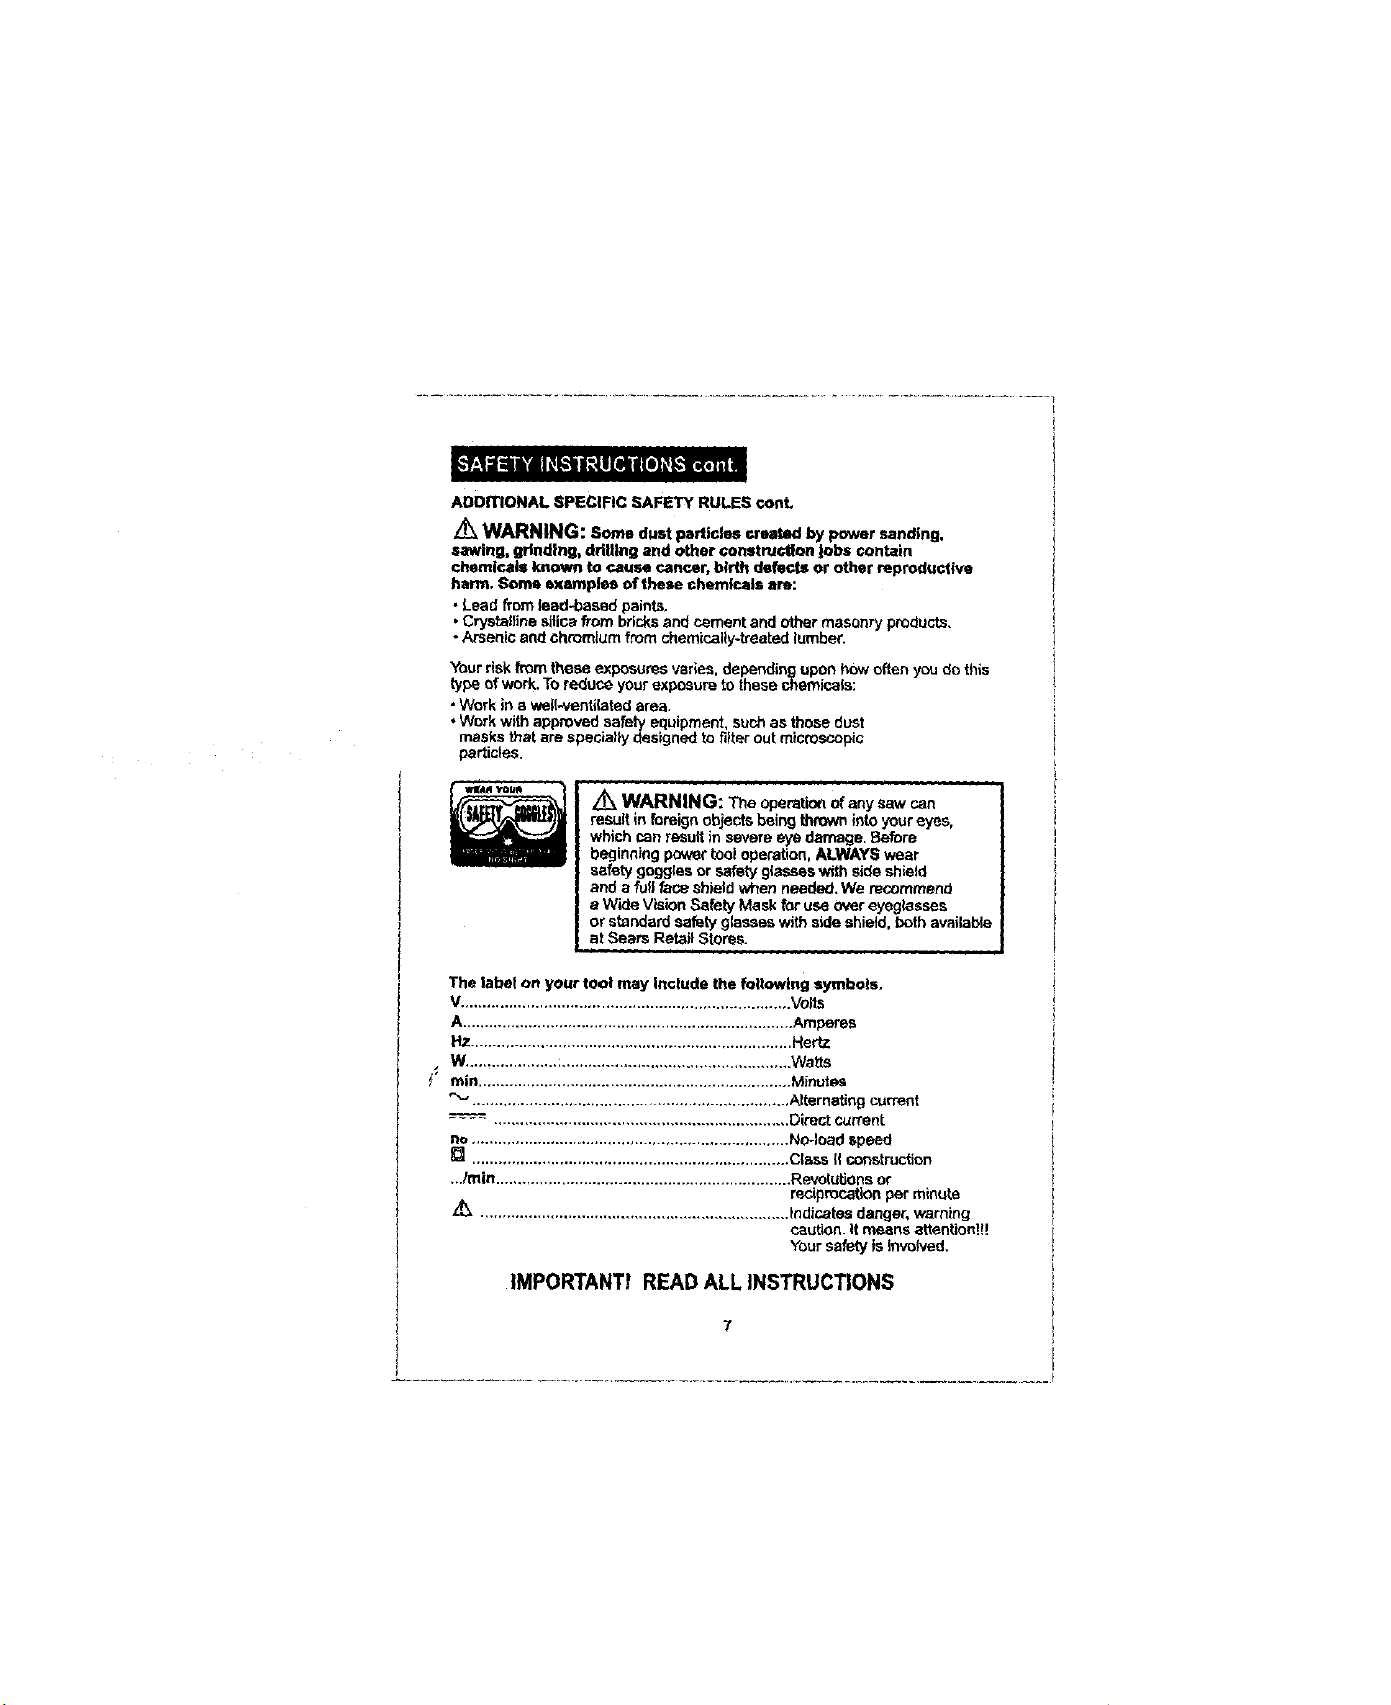
ADDITIONAL SPECIFIC SAFETY RULES ¢onL
Z_ WARNING: Some dust particles crusted by power sanding,
sawing, grinding, drilling and other ¢anetructlon Jobs contain
chemicals known to cause cancer, birth defects or other reproductive
harm. Soma examples of theee chemfcals am:
• Lead from lead,-based paints.
• Crystalline silica from bricksand cement and other masonry products.
- Arsenic and chromium from chemically-treated lumber,
Your riskfrom these exposures varies, depending upon how often you do this
type of work. Toreduce your exposure to these chemicals:
• Work in a wel{-ventifatad area.
• Work with approved safety equipment, such as those dust
masks that are specially designed to filterout microscopic
particles.
/_ WARNING: The operallan of any saw can
result in foreign objects being thrown iota your eyes,
which can reeolt in severe eye damage. Before
beginning power tool ope_'ation,ALWAYS wear
safety goggles or safety glasses with side shield
and a fall face shield when needed.We recommend
a Wide Vision Safety Mask for use o,_er eyegk_sses
or standard safety glasses with side shield, both available
at Sears Retail Stores.
The label on your tool may Include the foltowtng symbols.
V........................................................................... Volts
A........................................................................... Amperes
Hz ......................................................................... Hertz
• W. ......................................................................... Watts
_' rain ....................................................................... Miseries
_'_ ........................................................................ Alternating current
.... •.................................................................. Direct curt'ant
no ........................................................................ No-load speed
[] ........................................................................ Class If construction
.,./rata ................................................................... Revolutions or
z_ ...................................................................... Indicates danger, warning
reciprocation per minute
caution, it means attention!!!
Yoursafety is Involved.
IMPORTANT! READ ALL INSTRUCTIONS
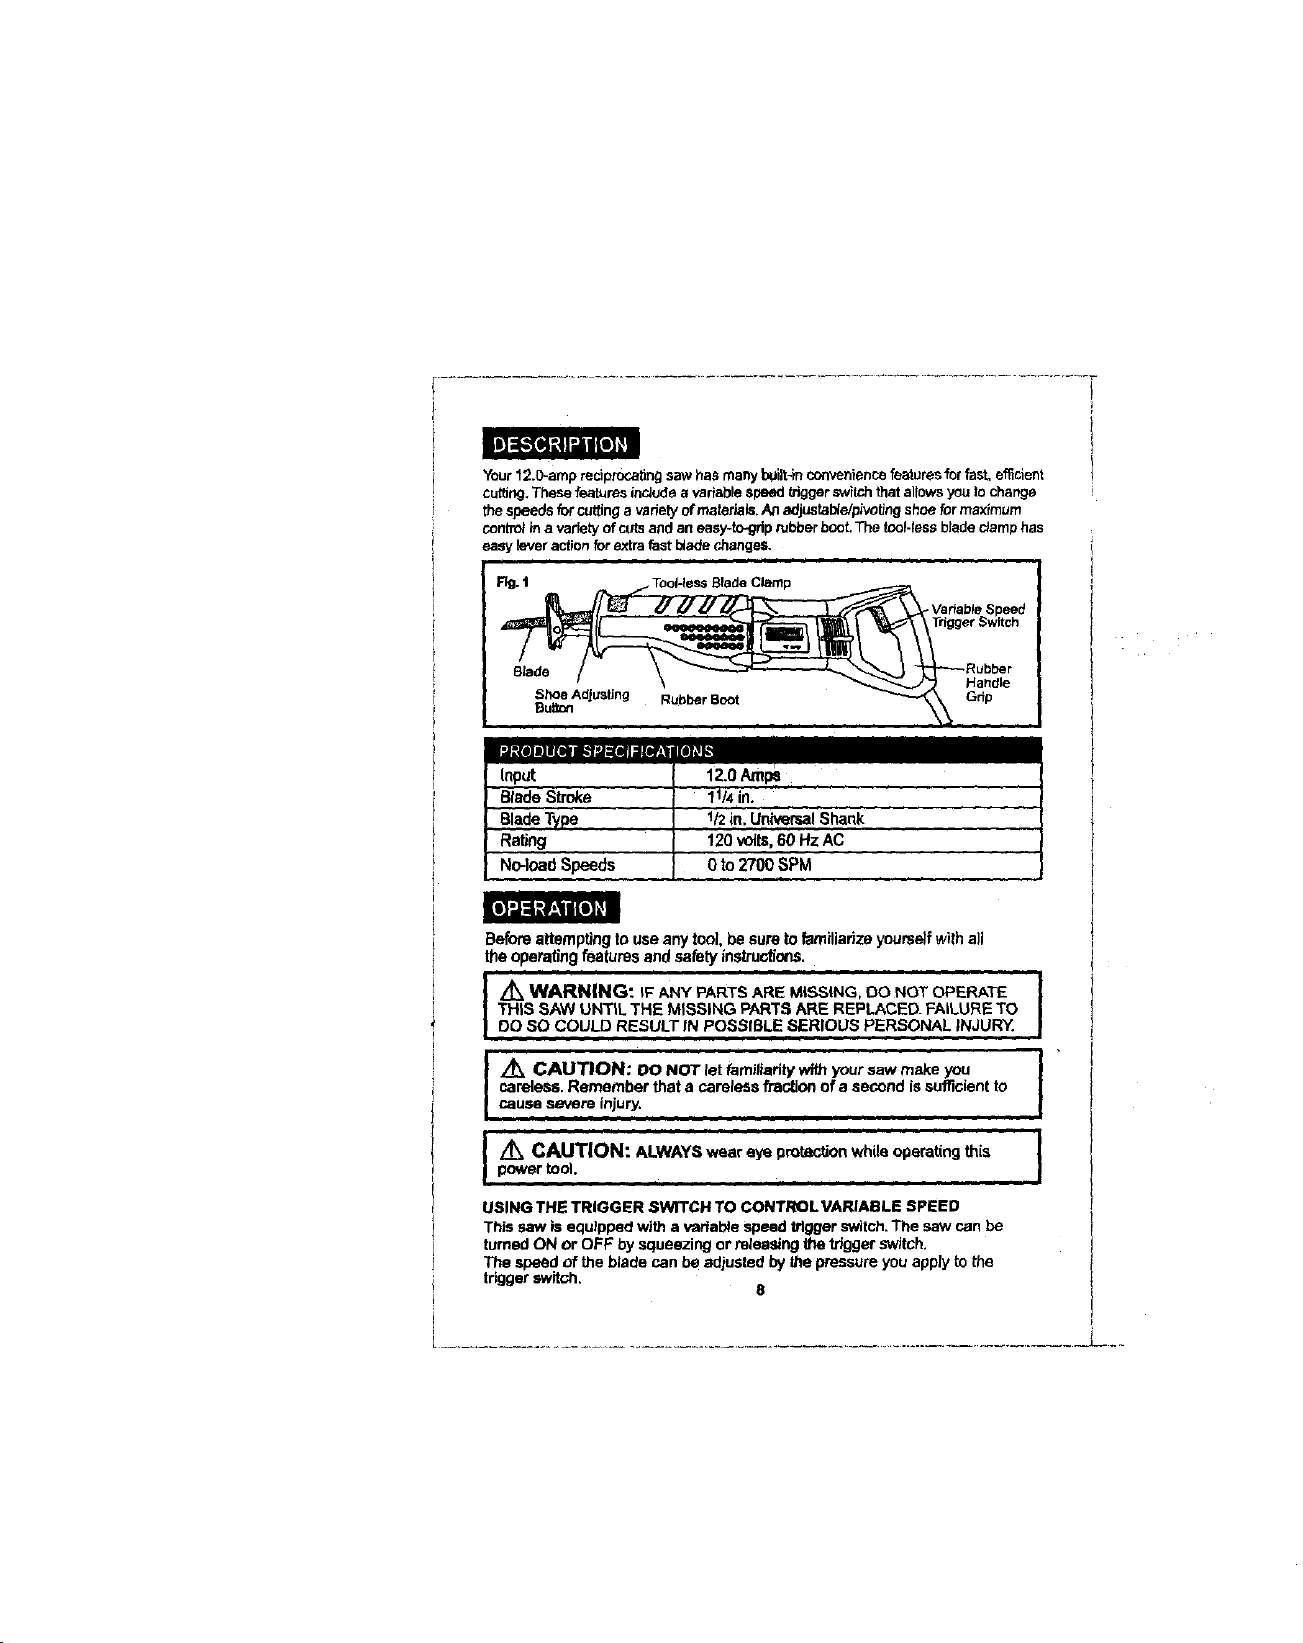
Your12.0-amp redprocabngsaw has manybuilt-inc_enience features for fast,efficient
cutting.Thesefeaturesincludea variablespssd triggerswitchthatallowsyouto change
the speeds for cuttinga vadetyof rrmteriais,A/1adjustal_e/pivotingshoe/or maximum
conlm_in a varfatyof cutsand an easy-tc-griprubberboot. The tool-lessbladecJamphas
easy leveraction far extrafast bladechanges.
Fig. 1 _r_ Tool-_essBlade Clamp /
Btade Rubber
• Gdp
='="==_llJir,=w_--=-__ _.;,_-=:- :'-:=.1_,
Input
BladeStroke
BladeType
Rating
No-feadSpeeds
Beforeattemptingtouse anytool,be sure tofamiliarizeyourselfwithall
theoperatingfeaturesandsafetyinstructfe_s.
z_ WARNING: %FANY PARTS ARE MISSING, 00 NOT OPERATE
THIS SAW UNTIL THE MISSING PARTS ARE REPLACED. FAILURE TO
DO SO COULD RESULT IN POSSIBLE SERIOUS PERSONAL INJURY.
A_ CAUTION; DO NOT let familiarity with your saw make you
careless. Remember that a careless fraction of a second issufficient to
cause severe injury,
Z_ CAUTION: ALWAYSwear eye protacttonwhileoperat(ngthis J
powertool. ,.....
USING THE TRIGGER SVVITCH TO CONTROL VARIABLE SPEED
This saw is equipped with a vadatde speed trigger switch. The saw can be
turned ON or OFF by squeezing or releasing the trigger switch.
The speed of the blade can be adjusted by the pressure you apply to the
trigger switch.
12.0 Amps
11/4in.
1/2in. Universal Shank
120 volts, 60 Hz AC
0 to 2700 SPM
i
Variable Speed
Trigger Switch
Handle
I
I
s !
USINGTHETRIGGER SWITCH TO CONTROLVARIABLE SPEED cont.
1. To increase the speed, apply more pressure to the trigger switch.
2. To decrease the speed, apply less pressure,
Choosing the Correct Speed
The speed you use will depend on the type of materials that you are cutting:
1. Use high speeds for cutting wood.
2. Medium speed is best for non-ferrous materials.
3. Low speed is recommended for curing metal,
NOTE:Material thickness and blade selection will also affect your speed
selection. As a general rule, as the material thickness increases, the speed
should be slower.
increase speed once the cut is started. Preloaged use at a very slow
Z_ CAUTION: use averyslowspeedwhen beginninga cut. Then
speed may damage your saw.
BLADE INSTALLATION AND REMOVAL
This sow isdesigned to use all 1/2-in. universal shank blades.
plug from power source BEFORE assembling parts, making adjustments
I _ WARNING: To prevent personal injury,ALWAYS disconnect the
or changing blades.
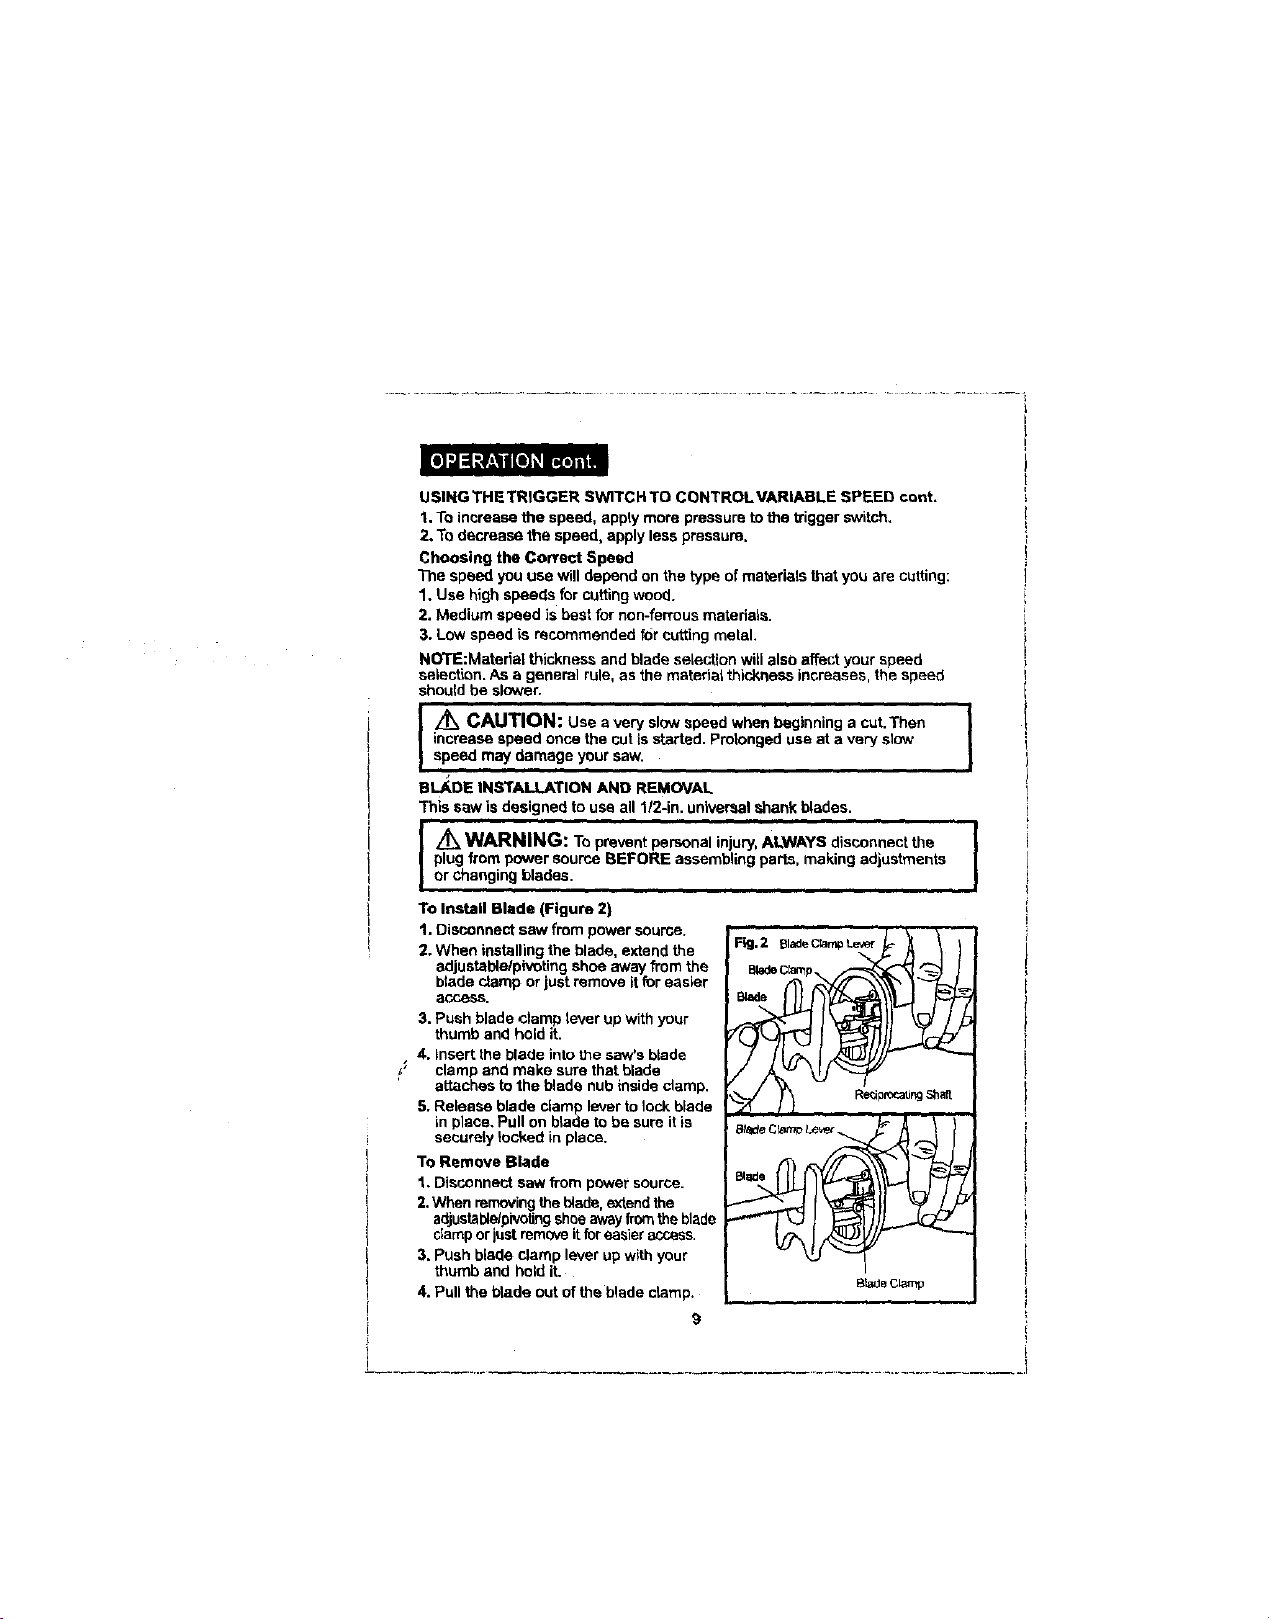
To Install Blade (Figure 2)
1. Disconnect saw from power soume.
2. When installing the blade, extend the
adjustable/pivoting shoe away from the
blade clamp or just remove it for easier
access.
3. Push blade clamp lever up with your
thumb and hold it.
• 4. insert the blade into the saw's blade
f" clamp and make sure that blade
attaches to 1he blade nub inside damp,
5. Release blade clamp lever to lock blade
in place. Pull on blade to be sure it is
securely locked in place.
To Remove Blade
1. Disconnect saw from power source.
2, When removingtheblade, extendthe
adjustable/pivotingshoeawayfrom the blade
damp or just removeitfor easier access.
3, Push blade clamp lever up with your
thumb and hold it.
4. Pull the blade out ofthe blade clamp.
Fig.2 {}ladeC_npLe_er_._ /
_pme_ sh_l
BIw,6e Cl_'_mp
L
0 m == 0 •
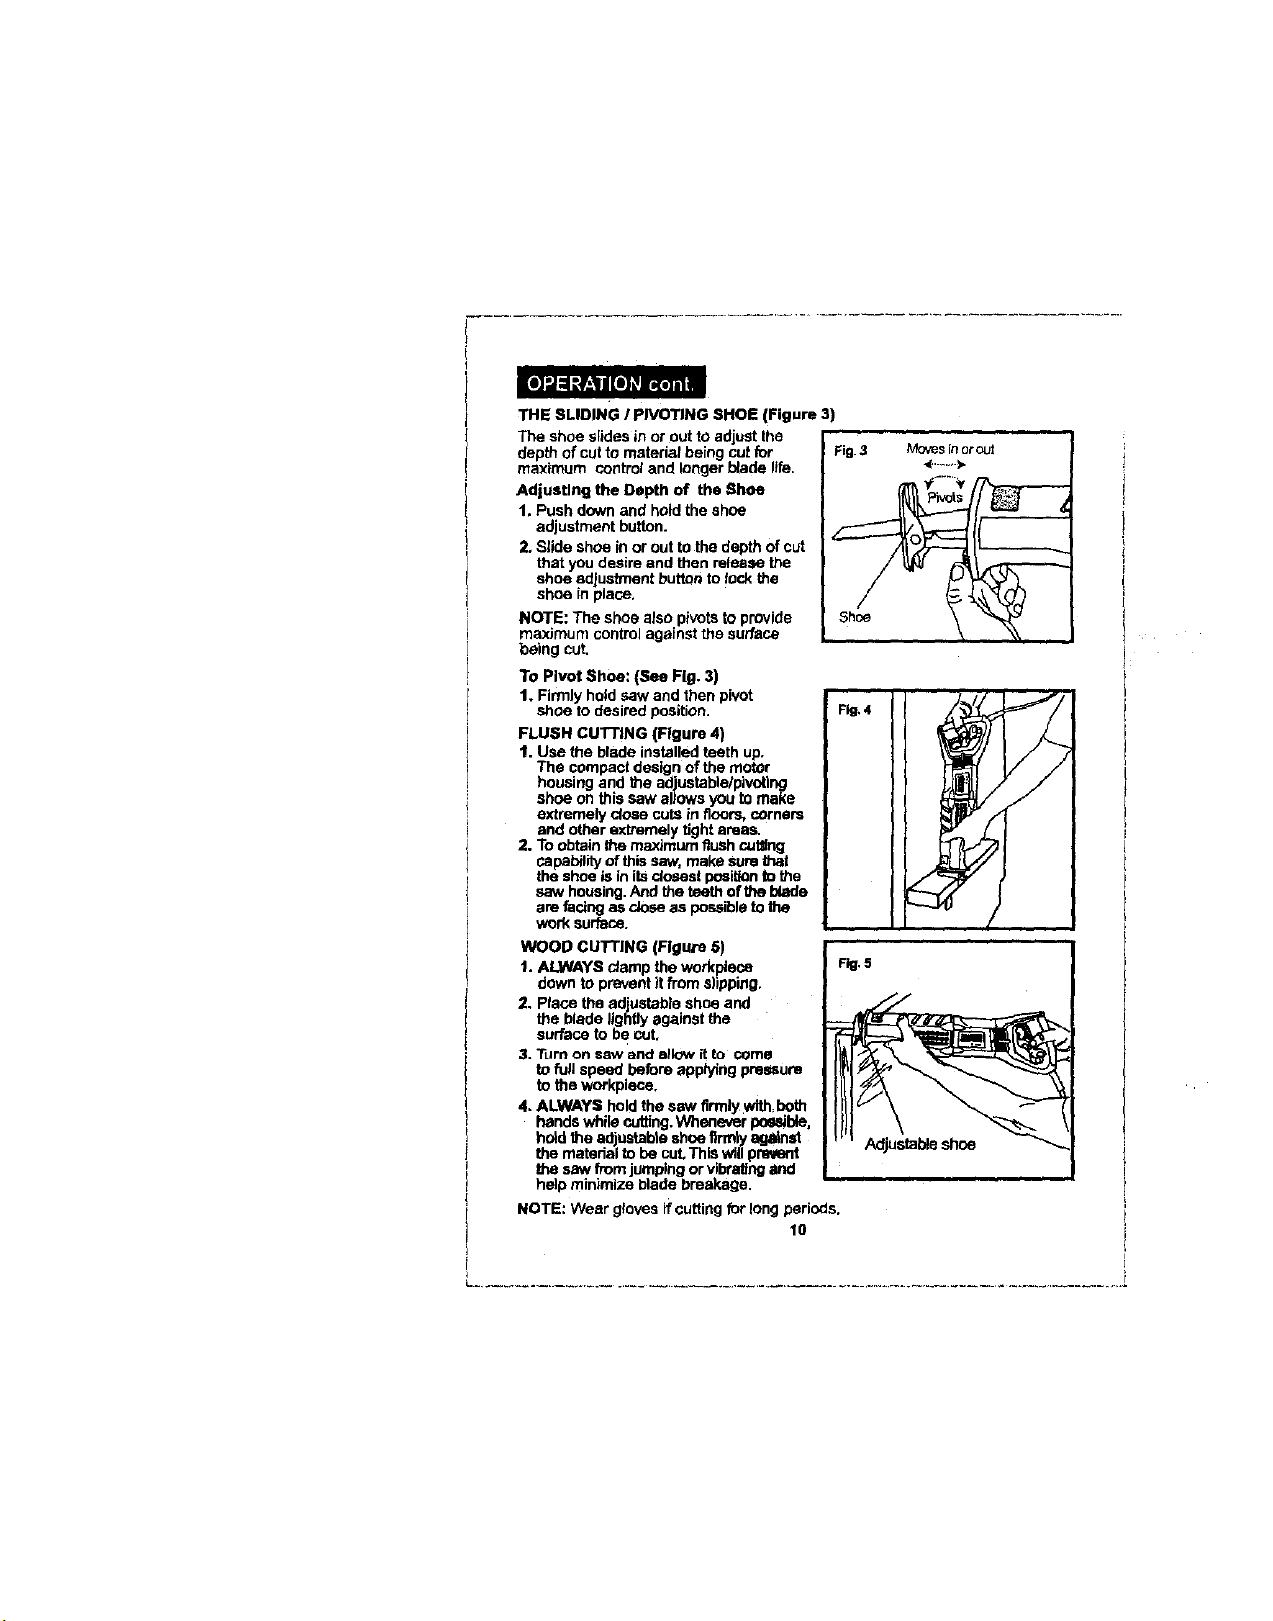
THE SLIDING I pIVOTING SHOE (Figure 3)
The shoe slides in or out to adjust the
depth of cut to material being cut for
maximum control and longer blade life.
Adjusting the Depth of the Shoe
1. Push down and hold the shoe
adjustment button.
2, Slide shoe in or out to the depth of cut
that you desire and then release the
shoe ad ustment buttor_to lock the
shoe in p ace.
NOTE: The shoe also pivots to provide
maximum control against the surface
being cut.
To Pivot Shoe: (See Fig. 3)
1. Firmly hbid saw and then pivot I
FLUSH CUTTING (Figure 4)
1. Use the blade installed teeth up.
The compact design of the motor
housing and the adjustabie/pivottog
shoe on this saw allows you to make
extremely ctose cuts in floors, corners
and other extremely tight areas.
2. To obtain the maximum flushcubing
capability of this saw, make sure that
shoe to desired position. I F ], 4
the shoe is in its cJceestposition to the
saw housing. And the teeth of'the blade
ere facing as close as possibleto the
work surface.
WOOD CUTTING (Figure 5)
t. ALWAYS clamp the workpieco
down to prevent it from s))pping.
2. Place the adjuetobie shoe and
the blade lightly against the
surface to be cut,
3. Turn on saw and allow it to come
to full speed before applying pressure
to the workplace,
4, ALWAYS hold the saw firmly with=beth
hands while cutting. Whenever powdble,
hotd the adjustable shoe flrmty ag_net
the matodal to be cuL This will preempt
the saw from jumping or vibretfngand
help minimize blade breakage.
NOTE: Wear gloves if cutting for long periods.
10
Fig. 3 Moves in or out
 Loading...