

Page 1

3084514
Sears Brands Management Corporation, Hoffman Estates, IL 60179 USA
Visit the Craftsman web page: www.craftsman.com
Visite el sitio Web de Craftsman: www.craftsman.com
Used under license Utilizado bajo licencia
Save this manual for future reference
Conserve este manual para futura referencia.
* Maximum initial battery voltage (measured without workload) is 24 volts.
Nominal working voltage is 21.6 volts.
* La tensión inicial máxima de la batería (medida sin carga) es 24 voltios.
La tensión de trabajo nominal es 21,6 volts.
OPERATOR′S MANUAL
MANUAL DEL USUARIO
24V MAX* LITHIUM-ION
CORDLESS LINE TRIMMER
ORILLADORA INALÁMBRICA CON BATERÍA
DE IONES DE LITIO DE 24 V MÁX.*
CAUTION:
To reduce the risk
of injury, the user must read and
understand the operator's manual
before using this product.
PRECAUCIÓN:
Para reducir
el riesgo de lesiones, el usuario
debe leer y comprender el manual
antes de utilizar este producto.
Model No. 151.50227
(INCLUDES (1) Battery and charger)
Modelo n
o
151.50227
(INCLUYE (2) Batería y cargador)
NOTE: Use Craftsman replacement
spool item number 71.64212
NOTA: Utilice el carrete de reemplazo
Craftsman número 71.64212
Page 2

2 ― English
TABLE OF CONTENTS / TABLA DE CONTENIDOS
INTRODUCTION / INTRODUCCIÓN
This tool has many features for making its use more pleasant and enjoyable. Safety, performance, and
dependability have been given top priority in the design of this product making it easy to maintain and
operate.
* * *
Esta herramienta tiene muchas funciones para hacerla más agradable y cómoda de usar. Se ha dado
máxima prioridad a la seguridad, rendimiento y dependencia en las etapas de diseño de este producto
para que sea fácil de utilizar y mantener.
■ Warranty .................................................................... 2
■ Introduction ................................................................ 2
■ Important Safety Instructions..................................3-5
■ Symbols .................................................................. 6-7
■ Features ..................................................................... 8
■ Assembly ................................................................... 9
■ Battery Packs and Charger ................................10-11
■ Operation ............................................................12-14
■ Care and Maintenance .......................................15-16
■ Environmentally Safe Battery Disposal ................... 17
■ Troubleshooting ....................................................... 18
■ Illustrated Parts List ............................................19-20
■ Figure Numbers (Illustrations) ............................... i-viii
■ Garantía ............................... Sección de Inglés pág. 2
■ Introducción ......................... Sección de Inglés pág. 2
■ Instrucciones de seguridad importantes ................3-5
■ Símbolos ................................................................. 6-7
■ Características ........................................................... 8
■ Armado .................................................................9-10
■ Batería y cargador ..............................................10-12
■ Funcionamiento .................................................. 13-15
■ Cuidados y mantenimiento .................................16-17
■ Eliminación ambientalmente segura de la batería.. 18
■ Resolución de problemas ........................................ 19
■ Lista de piezas, ilustrada ....................................20-21
■ Números de las guras (ilustraciones) .................. i-viii
ENGLISH ESPAÑOL
CRAFTSMAN LIMITED WARRANTY
FOR TWO YEARS from the date of sale, this power tool is warranted against defects in material or
workmanship.
FOR ONE YEAR from the sale date a supplied battery pack or charger is warranted against material or
workmanship defects.
WITH PROOF OF SALE, a defective product will be replaced free of charge.
For warranty coverage details to obtain free replacement, visit the web page:
www.craftsman.com/warranty
This warranty does not cover the trimmer line or spool, which are expendable parts that can wear out from
normal use within the warranty period.
This warranty is void if this product is ever used while providing commercial services or if rented to another
person.
This warranty gives you specic legal rights, and you may also have other rights which vary from state to
state.
Sears Brands Management Corporation, Hoffman Estates, IL 60179
* * *
GARANTÍA LIMITADA CRAFTSMAN
DURANTE DOS AÑOS a contar de la fecha de venta, esta herramienta está garantizada contra defectos
en sus materiales o fabricación.
DURANTE UN AÑO a contar de la fecha de venta, la batería o cargador incluidos con la herramienta están
garantizados contra defectos en sus materiales o fabricación.
Un producto defectuoso puede reemplazarse por uno nuevo, de manera gratuita, considerando que se
presente una PRUEBA DE VENTA.
Para conocer la cobertura de la garantía y obtener un reemplazo gratuito, visite el sitio Web
www.craftsman.com/warranty
Esta garantía no cubre el lamento de corte o carrete, las cuales son piezas desechables que pueden
desgastarse debido al uso normal dentro del periodo de garantía.
La garantía de un año se anula si el producto se usa para proporcionar servicios comerciales o si se le
arrienda a otra persona.
Esta garantía le entrega derechos legales especícos que pueden variar según su estado (podría tener
otros derechos adicionales).
Sears Brands Management Corporation, Hoffman Estates, IL 60179
Page 3

3 ― English
IMPORTANT SAFETY INSTRUCTIONS
WARNING
!
Read and understand all instructions. Failure
to follow all instructions listed below may
result in electric shock, re and/or serious
personal injury:
■ Do not allow children or untrained
individuals to use this unit.
■ Check the work area before each use.
Remove all objects such as rocks, broken
glass, nails, wire, or string which can be
thrown or become entangled in the machine.
■ Always wear eye protection with side
shields marked to comply with ANSI Z87.1.
Following this rule will reduce the risk of
serious personal injury.
■ Use safety glasses - always use face or
dust mask if operation is dusty.
■ Protect your lungs. Wear a face or dust
mask if the operation is dusty. Following this
rule will reduce the risk of serious personal
injury.
■ Dress Properly – Do not wear loose clothing
or jewelry. They can be caught in moving
parts. Use of rubber gloves and substantial
footwear is recommended when working
outdoors. Wear protective hair covering to
contain long hair. Wear heavy, long sleeves,
boots, and gloves. Do not wear loose tting
clothing, short pants, sandals, or go barefoot.
■ Secure long hair above shoulder level to
prevent entanglement in moving parts.
■ Keep Children Away – All visitors should be
kept at a distance from work area.
■ Stay Alert – Watch what you are doing. Use
common sense. Do not operate appliance
when you are tired.
■ Do not operate in poor lighting.
■ Keep all parts of your body away from any
moving part.
■ Do not operate power tools in explosive
atmosphere, such as in the presence of
ammable liquids, gases, or dust. Power
tools create sparks which may ignite the dust
or fumes.
■ Avoid body contact with grounded surfaces
such as pipes, radiators, ranges, and
refrigerators. There is an increased risk of
electric shock if your body is grounded.
■ Avoid Dangerous Environment - Don't use
line trimmer in damp or wet locations. Water
entering the line trimmer will increase the risk
of electric shock.
■ Use Right Power Tool - Do not use line
trimmer for any job except that for which it is
intended.
■ Don't Force Power Tool - It will do the job
better and with less likelihood of a risk of
injury at the rate for which it was designed.
■ Don’t Overreach – Keep proper footing and
balance at all times.
■ Avoid Accidental Starting - Be sure power
switch is in the locked or off position before
inserting battery pack. Carrying tools with
your nger on power switch or inserting the
battery pack into a tool with switch on invites
accidents.
■ Do not use tool if power switch does not
turn it on or off. Any tool that cannot be
controlled with the power switch is dangerous
and must be repaired if possible or discarded.
■ Disconnect Power - Disconnect battery
pack from the appliance before storing,
servicing, or changing accessories such
as cutting line. Such preventive safety
measures reduce the risk of starting the tool
accidentally.
■ Use only identical replacement parts and
accessories. Use of any other parts may
create a hazard or cause product damage.
■ Maintain tool with care - Replace spool
head if cracked, chipped, or damaged in
any way. Be sure the spool head is properly
installed and securely fastened. Failure to do
so can cause serious injury. Keep handles
dry, clean and free from oil and grease.
■ Check Damaged Parts – Before further
use of the appliance, a guard or other part
that is damaged should be carefully checked
to determine that it will operate properly
Page 4

4 ― English
and perform its intended function. Check for
alignment of moving parts, binding of moving
parts, breakage of parts, mounting, and any
other condition that may affect its operation.
A guard or other part that is damaged should
be properly repaired or replaced by an
authorized service center unless indicated
elsewhere in this manual.
■ Make sure all guards, straps, safety guards
and handles are properly and securely
attached.
■ Use only the specied replacement line in
the cutting head. Do not use any other cutting
line, for example, metal wire or rope.
■ Do not install any other cutting head to this
trimmer other than the identical replacement
to the one with which it is originally equipped.
■ Keep guards in place and in working order.
■ Keep blades sharp.
■ Keep hands and feet away from cutting area.
■ Don’t grasp the exposed cutting line or
cutting edges when picking up or holding the
appliance.
■ Maintain a rm grip on both handles while
trimming. Keep spool head below waist level.
Never cut with the spool head raised 30 in.
or more above the ground.
■ Store Idle Appliances Indoors – When not
in use, appliances should be stored indoors
in dry, and high or locked-up place – out of
reach of children.
■ Never use blades, ailing devices, wire
or rope. Unit is designed for line trimmer
use only. Use of any other accessories or
attachments will increase the risk of injury.
■ Inspect area to be cut. Remove objects
(rocks, broken glass, nails, wire, string, etc.)
which can be thrown or become entangled in
cutting head.
■ Keep the air vents clean and free of debris
to avoid overheating the motor. Clean after
each use.
■ Stop the unit and disconnect the power
source when not in use. Carry the unit with
the motor stopped.
■ Do not hang unit so that the power switch
is depressed.
■ Battery tools do not have to be plugged into
an electrical outlet; therefore, they are always
in operating condition. Be aware of possible
hazards when not using your battery powered
tool or when changing accessories. Following
this rule will reduce the risk of electric shock,
re, or serious personal injury.
■ Use only the following model number
battery: 71.98724 (24LB2513)
■ Do not charge either battery in rain, or in
wet locations. Following this rule will reduce
the risk of electric shock.
■ Do not use battery powered tool in rain.
■ Remove or disconnect battery before
servicing, cleaning or removing material from
the battery powered tool.
■ Do not dispose of the battery in a re. The
cell may explode. Check with local codes for
possible special disposal instructions.
■ Do not open or mutilate the battery.
Released electrolyte is corrosive and may
cause damage to the eyes or skin. It may be
toxic if swallowed.
■ Do not place tool or battery near re or
heat. This will reduce the risk of explosion
and possibly injury.
■ The battery can explode in the presence
of a source of ignition, such as a pilot light.
To reduce the risk of serious personal
injury, never use any cordless product in
the presence of open ame. An exploded
battery can propel debris and chemicals. If
exposed, ush affected bodily area with water
immediately.
■ Do not crush, drop or damage battery packs.
Do not use a battery pack or charger that
has been dropped or received a sharp blow.
A damaged battery is subject to explosion.
Properly dispose of a dropped or damaged
battery immediately.
■ Exercise care in handling the battery in
order not to short the battery with conducting
IMPORTANT SAFETY INSTRUCTIONS
Page 5

5 ― English
SAVE THESE INSTRUCTIONS
materials such as rings, bracelets, and keys.
The battery or conductor may overheat and
cause burns.
■ Do not operate charger with a damaged
cord or plug, which could cause shorting
and electric shock. If damaged, immediately
discontinue use. Replace the charger with the
identical unit as listed in the Parts List of this
manual.
■ To reduce the risk of serious personal
injury, do not store outside or in vehicles.
■ Under extreme usage or temperature
conditions, battery leakage may occur. If
liquid comes in contact with your eyes, ush
them with clean water for at least 10 minutes,
then seek immediate medical attention.
Following this rule will reduce the risk of
serious personal injury.
IMPORTANT SAFETY INSTRUCTIONS
■
Save these
instructions.
Refer to them frequently and use them to
instruct others who may use this power tool.
If you loan someone this power tool, loan
them these instructions also.
Page 6
6 ― English
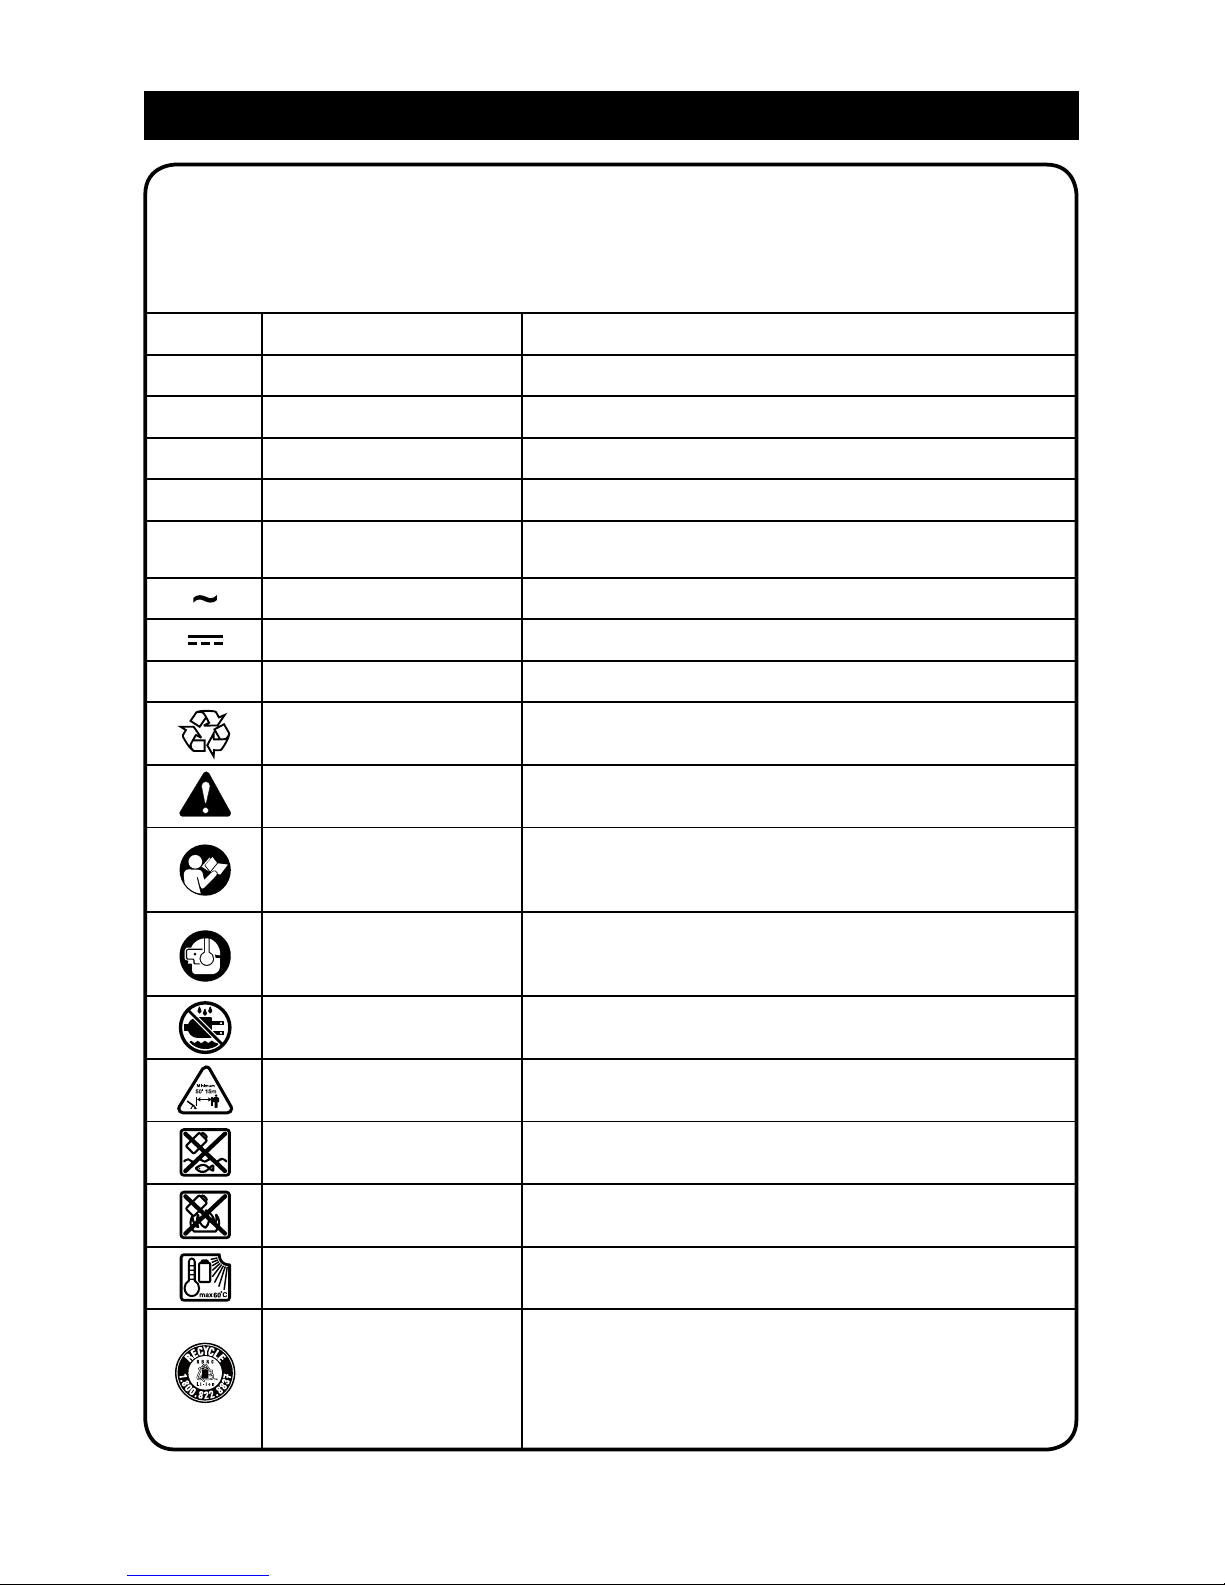
SYMBOLS
Some of the following symbols may be used on this product. Please study them and
learn their meaning. Proper interpretation of these symbols will allow you to operate
the product better and safer.
SYMBOL NAME DESIGNATION/EXPLANATION
V Volts Voltage
A Amperes Current
Hz Hertz Frequency (cycles per second)
W Watt Power
hrs Hours Time
/min Per Minute
Revolutions, strokes, surface speed, orbits etc., per
minute
Alternating Current Type of current
Direct Current Type or a characteristic of current
n
0
No Load Speed Rotational speed, at no load
Lithium-Ion Battery
Recycling
Designates that this tool is in compliance with
Lithium-Ion battery recycling program requirements
Safety Alert Indicates a potential personal injury hazard.
Read The Operator’s
Manual
To reduce the risk of injury user must read and
understand operator’s manual before using this
product.
Eye and Hearing
Protection
Always wear eye protection with side shields marked
to comply with ANSI Z87.1, along with hearing
protection.
Wet Conditions Alert Do not expose to rain or use in damp locations.
Keep Bystanders Away Keep all bystanders at least 50 ft. away.
Keep Away From Water
Do not dispose of battery packs in rivers or immerse
in water.
Keep Away From Fire
Do not dispose of battery packs in re. They will
explode or leak and cause injury.
Heat Alert
Do not expose battery packs to heat in excess of
60ºC.
Recycle Symbol
This product uses lithium-ion batteries. Local, state,
or federal laws may prohibit disposal of batteries in
ordinary trash. Consult your local waste authority
for information regarding available recycling and/or
disposal options.
Page 7
7 ― English
SYMBOLS
SYMBOL SIGNAL MEANING
DANGER
Indicates an imminently hazardous situation, which, if not
avoided, will result in death or serious injury.
WARNING
Indicates a potentially hazardous situation, which, if not
avoided, could result in death or serious injury.
CAUTION
Indicates a potentially hazardous situation, which, if not
avoided, may result in minor or moderate injury.
CAUTION
(Without Safety Alert Symbol) Indicates a situation that may
result in property damage.
The following signal words and meanings are intended to explain the levels of risk
associated with this product.
Page 8

8 ― English
FEATURES
PRODUCT SPECIFICATIONS
Type ................................................................................................ Cordless, battery-powered
Motor .................................................................................................................. 24V max* d.c.
Revolutions Per Minute ............................................................................................. 9000 rpm
Line Diameter .......................................................................................................... .0.065 inch
Cutting Width ................................................................................................................. 10 inch
Weight without Battery ...................................................................................3.81 lbs (1.73 kg)
Battery ...........................MODEL #71.98724 (24LB2513) 24V max* d.c., 2.5 Ah Lithium-Ion
Charger
Model No. ...........................................................................................................24LSC01-ETL
Rated Input Voltage .............................................................................................. 100-240VAC
Rated Output Voltage ....................................................................................................24VDC
Rated Output Current ........................................................................................................ 0.5A
Charging Time from Zero to Full Charge ......................................................................5-6Hour
KNOW YOUR LINE TRIMMER
See Figure 1, page i
The safe use of this product requires an
understanding of the information on the
product labeling and in this operator’s manual
as well as a knowledge of the project you
are attempting. Before use of this product,
familiarize yourself with all operating features
and safety rules.
SAFETY GUARD
The trimmer includes a safety guard that
helps protect from ying debris.
SAFETY SWITCH
The safety switch prevents accidental
starting.
ROTATING MAIN HANDLE
The rotating main handle can be locked in
three different positions for ease of use when
edging and trimming.
AUTOMATIC LINE ADVANCE
The trimmer is equipped with an auto-feed
head. Bumping the head to try to advance
the line will damage the trimmer and void the
warranty.
Page 9

9 ― English
ASSEMBLY
UNPACKING
This product requires assembly.
■ Carefully remove the product and any
accessories from the box. Make sure that all
items listed in the packing list are included.
PACKING LIST
24V Cordless Line Trimmer
Safety Guard with Screws
Auxiliary Handle Assembly with Locking Knob
Flower Guard
(1) 24V, 2.5Ah Battery
Charger
Operator's Manual
WARNING!
Do not use this product
if any parts on the Packing List are already
assembled to your product when you unpack
it. Parts on this list are not assembled to the
product by the manufacturer and require
customer installation. Use of a product that
may have been improperly assembled could
result in serious personal injury.
■ Inspect the product carefully to make sure
no breakage or damage occurred during
shipping.
■ Do not discard the packing material until
you have carefully inspected and satisfactorily
operated the product.
■ If any parts are damaged or missing, do not
operate the product. Return it for replacement
to the retailer from which it was purchased.
ATTACHING THE SAFETY GUARD
See Figure 12, page iv
WARNING!
The line cut-off blade on
the safety guard is sharp. Avoid contact with
the blade. Failure to avoid contact can result
in serous personal injury.
■ Align the safety guard with the spool head.
■ Secure guard by tightening the mounting
screws with a screwdriver.
WARNING!
If any parts are damaged
or missing do not operate this product until
the parts are replaced. Use of this product
with damaged or missing parts could result in
serious personal injury.
ATTACHING THE AUXILIARY HANDLE
See Figures 2-7, page ii
■ Loosen the locking knob counterclockwise
and remove it from the auxiliary handle.
■ Align the auxiliary handle with the handle
support. (Fig. 2)
■ Insert the locking knob through the
auxiliary handle and partially tighten the knob
clockwise by hand. (Fig. 3)
■ Adjust the auxiliary handle to desired
position. (Figs. 4-6)
■ Tighten the locking knob clockwise and
clamp the lever down to secure it. (Fig. 7)
NOTE: Only tighten the locking knob so that
it is possible to clamp the lever down with
light pressure. If the lever cannot be clamped,
slightly loosen the locking knob. If the lever
can be clamped without resistance, tighten
the locking knob.
ATTACHING THE FLOWER GUARD
See Figures 8-11, page iii
■ Align and seat the steel ower guard rails
into the 2 recessed channels on either side of
the motor housing.
■ Once aligned and with the steel rails of the
ower guard seated into housing channels,
slide the guard forward until the closed end of
the guard is against the motor housing.
■ With the two steel rails exposed, align the
two holes in the plastic toe pad with the end
of the steel rails of the guard and snap into
place securely.
WARNING!
Do not attempt to modify
this product or create accessories not
recommended for use with this product. Any
such alteration or modication is misuse and
could result in a hazardous condition leading
to possible serious personal injury.
WARNING!
To prevent accidental
starting that could cause serious personal
injury, always remove the battery pack from
the product when assembling parts.
Page 10

10 ― English
BECOME FAMILIAR WITH THE CHARGER
See Figure 13, page iv
Before attempting to use this charger,
become familiar with all of its operating
features and safety requirements.
CHARGING THE BATTERY PACKS
See Figure 14, page iv
BATTERY PACKS AND CHARGER
■ Do not use other battery chargers. The
battery charger supplied is specically
designed for the Lithium-Ion Battery used in
this garden appliance.
■ Check the main power supply! The voltage
of the power supply must correspond with the
data on the nameplate of the battery charger.
Battery chargers operate on 100-240V.
WARNING!
■ If any part of the charger is missing or
damaged, do not operate it! Replace the
charger with a new one. Failure to heed this
warning could result in possible serious injury.
■ Check the voltage! The voltage must
comply with the information on the rating
label.
BATTERY CHARGING PROCEDURE
■ Align one of the battery packs to the slots
on the charger and slide it in until it locks in
place.
■ Connect the charger to the power supply.
■ Allow sufcient charging time (see Product
Specications), and then disconnect the
charger from the power supply.
■ Press the release button on the battery
pack and remove it from the charger.
NOTE:
It is normal for the battery pack and
charger to become warm (but not hot) during
charging process. If the battery does not
charge properly, check to make sure the
electrical outlet is "live".
Always charge the battery before storage!
NOTE:
The battery is supplied partially
charged. To ensure full capacity of the
battery, charge the battery in the charger
before using the product for the rst time.
The Lithium-Ion battery can be charged at
any time without reducing its service life.
Interrupting the charging procedure does not
affect the battery.
WARNING!
To reduce the risk of re,
never leave either battery connected to the
charger for more than 24 hours!
CHARGER INDICATORS
■ Preparation: The charging process starts
as soon as the battery charger is plugged
into a power supply socket and the battery is
inserted into the charger.
■ If a battery is not inserted, a continuous
green light indicates that the charger is
plugged into a power supply socket and is
now ready to begin charging.
■ Charging: a continuous red light on the
charger indicates that the battery is charging
normally.
■ Charged: continuous green LED on the
charger indicates that the battery is ready for
use.
■ The indicator lights on the charger show
the charger status:
SYMBOL
INDICATOR
LIGHTS
STATUS
red,
continuous
charging
green,
continuous
fully charged
Page 11
11 ― English
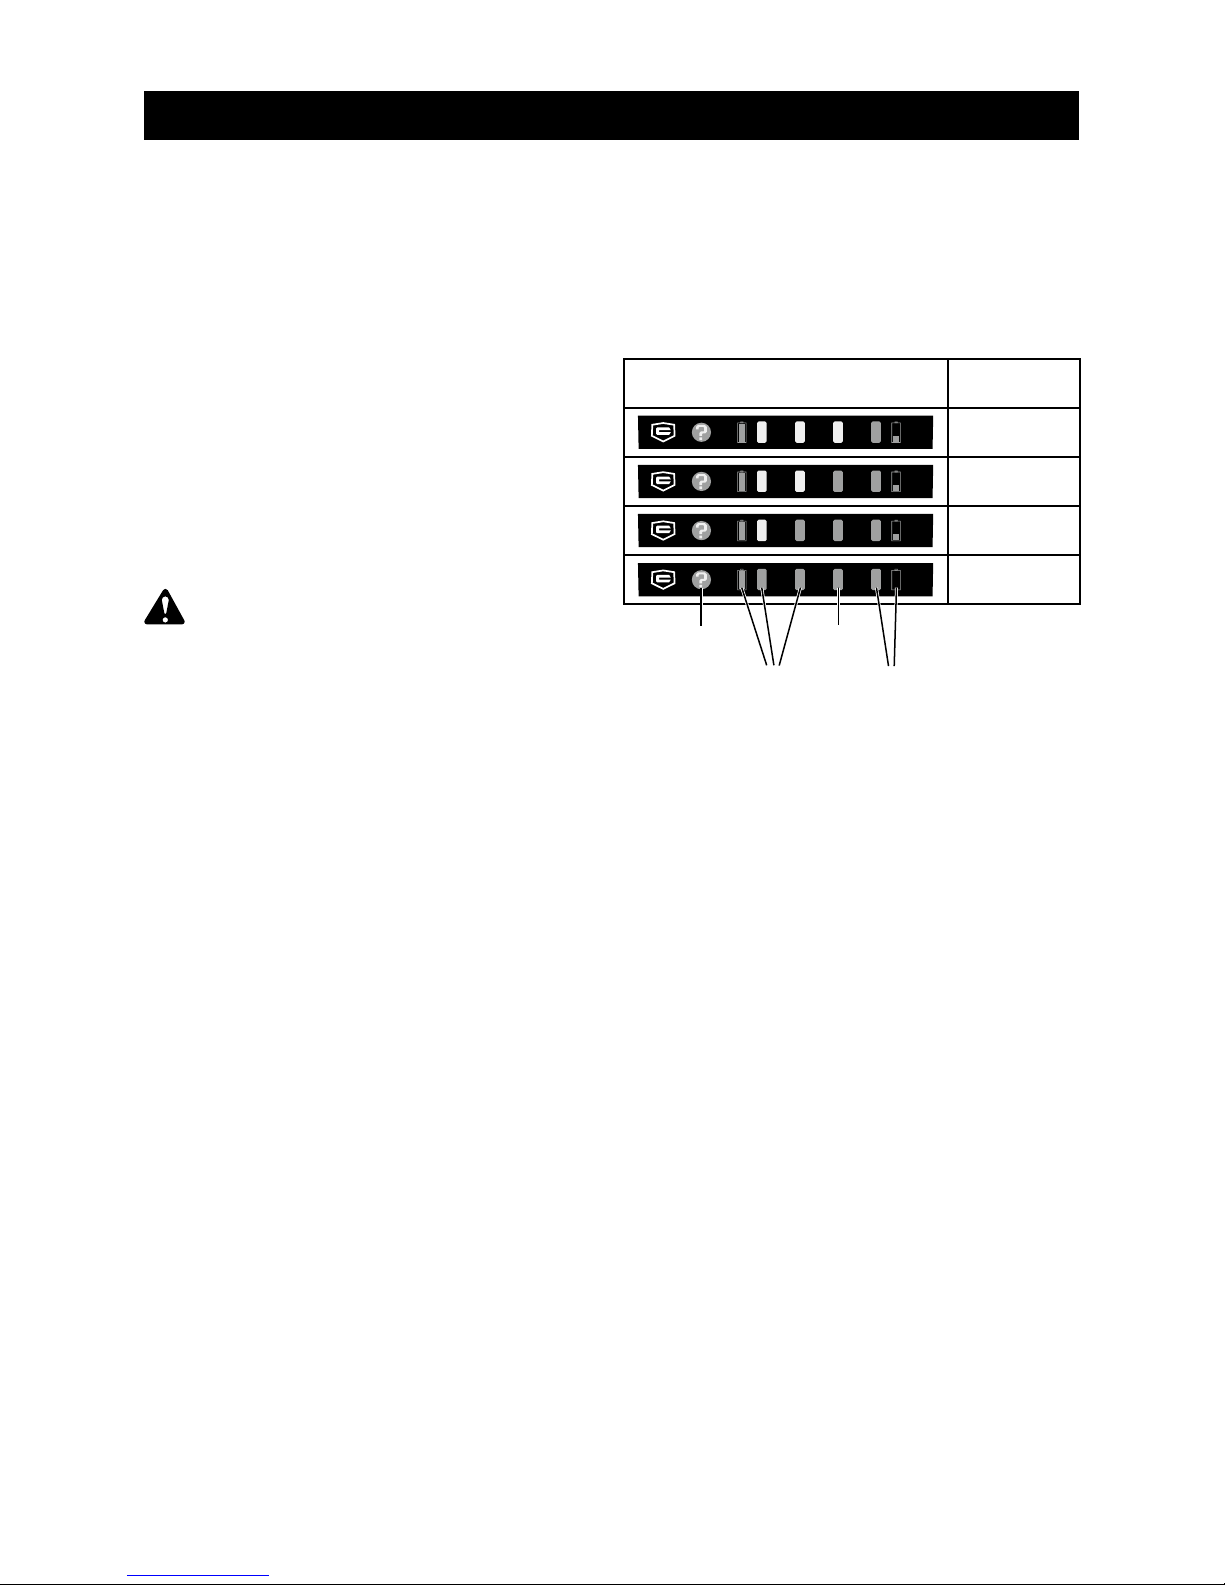
BATTERY LED INDICATORS
Check either battery pack capacity by pressing
the LED button.
When the LED button is pressed, the number
of illuminated lights indicates the state of
battery pack capacity. See Table below.
BATTERY PACKS AND CHARGER
SAFETY NOTES AND PRECAUTIONS
■ Do not disassemble either battery pack.
■ Keep away from children.
■ Do not expose either battery to water or
salt water. You should place the battery in a
cool and dry environment.
■ Do not place the battery in high temperature
locations, such as near a re or heater.
■ Do not reverse the positive terminal and the
negative terminal of the battery..
■ Do not connect the positive terminal and
the negative terminal of the battery to each
other with any metal objects.
■ Do not knock or strike the battery. Do not
step on the battery.
■ Do not solder directly onto the battery or
pierce the battery with nails or other edge tools.
■ In the event that either battery leaks and
uid gets into your eyes, do not rub the
eyes. Rinse well with water. Immediately
discontinue use of either battery if it emits
an unusual smell, fells hot, changes color,
changes shape, or appears abnormal in any
other way.
■ The intelligent charger ensures maximum
battery life, because it measures the existing
charge level of the battery and then charges
with the required current and voltage. Charge
the battery fully before storage.
■ After continuous or repeated charging
cycles without interruption, the charger
surface may become noticeably warm. This
is normal and does not indicate a technical
defect of the battery charger.
■ Green LED and Red LED flashing
alternately indicates that the battery voltage
is low, and that charging will only continue for
about another 30 minutes.
WARNING!
To avoid risk of re,
electric shock, or electrocution
:
■ Do not use a damp cloth or detergent on
the battery or battery charger.
■ Always remove the battery pack before
cleaning, inspecting, or performing any
maintenance on the product.
NUMBER of LIGHTED LEDs CAPACITY
0%-25%
25%-50%
50%-75%
75%-100%
LED
Button
green
yellow
red
Page 12

12 ― English
OPERATION
INTENDED USE
The trimmer is intended for cutting weed,
grass or similar soft vegetation in areas that
are hard to reach, e.g. under bushes, on
slopes and edges. Do not use trimmer to
work on unusually thick, dry or wet grass, e.g.,
pasture grass, or to shred leaves.
This product is intended for private domestic
use only, not for any commercial trade use. It
must not be used for any purposes other than
those described.
For complete charging instructions, see the
Operator’s Manuals for your battery pack and
charger.
TO INSTALL BATTERY PACK
See Figure 15, page iv
■ Align the tongue of the battery pack with
the cavity in the trimmer housing.
■ Grasp the line trimmer rmly.
■ Push the battery pack into the handle until
the latch locks into place.
■ Do not use force when inserting the battery
pack. It should slide into position and “click”.
TO REMOVE BATTERY PACK
See Figure 16, page v
■ Press the release button on the battery
pack.
■ Grasp the trimmer rmly, and pull the
battery pack out of the handle.
STARTING/STOPPING THE LINE TRIMMER
See Figure 17, page v
■ To start the line trimmer, squeeze the safety
switch and press the power switch.
■ To stop the line trimmer, release the power
switch.
ADVANCING LINE AUTOMATICALLY
NOTE: The trimmer is equipped with an
auto-feed head. Bumping the head to try to
advance the line will damage the trimmer and
void the warranty.
■ With the trimmer running but NOT trimming,
release the power switch.
■ Wait two seconds, and press the power
switch.
NOTE: The line will extend with each stop
and start of the power switch until the line
reaches the length of the safety guard cut-off
blade.
■ Resume trimming.
ADVANCING THE LINE MANUALLY
See Figure 18, page v
■ Remove the battery pack.
■ Push the advance button located on the
spool head while pulling on line to manually
advance the trimmer line. The lines will
advance and stop. Push the button again to
advance more line.
WARNING!
Do not allow familiarity
with products to make you careless.
Remember that a careless fraction of a
second is sufcient to inict serious injury.
WARNING!
Always wear eye
protection with side shields marked to comply
with ANSI Z87.1. Failure to do so could
result in objects being thrown into your eyes,
resulting in possible serious injury.
WARNING!
Do not use any
attachments or accessories not
recommended by the manufacturer or retailer
of this product. The use of attachments or
accessories not recommended can result in
serious personal injury.
Before each use, inspect the entire product
for damaged, missing, or loose parts such
as screws, nuts, bolts, caps, etc. Tighten
securely all fasteners and caps and do
not operate this product until all missing or
damaged parts are replaced.
Page 13

13 ― English
OPERATION
■ Push the button and pull lines out as many
times as it takes to reach the line cut-off
blade.
PIVOTING HEAD
See Figures 19-22, page v
■ To pivot the head, push the pivot button
and adjust to any of the 7 positions.
■ Adjust the angle of the spool head
according to the intended operation.
■ Adjust to desired position: Adjust to 135°
when trimming grass on at ground. Adjust to
90° or 180° when trimming near edges and
walls.
ADJUSTING TRIMMER HANDLE AND
SHAFT
See Figures 23-24, page vi
■ Press the rotation lock button and rotate the
main handle clockwise. Release button when
main handle has been rotated 90° or 180°.
User can rotate handle to any of 3 positions
for easier use.
■ Turn the locking collar clockwise to unlock.
You can slide the shaft up or down to achieve
the most comfortable working height.
■ Turn the locking collar counterclockwise
until the shaft locks into place.
FLOWER GUARD
See Figure 25, page vi
Use the ower guard to keep distance
from hard objects or owers that could be
hit by the cutting line.
■ Push the ower guard to its outer position
for operation until it snaps into place.
■ Push the ower guard to its inner position
after operation and when storing.
OPERATING THE TRIMMER
See Figure 26, page vii
Follow these tips when using the line
trimmer:
■ Hold the trimmer with your right hand on
the rear handle and your left hand on the
front handle.
■ Keep a rm grip with both hands while in
operation.
■ Trimmer should be held at a comfortable
position with rear handle about hip height.
■ Cut tall grass from the top down. This will
prevent grass from wrapping around the shaft
and spool head which may cause damage
from overheating.
If grass becomes wrapped around the
spool head:
■ Remove the battery pack from the trimmer.
■ Remove the grass.
EDGING
To use the trimmer for edging (see Fig. 32)
rotate the handle to the 90° or 180° position
(see Fig. 23 inset).
WARNING!
Adjust the Flower Guard
position only when the product is switched off
and the cutting head is at a complete stop!
WARNING!
Always hold the line
trimmer away from the body keeping
clearance between the body and the line
trimmer. Any contact with the line trimmer
cutting head while operating can result in
serious personal injury.
Page 14

14 ― English
OPERATION
■ Work rhythmically. Stand rmly with
your feet apart. Cut from right to left so the
trimmings will be thrown away from the work
area.
■ Do not move the product too fast as this
will result in ineffective cutting and possible
damage.
■ Cut repeatedly from top to bottom in layers
when the grass is very high. ( Figs. 28-29)
■ Keep the spool head at an angle of about
30° to the ground when trimming. Avoid
pressing it against the ground as this can ruin
the lawn and damage the product. (Fig. 30)
NOTE: Let the cutting device do the work. Let
it work at its own pace, never force it into the
area to be cut.
■ Carefully maneuver the product around
objects, such as trees and bushes, ensuring
it does not come into contact with them. Use
the Flower Guard to ensure that the cutting
line does not come into contact with sensitive
plants. (Fig. 31)
■ Adjust the spool head angle when trimming
on edges.
■ Use the Flower Guard to avoid bringing
the cutting line into contact with hard objects
such as walls and curbs. (Fig. 32)
CUTTING TIPS
See Figure 27, page vii
■ Keep the trimmer tilted toward the area
being cut; this is the optimal position for
trimming.
■ Swing the trimmer from right to left when
cutting (Fig. 27). This will avoid throwing
debris at the operator.
■ Use the tip of the line to do the cutting; do
not force spool head into uncut grass.
■ Wire and picket fences cause extra line
wear, even breakage. Stone and brick walls,
curbs, and wood may wear line rapidly.
■ Avoid trees and shrubs. Tree bark, wood
moldings, siding, and fence posts can easily
be damaged by the line.
TRIMMING
See Figures 28-30, page vii; Figures 31-32,
page viii
■ Do not cut wet grass because it tends to
stick to the cutting head and guard, prevents
proper discharge of grass clippings, and
could cause you to slip and fall.
■ Wait until the product has come to a
standstill before placing it down.
■ Regularly remove clippings and dirt around
the spool head with a switched off product.
■ Pay attention when performing work close
to trees and bushes. The cutting line can
damage sensitive bark, and damage fence
posts.
Page 15

15 ― English
CARE AND MAINTENANCE
WARNING!
When servicing, use only
identical replacement parts. Use of any other
parts may create a hazard or cause product
damage.
WARNING!
Do not at any time let
brake uids, gasoline, petroleum-based
products, penetrating oils, etc., come in
contact with plastic parts. Chemicals can
damage, weaken or destroy plastic which can
result in serious personal injury.
WARNING!
Always wear eye
protection with side shields marked to
comply with ANSI Z87.1, along with hearing
protection. Failure to do so could result in
objects being thrown into your eyes, resulting
in possible serious injury.
WARNING!
To avoid serious personal
injury, always remove the battery pack from
the tool when cleaning or performing any
maintenance.
GENERAL MAINTENANCE
Avoid using solvents when cleaning plastic
parts. Most plastics are susceptible to
damage from various types of commercial
solvents and may be damaged by their use.
Use clean cloths to remove dirt, dust, oil,
grease, etc.
BATTERY PACK
■ Store the battery pack fully charged.
■ Recharge the battery pack whenever
there is a noticeable reduction in trimmer
performance. Do not allow the battery pack to
become completely discharged.
■ Do not recharge a battery pack that is
already fully charged. Overcharging shortens
battery life.
■ Once the battery pack is fully charged,
remove the battery from the charger and
disconnect the charger from the outlet.
■ Do not store either battery pack on the tool
or in the charger.
■ Recharge battery at a temperature between
39.2°F and 104°F. If a battery pack is hot,
allow it to cool down before recharging.
CHARGER MAINTENANCE
■ Keep the charger clean and clear of debris.
Do not allow foreign material to get into the
recessed cavity or onto the contacts. Wipe
the charger clean with a dry cloth. Do not
use solvents or water, and do not place the
charger in wet conditions.
■ Unplug the charger when there is no
battery pack in it.
■ Store the charger at normal room
temperature. Do not store it in excessive
heat. Do not use the charger in direct
sunlight.
CLEANING
Remove The Battery Pack.
■ Brush or blow dust and debris out of the air
vents using compressed air or a vacuum.
■ Keep the air vents free of obstructions,
sawdust, and wood chips. Do not spray,
wash, or immerse the air vents in water.
■ Wipe off the housing and the plastic
components using a moist, soft cloth.
■ Do not use strong solvents or detergents
on the plastic housing or plastic components.
Certain household cleaners may cause
damage, and may cause a shock hazard.
Page 16

16 ― English
CARE AND MAINTENANCE
SPOOL REPLACEMENT
See Figure 33, page viii
■ Only use a spool with 0.065 inch
diameter round monolament line. Use the
replacement spool specied in the NOTE at
the end of this section.
■ Remove the battery pack.
■ Push in tabs on side of spool cover.
■ Pull spool cover up to remove.
■ Remove the old spool.
■ When installing the new spool, make sure
the the line is captured in the spool slot, and
that the end of the line extends approximately
6 inches beyond the slot.
■ Install the new spool so that the line and
slot align with the eyelet in the line head.
Thread the line into and through the eyelet.
■ Pull the line extending from the eyelet so
that the line releases from the slot in the
spool.
■ Reinstall the spool cover by depressing
tabs into slot in the line head and pushing
down until spool cover clicks into place.
NOTE: Use Craftsman replacement spool
item number 71.64212
LINE REPLACEMENT
See Figure 34, page viii
■ Remove the battery pack.
■ Push in tabs on side of spool cover and pull
cover up to remove.
■ Remove the spool from the spool head.
NOTE: Remove any old line remaining on the
spool.
■ Cut a piece of line approximately 9 ft. long.
Use only 0.065 in. diameter monolament
line.
■ Insert the line into the anchor hole in the
upper part of the spool. Wind the line around
the upper part of the spool clockwise, as
shown by the arrows on the spool.
STORAGE
■ Remove the battery pack from the line
trimmer before storing.
■ Clean all foreign material from the trimmer.
■ Store the product and its accessories in a
dry, frost free place.
■ Always store the product in a place that is
inaccessible to children. The ideal storage
temperature is between 50
o
F and 86 oF.
■ Keep tool away from corrosive agents such
as garden chemicals and de-icing salts.
■ We recommend using the original package
for storage or covering the product with a
suitable cloth to protect it against dust.
TRANSPORTATION
■ Switch the product off and remove the
battery pack before transporting it anywhere.
■ Attach transportation guards, if applicable.
■ Always carry the product by its handles.
■ Protect the product from any heavy impact
or strong vibrations which may occur during
transportation in vehicles.
WARNING!
Only use the appropriate
type of cutting line.
Place line in the slot on upper spool ange,
leaving about 6 in. extended beyond the slot.
Do not overll. After winding the line, there
should be at least 1/4 in. between the wound
line and the outside edge of the spool.
■ Install the spool in the line head and
replace the spool cover as described in Spool
Replacement.
Page 17

17 ― English
ENVIRONMENTALLY SAFE BATTERY DISPOSAL
To avoid injury and risk of re, explosion, or
electric shock, and to avoid damage to the
environment:
■ Cover the battery terminals with heavy-duty
adhesive tape.
■ DO NOT attempt to remove or destroy any
of the battery pack components.
■ DO NOT attempt to open the battery pack.
■ If a leak develops, the released electrolytes
are corrosive and toxic. DO NOT get the
solution in the eyes or on skin, and do not
swallow it.
■ DO NOT place this battery in your regular
household trash.
■ DO NOT incinerate.
■ DO NOT place battery where it will become
part of any waste landll or municipal solid
waste stream.
■ Take the battery to a certied recycling or
disposal center.
WARNING!
All toxic materials must be
disposed of in a specied manner to prevent
contamination of the environment. Before
disposing of damaged or worn out LithiumIon battery packs, contact your local waste
disposal agency, or the local Environmental
Protection Agency for information and specic
instructions.
WARNING!
If the battery pack cracks
or breaks, with or without leaks, do not
recharge it and do not use. Dispose of it and
replace with a new battery pack.
DO NOT ATTEMPT TO REPAIR IT!
The following toxic and corrosive
materials are in the battery used in this
battery pack:
Lithium-Ion, a toxic material.
Page 18

18 ― English
TROUBLESHOOTING
PROBLEM POSSIBLE CAUSE SOLUTION
Line will not advance
when using the autofeed head.
1. Line is welded to itself. 1. Lubricate with silicone spray.
2. Not enough line on
spool.
2. Install more line. Refer to LINE
REPLACEMENT section in this manual.
3. Line is worn too short.
3. Remove battery pack. Push advance
button on spool head while pulling on line
manually.
4. Line is tangled on
spool.
4. Remove line from spool and rewind.
Refer to LINE REPLACEMENT section in
this manual.
Grass wraps around
shaft and spool
head.
1. Cutting tall grass at
ground level.
1. Cut tall grass from the top down to
prevent wrapping.
Motor fails to start
when power switch
is depressed.
1. Battery is not secure.
1. To secure the battery pack, make sure
the tongue of the battery pack aligns with
the cavity in the housing and snaps into
place.
2. Battery is not charged.
2. Charge the battery pack according to
the instructions in this manual.
Page 19

19 ― English
CRAFTSMAN 24V MAX* LITHIUM-ION CORDLESS LINE TRIMMER – MODEL NUMBER 151.50227
TO PURCHASE REPLACEMENT PARTS, CALL 1-888-331-4569
The model number will be found on a label attached to the motor housing.
Page 20

20 ― English
ITEM NO. PART NO. DESCRIPTION QTY
1 221007101
Left Handle
1
2 221004102
PCB Board
1
3 221004103
Main Tube
1
4 221007104
Safe-locking Button Assembly
1
5 121003102
Switch
1
6 221007105
Power Switch
1
7 221007106
Right Handle Assembly
1
8 221007107
Rotation Lock Button
1
9 221007108
Locking Collar
1
10 221007109
Rotate Housing Assembly
1
11 221007110
Right Motor Housing Assembly
1
12 221007111
Right Pivot Housing
1
13 221004110
Shaft
1
14
121003118 Motor Assembly 1
15
221007112 Safety Guard 1
16
221007113 Flower Guard 1
17
221007114 Spool Locking Assembly 1
18
221007115 Spool Cover 1
19
64212 Spool (CRAFTSMAN # 71.64212) 1
20
121003113 Spool Head 1
21
121003117 Front Motor Bracket Assembly 1
22
221007118 Left Motor Housing 1
23
221007119 Left Pivot Housing 1
24
221007120 Assistant Handle Assembly 1
24.1
121003122 Assistant Handle 1
24.2
121003123 Washer 1
24.3
221007121 Quick Clamp 1
25
211003135 FO1211.15.00
1
26
71.98724
(1) 24V Lithium-Ion Battery (24LB2513)
1
CRAFTSMAN 24V MAX* LITHIUM-ION CORDLESS LINE TRIMMER – MODEL NUMBER 151.50227
TO PURCHASE REPLACEMENT PARTS, CALL 1-888-331-4569
The model number will be found on a label attached to the motor housing.
Page 21

A - Main Handle (Manila principal)
B - Safety Switch (Interruptor de seguridad)
C - Power Switch (Interruptor)
D - Locking Knob (Botón de bloqueo)
E - Handle Support (Soporte de la manilla)
F - Auxiliary Handle (Manilla auxiliar)
G - Rotation Lock Button (Botón de bloqueo
de giro)
H - Height Adjustment Locking Collar
(Aro de bloqueo del ajuste de altura)
I - Telescopic Shaft (Eje telescópico)
J - Motor Housing (Carcasa del motor)
K - Flower Guard (Protector para ores)
L - Trimmer Line (Cable podador)
M - Spool Head (Cabezal del carrete)
N - Safety Guard (Protección de seguridad)
O - Pivot Button (Botón del pivote)
P - Air Vents (Aberturas de ventilación)
Q - Rear Safety Guard (Protección de
seguridad posterior)
R - Battery Charger (Cargador de la batería)
S - (2) 24V MAX*, 2.5Ah Lithium-Ion Battery
(
(1) Batería de Iones de Litio de 24V Máx
y 2,5 Ah
)
S
R
B
C
A
O
N
P
G
H
I
F
Q
J
K
L
M
E
D
See this section for all of the gures referenced in the
operator’s manual.
Consulte esta sección para ver todas las guras mencionadas en el
manual del usuario.
Fig. 1
i
Page 22

ii
Fig. 2
Fig. 3
Fig. 5 Fig. 6
A - Locking Knob (Botón de bloqueo)
B - Auxiliary Handle (Manilla auxiliar)
C - Handle Support (Soporte de la manilla)
A - Locking Knob
(Botón de bloqueo)
A - Locking Knob
(Botón de bloqueo)
A - Auxiliary Handle
(Manilla auxiliar)
Fig. 7
Fig. 4
B
C
A
A
A
A
Page 23

iii
A - Plastic Toe Pad
(Almohadilla saliente plástica)
Fig. 8 Fig. 9
Fig. 10 Fig. 11
A
B
A
A - Steel Rails
(Rieles de acero)
B - Housing Channel
(Canal de la carcasa)
Page 24

iv
Fig. 14
Fig. 12
Fig. 13
A - Safety Guard (Protección de seguridad)
B - Line Cut-Off Blade (Hoja de corte de lamento)
Fig. 15
A
B
A
A
B
A - Tongue of The Battery
(Lengüeta de la batería)
A
A - Battery (Batería)
B - Charger (Cargador)
A - Power Cord with Plug (Cable de
corriente con enchufe)
B - Charger (Cargador)
B
Page 25

v
B
A
Fig. 16
Fig. 17
Fig. 18
Fig. 20
Fig. 21
Fig. 22
Fig. 19
135
o
180
o
90
o
A - Release Button
(Botón de liberación)
A - Safety Switch (Interruptor de seguridad)
B - Power Switch (Interruptor)
A - Advance Button (Botón de avance)
B - Trimmer Line (Cable podador)
A - Pivot Button (Botón del pivote)
A
BA
A
Page 26

vi
Fig. 24
Fig. 25
Fig. 23
A - Rotation Lock Button
(Botón de bloqueo de giro)
A -
Flower Guard (Protector para ores)
A - Height Adjustment Locking Collar
(Aro de bloqueo del ajuste de altura)
A
Outer Position
(Posición externa)
Inner Position
(Posición interna)
A
0
o
90
o
180
o
A
Page 27

vii
Fig. 26 Fig. 28
Fig. 29
Fig. 30
Fig. 27
30°
Page 28

viii
Fig. 31
Fig. 32
Fig. 33
Fig. 34
A - Spool (Carrete)
B - Anchor Hole (Oricio de anclaje)
C - Trimmer Line (Cable podador)
Replacement Spool
CRAFTSMAN # 71.64212
(Carrete de reemplazo
CRAFTSMAN # 71.64212)
A - Spool Cover (Tapa
del carrete)
B - Tabs (Pestañas)
C - Slot (Ranura)
D - Spool (Carrete)
E - Eyelet (Ojal)
F - Line Head (Cabezal
de lamento)
B
C
A
B
C
B
C
A
D
E
F
Page 29

3 ― Español
INSTRUCCIONES DE SEGURIDAD IMPORTANTES
¡ADVERTENCIA!
Lea y asegúrese de comprender todas
las instrucciones. El incumplimiento de
las instrucciones detalladas debajo puede
derivar en descargas eléctricas, incendios o
lesiones graves.
■ No permita que niños o personas no
capacitadas utilicen este dispositivo.
■ Verique el área de trabajo antes de
comenzar. Retire todos los objetos que
pudiesen enredarse o provocar problemas,
tales como rocas, vidrios rotos, uñas,
alambres o cuerdas.
■ Use siempre protección ocular con escudos
laterales para cumplir con la normativa ANSI
Z78.1. Siga esta regla y reducirá el riesgo de
sufrir lesiones severas.
■ Utilice antiparras de seguridad: utilice
siempre una mascarilla o máscara facial si el
uso del equipo genera polvo.
■ Proteja sus pulmones. Utilice una
mascarilla o máscara facial si el uso del
equipo genera polvo. Siga esta regla y
reducirá el riesgo de sufrir lesiones severas.
■ Vístase adecuadamente: no se ponga
prendas sueltas o joyas. Pueden quedar
atrapadas en las piezas móviles. Se
recomienda el uso de guantes y calzado de
goma sólido al trabajar en exteriores. Utilice
protección de contención para el cabello
largo. Utilice pantalones largos, ropa de
manga larga, botas y guantes. No utilice ropa
suelta, pantalones cortos, sandalias ni vaya a
pies descalzos.
■ Asegure su pelo, en caso de tenerlo largo,
sobre el nivel de sus hombros para evitar que
éste se enrede con las partes móviles.
■ Mantener alejado de los niños: todas las
personas deben mantenerse a distancia de
la zona de trabajo.
■ Esté alerta: preste atención a lo que hace.
Haga uso de su sentido común. No utilice el
producto cuando esté cansado.
■ No utilice la herramienta bajo mala
iluminación.
■ Mantenga su cuerpo alejado de las piezas
móviles.
■ No utilice herramientas eléctricas en
atmósferas explosivas como, por ejemplo, en
presencia de líquidos inamables, gases o
polvo. Las herramientas eléctricas producen
chispas que pueden hacer arder polvo o
gases.
■ Evite que su cuerpo entre en contacto
con supercies conectadas a tierra, como
por ejemplo tuberías, radiadores, hornillos
y neveras. Que el cuerpo esté conectado
a tierra aumenta el riesgo de sacudidas
eléctricas.
■ Evite entornos peligrosos: no utilice
aparatos en zonas húmedas o mojadas. Si
entra agua en la orilladora se incrementará
el riesgo de que se produzcan descargas
eléctricas.
■ Utilice el dispositivo correcto: no utilice el
aparato en actividades para las cuales no fue
diseñado.
■ No fuerce el aparato: hará el trabajo de
menor manera y con menor probabilidad de
lesiones al ritmo para el cual se diseñó.
■ No se extralimite: mantenga los pies en
tierra rme y el equilibrio en todo momento.
■ Evite encendidos accidentales: asegúrese
de que el interruptor de encendido esté en
la posición de bloqueo o apagado antes de
insertar la batería. Transportar herramientas
con su dedo sobre el interruptor o insertar la
batería en una herramienta con el interruptor
en posición de encendido es una invitación
para los accidentes.
■ No utilice la herramienta si el interruptor
no enciende o apaga. Una herramienta que
no puede controlarse con un interruptor
es peligrosa y debe ser reparada, de ser
posible, o bien desechada.
■ Desconecte la energía: desconecte la
batería del aparato antes de almacenarlo,
realizarle reparaciones o cambiar accesorios
Page 30

4 ― Español
tales como el lamento de corte. Estas
medidas de seguridad reducen el riesgo de
que la herramienta se encienda de manera
accidental.
■ Utilice solo piezas y accesorios de repuesto
idénticas. El uso de otras piezas podría
generar un peligro o dañar al producto.
■ Mantenga la herramienta con cuidado:
cambie el cabezal si está roto, si posee
desprendimientos o si tiene daño de algún
tipo. Asegúrese de que el cabezal del carrete
esté insertado y asegurado correctamente.
No hacerlo puede provocar lesiones graves.
Mantenga las manillas secas, limpias y libres
de aceite y grasa.
■ Compruebe que no haya piezas dañadas:
antes de seguir usando el aparato, se deben
comprobar los daños en las protecciones
u otras piezas a n de determinar si el
funcionamiento será el adecuado o no.
Compruebe el alineamiento de las piezas
móviles, choque de piezas móviles, rotura
de piezas y otras condiciones que puedan
afectar el funcionamiento. Una protección
u otra pieza dañada debe repararse o
cambiarse adecuadamente mediante un
centro de servicio autorizado a menos que se
indique lo contrario en alguna parte de este
manual.
■ Asegúrese de que todas las protecciones,
correas, protecciones de seguridad y manillas
estén jas de manera correcta y segura.
■ Utilice solo el lamento de repuesto
especicado en el cabezal de corte. No
utilice otro tipo de lamento de corte como,
por ejemplo, alambre metálico, cuerdas o
similares.
■ No instale ningún otro cabezal de corte
en esta orilladora a menos que éste sea
un repuesto idéntico al original. Un cabezal
de corte distinto puede derivar en graves
lesiones personales.
■ Mantenga las protecciones en su sitio y en
buen funcionamiento.
■ Mantenga las hojas aladas.
■ Mantenga sus manos y pies lejos de la
zona de corte.
■ No agarre las cuchillas expuestas ni
los bordes de corte al tomar o sostener el
aparato.
■ Mantenga un agarre rme sobre ambas
manillas al cortar pasto. Mantenga el cabezal
del carrete bajo el nivel de la cintura. Jamás
corte con el cabezal del carrete a más de 76
cms (30 pulgadas) sobre el suelo.
■ Almacene aparatos inactivos en interiores:
cuando no esté en uso, el dispositivo debe
almacenarse en interiores bajo un ambiente
seco y en un lugar cerrado con llave, lejos
del alcance de los niños.
■ Jamás utilice cuchillas, dispositivos
sacudidores, alambre o sogas. La unidad
está diseñada solo para usar lamento para
orilladoras. El uso de cualquier otro accesorio
incrementa el riesgo de sufrir lesiones.
■ Inspeccione el área de corte. Retire
todos los objetos que pudiesen enredarse
o salir expelidos por acción del cabezal de
corte, tales como rocas, vidrios rotos, uñas,
alambres o cuerdas.
■ Mantenga las aberturas de ventilación
limpias y libres de sedimentos para así evitar
el sobrecalentamiento del motor. Limpie
después de cada uso.
■ Detenga la unidad y desconecte la fuente
de alimentación cuando no esté en uso.
Transporte la unidad con el motor detenido.
■ No cuelgue la unidad de manera tal que el
interruptor de encendido quede presionado.
■ Las herramientas con batería pueden
operar sin estar enchufadas a una toma
de corriente, por lo que siempre están en
condiciones operativas. Tenga en cuenta
posibles riesgos mientras no utiliza su
herramienta a batería o cuando cambia sus
accesorios. Siga esta regla y reducirá el
riesgo de descargas eléctricas, incendios o
lesiones severas.
■ Utilice solo una batería del siguiente
número de modelo: 71.98724 (24LB2513)
INSTRUCCIONES DE SEGURIDAD IMPORTANTES
Page 31

5 ― Español
GUARDE ESTAS INSTRUCCIONES
■ No cargue la batería bajo la lluvia, en
condiciones húmedas o en un lugar mojado.
Siga esta regla y reducirá el riesgo de
descargas eléctricas.
■ No utilice herramientas a batería bajo la
lluvia.
■ Extraiga o desconecte la batería antes de
realizar reparaciones, limpieza o extracción
de materiales desde la herramienta a batería.
■ No elimine las baterías utilizando fuego.
La celda puede explotar. Revise los códigos
locales para saber si hay instrucciones de
eliminación especícas.
■ No abra ni desarme la batería. Los
electrolitos liberados son corrosivos y pueden
dañar los ojos o la piel. Puede ser tóxico si
se ingiere.
■ No coloque las herramientas ni sus
baterías cerca del fuego o fuentes de calor.
Esto reducirá el riesgo de explosión y
posibles lesiones.
■ Las baterías pueden explotar en presencia
de una fuente de ignición como, por ejemplo,
una luz piloto. Para reducir el riesgo de
lesiones severas, jamás utilice un producto
inalámbrico en presencia de llamas abiertas.
Una batería explotada puede expulsar
materiales y químicos. Si se expone, lave la
zona expuesta inmediatamente con agua.
■ No triture, deje caer o dañe la batería.
No utilice una batería o cargador que se
haya caído o recibido un golpe duro. Una
batería dañada puede explotar. De manera
adecuada, elimine inmediatamente una
batería dañada o que se haya caído.
■ Tenga cuidado al manipular baterías para
no generar cortocircuitos con materiales
conductores tales como anillos, brazaletes
y llaves. La batería o el conductor podrían
sobrecalentarse y causar quemaduras.
■ No utilice el cargador con un cable o
enchufe dañado, ya que podría provocar
cortocircuitos y descargas eléctricas. En
caso de presentar daños, descontinúe el uso
inmediatamente. Cambie el cargador por
uno idéntico, según se indique en la Lista de
piezas de este manual.
■ Para reducir el riesgo de lesiones severas,
no almacene la herramienta en el exterior o
dentro de vehículos.
■ Pueden ocurrir fugas de la batería bajo uso
o temperaturas extremas. Si el líquido entra
en contacto con sus ojos, enjuáguelos con
agua limpia por al menos 10 minutos y luego
busque atención médica. Siga esta regla y
reducirá el riesgo de sufrir lesiones severas.
■ Guarde estas instrucciones. Consúltelas
con frecuencia y úselas para enseñar a otras
personas a utilizar esta herramienta. Si le
presta esta herramienta a alguien, hágalo
junto con estas instrucciones.
INSTRUCCIONES DE SEGURIDAD IMPORTANTES
Page 32

6 ― Español
SÍMBOLOS
Algunos de los siguientes símbolos podrían aparecer en este producto. Estúdielos
y aprenda su signicado. La interpretación adecuada de estos símbolos le permitirá
utilizar el producto de mejor manera y con más seguridad.
SÍMBOLO NOMBRE NOMBRE/EXPLICACIÓN
V Voltios Voltaje
A Amperios Corriente
Hz Hertz Frecuencia (ciclos por segundo)
W Vatio Energía
hrs Horas Tiempo
/min Por minuto
Revoluciones, golpes, velocidad de la supercie,
órbitas, etc., por minuto
Corriente alterna Tipo de corriente
Corriente continua Tipo o característica de la corriente
n
0
Sin velocidad de carga Velocidad de giro, sin carga
Reciclaje de la batería
de iones de litio
Indica que esta herramienta cumple con los
requisitos del programa de reciclaje de baterías de
iones de litio
Alerta de seguridad Indica un riesgo potencial de lesiones a la persona.
Lea el manual de uso
Para reducir el riesgo de lesiones, el usuario debe
leer el manual de uso antes de utilizar este producto.
Protección ocular y
auditiva
Use siempre protección ocular con escudos laterales
para cumplir con l normativa ANSI Z78.1, junto con
protección auditiva.
Alerta de condiciones
húmedas
No exponer a la lluvia ni usar en lugares húmedos.
Mantenga a las
personas alejadas
Mantenga a todas las personas alejadas al menos
50 pies (15 metros).
Page 33

7 ― Español
SÍMBOLOS
SÍMBOLO NOMBRE NOMBRE/EXPLICACIÓN
Mantener alejado del
agua
No elimine las baterías lanzándolas a ríos ni las
sumerja en agua.
Mantener alejado del
fuego
No elimine las baterías utilizando fuego. Explotarán
o tendrán fugas y provocarán lesiones.
Alerta de calor No exponga las baterías a un calor superior a 60 °C.
Símbolo de reciclaje
Este producto utiliza baterías de iones de litio. Las
leyes locales, estatales o federales podrían prohibir
la eliminación de baterías junto con la basura
común. Consulte a su autoridad de eliminaciónlocal
para obtener información sobre la disponibilidad de
opciones de reciclaje o eliminación.
SÍMBOLO SEÑAL SIGNIFICADO
PELIGRO
Indica una situación peligrosa inminente, la cual, de no
evitarse, causará una muerte o lesiones severas.
ADVERTENCIA
Indica una situación peligrosa potencial, la cual, de no
evitarse, podría causar una muerte o lesiones severas.
CUIDADO
Indica una situación peligrosa potencial, la cual, de no
evitarse, podría causar una lesión menor o moderada.
CUIDADO
(Sin símbolo de alerta de seguridad) Indica una situación
que podría causar daños a la propiedad.
Las siguientes palabras y signicados están diseñados para explicar los niveles de
riesgo asociados a este producto.
Page 34

8 ― Español
CARACTERÍSTICAS
ESPECIFICACIONES DEL PRODUCTO
Tipo ..................................................................................................... Inalámbrico, con batería
Motor ................................................................................................................ 24 V máx.* d.c.
Revoluciones por minuto ........................................................................................... 9000 rpm
Diámetro del lamento..................................................................................... .0,065 pulgadas
Ancho de corte ...................................................................................................... 10 pulgadas
Peso sin batería.............................................................................................3,81 lbs (1,73 kg)
Batería .................... MODELO #71.98724 (24LB2513) 24 V máx.* d.c., 2,5 Ah Iones de Litio
Cargador
N° de modelo ...................................................................................................... 24LFC14-ETL
Voltaje de entrada nominal ......................................................................................... 120 VCA
Voltaje de salida nominal ..............................................................................................24 VCC
Corriente de entrada nominal ............................................................................................2,5 A
Tiempo de carga de cero a carga completa ............................................................70 minutos
CONOZCA SU ORILLADORA
Consulte la Figura 1, página i.
El uso seguro de este producto requiere que
conozca la información de la herramienta
indicada en su placa y la que aparece en
este manual así como también el proyecto
en el que está trabajando. Antes de usar
este producto, familiarícese con todas las
funciones operativas y reglas de seguridad.
PROTECCIÓN DE SEGURIDAD
La orilladora incluye una protección de
seguridad que ayuda a proteger contra
sedimentos expelidos.
INTERRUPTOR DE SEGURIDAD
El interruptor de seguridad evita los
encendidos accidentales.
MANILLA PRINCIPAL GIRATORIA
La manilla principal giratoria se puede
bloquear en tres posiciones distintas para
facilitar el uso.
AVANCE AUTOMÁTICO DEL FILAMENTO
La orilladora posee un cabezal con
alimentación automática. Golpear el cabezal
para intentar que avance el lamento dañará
a la orilladora y anulará la garantía.
Page 35

9 ― Español
ARMADO
DESEMBALAJE
Este producto requiere armado.
■ Con cuidado, extraiga el producto y sus
accesorios de la caja. Asegúrese de que
todos los elementos mencionados en la
lista de componentes del empaque estén
incluidos.
LISTA DE PIEZAS
Orilladora inalámbrica de 24 V
Protector de seguridad con tornillos
Conjunto de piezas de la manilla auxiliar con
perilla de bloqueo
Protector para ores
(1) Batería de Iones de Litio de 24V Máx.
y 2,5 Ah
(1) Cargador de batería de 24V Máx
Manual del usuario
¡ADVERTENCIA!
No utilice
este producto si alguna de las piezas
mencionadas en la lista de componentes del
empaque ya está ensamblada en el producto
al desempacarlo. Las piezas mencionadas en
esta lista no vienen ensambladas al producto
y requiere que el cliente las instale. Usar un
producto que podría haberse ensamblado
de manera errónea podría causar graves
lesiones.
■ Inspeccione el producto cuidadosamente
para asegurarse de que no se haya roto o
dañado durante el transporte.
■ No bote el material del empaque hasta
que haya inspeccionado completamente y
utilizado satisfactoriamente el producto.
■ No utilice el producto si alguna de las
piezas está dañada o falta. Devuélvala
para que el vendedor a quien compró la
herramienta la cambie.
¡ADVERTENCIA!
Si alguna pieza
está dañada o falta, no utilice este producto
hasta reemplazarlas. Usar este producto con
piezas dañadas o faltantes podría causar
lesiones severas.
CÓMO INSTALAR LA MANILLA AUXILIAR
Consulte las Figuras 2-7, página ii.
■ Suelte la perilla de bloqueo, girándola hacia
la izquierda, y extráigala desde la manilla
auxiliar.
■ Alinee la manilla auxiliar con el soporte de
la manilla. (Fig. 2)
■ Inserte la perilla de bloqueo a través de
la manilla auxiliar y apriete parcialmente la
perilla a mano, girándola hacia la derecha.
(Fig. 3)
■ Ajuste la manilla auxiliar en la posición en
la posición deseada. (Figs. 4-6)
■ Apriete la perilla de bloqueo hacia la
derecha y pince la palanca hacia abajo para
jarla. (Fig. 7)
NOTA: Apriete solo la perilla de bloqueo
de manera tal que pueda pinzar la palanca
ejerciendo una presión leve. Si la palanca no
puede pinzarse, suelte levemente la perilla
de bloqueo. Si la palanca puede pinzarse
sin resistencia alguna, apriete la perilla de
bloqueo.
¡ADVERTENCIA!
No intente
modicar este producto o crear accesorios
no recomendados para su uso con este
producto. Cualquier alteración de este tipo o
modicación se considera un uso indebido
que podría causar potenciales lesiones
severas.
¡ADVERTENCIA!
Para evitar un
encendido accidental que pueda provocar
graves lesiones personales, extraiga siempre
la batería del producto al ensamblar las
piezas.
Page 36

10 ― Español
ARMADO
CÓMO INSTALAR EL PROTECTOR DE
SEGURIDAD
Consulte la Figura 12, página iv.
¡ADVERTENCIA!
La hoja de corte
para el lamento, instalada en el protector
de seguridad, es losa. Evite el contacto con
la hoja. El no evitar el contacto con la hoja
puede provocar graves lesiones personales.
■ Alinee el protector de seguridad con el
cabezal del carrete.
■ Asegure el protector jando los tornillos de
montaje con un destornillador.
CÓMO INSTALAR EL PROTECTOR PARA
FLORES
Consulte las Figuras 8-11, página iii.
■ Alinee y asiente los rieles del protector para
ores sobre los 2 canales de ambos costados
de la carcasa del motor.
■ Una vez alineados y con los rieles de acero
del protector para ores asentados sobre los
canales de la carcasa, deslice el protector
hasta que el extremo cerrado del mismo
quede contra la carcasa del motor.
■ Con los dos rieles de acero expuestos,
alinee los dos oricios de la almohadilla
saliente plástica con el extremo de los rieles
de acero y hágalos calzar en su lugar de
forma segura.
FAMILIARÍCESE CON EL CARGADOR
Consulte la Figura 13, página iv.
Antes de usar este cargador, familiarícese
con todas sus características operativas y
requisitos de seguridad.
CÓMO CARGAR LA BATERÍA
Consulte la Figura 14, página iv.
BATERÍA Y CARGADOR
¡ADVERTENCIA!
■ Si alguna parte del cargador falta o está
dañada, ¡no lo utilice! Cambie el cargador por
uno nuevo. No hacer caso a esta advertencia
puede causar lesiones severas.
■ ¡Revise el voltaje! El voltaje y la corriente
deben cumplir con la información indicada en
la etiqueta de clasicación eléctrica.
PROCEDIMIENTO PARA CARGAR LA
BATERÍA
■ Alinee la batería con las ranuras del
cargador y deslícela hasta que se ajuste en
su lugar.
■ Conecte el cargador a la toma de energía.
■ Deje que la batería se cargue por un tiempo
suciente (consulte las especicaciones del
producto) y desconecte el cargador de la
toma de energía.
■ Presione el botón de liberación de la
batería y sáquela del cargador.
NOTA:
Es normal que la batería y el
cargador se calienten (pero no demasiado)
durante el proceso de carga. Si la batería no
carga adecuadamente, revise que la toma
eléctrica esté "viva".
Siempre cargue la batería antes de
almacenarla.
Page 37

11 ― Español
BATERÍA Y CARGADOR
■ Las luces del cargador indican su estado
de carga:
■ El cargador inteligente garantiza la máxima
vida útil de la batería, ya que mide el nivel
de carga actual de la batería y luego la
carga con la corriente y voltaje necesarios.
Cargue la batería completamente antes de
almacenarla.
■ Problema técnico: una luz LED roja
parpadeante en el cargador indica que la
batería tiene un problema de carga o que
podría estar defectuosa.
- Una posible condición es que la temperatura
de la batería no esté dentro del rango de
carga de -5 a 50 °C (23 a 122 °F), o bien que
la corriente de carga sea demasiado alta.
Apenas se alcance la temperatura permitida
y se logren los rangos de corriente de carga,
el cargador comenzará a cargar la batería
automáticamente.
- Si el rango de temperatura y la corriente
de carga son correctas y la luz LED
continúa parpadeando de color rojo,
extraiga y reinserte la batería. Si el estado
Panel indicador del cargador
Connected
To Power
Technical
Issue
(see manual)
Fully
Charged
Charging
24V
Charging Status
SÍMBOLO
LUCES
INDICADORAS
ESTADO
rojo,
parpadeo
Problema de carga;
consulte la sección de
problemas técnicos
rojo,
continuo
conectado a la toma de
energía
verde,
parpadeo
cargando
verde,
continuo
totalmente cargado
¡ADVERTENCIA!
Para reducir el riesgo
de incendio, no deje la batería conectada con
el cargador por más de 24 horas.
■ No utilice otros cargadores de batería.
El cargador que le suministramos está
especialmente diseñado para la batería de
litio - ion que utiliza este aparato para el
jardín.
■ ¡Compruebe el suministro de alimentación
principal! El voltaje del suministro de
alimentación debe corresponder con los
datos de la placa nominal del cargador de la
batería. Los cargadores de baterías operan
en 120 V.
■ La batería posee un monitor de temperatura
que permite realizar la carga solo dentro de
un rango de temperatura entre -5 y 50 °C (23
- 122 °F). Esto asegura una vida de servicio
óptima para la batería.
NOTA:
La batería que le suministramos está
parcialmente cargada. Para garantizar la
máxima capacidad de la batería, cárguela
con su cargador antes de usar el producto
por primera vez. La batería de iones de litio
se puede cargar en cualquier momento sin
reducir su vida útil. Interrumpir el proceso de
carga no afecta a la batería.
INDICADORES DEL CARGADOR
■ Preparación: El proceso de carga
comienza apenas el cargador se conecta a
una toma de corriente y la batería se inserta
en el cargador.
■ Si la batería no se inserta, una luz roja
continua indica que el cargador está
conectado a una toma de corriente, pero que
no está listo para comenzar el proceso de
carga.
■ Carga: un indicador LED verde
parpadeante en el cargador indica que la
batería está cargando con normalidad.
■ Cargada: un indicador LED verde continuo
en el cargador indica que la batería está lista
para usarse.
Page 38

12 ― Español
BATERÍA Y CARGADOR
¡ADVERTENCIA!
Para evitar el
riesgo de incendio, descarga eléctrica o
electrocución:
■ No use un paño húmedo o detergente
sobre la batería o el cargador.
■ Siempre saque la batería antes de limpiar,
inspeccionar o realizar cualquier tipo de
mantenimiento en el producto.
del LED se repite una segunda vez, intente
cargar otra batería idéntica. Si la batería
carga normalmente, deseche la batería
defectuosa (consulte la sección Eliminación
ambientalmente segura de la batería).
- Si la luz roja parpadeante continúa tras
instalar una segunda batería, el cargador
podría estar defectuoso. Cámbielo por otro
nuevo.
■ Tras ciclos de carga continuos o repetidos
sin interrupción, la superficie de carga puede
volverse evidentemente tibia. Esto es normal
y no indica defecto técnico alguno de la
batería.
■ Un LED verde parpadeante con rapidez
indica que el voltaje de la batería es bajo y
que la carga continuará durante solo unos 30
minutos más.
NOTAS DE SEGURIDAD Y
PRECAUCIONES
■ No desarme la batería.
■ Mantener lejos del alcance de los niños.
■ No exponga el cargador al agua potable
o de mar. La batería debe dejarse en un
ambiente fresco y seco.
■ No ponga la batería en lugares de altas
temperaturas, tales como calentadores o
fuego.
■ No invierta los terminales positivo y
negativo de la batería.
■ No conecte el terminal positivo y negativo
de la batería entre sí con ningún tipo de
objeto metálico.
■ No golpee la batería ni se pare sobre ella.
■ No suelde directamente sobre la batería ni
la rompa con sus uñas u otras herramientas.
■ En caso de que la batería tenga fugas y
el uido llegue a sus ojos, no los restriegue.
Enjuáguese bien con agua. Deje de usar
la batería inmediatamente en caso de que
emita un aroma inusual, se sienta caliente,
cambie de color, cambie de forma o se vea
anormal en cualquier otra manera.
INDICADORES LED DE LA BATERÍA
Compruebe la capacidad de la batería
presionando el botón LED.
Al presionar el botón LED, el número de
luces iluminadas indica el estado de la
capacidad de la batería. Consulte la siguiente
tabla.
LUCES NÚMERO DE LED
ENCENDIDOS
CAPACIDAD
0%-25%
25%-50%
50%-75%
75%-100%
Botón
LED
verde
amarillo
rojo
Page 39

13 ― Español
FUNCIONAMIENTO
TIPO DE USO
La orilladora está hecha para cortar pasto,
maleza o vegetación suave de naturaleza
similar en zonas difíciles de alcanzar; por
ejemplo, bajo arbustos, en lomas y en
bordes. No utilice la orilladora para cortar
pasto húmedo o seco de grosor inusual; por
ejemplo, pasto de rebaños, ni para triturar
hojas.
Este producto está diseñado solo para
uso doméstico y no para algún otro uso
comercial. No se debe utilizar para otros
propósitos que no sean los aquí descritos.
Para conocer las instrucciones de carga
completas, consulte el Manual del usuario de
su batería y cargador.
CÓMO INSTALAR LA BATERÍA
Consulte la Figura 15, página iv.
■ Alinee la lengüeta de la batería con la
cavidad en la carcasa de la orilladora.
■ Agarre la orilladora con rmeza.
■ Presione la batería hacia la manilla hasta
que las trabas la jen en su lugar.
■ No utilice fuerza al insertar la batería. Debe
calzar en su posición y hacer "clic".
EXTRACCIÓN DEL PAQUETE DE
BATERÍAS
Consulte la Figura 16, página v.
■ Presione el botón de liberación de la
batería.
■ Agarre la orilladora rmemente y saque la
batería de la manilla.
CÓMO ENCENDER/DETENER LA
ORILLADORA
Consulte la Figura 17, página v.
■ Para encender la orilladora, apriete el
interruptor de seguridad y luego presione el
interruptor de encendido.
■ Para detener la orilladora, suelte el
interruptor de encendido.
AVANCE AUTOMÁTICO DEL FILAMENTO
NOTA: La orilladora posee un cabezal con
alimentación automática. Golpear el cabezal
para intentar que avance el lamento dañará
a la orilladora y anulará la garantía.
■ Con la orilladora funcionando, pero NO
cortando, suelte el interruptor de encendido.
■ Espere dos segundos y presione el
interruptor de encendido.
NOTA: El lamento se extenderá con cada
detención y encendido del interruptor de
encendido, hasta alcanzar el largo de la hoja
de corte para el lamento en el protector de
seguridad.
■ Vuelva a cortar.
¡ADVERTENCIA!
No permita que
estar acostumbrado a usar un producto
genere descuidos en usted. Recuerde que
una sola fracción de segundo en que se
descuide es suciente para generar una
lesión severa.
¡ADVERTENCIA!
Use siempre
protección ocular con escudos laterales para
cumplir con la normativa ANSI Z78.1. El no
seguir esta instrucción podría causar que
objetos salgan disparados hacia sus ojos,
causando una posible lesión severa.
¡ADVERTENCIA!
No utilice accesorios
o aditamentos no recomendados por el
fabricante o vendedor de este producto. El
uso de accesorios no recomendados puede
causar lesiones severas.
Antes de cada uso, inspeccione el producto
completo en busca de piezas dañadas,
faltantes o sueltas tales como tornillos,
tuercas, tapas, etc. Apriete con seguridad
todos los seguros, tapas y no utilice este
producto sino hasta haber instalado todas las
piezas faltantes o dañadas.
Page 40

14 ― Español
FUNCIONAMIENTO
AVANCE MANUAL DEL FILAMENTO
Consulte la Figura 18, página v.
■ Extraiga la batería.
■ Empuje el botón de avance ubicado en el
cabezal de corte mientras tira del lamento.
El lamento avanzará y se detendrá.
Presione nuevamente el botón para sacar
más lamento.
■ Presione el botón y tire de los lamentos
cuantas veces sea necesario, para así
alcanzar la hoja de corte.
CABEZAL PIVOTANTE
Consulte las Figuras 19-22, página v.
■ Para pivotar el cabezal, empuje el botón
de pivote y ajuste en cualquiera de las 7
posiciones.
■ Ajuste el ángulo del cabezal del carrete
según el uso deseado.
■ Ajuste en la posición deseada: Ajuste a
135° al cortar pasto en un suelo plano. Ajuste
a 90° o 180° al cortar cerca de bordes y
paredes.
AJUSTE DE LA MANILLA Y EJE DE LA
ORILLADORA
Consulte las Figuras 23-24, página vi.
■ Presione el botón de bloqueo de giro y gire
la manilla principal hacia la derecha. Suelte el
botón cuando la manilla haya girado en 90° o
180°. Puede girar la manilla en cualquiera de
las 3 posiciones para facilitar el uso.
■ Gire el aro de bloqueo hacia la derecha
para desbloquearlo. Puede deslizar el eje
hacia arriba o abajo hasta alcanzar la altura
de trabajo más cómoda.
■ Gire el aro de bloqueo hacia la izquierda
hasta que el eje quede jo en su lugar.
PROTECTOR PARA FLORES
Consulte la Figura 25, página vi.
Utilice el protector para ores a n de
mantener distancia de objetos duros o
ores que pueda golpear con el lamento
de corte.
CÓMO UTILIZAR LA ORILLADORA
Consulte la Figura 26, página vii.
Siga estos consejos al utilizar la
orilladora:
■ Sostenga la orilladora con su mano
derecha sobre la manilla posterior y su mano
izquierda sobre la manilla frontal.
■ Sostenga rmemente con ambas manos
mientras la esté usando.
■ La orilladora debe mantenerse en una
posición cómoda, con la manilla posterior a
una altura cercana a la cadera.
■ Corte el pasto desde la parte superior
hacia abajo. Esto evitará que el pasto
se enrede en torno al eje y cabezal del
carrete, lo cual podría provocar daños por
sobrecalentamiento.
Si queda pasto atrapado alrededor del
cabezal del carrete:
■ Extraiga la batería de la orilladora.
■ Quite el pasto.
¡ADVERTENCIA!
Ajuste la posición
del protector para ores solo cuando el
producto esté apagado y el cabezal de corte
esté completamente detenido.
CORTE DE BORDES
Para utilizar la orilladora para cortar bordes
(consulte la Fig. 32), gire la manilla hacia la
posición de 180° (consulte la Fig. 23).
¡ADVERTENCIA!
Sostenga siempre
la orilladora lejos de su cuerpo, dejando
un espacio libre entre usted y la orilladora.
Cualquier contacto con el cabezal de corte de
la orilladora durante el uso puede provocar
graves lesiones personales.
■ Empuje el protector para ores hacia su
posición más externa durante el uso, hasta
que calce en su lugar.
■ Empuje el protector para ores hacia su
posición interna tras el uso y al almacenarlo.
Page 41

15 ― Español
FUNCIONAMIENTO
■ Trabaje con un ritmo constante.
Manténgase rme con los pies separados.
Corte de derecha a izquierda para que los
trozos de pasto salgan eyectados lejos de la
zona de trabajo.
■ No mueva el producto demasiado rápido,
ya que se traducirá en un corte poco efectivo
y posibles daños.
■ Cuando el pasto sea muy alto, corte
reiteradamente desde arriba hacia abajo en
capas. ( Figs. 28-29)
■ Mantenga el cabezal del carrete en un
ángulo de unos 30° en relación al piso
mientras corte. Evite presionar contra el
suelo, ya que esto puede arruinar el césped
y dañar el producto. (Fig. 30)
NOTA: Deje que el dispositivo de corte haga
el trabajo. Deje que realice el trabajo a su
ritmo, nunca lo empuje a la fuerza dentro del
área a cortar.
■ Maneje el producto con cuidado alrededor
de objetos como árboles y arbustos,
asegurándose de que no entra en contacto
con ellos. Utilice el protector para ores a n
de garantizar que el lamento de corte no
entre en contacto con plantas delicadas.
(Fig. 31)
■ Ajuste el ángulo del cabezal al cortar
bordes.
■ Utilice el protector para ores a n de evitar
que el lamento de corte entre en contacto
con objetos duros, tales como muros y
piedras. (Fig. 32)
CONSEJOS PARA UN CORTE EFICAZ
Consulte la Figura 27, página vii.
■ Mantenga la orilladora inclinada hacia la
zona de corte, la cual es la posición de corte
óptima.
■ Mueva la orilladora de derecha a izquierda
durante el corte (Fig. 27). Esto evitará que
los sedimentos salgan disparados hacia el
usuario.
■ Utilice el tipo de lamento adecuado para el
tipo de corte, no fuerce el cabezal del carrete
en pasto sin cortar.
■ Las rejas de alambre y erro provocan
un mayor desgaste del lamento e incluso
pueden romperlo. Los muros de ladrillo,
piedra, las cunetas y la madera pueden
desgastar el lamento rápidamente.
■ Evite los árboles y arbustos. El lamento
puede dañar fácilmente la corteza de los
árboles, las molduras de madera y los postes
de los cercos.
CORTE
Consulte las Figuras 28-30, página vii;
Figuras 31-32, página viii.
■ No corte pasto húmedo, ya que éste tiende
a pegarse al cabezal de corte y protector,
lo cual evita una correcta descarga de los
trozos de pasto y puede provocarle una
caída.
■ Espere a que el producto se haya parado
antes de dejarlo en el suelo.
■ Extraiga regularmente los trozos de pasto
y la suciedad del cabezal, con el producto
apagado.
■ Preste atención cuando esté trabajando
cerca de árboles y arbustos. El lamento
de corte puede dañar cortezas sensibles y
postes de rejas.
Page 42

16 ― Español
CUIDADO Y MANTENIMIENTO
¡ADVERTENCIA!
Al realizar
reparaciones, utilice solo piezas de repuesto
idénticas. El uso de otras piezas podría
generar un peligro o dañar al producto.
¡ADVERTENCIA!
En ningún momento
permita que uidos de frenos, gasolina,
productos derivados del petróleo, aceites
penetrantes, etc. entren en contacto con las
piezas móviles. Los químicos pueden dañar,
debilitar o destruir el plástico, lo cual podría
causar graves lesiones personales.
¡ADVERTENCIA!
Use siempre
protección ocular con escudos laterales para
cumplir con l normativa ANSI Z78.1, junto
con protección auditiva. El no seguir esta
instrucción podría causar que objetos salgan
disparados hacia sus ojos, causando una
posible lesión severa.
¡ADVERTENCIA!
Para evitar graves
lesiones personales, extraiga siempre la
batería de la herramienta al limpiarla o
realizar tareas de mantenimiento.
MANTENIMIENTO GENERAL
Evite el uso de solventes al limpiar piezas
plásticas. La mayoría de los plásticos son
susceptibles a daños causados por varios
tipos de solventes comerciales. Utilice paños
limpios para retirar la suciedad, polvo, aceite,
grasa, etc.
BATERÍA
■ Almacene la batería hasta que esté
cargada por completo.
■ Recargue la batería cuando exista una
evidente reducción en el desempeño de
la orilladora. No deje que las baterías se
descarguen por completo.
■ No recargue una batería que ya se ha
cargado por completo. Sobrecargar las
baterías acorta su vida útil.
■ Cuando la batería se cargue por
completo, extraiga la batería del cargador y
desconéctelo de la toma de corriente.
■ No almacene la batería puesta en la
herramienta o en el cargador.
■ Recargue la batería a temperatura
ambiente entre -5 y 50 °C (23 a 122 °F). Si
la batería está caliente, deje que se enfríe
antes de recargarla.
MANTENIMIENTO DEL CARGADOR
■ Mantenga el cargador limpio y libre de
sedimentos. No deje que materiales extraños
entren en la cavidad o en los contactos.
Limpie el cargador con un paño seco. No
utilice solventes o agua ni deje el cargador
en condiciones húmedas.
■ Desconecte el cargador cuando no tenga
una batería conectada a él.
■ Mantenga el cargador almacenado a
temperatura ambiente normal. No almacene
el cargador bajo un calor excesivo. No utilice
el cargador bajo luz solar directa.
LIMPIEZA
Extraiga la batería.
■ Cepille o sople el polvo y basuras que
pueda haber en las ventilas de aire utilizando
aire comprimido o una aspiradora.
■ Mantenga las ventilas libres de
obstrucciones, polvo y trozos de madera.
No rocíe, lave o sumerja las ventilas bajo el
agua.
■ Limpie la carcasa y componentes plásticos
utilizando un paño suave y húmedo.
■ No utilice solventes fuertes o detergentes
sobre la carcasa plástica o sobre los
componentes. Ciertos productos de limpieza
domésticos pueden causar daños y provocar
riesgo de descarga eléctrica.
Page 43

17 ― Español
CUIDADO Y MANTENIMIENTO
CAMBIO DEL CARRETE
Consulte la Figura 33, página viii.
■ Utilice solo un carrete con hilo
monolamento redondo de 0,065 pulgadas
de diámetro. Utilice el carrete de repuesto
especicado en la NOTA al nal de esta
sección.
■ Extraiga la batería.
■ Empuje las pestañas del costado de la tapa
del carrete.
■ Jale la tapa del carrete para quitarla.
■ Extraiga el carrete viejo.
■ Al instalar el nuevo carrete, asegúrese de
que el lamento esté capturado en la ranura
del carrete y de que el extremo del lamento
se extienda aproximadamente 15 cm más
allá de la ranura.
■ Instale el nuevo carrete de manera tal que
el lamento y la ranura se alineen con el
ojal del cabezal. Pase el lamento hacia y a
través del ojal.
■ Jale el lamento extendiéndolo desde el
ojal, de manera tal que se libere desde la
ranura del carrete.
■ Coloque la tapa del carrete presionando
las pestañas hacia la ranura del cabezal de
lamento y empujando el carrete hasta que
la tapa haga "clic" y calce en su lugar.
NOTA: Utilice el carrete de reemplazo
Craftsman número 71.64212
CAMBIO DEL FILAMENTO
Consulte la Figura 34, página viii.
■ Extraiga la batería.
■ Empuje las lengüetas a ambos lados de la
carcasa del carrete y saque la tapa.
■ Saque el carrete desde el cabezal.
NOTA: Saque cualquier resto de lamento
antiguo desde el carrete.
■ Corte un trozo de lamento de
aproximadamente 1,8 mts de largo. Utilice
solo hilo monolamento de 1,65 mm (0,065
pulgadas) de diámetro.
■ Inserte el lamento en el oricio de anclaje
ALMACENAJE
■ Extraiga la batería de la orilladora antes de
guardarla.
■ Limpie todos los materiales externos de la
orilladora.
■ Guarde el producto y sus accesorios en un
sitio seco y donde no se produzcan heladas.
■ Guarde siempre el producto en un lugar
al que no puedan acceder los niños. La
temperatura de almacenamiento ideal está
entre 10°C y 27°C (50°F y 86°F).
■ Mantenga la herramienta alejada de
agentes corrosivos como químicos para
jardín y sales descongelantes.
■ Recomendamos guardar el producto en
el embalaje original o cubrirlo con un tejido
adecuado que lo proteja del polvo.
TRANSPORTE
■ Apague el producto y saque la batería
antes de transportarlo.
■ Póngale la protección para el transporte, si
fuera aplicable.
■ Sujete siempre el producto por los mangos.
■ Proteja el producto de golpes fuertes o
vibraciones intensas que puedan ocurrir
durante el transporte en vehículos.
¡ADVERTENCIA!
Utilice solo el tipo
adecuado de lamento de corte.
que se encuentra en la parte superior del
carrete. Enrolle el lamento en la parte
superior del carrete en dirección a la derecha,
como lo indican las echas del carrete.
Coloque el lamento en la ranura de la brida
superior del carrete, dejando unos 15 cm (6
pulgadas) extendidos más allá de la ranura.
No coloque más de la cuenta. Después de
enrollar el lamento, debe haber al menos
6 mm (1/4 de pulgada) entre el lamento
bobinado y el borde externo del carrete.
■ Instale el carrete en el cabezal y coloque la
tapa del carrete según se indica en Cambio
del carrete.
Page 44

18 ― Español
ELIMINACIÓN AMBIENTALMENTE SEGURA DE LA BATERÍA
Para evitar el riesgo de incendio, explosión,
descarga eléctrica y daños al medioambiente:
■ Cubra los terminales de la batería con cinta
adhesiva aislante.
■ NO intente extraer ni destruir alguno de los
componentes de la batería.
■ NO intente abrir la batería.
■ Si ocurre una fuga, los electrolitos liberados
son corrosivos y tóxicos. NO deje que la
solución entre en contacto con sus ojos o piel
ni tampoco la trague.
■ NO coloque estas baterías junto con su
basura doméstica regular.
■ NO incinerar.
■ NO deje baterías en un lugar donde se
recojan para ser llevadas a algún relleno
sanitario o sistema municipal para desechos
sólidos.
■ Llévelas a un centro de reciclaje o
eliminación certicado.
¡ADVERTENCIA!
Todos los materiales
tóxicos deben eliminarse de la manera
especicada a n de evitar contaminación al
ambiente. Antes de eliminar una batería de
litio dañada o gastada, contacte a su agencia
local de eliminación de desechos o a la
agencia local de protección ambiental para
obtener información sobre las instrucciones
especícas.
¡ADVERTENCIA!
Si la batería
se rompe o parte, con o sin fugas, no la
recargue ni tampoco la use. Elimínela y
reemplácela con una batería nueva.
¡NO INTENTE REPARARLA!
Los siguientes materiales tóxicos y
corrosivos están presentes en esta batería:
Iones de litio, un material tóxico.
Page 45

19 ― Español
RESOLUCIÓN DE PROBLEMAS
PROBLEMA POSIBLE CAUSA SOLUCIÓN
El lamento no
avanza al utilizar el
cabezal de avance
automático.
1. El lamento está
pegado a sí mismo.
1. Lubrique con spray de silicona.
2. No hay suciente
lamento en el carrete.
2. Instale más lamento. Consulte la
sección CAMBIO DEL FILAMENTO en
este manual.
3. El lamento se gastó y
quedó demasiado corto.
3. Extraiga la batería. Empuje el botón
de avance del cabezal mientras tira del
lamento manualmente.
4. El lamento está
enredado en el carrete.
4. Extraiga el lamento del carrete y
enróllelo nuevamente. Consulte la sección
CAMBIO DEL FILAMENTO en este
manual.
Se enrolla pasto en
el eje y cabezal.
1. Cómo cortar pasto alto
a nivel del suelo.
1. Corte el pasto desde la parte superior
hacia abajo, a n de evitar que se enrede.
El motor no enciende
al presionar el
interruptor.
1. La batería no está
asegurada.
1. Para jar la batería, asegúrese de que
la lengüeta se alinee con la cavidad del
receptáculo y que calce en su lugar.
2. La batería no está
cargada.
2. Cargue la batería siguiendo las
instrucciones de este manual.
Page 46

20 ― Español
PARA ADQUIRIR PIEZAS DE REPUESTO, LLAME AL 1-888-331-4569
El número de modelo se encuentra en la etiqueta adjunta a la carcasa del motor.
ORILLADORA INALÁMBRICA CRAFTSMAN CON BATERÍA DE IONES DE LITIO, 24 V MÁX.*
(NÚMERO DE MODELO 151.50227)
Page 47

21 ― Español
PARA ADQUIRIR PIEZAS DE REPUESTO, LLAME AL 1-888-331-4569
El número de modelo se encuentra en la etiqueta adjunta a la carcasa del motor.
N° DE
ARTÍCULO
N° DE PIEZA DESCRIPCIÓN CANT.
1
221007101 Mango izquierdo
1
2
221004102 Placa PCB
1
3
221004103 Tubo principal
1
4
221007104
Conjunto de piezas del botón de bloqueo de
seguridad
1
5
121003102 Interruptor
1
6
221007105 Interruptor de encendido
1
7
221007106 Conjunto de piezas de la manilla derecha
1
8
221007107 Botón de bloqueo de giro
1
9
221007108 Aro de bloqueo
1
10
221007109 Conjunto de piezas de la carcasa giratoria
1
11
221007110
Conjunto de piezas de la carcasa del lado derecho
del motor
1
12
221007111 Carcasa derecha del pivote
1
13
221004110 Eje
1
14
121003118 Conjunto de piezas del motor 1
15
221007112 Protección de seguridad 1
16
221007113 Protector para ores 1
17
221007114 Conjunto de piezas del bloqueo del carrete 1
18
221007115 Tapa del carrete 1
19
64212 Carrete (CRAFTSMAN # 71.64212) 1
20
121003113 Cabezal del carrete 1
21
121003117 Conjunto de piezas de soporte frontales del motor 1
22
221007118 Carcasa izquierda del motor 1
23
221007119 Carcasa izquierda del pivote 1
24
221007120 Conjunto de piezas de la manilla asistente 1
24.1
121003122 Manilla asistente 1
24.2
121003123 Golilla 1
24.3
221007121 Abrazadera rápida 1
25
211003135 FO1211.15.00
1
26
71.98724 Batería de Iones de Litio de 24V (24LB2513)
1
ORILLADORA INALÁMBRICA CRAFTSMAN CON BATERÍA DE IONES DE LITIO, 24 V MÁX.*
(NÚMERO DE MODELO 151.50227)
Page 48

® Registered Trademark / TM Trademark of KCD IP, LLC in the United States, or Sears Brands, LLC in other countries
® Marca Registrada /
TM
Marca de Fábrica de KCD IP, LLC en Estados Unidos, o Sears Brands, LLC in otros países
Product questions or problems?
1-888-331-4569
Customer Care Hot Line
Get answers to questions, troubleshoot problems,
order parts, or schedule repair service.
Para respuestas a preguntas o problemas, y ordenar
piezas o pedir servicio para la reparación de su equipo.
To help us help you, register your product at www.craftsman.com/registration
Para poderte ayudar mejor, registra tu producto en www.craftsman.com/registration
Receive exclusive member benefits including special pricing and offers,
project sharing, expert advice, and SHOP YOUR WAY REWARDS!
Como miembro exclusivo, recibe diversos beneficios como ofertas, precios especiales, proyectos
nuevos, consejos de expertos y nuestro programa de puntos SHOP YOUR WAY REWARDS!
Join the Craftsman Club today!
 Loading...