

Page 1
OPERATOR′S MANUAL
MANUAL DEL USUARIO
Model No.
151.39942
Modelo no
151.39942
Sears Brands Management Corporation, Hoffman Estates, IL 60179 USA
Visit the Craftsman web page: www.craftsman.com
Visite el sitio Web de Craftsman: www.craftsman.com
WARNING:
To reduce the risk of injury, the user must read and understand the operator's manual
before using this product.
Save this manual for future reference
Conserve este manual para futura referencia
ADVERTENCIA:
Para reducir el riesgo de lesiones, el usuario debe leer y comprender el manual antes de utilizar
este producto.
3084514
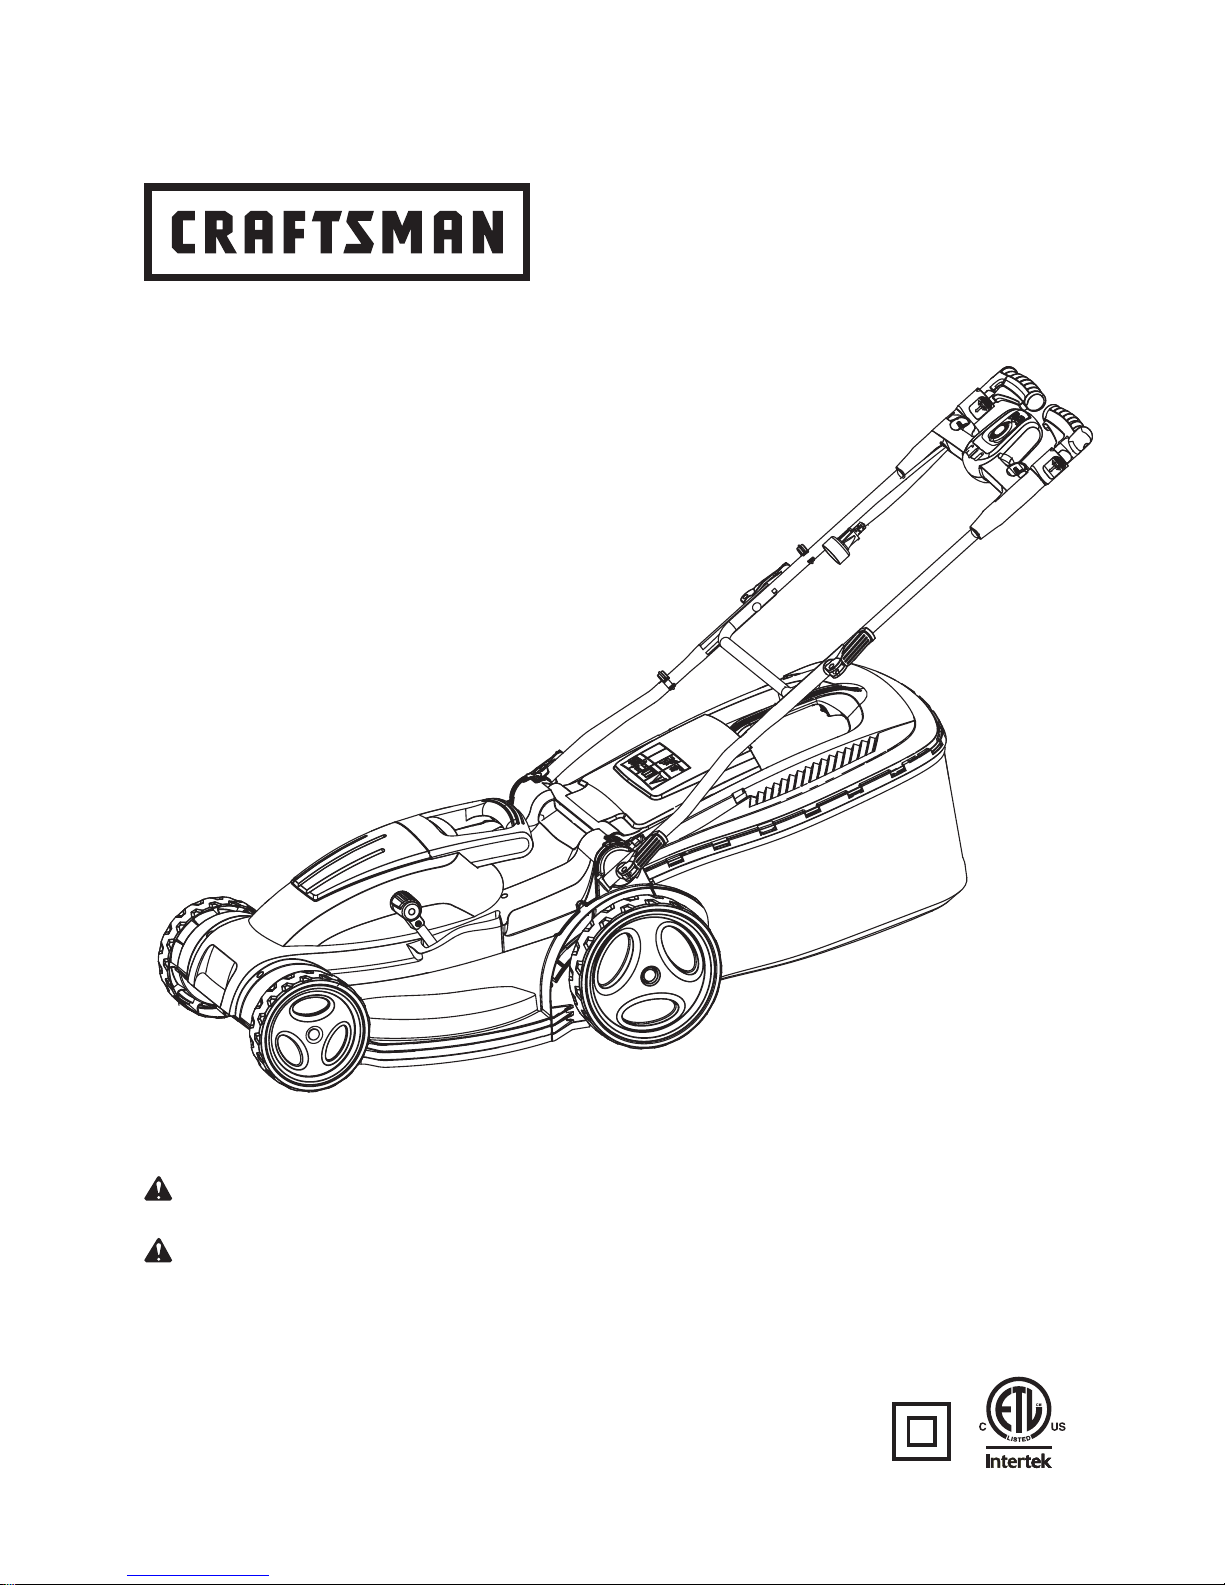
12.5A - 19" 3-IN-1
CORTADORA DE PASTO ELÉCTRICA
12.5A - 19" 3-IN-1
ELECTRIC MOWER
Page 2

2 ― English
TABLE OF CONTENTS / TABLA DE CONTENIDOS
ENGLISH
INTRODUCTION / INTRODUCCIÓN
This tool has many features for making its use more pleasant and enjoyable. Safety, performance, and
dependability have been given top priority in the design of this product making it easy to maintain and operate.
* * *
Esta herramienta tiene muchas funciones para hacerla más agradable y cómoda de usar. Se ha dado máxima
prioridad a la seguridad, rendimiento y confiabilidad en las etapas de diseño de este producto para que sea fácil
de utilizar y mantener.
■ Warranty ...................................................................2
■ Introduction ...............................................................2
■ General safety rules ..............................................3-4
■ Specifi c safety rules .................................................4
■ Symbols .................................................................5-6
■ Features ...................................................................7
■ Electrical ...................................................................8
■ Assembly .............................................................9-10
■ Operation ...........................................................10-11
■ Care and maintenance ...................................... 11-12
■ Troubleshooting ......................................................13
■ Illustrated parts list ............................................14-15
CRAFTSMAN LIMITED WARRANTY
FOR 2 YEARS from the date of sale, this product is warranted against defects in material or workmanship.
WITH PROOF OF SALE, a defective product will be replaced free of charge.
For warranty coverage details to obtain free replacement, visit the web page: www.craftsman.com/warranty
This warranty does not cover the mower blade or the collection bag, which are expendable parts that can wear
out from normal use within the warranty period.
This warranty is void if this product is ever used while providing commercial services or if rented to another
person.
This warranty gives you specific legal rights, and you may also have other rights which vary from state to state.
Sears Brands Management Corporation, Hoffman Estates, IL 60179
* * *
GARANTÍA LIMITADA CRAFTSMAN
DURANTE 2 AÑOS a contar de la fecha de venta, este producto está garantizado contra defectos en sus
materiales o fabricación.
Un producto defectuoso puede reemplazarse por uno nuevo, de manera gratuita, considerando que se presente
una PRUEBA DE VENTA.
Para conocer la cobertura de la garantía y obtener un reemplazo gratuito, visite el sitio Web www.craftsman.com/
warranty
Esta garantía no cubre el aspa de la cortadora ni la bolsa de recolección de polvo, las cuales son piezas
desechables que pueden desgastarse debido al uso normal dentro del periodo de garantía.
La garantía de un año se anula si el producto se usa para proporcionar servicios comerciales o si se le arrienda a
otra persona.
Esta garantía le entrega derechos legales específicos que pueden variar según su estado (podría tener otros
derechos adicionales).
Sears Brands Management Corporation, Hoffman Estates, IL 60179
■ Garantía ..............................Sección de Inglés pág. 2
■ Introducción .........................Sección de Inglés pág. 2
■ Reglas generales de seguridad .............................3-4
■ Reglas de seguridad específi cas ..........................4-5
■ Símbolos ...............................................................6-7
■ Características .........................................................8
■ Especifi caciones eléctricas ......................................9
■ Armado ..............................................................10-11
■ Funcionamiento ................................................. 11-12
■ Cuidado y mantenimiento ..................................13-14
■ Resolución de problemas .......................................15
■ Lista de piezas, ilustrada ...................................16-17
■ Figura numeras (ilustraciones) .............................. i-vi
SPANISH
Page 3

3 ― English
GENERAL SAFETY RULES
READ ALL INSTRUCTIONS
■ This cutting machine is capable of amputating hands
and feet and throwing objects. Failure to observe all
safety instructions could result in serious injury or
death.
■ Do not use the lawn mower in damp or wet conditions
or operate in the rain.
■ Never allow adults to operate the product without
proper instruction.
■ Keep the area clear of all bystanders, children, and
pets while mowing. Stop machine if anyone enters the
area.
■ Tragic accidents can occur if the operator is not alert
to the presence of children. Children are often attracted
to the machine and the mowing activity. Never assume
that children will remain where you last saw them.
• Keep children out of the mowing area and under the
watchful care of a responsible adult other than the
operator.
• Be alert and turn mower off if a child enters the area.
• Never allow children to operate the machine.
• Use extra care when approaching blind corners,
shrubs, trees, or other objects that may block your view
of a child.
■ Do not wear loose clothing or jewelry. They can
be caught in moving parts. Use of rubber gloves and
footwear is recommended when working outdoors.
■ Keep fi rm footing and balance. Do not overreach.
Over -reaching can result in loss of balance.
■ Do not operate the equipment while barefoot or
when wearing sandals or similar lightweight footwear.
Wear protective footwear that will protect your feet and
improve your footing on slippery surfaces.
■ Do not leave the mower unattended while running.
■ Keep hands and feet away from cutting area. Keep
hands and feet away from cutting area.
■ Operate the lawn mower only in daylight or good
artifi cial light.
■ Always wear safety glasses with side shields.
Everyday glasses have only impact resistant lenses.
They are NOT safety glasses. Following this rule will
reduce the risk of eye injury. Use face mask if operation
is dusty.
IMPORTANT SAFETY INSTRUCTIONS
IMPORTANT!
READ AND UNDERSTAND
ALL INSTRUCTIONS. Failure to follow all instructions
listed below may result in electric shock, fi re, and/or
serious personal injury.
■ Wear safety glasses or goggles that are marked to
comply with ANSI Z87.1 standard when operating this
product.
■ Use the right appliance. Do not use the lawn mower
for any job except that for which it is intended.
■ Do not force the lawn mower. It will do the job better
and safer at the rate for which it was designed.
■ Stay alert, watch what you are doing, and use
common sense when operating the lawn mower. Do not
operate the mower while tired or under the infl uence of
drugs, alcohol, or medication. A moment of inattention
while operating the lawn mower may result in serious
personal injury.
■ Keep machine in good working condition. Keep
blades sharp and guards in place and in working order.
■ Check all nuts, bolts, and screws at frequent intervals
for proper tightness to be sure the equipment is in safe
working condition.
■ Stop the motor and wait until the blade comes to
a complete stop before cleaning the lawn mower,
removing the collection bag, or unclogging the
discharge guard.
■ When not in use, mower should be stored indoors in
a dry, locked up place - out of the reach of children.
■ To reduce the risk of electric shock, this product has
a polarized plug (one blade is wider than the other) and
will require the use of a polarized extension cord. The
plug will fi t into a polarized extension cord only one
way, if the plug does not fi t fully into the extension cord,
reverse the plug. If the plug still does not fi t, obtain a
correct polarized extension cord. A polarized extension
cord will require the use of a polarized wall outlet. This
plug will fi t into the polarized wall outlet only one way.
If the plug does not fi t fully into the wall outlet, reverse
the plug. If the plug still does not fi t, contact a qualifi ed
electrician to install the proper wall outlet. Do not
change the equipment plug, extension cord receptacle,
or extension cord plug in any way.
■ Do not abuse the cord. Never use the cord to pull the
lawn mower or to disconnect the plug from an outlet.
Keep cord away from heat, oil, sharp edges, or moving
parts. Replace damaged cords immediately. Damaged
cords increase the risk of electric shock.
■ Make sure your extension cord is in good condition.
When using an extension cord, be sure to use one
heavy enough to carry the current your product will
draw. A wire gauge size (A.W.G.) of at least 14 is
recommended for an extension cord 50 feet or less
in length. If in doubt, use the next heavier gauge.
The smaller the gauge number, the heavier the cord.
An undersized cord will cause a drop in line voltage
resulting in loss of power and overheating.
Page 4

4 ― English
GENERAL SAFETY RULES
SPECIFIC SAFETY RULES
SAVE THESE INSTRUCTIONS
■ WARNING: Use outdoor extension cords marked
SW-A, SOW-A, STW-A, STOW-A, SJW-A, SJTA,
SJTW-A or SJTOWA. These cords are rated for outdoor
use and reduce the risk of electric shock.
■ Ground Fault Circuit Interrupter (GFCI) protection
should be provided on the circuit(s) or outlet(s) to be
■ Do not operate the mower with out the entire
collection bag, discharge guard, rear guard, or other
safety protective devices in place and working.
■ Follow manufacturer’s instructions for proper
operation and installation of accessories. Only use
accessories specifi ed in this operator's manual.
■ Clear the work area before each use. Remove all
objects such as rocks, sticks, wire, bones, toys, or
other objects which can be thrown by the blade. Stay
behind the handle when the motor is running.
■ Avoid holes, ruts, bumps, rocks, or other hidden
objects. Uneven terrain could cause a slip and fall
accident.
■ Do not mow near drop-offs, ditches, or embankments.
■ Mow across the face of slopes, never up and down.
Exercise extreme caution when changing direction on
slopes.
■ Plan your mowing pattern to avoid discharge of
material toward roads, sidewalks, bystanders, and the
like. Also, avoid discharging material against a wall or
obstruction, which may cause the material to ricochet
back toward the operator.
■ Do not mow on wet grass or excessively steep
slopes. Poor footing could cause a slip and fall
accident. Walk, never run.
■ Use extra care when approaching blind corners,
shrubs, trees, or other objects that may block your
view.
■ Do not pull the mower backward unless absolutely
necessary. If you must back the mower away from a
wall or obstruction, fi rst look down and behind to avoid
tripping.
■ Never direct discharged material toward anyone.
Avoid discharging material against a wall or obstruction.
Material may ricochet back toward the operator. Stop
the blade when crossing gravel surfaces.
■ Objects struck by the lawn mower blade can cause
severe injuries to persons. The lawn should always be
carefully examined and cleared of all objects prior to
each mowing.
used for the lawn mower. Receptacles are available
having built- in GFCI protection and may be used for
this measure of safety.
■ Inspect extension cords periodically and replace if
damaged. Keep handles dry, clean, and free from oil or
grease.
■ If the lawn mower strikes a foreign object, follow
these steps:
• Stop the lawn mower and release the switch control.
• Disconnect the power cord.
• Thoroughly inspect the mower for any damage.
• Repair any damage before restarting and continuing
to operate the mower.
■ Stop the motor, disconnect the power cord, and
wait until the blade comes to a complete stop before
removing the collection bag or unclogging the chute.
The cutting blade continues to rotate for a few seconds
after the motor is shut off. Never place any part of the
body in the blade area until you are sure the blade has
stopped rotating.
■ Disconnect the plug from power source before
making any adjustments, changing accessories,
or storing the lawn mower. Such preventive safety
measures reduce the risk of starting the product
accidentally.
■ If the mower should start to vibrate abnormally,
stop the motor and check immediately for the cause.
Vibration is generally a warning of trouble.
■ Service on the product must be performed by
qualifi ed repair personnel only. Service or maintenance
performed by unqualifi ed personnel could result in
injury to the user or damage to the product.
■ Use only identical replacement parts when servicing
the product. Use of unauthorized parts may create
a risk of serious injury to the user, or damage to the
product.
■ If the power supply cord is damaged, stop using
the unit. Take unit to a qualifi ed service dealer
for inspection and possible repair using identical
replacement parts.
■ Save these instructions. Refer to them frequently
and use them to instruct others who may use this
product. If you loan someone this tool, loan them these
instructions also.
Page 5

5 ― English
SYMBOLS
Some of the following symbols may be used on this product. Please study them and learn their meaning.
Proper interpretation of these symbols will allow you to operate the product better and safer.
SYMBOL NAME DESIGNATION/EXPLANATION
V Volts Voltage
A Amperes Current
Hz Hertz Frequency (cycles per second)
W Watts Power
min Minutes Time
Alternating Current Type of current
Direct Current Type or a characteristic of current
n
o
No Load Speed Rational speed, at no load
Class II Construction Double-insulated construction
/min
Per Minute Revolutions, strokes, surface speed, orbits etc., per minute
Wet Conditions Alert Do not expose to rain or use in damp locations
Read The Operator’s Manual
To reduce the risk of injury user must read and understand
operator’s manual before using this product.
Eye and Hearing Protection
Always wear eye protection with side shields marked to
comply with ANSI Z87.1, along with hearing protection.
Opened Hatch
When the latch is opened, the collection bag has effi cient
volume left to collect grass.
Closed Hatch
When the hatch is closed, the collection bag is full and must
be emptied.
Ricochet
Thrown objects can ricochet and result in personal injury or
property damage.
Sharp Blade Danger - Keep hands and feet away from blade.
Operating on a slope Do not mow a slope that has an angle of greater than 15°.
Keep Bystanders Away Keep all bystanders at least 50 ft. away.
Electric Shock
Failure to use in dry conditions and to observe safe
practices can result in electric shock.
MAX 15
o
Page 6
6 ― English
SYMBOLS
SYMBOL SIGNAL MEANING
DANGER
Indicates an imminently hazardous situation, which, if not avoided, will result
in death or serious injury.
WARNING
Indicates a potentially hazardous situation, which, if not avoided, could result
in death or serious injury.
CAUTION
Indicates a potentially hazardous situation, which, if not avoided, may result
in minor or moderate injury.
CAUTION
(Without Safety Alert Symbol) Indicates a situation that may result in property
damage.
WARNING
To avoid serious personal injury, do not attempt to use this product until you
read thoroughly and understand completely the operator’s manual. If you
do not understand the warnings and instructions in the operator’s manual,
do not use this product. Call the Customer Care Hot Line for assistance at
1-888-331-4569.
The operation of any power tool can result in foreign objects being thrown into your eyes,
which can result in severe eye damage. Before beginning power tool operation, always wear
safety goggles or safety glasses with side shields and, when needed, a full face shield. We
recommend Wide Vision Safety Mask for use over eyeglasses or standard safety glasses with
side shields. Always use eye protection which is marked to comply with ANSI Z87.1.
The following signal words and meanings are intended to explain the levels of risk associated with this
product.
Page 7

7 ― English
FEATURES
PRODUCT SPECIFICATIONS
Voltage.................................................................................................................................................. 120V~ 60Hz
Current.......................................................................................................................................................12.5 AMP
Motor Speed ............................................................................................................................................ 3600 r/min
Cutting Width ................................................................................................................................. 18 inch (457mm)
Deck Width .....................................................................................................................................19inch (483mm)
Height Adjustments.......................................................................................... 1.35-3.35 inch (35-85 mm); 6 levels
Collection Bag Volume .......................................................................................................... 18.5 gallon (70 liters)
Wheel Size ......................................................................................................................... 8/10 inch (200/255mm)
Unit Weight ................................................................................................................................. 50.3 lbs (22.82 kg)
KNOW YOUR LAWN MOWER
See Figure 1.
The safe use of this product requires an understanding
of the information on the tool spacing and in this
operator’s manual as well as a knowledge of the
project you are attempting. Before use of this product,
familiarize yourself with all operating features spacing
and safety rules. This 3-in-1 lawn mower is capable of
mulching, side discharge cutting and collection bag.
CORD RETAINER
A convenient cord retainer helps keep the extension
cord connection secure during mower operation.
DUST BLOCKER COLLECTION BAG
This mower includes a Dust Blocker Collection Bag that
reduces the amount of dust from mowing that passes
through the bag fabric.
HEIGHT ADJUSTMENT LEVER
The height adjustment lever provides adjustment to 6
cutting height positions.
ROTO-FIT
The Roto-Fit handles are 360º pivoting handles that
can lock into 8 different positions. Users can adjust the
handle angle to achieve the best grip and orientation
for them or for a specifi c task while mowing.
MULCHING PLUG
The mower is equipped with a mulching plug that
enables the mower to cut and recut grass into fi ner
clippings. The mulching plug is installed at the factory
and MUST be removed if the collection bag is used.
SIDE DISCHARGE DEFLECTOR
Use the side discharge defl ector on your mower when
the grass is too high to mulch or when side discharging
is preferred. The grass clippings produced when using
the side discharge defl ector are noticeably larger than
when the mower is set for mulching.
Page 8
8 ― English
WARNING!
Keep the extension cord clear of
the working area. Position the cord so that it will not
get caught on lumber, tools, or other obstructions while
you are working with a power tool. Failure to do so can
result in serious personal injury.
WARNING!
Check extension cords before
each use. If damaged replace immediately. Never use
the product with a damaged cord since touching the
damaged area could cause electrical shock resulting in
serious injury.
WARNING!
READ AND UNDERSTAND ALL
INSTRUCTIONS. Failure to follow all instructions listed
below and on the machine may result in electric shock,
fi re, and/or serious personal injury.
ELECTRICAL
DOUBLE INSULATION
Double insulation is a concept in safety in electric
power tools, which eliminates the need for the usual
threewire grounded power cord. All exposed metal parts
are isolated from the internal metal motor components
with protecting insulation. Double insulated tools do not
need to be grounded.
NOTE:
Servicing of a product with double insulation
requires extreme care and knowledge of the system
and should be performed only by a qualifi ed service
technician. Always use original replacement parts as
listed in the Parts List pages of this manual.
ELECTRICAL CONNECTION
This product has a precision-built electric motor. It
should be connected to a power supply that is 120
volts, 60 Hz, AC only (normal household current).
Do not operate this product on direct current (DC). A
substantial voltage drop will cause a loss of power and
the motor will overheat. If the product does not operate
when plugged into an outlet, double-check the power
supply.
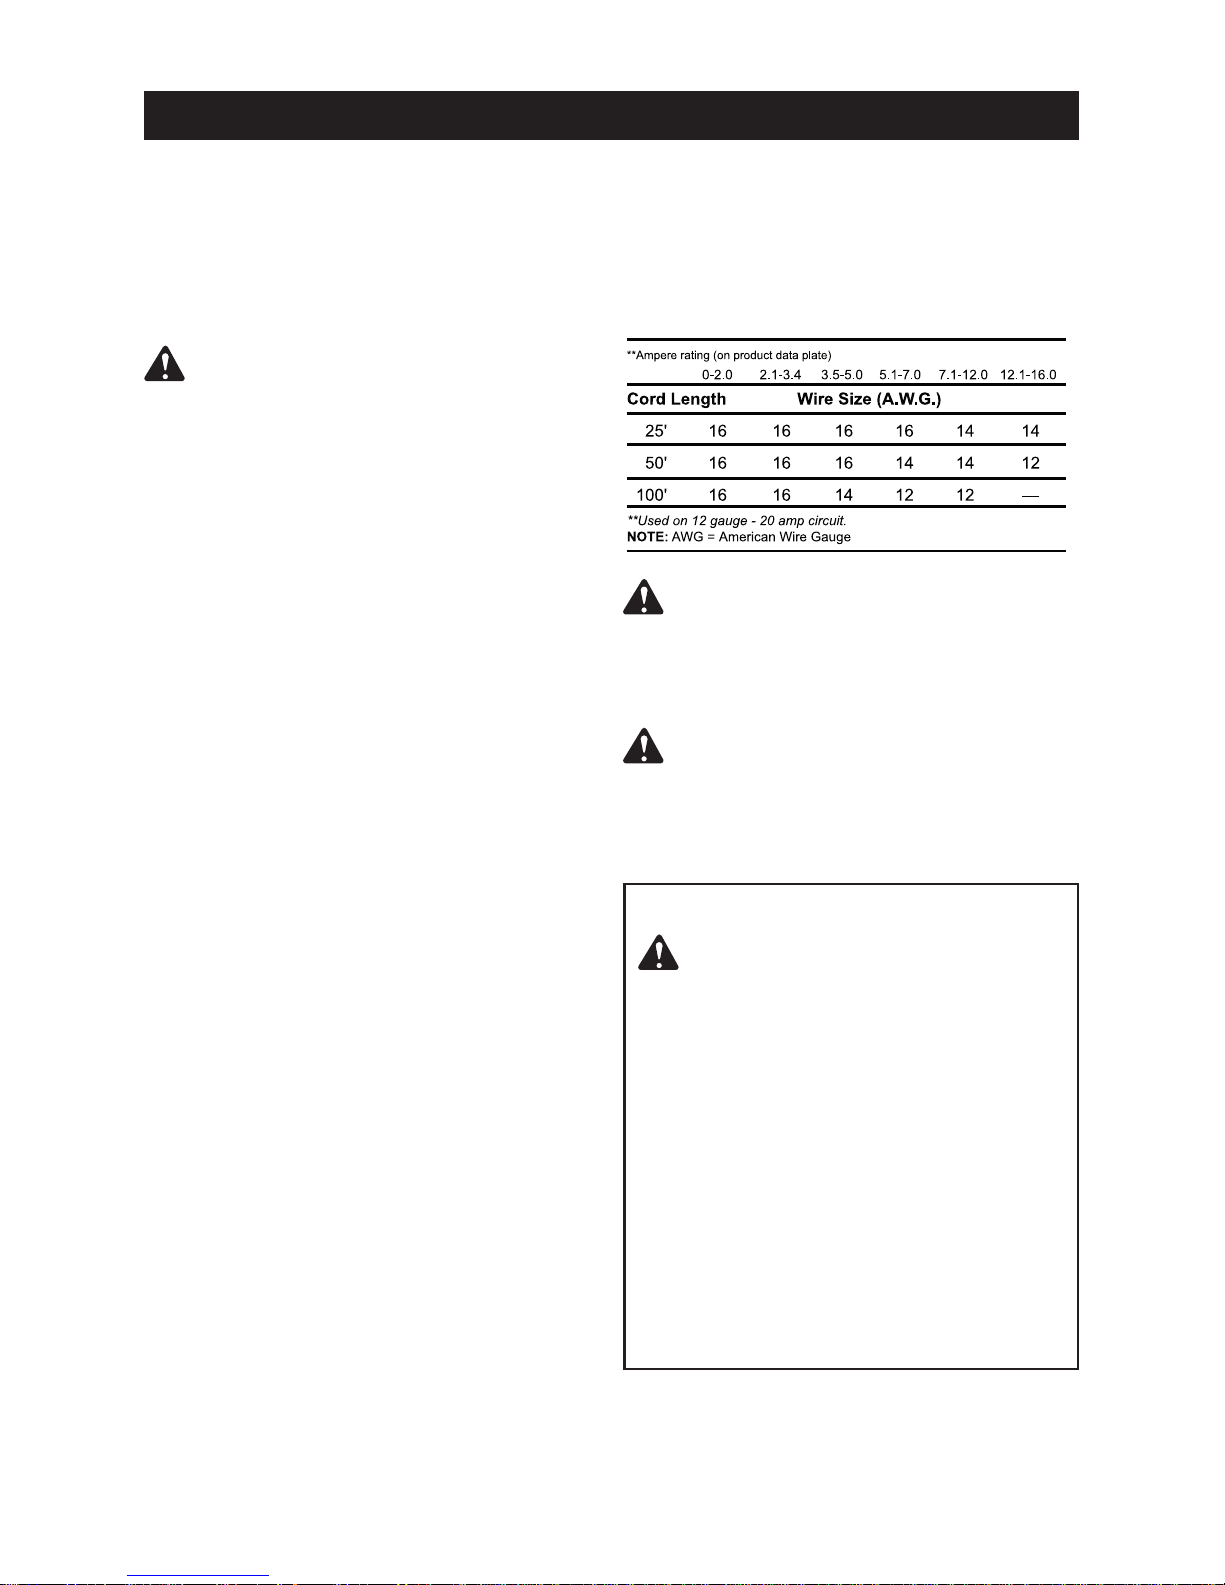
EXTENSION CORDS
See Figure 2.
When using a power tool at a considerable distance
from a power source, be sure to use an extension cord
that has the capacity to handle the current the product
will draw. An undersized cord will cause a drop in line
voltage, resulting in overheating and loss of power. Use
the chart to determine the minimum wire size required
in an extension cord. Only round jacketed cords listed
by Underwriter’s Laboratories (UL) should be used.
When working outdoors with a product, use an
extension cord that is designed for outside use. This
type of cord is designated with “WA” on the cord’s
jacket.
Before using any extension cord, inspect it for loose or
exposed wires and cut or worn insulation.
It is possible to tie the extension cord and power
cord in a knot to prevent them from becoming
disconnected during use. Make the knot as shown in
fi gure 2, then connect the plug end of the power cord
into the receptacle end of the extension cord. This
method can also be used to tie two extension cords
together.
PROPOSITION 65
WARNING!
Some dust created by
power sanding, sawing, grinding, drilling, and other
construction activities contains chemicals known to
cause cancer, birth defects or other reproductive
harm. Some examples of these chemicals are:
• lead from lead-based paints
• crystalline silica from bricks and cement and other
masonry products
• arsenic and chromium from chemically-treated
lumber
Your risk from these exposures varies, depending
on how often you do this type of work. To reduce
your exposure to these chemicals: work in a
well ventilated area, and work with approved
safety equipment, such as those dust masks that
are specially designed to fi lter out microscopic
particles.
Page 9

9 ― English
ASSEMBLY
UNPACKING
This product requires assembly.
■ Carefully remove the product and any accessories
from the box. Make sure that all items listed in the
packing list are included.
■ Inspect the product carefully to make sure no
breakage or damage occurred during shipping.
■ Do not discard the packing material until you have
carefully inspected and satisfactorily operated the
product.
■ If any parts are damaged or missing, do not operate
the mower. Return it for replacement to the retailer from
which it was purchased.
ASSEMBLING HANDLE
See Figure 3-6.
■ Insert lower handles ONTO and over the exposed
attachment plate bolts at the rear of the motor housing.
Make sure the power cord clips on the handles are
BOTH facing up. On each side, place washer over bolt
tip and thread locking lever onto it. Fold lever down to
secure handle into position. (Fig. 3)
NOTE: For ease of use, the overall handle pitch angle
can be raised or lowered by choosing an attachment
point that is higher or lower on the attachment plate.
(Fig. 3)
■ Attach the upper handle to the lower one using
carriage bolts, washers and locking levers. There are
three adjustment positions. Choose the position which
is best for you. (Fig. 4)
■ Secure the handle into position by turning the locking
lever to tighten and then folding the lever down. Do not
apply excessive force to fold the lever down or it may
break. Loosen the lever to the point where it will fold
down without breaking. (Fig. 5)
■ Secure the power cord with the cord clips. (Fig. 6)
DUST BLOCKER COLLECTION BAG
See Figure 7-9.
■ Your mower comes with a tool-less collection bag.
Your bag ships fl at as shown.
■ To assemble the bag straighten the hinged steel
frame at opening of bag as shown.
■ Pry open the long soft plastic tubular sleeve with
you fi ngers and insert the steel frame into the tube as
shown.
INSTALLING THE COLLECTION BAG
See Figure 10.
NOTE:
When using the collection bag, do not install the
mulching plug.
■ Lift the rear discharge door.
■ Lift the collection bag by its handle and place under
the rear discharge door so that the hooks on the
collection bag are seated on the door rod.
■ Release the rear discharge door.
■ Mulch plug MUST be removed prior to installing
collection bag.
INSTALLING THE MULCHING PLUG
See Figure 11.
NOTE:
When using the mulching plug, do not install
the collection bag.
■ Lift the rear discharge door.
■ Grasp the mulching plug by its handle.
■ Insert the plug into the rear discharge opening.
■ Lower the rear discharge door.
PACKING LIST
Mower
Mulching Plug (already installed)
Dust Blocker Collection Bag
Side Discharge Chute
Bolt x4
Washer x4
Locking lever x4
Cord clip x2
Operator’s Manual
WARNING!
If any parts are damaged or
missing do not operate this product until the parts are
replaced. Failure to heed this warning so could result in
serious personal injury.
WARNING!
Do not attempt to modify this
product or create accessories not recommended
for use with this product. Any such alteration or
modifi cation is misuse and could result in a hazardous
condition leading to possible serious personal injury.
WARNING!
Do not connect to power supply
until assembly is complete. Failure to comply could
result in accidental starting and possible serious
personal injury.
WARNING!
Never operate the mower
without the proper safety devices in place and working.
Never operate the mower with damaged safety
devices. Failure to heed this warning can result in
serious personal injury.
Page 10

10 ― English
ASSEMBLY
OPERATION
APPLICATIONS
You may use this product for the purpose listed below:
Mowing your lawn
ON/OFF OPERATION
See Figure 14-15.
■ Make a loop at the end of the extension cord and
hang the loop onto the strain relief on the cross bar.
Connect the mower to your power supply socket.
■ Before switching on, ensure that the mower is not in
contact with any foreign objects.
■ To start operation, use one hand to press the safety
lock-off button in the center of the upper handle. Then
with the other hand depress either of the Start/Stop
Switch Triggers. Release the lock-off button.
■ To stop operation, release both Start/Stop Switch
Triggers.
MULTI-POSITIONAL ROTO-FIT GRIPS
See Figure 16-17.
■ For safety purposes, DO NOT adjust the Roto-Fit
Grips while the mower is running or while mowing.
Only operate the product once the locking collar is fully
engaged.
■ The Roto-Fit Grips can rotate 360° and lock into 8
different positions. (Fig. 16) Users can adjust the grip
angle to achieve the best grip and orientation for them
or for a specifi c task while mowing.
■ Of the 8 possible Roto-Fit Grip positions, 6 are
recommended for use: Standard, Ergonomic Narrow,
Vertical Grip, Horizontal Wide, Ergonomic Wide and
Pistol Grip. (Fig. 17)
■ The handles are designed to be rotated using only 1
hand. This means you can adjust both handles at once.
To adjust the Roto-Fit handle Grip position:
■ Pull the locking collar toward you.
■ Rotate collar to the desired position.
■ Let go of collar to engage in position.
MOWING TIPS
■ Make sure the lawn is clear of stones, sticks, wires,
and other objects that could damage the lawn mower
blades or motor. Such objects could be accidentally
thrown by the mower in any direction and cause
serious personal injury to the operator and others.
■To reduce the likelihood of disconnecting the lawn
mower from the extension cord, be sure to use the cord
retainer provided.
■For a healthy lawn, always cut off one-third or less of
the total length of the grass.
■When cutting heavy grass, reduce walking speed to
allow for more effective cutting and a proper discharge
of the clippings.
■Do not cut wet grass. It will stick to the underside
WARNING!
Do not allow familiarity with this
type of product to make you careless. Remember that
a careless fraction of a second is suffi cient to infl ict
serious injury.
WARNING!
Always wear safety goggles or
safety glasses with side shields when operating this
product. Failure to do so could result in objects being
thrown into your eyes, resulting in possible serious
injury.
WARNING!
Do not use any attachments or
accessories not recommended by the manufacturer of
this product. The use of attachments or accessories not
recommended can result in serious personal injury.
WARNING!
After switching off the
equipment, the blade may continue to turn for several
seconds. Do not touch the moving blade. There is risk
of serious injury.
INSTALLING THE SIDE DISCHARGE CHUTE
See Figure 12.
The mower comes set in the mulching confi guration to
dispense grass clippings directly beneath the mower.
To dispense clippings outside the mower, pull up the
side discharge cover and insert the side discharge
chute.
SETTING CUTTING HEIGHT
See Figure 13.
When shipped, the wheels on the mower are set to a
low-cutting position. Before using the mower for the
fi rst time, adjust the cutting position to the height best
suited for your lawn. The average lawn should be
between 1.35" to 3.35".
To set the cutting height:
■ To raise the cutting height, grasp the height
adjustment lever and move it toward the back of the
mower.
■ To lower the cutting height, grasp the height
adjustment lever and move it toward the front of the
mower.
Page 11

11 ― English
OPERATION
CARE AND MAINTENANCE
WARNING!
When servicing, use only
identical replacement parts. Use of any other parts may
create a hazard or cause product damage.
WARNING!
Always wear safety goggles
or safety glasses with side shields during power tool
operation or when blowing dust. If operation is dusty,
also wear a dust mask.
WARNING!
Do not use attachments or
accessories not specifi ed in this operator's manual.
The use of other attachments or accessories can
result in serious personal injury.
GENERAL MAINTENANCE
Avoid using solvents when cleaning plastic parts. Most
plastics are susceptible to damage from various types
of commercial solvents and may be damaged by their
use. Use clean cloths to remove dirt, dust, oil, grease,
etc.
Periodically check all nuts and bolts for proper
tightness to ensure safe operation of the mower.
Remove any buildup of grass and leaves on or around
the motor cover. Wipe the mower clean with a dry cloth
occasionally. Do not use water.
WARNING!
Always protect hands by wearing
heavy gloves and/or wrapping the cutting edges of the
blade with rags and other material when performing
blade maintenance. Failure to heed this warning could
result in serious personal injury.
LUBRICATION
■ All of the bearings in this product are lubricated with
a suffi cient amount of high grade lubricant for the life of
the unit under normal operating conditions. Therefore,
no further bearing lubrication is required. At the
beginning and end of each mowing season:
■ Lubricate the springs on the rear discharge door with
light oil.
■ Lubricate the height adjustment lever and related
hardware with light oil.
■ Remove the wheels and lubricate the surface of the
axle bolt and the inner surface of the wheel with light
oil.
■ Remove the blade and blade hub assembly and
lubricate the motor shaft with light oil or engine oil.
See Replacing the Cutting Blade for instructions on
removing the blade.
of the deck and prevent proper mulching of grass
clippings.
■ New or thick grass may require a narrower cut.
■ Clean the underside of the mower deck after each
use to remove grass clippings, leaves, dirt, and any
other accumulated debris.
MOWING ON A SLOPE
See Figure 18.
■ Slopes are a major factor related to slip and fall
accidents that can result in severe injury. Mowing on
slopes requires extra caution. If you feel uneasy on a
slope, do not mow it. For your safety, do not attempt to
mow slopes greater than 15 degrees.
■ Mow across the face of slopes, not up and down.
Exercise extreme caution when changing direction on
slopes.
■ Watch for holes, ruts, rocks, hidden objects, or
bumps which can cause you to slip or trip. Tall grass
can hide obstacles. Remove all objects such as rocks,
tree limbs, etc., which could be tripped over or thrown
by the blade.
■ Always be sure of your footing. A slip and fall can
cause serious personal injury. If you feel you are losing
your balance, release the switch triggers immediately.
■ Do not mow near drop-offs, ditches, or embankments;
you could lose your footing or balance.
EMPTYING THE COLLECTION BAG
See Figure 19.
■ Lift the collection bag by its handle and lift to remove
from mower.
■ Empty grass clippings.
■Lift the rear discharge door and reinstall the collection
bag as described earlier in this manual.
WARNING!
Before performing any
maintenance, make sure the mower is unplugged from
the power supply. Failure to heed this warning could
result in serious personal injury.
Page 12

12 ― English
BALANCING THE BLADE
See Figure 23.
When sharpening, care should be taken to keep the
blade balanced. An unbalanced blade will cause
excessive vibration when the mower is running. This
vibration will eventually cause damage to the mower,
especially the motor.
To check the blade balance:
■ Clamp a screwdriver (or nail shank) horizontally in a
vise as shown.
NOTE:
If a vise is not available, a straight nail can also
be used.
■ Place the center hole of blade on the screwdriver(or
nail) shank.
■ If blade is balanced, it will remain in a horizontal
position. If either end of the blade drops downward,
sharpen the heavy side until the blade is balanced.
REPLACING WHEELS
See Figure 24.
To replace a wheel:
■ Disconnect the mower from the power supply.
■ Turn the mower on its side.
■ Using a fl at blade screwdriver, pry off the retaining
hubcap.
■ Remove the wheel and replace with an identical part
new wheel.
■ Replace retaining hubcap.
STORING THE MOWER
See Figure 25.
■ Disconnect the mower from the power supply
■ Turn mower on its side and clean grass clippings that
have accumulated on the underside of the mower deck.
■ Wipe the mower clean with a dry cloth.
■ Check all nuts, bolts, knobs, screws, fasteners, etc.,
for tightness.
■ Inspect moving parts for damage, breakage, and
wear. Have repairs made on any damaged or missing
parts.
■ Store mower indoors in a clean, dry place out of the
reach of children.
■ Do not store near corrosive materials such as
fertilizer or rock salt.
■ To lower the handle before storing:
- Fully loosen the locking levers on each side of the
upper handle and fold the handle down.
- Push inward on each side of the lower handle, and
lift the sides of the lower handle past the edges of the
handle mounting brackets.
- Fold the lower handle forward, making sure not to
bend or kink the power cord.
CARE AND MAINTENANCE
WARNING!
When removing, inspect the
blade carefully. If blade is bent or damaged, replace
immediately with a new blade. Failure to replace a bent
or damaged blade could cause an accident resulting in
possible serious injury.
REPLACING THE CUTTING BLADE
See Figure 20-21.
NOTE:
Only use identical replacement blades.
■ Stop the motor and disconnect the power supply.
Allow the blade to come to a complete stop.
■ Turn the mower on its side.
■ Wedge a block of wood between the blade and the
mower deck in order to prevent the blade from turning
when the nut is being removed.
■ Loosen the blade nut using a 14 mm wrench or
socket (not provided).
■ Remove the blade nut, and blade.
■ Make certain the fan assembly is pushed completely
against the motor shaft.
■ Place the new blade on the shaft against the fan
assembly. Make sure it is installed with the curved
ends pointing up toward the mower deck and not down
toward the ground.
■ Thread the blade nut on the shaft and fi nger tighten.
NOTE:
Make certain all parts are replaced in the exact
order in which they were removed.
■ Torque the blade nut down using a torque wrench (not
provided) to ensure the bolt is properly tightened.
NOTE:
Only use Craftsman mower blade replacement
part # 33027.
SHARPENING THE BLADE
See Figure 22.
For best mowing performance, the mower blade must
be kept sharp. A dull blade does not cut grass evenly
and overloads the motor. Under normal circumstances,
sharpening the blade twice during the mowing season
is usually suffi cient. However, if your lawn has sandy
soil, more frequent sharpenings may be required.
■ Following the instructions in the Replacing the
Cutting Blade section to remove the mower blade.
■ DO NOT attempt to sharpen the blade while it is
attached to the mower.
■ Using a fi ne-tooth fi le or sharpening stone, sharpen
cutting edges on both ends of the blade, removing
equal amounts of material from both ends.
Page 13

13 ― English
TROUBLESHOOTING
PROBLEM
POSSIBLE CAUSE SOLUTION
Handle not in
position
Carriage bolts not seated properly.
Adjust the height of the handle and make sure the
carriage bolts are seated properly.
Cam locks not tightened. Tighten cam locks.
Extension cord not connected to
the mower plug.
Reconnect the cord and use the cord retainer to
keep the cord close to the motor/blade control.
Extension cord not connected to
power source.
Connect the extension cord to a live 120V AC, 60
HZ AC receptacle.
Tripped circuit breaker in the
house.
Reset house circuit breaker.
If it trips again, call a qualifi ed electrician.
Motor control switch defective.
Have motor control switch replaced by a qualifi ed
service dealer using identical replacement part.
Mower cutting grass
unevenly
Lawn is rough or uneven or cutting
height not set properly.
Move the wheels to a higher position. All wheels
must be placed in the same cutting height for the
mower to cut evenly.
Mower not mulching
properly
Wet grass clippings sticking to the
underside of the deck.
Wait until the grass dries before mowing.
Mower hard to push
High grass, rear of mower housing
and blade dragging in heavy
grass, or cutting height too low.
Raise cutting height.
Mower vibrating at
higher speed
Blade is unbalanced.
Balance the blade by grinding each cutting edge
equally.
Bent motor shaft.
Stop the motor, disconnect the power source, and
inspect for damage. Before restarting, have repairs
made by a qualifi ed service dealer using identical
replacement parts.
Page 14

14 ― English
CRAFTSMAN 19-INCH ELECTRIC LAWN MOWER – MODEL NUMBER 151.39942
TO PURCHASE REPLACEMENT PARTS, CALL 1-888-331-4569
The model number will be found on a label attached to the motor housing.
Page 15

15 ― English
ITEM NO. PART NO. DESCRIPTION QTY
1 GM57BX.00.01.X2.01 Motor Housing 1
2 GM5ABX.20.00.X1.01 Motor Assembly 1
2.1 WOCSDX.10.PJ V-Belt 1
3 GMA0BX.00.03.X1.01 Side Discharge Assembly 1
3.1 GMA0BX.00.06 Discharge Chute 1
4 GM80BX.00.60 Sandbag 1
5 TGQTGL.51.00.X1.03 10" Rear Wheel Assembly 2
5.1 BOC2YX.14.NS Screws 2
5.2 TGQTGL.51.00 Wheel 2
6 TGQTGL.46.00.X1.04 8" Front Wheel Assembly 2
6.1 BOC2YX.13.NS Screws 2
6.2 TGQTGL.46.00.61 Wheel 2
7 GM50BX.X0.02 Blade Assembly 1
7.1 BOA4FL.10.20 Blade Stud 1
8 TOQTGX.13.XJ Cable Clamp 2
9 TGQTXN.05.00.X4.01 Lower Cam Lock Assembly 2
10 GM01BX.X0.04 Left Lower Handle Bracket 1
11 TOQTGX.X0.01 Cable Tie Down Assembly 1
12 GM57BX.00.02.W4 Deck 1
13 GM50BX.X0.03 Lower Deck Plate 1
14 GM58BX.00.01.X1.01 Front Axle Brackets 2
15 GM58BX.00.10 Front Axle 1
16 TGDQ15.C8.00.X1.01 Upper Handle Assembly with Switch Box 1
17 TGQTXN.05.00.X3.02 Upper Cam Lock Assembly 2
18 GM01BX.X0.01 Right Lower Handle Bracket 1
19 GM50BX.50.00 Mulch Plug 1
20 GM50BX.X0.05 Rear Axle 1
21 GM50BX.00.05 Deck Plate 1
22 GM56BX.X0.02 Lower Rear Debris Flap 1
23 GM01BX.00.07.X2.02 Height Selector Handle 1
24 GM50BX.X0.07 Height Adjust Connecting Rod 1
25 GM56BX.20.10.X1.01 Height Selector 1
26 TOTHYL.01.17.X1.01 Spring 1
27 GM56BX.00.04.X1.01 Rear Exhaust Flap Assembly 1
28 GM5ABX.10.00 Collection Bag 1
29 GM5ABX.00.01 Lower Handle 2
CRAFTSMAN 19-INCH ELECTRIC LAWN MOWER – MODEL NUMBER 151.39942
TO PURCHASE REPLACEMENT PARTS, CALL 1-888-331-4569
The model number will be found on a label attached to the motor housing.
TO PURCHASE REPLACEMENT PARTS, CALL 1-888-331-4569
The model number will be found on a label attached to the motor housing.
Page 16

See this section for all of the fi gures referenced in the
operator’s manual.
Consulte esta sección para ver todas las fi guras mencionadas en el
manual del usuario.
Fig. 1
C
D
E
O
MN
G
H
F
J
I
K
L
A - Cord Retainer (Enganche para el cable)
B - Mulching Plug (Conector de mantillo)
C - Height Adjustment Lever (Palanca de ajuste de altura)
D - Lift Handle (Manilla de elevación)
E - Rear Exhaust Door (Puerta de escape posterior)
F - Start/Stop Switch Trigger (Gatillo de encendido/detención)
G - Safety Lock Off Button (Botón de bloqueo de seguridad)
H - Power Cord (Cable de corriente)
I - Collection Bag (Bolsa recolectora)
J - Cam Locks (Cerrojos de leva)
K - Wheel (Rueda)
L - Mower Deck (Cubierta de la cortadora de pasto)
M - Side Discharge Door (Puerta descarga lateral)
N - Side Discharge Chute (Escape de descarga lateral)
O - Cord clip (Sujetador para el cable)
A
B
i
Page 17

Fig. 2
Fig. 3
Fig. 4 Fig. 5 Fig. 6
Fig. 7 Fig. 9Fig. 8
A - Cord (Cable)
B - Extension Cord (Alargador)
A - Steel Frame (Marco de acero) B - Soft Plastic Tube (Tubo plástico suave) C - Hinge (Bisagra)
A
B
A
C
B
ii
A - Power Cord Clip
(Sujetador del cable de energía)
B - Attachment Plate
(Placa de fijación)
A
B
Page 18

A - Side Discharge Cover (Tapa de descarga lateral)
B - Side Discharge Chute (Escape de descarga lateral)
Fig. 10
Fig. 12
Fig. 14
Fig. 11
Fig. 13
Fig. 15
A
B
A - Safety Lock-Off Button
(Botón de bloqueo de seguridad)
B - Start/Stop Switch Trigger
(Gatillo de encendido/detención)
NOTE:
Mulch plug MUST
be removed before installing
collection bag.
NOTA:
El conector de mantillo
se DEBE sacar antes de instalar
la bolsa recolectora.
AB
iii
Page 19

Fig. 16
Fig. 17
A
C
E
B
D
F
A - Standard Horizontal (Horizontal estándar)
C - Vertical Grip (Agarre vertical)
E - Ergonomic Wide (Ancha ergonómica)
B - Ergonomic Narrow (Ergonómica estándar)
D - Horizontal Wide (Ancha horizontal)
F - Pistol Grip (Agarre de pistola)
iv
Page 20

A
A
B
B
C
Fig. 19 Fig. 20
Fig. 21
A - Blade (Aspa)
B - Wood Block (Bloqueo con madera)
C - Wrench (Llave)
A - Blade (Aspa)
B - Bolt (Perno)
Fig. 18
v
Page 21

Fig. 22 Fig. 23
Fig. 24 Fig. 25
B
D
C
AB
A
C
A - Upper Handle (Manilla superior)
B - Lower Handle Assembly (Conjunto de piezas de la
manila inferior)
C - Handle Cam Locks (Cerrojos de leva de la manilla)
D - Fixed Plate (Placa fija)
A - Axle (Eje)
B - Retaining Hubcap (Tapa de retención)
C - Wheel (Rueda)
vi
Page 22

3 ― English
REGLAS GENERALES DE SEGURIDAD
LEA TODAS LAS INSTRUCCIONES
■ Esta máquina de corte es capaz de amputar manos
y pies, además de lanzar objetos. El no seguir las
instrucciones de seguridad puede causar lesiones
severas o incluso la muerte.
■ No utilice la cortadora de pasto en condiciones
mojadas, húmedas ni tampoco bajo la lluvia.
■ Jamás permita que adultos utilicen el producto sin
saber cómo hacerlo.
■ Mientras corte el pasto, mantenga la zona despejada
de personas, niños y mascotas. Detenga la máquina
en caso de que alguien entre en la zona.
■ Pueden ocurrir accidentes trágicos si el operador
no está alerta de la presencia de niños. A menudo,
los niños se sienten atraídos por las máquinas
y el movimiento. Jamás asuma que los niños
permanecerán en el lugar donde los vio por última vez.
■ Mantenga a los niños alejados del área de trabajo y
bajo la vigilancia de un adulto responsable que no sea
el operador de la máquina.
■ Esté alerta y apague la cortadora de pasto cuando
un niño entre en la zona.
■ Jamás permita que niños utilicen la máquina.
■ Tenga cuidado adicional al acercarse a esquinas
con punto ciego, arbustos, árboles u otros objetos que
puedan bloquear su visión de un niño.
■ No se ponga prendas anchas o joyas. Pueden
quedar atrapadas en las piezas móviles. Se
recomienda el uso de guantes y calzado de goma al
trabajar en exteriores.
■ Párese fi rmemente y de manera equilibrada. No
intente alcanzar demasiado lejos. Extralimitarse puede
causar una pérdida del equilibrio.
■ No utilice el equipo si está descalzo o lleva sandalias
o algún calzado ligero similar. Utilice un calzado
que proteja su pie y mejore su agarre en superfi cies
resbalosas.
■ No deje la cortadora de pasto sola y encendida.
INSTRUCCIONES DE SEGURIDAD IMPORTANTES
¡IMPORTANTE!
LEA Y ASEGÚRESE DE
COMPRENDER TODAS LAS INSTRUCCIONES. El
incumplimiento de las instrucciones detalladas debajo
puede derivar en descargas eléctricas, incendios o
lesiones graves.
■ Mantenga sus manos y pies lejos de la zona de corte.
Mantenga sus manos y pies lejos de la zona de corte.
■ Opere la cortadora de pasto solo durante el día o
bajo una buena iluminación artifi cial.
■ Use siempre lentes de seguridad con protección
lateral. Los lentes de uso cotidiano solo tienen cristales
resistentes a impactos. NO son lentes de seguridad.
Siga esta regla y reducirá el riesgo de sufrir lesiones
oculares. Utilice una máscara facial si el uso del equipo
genera polvo.
■ Al operar este producto, utilice lentes de seguridad o
antiparras que cumplan con el estándar ANSI Z87.1.
■ Utilice el dispositivo correcto. No utilice la cortadora
de pasto en actividades para las cuales no fue
diseñada.
■ No fuerce la cortadora de pasto. La herramienta
correcta hará el trabajo mejor y de manera más segura
si la utiliza de la manera para la que fue diseñada.
■ Manténgase alerta, tenga cuidado con lo que hace y
haga uso de su sentido común al utilizar la cortadora
de pasto. No use la cortadora de pasto cuando esté
cansado o bajo la infl uencia de drogas, alcohol o
medicamentos. Un momento de falta de atención
mientras usa la cortadora de pasto puede derivar en
graves lesiones personales.
■ Mantenga la máquina en buenas condiciones
operativas. Mantenga las aspas afi ladas y las
protecciones puestas, en buen estado operativo.
■ Revise todos los pernos, tuercas y tornillos en
intervalos frecuentes para verifi car que estén apretados
y asegurarse de que el equipo está en condiciones
operativas seguras.
■ Antes de limpiar la cortadora de pasto o quitar la
acumulación de pasto de la protección de descarga,
detenga el motor hasta que el aspa pare por completo,
saque la bolsa recolectora.
■ Cuando no esté en uso, la cortadora de pasto debe
guardarse en interiores bajo un ambiente seco y en un
lugar cerrado con llave, lejos del alcance de los niños.
■ Para reducir el riesgo de descarga eléctrica, este
producto posee un enchufe polarizado (un aspa es
más ancha que la otra), por lo que será necesario el
uso de un alargador polarizado. El enchufe entrará
en un cable extensor polarizado en una sola posición;
si el enchufe no calza por completo, inviértalo. Si
el enchufe sigue sin encajar, consiga un alargador
Page 23

4 ― English
REGLAS GENERALES DE SEGURIDAD
polarizado correcto. Un alargador polarizado requiere
el uso de una toma de corriente de pared polarizada.
Este enchufe encajará en la toma de corriente de
pared de una sola manera. Si el enchufe no entra
completamente en el tomacorriente de pared, póngalo
al revés. Si el enchufe sigue sin encajar, póngase
en contacto con un electricista califi cado que instale
una toma de corriente de pared correcta. No cambie
el enchufe del equipo, receptáculo del alargador o
enchufe del alargador de manera alguna.
■ No maltrate el cable. Jamás utilice el cable para jalar
la cortadora de pasto o para desconectar el enchufe
de una toma de corriente. Mantenga el cable alejado
del calor, de aceites, bordes afi lados o partes móviles.
Reemplace los cables dañados inmediatamente. Los
cables dañados incrementan el riesgo de descargas
eléctricas.
■ Asegúrese de que su alargador esté en buenas
condiciones. Al utilizar un alargador, asegúrese de
utilizar uno lo sufi cientemente potente como para
llevar la corriente necesaria que el producto necesita.
Para alargadores de 50 pies (15 metros) o menos, se
recomienda un cable con calibre (A.W.G.) de al menos
14. En caso de duda, utilice el siguiente que tenga más
capacidad. Cuanto menor sea el calibre, más fuerte
será el cable. Un cable muy pequeño provocará una
baja en el voltaje, lo que causará pérdida de energía y
sobrecalentamiento.
■ ADVERTENCIA: Utilice alargadores marcados como
SW-A, SOW-A, STW-A, STOW-A, SJW-A, SJTA,
SJTW-A o SJTOWA. Estos cables son aptos para
uso en exteriores y reducen el riesgo de descargas
eléctricas.
■ Debe haber protección del interruptor de circuito
por pérdida a tierra (GFCI) en el circuito(s) o toma(s)
de corriente que usará la cortadora de pasto. Hay
disponible receptáculos con protección GFCI integrada,
los cuales se pueden utilizar para esta medida de
seguridad.
■ Inspeccione los alargadores periódicamente y
reemplácelos si están dañados. Mantenga las manijas
secas, limpias y libres de aceite o grasa.
REGLAS DE SEGURIDAD ESPECÍFICAS
■ No opere la cortadora de pasto sin la bolsa
recolectora, protección contra descarga, protección
trasera o algún otro dispositivo de seguridad, o si estos
no están en condiciones operativas.
■ Siga las instrucciones del fabricante para operar e
instalar adecuadamente los accesorios. Utilice solo
accesorios especifi cados en el manual del usuario.
■ Limpie el área de trabajo antes de comenzar. Quite
objetos como rocas, varas, alambres, huesos, juguetes
u otros que puedan salir expelidos por las aspas.
Mientras el motor esté andando, permanezca detrás
de la manija.
■ Evite agujeros, surcos, montículos, rocas u otros
objetos ocultos. Los terrenos disparejos pueden causar
un resbalo y accidente por caída.
■ No corte cerca de salientes, zanjas o muros de
contención.
■ Corte a través de la cara de las lomas, jamás de
manera ascendente o descendente. Ponga extremo
cuidado al cambiar de dirección en lomas.
■ Planifi que su patrón de corte para evitar que los
materiales se descarguen hacia caminos, veredas,
peatones y otros. Además, evite descargar el material
contra un muro u obstrucción, lo cual podría causar
que el material se devuelva hacia al operador.
■ No corte pasto mojado o en lomas excesivamente
empinadas. El uso del calzado incorrecto puede causar
un resbalo y accidente por caída. Camine, no corra.
■ Tenga cuidado adicional al acercarse a esquinas
con punto ciego, arbustos, árboles u otros objetos que
puedan bloquear su visión.
■ No jale la cortadora de pasto hacia atrás a menos
que sea absolutamente necesario. Si debe jalar
la cortadora de pasto para quitarla de un muro u
obstrucción, primero mire hacia abajo y atrás para
evitar caídas.
■ Jamás apunte los materiales de descarga hacia una
persona. Evite descargar materiales contra un muro
u obstrucción. Los materiales podrían salir de vuelta
hacia el operador. Detenga el aspa al cruzar sobre
superfi cies con piedras.
Page 24

5 ― English
GUARDE ESTAS INSTRUCCIONES
REGLAS DE SEGURIDAD ESPECÍFICAS
■ Los objetos atrapados en el aspa de la cortadora de
pasto pueden causar lesiones severas a las personas.
Antes de cada trabajo, se debe examinar y limpiar
cuidadosamente la cortadora de pasto, quitando
cualquier objeto externo de ella.
■ Si la cortadora de pasto golpea a un objeto extraño,
siga estos pasos:
• Deténgala y suelte el control.
• Desconecte el cable de alimentación.
• Inspeccione exhaustivamente la cortadora de pasto
en búsqueda de daños.
• Repare los daños antes de volver encenderla y
continuar con el trabajo.
■ Antes de extraer la bolsa recolectora o quitar las
acumulaciones de pasto del escape, detenga el motor,
desconecte el cable de alimentación y espere hasta
que las aspas paren por completo. Las aspas siguen
girando por algunos segundos después de apagar el
motor. Jamás coloque partes del cuerpo en la zona de
las aspas hasta que esté seguro de que éstas se han
detenido por completo.
■ Desconecte el enchufe de la fuente de alimentación
antes de hacer algún ajuste, cambio de accesorios
o guardar la cortadora de pasto. Estas medidas de
seguridad reducen el riesgo de que el producto se
encienda de manera accidental.
■ Si la cortadora de pasto comienza a vibrar
anormalmente, detenga el motor y busque la
causa inmediatamente. La vibración suele ser una
advertencia de problemas.
■ Las reparaciones del producto se deben realizar
solo mediante personal califi cado. Una reparación
o mantenimiento realizados por una persona no
califi cada puede causar lesiones al usuario o daños al
producto.
■ Al reparar el producto, utilice solo piezas de repuesto
idénticas. El uso de piezas no autorizadas puede crear
un riesgo de lesiones severas al usuario o dañar el
producto.
■ Si el cable de alimentación está dañado, deje de
usar el producto. Lleve el producto a un concesionario
de servicio califi cado para que lo inspeccione y repare,
en caso de ser necesario.
■ Conserve estas instrucciones. Consúltelas con
frecuencia y úselas para enseñar a otras personas a
utilizar este producto. Si le presta esta herramienta a
alguien, hágalo junto con estas instrucciones
Page 25

6 ― English
SÍMBOLO NOMBRE NOMBRE/EXPLICACIÓN
V Volts Voltaje
A Amperes Corriente
Hz Hertz Frecuencia (ciclos por segundo)
W Vatios Energía
min Minutos Tiempo
Corriente alterna Tipo de corriente
Corriente continua Tipo o característica de la corriente
n
o
Sin velocidad de carga Velocidad racional, sin carga
Construcción clase II Construcción con aislamiento doble
/min
Por minuto
Revoluciones, golpes, velocidad de la superfi cie, órbitas, etc.,
por minuto
Alerta de condiciones
húmedas
No exponer a la lluvia ni usar en lugares húmedos
Lea el manual de uso
Para reducir el riesgo de lesiones, el usuario debe leer y
comprender el manual de uso antes de utilizar este producto.
Protección ocular y
auditiva
Use siempre protección ocular con escudos laterales que cumpla
con la normativa ANSI Z78.1, junto con protección auditiva.
Trampilla abierta
Al abrirse el seguro, la bolsa recolectora tiene un volumen
restante efi ciente como para recolectar pasto.
Trampilla cerrada
Al cerrarse la trampilla, la bolsa recolectora está llena y debe
vaciarse.
Rebotes
Los objetos arrojados pueden rebotar y provocar lesiones a
personas o a la propiedad.
Aspa afi lada Peligro: mantenga sus manos y pies alejados del aspa.
Uso en lomas No corte pasto en una loma con un ángulo mayor a 15°.
Mantenga a las personas
alejadas
Mantenga a todas las personas alejadas al menos 50 pies
(15 metros).
Descarga eléctrica
Utilizar el producto en condiciones húmedas y no seguir las
prácticas de seguridad puede provocar una descarga eléctrica.
SÍMBOLOS
Algunos de los siguientes símbolos podrían aparecer en este producto. Estúdielos y aprenda su
signifi cado. Una interpretación correcta de estos símbolos le permitirá utilizar el producto mejor y
de forma más segura
MAX 15
o
Page 26

7 ― English
SÍMBOLOS
SÍMBOLO SEÑAL SIGNIFICADO
PELIGRO
Indica una situación peligrosa inminente, la cual, de no evitarse, causará
la muerte o lesiones severas.
ADVERTENCIA
Indica una situación potencialmente peligrosa, la cual, de no evitarse,
podría causar la muerte o lesiones severas.
CUIDADO
Indica una situación potencialmente peligrosa, la cual, de no evitarse,
podría causar una lesión menor o moderada.
CUIDADO
(Sin símbolo de alerta de seguridad) Indica una situación que podría
causar daños a la propiedad.
ADVERTENCIA
Para evitar lesiones severas, no intente utilizar este producto hasta
que haya leído y comprendido exhaustivamente el manual del usuario.
Si no comprende las advertencias e instrucciones del manual del
usuario, no utilice este producto Para obtener ayuda, llame a la línea
de atención telefónica al usuario, al 1-888-331-4569.
El uso de herramientas eléctricas puede causar que objetos extraños entren en sus ojos, lo
cual puede provocar lesiones severas. Antes de utilizar una herramienta eléctrica, póngase
antiparras o lentes de seguridad con protección lateral y, de ser necesario, use escudo facial.
Recomendamos una máscara de seguridad que permita una visión amplia para usarse encima
de los lentes o bien lentes de seguridad con protección lateral. Use siempre protección ocular
que cumpla con la normativa ANSI Z87.1.
Las siguientes palabras y signifi cados están diseñados para explicar los niveles de riesgo asociado a
este producto.
Page 27

8 ― English
CARACTERÍSTICAS
ESPECIFICACIONES DEL PRODUCTO
Voltaje ................................................................................................................................................... 120V~ 60Hz
Corriente ....................................................................................................................................................12,5 AMP
Velocidad del motor .................................................................................................................................3600 r/min
Ancho de corte ..................................................................................................................... 457 mm (18 pulgadas)
Ancho de la cubierta .............................................................................................................483 mm (19 pulgadas)
Ajustes de altura .................................................................................... 35-85 mm (1,35-3,35 pulgadas); 6 niveles
Volumen de la bolsa recolectora ........................................................................................ 70 litros (18,5 galones)
Tamaño de la rueda ................................................................................................... 200/255 mm (8/10 pulgadas)
Peso de la unidad ....................................................................................................................... 50,3 lbs (22,82 kg)
CONOZCA SU CORTADORA DE PASTO
Consulte la Figura 1.
El uso seguro de este producto requiere que conozca
la información de la herramienta y la que aparece
en este manual así como también el proyecto en el
que está trabajando. Antes de usar este producto,
familiarícese con todas las funciones operativas y
reglas de seguridad relacionadas. Esta cortadora de
pasto 3 en 1 viene con recolector de mantillo, defl ector
lateral de corte y bolsa de recolección.
CONTENEDOR DEL CABLE
Un práctico contenedor para el cable ayuda a mantener
el alargador seguro mientras se usa la sopladora.
BOLSA RECOLECTORA DE POLVO
Esta cortadora de pasto incluye una bolsa recolectora
con bloqueador de polvo que reduce la cantidad de
polvo que ingresa a la bolsa.
PALANCA DE AJUSTE DE ALTURA
La palanca de ajuste permite seleccionar una de las 6
alturas de corte.
ROTO-FIT
Las manillas Roto-Fit son manillas pivotantes de 360°
que se pueden ajustar en 8 distintas posiciones. Los
usuarios pueden ajustar el ángulo de la manilla para
alcanzar el mejor agarre y orientación que estimen
conveniente para una tarea en específi co.
CONECTOR DE MANTILLO
La cortadora de pasto posee un conector de mantillo
que permite cortar y volver a cortar el pasto en trozos
más pequeños. El conector de mantillo se instala en
la fábrica y DEBE sacarse en caso de usar la bolsa
recolectora.
DEFLECTOR DE DESCARGA LATERAL
Utilice el defl ector de descarga lateral en su cortadora
de pasto cuando éste se encuentre demasiado alto
o cuando prefi era utilizar una descarga lateral. Los
trozos de pasto producidos al utilizar el defl ector lateral
son considerablemente más grandes que al utilizar el
conector de mantillo.
Page 28

9 ― English
¡ADVERTENCIA!
Mantenga el alargador
fuera del área de trabajo. Coloque el cable de manera
tal que no quede atrapado en maderos, herramientas
u otras obstrucciones. El no seguir estas indicaciones
puede provocar lesiones severas.
¡ADVERTENCIA!
Revise los alargadores
antes de cada uso. Si está dañado, reemplácelo
inmediatamente. Jamás utilice el producto con un cable
dañado, ya que tocar las zonas dañadas podría causar
descargas eléctricas y lesiones severas.
ELÉCTRICO
DOBLE AISLANTE
El aislamiento doble en las herramientas eléctricas
elimina la necesidad del cable tradicional de tres patas
con conexión a tierra. Todas las piezas metálicas
expuestas están aisladas de los componentes internos
metálicos del motor mediante una aislación protectora.
Las herramientas con doble aislación no necesitan
conexión a tierra.
¡ADVERTENCIA!
LEA Y ASEGÚRESE DE
COMPRENDER TODAS LAS INSTRUCCIONES. El
incumplimiento de las instrucciones detalladas en la
máquina y a continuación puede derivar en descargas
eléctricas, incendios o lesiones graves.
NOTA:
El mantenimiento de un producto con doble
aislación requiere extremo cuidado y conocimiento
del sistema, por lo que debiera realizarlo personal
de servicio califi cado. Asegúrese de usar piezas de
repuesto originales indicadas en la Lista de piezas de
este manual.
CONEXIÓN ELÉCTRICA
Este producto tiene un motor eléctrico de precisión.
Debiera conectarse a un suministro eléctrico de 120
volts, solo CA (corriente normal domiciliaria) de 60 Hz.
No utilice este producto en corriente continua (CC).
Una baja sustancial del voltaje causará una pérdida de
energía y el motor se sobrecalentará. Si el producto no
funciona estando enchufado a un tomacorriente, revise
dos veces el suministro eléctrico.
ALARGADORES
Consulte la Figura 2.
Al utilizar una herramienta eléctrica que se encuentre
a una distancia considerable de la fuente de
alimentación, asegúrese de utilizar un alargador
que tenga la capacidad necesaria para administrar
la corriente que el producto necesita. Un cable muy
pequeño provocará una baja en el voltaje, lo que
causará pérdida de energía y sobrecalentamiento.
Utilice la tabla para determinar el tamaño mínimo
del cable que se requiere en un alargador. Se deben
utilizar solo cables redondos cubiertos mencionados
en la lista de Underwriter's Laboratories (UL).
Al trabajar en exteriores, utilice un alargador diseñado
para dicho uso. Este tipo de cable dice "WA" en su
cubierta plástica.
Antes de usar un alargador, inspecciónelo en
búsqueda de cables sueltos o expuestos y cortes o
zonas gastadas.
Para evitar que se desconecte, se puede amarrar
el alargador y el cable de alimentación haciendo un
nudo. Haga el nudo como se indica en la fi gura 2 y
luego conecte el enchufe del cable de alimentación
al receptáculo del alargador. Este método también se
puede utilizar para atar dos alargadores en conjunto.
**Clasifi cación del amperaje (en la placa de información del producto)
**Utilizado en circuito de calibre 12 - 20 amp.
NOTA: AWG = American Wire Gauge
Largo del
cable
Tamaño del cable
(A.W.G.)
PROPUESTA 65
¡ADVERTENCIA!
Parte del polvo
creado por la abrasión con arena, cortes,
moliendas, taladraje y otras actividades de
construcción contiene químicos que, a saber,
pueden causar cáncer, defectos congénitos u otro
daño al sistema reproductivo. Algunos ejemplos de
estos químicos son:
• el plomo de pinturas en base a plomo.
• el sílice cristalino de ladrillos, cemento y otros
productos de albañilería.
• el arsénico y el cromo de la madera tratada con
químicos.
El riesgo de exposición varía según la regularidad
con que haga este tipo de trabajo. Para reducir su
exposición, trabaje en lugar bien ventilado y utilice
equipos de seguridad aprobados, tales como
máscaras de polvo especialmente diseñadas para
fi ltrar partículas microscópicas.
Page 29

10 ― English
ARMADO
DESEMBALAJE
Este producto requiere armado.
■ Con cuidado, extraiga el producto y sus accesorios
desde la caja. Asegúrese de que todos los elementos
mencionados en la lista de componentes del empaque
estén incluidos.
■ Inspeccione el producto cuidadosamente para
asegurarse de que no se haya roto o dañado durante
el transporte.
■ No bote el material del empaque hasta que
haya inspeccionado completamente y utilizado
satisfactoriamente el producto.
■ No utilice la cortadora de pasto si alguna de las
piezas está dañada o falta. Devuélvala para que el
vendedor a quien compró la herramienta la repare.
ENSAMBLAJE DE LA MANILLA
Consulte la Figura 3-6.
■ nserte las manillas inferiores HACIA y sobre los
pernos expuestos de la placa de fi jación que se
encuentra en la parte posterior de la carcasa del motor.
Asegúrese de que los sujetadores del cable en las
manillas estén AMBOS hacia arriba. En cada costado,
coloque una golilla sobre la punta del perno y apriete
la palanca de bloqueo en él. Pliegue la palanca hacia
abajo para asegurar la manilla en posición. (Fig. 3)
NOTA: Para facilitar el uso, el ángulo general de la
manilla se puede aumentar o reducir al seleccionar
un punto de unión inferior o superior en la placa de
fi jación. (Fig. 3)
■ Fije la manilla superior a la inferior utilizando pernos
del carro, golillas y palancas de bloqueo. Hay tres
posiciones de ajuste. Seleccione la posición que mejor
se adapte a usted. (Fig. 4)
■ Asegure la manilla en posición girando la palanca de
bloqueo para apretarla y luego pliéguela hacia abajo.
No aplique fuerza excesiva al plegar la palanca o
podría romperse. Suelte la palanca hasta el punto en
que se plegará sin romperse. (Fig. 5)
■ Asegure el cable utilizando los sujetadores. (Fig. 6)
BOLSA RECOLECTORA DE PASTO CON
BLOQUEADOR DE POLVO
Consulte la Figura 7-9.
■ Su cortadora de pasto posee una bolsa recolectora
sencilla. La bolsa incluida es la ilustrada.
■ Para armar la bolsa, enderece el marco de acero
abisagrado en la abertura de la bolsa, tal como se
indica.
■ Abra la manga tubular larga de plástico suave
utilizando sus dedos e inserte el marco de acero en los
tubos, tal como se indica.
CÓMO INSTALAR LA BOLSA RECOLECTORA
Consulte la Figura 10.
NOTA:
Al usar la bolsa recolectora de pasto, no instale
el conector de mantillo.
■ Levante la tapa de descarga posterior.
■ Levante la bolsa recolectora de pasto por su manija
y colóquela bajo la puerta de descarga de manera que
se enganche en la varilla de la puerta.
■ Suelte la tapa de descarga posterior.
■ El conector de mantillo se DEBE sacar antes de
instalar la bolsa recolectora.
LISTA DE EMPAQUE
Cortadora de pasto
Conector de mantillo (ya instalado)
Bolsa recolectora con bloqueador de polvo
Escape de descarga lateral
Perno x4
Golilla x4
Palanca de bloqueo x4
Sujetador para el cable x2
Manual del usuario
¡ADVERTENCIA!
Si alguna pieza
está dañada o falta, no utilice este producto hasta
reemplazarlas. No hacer caso a esta advertencia
puede causar lesiones severas.
¡ADVERTENCIA!
No intente modifi car este
producto o crear accesorios no recomendados para
su uso con este producto. Cualquier alteración de este
tipo o modifi cación se considera un uso indebido que
podría causar potenciales lesiones severas.
¡ADVERTENCIA!
No conectar a la
alimentación hasta que el armado esté completo. El
no cumplir con esto podría causar un funcionamiento
inicial erróneo y posibles lesiones severas.
¡ADVERTENCIA!
Jamás utilice la
cortadora de pasto sin los dispositivos de seguridad
adecuados puestos y operativos. Jamás utilice la
cortadora de pasto con dispositivos de seguridad
dañados. No hacer caso a esta advertencia puede
causar lesiones severas.
Page 30

11 ― English
ARMADO
FUNCIONAMIENTO
APLICACIONES
Puede utilizar este producto para el propósito
mencionado a continuación: Cortar su pasto
¡ADVERTENCIA!
No permita que estar
acostumbrado a usar este tipo de productos genere
descuidos en usted. Recuerde que una sola fracción
de segundo en que se descuide es sufi ciente para
generar una lesión severa.
¡ADVERTENCIA!
Al utilizar este producto,
use siempre antiparras o lentes de seguridad con
protección lateral. El no seguir esta instrucción podría
causar que objetos salgan disparados hacia sus ojos,
causando una posible lesión severa.
¡ADVERTENCIA!
No utilice accesorios
no recomendados por el fabricante de este producto.
El uso de accesorios no recomendados puede causar
lesiones severas.
¡ADVERTENCIA!
Tras apagar el equipo,
el aspa podría seguir girando durante varios segundos.
No toque el aspa en movimiento. Existe un riesgo de
lesiones severas.
CÓMO INSTALAR EL CONECTOR DE MANTILLO
Consulte la Figura 11.
NOTA:
Al utilizar el conector de mantillo, no instale la
bolsa recolectora de pasto.
■ Levante la tapa de descarga posterior.
■ Tome el conector de mantillo desde su manilla.
■ Inserte el conector en la abertura de descarga
posterior.
■ Baje la puerta de descarga posterior.
INSTALACIÓN DEL ESCAPE DE DESCARGA
LATERAL
Consulte la Figura 12.
La cortadora de pasto viene ensamblada en
confi guración de mantillo, para expulsar los trozos
de pasto directamente bajo la cortadora. Para enviar
los trozos de pasto fuera de la cortadora, jale la tapa
de descarga lateral e inserte el escape de descarga
lateral.
AJUSTE DE LA ALTURA DE CORTE
Consulte la Figura 13.
De fábrica, las ruedas de la cortadora de pasto están
en posición de corte baja. Antes de usar la cortadora
de pasto por primera vez, ajuste la posición de corte
a la altura que mejor se ajuste a su pasto. El pasto
promedio debiera estar entre 1,35" y 3,35".
Para establecer la altura de corte:
■ Para aumentar la altura de corte, tome la palanca de
ajuste de altura y muévala hacia la parte posterior de
la cortadora de pasto.
■ Para reducir la altura de corte, tome la palanca de
ajuste de altura y muévala hacia la parte posterior de
la cortadora de pasto.
ENCENDIDO/APAGADO
Consulte la Figura 14-15.
■ Cree un bucle en el alargador y cuélguelo en el tubo
pasacables de la barra cruzada. Conecte la cortadora
de pasto a la toma de energía.
■ Antes de encenderla, asegúrese de que la cortadora
no esté en contacto con ningún objeto extraño.
■ Para empezar a usarla, ocupe una mano para
presionar el botón de bloqueo de seguridad en el
centro de la manilla superior. Luego, utilice la otra
mano para presionar cualquiera de los gatillos de
encendido/apagado. Suelte el botón de bloqueo.
■ Para detener el funcionamiento, suelte ambos
gatillos de encendido/apagado.
Page 31

12 ― English
FUNCIONAMIENTO
AGARRES ROTO-FIT MULTIPOSICIÓN
Consulte la Figura 16-17.
■ Por causas de seguridad, NO ajuste los agarres
Roto-Fit mientras la cortadora esté encendida o
cortando pasto. Utilice el producto solo después de
haber accionado por completo el aro de bloqueo.
■ Los agarres Roto-Fit pueden girar a 360° y ajustarse
en 8 distintas posiciones. (Fig. 16) Los usuarios
pueden ajustar el ángulo de agarre para alcanzar el
mejor agarre y orientación que estimen conveniente
para una tarea en específi co.
■ De las 8 posibles posiciones del agarre Roto-Fit, se
recomiendan 6 para su uso: Estándar, ergonómica
angosta, agarre vertical, ancha horizontal, ancha
ergonómica y agarre de pistola. (Fig. 17)
■ Las manillas están diseñadas para hacerse girar
utilizando 1 sola mano. Esto quiere decir que puede
ajustar ambas manos a la vez.
Para ajustar la posición de agarre de la manilla
Roto-Fit:
■ Jale el aro de bloqueo hacia usted.
■ Gire el aro hacia la posición deseada.
■ Suelte el aro para que se fi je en posición.
CONSEJOS PARA CORTAR PASTO
■ Asegúrese de que el pasto no tenga piedras, varas,
cables u otros objetos que puedan dañar las aspas
o motor de la cortadora. Tales objetos podrían salir
disparados accidentalmente por la cortadora de
pasto y causar lesiones severas al operador y a otras
personas.
■ Para reducir la probabilidad de que la cortadora
de pasto se desconecte del alargador, asegúrese de
utilizar el contenedor de cable incluido.
■ Para tener un pasto saludable, corte siempre un
tercio o menos del largo total del pasto.
■ Al cortar en pasto denso, reduzca la velocidad para
obtener un corte más efectivo y una mejor descarga de
los residuos.
■ No corte pasto mojado. Se pegará a la parte inferior
de la cortadora de pasto y evitará que el mantillo se
genere adecuadamente.
■ El paso nuevo o espeso podría requerir un corte más
estrecho.
■ Limpie la parte inferior de la cortadora de pasto
después de cada uso a fi n de extraer pasto, residuos,
tierra o cualquier otro sedimento acumulado.
CÓMO CORTAR PASTO EN UNA PENDIENTE
Consulte la Figura 18.
■ Las lomas son un factor importante que se relaciona
con resbalones y caídas por accidente que pueden
causar lesiones severas. Cortar el pasto en lomas
requiere cuidado adicional. Si se siente incómodo
en una loma, no la corte. Por su seguridad, no trate
de cortar el pasto en lomas de más de 15 grados de
inclinación.
■ Corte el pasto a través de la cara de las lomas, no
de manera ascendente o descendente. Ponga extremo
cuidado al cambiar de dirección en lomas.
■ Tenga cuidado con agujeros, surcos, rocas, objetos
ocultos o montículos que puedan causar caídas o
resbalones. El pasto largo puede ocultar obstáculos.
Quite todos los objetos tales como rocas, ramas, etc.
que puedan provocar un tropezón o que puedan salir
expelidos por el aspa.
■ Tenga siempre cuidado por donde pisa. Un resbalón
y caída pueden causar lesiones severas. Si siente que
pierde su equilibrio, suelte los gatillos inmediatamente.
■ No corte pasto cerca de salientes, zanjas o muros de
contención; podría perder el equilibrio o su calzado.
CÓMO VACIAR LA BOLSA RECOLECTORA
Consulte la Figura 19.
■ Para extraerla de la cortadora de pasto, levante la
bolsa recolectora desde su manilla.
■ Saque los trozos de pasto.
■ Levante la puerta de descarga posterior y reinstale
la bolsa recolectora de pasto según se indica
anteriormente en este manual.
Page 32

13 ― English
CUIDADO Y MANTENIMIENTO
¡ADVERTENCIA!
Al realizar
mantenimiento, utilice solo piezas de repuesto
idénticas. El uso de otras piezas podría generar un
peligro o dañar al producto.
¡ADVERTENCIA!
Cuando utilice
herramientas eléctricas o levante polvo, use siempre
antiparras o lentes de seguridad con protección lateral.
Si la operación levanta polvo, utilice también una
mascarilla.
¡ADVERTENCIA!
No utilice accesorios no
especifi cados en el manual del usuario. El uso de otros
accesorios puede causar lesiones severas.
MANTENIMIENTO GENERAL
Evite el uso de solventes al limpiar piezas plásticas.
La mayoría de los plásticos son susceptibles a daños
causados por varios tipos de solventes comerciales.
Utilice paños limpios para retirar la suciedad, polvo,
aceite, grasa, etc.
Revise y apriete periódicamente todas las tuercas y
pernos para asegurar el funcionamiento seguro de la
cortadora de pasto. Extraiga cualquier acumulación de
pasto y hojas que esté sobre o alrededor de la cubierta
del motor. Ocasionalmente, limpie la cortadora de
pasto con un paño seco. No usar agua.
LUBRICACIÓN
■ Todos los cojinetes de este producto están lubricados
con una cantidad sufi ciente de lubricante de alto
rendimiento que debiera ser sufi ciente para toda la
vida útil de este producto, bajo condiciones operativas
normales. Por lo tanto, no hay necesidad de lubricar
los cojinetes. Antes y después de cada uso:
■ Lubrique los resortes de la puerta de descarga
posterior con aceite ligero.
■ Lubrique la palanca de ajuste de altura y demás
piezas relacionadas con aceite ligero.
■ Extraiga las ruedas y lubrique con aceite ligero la
superfi cie del perno del eje y la superfi cie interna de la
rueda.
■ Extraiga el aspa y su maza; lubrique el eje del motor
con aceite ligero o aceite para motor. Para obtener
instrucciones sobre cómo extraer el aspa consulte
Cómo reemplazar el aspa de corte.
¡ADVERTENCIA!
Al realizar mantenimiento
en el producto, proteja siempre sus manos utilizando
guantes gruesos y/o envolviendo los bordes cortantes
del aspa con trapos y otros materiales. No hacer caso
a esta advertencia podría causar lesiones severas.
¡ADVERTENCIA!
Antes de realizar
actividades de mantenimiento, asegúrese de que la
cortadora de pasto esté desconectada de la fuente de
alimentación. No hacer caso a esta advertencia podría
causar lesiones severas.
REEMPLAZO DE LA HOJA CORTADORA
Consulte la Figura 20-21.
NOTA:
Utilice solo aspas de repuesto idénticas.
■ Detenga el motor y desconecte la fuente de
alimentación. Deje que el aspa se detenga por
completo.
■ Voltee la cortadora de pasto.
■ Coloque un bloque de madera entre el aspa y el
cuerpo de la cortadora de pasto para evitar que el aspa
gire al extraer la tuerca.
■ Suelte la tuerca del aspa utilizando una llave o llave
de tubo de 14 mm.
■ Extraiga la tuerca del aspa y el aspa.
■ Asegúrese de empujar completamente el conjunto de
piezas del ventilador hacia el eje del motor.
■ Coloque el aspa nueva en el eje contra el ventilador.
Asegúrese de instalarla con los extremos curvos hacia
arriba de la cubierta, no hacia abajo.
■ Gire la tuerca del aspa en el eje y apriete con los
dedos.
NOTA: Asegúrese de volver a colocar todas las piezas
en el mismo orden en que las sacó.
■ Mueva la tuerca del aspa con una llave de torque (no
incluida) para asegurarse de que esté bien apretada.
NOTA: Utilice solo el aspa de corte Craftsman de
repuesto pieza N° 33027.
AFILADO DE LA HOJA
Consulte la Figura 22.
Para un mejor desempeño de la cortadora de pasto,
el aspa debe permanecer afi lada. Un aspa sin fi lo no
corta el pasto de manera pareja y sobrecarga el motor.
Bajo circunstancias normales, afi lar el aspa dos veces
durante la temporada de corte suele ser sufi ciente. Sin
embargo, si el suelo de su pasto es arenoso, podrían
requerirse más secuencias de afi lado.
■ Siguiendo las instrucciones de la sección Cómo
reemplazar el aspa de corte, extraiga el aspa.
■ NO INTENTE afi lar el aspa mientras está fi jada a la
cortadora de pasto.
■ Utilizando una piedra de afi lar o lija fi na, afi le los
bordes del aspa en ambos extremos, extrayendo la
misma cantidad de material en ambos.
Page 33

14 ― English
CUIDADO Y MANTENIMIENTO
BALANCEO DE LA HOJA
Consulte la Figura 23.
Al afi lar el aspa se debe tener cuidado para mantenerla
equilibrada. Un aspa no equilibrada causará vibración
excesiva cuando la cortadora de pasto esté en
funcionamiento. Esta vibración eventualmente causará
daño a la cortadora de pasto, especialmente al motor.
Para verifi car el equilibro del aspa:
■ Coloque un destornillador (o clavo anillado)
horizontalmente en un tornillo de banco, tal como se
indica.
NOTA: Si no tiene disponible un tornillo de banco,
puede utilizar un clavo recto.
■ Coloque el clavo o destornillador a través del agujero
del centro del aspa.
■ Si el aspa está equilibrada, se mantendrá en
posición horizontal. Si un extremo del aspa cae hacia
abajo, afi le el extremo pesado hasta que todo esté
equilibrado.
REEMPLAZO DE LAS RUEDAS
Consulte la Figura 24.
Para reemplazar una rueda:
■ Desconecte la cortadora de pasto de la toma de
energía.
■ Voltee la cortadora de pasto.
■ Utilizando un destornillador de cabeza plana, saque
la tapa.
■ Saque la rueda y reemplácela por una rueda nueva
idéntica.
■ Vuelva a colocar la tapa.
¡ADVERTENCIA!
Al extraer el aspa,
inspecciónela cuidadosamente. Si está doblada o
dañada, reemplácela inmediatamente con una nueva.
El no reemplazar un aspa dañada o doblada podría
causar un accidente y posibles lesiones severas.
ALMACENAMIENTO DE LA CORTADORA
Consulte la Figura 25.
■ Desconecte la cortadora de pasto de la toma de
energía
■ Ponga la cortadora de pasto de lado y saque los
restos de pasto que se hayan acumulado en la parte
inferior.
■ Limpie la cortadora de pasto con un paño seco.
■ Compruebe que todas las tuercas, pernos, botones,
tornillos, cierres, etc. estén apretados.
■ Inspeccione las piezas móviles en búsqueda de
daños, roturas y desgaste. Lleve a reparación cualquier
pieza dañada o faltante.
■ Guarde la cortadora de pasto en interiores en un
lugar limpio, seco y alejado del alcance de los niños.
■ No almacene materiales corrosivos tales como
fertilizantes o sal de roca cerca de la cortadora de
pasto.
■ Para bajar la manija antes de guardar la cortadora de
pasto:
- Suelte completamente los cerrojos de leva de
ambos lados de la manilla superior y pliéguela hacia
abajo.
- Empuje hacia adentro desde cada lado de la manija
inferior y levante sus costados pasando por los
bordes de las abrazaderas de montaje de la manilla.
- Pliegue la manilla inferior hacia adelante,
asegurándose de no doblar o rizar el cable de
alimentación.
Page 34

15 ― English
RESOLUCIÓN DE PROBLEMAS
PROBLEMA
POSIBLE CAUSA SOLUCIÓN
La manilla no está
en posición.
Las tuercas no están bien
asentadas.
Ajuste la altura de la manija y asegúrese de que los
pernos del carro están asentados correctamente.
Los cerrojos de leva no están
apretados.
Apriete los cerrojos de leva.
El alargador no está conectado al
enchufe de la cortadora de pasto.
Vuelva a conectar el cable y utilice el contenedor
para mantenerlo cerca del control del motor/aspa.
El alargador no está conectado a
la fuente de alimentación.
Vuelva a conectar el alargador a un receptáculo de
120V AC, 60 HZ AC vivo.
Automático activado en la casa.
Baje y suba el automático de la casa.
Si se activa nuevamente, llame a un electricista
califi cado.
El interruptor de control del motor
está defectuoso.
Haga que un concesionario de servicio califi cado
cambie el interruptor de control del motor utilizando
una pieza de repuesto idéntica.
La cortadora corta
el pasto de manera
dispareja.
El pasto es duro, disparejo o la
altura de corte no está establecida
correctamente.
Mueva las ruedas hacia una posición más alta.
Todas las ruedas deben colocarse en la misma
altura para que la cortadora corte parejo.
La cortadora no
genera mantillo
adecuadamente.
Hay restos de pasto que se pegan
en la parte inferior de la cubierta.
Antes de cortar el pasto, espere hasta que se
seque.
Cuesta empujar la
cortadora de pasto
El pasto es muy alto, la parte
posterior de la cortadora y el aspa
se atascan en pasto alto o la altura
de corte es demasiado baja.
Aumente la altura de corte.
La cortadora de
pasto vibra a una
velocidad mayor
El aspa no está equilibrada.
Balancee el aspa limando equitativamente cada
lado.
El eje del motor está doblado.
Detenga el motor, desconecte la fuente de
alimentación e inspecciónelo en búsqueda de
daños. Haga que un concesionario de servicio
califi cado repare el producto utilizando piezas de
repuesto idénticas.
Page 35

16 ― English
CORTADORA DE PASTO ELÉCTRICA CRAFTSMAN DE 19 PULGADAS,
MODELO NUMERO: 151.39942
PARA ADQUIRIR PIEZAS DE REPUESTO, LLAME AL 1-888-331-4569
El número de modelo se encuentra en la etiqueta adjunta a la carcasa del motor
Page 36

17 ― English
N° DE
ARTÍCULO
N° DE PIEZA DESCRIPCIÓN CANT.
1 GM57BX.00.01.X2.01 Carcasa del motor 1
2 GM5ABX.20.00.X1.01 Conjunto de piezas del motor 1
2.1 WOCSDX.10.PJ Correa en V 1
3 GMA0BX.00.03.X1.01 Conjunto de piezas de la descarga lateral 1
3.1 GMA0BX.00.06 Escape de descarga 1
4 GM80BX.00.60 Bolsa de arena 1
5 TGQTGL.51.00.X1.03 Conjunto de piezas de la rueda posterior de 10" 2
5.1 BOC2YX.14.NS Tornillos 2
5.2 TGQTGL.51.00 Rueda 2
6 TGQTGL.46.00.X1.04 Conjunto de piezas de la rueda frontal de 8" 2
6.1 BOC2YX.13.NS Tornillos 2
6.2 TGQTGL.46.00.61 Rueda 2
7 GM50BX.X0.02 Conjunto de piezas del aspa 1
7.1 BOA4FL.10.20 Broche del aspa 1
8 TOQTGX.13.XJ Pinza del cable 2
9 TGQTXN.05.00.X4.01 Conjunto de piezas del cerrojo de leva inferior 2
10 GM01BX.X0.04 Abrazadera de la manilla inferior izquierda 1
11 TOQTGX.X0.01 Conjunto de piezas del amarre del cable 1
12 GM57BX.00.02.W4 Cubierta 1
13 GM50BX.X0.03 Placa de la cubierta inferior 1
14 GM58BX.00.01.X1.01 Abrazaderas del eje frontal 2
15 GM58BX.00.10 Eje frontal 1
16 TGDQ15.C8.00.X1.01 Conjunto de piezas de la manilla superior con caja eléctrica 1
17 TGQTXN.05.00.X3.02 Conjunto de piezas del cerrojo de leva superior 2
18 GM01BX.X0.01 Abrazadera de la manilla inferior derecha 1
19 GM50BX.50.00 Conector de mantillo 1
20 GM50BX.X0.05 Eje trasero 1
21 GM50BX.00.05 Placa de la cubierta 1
22 GM56BX.X0.02 Solapa para sedimentos posterior inferior 1
23 GM01BX.00.07.X2.02 Manilla selectora de altura 1
24 GM50BX.X0.07 Varilla conectora del ajuste de altura 1
25 GM56BX.20.10.X1.01 Selector de altura 1
26 TOTHYL.01.17.X1.01 Resorte 1
27 GM56BX.00.04.X1.01 Conjunto de piezas de la solapa de escape posterior 1
28 GM5ABX.10.00 Bolsa recolectora 1
29 GM5ABX.00.01 Manilla inferior 2
CORTADORA DE PASTO ELÉCTRICA CRAFTSMAN DE 19 PULGADAS,
MODELO NUMERO: 151.39942
PARA ADQUIRIR PIEZAS DE REPUESTO, LLAME AL 1-888-331-4569
El número de modelo se encuentra en la etiqueta adjunta a la carcasa del motor
Page 37

® Registered Trademark / TM Trademark of KCD IP, LLC in the United States, or Sears Brands, LLC in other countries
® Marca Registrada /
TM
Marca de Fábrica de KCD IP, LLC en Estados Unidos, o Sears Brands, LLC in otros países
Product questions or problems?
1-888-331-4569
Customer Care Hot Line
Get answers to questions, troubleshoot problems,
order parts, or schedule repair service.
Para respuestas a preguntas o problemas, y ordenar
piezas o pedir servicio para la reparación de su equipo.
To help us help you, register your product at www.craftsman.com/registration
Para poderte ayudar mejor, registra tu producto en www.craftsman.com/registration
Receive exclusive member benefits including special pricing and offers,
project sharing, expert advice, and SHOP YOUR WAY REWARDS!
Como miembro exclusivo, recibe diversos beneficios como ofertas, precios especiales, proyectos
nuevos, consejos de expertos y nuestro programa de puntos SHOP YOUR WAY REWARDS!
Join the Craftsman Club today!
 Loading...