

Page 1
XXXXXXXXXXXXXXXXXXXXXXXXXX
OPERATOR′S MANUAL
MANUEL DEL OPERADOR
Model No.
151.37664
Número de modelo
151.37664
Sears Brands Management Corporation, Hoffman Estates, IL 60179 USA
Visit the Craftsman web page: www.craftsman.com
Visite el sitio web de Craftsman: www.craftsman.com
Save this manual for future reference
Guarde este manual pare futuras consulta
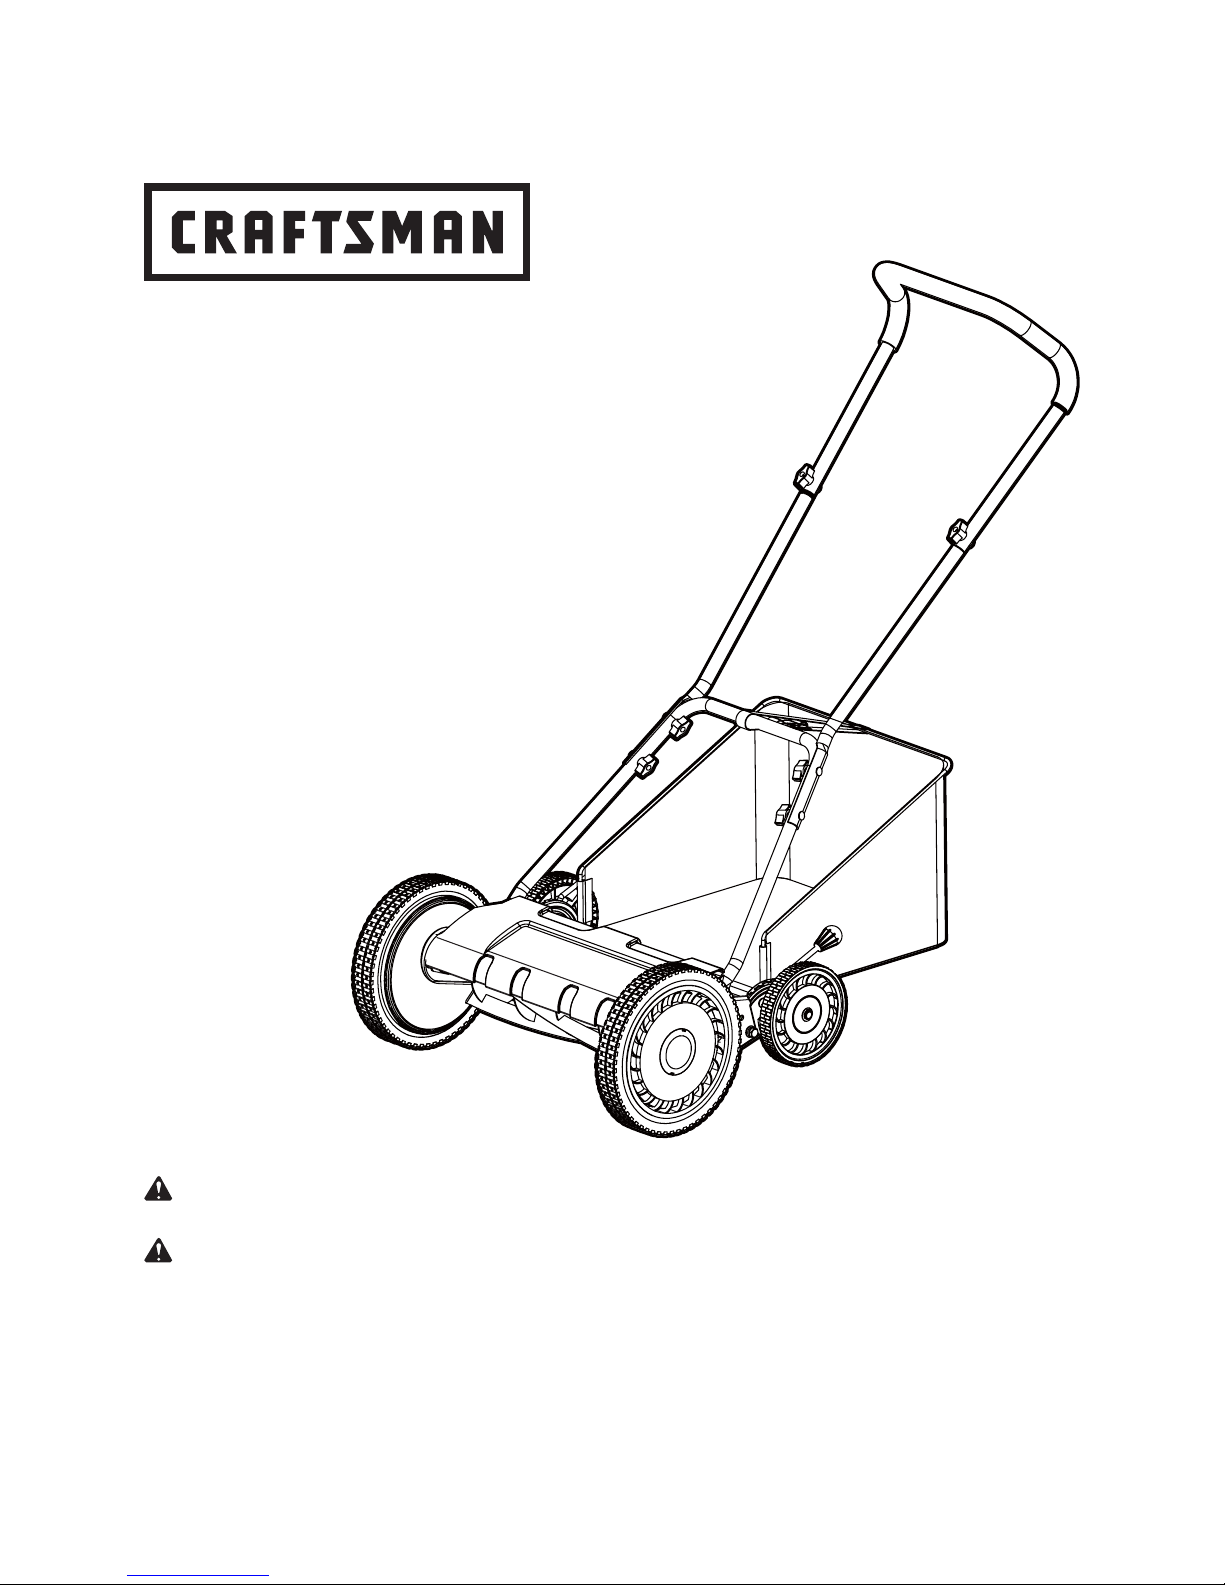
18 in. REEL MOWER
WARNING:
To reduce the risk of injury, the user must read and understand the operator's manual
before using this product.
ADVERTENCIA:
Para reducir el riesgo de lesiones, el usuario debe leer y comprender el manual del operador
antes de usar este producto.
Page 2

2 ― English
TABLE OF CONTENTS / ÍNDICE DE CONTENIDO
ENGLISH
INTRODUCTION / INTRODUCCIÓN
This tool has many features for making its use more pleasant and enjoyable. Safety, performance, and
dependability have been given top priority in the design of this product making it easy to maintain and operate.
* * *
Esta herramienta ofrece numerosas características para hacer más agradable y placentero su uso. En el diseño
de este producto se ha conferido prioridad a la seguridad, el desempeño y la fiabilidad, por lo cual se facilita su
manejo y mantenimiento.
■ Warranty ................................................................... 2
■ Introduction ...............................................................2
■ Safety Information .................................................3-4
■ Symbols .................................................................5-6
■ Features ...................................................................6
■ Assembly ..................................................................7
■ Operation ..................................................................8
■ Care and maintenance ............................................. 9
■ Illustrated parts list ............................................10-12
■ Garantía ..............................Sección de Inglés pág. 2
■ Introducción .........................Sección de Inglés pág. 2
■ Información sobre seguridad .................................3-4
■ Símbolos ...............................................................5-6
■ Características .........................................................6
■ Armado .....................................................................7
■ Funcionamiento ........................................................ 8
■ Cuidado y mantenimiento .........................................9
■ Figura numeras (ilustraciones) .............................. i-iv
SPANISH
CRAFTSMAN LIMITED WARRANTY
FOR TWO YEARS from the date of sale this product is warranted against defects in material or workmanship.
WITH PROOF OF SALE a defective product will be replaced free of charge.
For warranty coverage details to obtain free replacement, visit the web page: www.craftsman.com/warranty
This warranty is void if this product is ever used while providing commercial services or if rented to another
person.
This warranty gives you specific legal rights, and you may also have other rights which vary from state to state.
Sears Brands Management Corporation, Hoffman Estates, IL 60179
* * *
XXXXXXXXXXXXXXXXXXXXXXXXXXXXXXXXXXX
XXXXXXXXXXXXXXXXXXXXXXXXXXXXXXXXXXXXXXXXXXXXXXXXXXXXXXXXXXXXXXXXXXXXXXXXXXX
XXXXXXXXXXXXXXXXXXXXXXXXXXXXXXXXXXXXXXXXXXXXXXXXXXXXXXXXXXXXX
XXXXXXXXXXXXXXXXXXXXXXXXXXXXXXXXXXXXXXXXXXXXXXXXXXXXXXXXXXXXXXXXXXXXXXXXXXX
XXXXXXXXXXXXXXXXXXXXXXXXXXXXXXXXXXXXXXXXXXXXXXXXXXXXXXXXXXXXXX
XXXXXXXXXXXXXXXXXXXXXXXXXXXXXXXXXXXXXXXXXXXXXXXXXXXXXXXXXXXXXXXXXXXXXXXXXXX
XXXXXXXXXXXXXXXXXXXXXXXXXXXXXXX
XXXXXXXXXXXXXXXXXXXXXXXXXXXXXXXXXXXXXXXXXXXXXXXXXXXXXXXXXXXXXXXXXXXXXXXXXXX
XXXXXXXXXXXXXXXXXXXXXXXXXXXXXXX
XXXXXXXXXXXXXXXXXXXXXXXXXXXXXXXXXXXXXXXXXXXXXXXXXXXXXXXXXXXXXXXXXXXXXXX
Page 3

3 ― English
SAFETY INFORMATION
■ Do not operate power tools in explosive environment,
such as in the presence of fl ammable liquids, gases, or
dust. Power tools create sparks which may ignite the
dust or fumes.
■ Avoid body contact with grounded surfaces such
as pipes, radiators, ranges, and refrigerators. There
is an increased risk of electric shock if your body is
grounded.
■ Never allow children to operate the equipment.
This is not a toy. Never allow adults to operate the
equipment without proper instruction.
■ Keep all bystanders, children, and pets at least 50 ft.
away.
■ Always wear safety glasses with side shields.
Everyday glasses have only impact resistant lenses.
They are NOT safety glasses. Following this rule will
reduce the risk of eye injury. Use face mask if operation
is dusty.
■ Wear eye protection with side shields which are
marked to comply with ANSI Z87.1 when operating this
product.
■ Do not expose to rain; store indoors.
■ Use only as described in this manual. Use only
identical manufacturer’s replacement parts and
accessories. Use of any other parts may create a
hazard or cause product damage.
■ Secure long hair so it is above shoulder level to
prevent entanglement in any moving parts.
■ Wear heavy long pants, boots, and gloves. Avoid
loose garments or jewelry that could get caught in
moving parts of the machine.
■ Keep fi rm footing and balance. Do not overreach.
Overreaching can result in loss of balance.
■ Do not operate the equipment while barefoot or
when wearing sandals or similar lightweight footwear.
Wear protective footwear that will protect your feet and
improve your footing on slippery surfaces.
■ Never place hands, fi ngers or feet inside the reel.
Although a motor does not power this mower, when the
wheels turn the reel spins and can cut.
■ Never mow when grass is wet as it can be slippery.
■ Do not use the reel mower while barefoot or while
wearing sandals.
■ Walk behind, never run, while using reel mower.
■ Always make sure of your footing when using this
reel mower.
IMPORTANT SAFETY INSTRUCTIONS
IMPORTANT!
READ AND UNDERSTAND
ALL INSTRUCTIONS. Failure to follow all instructions
listed below may result in electric shock, fi re, and/or
serious personal injury.
SPECIFIC SAFETY RULES FOR REEL MOWER
WARNING!
This symbol points out
important safety instructions, which if not followed,
could endanger the personal safety and/or property of
yourself and others. Read and follow all instructions in
this manual before attempting to operate this machine.
Failure to comply with these instructions may result in
personal injury.
DANGER!
This machine was built to be
operated according to the rules for safe operation in
this manual. As with any type of power equipment,
carelessness or error on the part of the operator can
result in serious injury. This machine is capable of
amputating hands and feet and throwing objects.
Failure to observe the following safety instructions
could result in serious injury or death.
WARNING!
When using reel mowers, basic
safety precautions should always be followed to reduce
the risk of fi re, electric shock, and personal injury.
■ Never intentionally strike or hit trees, fences, etc. This
can cause injuries or severely damage the reel mower
mechanisms.
■ Make sure your reel mower is in a safe operating
condition. Do not attempt to operate this reel mower if
damaged. Take the mower to a qualifi ed service dealer
for inspection and possible repair.
■ Do not force tool. Use the correct tool for your
application. The correct tool will do the job better and
safer at the rate for which it is designed.
GENERAL OPERATION
Use of this reel mower should be restricted to
individuals who have read, understood and will follow
the warnings and instructions that are printed in this
manual and on the reel mower.
■ Carefully read all instructions on the reel mower
and in the manual before attempting to assemble and
operate the reel mower. Keep this manual in a safe
place for future reference, and consult it regularly.
■ In order to avoid contact with the blade or injury
caused by a thrown object, stay in the operating zone
behind the handles, and keep children and bystanders
at least 50 ft.(15 m) away from the mower while it is
in operation. Stop the motor immediately if someone
enters the mowing area.
■ Thoroughly inspect the area where the reel mower is
to be used. Remove all stones, sticks, wire, toys, and
other objects that could be tripped over or thrown by
the blade. Thrown objects can cause serious personal
injury.
Page 4

4 ― English
■ Plan your mowing pattern in such a way as to
avoid discharging material toward roads, sidewalks,
bystanders, etc.
■ Always wear a face mask or a dust mask when
operating the mower in a dusty environment.
■ Dress properly. Do not wear loose clothing or jewelry
that can get caught in moving parts. The wearing of
protective gloves and safety footwear is recommended.
■ Do not use the reel mower for any job except that for
which it is intended. Do not force the reel mower.
■ Avoid dangerous environments. Do not operate the
mower in the rain or in wet or damp grass.
■ Mow only in daylight or in good artifi cial light. Do not
rush a mowing job.
■ Stop machine if anyone enters the area.
■ Do not pull machine backward unless absolutely
necessary. Always look down and behind before and
while moving backward.
■ Never leave a running machine unattended.
■ Operate machine only in daylight or good artifi cial
light.
SAFETY INFORMATION
CHILD SAFETY
Tragic accidents can occur if the operator is not aware
of the presence of children.
■ Keep children out of the mowing area and under the
watchful care of a responsible adult.
■ Do not allow children under the age of 14 to operate
this reel mower. Children who are 14 years of age
and older must read and understand the operating
instructions and safety rules in this manual and must
be trained and supervised by a parent.
■ Stay alert, and stop the reel mower if a child or any
other person enters the mowing area.
■ Look behind and down for small children before and
while moving backwards.
■ Use extreme care when approaching blind corners,
doorways, shrubs, trees, or other objects that may
obscure your view of a child who may run into the path
of the reel mower.
SAVE THESE INSTRUCTIONS
WARNING! (PROPOSITION 65)
Some dust created by power sanding, sawing, grinding,
drilling and other construction activities contains
chemicals known to the state of California to cause
cancer, birth defects or other reproductive harm. Some
examples of these chemicals are:
• Lead from lead-based paints,
• Crystalline silica from bricks and cement and other
masonry products, and
• Arsenic and chromium from chemically-treated
lumber.
Your risk from these exposures varies, depending on
how often you do this type of work. To reduce your
exposure to these chemical: work in a well ventilated
area, and work with approved safety equipment, such
as those dust masks that are specially designed to fi lter
out microscopic particles.
Page 5
5 ― English
SYMBOLS
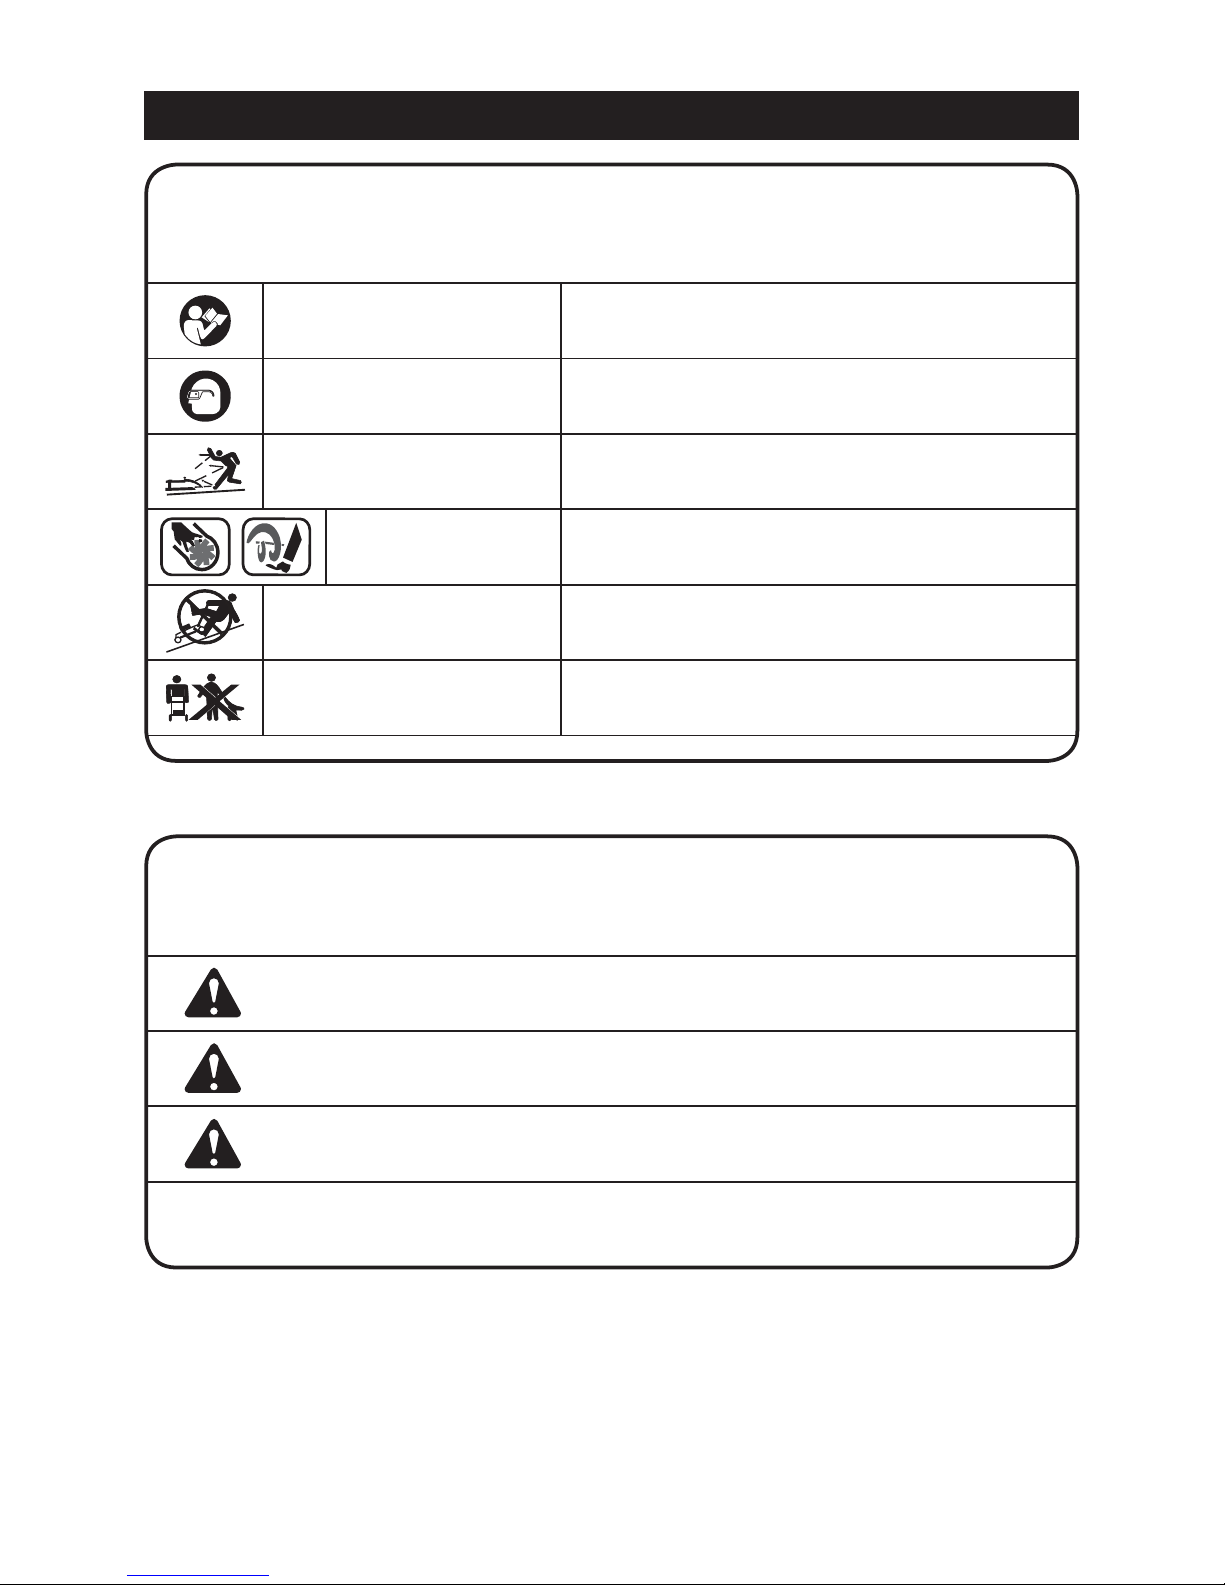
SYMBOL SIGNAL MEANING
DANGER
Indicates an imminently hazardous situation, which, if not avoided,
will result in death or serious injury.
WARNING
Indicates a potentially hazardous situation, which, if not avoided,
could result in death or serious injury.
CAUTION
Indicates a potentially hazardous situation, which, if not avoided,
may result in minor or moderate injury.
CAUTION
(Without Safety Alert Symbol) Indicates a situation that may result
in property damage.
The following signal words and meanings are intended to explain the levels of risk associated with this
product.
SYMBOL NAME DESIGNATION/EXPLANATION
Read The Operator’s Manual
To reduce the risk of injury user must read and understand
operator’s manual before using this product.
Eye and Head Protection
Always wear eye protection with side shields that are
marked to comply with ANSI Z87.1
Sharp Blade
Thrown objects can ricochet and result in personal injury or
property damage.
Danger Danger – Keep hands and feet away from blade.
Operating on a slope Do not mow slope that has an angle of greater than 15°.
Keep Bystanders Away Keep all bystanders at least 50 ft. away.
Some of the following symbols may be used on this product. Please study them and learn their meaning.
Proper interpretation of these symbols will allow you to operate the product better and safer.
MAX 15
o
Page 6

6 ― English
FEATURES
PRODUCT SPECIFICATIONS
Cutting path ............................................................................................................................................18" (45 cm)
Height adjustments ............................................................................................................. 3/4 - 2 1/2" (1.9-6.3 cm)
Number of blades ............................................................................................................................5 Helical blades
Weight .......................................................................................................................................... 29.3 lbs (13.3 kg)
KNOW YOUR LAWN MOWER
See Figure 1.
The safe use of this product requires an understanding
of the information on the product and in this operator’s
manual as well as a knowledge of the project you
are attempting. Before use of this product, familiarize
yourself with all operating features and safety rules.
REAR BAG
The rear bag prevents grass clippings from being
scattered across your lawn as you mow.
HEIGHT ADJUSTMENT LEVER
The height adjustment lever provides cutting height
adjustments. There is an adjusting lever found on the
both sides of the mower.
Page 7

7 ― English
ASSEMBLY
UNPACKING
Before attempting to assemble, empty carton and
compare parts with parts list below.
■ Carefully remove the product and any accessories
from the box.
■ Inspect the parts to make sure no breakage or
damage occurred during shipping.
■ Do not discard the packing material until all parts are
examined.
■ If any parts are damaged or missing, do not operate
the mower. Return it for replacement to the retailer from
which it was purchased.
■ Be sure to tighten the lock nuts when assembled to
prevent the handle from rocking.
PACKING LIST
See Figure 2.
■ 1-Top handle
■ 2-Center handle pieces
■ 1-Lower handle
■ 6-Knobs
■ 6-Carriage bolts
■ 1-Reel mower body
■ 1-Rear bag
ASSEMBLING THE HANDLE
See Figure 3-4.
NOTE:
Do not completely tighten bolts until assembly
is complete.
■ Insert the two center handle pieces (2) into the left
and right side of the top handle (1) and secure with two
carriage bolts (5) and knobs (6) provided. (Fig. 3)
■ Attach the top handle subassembly previously
assembled, to the lower handle subassembly (3) using
four carriage bolts (5) and knobs (6) provided. (Fig. 4)
■ Tighten all the knobs on the joints of the handle
assembly.
ATTACHING THE HANDLE TO THE MOWER BASE
See Figure 5.
■ Align holes (1) at the lower end of each handle arm
with posts (2) extending from the mower base side
plates.
■ Slide lower ends of handle arms onto posts.
ATTACH THE REAR BAG
See Figure 6-8.
■ Take out all components in the packing (Fig. 6).
■ Place the hooks on the rear bag onto the roller shaft.
Secured the bag to the lower handle using the support
belt supplied. (Fig. 7).
■ Adjust strap for proper height so the bag does not rub
the ground while mowing or transporting. (Fig. 8).
WARNING!
Do not allow familiarity with
this product to make you careless. Remember that
a careless fraction of a second is suffi cient to infl ict
serious injury.
WARNING!
Do not use any attachments or
accessories not recommended by the manufacturer of
this product. The use of attachments or accessories not
recommended can result in serious personal injury.
Page 8

8 ― English
OPERATION
CUTTING HEIGHT ADJUSTMENT
See Figure 9.
■ The cutting height of the mower adjusts from 3/4 2 1/2″ (1.9 - 6.3 cm) with 9 positions for adjustment
height by moving the height adjustment levers to the
required position.
■ To achieve the lowest cutting position, one at a time,
move the adjustment levers on both sides, located next
to the rear wheels, up to the highest position.
■ To achieve the highest cutting position, move the
adjustment levers on both sides to their lowest position.
■ Other cutting heights are achieved by moving the
adjustment levers to any stop between the highest and
lowest positions.
NOTE:
The two adjustment levers MUST be set to the
same position (height).
For best performance, align the edge of the cutting
blades to overlap the previously cut path. This will
ensure no grass is missed during the process.
NOTE:
Do not use wheels as a reference point for
grass cut line.
MOWER BLADE ADJUSTMENTS
See Figure 10.
CHECKING THE ADJUSTMENT
See Figure 11.
■ Turn mower upside down.
■ Insert a piece of paper between cutting bar and one
of the reel blades, and slowly turn wheel by hand.
■ Each blade should cut across the paper in a
continuous line. If there are missed spots in the cut, it
is necessary to make further adjustments. See Mower
Blade Adjustments.
NOTE:
Blades are factory adjusted.
■ Misalignment can occur, often caused by blades
being too loose or too tight. This can cause an uneven
cut or diffi culty pushing the mower.
■ Each end of the cutting bar is adjusted separately.
■ To move the cutting bar closer to the blades turn
the adjustment screw clockwise. To move the cutting
bar away from the blades turn the adjustment screw
counterclockwise.
■ When the space equals the thickness of paper
(0.12mm), insert a piece of paper between one of the
blades and the cutting bar, and slowly turn the wheel
by hand.
■ The blade should cut the paper evenly at every point.
If not, it is necessary to readjust the cutting action.
WARNING!
Blades are extremely sharp.
To avoid injury, do not touch blades when making
adjustments.
CAUTION!
Adjusting the screws for blade
adjustments is a very sensitive procedure. A sixteenth
of a turn is considered a major adjustment. Βefore
tightening one adjustment screw, make sure to loosen
the opposite screw an equal amount.
CAUTION!
Do not overtighten adjustment
screws, as this could damage cutting bar. Both screws
must be tight on fi nal adjustment.
Page 9

9 ― English
CARE AND MAINTENANCE
■ Minimum care is required to ensure smooth operation
of your mower.
■ To avoid damage to mower or cutting blades, keep
area to be mowed free from debris.
■ For best results, regularly apply lubricant to mower’s
cutting surfaces, cutting reel axle shaft and wheels.
SHARPENING THE CUTTING BLADES
■ Spread a thin layer of lapping compound, available
at most hardware stores, onto the front edge of the reel
blades.
■ Adjust the cutting bar so that the blade has light but
fi rm contact across the full width of the cutting bar.
■ Turn the reel blades until the front edge of the cutting
bar blade is polished.
NOTE:
Clean any grinding compound or debris from
the cutting bar blade, reel blade, pinions, and pawls.
NOTE:
Use industrial or valve lapping compound
between 100 and 240 grit. Lubricate the axle and pinion
with a light fi lm of wheel bearing grease.
CLEANING AND STORAGE
■ Clean the exterior of the machine thoroughly using a
soft brush and cloth before storing. Do not use water,
solvents or polishes.
■ Turn the mower on its side to clean the blade area.
■ Store the mower in a dry place. Do not place other
objects on top of the mower during storage.
WARNING!
Do not place hands in the mower
near blades. If grass cuttings are compacted in the
blade area, remove using a wood or plastic cleaning
tool appropriate for the cleaning of the blades.
CAUTION!
Do not overtighten the adjusting
screws, as this could damage the cutting bar. Tighten
both screws during fi nal adjustment.
Page 10

10 ― English
CRAFTSMAN 18in. REEL MOWER – MODEL NUMBER 151.37664
TO PURCHASE REPLACEMENT PARTS, CALL 1-888-331-4569
The model number will be found on a label attached near left wheel.
Page 11

11 ― English
CRAFTSMAN 18in. REEL MOWER – MODEL NUMBER 151.37664
TO PURCHASE REPLACEMENT PARTS, CALL 1-888-331-4569
The model number will be found on a label attached near left wheel.
ITEM NO. PART NO. DESCRIPTION QTY
1
100106451-001
Soft grip 1
2 Top handle 1
3 100106452-01 Middle handle 2
4 100106553-01 Bottom handle 1
5 100101010-001
Bolt 6
Knob 6
6 100103532-01 Rear shaft 1
7 22030812 Lock nut M8 2
8 2301170812 Washer 6
9 100104832-01 Cutting bar pivot rod 1
10 21030810162 Bolt 2
11 100105950-01 Rear bracket 2
12 100106530-01 Adjustment handle (L) 1
13
100105940-01 Rear wheel 2
GB/T894.1-10 C-clip 2
14 GB955-12 Wave spring 2
15 23012013082 Washer 6
16 100101557-01 Bolt 2
17 100103550-01 Cutting bar assy. 1
18 22050822 Blade adjustment nut 2
19 271704392 Blade adjustment spring 2
20 GB/T7244-8 Spring washer 4
21 21010820602 Blade adjustment bolt 2
22 100103054-01 Supporting plate (L) 1
23 100104324-01 Wheel cover 2
Page 12

12 ― English
CRAFTSMAN 18in. REEL MOWER – MODEL NUMBER 151.37664
TO PURCHASE REPLACEMENT PARTS, CALL 1-888-331-4569
The model number will be found on a label attached near left wheel.
ITEM NO. PART NO. DESCRIPTION QTY
24 100106455-004
C-clip 2
Washer 2
Wheel assy. 2
25 100104820-01 Supporting assy.(L) 1
26 GB/T7244-10 Spring washer 2
27 22011012 Nut M10 2
28 100101205-01 Gear (L) 1
29 100101208-01 Pin 2
30 23013415012 Washer 2
31 6002Z Ball bearing 2
32 GB8941-15 C-clip 2
33 100105110-01 Cylinder-blade assy. 1
34 100101206-01 Gear (R) 1
35 100106520-01 Cover assy. 1
36 100104830-01 Supporting assy. (R) 1
37 100104321-01 Wheel shaft 2
38 21020810162 Bolt 2
39 22010812 Nut M8 2
40 100103055-01 Supporting plate (R) 1
41 100104857-01 Adjustment bracket 2
42 100106540-01 Adjustment handle (R) 1
43 100105970-01 Grass bag 1
Page 13

A
B
C
F
H
G
D
E
I
See this section for all of the fi gures referenced in the
operator’s manual.
Consulte esta sección para ver todas las fi guras a las que se hace
referencia en el manual del operador.
A - Upper handle (Agarradera superior)
B - Middle handle (Agarradera central)
C - Lower handle (Agarradera inferior)
D - Rear bag (Bolsa trasera)
E - Adjustment lever (Ajuste de la altura)
F - Housing (Carcasa)
G - Rear wheel (Rueda posterior)
H - Front wheel (Rueda frontal)
I - Bag support belt (Bolsa con cinta de sujeción)
Fig. 1
i
Page 14

D
A
F
F
I
F
E
E
E
E
G
B
C
B
H
5
3
6
5
Fig. 2
4
6
6
5
2
2
5
1
A - Top handle (Agarradera superior)
B - Center handle pieces (Piezas centrales de la
agarradera)
C - Lower handle (Agarradera inferior)
D - Foam grip (Asidero de espuma)
E - Carriage bolts (Pernos de soporte)
F - Knobs (Perilla)
G - Reel mower body (Cuerpo de la podadora de carrete)
H - Rear bag (Bolsa trasera)
I – Bag support belt (Bolsa con cinta de sujeción)
Fig. 4
Fig. 3
Fig. 2
ii
Page 15

12
Fig. 6
Fig. 8
Fig. 7
Fig. 5
iii
Page 16

A
A - Height adjustment lever (Ajuste de la altura) A - Adjustment screw (Tornillo de ajuste)
Fig. 9
Fig. 11
Fig. 10
A
A - Paper (Papel)
B - Blade (xxxxxxxxxx)
C - Cutting bar (Barra de corte)
B
A
C
iv
Underside of mower
(xxxxxxxxxxxxxxxxxxxxxxxxxxxxxxxx)
Page 17

® Registered Trademark / TM Trademark of KCD IP, LLC in the United States, or Sears Brands, LLC in other countries
® Marca Registrada /
TM
Marca de Fábrica de KCD IP, LLC en Estados Unidos, o Sears Brands, LLC in otros países
Product questions or problems?
1-888-331-4569
Customer Care Hot Line
Get answers to questions, troubleshoot problems,
order parts, or schedule repair service.
Para respuestas a preguntas o problemas, y ordenar
piezas o pedir servicio para la reparación de su equipo.
To help us help you, register your product at www.craftsman.com/registration
Para poderte ayudar mejor, registra tu producto en www.craftsman.com/registration
Receive exclusive member benefits including special pricing and offers,
project sharing, expert advice, and SHOP YOUR WAY REWARDS!
Como miembro exclusivo, recibe diversos beneficios como ofertas, precios especiales, proyectos
nuevos, consejos de expertos y nuestro programa de puntos SHOP YOUR WAY REWARDS!
Join the Craftsman Club today!
 Loading...