

Page 1

OPERATOR'S MANUAL
MANUEL DEL OPERADOR
10A - 19" 2-1N-1
ELECTRIC MOWER
XXXXXXXXXXXXXXXXXXXXXX
XXXXXXXXXXXX
Model No.
151.3721 4
NSrnero de modelo
151.3721 4
_, WARNING: To reduce the risk of injury, the user must read and understand the operator's manual
_ ADVERTENClA: Para reducir el riesgo de lesiones, el usuario debe leer y comprender el manual del operador
Sears Brands Management Corporation, Hoffman Estates, IL 60179 USA
Visit the Craftsman web page: www.craftsman.com
Visite el sitio web de Craftsman: www.craffsman.com
before using this product.
antes de usar este producto.
Save this manual for future reference
Guarde eete manual pare futurae eonsulta
c os
Inter_k
3084514
Page 2
ENGLISH
[] Warranty ................................................................... 2
[] Introduction ............................................................... 2
[] General Safety Rules ............................................ 3-4
[] Specific Safety Rules ............................................... 4
[] Symbols ................................................................. 5-6
[] Features ................................................................... 7
[] Electrical ................................................................... 8
[] Assembly .................................................................. 9
[] Operation ................................................................ 10
[] Maintenance ...................................................... 11-12
[] Troubleshooting ...................................................... 13
[] Illustrated parts list ............................................ 14-15
[] Figura numeras (ilustraciones) .............................. i-vi
SPANISH
[] XXXXX ...................................................................... XX
[] XXXXX ...................................................................... XX
[] XXXXX ...................................................................... XX
[] XXXXX ...................................................................... XX
[] XXXXX ...................................................................... XX
[] XXXXX ...................................................................... XX
[] XXXXX ...................................................................... XX
[] XXXXX ...................................................................... XX
[] XXXXX ...................................................................... XX
[] XXXXX ...................................................................... XX
[] XXXXX ...................................................................... XX
[] XXXXX ...................................................................... XX
[] xxxxx ..................................................................... i-vi
CRAFTSMAN LIM(TED WARRANTY
FOR 2 YEARS from the date of sale, this product is warranted against defects in material or workmanship.
WITH PROOF OF SALE, a defective product will be replaced free of charge.
For warranty coverage details to obtain free replacement, visit the web page: www.craftsman.com/warranty
This warranty does not cover the mower blade, which is an expendable part that can wear out from normal use
within the warranty period.
This warranty is void if this product is ever used while providing commercial services or if rented to another
person.
This warranty gives you specific legal rights, and you may also have other rights which vary from state to state.
Sears Brands Management Corporation, Hoffman Estates, IL 60179
XXXXXXXXXXXXXXXXXXXXXXXXXXXXXXXXXXXXXXXXXXXX
xx_x_x__x_x_xx_x_x__x_x_xx_x_x__x_x_xx_x_x__x_x_xx_x_x__x_x_xx_x_x__x_x_xx_x_x__x_x_xx_x_x__x_x_xx_x
XXXXXXXXXXX
XXXXXXXXXXXXXXXXXXXXXXXXXXXXXXXXXXXXXXXXXXXXXXXXXXX
xxXxXxXxxXxXxxXxXxXxxXxXxxXxXxXxxXxXxxXxXxXxxXxXxxXxXxXxxXxXxxXxXxXxxXxXxxXxXxXxxXxXxxXxXxXxxXxXxxXx
XXXXXXXXX
xxXxXxXxxXxXxxXxXxXxxXxXxxXxXxXxxXxXxxXxXxXxxXxXxxXxXxXxxXxXxxXxXxXxxXxXxxXxXxXxxXxXxxXxXxXxxXxXxxXx
XXXXXXXXXXXXXXXX
xxXxXxXxxXxXxxXxXxXxxXxXxxXxXxXxxXxXxxXxXxXxxXxXxxXxXxXxxXxXxxXxXxXxxXxXxxXxXxXxxXxXxxXxXxXxxXxXxxXx
XXXXXXXX
XXXXXXXXXXXXXXXXXXXXXXXXXXXXXXXXXXXXXXXXXXXXXXXXXXXXXXXXXXXXXXX
This tool has many features for making its use more pleasant and enjoyable. Safety, performance, and
dependability have been given top priority in the design of this product making it easy to maintain and operate.
Esta herramienta ofrece numerosas caracteristicas para hacer m&s agradable y placentero su uso. En el diseSo
de este producto se ha conferido prioridad a la seguridad, el desempeSo y la fiabilidad, por Io cual se facilita su
manejo y mantenimiento.
2 -- English
Page 3
_ll_ WARNINGt
READ AND UNDERSTAND ALL INSTRUCTIONS.
Failure to follow all instructions listed below and on
the machine may result in electric shock, fire, and/or
serious personal injury.
READ ALL INSTRUCTIONS
[] This cutting machine is capable of amputating hands
and feet and throwing objects. Failure to observe all
safety instructions could result in serious injury or
death.
[] Do not use the lawn mower in damp or wet conditions
or operate in the rain.
[] Never allow adults to operate the product without
proper instruction.
[] Keep the area clear of all bystanders, children, and
pets while mowing. Stop machine if anyone enters the
area.
[] Tragic accidents can occur if the operator is not
alert to the presence of children. Children are often
attracted to the machine and the mowing activity.
Never assume that children will remain where you tast
saw them.. Keep children out of the mowing area and
under the watchful care of a responsible adult other
than the operator.. Be alert and turn mower off if a
child enters the area.. Never allow children to operate
the machine.. Use extra carewhen approaching blind
corners, shrubs, trees, or other objects that may block
your view of a child.
[] Do not wear loose clothing or jewelry. They can be
caught in moving parts. Use of rubber gloves and
footwear is recommended when working outdoors.
[] Keep firm footing and balance. Do not overreach.
Over -reaching can result in loss of balance.
[] Do not operate the equipment while barefoot or
when wearing sandals or similar lightweight footwear.
Wear protective footwear that will protect your feet and
improve your footing on slippery surfaces.
[] Do not leave the mower unattended while running.
[] Keep hands and feet away from cutting area.
[] Operate the lawn mower only in daylight or good
artificial light.
[] Never intentionally strike or hit trees, fences, etc. This
can cause injuries or severely damage the reel mower
mechanisms.
[] Make sure the lawn mower is in safe operating
condition. Do not attempt to operate this mower if
is is damaged. Take it to a qualified service dealer
for inspection and possible repair using identical
replacement parts.
[] Do not force tool. Use the correct tool for your
application. The correct tool will do the job better and
safer at the rate for which it is designed.
[] Always wear safety glasses with side shields.
Everyday glasses have only impact resistant lenses.
They are NOT safety glasses. Following this rule will
reduce the risk of eye injury. Use face mask if operation
is dusty.
[] Wear safety glasses or goggles that aremarked to
comply with ANSI Z87.1 standard when operating this
product.
[] Use the right appliance. Do not use the lawn mower
for any job except that for which it is intended.
[] Do not force the lawn mower. It will do the job better
and safer at the rate for which it was designed.
[] Stay alert, watch what you are doing, and use
common sense when operating the lawn mower.
Do not operate the mower while tired or under the
influence of drugs, alcohol, or medication. A moment of
inattention while operating the lawn mower may result
in serious personal injury.
[] Keep machine in good working condition. Keep
blades sharp and guards in place and in working
order.
[] Check all nuts, bolts, and screws at frequent intervals
for proper tightness to be sure the equipment is in safe
working condition.
[] Stop the motor and wait until the blade comes to
a complete stop before cleaning the lawn mower,
removing the grass catcher, or unclogging the
discharge guard.
[] When not in use, mower should be stored indoors in
a dry, locked up place--out of the reach of children.
[] To reduce the risk of electric shock, this product has
a polarized ptug (one blade is wider than the ther)
and will require the use of a polarized extension cord.
The plug will fit into a polarized extansion cord only one
way, if the plug does not fit fully into the extension cord,
reverse the plug. If the plug still does not fit, obtain a
correct polarized extension cord. A polarized extension
cord will require the use of a polarized wall outlet. This
plug will fit into the polarized wall outlet only one way.
If the plug does not fit fully into the wall outlet, reverse
the plug. If the plug still does not fit, contact a qualified
electrician to install the proper wall outlet. Do not
change the equipment plug, extension cord receptacle,
or extension cord plug in any way.
[] Do not abuse the cord. Never use the cord to pull the
lawn mower or to disconnect the plug from an outlet.
Keep cord away from heat, oil, sharp edges, or moving
parts. Replace damaged cords immediately. Damaged
cords increase the risk of electric shock.
[] Make sure your extension cord is in good condition.
When using an extension cord, be sure to use one
heavy enough to carry the current your product will
draw. A wire gauge size (A.W.G.) of at least 14 is
recommended for an extension cord 50 feet or less
in length. If in doubt, use the next heavier gauge.
The smaller the gauge number, the heavier the cord.
An undersized cord will cause a drop in line voltage
resulting in loss of power and overheating.
[] WARNING: Use outdoor extension cords marked
SW-A, SOW-A, STW-A, STOW-A, SJW-A, SJTA,
SJTW-A,or SJTOWA. These cords are rated for
outdoor use and reduce the risk of electric shock.
3 -- English
Page 4
[] Ground Fault Circuit Interrupter (GFCI) protection
should be provided on the circuit(s) or outlet(s) to be
used for the lawn mower. Receptacles are available
having built- in GFCl protection and may be used for
this measure of safety.
[] Inspect extension cords periodically and replace if
damaged. Keep handles dry, clean, and free from oil
or grease.
[] Do not operate the mower without the entire grass
catcher, discharge guard, rear guard, or other safety
protective devices in place and working.
[] Follow manufacturer's instructions for proper
operation and installation of accessories. Only use
accessories specified in this Operator's Manual.
[] Clear the work area before each use. Remove all
objects such as rocks, sticks, wire, bones, toys, or
other objects which can be thrown by the blade. Stay
behind the handle when the motor is running.
[] Avoid holes, ruts, bumps, rocks, or other hidden
objects. Uneven terrain could cause a slip and fall
accident.
[] Do not mow near drop-offs, ditches, or embankments.
[] Vibration is motor and check immediately for the
cause.
[] Plan your mowing pattern to avoid discharge of
material toward roads, sidewalks, bystanders, and the
like. Also, avoid discharging material against a wall or
obstruction, which may cause the material to ricochet
back toward the operator.
[] Do not mow on wet grass or excessively steep
slopes. Poor footing could cause a slip and fall.
accident. Walk, never run.
[] Use extra care when approaching blind corners,
shrubs, trees, or other objects that may block your
view.
[] Do not pull the mower backward unless absolutely
necessary. If you must back the mower away from a
wall or obstruction, first look down and behind to avoid
tripping.
[] Never direct discharged material toward anyone.
Avoid discharging material against a wall or obstruction.
Material may ricochet back toward the operator. Stop
the blade when crossing gravel surfaces.
[] Objects struck by the lawn mower blade can cause
severe injuries to persons. The lawn should always
be carefully examined and cleared of all objects prior to
each mowing.
[] If the tawn mower strikes a foreign object, follow
these steps:
. Stop the lawn mower and release the switch control.
. Disconnect the power cord.
. Thoroughly inspect the mower for any damage.
. Repair any damage before restarting and continuing
to operate the mower.
[] Stop the motor, disconnect the power cord, and
wait until the blade comes to a complete stop before
removing the grass catcher or unclogging the chute.
The cutting blade continues to rotate for a few seconds
after the motor is shut off. Never place any part of the
body in the blade area until you are sure the blade has
stopped rotating.
[] Disconnect the plug from power source before
making any adjustments, changing accessories,
or storing the lawn mower. Such preventive safety
measures reduce the risk of starting the product
accidentally.
[] If the mower should start to vibrate abnormally,
stop the motor and check immediately for the cause.
Vibration is generally a warning of trouble.
[] Service on the product must be performed by
qualified repair personnel only. Service or maintenance
performed by unqualified personnel could result in
injury to the user or damage to the product.
[] Use only identical replacement parts when servicing
the product. Use of other parts may create a risk of
serious injury to the user, or damage to the product.
[] If the power supply cord is damaged, stop using
the unit. Take unit to a qualified service dealer
for inspection and possible repair using identical
replacement parts.
[] Save these instructions. Refer to them frequently
and use them to instruct others who may use this
product. If you loan someone this tool, loan them these
instructions also.
4 -- English
Page 5
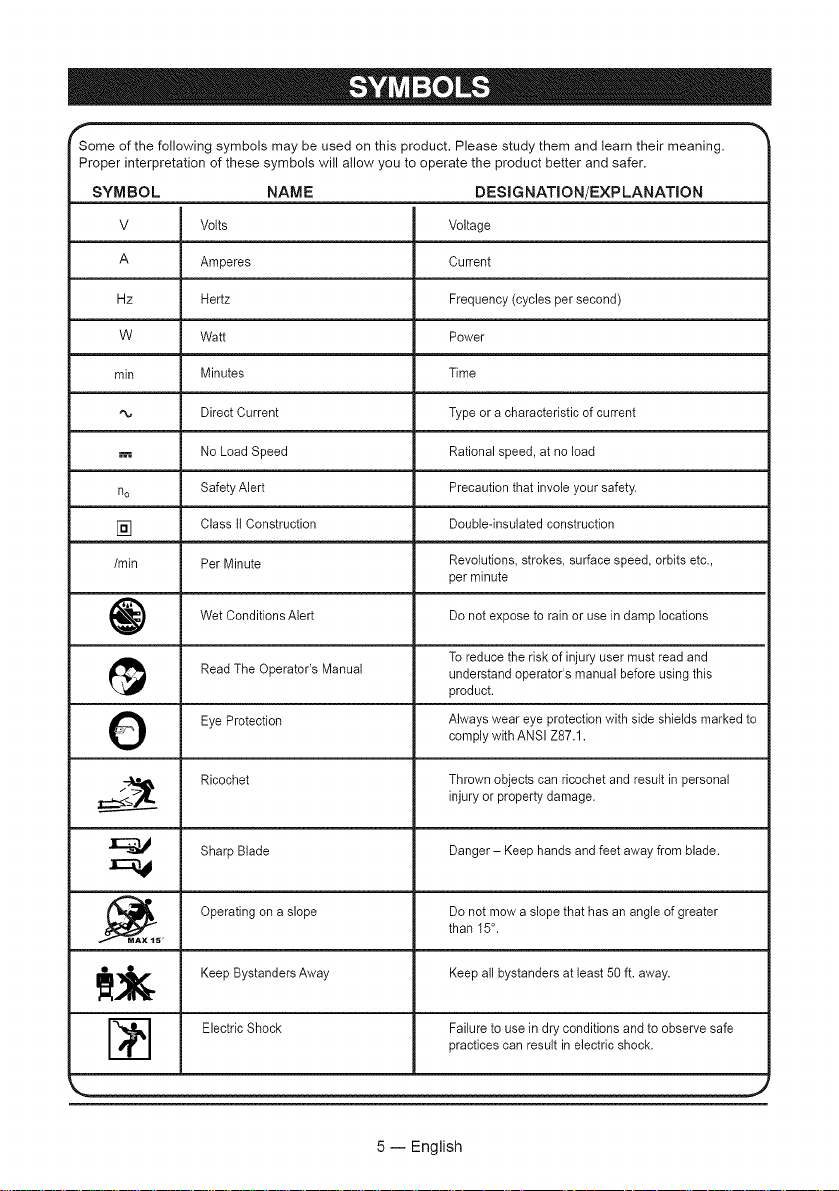
Some of the following symbols may be used on this product. Please study them and learn their meaning.
Proper interpretation of these symbols will allow you to operate the product better and safer.
SYMBOL NAME DESIGNATION/EXPLANATION
V Volts Voltage
A Amperes Current
Hz Hertz Frequency (cycles per second)
W Watt Power
min Minutes Time
"_ Direct Current Type or a characteristic of current
No Load Speed Rational speed, at no load
no Safety Alert Precaution that invole your safety.
[] Class li Construction Double-insulated construction
/min Per Minute Revolutions, strokes, surface speed, orbits etc.,
per minute
Wet Conditions Alert Do not to rain in locations
Read The Operator's Manual understand operator's manual before using this
expose
To reduce the risk of injury user must read and
product.
or use
damp
O Eye Protection Always wear eye protection with side shields marked tocomply with ANSI Z87.1.
•-..I_ Ricochet Thrown objects can ricochet and result in personal
injury or property damage.
Sharp Blade Danger - Keep hands and feet away from blade.
_MAX_5 Operating on a slope Do not mowa slope that has an angle of greater
than 15°.
_j_._ Keep Bystanders Away Keep all bystanders at least 50 ft. away.
--_ Electric Shock Failure to use in dry conditions and to observe safepractices can result in electric shock.
5 -- English
Page 6
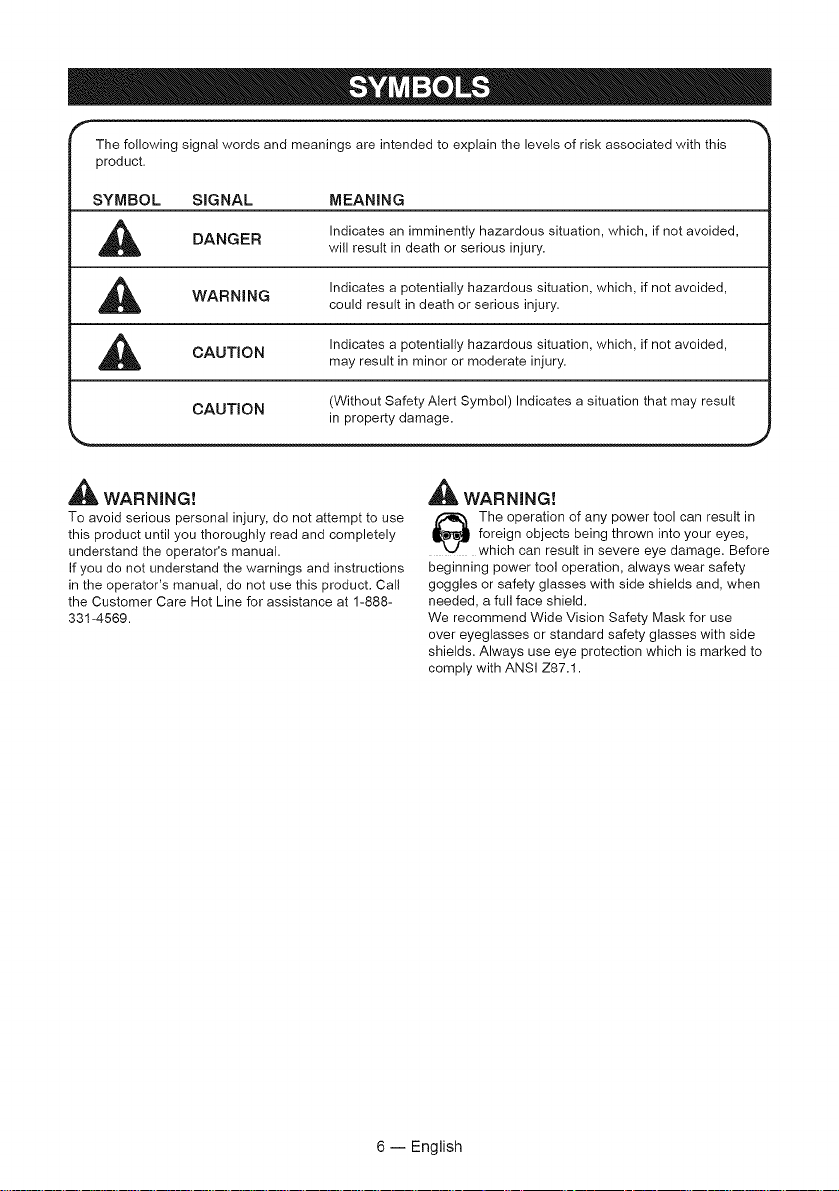
The following signal words and meanings are intended to explain the levels of risk associated with this
product.
SYMBOL SIGNAL MEANING
,_ Indicates an imminently hazardous situation, which, if not avoided,
,_ Indicates a potentially hazardous situation, which, if not avoided
_lL WARNING!
To avoid serious personal injury, do not attempt to use
this product until you thoroughly read and completely
understand the operator's manual.
If you do not understand the warnings and instructions
in the operator's manual, do not use this product. Call
the Customer Care Hot Line for assistance at 1-888-
331-4569.
DANGER will result in death or serious injury.
WARNING could result in death or serious injury.
CAUTION may result in minor or moderate injury.
CAUTION (Without Safety Alert Symbol) Indicates a situation that may result
Indicates a potentially hazardous situation, which, if not avoided
in property damage.
,_ WARNINGt
foreign objects being thrown into your eyes,
O he operation of any power tool can result in
which can result in severe eye damage. Before
beginning power tool operation, always wear safety
goggles or safety glasses with side shields and, when
needed, a full face shield.
We recommend Wide Vision Safety Mask for use
over eyeglasses or standard safety glasses with side
shields. Always use eye protection which is marked to
comply with ANSI Z87.1.
J
6 -- English
Page 7

PRODUCT SPECIFICATIONS
Electric Mower Voltage ............................................................................................................. 120V~6Hz
Motor Amperage ........................................................................................................................... t0A
Motor Speed ........................................................................................................................ 3600 r/min
Cutting Width ............................................................................................................... 18 inch (460mm)
Cutting HeightAdjustment ..................................................................... 6 Levels (1.5"/38mm - 4"/101.6mm)
Deck Width .................................................................................................................... 19 inch (48mm)
Wheel Size ................................................................................................................ 6.7 inch (170mm)
Weight ........................................................................................................................ 31 lbs (14.00kg)
KNOW YOUR LAWN MOWER
Fig. 1
The safe use of this product requires an understanding
of the information on the product and in this operator's
manual as well as a knowledge of the project you are
attempting. This 2-in-1 lawn mower is capable of both
mulching and side discharge.
Before use of this product, familiarize yourself with all
operating features and safety rules.
A - Cord retainer - A convenient cord retainer helps
keep the extension cord connection secure during
mower operation.
B - Cutting height adjustment lever - Single lever
adjusts height of all four wheels to 6 different positions
C - Foldable push handle - ergonomic steel handle
makes mowing easy.
D - Lever switch - depress to start mower; release to
stop mower.
E - Power button switch - engages power to lever
switch for start-up.
F - Power cord receptacle - easy power cord
attachment
G - Wheel - large 6.7" wheels
H - Mower deck - lightweight never rust mower deck.
I - Side discharge chute.
J - Mulching door.
7 -- English
Page 8

DOUBLE INSULATION
Double insulation is a concept in safety in electric
power tools, which eliminates the need for the usual
threewire grounded power cord. Atl exposed metal parts
are isolated from the internal metal motor components
with protecting insulation. Double insulated tools do not
need to be grounded.
_ WARNING! READ AND UNDERSTAND ALL
INSTRUCTIONS. Failure to follow all instructions listed
below and on the machine may result in electric shock,
fire, and/or serious personal injur.
NOTE: Servicing of a product with double insulation
requires extreme care and knowledge of the system
and should be performed only by a qualified service
technician. Always use original replacement parts as
listed in the Parts List pages of this manual.
ELECTRICAL CONNECTmON
This product has a precision-built electric motor. It
should be connected to a power supply that is 120
volts, 60 Hz, AC only (normal household current).
Do not operate this product on direct current (DC).
A substantial voltage drop will cause a loss of power
and the motor will overheat. If the product does not
operate when plugged into an outlet, double-check
the power supply.
EXTENSION CORDS
See Fig 2
When using a power tool at a considerable distance
from a power source, be sure to use an extension
cord that has the capacity to handle the current the
product will draw. An undersized cord will cause a
drop in line voltage, resulting in overheating and loss
of power. Use the chart to determine the minimum
wire size required in an extension cord. Only round
jacketed cords listed by Underwriter's Laboratories
(UL) should be used.
When working outdoors with a product, use an
extension cord that is designed for outside use. This
type of cord is designated with "WA" on the cord's
jacket.
Before using any extension cord, inspect it for loose
or exposed wires and cut or worn insulation.
It is possible to tie the extension cord and power
cord in a knot to prevent them from becoming
disconnected during use. Make the knot as shown in
figure 2, then connect the plug end of the power cord
into the receptacle end of the extension cord. This
method can also be used to tie two extension cords
together.
**Ampere rating (on product data plate)
0-2.0 2.1-3.4 3.5-5.0 5.1-7.0 7.1-12.0 12.1-16.0
Cord Length Wire Size (A,W,G,)
25' 16 16 16 16 14 14
50' 16 16 16 14 14 12
100' 16 16 14 12 12 --
**Used on 12 gauge _ 20 amp circuit.
NOTE: AWG = American Wire Gauge
_k WARNING! Keep the extension cord clear of
the working area. Position the cord so that it will not
get caught on lumber, tools, or other obstructions while
you are working with a power tool. Failure to do so can
result in serious personal injury.
_k WARNING! Check extension cords before
each use. If damaged replace immediately. Never use
the product with a damaged cord since touching the
damaged area could cause electrical shock resulting in
serious injury.
PROPOSITION 65
_,WARNING! Some dust created by
power sanding, sawing, grinding, drilling, and other
construction activities contains chemicals known to
cause cancer, birth defects or other reproductive
harm. Some examples of these chemicals are:
. lead from lead-based paints
. crystalline silica from bricks and cement and
other masonry products
. arsenic and chromium from chemically-treated
lumber
Your risk from these exposures varies, depending on
how often you do this type of work. To reduce your
exposure to these chemicals: work in a well ventilated
area, and work with approved safety equipment, such
as those dust masks that are specially designed to filter
out microscopicparticles.
8 -- English
Page 9

KNOW YOUR LAWN MOWER
See Fig 3
This product requires assembly.
[] Carefully remove the product and any accessories
from the box. Make sure that all items listed in the
packing list are included.
[] Inspect the product carefully to make sure no
breakage or damage occurred during shipping.
[] Do not discard the packing material until you have
carefully inspected and satisfactorily operated the
product.
[] If any parts are damaged or missing, do not operate
the mower. Return it for replacement to the retailer from
which it was purchased.
NOTE: Sometimes the hardware pack is found beneath
the interior box flaps.
PACKING LIST
A Mower assembly
B Side discharge chute
C Operator's Manual
D Hardware Pack
,_ WARNING!
If any parts are damaged or missing do not operate this
product until the parts are replaced.
Failure to heed this warning so could result in serious
personal injury.
,_ WARNINGt
Do not attempt to modify this product or create
accessories not recommended for use with this
product. Any such alteration or modification is misuse
and could result in a hazardous condition
leading to possible serious personal injury.
_IL WARNING!
Do not connect to power supply until assembly is
complete. Failure to comply could result in accidental
starting and possible serious personal injury.
ASSEMBLING HANDLE
See Fig 3-4
[] Take the mower out of the box,put it on the ground
[] Pull up and back on the lower handle and upper
handle to raise the handles into operating position.
Make certain the handles snap into place.
[] Tighten the handle locking knobs on both sides of
the handle to secure.Tighten all locking knobs but do
not over-tighten. There are a total of 4 knobs: 2 at the
junction of the upper and lower handle, and 2 at the
base of the lower handle near the mower deck.
SIDE DmSCHARGE CHUTE
See Fig 5
The mower comes set in the mulching configuration to
dispense grass clipping directly beneath the mower.
To dispense clippings outside the mower, pull up
the spring-loaded side door on deck. Install the side
discharge chute by latching the two chute plastic hooks
over the steel rod across side opening.
CUTTING HEIGHT POSITIONS
See Fig 6
Position Cut
1 (LOW) 1.5" ( 38 mm )
2 2" (50.7 mm )
3 2.5" (63.4mm)
4 3" (76.2 mm )
5 3.5" (88.9mm)
6(HIGH) 4" (101.6mm)
SETTING CUTTING HEIGHT
When shipped, the wheels on the mower are set to a
low-cutting position. Before using the mower for the
first time, adjust the cutting position to the height best
suited for your lawn. The average lawn height should
be between 1" to 4" based on the type of grass grown.
To set the cutting height:
[] To raise the cutting height, grasp the height
adjustment lever and move it toward the back of the
mower.
[] To lower the cutting height, grasp the height
adjustment lever and move it toward the front of the
mower.
_b, WARNING!
Never operate the mower without the proper safety
devices in ptace and working. Never operate the
mower with damaged safety devices. Failure to heed
this warning can result in serious personal injury.
9 -- English
Page 10

,_ WARNINGt
Do not allow familiarity with this type of product to
make you careless. Remember that a careless fraction
of a second is sufficient to inflict serious injury.
,_ WARNINGt
Always wear safety goggles or safety glasses with
side shields when operating this product. Failure to do
so could result in objects being thrown into your eyes,
resulting in possible serious injury.
,_ WARNING!
Do not use any attachments or accessories not
recommended in this operator's manual. The use of
attachments or accessories not recommended can
result in serious personal injury.
APPLICATIONS
See Fig 7
You may use this product for the purpose listed below:
Mowing your lawn
STARTmNGISTOPPING THE MOWER
[] Attach the outlet end of an extension cord to the plug
on the rear of the mower.
NOTE: Use only an approved outdoor extension cord
as described previously in this manual=
[] Make a toop in the extension cord. From the right
side, pass the loop through the hole in the back of cord
retainer and place it around the hook.
[] Press down the Power switch button and hold it.
[] Pull the Lever switch toward the mower handle and
release the Power switch button. Continue to hold the
lever switch against the mower handle as you mow.
[] To stop the mower, release the lever switch.
NOTE: A high-pitched noise and sparking may occur
as the electric motor decelerates. This is normal.
MOWING TIPS
[] Make sure the lawn is clear of stones, sticks, wires,
and other objects that could damage the tawn mower
blades or motor. Such objects could be accidentally
thrown by the mower in any direction and cause
serious personal injury to the operator and others.
[] To reduce the likelihood of disconnecting the lawn
mower from the extension cord, be sure to use the cord
retainer provided.
[] For a healthy lawn, always cut off one-third or less of
the total length of the grass.
[] When cutting heavy grass, reduce walking speed to
allow for more effective cutting and a proper discharge
of the clippings.
[] Do not cut wet grass. It will stick to the underside
of the deck and prevent proper mulching of grass
clippings.
[] New or thick grass may require a shallower cut.
[] Clean the underside of the mower deck after each
use to remove grass clippings, leaves, dirt, and any
other accumulated debris.
MOWING ON A SLOPE
See Fig 8
[] Slopes are a major factor related to slip and fall
accidents that can result in severe injury. Mowing on
slopes requires extra caution. If you feel uneasy on a
slope, do not mow it. For your safety, do not attempt to
mow slopes greater than 15 degrees.
[] Mow across the face of slopes, not up and down.
Exercise extreme caution when changing direction on
slopes.
[] Watch for holes, ruts, rocks, hidden objects, or
bumps which can cause you to slip or trip. Tall grass
can hide obstacles. Remove all objects such as rocks,
tree limbs, etc., which could be tripped over or thrown
by the blade.
[] Always be sure of your footing. A slip and fall can
cause serious personal injury. If you feel you are losing
your balance, release the Lever switch immediately.
[] Do not mow near drop-offs, ditches, or embankments;
you could lose your footing or balance.
10 -- English
Page 11

_ WARNiNGt
When servicing, use only identical replacement parts.
Use of any other parts may create a hazard or cause
product damage.
,_ WARNINGt
Always wear safety goggles or safety glasses with side
shields during power tool operation or when blowing
dust. If operation is dusty, also wear a dust mask.
GENERAL MAINTENANCE
Avoid using solvents when cleaning plastic parts. Most
plastics are susceptible to damage from various types
of commercial solvents and may be damaged by their
use. Use clean cloths to remove dirt, dust, oil, grease,
etc.When servicing, use only identical replacement
parts. Use of any other parts may create a hazard or
cause product damage.
,_ WARNINGt
Periodically check all nuts and bolts for proper
tightness to ersure safe operation of the mower.
Remove any buildup of grass and leaves on or around
the motor cover. Wipe the mower clean with a dry cloth
occasionally. Do not use water.
LUBRICATION
All of the bearings in this product are lubricated with a
sufficient amount of high grade lubricant for the life of
the unit under normal operating conditions. Therefore,
no further bearing lubrication is required. At the
beginning and end of each mowing season:
[] Lubricate the springs on the rear discharge door with
light oil.
[] Lubricate the height adjustment lever and related
hardware with light oil.
[] Remove the wheels and lubricate the surface of the
axle bolt and the inner surface of the wheel with light
oil.
[] Romove the blade and blade hub assembly and
lubricate the motor shaft with light oil or engine oil.
See Replacing the Cutting Blade for instructions on
removing the blade.
Do not use any attachments or accessories not
recommended in this operator's manual. The use of
attachments or accessories not recommended can
result in serious personal injury.
,_WARNINGt
Before performing any maintenance, make sure the
mower is unplugged from the power supply. Failure
to heed this warning could result in serious personal
injury.
REPLACING THE CUTTING BLADE
See Fig 9
NOTE: Only use identical replacement blades.
[] Stop the motor and disconnect the power supply.
Allow the blade to come to a complete stop.
[] Turn the mower on its side.
[] Wedge a block of wood between the blade and the
mower deck in order to prevent the blade from turning
when the nut is being removed.
[] Loosen the blade nut using a 14 mm wrench or
socket (not provided).
[] Remove the blade nut, and blade.
[] Make certain that the fan assembly does not slide off
of the motor shaft.
[] Place the new blade on the shaft against the fan
assembly. Make sure it is installed with the curved
ends pointing up toward the mower deck and not down
toward the ground.
[] Thread the blade nut on the shaft and finger tighten.
NOTE: Make certain all parts are replaced in the exact
order in which they were removed.
[] Torque the blade nut down to 142-159 in. tbs. using
a torque wrench (not provided) to ensure the blade bolt
is properly tightened!
SHARPENING THE BLADE
See Fig IO-A
For best mowing performance, the mower blade must
be kept sharp. A dutl blade does not cut grass evenly
and overloads the motor. Under normal circumstances,
sharpening the blade twice during the mowing season
is usually sufficient. However, if your tawn has sandy
soil, more frequent sharpenings may be required.
[] Following the instructions in the Replacing the
Cutting Blade section, remove the mower blade. DO
NOT attempt to sharpen the blade while it is attached
to the mower.
[] Using a fine-tooth file or sharpening stone, sharpen
cutting edges on both ends of the blade, removing
equal amounts of material from both ends.
_, WARNING!
Always protect hands by wearing heavy gloves and/or
wrapping the cutting edges of the blade with rags and
other material when performing blade maintenance.
Failure to heed this warning could result in serious
personal injury.
11 -- English
,_ WARNINGt
When removing, inspect the blade carefully. If blade
is bent or damaged, replace immediatelywith a new
blade. Failure to replace a bent or damaged blade
could cause an accident resultingin possible serious
injury.
Page 12

BALANC(NG THE BLADE
See Fig IO-B
When sharpening, care shou(d be taken to keep the
blade ba(anced. An unbalanced blade wil( cause
excessive vibration when the mower is running. This
vibration wi(I eventua(ly cause damage to the mower,
especial(y the motor.
To check the blade ba(ance:
[] C(amp a screwdriver (or nail shank) horizontal(y in a
vise as shown.
NOTE: If a vise is not available, a straight nail can also
be used.
[] Place the center hole of blade on the screwdriver(or
nail) shank.
[] If blade is balanced, it will remain in a horizontal
position. If either end of the blade drops downward,
sharpen the heavy side until the blade is balanced.
REPLACING WHEELS
See Fig 11
[] Disconnect the mower from the power supply.
[] Turn the mower on its side.
[] Using a flat blade screwdriver, pry off the hubcap.
[] Remove the whee( and replace with new wheel.
[] Replace hubcap.
STORING THE MOWER
See Fig 12
[] Disconnect the mower from the power supply.
[] Turn mower on its side and clean grass clippings
that have accumulated on the underside of the mower
deck,
[] Wipe the mower clean with a dry cloth.
[] Check all nuts, bolts, knobs, screws, fasteners, etc.,
for tightness,
[] Inspect moving parts for damage, breakage, and
wear, Have repairs made on any damaged or missing
parts,
[] Store mower indoors in a clean, dry place out of the
reach of children,
[] Do not store near corrosive materials such as
fertilizer or rock salt. To lower the handle before storing:
[] Loosen the handle locking knobs on the sides of the
upper handle and fold the upper handle down,
[] Push inward on each side of the lower handle, and
lift the sides of the lower handle past the edges of the
handle mounting brackets,
[] Fold the lower handle forward, making sure not to
bend or kink the power cord,
12 -- English
Page 13

Problem Possible Cause Solution
Handlelocks not tightened. Tighten handle locking knobs.
Reconnect the cord and use the
cordretainerto keep the cordclose
to the motor/blade control.Connect
Extension cord not connected
to the mower plug. Extension
Handlenot in position. Reset house circuit breaker.
cord not connected topower
source,Tripped circuit breaker in
the houseMotor control switch
defective.
the extension cord to a live 120V
AC,60 HZ AC receptacle.
If it trips again, call a qualified
electrician.
Have motorcontrolswitchreplaced
by aqualified service dealer using
identicalreplacement part.
Mower cutting grass
unevenly,,
Lawn is rough or uneven or
cutting height not set properly.
tion.All wheels must be placed
inthe same cutting heightfor the
mower to cutevenly.
Movethewheels to a higher posi-
Mower not mulching
properly,
Wet grass clippings sticking to the
underside of the deck.
Wait until the grass dries before
mowing.
Highgrass, rear of mower housing
Mower hard to push.
and bladedragging in heavy grass,
Raisecutting height.
or cutting height too low.
Balance the blade by grinding
each cutting edge equally. Stop
Mower vibrating at source, and inspect for damage.
higher speed Have repaired made by an qualified
Bladeis unbalanced or bent motor
shaft.
the motor, disconnect the power
service dealer before restarting.
13 -- English
Page 14

CRAFTSMAN 10A - 19" 2qN-1 ELECTRIC MOWER - MODEL NUMBER 151,37214 ====_
The model number will be found on a label attached to the motor housing. J
TO PURCHASE REPLACEMENT PARTS, CALL 1=888-331=4569
14 -- English
Page 15

CRAFTSMAN 10A - 19" 2-1N=1 ELECTRIC MOWER - MODEL NUMBER 151,37214 -=====_
The model number will be found on a label attached to the motor housing. J
TO PURCHASE REPLACEMENT PARTS, CALL 1=888-331=4569
Key Number Drawing Number Description Quantity
1 GM65BX.00.02.X1.01 Motor Cover Assembly 1
2 GM65BX.00.03.X1.01 Side Discharge Chute Assembly 1
2.1 GM65BX.00.04 Discharge Chute 1
3 TGQTGL.78.00.X1.02 Wheel Assembly 4
3.1 BOC2YX.14.NS Screws 4
3.2 TGQTGL.78.00 Wheel 4
4 GM65BX.00.13 Debris Filter 2
5 M65BX.00.01 .X1.01 Deck 1
6 GM65BX.A0.04 Lower Deck Housing 1
7 GM65BX. 10.00 Front Axle 1
8 GM65BX.20.00.X1.02 Rear Axle w/Height adjust handle 1
9 TGQTXN.06.00.X3.01 Knob Assembly 1
10 GM65BX.00.11 Lower Hanlde 1
11 TGQTXN.06.00.X4.01 Upper Handle Knob Assembly 1
12 GC10SS.10.14 Cord Retainer 1
13 GM65BX.00.10.X1.02 Upper Handle Assembly 1
13.1 TGDQ15.82.00.01 Switch Assembly 1
14 TM9460.00.00.X1.01 Motor Assembly 1
15 GM65BX.00.14.X1.01 Height Adjustment Connecting Rod 1
16 TOQTGX. 13.XJ Cable Clamp 1
17 TOQTGX.X0.01 Cable Tie Down Assembly 1
18 GM65BX.A0.06 Height Selector Bracket 1
19 GM65BX.00.07.X1.01 Blade Assembly 1
19.1 BOA4FL.10.20 Blade Stud 1
20 GM65BX.A0.03 Mounting Brackets
15 -- English
J
Page 16

See this section for all of the figures referenced in the
operator's manual.
Consulte esta secci6n para vet todas las figuras a las que se hate
referencia en el manual del operador.
Fig.1
D
A- Cord retainer
B - Cutting Height Adjustment
Lever
C - Foldable push handle
D - Lever switch
J_ B
- "m
-G
E - Power button switch
F - Power cord
G - Wheel
H - Mower deck
I - Side discharge chute.
J - Mulching door.
Fig. 2
Page 17

Fig,3
Fig,4
Fig,5 Fig,6
Page 18

Fig,7
Fig,8
WEDGE A BLOCK
Fig. 9
FAN ASSEMBLY
L
Page 19

Fig.11
Fig.12
HANDLE LOCKING KNOBS
X_ ........:__ UPPER
__._4----"ANDLE
BRACKETS
Page 20

1" °
Product questions or problems?
1-888-3 1-4569
Customer Care Hot Line
Get answers to questions, troubleshoot problems,
order parts, or schedule repair service.
Para respuestas a preguntas o problemas, y ordenar
piezas o pedir servicio para la reparaci6n de su equipo.
To help us help you, register your product at www,craftsman,com/registration
Para poderte ayudar mejor, registra tu producto en www.craftsman.com/registration
Join the Craftsman Club today!
www.craftsman.com/sign up
Receive exclusive member benefits including special pricing and offers,
project sharing, expert advice, and SHOP YOUR WAY REWARDS!
Como miembro exclusivo, recibe diversos beneficios como ofertas, precios especiales, proyectos
nuevos, consejos de expertos y nuestro programa de puntos SHOP YOUR WAY REWARDSr
£ TM
(_ Registered Trademark / Trademark of KCD IP, LLC in the United States, or Sears Brands, LLC in other countr{es
£ TM
(_ Marca Registrada / Marca de Fabrica de KCD IP, LLC eR Estados Unidos, o Sears Brands, LLC in otros paises
 Loading...