

Page 1

CS900Mobile
Page 2

General Information
Congratulations on the purchase of your
CPR CS900!
We are endeavouring to improve our
products and services. We reserve all
the rights to revise and change the
description of this product and its
software as well as this user’s manual
without obligation to notify any person
of such revisions and changes.
All the pictures in this manual are for
reference only. There may be slight
difference between the appearance of
phone/ keys/ contents of display used
Page 3

in this guide and those of your phone.
Please refer to your phone for
actuality. Some features introduced in
this manual are network or subscription
supported features.
Please contact your network operator
for further information.
Please check the package contents to
ensure that all components listed below
are included. If the product is defective
or if there is a component missing,
immediately contact the retailer where you
purchased this handset.
Your CPR CS900 box contains:
• 1 mobile phone
• 1 desktop charger
• 1 travel charger
Page 4

• 1 battery
• 1 USB cable
• User manuals
If you find the size of the script not
easily readable for you, you can also
find this guide on our website:
support.cprcallblocker.com
Device code:
This device code ensures that
unauthorized persons will not be able
to use your phone. The default code
is
0000
PIN-code
The PIN-code will be supplied to you by
your network operator.
Page 5

General
Information .................................. 2
Device
Code: ....................................... 4
PIN-
Code: ............................................
4
Directory ...........................................
......... 5
Your
Phone ..............................................
11
Getting
started ........................................ 14
What is a SIM card? ..........................
14
Insert the SIM card and Micro SD card
.......................................................
.... 15
Page 6

Insert the battery as follows: ........... 18
Charging the battery: ...................... 18
Switching the telephone on or off
……………………………………….. 20
Screen icons:......................................
21
Menu Operation: .............................
25
Torch: .............................................
... 26
Connect an optional headset: ........ 26
Call
function .............................................
27
Make a
call: ....................................... 28
Make a call using the phone book
……………………………………..... 28
Page 7

Answering a call: ..............................
29
Operations during a call: .................
30
Hands
Free: ....................................... 30
Menu ..............................................
.......... 31
Phonebook ........................................
...... 31
To access the phonebook: .............. 31
Add new contact: ............................
32
To edit a Phone Book entry: …....... 32
To delete all entries from the phone or
SIM
card: ............................................
33
To copy all entries from the phone or
Page 8

SIM
card: ............................................
33
Store a Phonebook entry to a
Speed
dial key……. ......................................
34
Direct Number: .................................
34
Making calls using the Photo Contacts
.......................................................
... 35
Create photo contact:.. .....................
36
Call Blocking ……..…...………….… 38
Messages .........................................
........ 39
Inbox: ..............................................
.. 42
Page 9

Drafts: .............................................
... 43
Outbox: .............................................
43
Broadcast messages: .......................
44
Voicemail server: ..............................
45
Message settings: ............................
46
Call
history .............................................
.. 48
Missed Dialled and Received: ......... 48
Delete call logs: ................................
48
Organizer ..........................................
....... 49
Page 10

Alarm: .............................................
... 49
Tasks: .............................................
.... 50
Calculator: .........................................
50
Multimedia ........................................
....... 53
Camera: ...........................................
.. 53
Take a
picture: ...................................54
Show pictures: ..................................
56
FM-Radio: .........................................
57
File Manager: ...................................
59
Page 11

Settings ............................................
........ 60
Profiles (Tone settings) : ...................
60
Silent mode: .....................................
61
SOS settings: ....................................
61
SOS description: ..............................
62
SOS settings: ....................................
65
Phone settings: ..................................
65
Time and date: ..................................
65
Language: ........................................
.. 66
Page 12

Pref. Input method: ...........................
66
Display: ...........................................
.... 66
LED
Mode: .........................................
67
Night mode: ......................................
67
Call settings: ......................................
68
Caller
ID: ............................................ 68
Call waiting: .......................................
68
Call
divert: ..........................................
68
Page 13

Call barring: .......................................
69
Call time reminder: ….......................
69
Answer Mode: ...................................
69
Network settings: ..............................
70
Network selection: ............................
70
Set automatic or manual mode: ….. 70
Security settings: ...............................
71
Connectivity: ......................................
71
Bluetooth: ..........................................
71
Visibility: ..........................................
... 71
Page 14

My
device: ..........................................
72
Search audio device: ........................
72
Search audio device description: .... 73
My
Name: ..........................................
73
Restore factory settings: ...................
74
Basic Specifications: .........................
74
FAQ ................................................
........ 75
Battery .............................................
....... 79
Phone .............................................
........ 81
Page 15

For your
safety ....................................... 83
Operating environment: ................. 85
Electronic devices: ..........................
85
Pacemakers: ....................................
86
Hearing aids: ...................................
87
Other medical devices: ................... 87
Posted facilities: ..............................
88
Potentially explosive atmospheres:
…………………………………….... 88
Vehicles: ..........................................
89
Certification information (SAR): ……....
90
Page 16
Information ........................................
.... 90
Liability Disclaimer: ..........................
90
Contact Information:……………….. 92
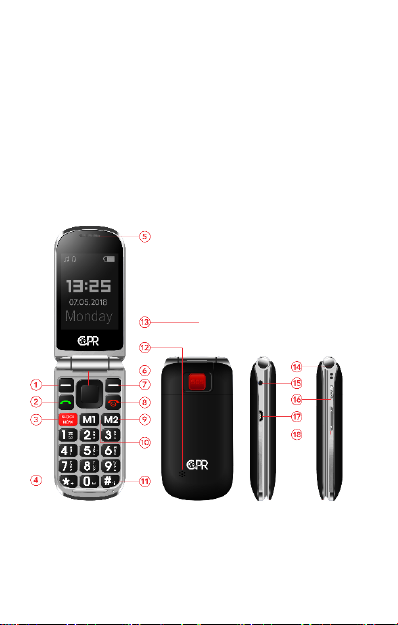
Your Phone
Page 17

1
Left menu key / Main menu
key
2
Dialling / History Calls
3
Block nuisance numbers
4
* Key,
Press this button on the
idle screen to enter the
following symbols : * /+ /P /
W.
5
Receiver
6
Navi key:
Key up:
On the idle screen this
button takes you to the
Messages menu.
Key down:
On the idle screen this button
takes you to the Photo contacts.
7
Right menu key,
On the idle
Page 18

screen this button takes you to
the Phonebook menu.
8
Power on/off /End key
9
Direct dialling numbers M2
10
Power on/off /End key
11
Camera Key
12
# Key
, Long press can switch
between in silent mode with
general modes; In edit mode,
change the input method.
13
SOS button
14
Polyphone loudspeaker
15
Headset , Jack 3.5mm
16
Micro USB charger port
17
Volume key +
18
Volume key 17/18 - Torch key,
Long press the flashlight
Page 19

Getting started
What is a SIM card?
Every mobile phone has a SIM card
(Subscriber Identity Module). This is a
micro-chip that holds your personal
information such as names and phone
numbers. Your phone won’t work without
it.
Keep the SIM card away from children.
The SIM card can easily be damaged or
bent. You should therefore handle the
SIM card with care during installation
and/or removal.
Insert the SIM card and Micro
SD card
Page 20
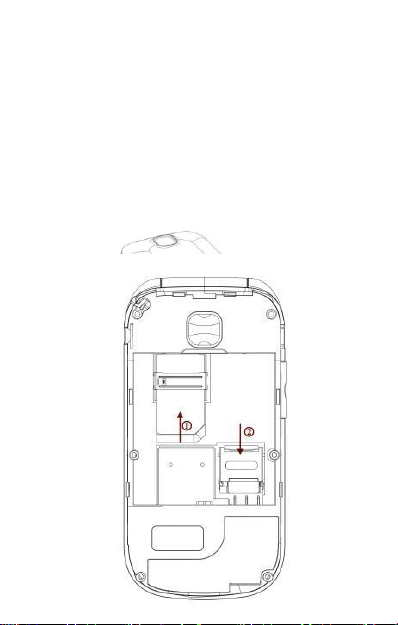
1 Make sure that the phone is switched
off and the charger is disconnected
from the phone.
2 Turn the phone over and remove the
battery cover.
3 If the battery is already inside,
remove it.
Page 21
1 Plug the charger into the charger
connector.
2 Plug the other end into an electrical
outlet.
3 The phone may need several hours
for reaching a full charge.
When your phone is power off, it
might take a few seconds to show
charging display and it shows charge
complete when finished.
When your phone is power on, the
battery icon flickers when it starting
Page 22

charging and become still with full
bars in battery icon when finished.
4 The battery is fully charged when the
red LED is off. Disconnect the
charger from the phone and the AC
outlet.
Note: Charge the battery for at least 12
hours before using the phone for the first
time.
Switching the telephone on or off
Make sure that you SIM card is in your
mobile phone and that the battery is
charged.
1 Press the
red key
to switch the
phone on.
2 If prompted, choose your language
and press
OK.
Page 23

3 If you have entered a PIN-code
Green LED
Incoming call, missed
call or unread
message
before, the phone will ask for the
code now. Enter the PIN-code and
confirm by pressing
4 To turn off your phone, press and
hold the
If you don’t insert a SIM card, your
phone will show
functions related to SIM card can be
used. You can make an emergency call
only
red key
OK.
for two seconds.
Insert SIM
. None of the
LED Description
Page 24
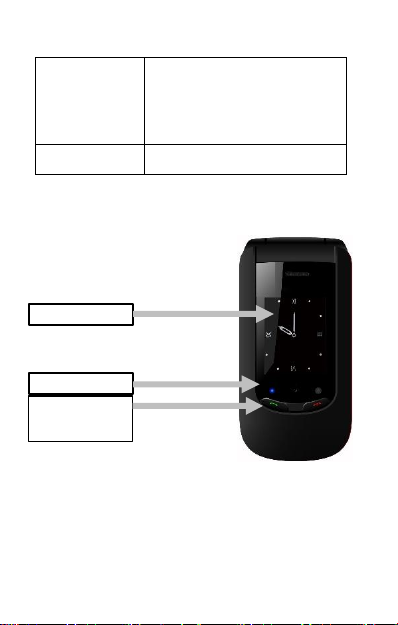
Display
LEDs
Quick Answer
/Hung up
Red LED
Battery low (flash),
Battery charging
(light)
White LED
Torch
Page 25
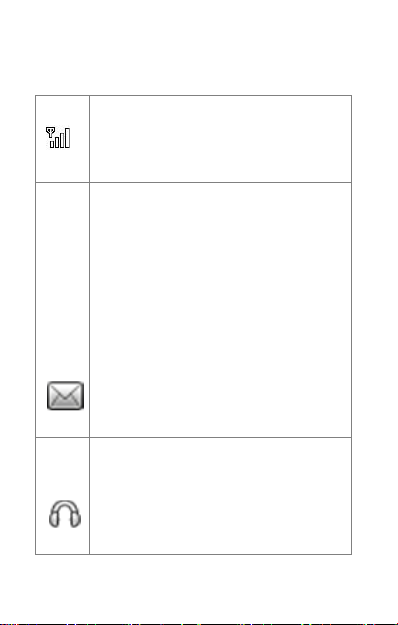
Screen icons:
Signal Strength
The vertical bars show the
network connection strength.
New messages
This icon shows when you
receive a new message.
SIM Card has an unread
message
The inbox is full.
This icon flickers when the
inbox is full and you need to
delete messages to receive
new messages.
Earphone
This icon shows when you
plug the earphone in. Sound
will be heard from the
Page 26
earphones.
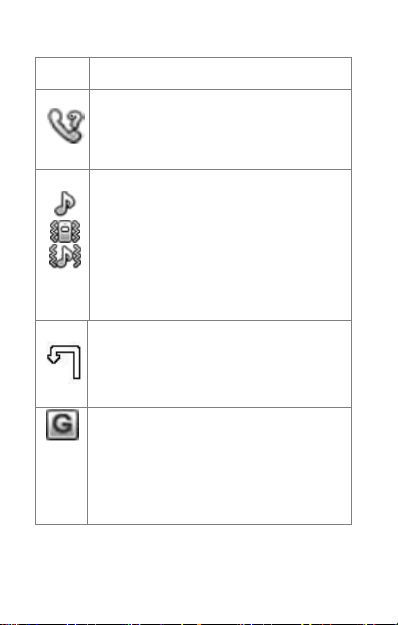
Missed Calls
This icon shows when you
have missed a call.
Alert Type
Ring
Silent mode on and Vibration
only
Vibrate and ring
Call Divert
This icon shows when you
divert all calls unconditionally.
GPRS
This icon shows when the
GPRS connection is available
or active.
Page 27
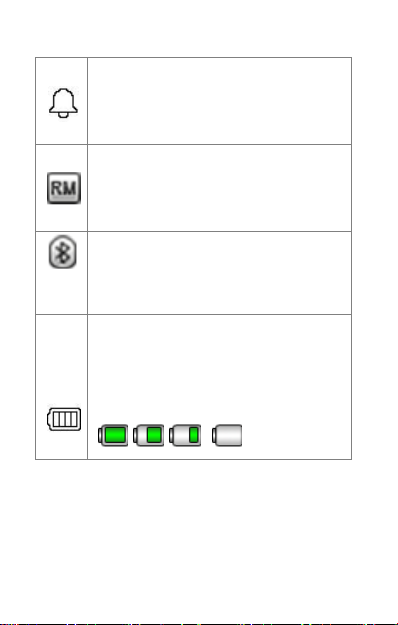
Turn alarm on
This icon shows when you
turn alarm on.
Roaming
This icon shows when your
phone is in roaming state.
Bluetooth
This icon shows when the
Bluetooth is active.
Battery capacity
This icon colour changes
according to the status of
battery capacity:
, , ,
Page 28

Menu Operation
Menu lists are used for set up and
operation.
The left and right menu keys initially are
Menu
( ) and
Note: symbols not displayed if the
analogue style clock is set for idle mode.
Press
Menu
changes and the soft keys become
OK
and
Back
move up or down menu lists, and
OK
or
Back
display.
Phonebook
( ) and the display
. Use Up or
for the next or previous
( ).
Down
to
Torch
Press and hold on the side volume keys
of the phone to switch the built-in torch
on/off.
Page 29

Connect an optional headset
You can use a headset (not supplied)
with the 3.5 mm type, plugged into the
Headset socket on the top side of the
handset.
When using headsets, pay attention to
volume levels and read its user guide
for safety instructions. Do not connect
incompatible products.
When correctly inserted the headset
icon is shown.
Page 30
Headset Connector:
Plug in headset accessory for headset
use.
(3,5mm Audio Jack)
Page 31

Call function
Make a call
1 To make a call, enter the phone
number with the prefix and press
the
green key
calls, enter ‘+’ by pressing for
2 sec. Then enter the country
code followed by the telephone
number, in which the 0 of the
prefix must be dropped.
2 If you have entered a wrong
number, press the soft key ‘right’
Clear
to remove the number to
the left of the blinking cursor.
3 Press the
number.
. For international
green key
to call the
Page 32

4
Press the
to cancel the call attempt.
red key
to end the call or
Make a call using the phone
book
If you have saved a name and
number in the phone book, you can
also use the phonebook to make a
call.
In standby mode, press the soft key
‘right’ to go to
1 Scroll with the up and down arrow
key to the name you want to call.
2 Press the
number.
3 Press the
to cancel the call attempt.
Phonebook
green key
red key
to call the
to end the call or
.
Page 33

Answering a call
When there is an incoming call, the
phone rings and/or vibrates and shows
the number or the corresponding name.
1 Press the
you would like to answer a call.
2 Press the
would like to reject a call, or for
ending the connection after the
call.
Earphone/Bluetooth Mode: When plugging
the earphone (including Bluetooth
earphone), you can answer a call by
pressing the key on the earphone.
green key or Answer
red key
or
silent
if you
if
Operations during a call
Press the right Menu key for Hands free
Press left menu key “
Options”
to perform
Page 34

following operation during a call:
de/activate the microphone
To go to
Hold:
Message:
New Call:
End:
Phonebook
Hold this call.
To go to
To dial the number
End this Call.
.
Messages
Mute:
Phonebook:
.
Hands Free
During a call you can turn the hands
free equipment on (Loudspeaker on).or
off with the right Menu key.
Menu
Press the up arrow key to go to the
Menu. Scroll through the menu using
the arrow keys.
Page 35

Phonebook
You can store names and phone numbers
in the internal phone book, save up to
200 numbers.
To access the phonebook
In idle mode, press
In idle mode, press
key, Phonebook
Note: Indicates entries in SIM
phone book, Indicates entries in the
internal phone book.
Right menu key
.
Left menu
and press OK
Add new contact:
1 Select
Menu, Phonebook
menu key
.
and press
left
Page 36

2 Select
3 Select Preferred storage,
Add new contact
left menu key
and press
To SIM
To Phone
you can edit
Caller ringtone. Press
save
, if you choose
to phone:
Name, Number
Options
if you want to save the contact.
To edit a Phone Book entry:
or
and
and
1 Press
2 Press
right menu key
book search which one You want
to change, press
select
Edit
then modify the name,
press
Down
modify the number.
Option
and OK to save the
change(s).
to phone
left menu key
To delete all entries from the
phone or SIM card:
Page 37

1 Select
2 Select
3 Select
4 Select
5
6 Press
Menu, Phonebook
menu key
.
Phonebook settings
left menu key
Delete all Contacts
left menu key
From Phone
Delete all
OK
again to confirm
and press
or
From SIM
and press
and press
To copy all entries from the phone
or SIM card:
left
1 Select
menu key
2 Select
left menu key
3 Select
key
Menu, Phonebook
.
and press
Phonebook settings
Copy all
and press
left
and press
left menu
Page 38

4 Select
5 Press
To Phone
SIM/Phone
OK
or
To SIM
again to confirm
From
Store a Phonebook entry to a Speed
dial key (2-9)
1 Select
Menu, Phonebook
menu key
2 Select
3 Set
Status
numbers
4 Press
5 Press
key to save to
and press
.
Speed dial
.
OK
the display shows ,2-9
Up
or
and Press OK
to On, press down to
Down
to choose the
left
Set
Page 39

6 Press
entry.
OK
to confirm the memory
Direct Number:
1 Select
2 Select
Add
Press in Standby mode M1 or M2 for
call
menu key
menu key
M1
and
Menu, Phonebook
.
Direct Number
.
M2
and press
dial numbers.
and press
left
left
Making calls using the Photo Contacts:
In the default screen, press the
downwards arrow key
.
Page 40

Here you can select up to 8 photo
contacts. Scroll with the
the desired photo contact and then press
the
Call key
The selected photo appears in the
photo contact directory. Carry out the
following steps in order to assign a
photo to this contact:
(green key).
Arrow keys
to
Create photo contact:
1 In the default screen, press the
Arrow key (downwards)
to go to the photo contact menu.
2 Use the arrow keys to scroll.
3 To edit a photo contact, press
in order
Page 41

4 “
Options
” (
left menu key
Edit
5 and confirm with the “
menu key
6 Enter the telephone number and
add a caller picture.
7 You have the option to take a
picture directly with the camera
(from Camera with Photo size:
“Photo call settings”) or to select
an already saved photo (from a
folder) using the file manager.
8 Add the photo and press “
(
right menu key
After you have finished editing the contact,
to save it press “
).
)
Back
”
), select
OK
” (
Back
left
”
Call Blocking
The CS900 is pre-loaded with CPR’s
Page 42

nuisance robocall lists so from the start
you will see a reduction of unwanted
calls.
How to block calls:
The quickest way to block calls is by
using the big red BLOCK NOW button on
the telephone keypad. This will disconnect
the call and add that caller to the Black
List.
Call Blocking Menu:
1. Select Menu, Call Blocking and
press OK
Page 43

2. Scroll to Black List to setup blocking
specific numbers from calling you,
here you can add/remove up to 900
numbers.
3. To turn the Black List function
ON/OFF, scroll to Black List and
then scroll to Turn ON/OFF.
4. To quickly add numbers that have
called you to the Black List press
Green Answer key scroll to the
number you wish to block and press
Options then scroll to Add to Black
List.
5. To quickly add SMS Text message
numbers to the Black list navigate to
the SMS message press Options then
Page 44

View then Options and scroll to Add
to Black List..
6. Scroll to White List to setup blocking
all calls apart from those added into
your white list, here you can
add/remove up to 900 numbers.
7. To turn the White List function
ON/OFF scroll to Block List and
press Turn ON/OFF. The phone
password is 1122
Messages
Write messages:
1 Select
Menu, Messages
OK
and press
Page 45

2 Press
3 Select
In this menu, you can compose
messages.
The number of letters used can be seen
at the upper right edge of the display.
Write message
SMS or MMS
and press
OK
Text input:
The following functions are available:
• Press
• Press the
• Press the arrow key to move the
0
to add a space.
*
key to add special
characters; using the “
you can navigate to the desired
symbols.
position indicator to the left or
right.
Arrow keys
”,
Page 46

• Press
• Press the
Delete
to delete a letter; to
delete the entire text, press and
hold
Delete
.
#
key to switch
between upper and lower case and
word recognition:
123
and pay attention to the
symbol in the top left of the
display.
Smart, ABC, abc,
Word recognition:
Enter the desired word by pressing the
keys for each individual letter only
once. The word changes depending on
which key is pressed.
E.g. To write “Hello”, press the “43556”
key.
Page 47

1 Enter contents and press
key
to enter
Options
left menu
. (You can select
Send to, Insert symbol, Input Method,
Advanced: Insert number and name,
and
Save
.
2 Select
3 Select
4 Select telephone numbers and press
5 Press
Send to
key
again.
Enter number
Phonebook
OK
.
left menu key
and press
and press
or
.
to enter
left menu key
left menu
Add from
Options
to
Send
Inbox:
The
messages. Depending on the selected
mode, the phone vibrates or rings
when you receive a new message.
Inbox
is for storing received SMS
Page 48

And in the standby mode you see this
icon until you have read the new
SMS message.
You can choose the following options
while reading your received SMS:
View,
Reply by SMS, Reply by MMS, Call
sender, Forward, Delete, Delete all,
Save to Phonebook*
option
: Copy to Phone* Move to
Phone*, Copy all
In the
and
Move all.
Advanced
*These options may not appear according
to the storage location.
Note: The new message icon keeps
flickering in the standby mode when your
inbox is full. Please delete some
messages for receiving new messages.
Page 49

Drafts:
By
messages you have saved.
You can choose the following options
while reading your draft:
Drafts
you can view the draft SMS
View, Send, Edit, Delete, Delete all
Advanced.
and
Outbox:
The
don’t sent but saved.
You can choose the following options
while reading your sent SMS:
Send, Edit, Delete
Outbox
to view the messages you
and
Delete all.
Sent messages:
The
Sent messages
messages you sent.
to view the
Page 50

You can choose the following options
while reading your sent SMS:
View, Forward, Delete, Delete all
and
Advanced.
In the
Advanced
option:
Copy to
Phone* Move to Phone*, Copy all
and
Move all *These options may not
appear according to the storage
location.
Broadcast messages:
Look up the broadcast messages. Your
options include:
Receive mode:
Turn on or turn off cell broadcasting.
Channels:
You can add, edit channel and can
Page 51

delete the current channel and cancel
the read.
Languages:
set the cell broadcast language.
Read messages:
Save read cell broadcast information
Voicemail server:
Voicemail is a service supplied by
your network operator. For more
information and for the voice mailbox
number, contact your network operator.
When you have a new voice mail
message, your phone will receive a
message.
1 Select
Menu, Messages
menu key
.
and press
left
Page 52

2 Select
3 Press
4 If you choose
Voice mail server
menu key
.
Option
and choose
Edit
and number of the voice mail. After
enter the number press
and press
Call
or
, edit the name
OK.
left
Edit
In standby mode
Press and hold key number 1 for directly
calling the
saved under voice mail address 1 is
called.
:
Voice mail
. Only the number
Message settings:
You can define the SMS settings. The
following functions are available:
SIM (Profile settings):
.
Page 53

Here you can set, among others, the
message service centre number (SMSC)
(dependent on the network operator) and
other SMS settings.
Memory status:
With this option, the SMS memory status
from your SIM card and your telephone
are displayed.
Text msg. counter:
Counts the number of text message
sent and received by you
Sent messages:
Switch on/off the storage of sent
messages
Preferred storage:
Select the storage location for the SMS
Page 54

Telephone
or
SIM
Multimedia Messages
Data account:
Select the data account to be used
Common settings:
The following settings are available:
Compose, Send, Retrieval, Preferred
storage
and
Memory status
Important note:
In order to be able to send or receive
MMS messages, you require a memory
card that supports the CS900, Micro SD
cards with up to 16 GB memory.
.
Page 55

In order to configure the MMS
settings properly, please contact your
network operator. You can create a
data account in the following menu:
Settings – Connectivity – Data
account.
Call History
The phone registers the phone numbers
of
Missed, Received, Dialled
calls.
When you press OK by
or
Received,
you
you can view the calls
and
All
Missed, Dialled
Page 56

Missed, Dialled
press
Option
following options:
or
Received.
you can choose the
If you
View, Call, Sent text message, sent
multimedia message, Save to
Phonebook,
and
Delete
.
Delete call logs
You can delete all the records of the
Dialled, Missed
can also choose delete
delete all the records of the abovementioned calls logs.
and
Received calls
All calls
, you
to
Organizer
Alarm
Page 57

1 Select
2 Select
3 You can set a maximum of 5
4 To set an alarm clock:
5 Select one alarm and press
6
Menu, Organizer
menu key
key
different alarms.
Edit alarm:
.
.
Alarm
and press
set
On or Off, (with
and press
left menu
helping the M1 and M2 key) Time,
Repeat and Alert type
7 Press
When alarm sounds, you can stop the
alarm by pressing
Snooze,
minutes again.
Save
to save the
Stop.
the alarm stops and rings after 5
.
Alarm
If you press
Edit
left
.
.
Page 58

Tasks
1 Select
2 Select
Menu, Organizer
menu key
Add events:
Press
Enter the desired details.
To save the event, press
Save
If there are some existed event in
the task list, press the
key to select an event to get into
the
.
Tasks
and press
Options
and select
.
options: View, Add, Edit,
Delete, Delete overdue,
Delete all
and
View uncompleted
and press
left menu key
Add
Options
up / down
Calculator
left
.
and
Page 59

1 Select
Key
Function
1-0
The keys 1 to 0
insert a digit.
#
To insert a
decimal
Arrow key up
+
2 Select
3 The phone is provided with a
In Calculator mode, the following
functions are available to you:
Menu, Organizer
menu key
key
calculator. This calculator has
limited accuracy and rounding
errors may occur, especially in
long divisions.
.
Calculator
and press
and press
left menu
left
Page 60

Arrow key down
-
M1
x
M2
÷
Camera key
=
• The keys 1 to 0 insert a digit.
• To insert a decimal, press #.
• Press the up and down arrow key
for +, -
• Press M1 and M2 key for x and
÷.
• Press Camera key for =.
To get the result, press
and hold
Clear
to clear the display for
Equal
a new calculation.
. Press
Page 61

Calendar
1 Select
2 Select
3
4 Press
5 Enter the desired details.
6 To save the event, press
7 If there are some existed event in
On the calendar interface, press the Navi
keys to browse through different days.
Menu, Extras
Calendar
Add events:
Options
and press
and press
and select
OK
OK
Add event
Options
and
Save
.
the task list, press the
key to select an event to get into
the
options: View, Add, Edit, Delete:
Delete all, overdue, Delete all
Specific period
up / down
and
.
Page 62

Multimedia
Camera
1 Press
2 Select
3 Select
Camera key
or
Menu, Multimedia
OK
Calendar
and press
and press OK
Take a picture:
Aim the camera lens at the place /
object, and press key “camera”, to
take a picture. Keep the camera lens
Page 63

steady for a while for a better image
Key
Function
1
Change image
resolution
2
Image quality
4
White balance
6
Delay timer
Arrow key left
Underexpose
picture (EV)
quality.
Important: To save several photos,
please use a memory card (Micro SD
card up to 16 GB).
In photo mode, the following functions
are available to you:
Page 64

Arrow key right
Overexpose
picture
(EV+)
Under
Option
you have access to the
following functions:
Photos:
Here you can view the saved pictures.
Also the pictures you received by
Bluetooth. The pictures that the
camera makes are saved as a .jpg
file. If you press
you can choose the following options:
Option
by a picture
View, Browser style, Send, Use as,
Rename, Delete, sort by, Storage
and
Page 65

Image information.
Camera settings:
Here you can set the
Contrast, Anti-flicker
Shutter sound, EV,
and
Image settings:
Here you can adjust the
image quality.
Delay timer.
image size
and
White balance:
Adapt to the ambient lighting conditions.
Scene mode:
Page 66

Here you can choose between:
Night.
Auto
or
Effects:
Here you can add different photo effects.
Storage:
Choose storage:
Phone
or
Memory card
Restore default:
Restore the default settings.
Note: The photos are stored on the
phone, for more pictures please use a
memory card. So please install this
Page 67

card if you want to take and save
pictures.
Image viewer
1. Select
OK
2. Select
View the saved photos (in .jpg
format). You can send and also
receive the photos via
The following functions are available to
you under
Menu, Multimedia
Image viewer
Options:
and press
and press
Bluetooth
OK
.
View, Browser style, Send, Use as,
Rename, Delete, sort by, Storage and
Page 68

Image information.
Key
Function
Arrow left
Search previous
channel
Arrow
right
Search next channel
Arrow key
volume up
FM-Radio
Select
Select
The tuned frequency is displayed.
In FM-Radio mode, the following
functions are available to you:
Menu, Multimedia
FM-Radio
and press
and press
OK
OK
Page 69

up
Arrow key
down
volume down
OK key
On/off the radio
function
Enter
Options
, you can make the
following operations:
Channel List:
There are 30 channels for you to store.
Manual Input:
Inputs the FM frequency you prefer.
Current channel save:
When a station has been found, select
Current channel save
and press
OK
Page 70

Note: Auto search needs some time, so
please be patient.
For better radio reception connect a
headset to the headset socket
.
File Manager
1
Select
2 Select
3 Press the
Menu, Multimedia
and press
OK
File Manager
left menu key
File manager. After inserting the
memory card, there are two options
you can choose:
card
.
and press
Phone
to enter
and
Memory
OK
Page 71

4 Select one of them and you can
see the contents as follows:
5 Enter
If you press
you can choose the following options:
Open:
selected folder.
New folder:
Rename:
Delete:
Phone
or
Memory card
then press the
access the submenus.
To display the content of the
To rename a folder.
To delete a folder.
left menu key
Option
by a file or folder
To create a new folder.
and
to
Settings
Page 72

Profiles (Tone settings)
Enter in the function; display the profile
mode list including
Meeting, Outdoor
Select one mode and enter the option
menu:
General, Silent,
.
Activate:
Customize:
following:
Activate the profile mode.
Customize the profile mode as
Alert type, Ring type, Ring tone,
Ringtone volume, Message tone,
Message volume, Alarm tone, Alarm
volume, Keypad tone, Keypad volume,
Power on, Power off, Cover open,
Cover Close
Reset:
and
System alert.
Reset the setting to the default.
Page 73

Silent mode
Silent is a fixed profile with ring tone,
keypad tone and message tone disabled.
The alarm signals even if the phone is
set to silent. Press and hold # to
activate/deactivate Silent mode.
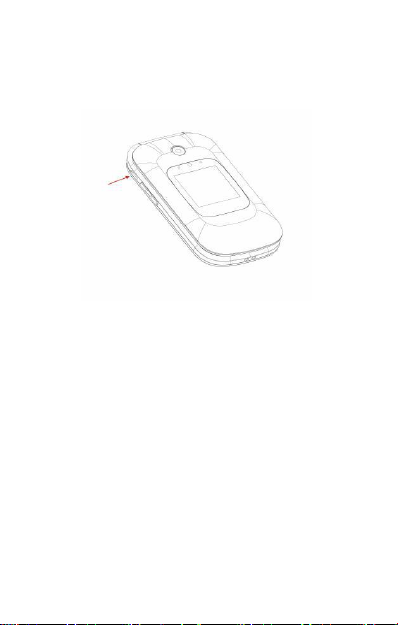
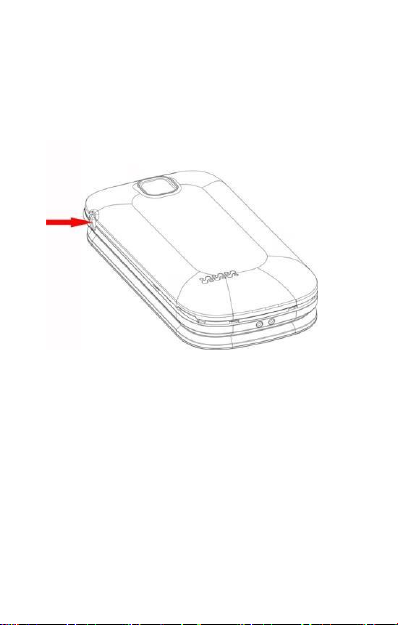
SOS Emergency Assist settings
The SOS function is a simple function
which can save lives at the deciding
moment. In all, you can save 5 SOS
numbers (relatives, neighbours, friends
and rescue). These numbers, previously
saved in order of sequence, will be
automatically dialled in an SOS by
pressing the
the mobile phone. During the SOS call,
a warning tone sounds so the person
that you rang knows that it is an
SOS button
on the back of
Page 74

emergency! If you cannot get through on
the first number, the second number will
be called automatically. If you cannot get
through on the second number, the third
number will be called etc.
If no emergency number is saved or
your phone card has run out, or you
are not allowed under a foreign
network (e.g. Roaming not activated),
you can dial 112 or another
emergency number on the numerical
keypad.
SOS description
Press the
the mobile phone for 3 seconds. If you
want to stop or cancel the SOS call,
press the
Functionality:
SOS button
SOS button
on the back of
again.
Page 75

By pressing the
will send an SOS SMS person (in case
mobile number or telephones with SMS
function is available for emergency
contact) to the emergency numbers you
have previously saved and will be
automatically dialled in the given
sequence. (The emergency button also
functions when the phone is closed).
The mobile phone switches on the hands
free function at full volume and at the
same time, if the SOS call is not
answered within 25 seconds the next
number is dialled etc.
SOS button
, the phone
Page 76

Note:
• If you want to stop or cancel
the SOS call, press the
menu key or SOS Key
• As a rule, the international
right
.
emergency call 112 can still be
called outside of the regional
network of your network operator.
• When changing a phone card:
Always make sure that there is
sufficient credit on your phone
card because private emergency
numbers cannot be dialled
without sufficient credit.
Attention: If the SOS call is forwarded to
the voicemail, the SOS mode will end.
Page 77

Attention: If you want to save SOS
numbers such as the ambulance
service, the police, fire brigade etc. as
an SOS number, you must gain
permission from each of these
institutions beforehand. There will be
no liability for possible costs arising
from calling them by accident.
SOS settings
Set SOS:
Set On or
function.
Off
the SOS alarm tone
Set SOS numbers:
Page 78

There you can edit and save at
most five SOS number in your
phone.
SOS message:
Edit the content of the SOS
message which will be sent out
automatically when the SOS
function is using.
Phone settings
Time and date:
Page 79

Set Home city and time and date
Language:
Here you can choose the language you
want in your display.
Pref. Input method:
Here you can choose the Input method
you want for write.
Display:
Wallpaper
Select your favourite picture as the
wallpaper of the standby window.
:
Sub LCD Wallpaper:
Select your favourite picture as the
wallpaper of the standby window.
Page 80

Show date and time:
In this menu, you can show/hide the
time and date display in default mode.
LED Mode:
On:
Set LED model for open, when there
is a missed call and unread message,
mobile phone green tip LED lights
flashing. The red light glows when
connecting the charger is connected
the charger is charging tips.
Off:
The LED function is off
Night mode:
Page 81

Night mode for activating /
deactivating the operation of the LED
of the front cover. When set to
"Night mode", light time is from 8.00
till 20.00.
LCD backlight:
LCD backlight for setting up the
duration (sec) of backlight and
brightness.
Call settings:
Depending on network operator support
and subscription, you can choose the
following options:
Caller ID:
Set the function of caller ID
Page 82

Call waiting:
When this network service is activated,
the network notifies you of a new
incoming call while you have a call in
progress. Press
waiting call. The first call is put on
hold or press the
the call.
OK
to answer the
red key
to reject
Call divert:
To divert your incoming calls to your
voice mailbox or some other phone
number (network service). Select the
divert option you want. Several divert
options may be active at the same time.
Call barring:
Page 83

With this network service you can
restrict the making and receiving of
calls with your phone.
Call time reminder:
Choose to remind you
60 seconds) or select
3000 Seconds) or select
Periodic
Single
Off
(30 (1.
Answer Mode:
Cover answer:
Open the phone to answer the incoming
call.
Any Key:
You can press any key to answer a call.
Auto answer when headset mode
The phone answer the call automatically.
Page 84

Network settings:
This menu has connection with the
network suppliers, so please get in
touch with them when you use this
function. If you want to get into one
network which doesn’t have the
roaming protocol with the original
network you have been in, the phone
will display the content that you can
make an emergency call.
Network selection:
Depending on network operator support,
you can choose the following options:
Selection mode
Page 85

Set
automatic
or
manual mode
GPRS connection
When needed and
always.
GPRS transfer pref.
You can select data prefer or call prefer.
Security settings:
You can choose the following options:
SIM security:
PIN code On or
change PIN2.
To turn your SIM
Off, change PIN
and
Page 86

Phone security:
with a password. The default
password is:
Change password:
change your password of:
password
.
To lock your phone
0000.
Here you can
Phone
Connectivity:
You can connect wirelessly to other
Bluetooth compatible devices.
Bluetooth:
In standby mode: Press the down arrow
key to go directly to Bluetooth.
You can choose the following options:
Power:
Here you can choose to turn Bluetooth
On
or
Off
.
Page 87

Visibility:
You can set the visibility on or
off
.
My device:
List of saved devices and enables you to
add new devices;
Search new device
.
Search audio device:
Search for available Bluetooth audio
devices. If Bluetooth is not enabled you
can enable it now by pressing
Search audio device description:
1 Press
2 Select the devices you want to
OK,
the phone is going to
search for new devices.
connect with and press
Pair.
Yes
.
Page 88

3 When connecting with another
Bluetooth device you need a
shared passcode. Enter the
passcode and press
4 Select the device from the list and
press
Option
. Can choose the
following options:
Delete
and
Delete all
OK.
Connect, Rename,
.
My Name:
Here you can set the Bluetooth device
Name.
Advanced:
Here you can set your:
Storage
Data Account:
and check the
Audio path,
my address.
Page 89

In order to be able to use the MMS
Network–Dual
Band
GSM
900/DCS1800
Dimension:
101x50.5x19.5mm
Battery:
Li-ion 3.7V 1000mAh
function, you must create a data
account. The configuration of a data
account is dependent on the data of
your network operator.
Restore factory settings:
To reset some of the menu settings to
their original values. The password is:
0000
Basic Specifications:
Page 90

Standby time:
up to 350 hours*
Talk time:
Up to 500
minutes*
*Variation in operation times may
occur depending on SIM card, network,
and usage settings, usage style and
environments.
FAQ’s
If your phone appears the questions
frequently, please refer to the answers as
follows. After that, you cannot solve the
Page 91

questions, please contact with the mobile
phone dealers or network operator.
Can’t turn the phone on:
• Check battery installation, please
install battery correctly.
• Check if battery level is low,
change a battery or charge the
battery.
• Check if entered incorrect PIN
code 3 times in a row.
If yes, the phone is locked,
then you should enter your
PUK code (please contact your
network operator for your PUK
code).
Page 92

SIM error:
• Is the SIM card dirty? Please
clean it.
• Try and reinstall the SIM card.
• Is the SIM card damaged? Please
contact your network operator.
Weak signal or no signal:
• You may be in a location where
the reception is bad, such as
tunnel or cellar, please relocate
and try again.
• You can try turning around slightly
or get near the window if you are
in a room.
• Please contact your network
operator, if you still have a weak
signal or no signal.
Bad talking quality:
Page 93

• Weak signal? See: Weak signal or
no signal.
• Check if battery if battery is low.
Charge the battery or change the
battery.
• Use the up volume key to adjust
the microphone volume during a
call.
Can’t make a call:
• Check if you enter the correct
number and press
• Check if you set call barring, if
green key
.
yes, please cancel it.
• Check if the SIM card is
registered in the network.
• If your SIM card is a prepaid card,
please make sure there is enough
money on the card.
Can’t receive calls:
Page 94

• Is the SIM card registered in the
network?
• Check if your phone is turned on.
Check if screens show no signal,
if yes, see: Weak signal or no
signal.
• Check if you set call barring, if
yes, please cancel it.
Screen is dark:
• Check if battery if battery is low.
Charge the battery or change the
battery.
• Adjust the wallpaper.
• Your phone may be affected with
damp, keep it dries.
PIN locked:
• Check if entered incorrect PIN
code 3 times in a row.
Page 95

If yes, the phone is locked, then you
should enter your PUK code (please
contact your network operator for your
PUK code).
Battery
Your phone is powered by a
rechargeable battery.
Note that a new battery's full
performance is achieved only after
two or three complete charge and
discharge cycles! The battery can be
charged and discharged hundreds of
times but it will eventually wear out.
Page 96

When the operating time (talk-time
and standby time) is noticeably
shorter than normal, it is time to buy
a new battery. Use only batteries
approved by the phone manufacturer
and recharge your battery only with
the chargers approved by the
manufacturer.
Unplug the charger when not in use.
Do not leave the battery connected
to a charger for longer than 10 days,
since overcharging may shorten its
lifetime. If left unused a fully charged
battery will discharge itself over time.
Temperature extremes can affect the
ability of your battery to charge.
Use the battery only for its intended
purpose.
Page 97

Never use any charger or battery
which is damaged.
Do not short-circuit the battery.
Accidental short-circuiting can occur
when a metallic object (coin, clip or
pen) causes direct connection of the
+ and - terminals of the battery
(metal strips on the battery) for
example when you carry a spare
battery in your pocket or purse.
Short-circuiting the terminals may
damage the battery or the connecting
object.
Leaving the battery in hot or cold
places, such as in a closed car in
summer or winter conditions, will
reduce the capacity and lifetime of
the battery. Always try to keep the
battery between 15°C and 25°C. A
Page 98

phone with a hot or cold battery
may temporarily not work, even when
the battery is fully charged. Batteries
performance is particularly limited in
temperatures well below freezing.
Do not dispose of batteries in a fire!
Dispose of batteries according to
local regulations (e.g. recycling).
Do not dispose as household waste.
Do not charge your mobile phone if
the battery is not installed.
Page 99

Phone
Your phone is a product of superior
design and craftsmanship and should
be treated with care.
The suggestions below will help you
to fulfil any warranty obligations and
to enjoy this product for many years.
Keep the phone and all its parts
and accessories out of the reach of
small children.
Keep the phone dry. Precipitation,
humidity and all types of liquids or
moisture can contain minerals that
will corrode electronic circuits.
Page 100

Do not use or store the phone in
dusty, dirty areas. Its moving parts
can be damaged.
Do not store the phone in hot areas.
High temperatures can shorten the
life of electronic devices, damage
batteries, and warp or melt certain
plastics.
Do not store the phone in cold
areas. When it warms up (to its
normal temperature), moisture can
form inside, which may damage
electronic circuit boards.
Do not attempt to open the phone.
Non-expert handling may damage it.
Do not drop, knock or shake the
phone. Rough handling can break
internal circuit boards.
 Loading...