

CPcam CPD500W Quick Start Manual
1.Makesureyourpackagecontains:
1)DigitalVideoRecorder(withHDDcartridge)*1
2)Usersmanual*1
3)Key*2
4)Accessoriespack*2
5)Poweradapterandcord*1
6)CD-ROM*1
NOTE:1)Thisadaptorisonlyforthismachine.Donotuseitforother
electronicproducts.
2)ThisadaptorisDC19V2A.Ifitisdamaged,userscanfind
replacementadaptorofthesamekind.
2.Howtomakethemachinerun?
IN
RISKOFELECTRICSHOCK
DONOTOPEN
WARNING:TOREDUCETHERISKOFELECTRICSHOCK,
DONOTREMOVECOVER(ORBACK).
NOUSER-SERVICEABLEPARTSINSIDE.
REFERSERVICINGTOQUALIFIED
SERVICEPERSONNEL.
EXTERNALI/OLAN
ACT
LINK
USB
1
3
OUTIN
2
4
MAIN
CALL
1
3
OUT
2
4
DC19V
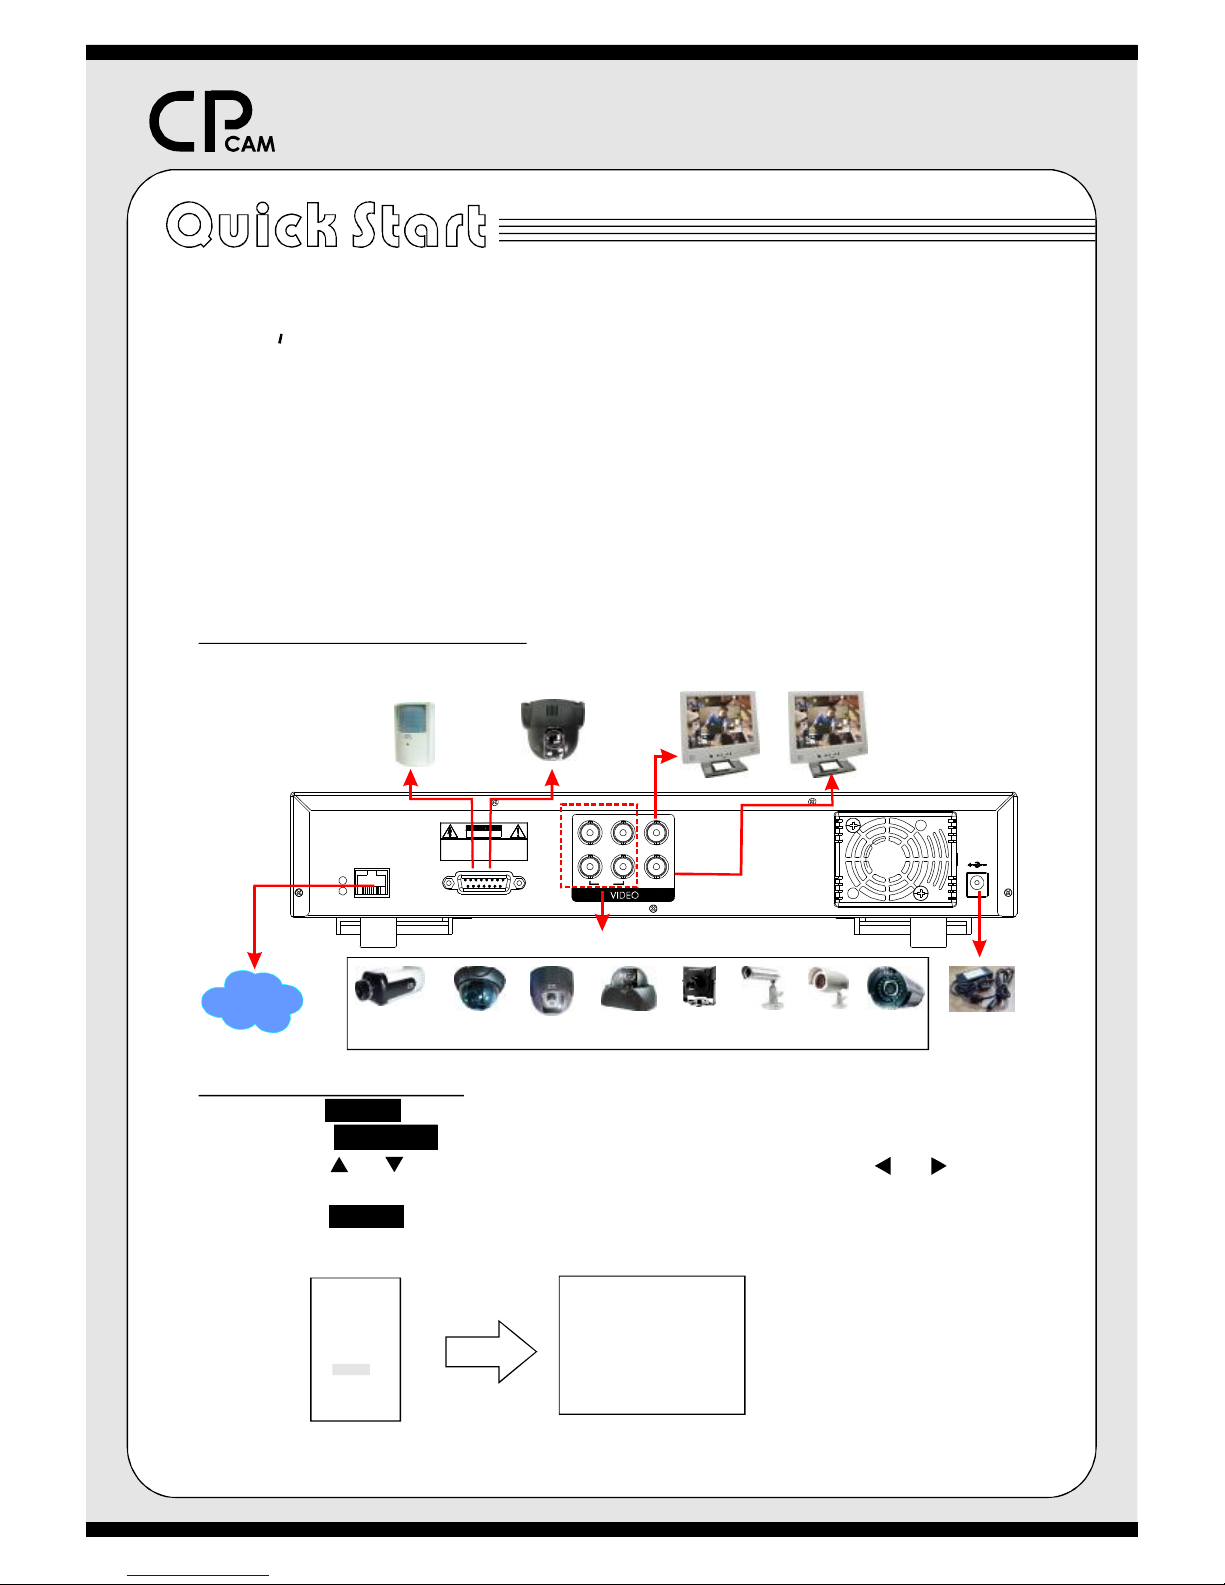
PIR PTZ Monitor Monitor
CAMERA
Bullet
Cam.IRCam.
Outdoor
Cam.
Regular
CCDCam.
Dome
Cam.
Dome
Cam.
Vari-Focal
ComeCam.
Mini.
Cam.
Power
1)SituateandconnectDVR
2)SystemTimesetup:
A.Pressbuttontoentermenulist.
B.Selectandchoosedatedisplay.
C.PressortosetcorrectDateandTime,andpressor
tomovethedigitlocation.
D.Presstoexitandconfirmcurrentoperation.
MENU
SYSTEM
MENU
KEYMUTE
BUZZER
MESSAGELATCH
DATEDISPLAY
DATE
TIME
HDDFORMAT
SYSTEMRESET
LANGUAGE
UPGRADE
MENU
RECORD
CAMERA
DETECTION
DISPLAY
USER
SYSTEM
EVENT
NETWORK
PTZ
RETR
OFF
SETUP
OFF
Y/M/D
2004-NOV-25
14:55:38
NO
NO
ENGLISH
SETUP
SYSTEM
EVOLUTION
ForYourDemand
Internet
500WV1.1
EVOLUTION
ForYourDemand
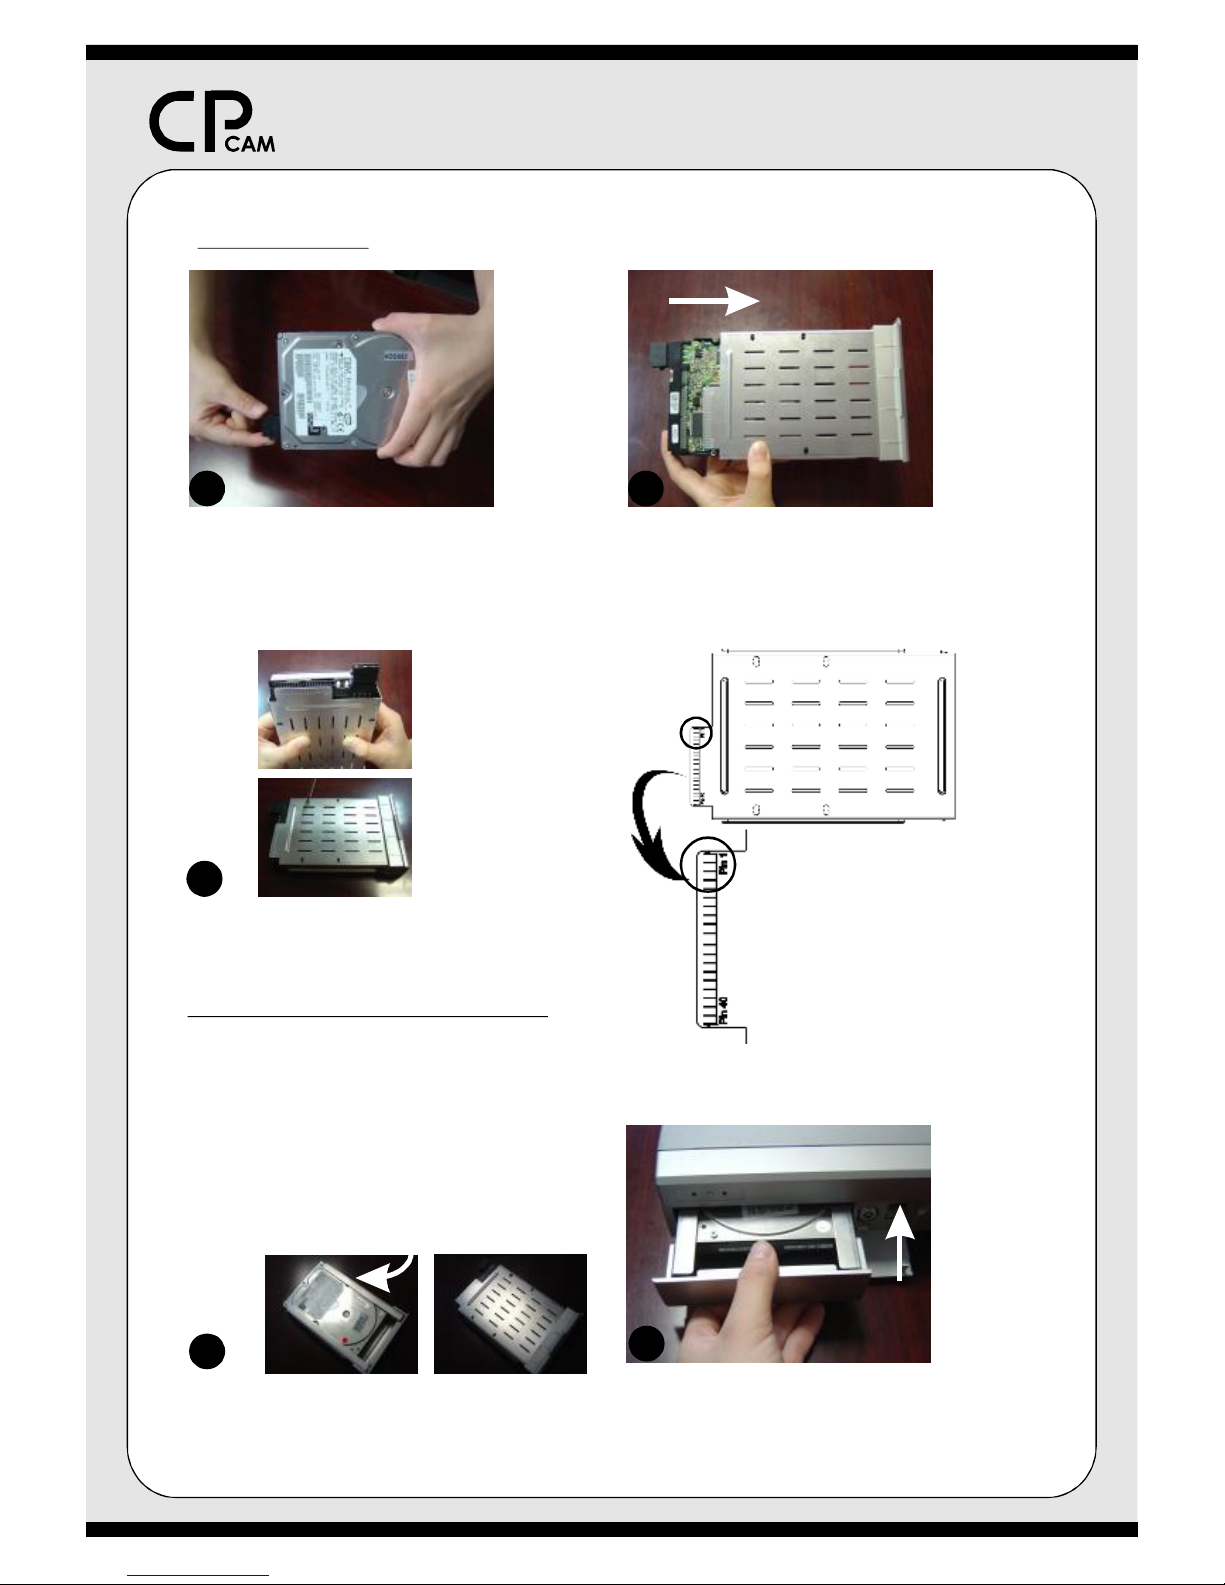
3)InstallHDD:
1
2
3
4
5
Connecttheconnectorwith
theHDD.
PuttheHDDintotheHDDcartridge.
Pleasenoticethebottomsideis
powerside.
ScrewtheHDDtothecartridge.
BeforeyouscrewtheHDD,please
beawarethatyoumustlevel
,
becausethescrewholeisdifferent
fromdifferentHDDbrands.Then
screwtheHDD.
pin1oftheHDDatpin1mark
Youmustprecisely
aligntheharddisktothepin
connecttoensurecorrect
installation.
ReversetheHDDandputit
intoDVR.
ConnecttheHDDwithDVR
Pleaselevelpin1ofthe
HDDatpin1mark
 Loading...