

Page 1
CPC504-A V1.0
6
Page 2
All the safety and operating instructions should be read before operation.
The improper operation may cause permanent damage.
v WARNING
Wereserve the right to make improvements tothe documentation,software andfirmware
of its products without notice.In order to provide users with better operation of this product,
information in this manual is intended to be accurate and reliable.However,weassume no
responsibility for its use; nor for any infringements of rights of third parties which may result
from its use.
Page 3
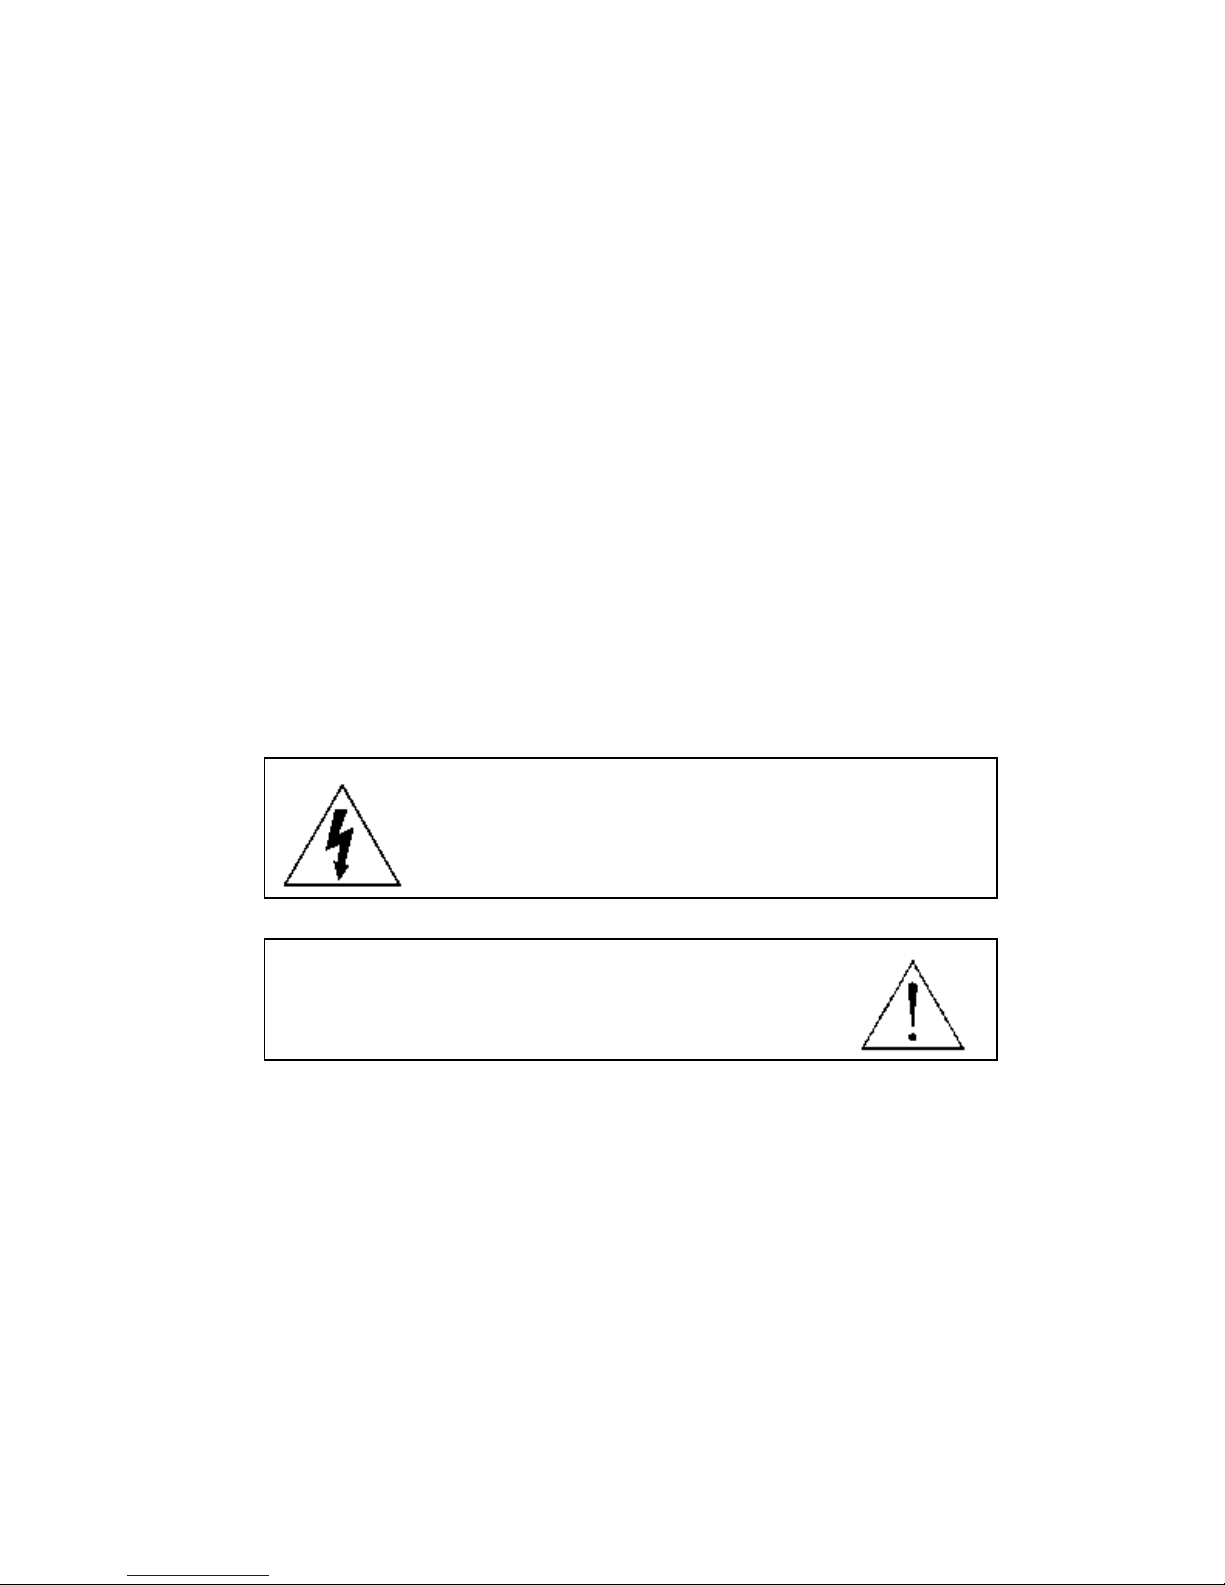
The lightning flash with arrowhead symbol, within an equilateral
triangle, is intended to alert theuser to the presence of uninsulated
"dangerous voltage" within the product's enclosure that may be of
sufficient magnitude to constitute arisk of electric shock to persons.
The exclamation point within an equilateral triangle is intendedto alert the
user to the presence of important operating and maintenance-(servicing)
instructions in the literature accompanying the appliance.
• Please lift and place this equipment gently.
• Do not expose this equipment to direct sunlight.
• Do not use this equipment near water or in contact with water.
• Do not spill liquid of any kind on the equipment.
• Do not block the ventilation holes at the top and bottom of theunit.
• Installation should be made by qualified service personnel.
Page 4

v TABLE OF CONTENTS
1. PRODUCT INTRODUCTION
Features
Description
Precautions
Specifications
Package content
Operating and installation
Connection
2. SITUATION SIMULATE
Situation simulate
STEP1 : SET THE PRESET
STEP2 : SET SEQUENCE
STEP3 : SET AUTO
…………………………………………………………………………………………………………………….1
………………………………………………………………………………..……………………………….3
………………………….…………………………………………………...……………………………….3
……………..………………………………………….………………...………………………………..4
…………………………………………………….………………...…….………………………..6
…………………………….…………………….………...…….………………………..7
………………………………………………….………………….….………...…….……………………….10
……………………………………..…………………….….……...…….………………………..12
……………..……….……….……………………….…….…………………...12
……………..……….….……….……...…….……………………..……………...13
……………..……….…………...……………..…….………………………..…………....14
Page 5

……………..……………………………………………………….…………...…………………..…..……………15
……………..……….….…………...…………..…………………………………...…...16
…………….…………...……..……………………...…….………………..…..………………..….…...18
…..…………….…………...……..…………....…….……………………..…..…………………….….…...19
…………….…………....……..………..….…………………………..…..…………………….…...20
…………….…………...……..……...………….…………………………….…..…………………….…...20
…………….…………...……..……...……………….….……………………………………...….…...21
…………….…………...……..…..……………….………….……………...…………….…...23
……….………….....……...…….………………………….……………………...…………….…...25
…………….…………...……..……...…….…………………..……….………………...………….…...27
………………….…………...……..……...…….………………………….………………...…………….…...31
…………….…………...……..………..…...…….……………….……………………………...….…...22
3. DETAILED MENU SETUP
Menu
Enter PT(Z) Menu Via AP
Control Panel
Main menu
Main options
AUTO
AUTO PAN
PRESET
PT(Z) HOT POINT
SEQUENCE
CAMERA
SYSTEM
4. APPENDIX
Keypad
…………….…………...……..……...…….…………………..……….………………...………….…...29
Page 6

v Product introduction
CPC501&502 Features
• Compatible with Intelligent Mutiplexing DVRs.
• 1/3" Sony CCD. .
• OSD function select.
• S/N ratio more than 48dB(AGC off)
• 16 Presets
• RS-485 data port for surveillance application.
• On screen menu.
Note : The usage limit for the motor is 500 million times.
1
Page 7

CPC503&504 Features
•Compatible with Intelligent Mutiplexing DVRs.
•1/3" Sony CCD.
• 480 TV lines of resolution.
• High sensitivity of 1.5 Lux/ F2.6
• OSD function select.
• 3X optical zoom lens
• S/N ratio more than 48dB(AGC off)
• 16 Presets
• RS-485 data port for surveillance application.
• On screen menu.
Note : The usage limit for the motor is 500 million times.
2
Page 8

Description
This is a color CCD pan/tilt/(zoom) camera which employs a 1/3" Sony CCD solid-state
imaging device which provides extremely long life and high reliability. The camera
provides 350º Pan Range, 0º ~ 90 Tilt Range.
• Don’t shoot images that are extremely bright (e.g.,light sources, the sun, etc.)
for long periods of time.
• Don’t use or store the camera in the following conditions :
(1) Extremely hot or cold places ( operating temperature 0ºC to 40 ºC (=32 ºF
to104 ºF))
(2) Close to generators of powerful electromagnetic radiation such as radio or
TV transmitters.
(3) Where it is subject to fluorescent light reflections.
(4) Where it is subject to unstable lighting ( flickering, etc.) conditions.
(5) Where it is subject to strong vibration.
Precautions
3
Page 9

Colorful/Normal/Light SelectColor Gain
On/OffNAMirror
ATWWhite Balance
Sharpness/Normal/Soft SelectSharpness
1/60 (1/50) to 1/100,000 sec.Electronic Shutter
26.7º~80º80ºAngular Field of View
4.2~12.7mm4mmFocal Length
F2.6(Wide) ~4.3(Tele)F2,0Aperture
approx. 1s (Tele/Wide) in manual mode-Zoom Speed
1.5 Lux/ F2.61.5 Lux / F2.6 1 Lux / F2.00.5 Lux/ F2.0Minimum Illumination
More than 48dB (AGC off)Signal-to-Noise Ratio
1.0 Vp-p, 75 ΩVideo Output
480 TV lines420 TV linesResolution
768(H) x 494(V) <NTSC> / 752(H) x 582(V) <PAL>
510(H) x492(V)
<NTSC> / 500(H) x
582(V) <PAL>
Number of Pixel
1/3" Sony High Resolution CCD image sensorPick up Element
CPC504CPC503CPC502CPC501Model No.
Specifications
4
Page 10

approx. 320g (0.66 lbs.)Weight
CPC504CPC503CPC502CPC501Model No.
Ø105 (D) x 105 (H) mmDimensions
1A RegulatedCurrent Consumption
DC12VPower Source
0°C ~ 40°C (32°F -104°F)
Ambient Operating
Temperature
pan/tilt, lens, 16 preset positions, home position
Controls
manual/sequential position
Tilt Mode
90 º
Tilt Range
manual/sequential position/auto pan
Pan Mode
possible (in auto-pan mode)
Pan Angle Setting
350º
Pan Range
preset ID, camera ID: up to 8 characters
Camera ID
SEQ/AUTO PAN
Auto Mode
MANUAL/AUTO-Auto Focus
3X Optical Zoom
(4.2~12.7mm)
3X Optical Zoom
(4.2~12.7mm)
CCTV Lens(4,6,12mm)Board Lens(4,6,12mm)Lens
On / OffBLC
On (low) / On (mid) / On (high) / Off
AGC
5
•This machine is only compatible with DC12V 1A regulated adaptor.
•There is some noise when the machine is start working.
Page 11
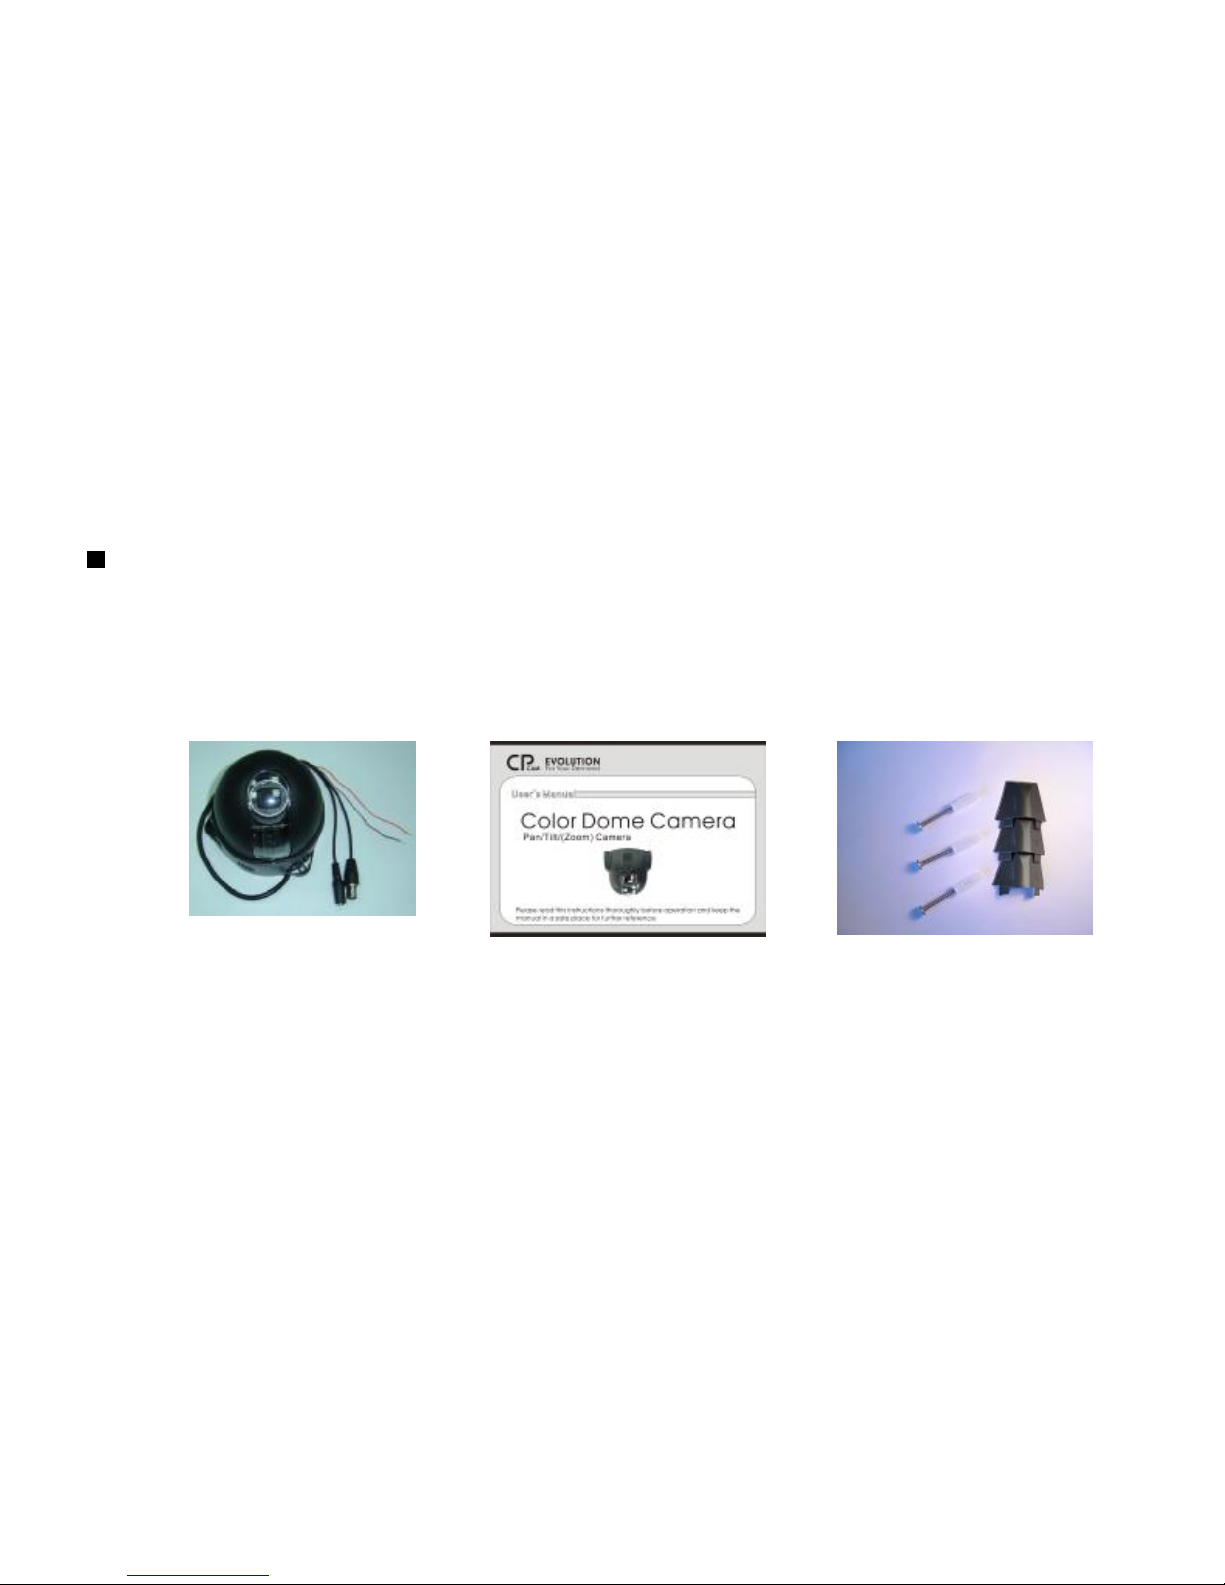
1.Camera x 1 with power/video cable and single line (orange color x 1, brown color x 1).
2.User’s manual x 1.
3.Decoration cover x 3, screw x 3, screw faster x 3.
Package Content
PT(Z) Camera User’s manual
Screws and Decoration covers
6
Page 12
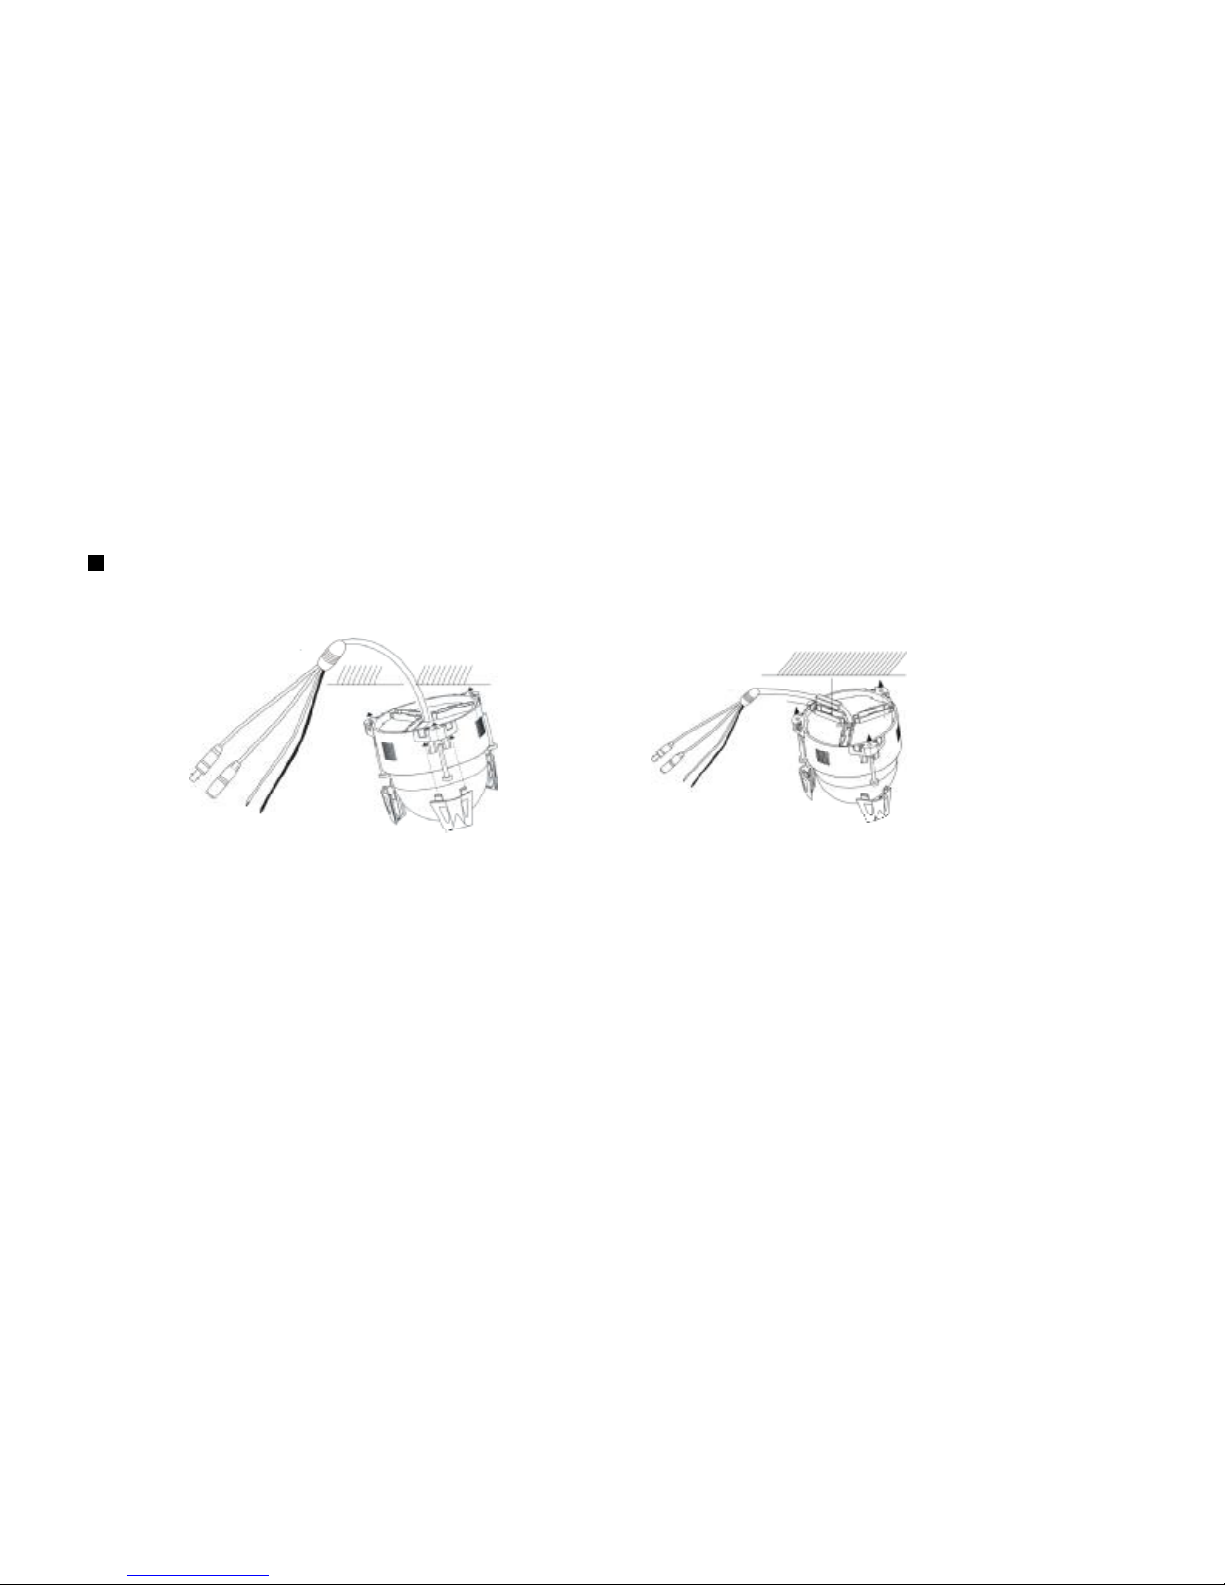
1. Cable routing to the attic (refer to figure 1)
2. Put the cable on the indentation, and cut off the thin border with nippers if
necessary; else route the cable along the circular surface of the screw base,then
place the cable into the cut. Routing the cable over the ceiling surface (refer to
figure 2).
3. Screw the three screws into the three individual screwed basesto stick to ceiling.
4. Insert the three decoration covers onto the three different screwed bases
(refer to figure 3)
Operating And Installation
Refer to the illustrations below before installing the camera:
Figure 1 Cable routing to the attic Figure 2 Cable routing over the ceiling surface
7
Page 13
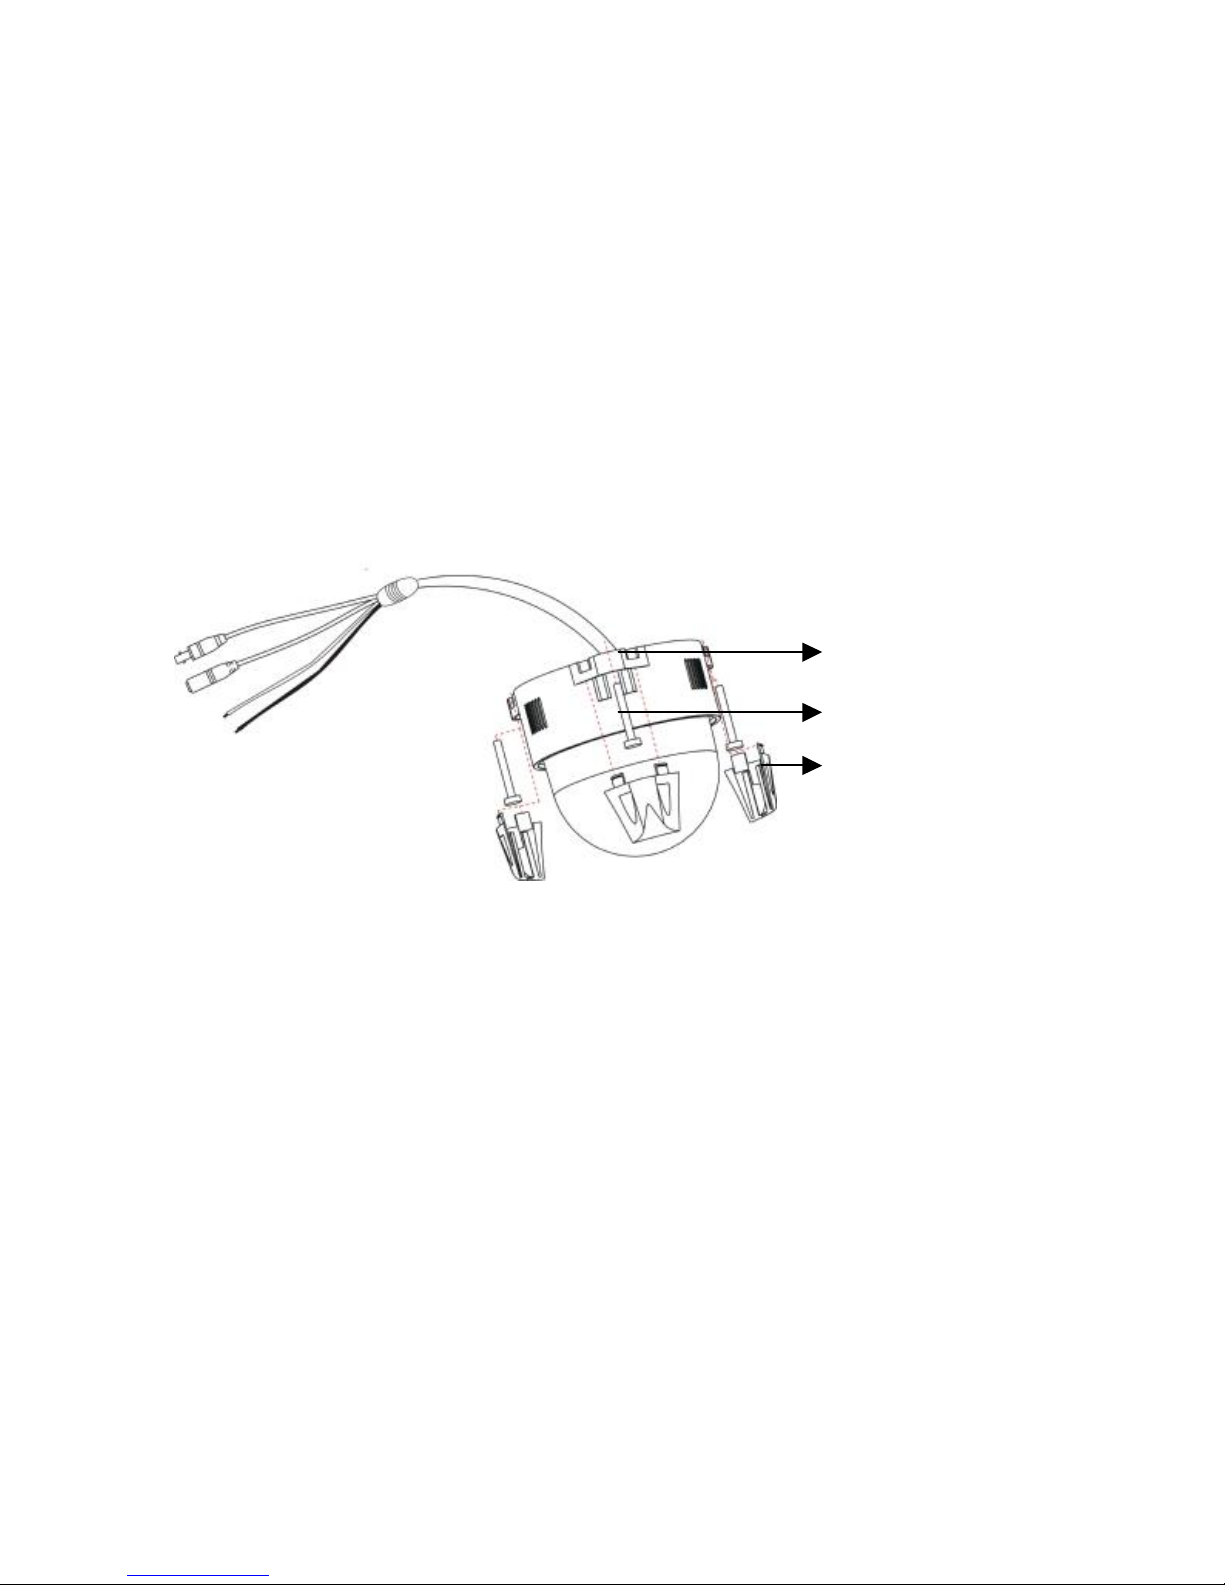
Screw
Screwed
Base
Decoration
Cover
Figure 3
Note:
1. Don’t install the camera in the corner, because doing so may limit the function of the PT(Z).
2. Installation angle : ±15 degrees to a horizontal surface.
3. Don’t fasten the screw with a torque greater than 2kg-cm, else the base may deform and
then hamper the movement of the PT(Z)
8
Page 14
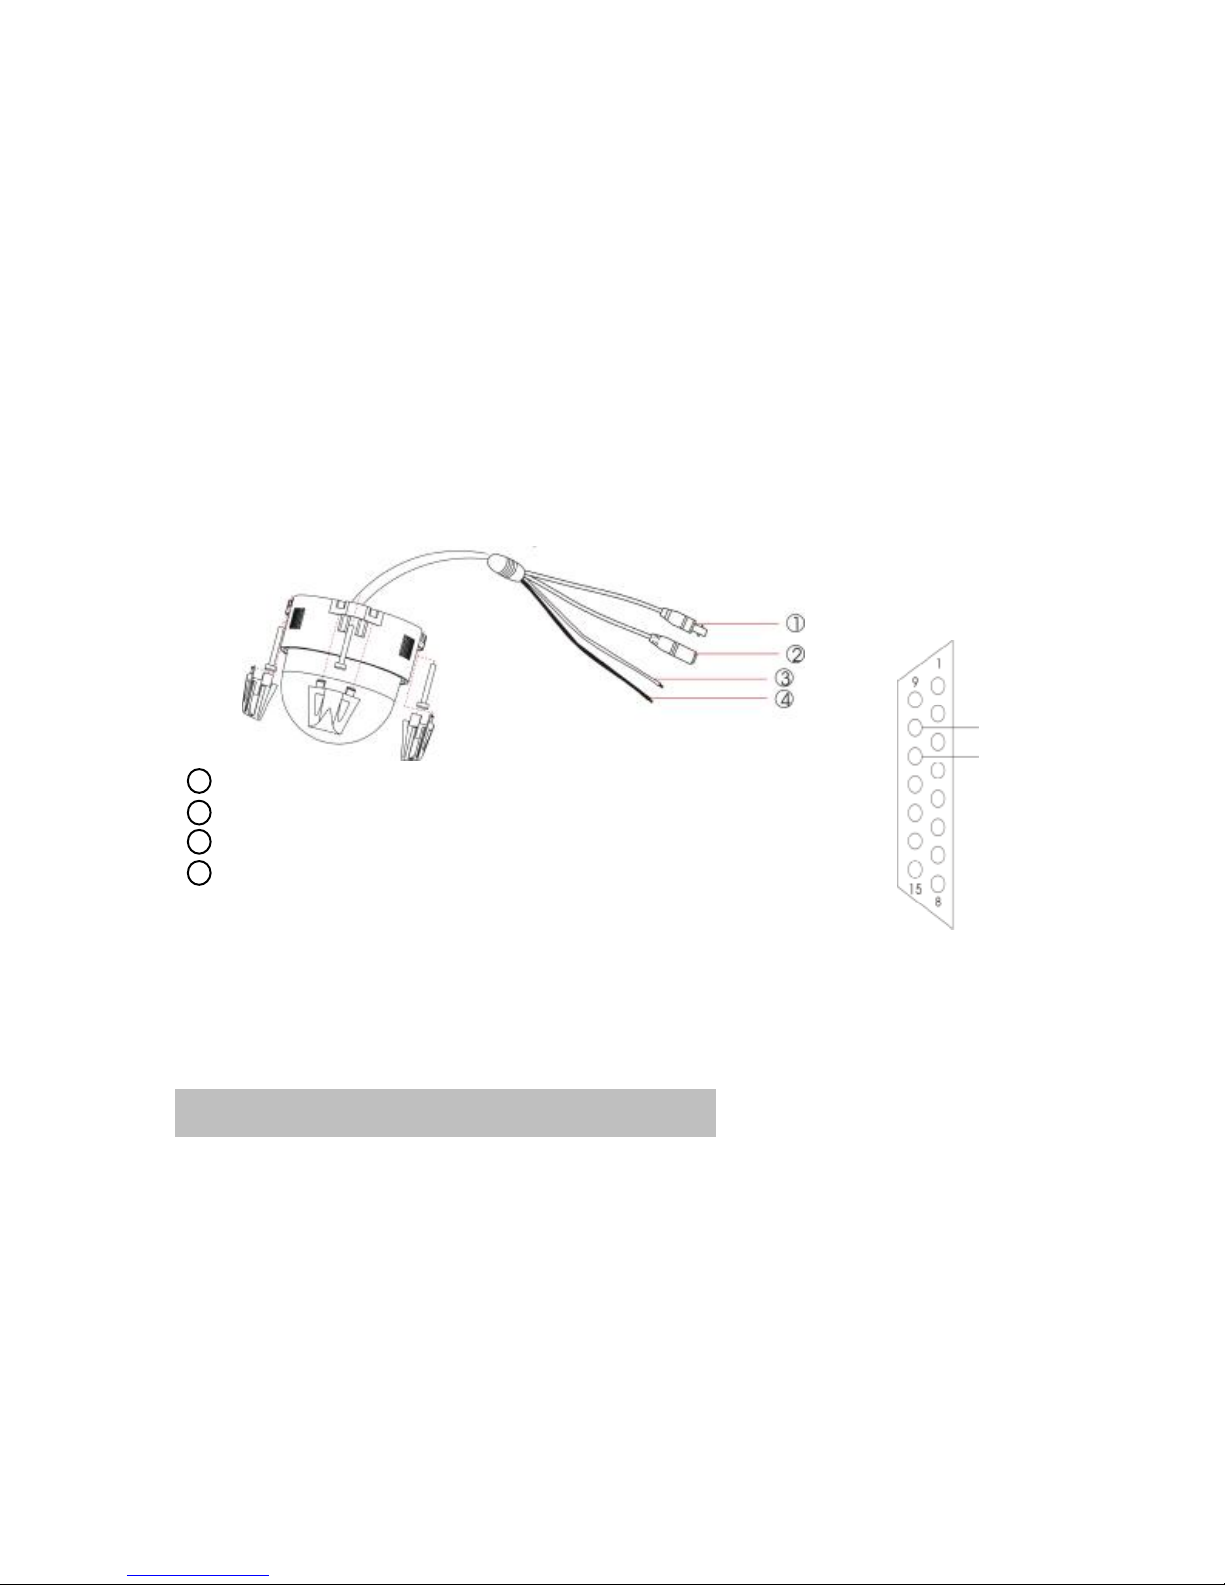
1 Video Output Connector
2 Power Cable
3 RS485-B (orange color line)
4 RS485-A (brown color line)
RS485-B
RS485-A
Figure 4
Figure 5
I.M. DVR
5. Connect the Video Output Connector to DVR’s Video Input.
6. Connect the Power Cable to Adaptor.
7. Connect “RS485-A(brown color line)” to 11th aperture on DVR’s Sub-D Plug.
8. Connect “RS485-B(orange color line)” to 10th aperture on DVR’s Sub-D Plug.
Note : The usage limit for the motor is 500 million times.
9
Page 15
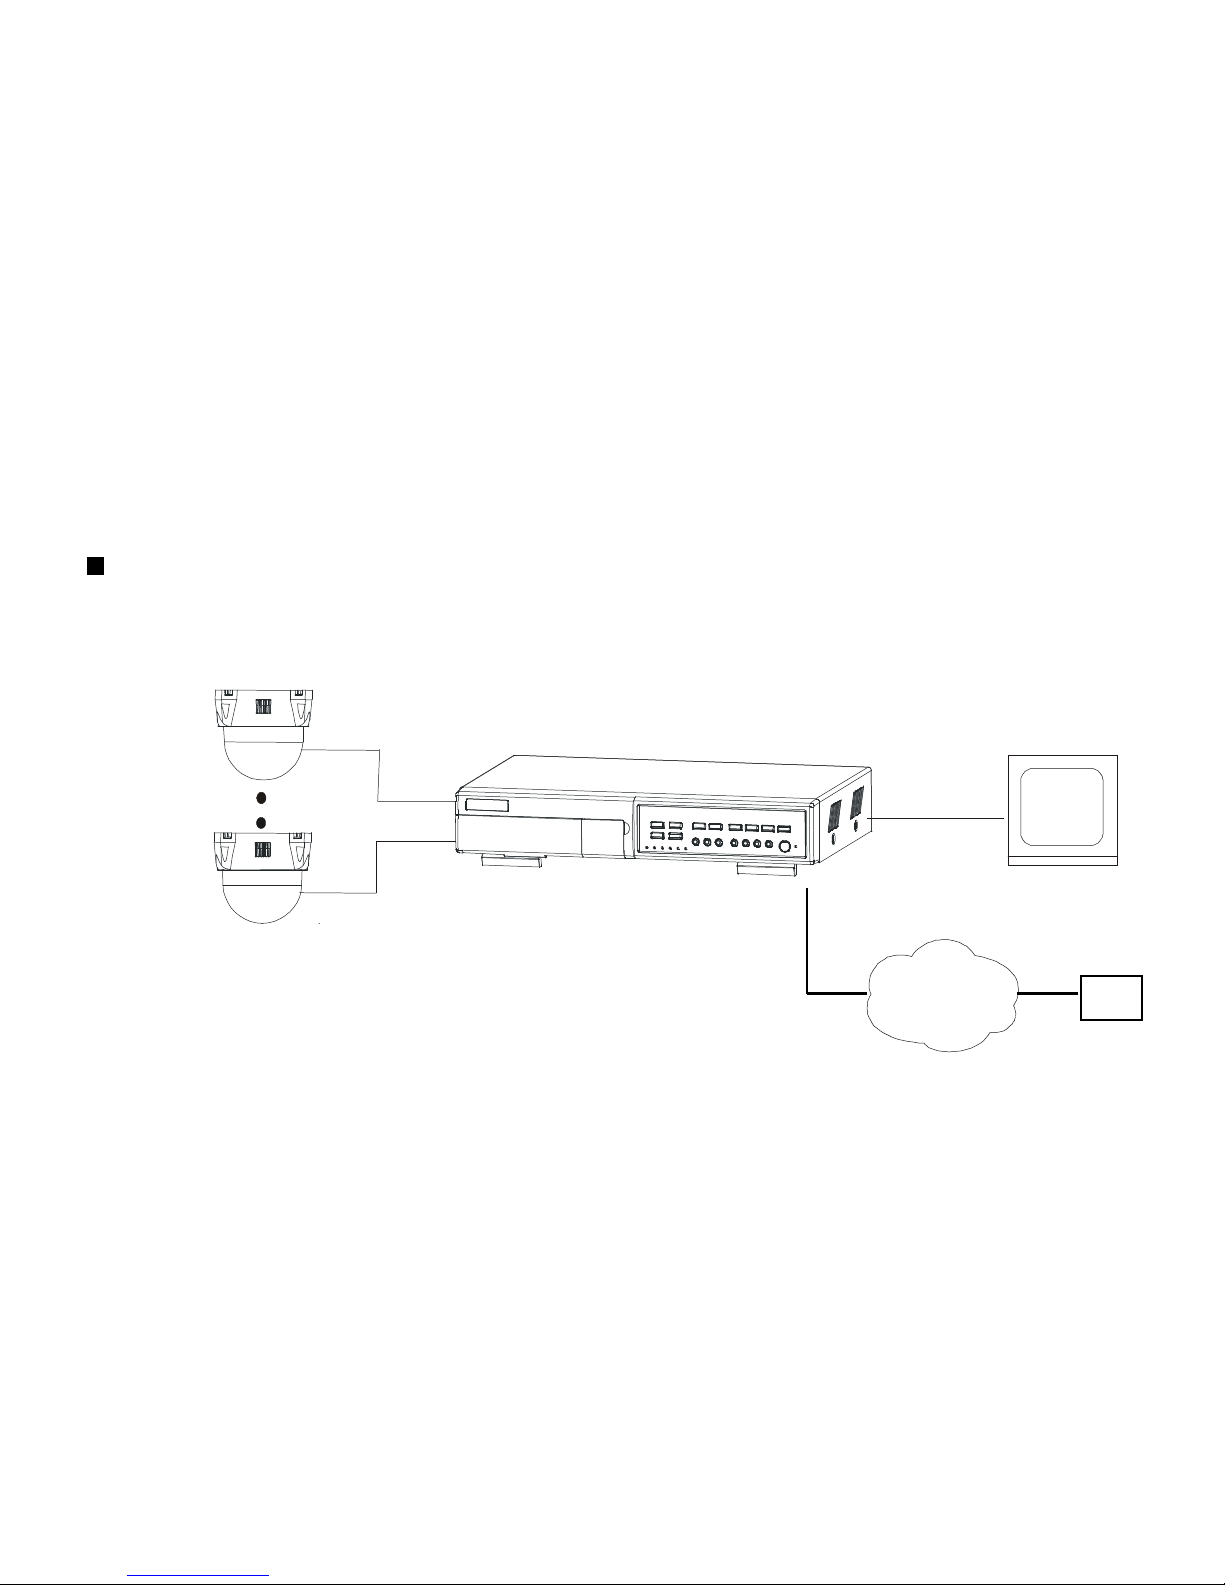
Connection
PAN/TILT/(ZOOM)
PAN/TILT/(ZOOM)
I.M. DVR
MONITOR
Internet
PC
10
Page 16
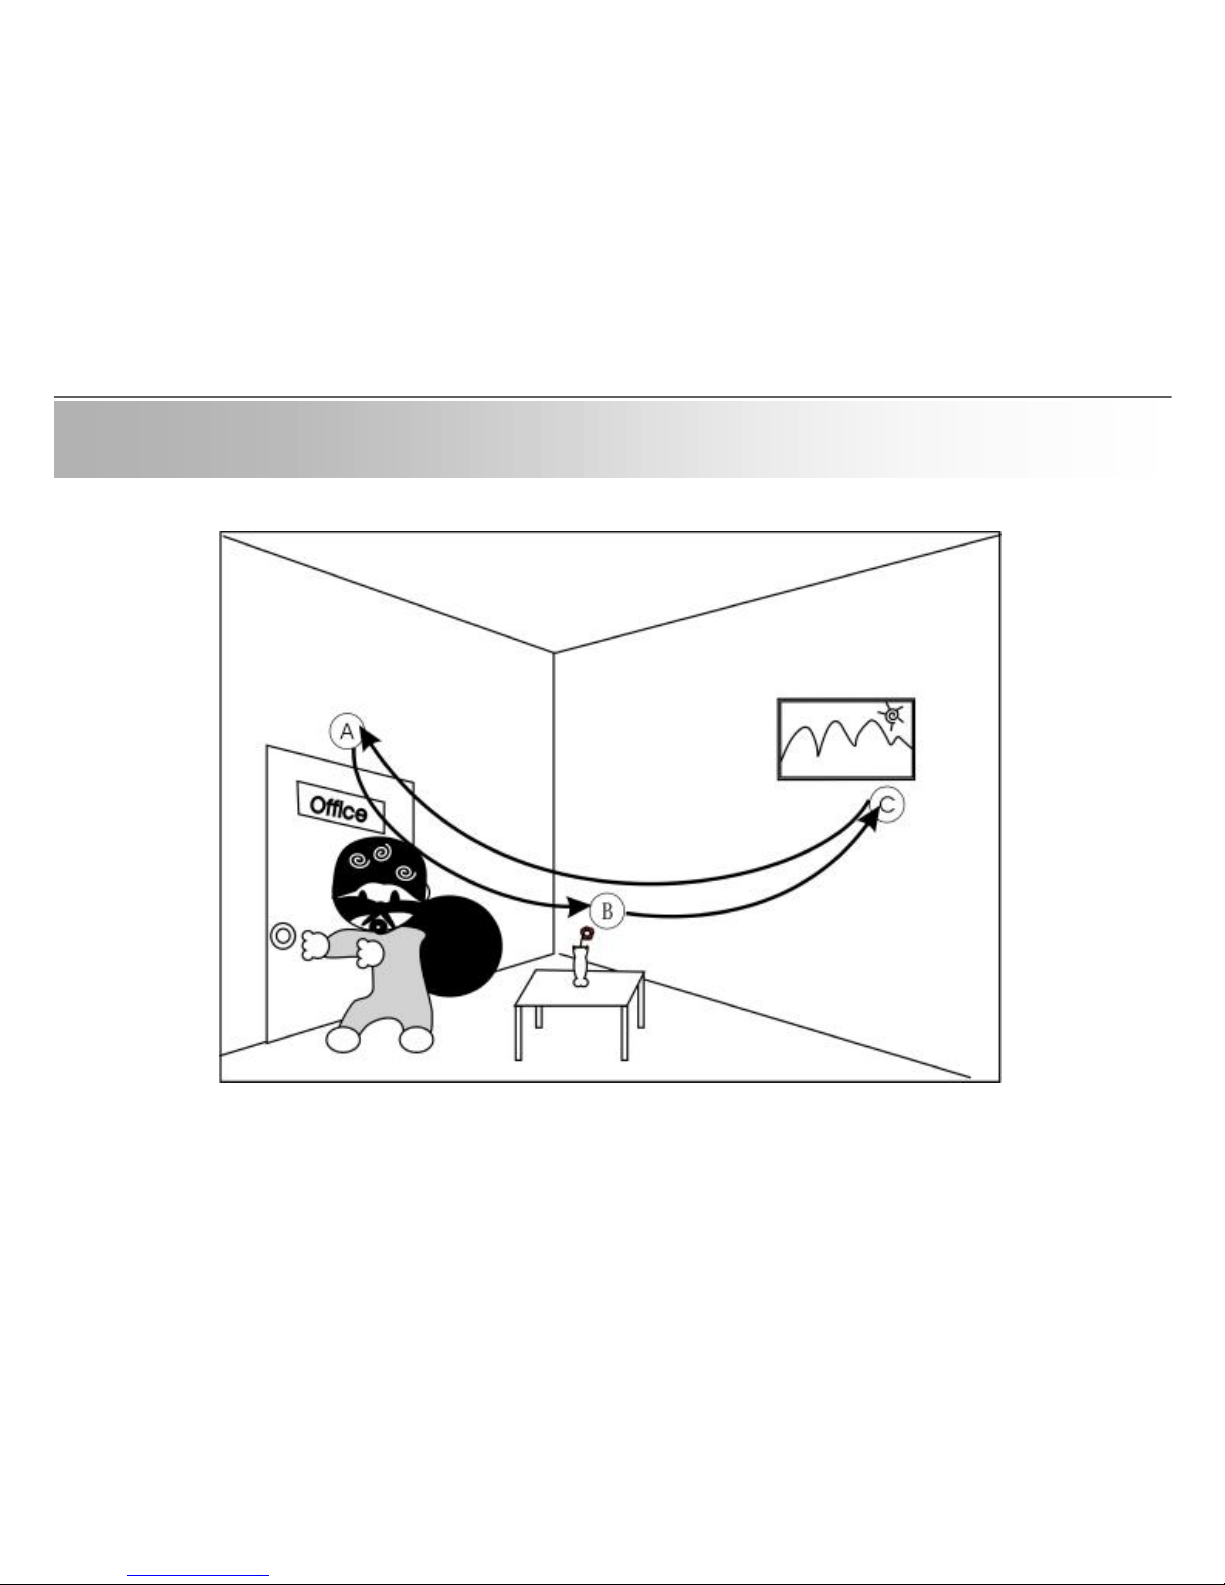
v SITUATION SIMULATE
(an example for PT(Z) operation)
Figure 6
11
Page 17

Situation simulate
•If there are 3 important points you want to detect, and we need the camera to detect them
like the figure 6. (AàBàCàA).
•The speed moving from A to B is slow, from B to C is slow, and from C to A is fast.
•When it moves to A, you want it to stay for 30 seconds. When it move to B and C, you want
it to stay for 10 seconds.
1. Press “MENU” to enter the main menu and press “ ” to move to “PRESET” function.
2. Press “ENTER” to enter the “PRESET” function.
3. Choose “ADD” to add the preset and set its name.
4. Enter “MENU” to confirm it and return to the “MENU” function.
STEP 1 : SET THE PRESET
12
Page 18
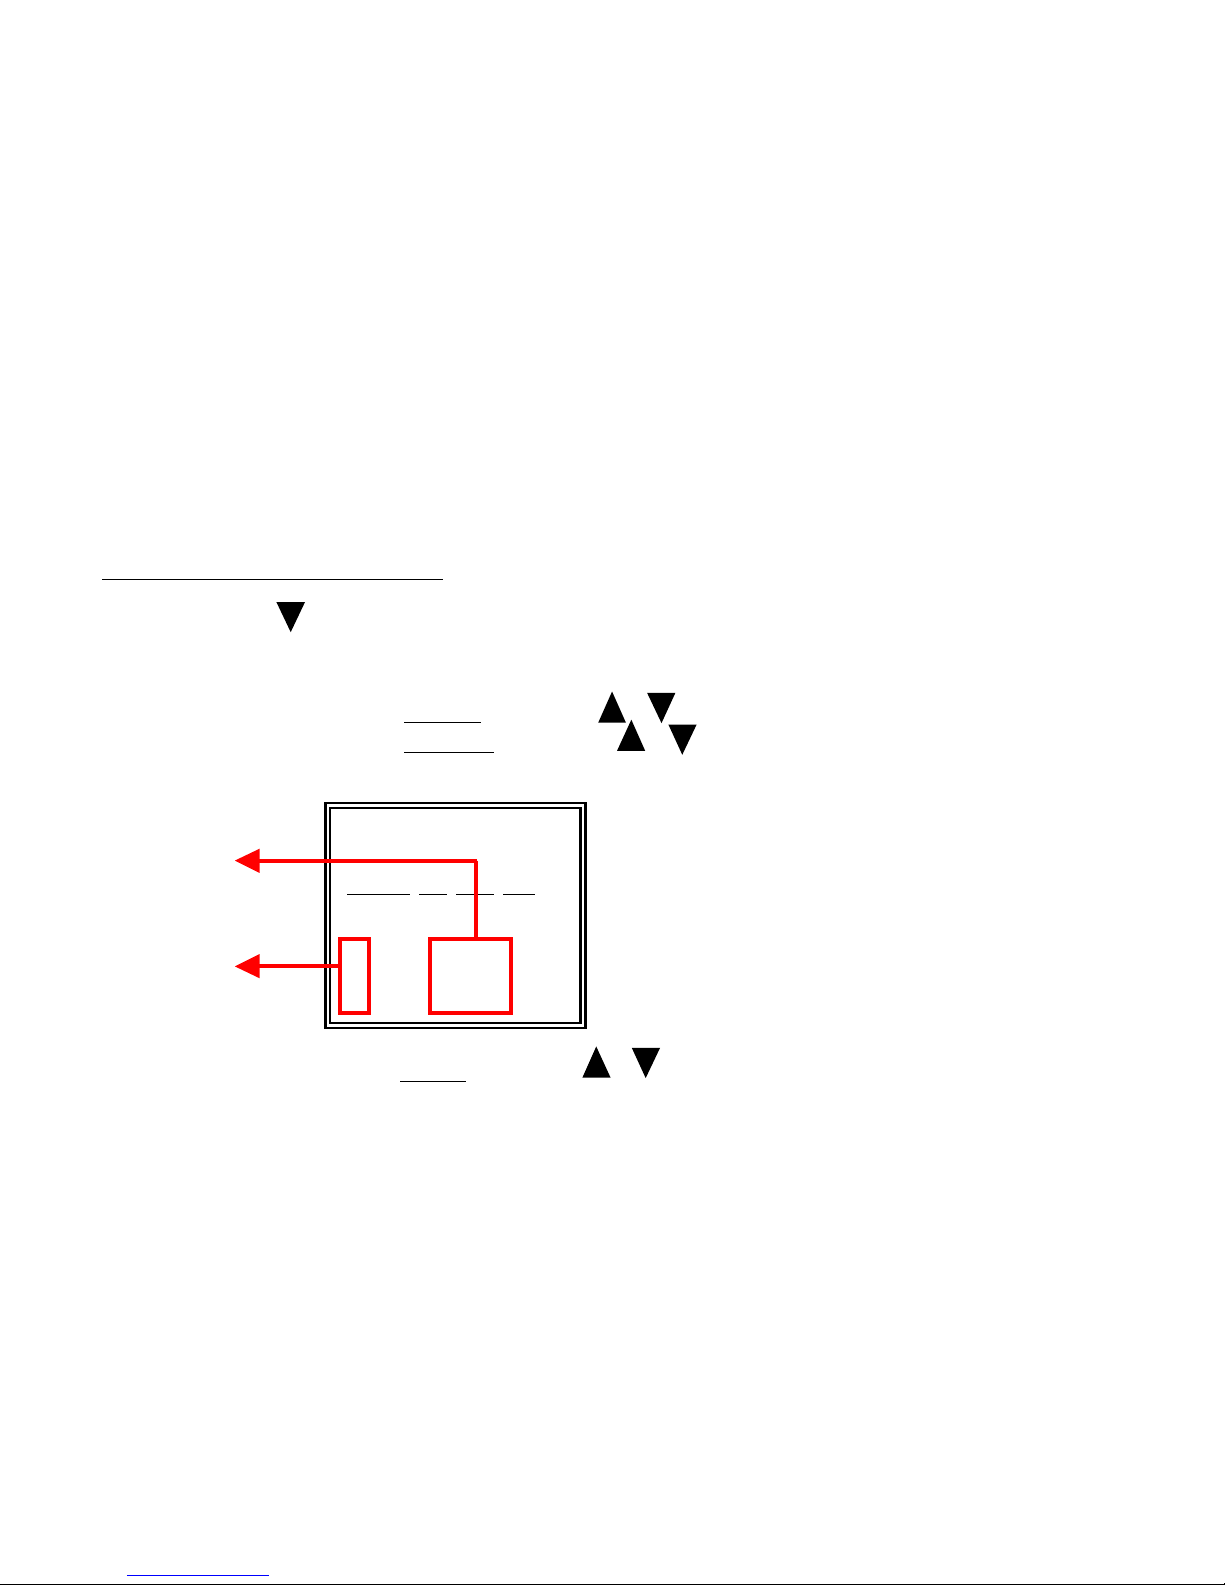
1. Press “ ” to move to “SEQUENCE” function.
2. Press “ENTER” to enter the “SEQUENCE” function.
3. Choose “ADD” to add the preset.
4. Move the cursor to SPEED, and press “”” ”to choose the speed.
5. Move the cursor to PRESET, and press “”“ “to choose the preset , A, B or C.
(It is because that you want to set the order as A to B to C ,to A and back, 3.)
STEP 2 : SET SEQUENCE
6. Move the cursor to STAY, and press “”” ”to choose the staying time.
7. Enter “MENU” to confirm it and return to the “MENU” function.
SEQUENCE
ADD INS EDIT DEL
SPEED PRESET STAY
01 : FAST 01àA 30s
02 : SLOW 02àB 10s
03 : FAST 03àC 10s
Number of
Sequence
Preset Number
and Name
•The speed 01 is fast. This means that when you change to SEQUENCE
mode, camera will move to A in fast speed(because it is the first order).
•The speed move from A to B is slow.
13
Page 19
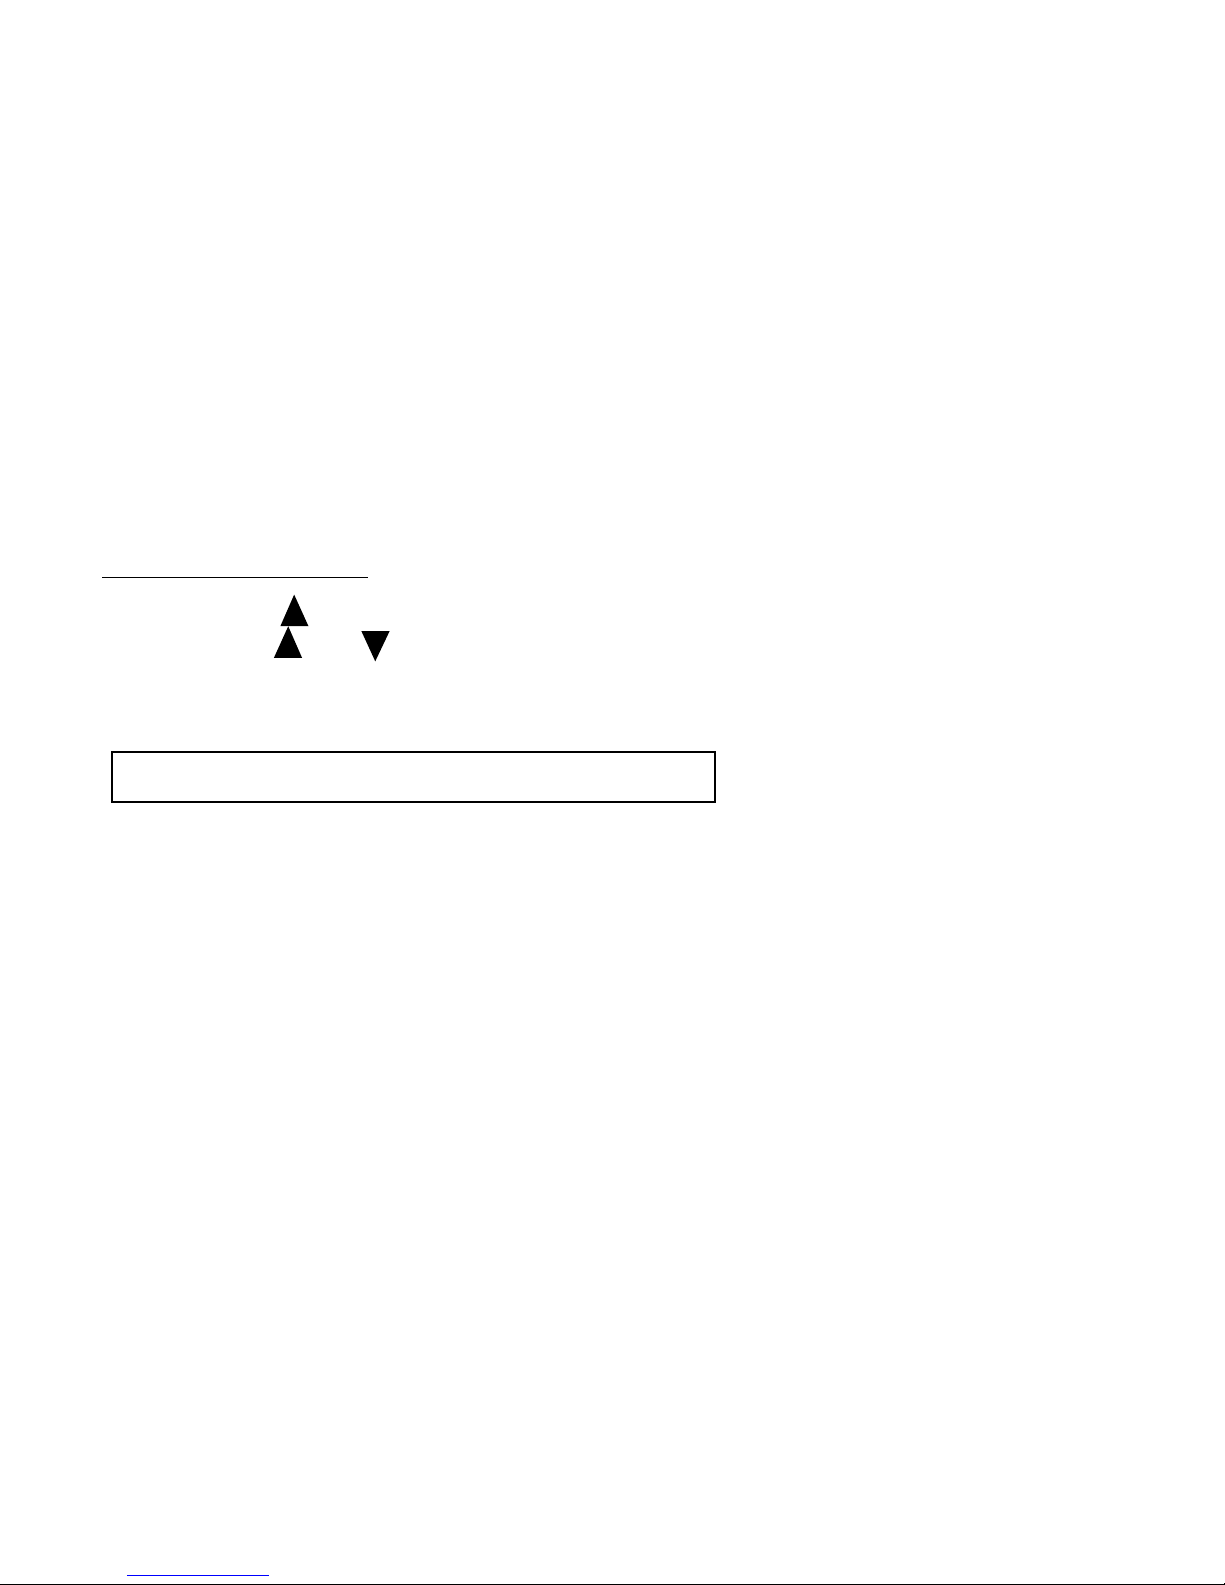
1. Press “ ” to move to “AUTO” function.
2. Press “ ” or ” ” to change the auto mode from AUTO PAN to SEQUENCE.
3. Press ENTER or MENU to confirm the selection.
4. Press “AUTO” button to switch to auto mode.
STEP 3 : SET AUTO
After these three steps, PT(Z) will operate as figure 6 displays.
14
Page 20
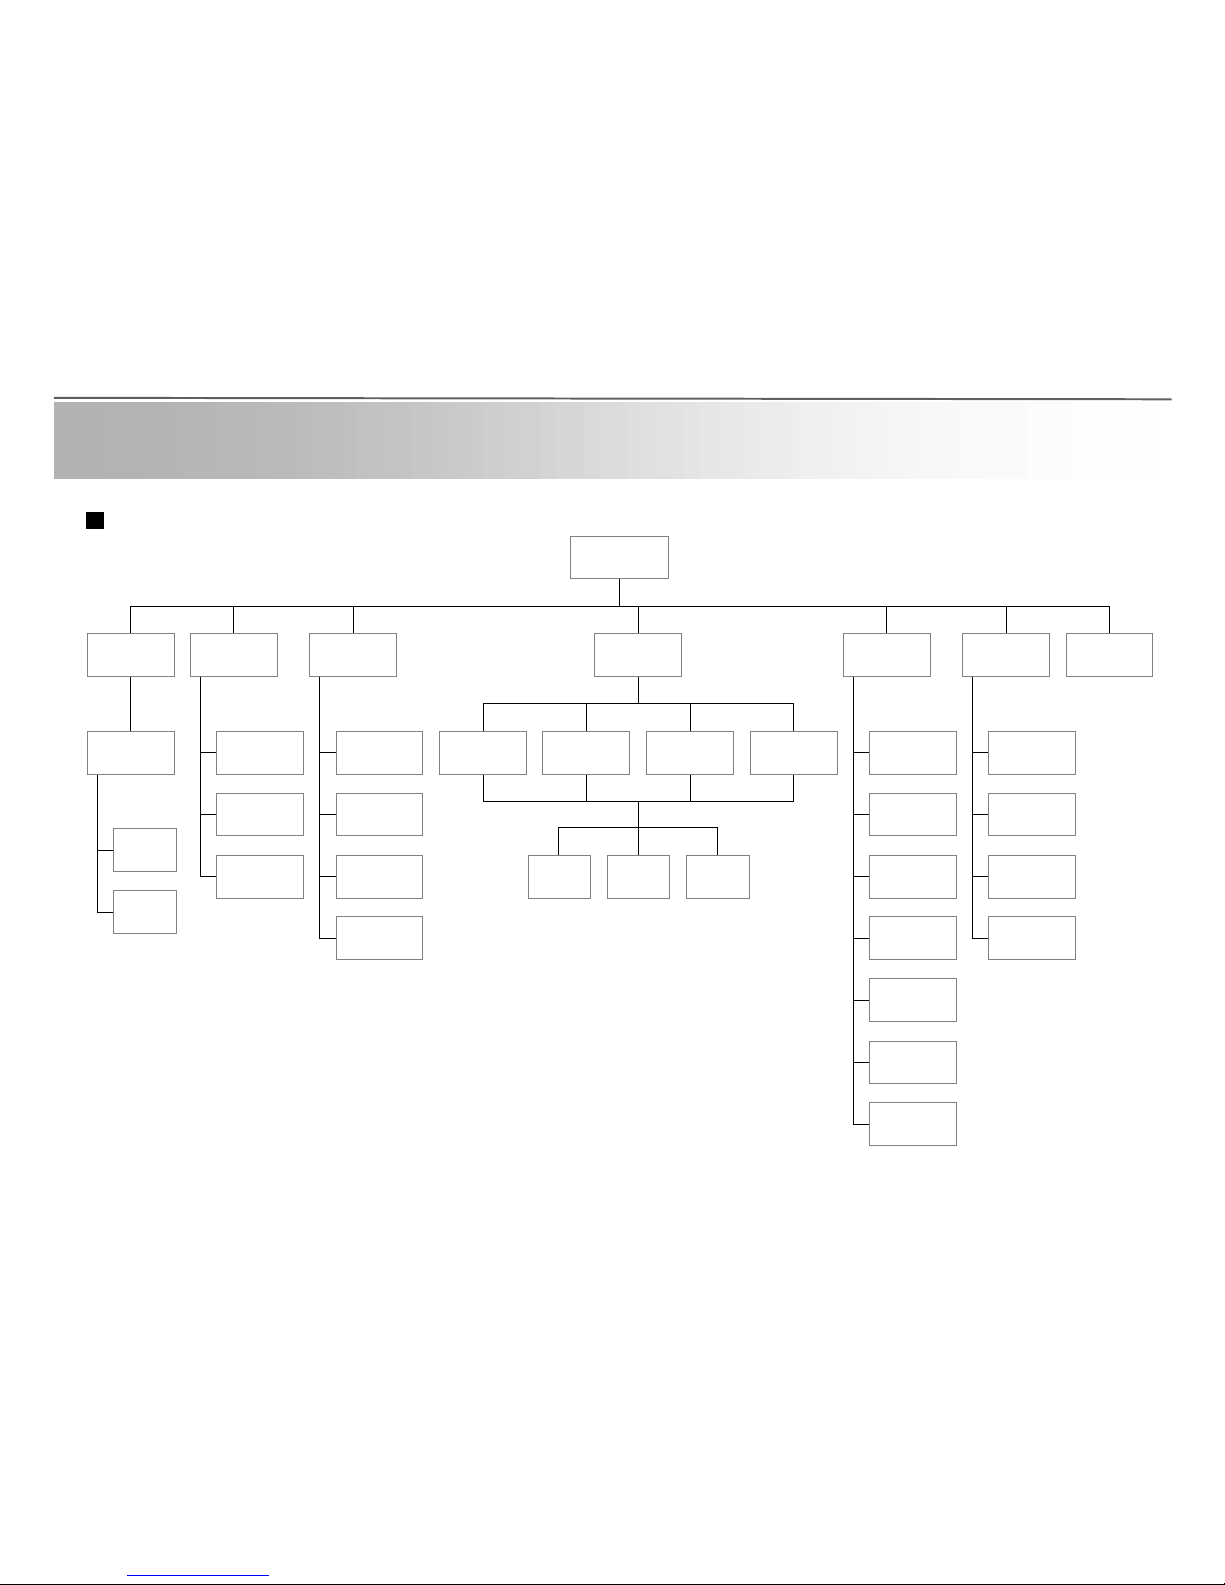
Menu
SEQUENCE
AUTO PAN
AUTO MODE
AUTO
SPEED
LEFT LIMIT
RIGHT LIMIT
AUTO PAN
ADD
INS
EDIT
DEL
PRESET
ADD INS EDIT DEL
SPEED PRESET STAY
SEQUENCE
BACKLIHT
AGC
BRIGHTNESS
SHARPNESS
COLOR
MIRROR
TITLE
CAMERA
TITLE DISPLAY
TITLE POSITION
PAN TILT SPEED
SYSTEM RESET
SYSTEM HOME
MENU
NOTE:
•CPC501—Without Mirror Function
•How to use AP to control the PT(Z) will be described below.
•How to download AP is described in the user’s manual of the I.M. DVR.
•How to set I.D. is described in the user’s manual of the I.M. DVR.
•How to control PT(Z) by I.M. DVR is described in Appendix.
15
v DETAILED MENU SETUP
Page 21
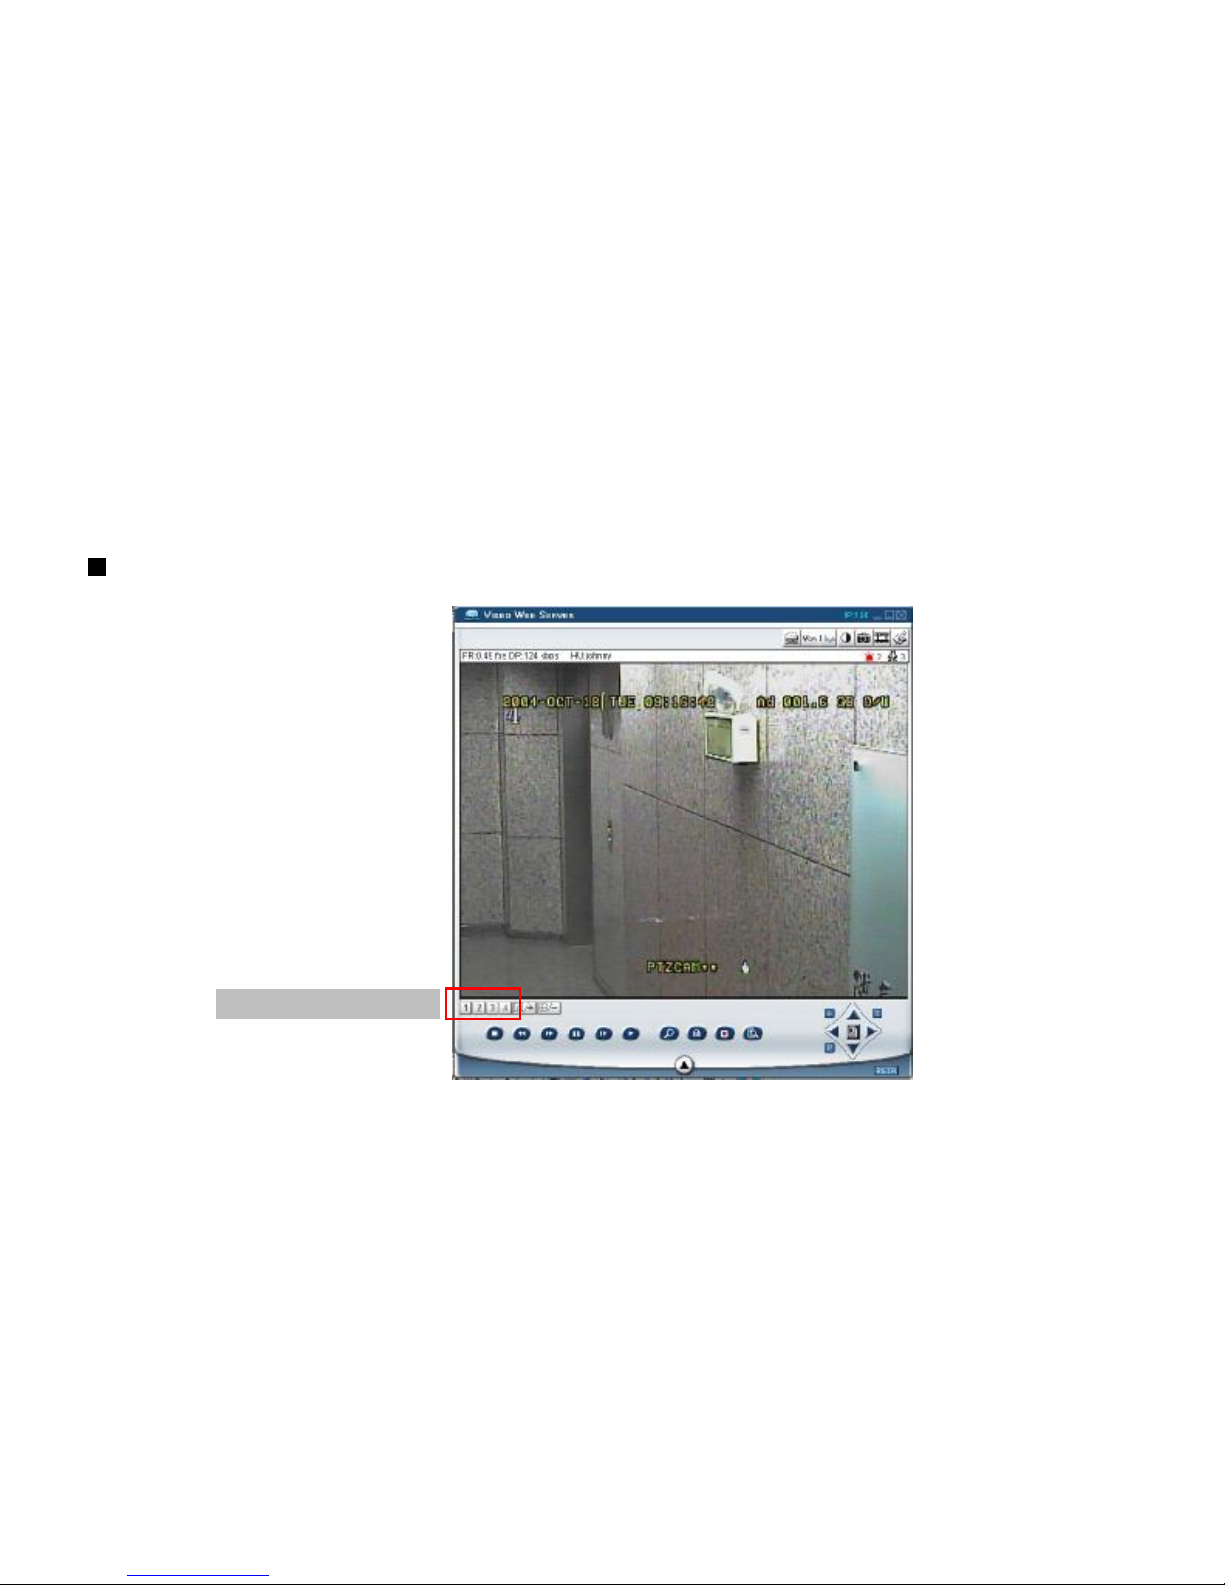
Enter PT(Z) Menu Via AP
Click here to choose channel
16
Page 22
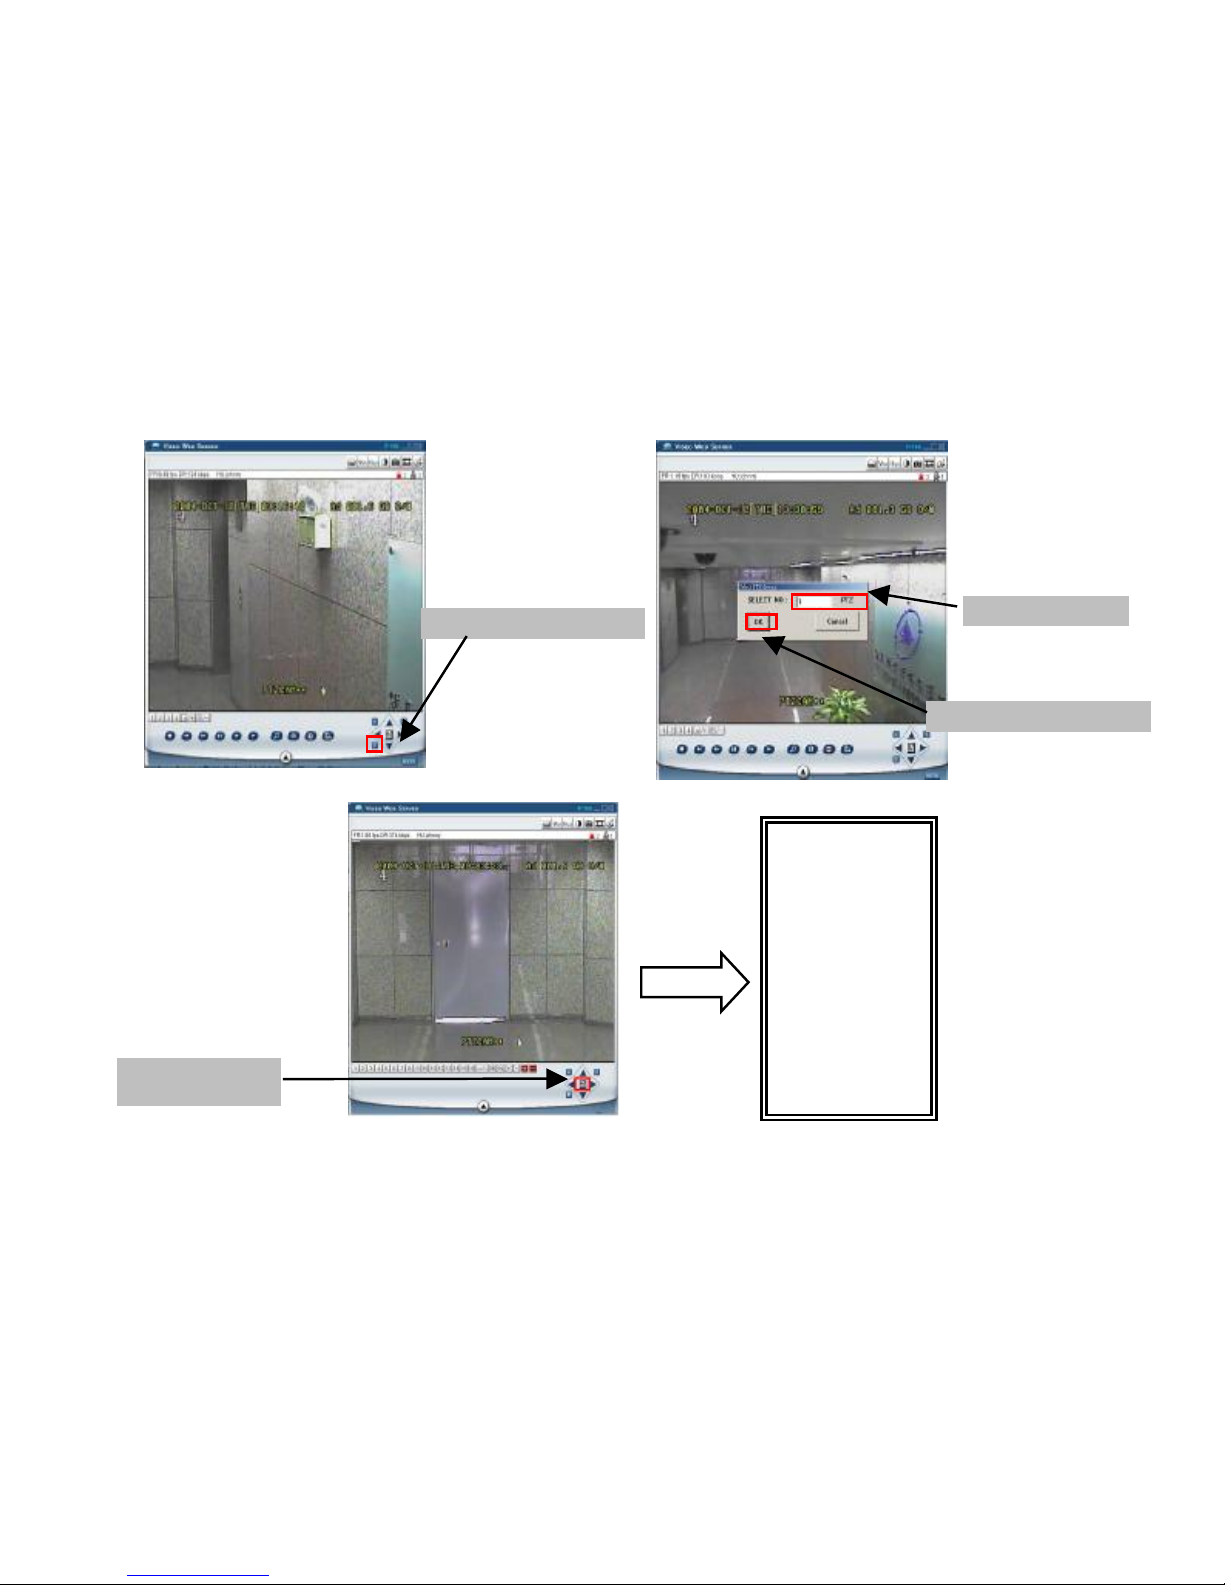
Select PT(Z) number
Click here to enter PT(Z) mode
Click here to enter
the menu
MENU
AUTO
AUTO PAN
PRESET
SEQUENCE
CAMERA
SYSTEM
HOME
Click here to enter PT(Z) mode
17
Page 23
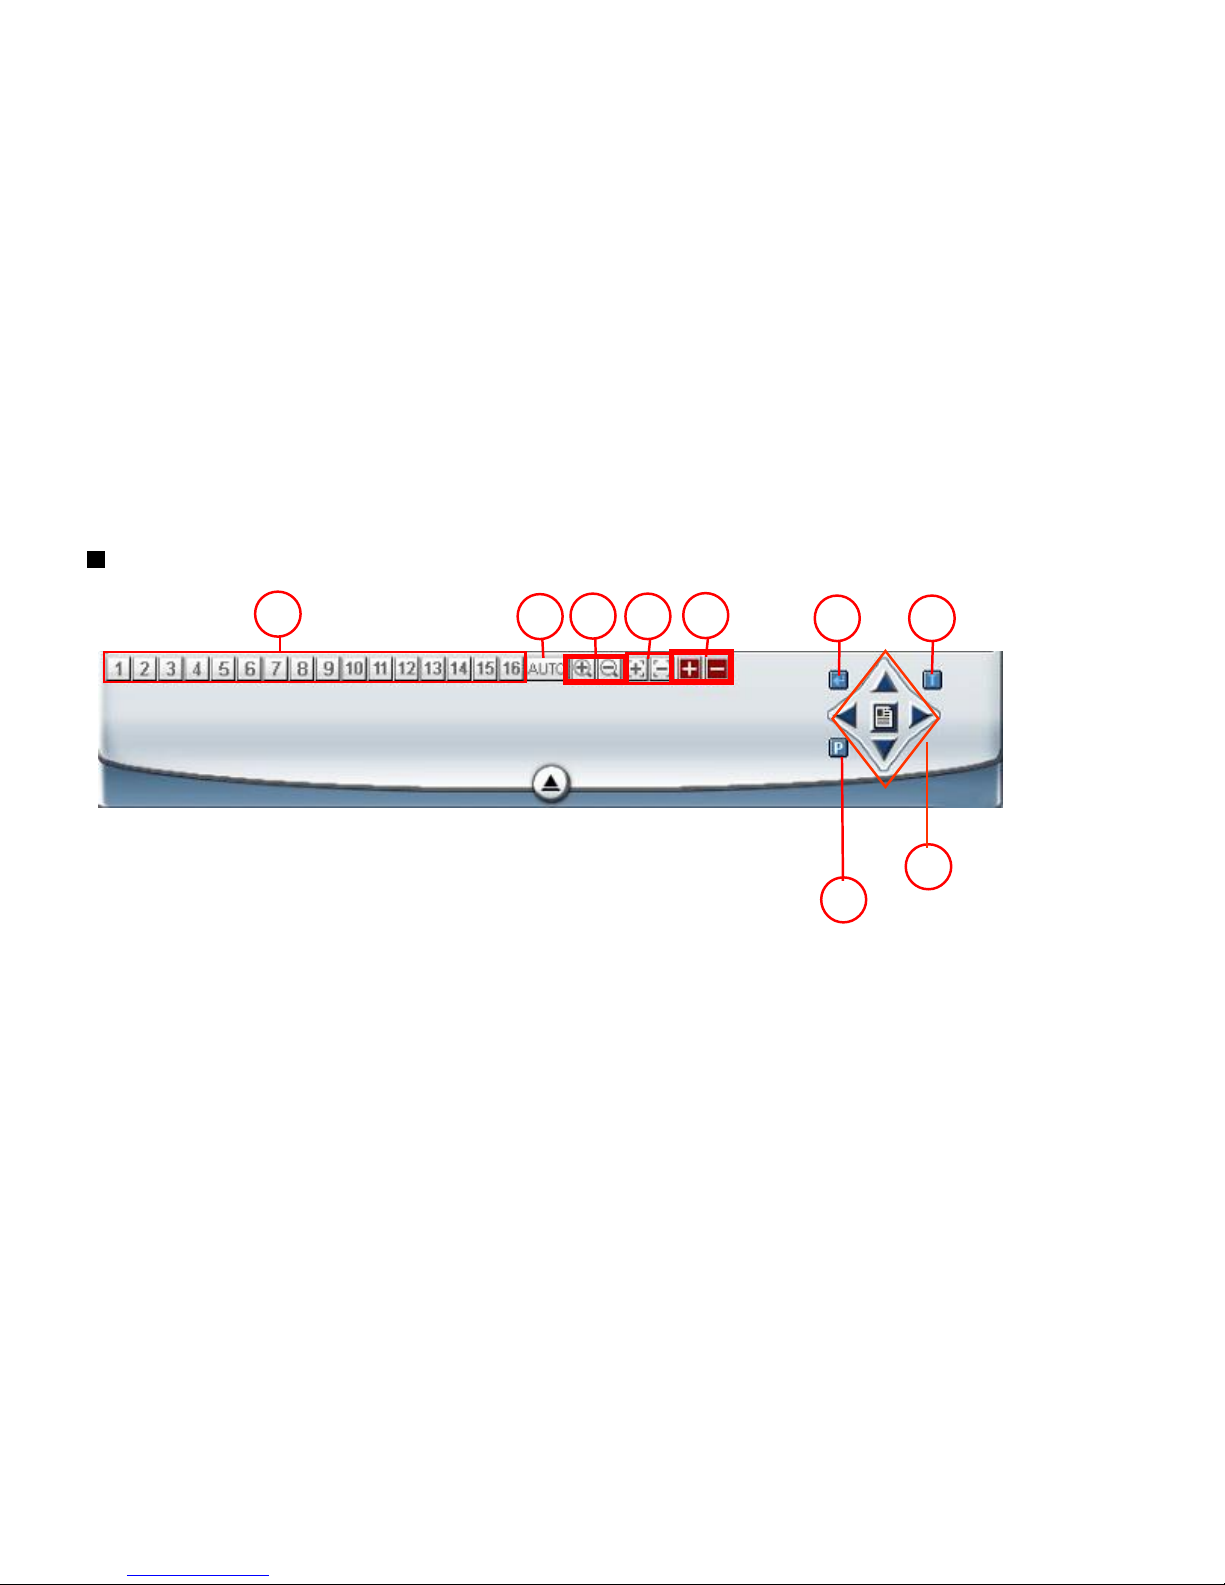
Control Panel
1
2
3 4
5
6
97
8
1. preset(1-16).
2. To start the AUTO Mode.
3. ZOOM Tele/ ZOOM Wide.
4. FOCUS Near/ FOCUS Far.
5. Max zoom in/ Max zoom out.
6. PTZ
7. Enter
8. Menu(Exit), Left, Right, Up, Down.
9.TURBO
18
Page 24
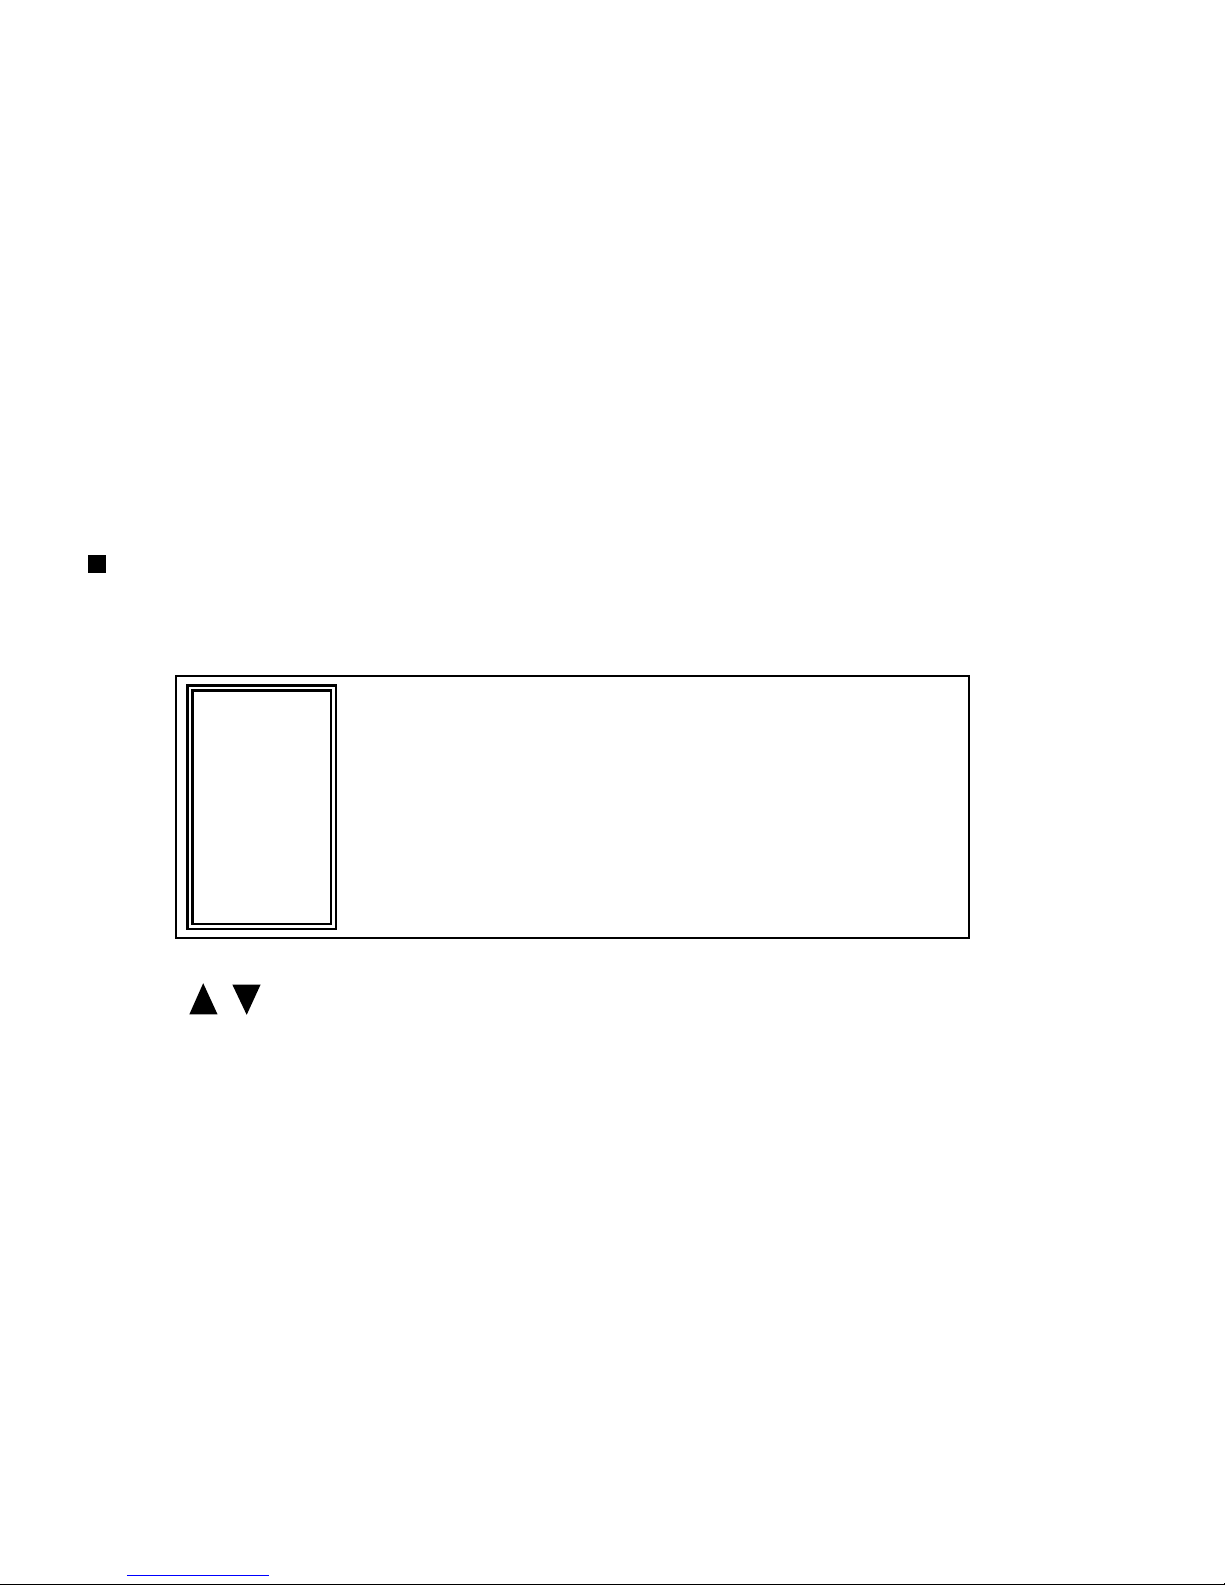
Main Menu
Press “MENU” button to enter the main menu.
There are 7 options available in the Main Menu.
MENU
AUTO
AUTO PAN
PRESET
SEQUENCE
CAMERA
SYSTEM
HOME
AUTO-----------To choose the mode “SEQUENCE” or “AUTO PAN”.
AUTO PAN----Auto pan setup.
PRESET--------preset setup (1 to 16).
SEQUENCE---Sequence setup.
CAMERA------Camera setup.
SYSTEM-------System setup.
HOME----------Home position.
The following buttons are used for menu setting :
•“ ”” ”: Move the cursor.
•ENTER : Enter a submenu mode/Choose an option under a submenu for browsing/Confirm the selection.
•MENU : Enter the menu mode/ Confirm the change/ Exit the menu.
19
Page 25
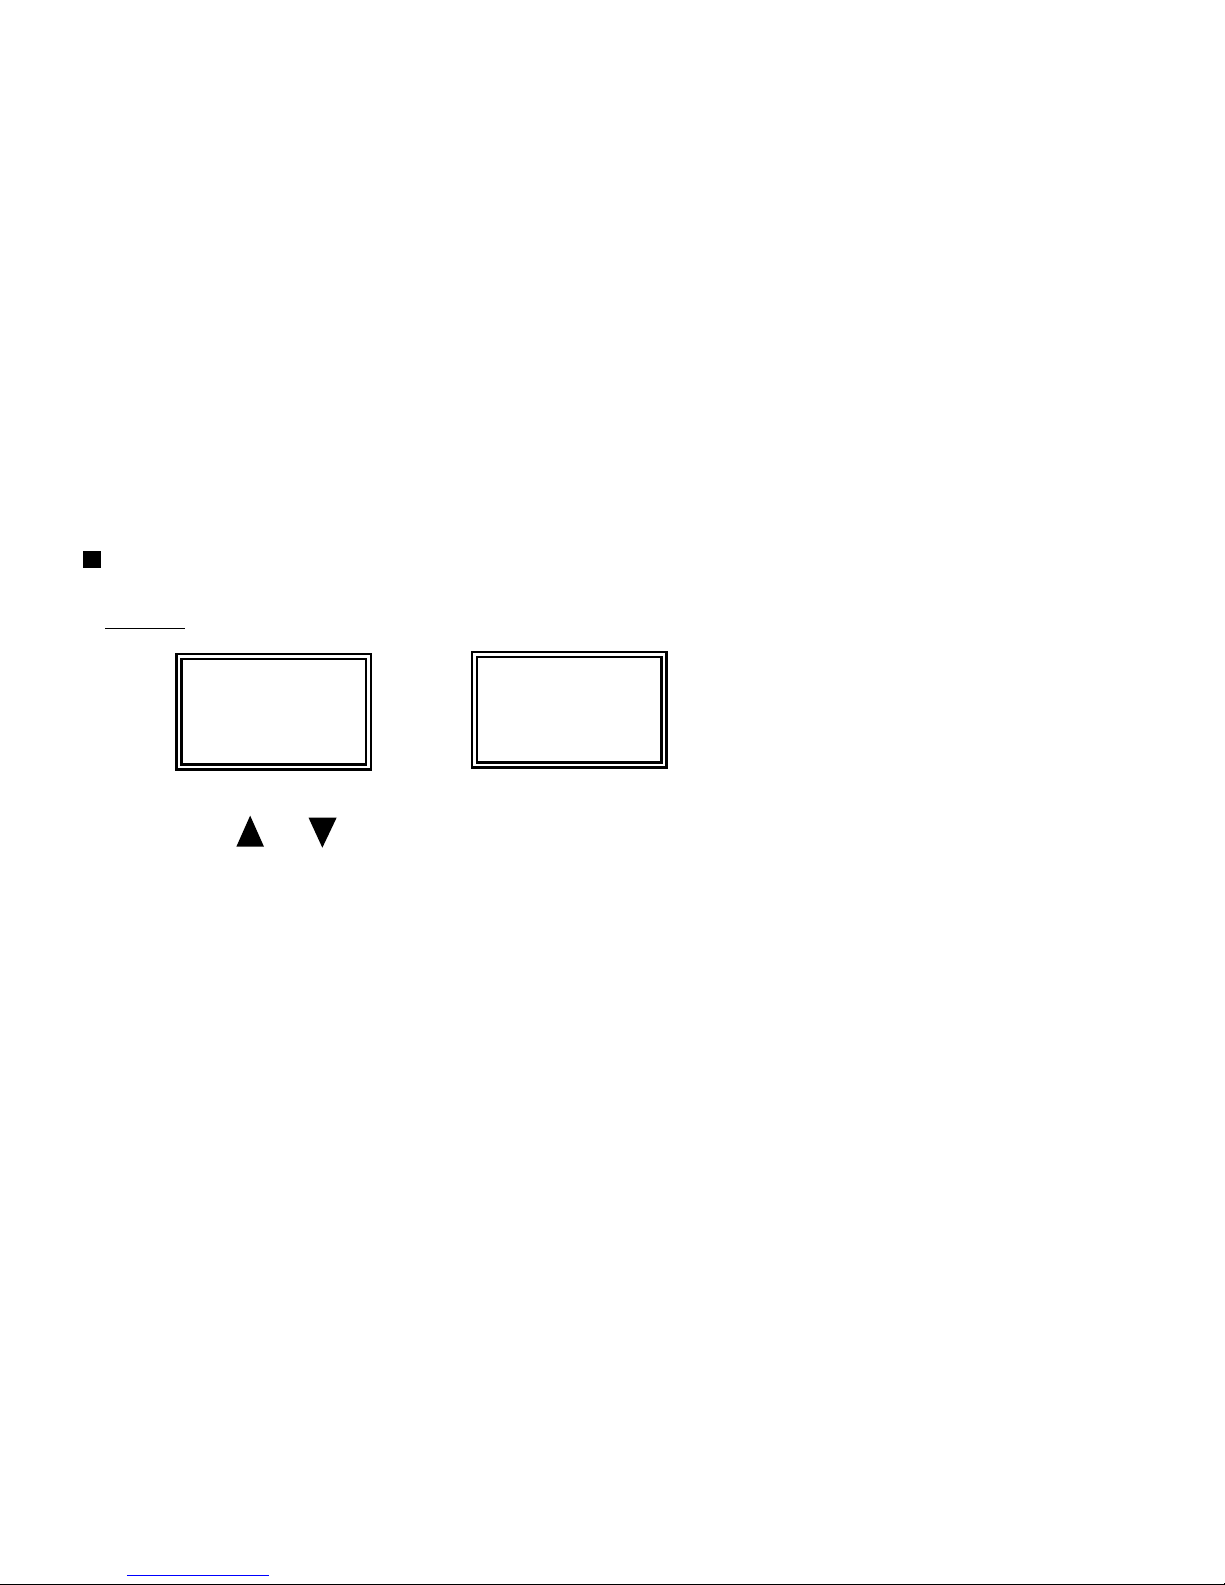
Main Options
AUTO
AUTO MODE
AUTO PAN
AUTO MODE
SEQUENCE
•Press “ ” or ” ” can change the auto mode to AUTO PAN or SEQUENCE.
•Press MENU to confirm the selection.
•In the “AUTO PAN” mode, PT(Z) will catch the image automatically.
•In the “SEQUENCE” mode, users can setup the point users want to detect and PT(Z) will catch
the image according to your setting.
20
Page 26
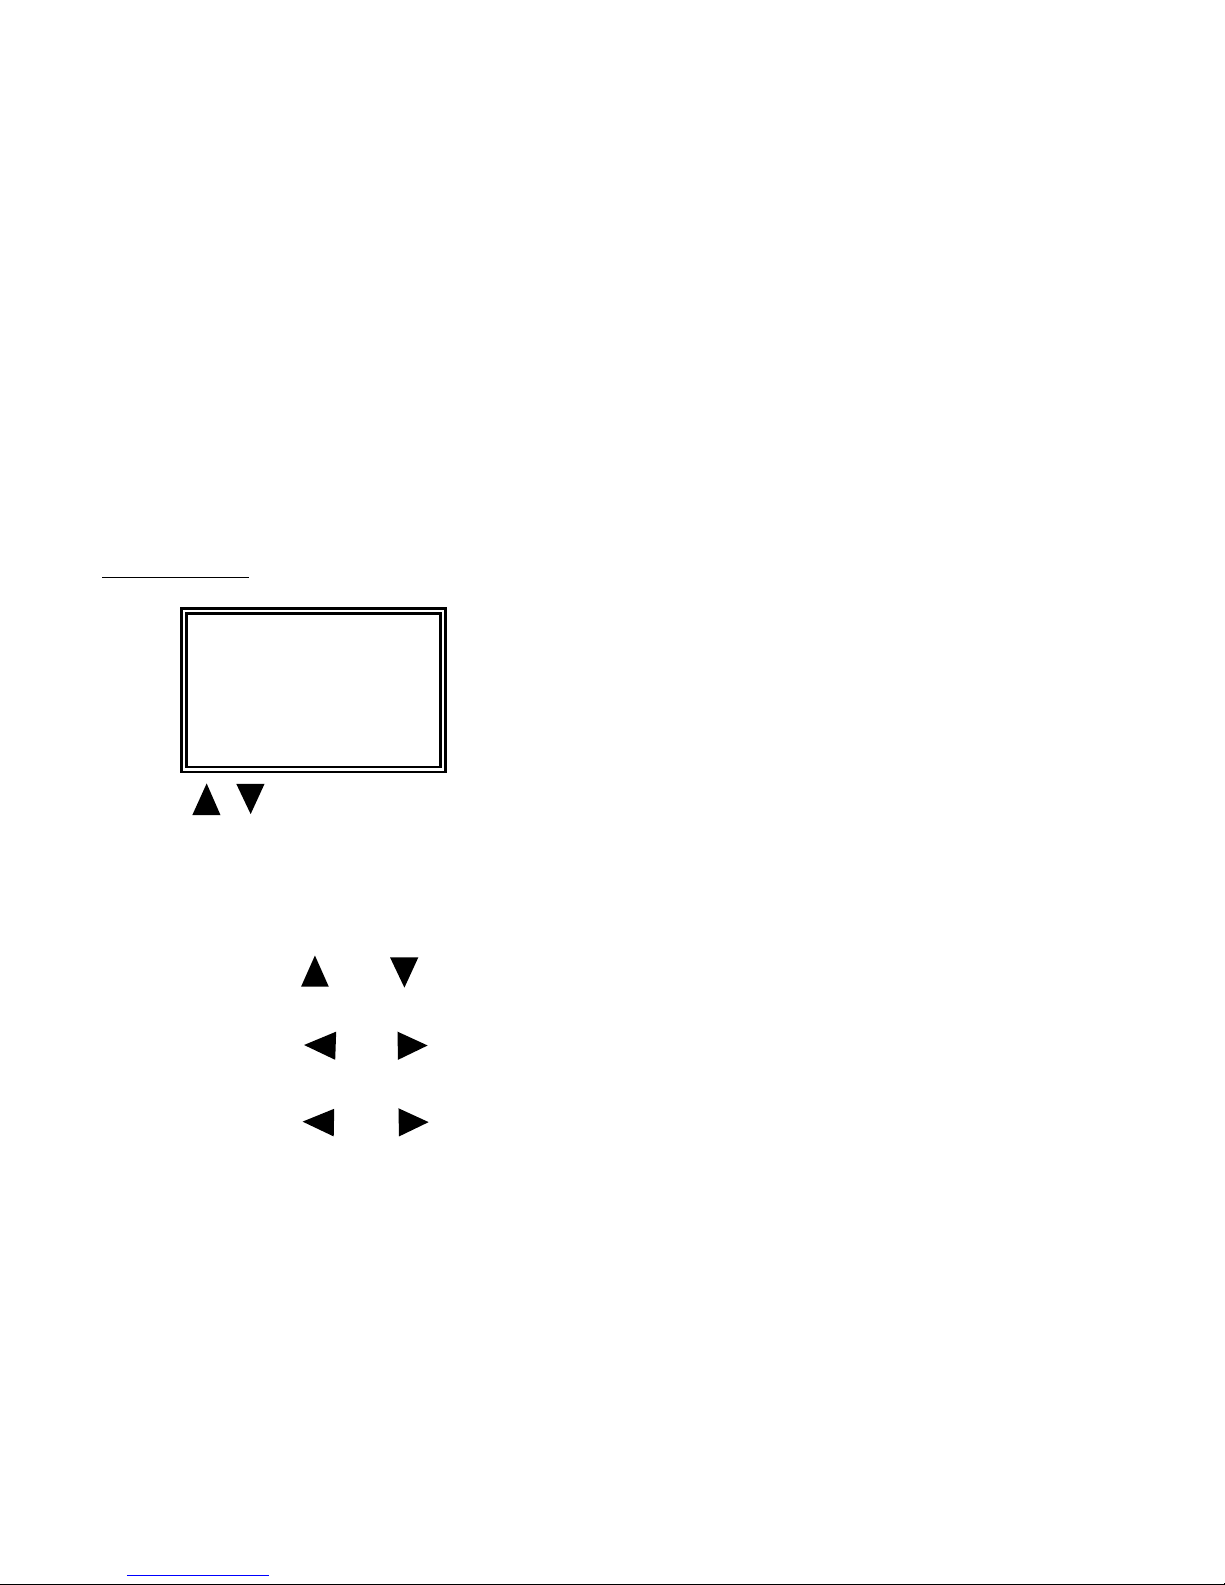
1. SPEED
•There are 2 options available in the “SPEED”– FAST and SLOW.
•Press “ ” or ” ” can change the speed.
2. LEFT LIMIT
•Press “ ” or ” ” can setup the left limit and press enter to confirm it.
3. RIGHT LIMIT
•Press “ ” or ” ” can setup the right limit and press enter to confirm it.
AUTO PAN
AUTO PAN
SPEED FAST
LEFT LIMIT
RIGHT LIMIT
•“ ”” ”: Move the cursor.
•ENTER : Enter a submenu mode/ an option under a submenu for browsing/Confirm the selection.
•MENU : Enter the menu mode/ Confirm the change/ Exit a menu.
21
Page 27
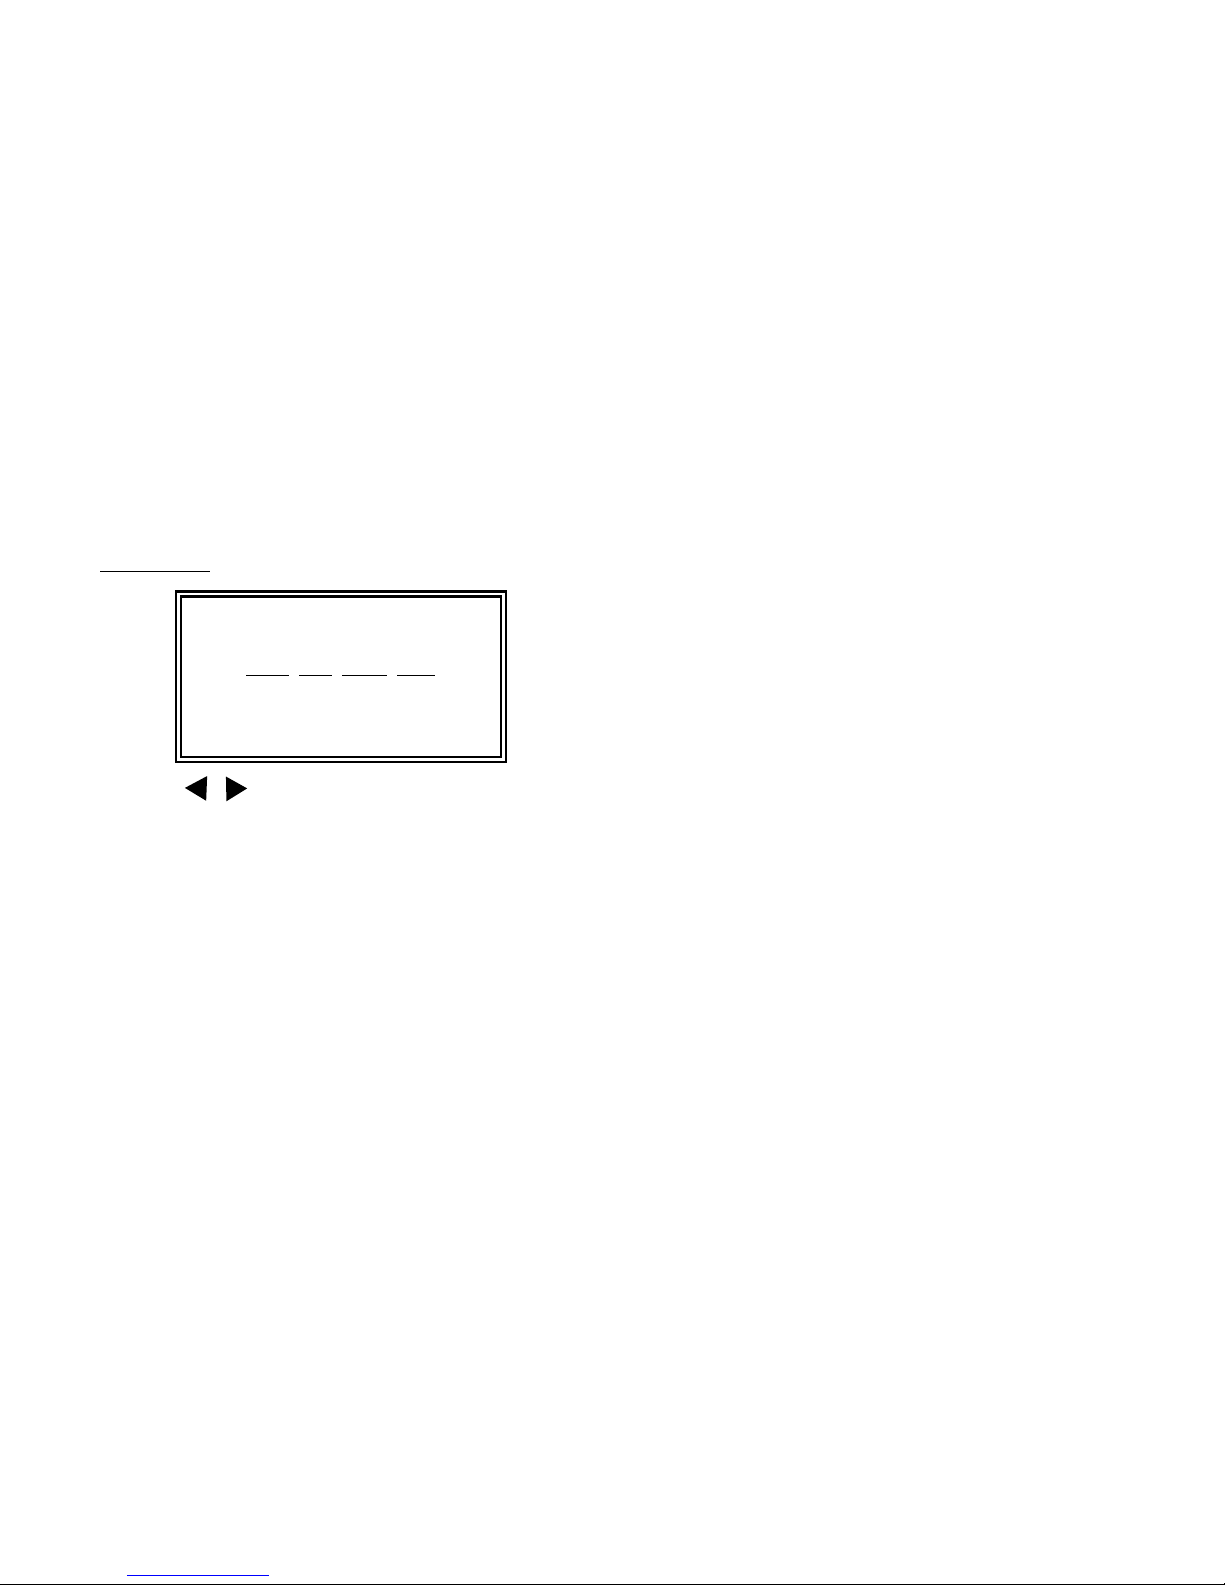
PRESET
PRESET
ADD INS EDIT DEL
01 : A
02 : B
•“ ”” ”: Move the cursor.
•ENTER : Enter a submenu mode/ an option under a submenu for browsing/Confirm the selection.
•MENU : Enter the menu mode/ Confirm the change/ Exit a menu.
1. ADD
•To add the preset (maximum is 16).
2. INS
•To insert the camera preset
22
Page 28
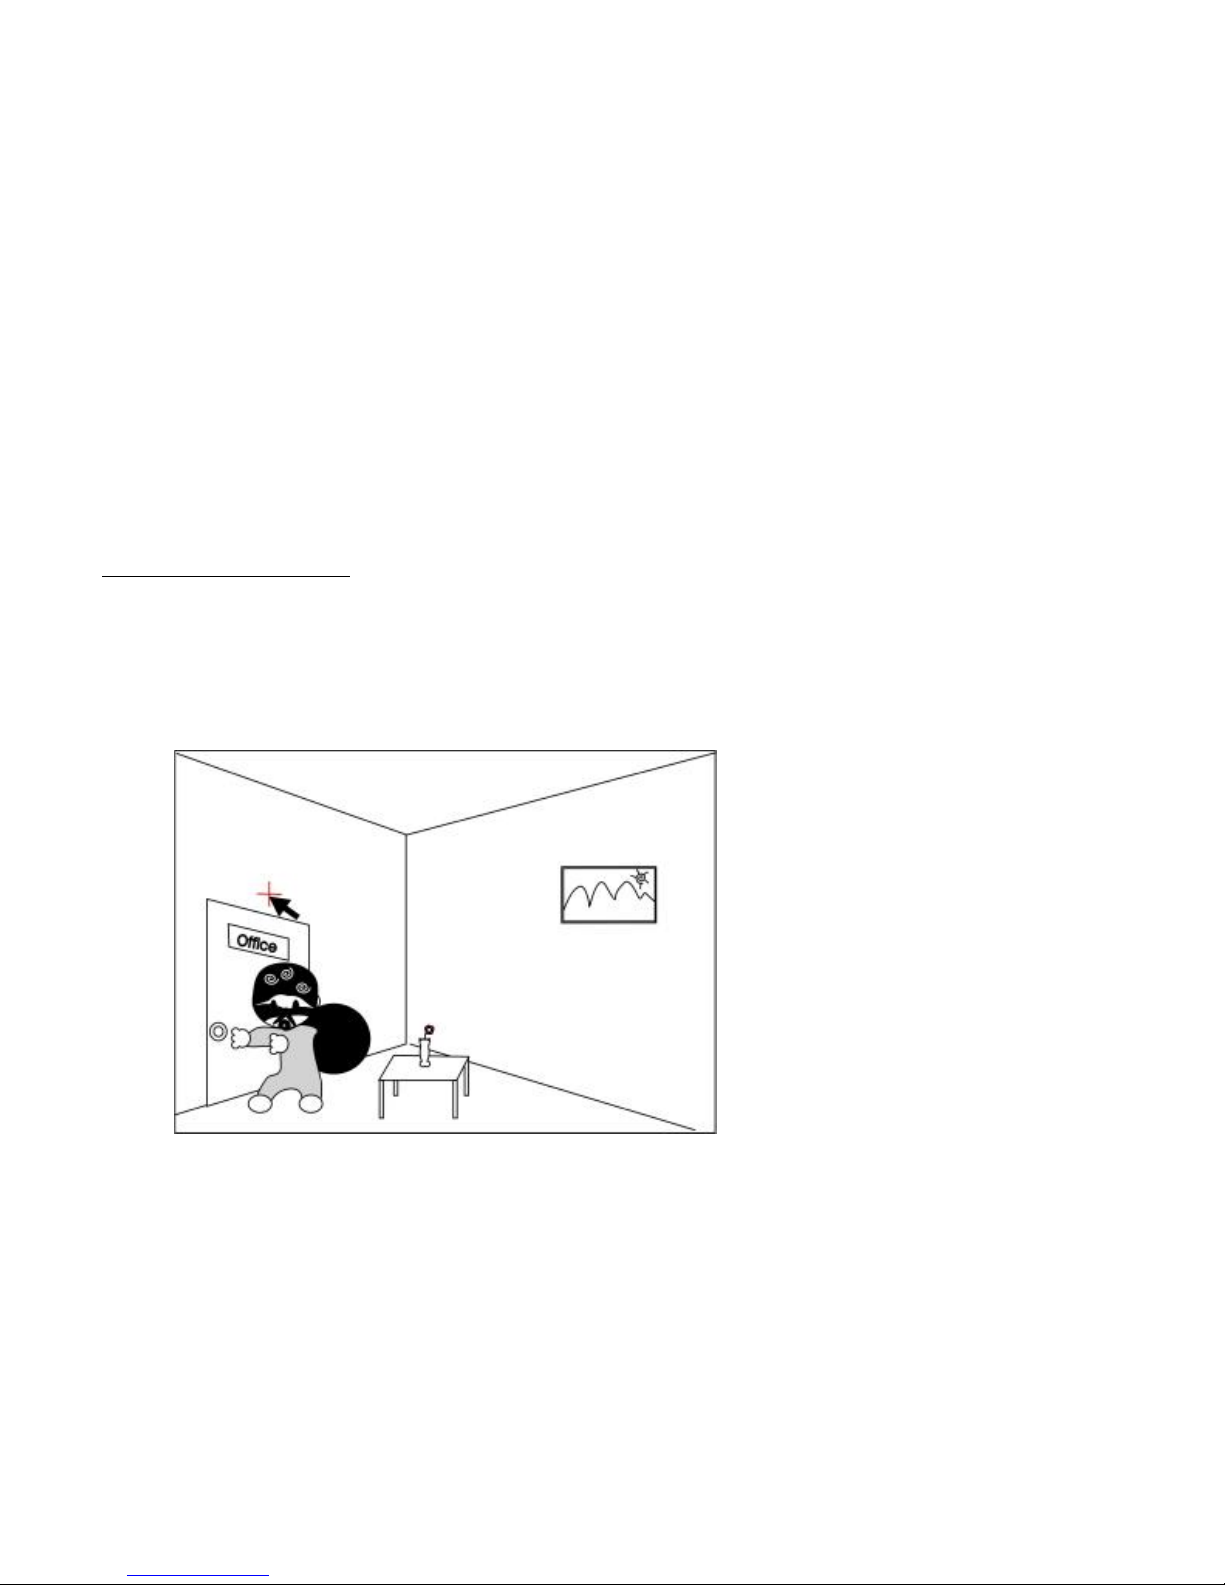
PT(Z) HOT POINT (Control via CPD DVR)
•You can control PT(Z) by mouse. Click the position you want to d
etect, and PT(Z) would move to
where you click.
•Below is the example for “PT(Z) HOT POINT”.
A
•If you want to detect point A, you could
move the mouse to point A.(figure 7)
•Click the left click.
•You can see the symbol “ + “.
•And you will see the result below.
(figure 8)
(figure 7)
23
Page 29
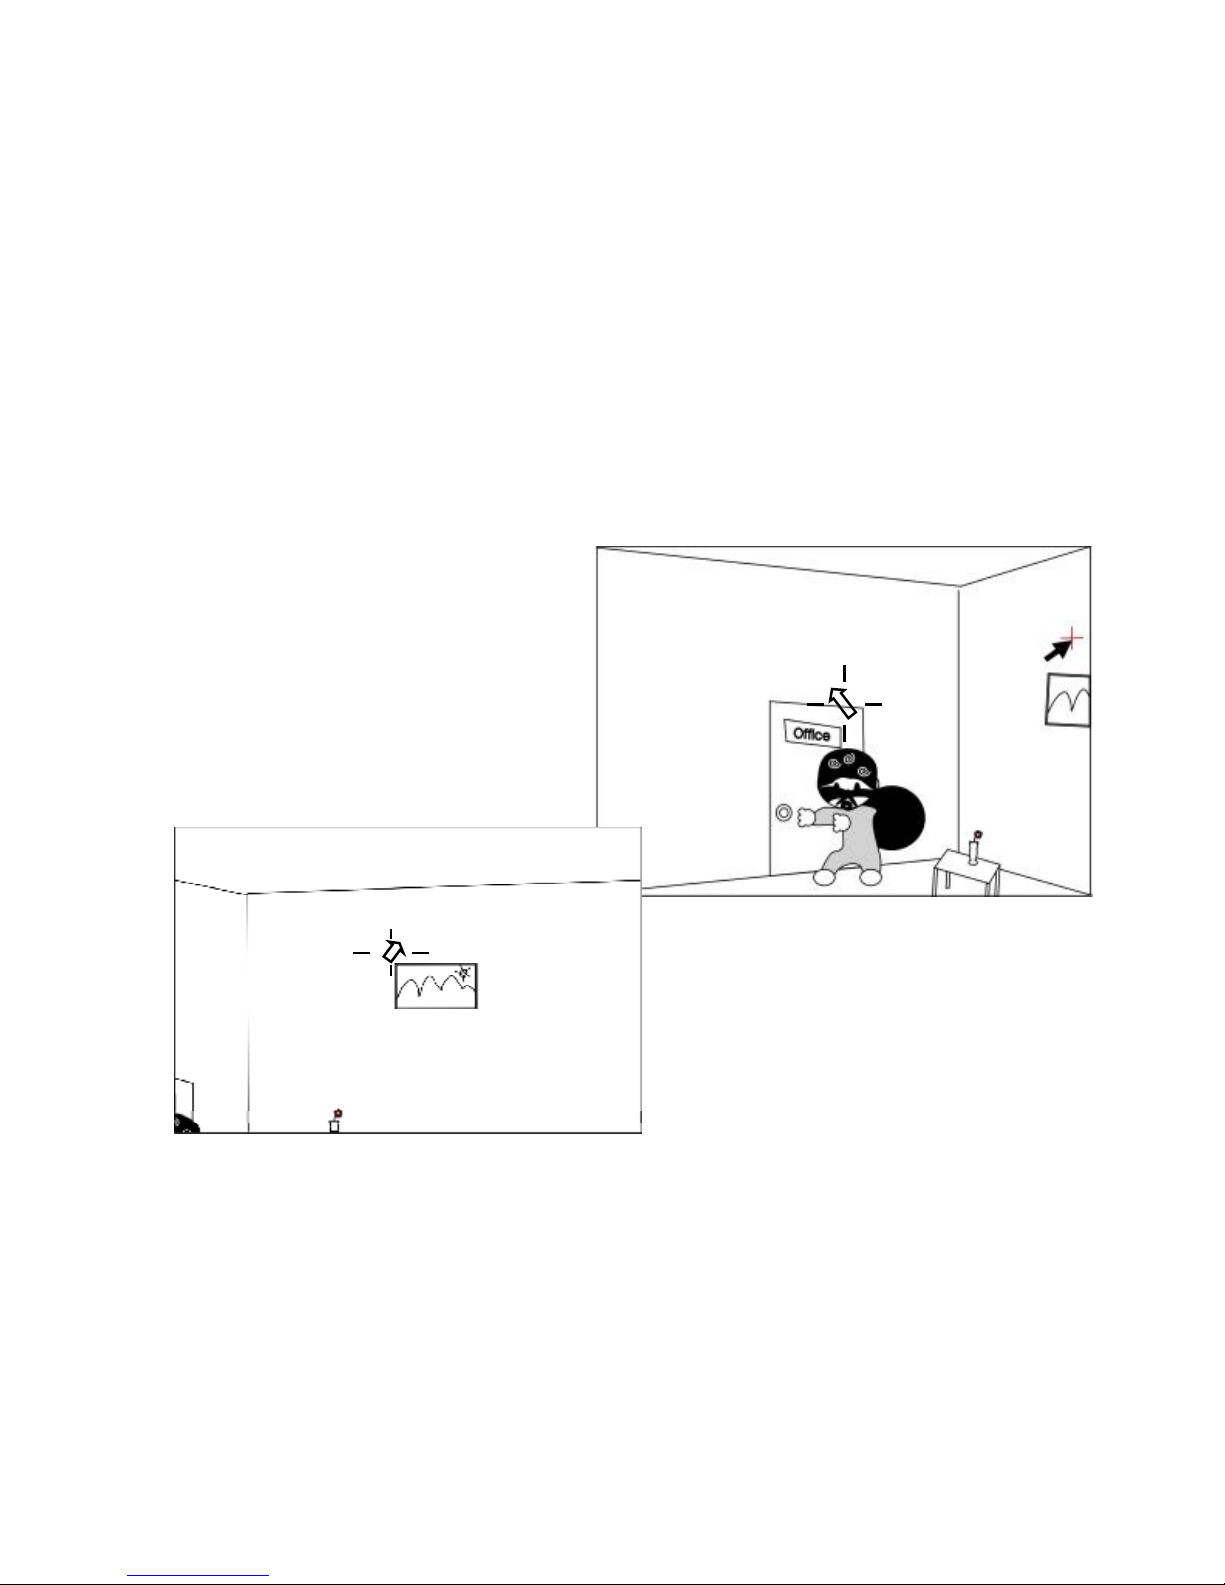
•And then, if you want to detect point B.
Move the mouse to point B.(figure 8)
•Click the left click.
•You can see the symbol “ + “.
•And you will see the result below.
(figure 9)
A
B
(figure 8)
(figure 9)
B
24
Page 30
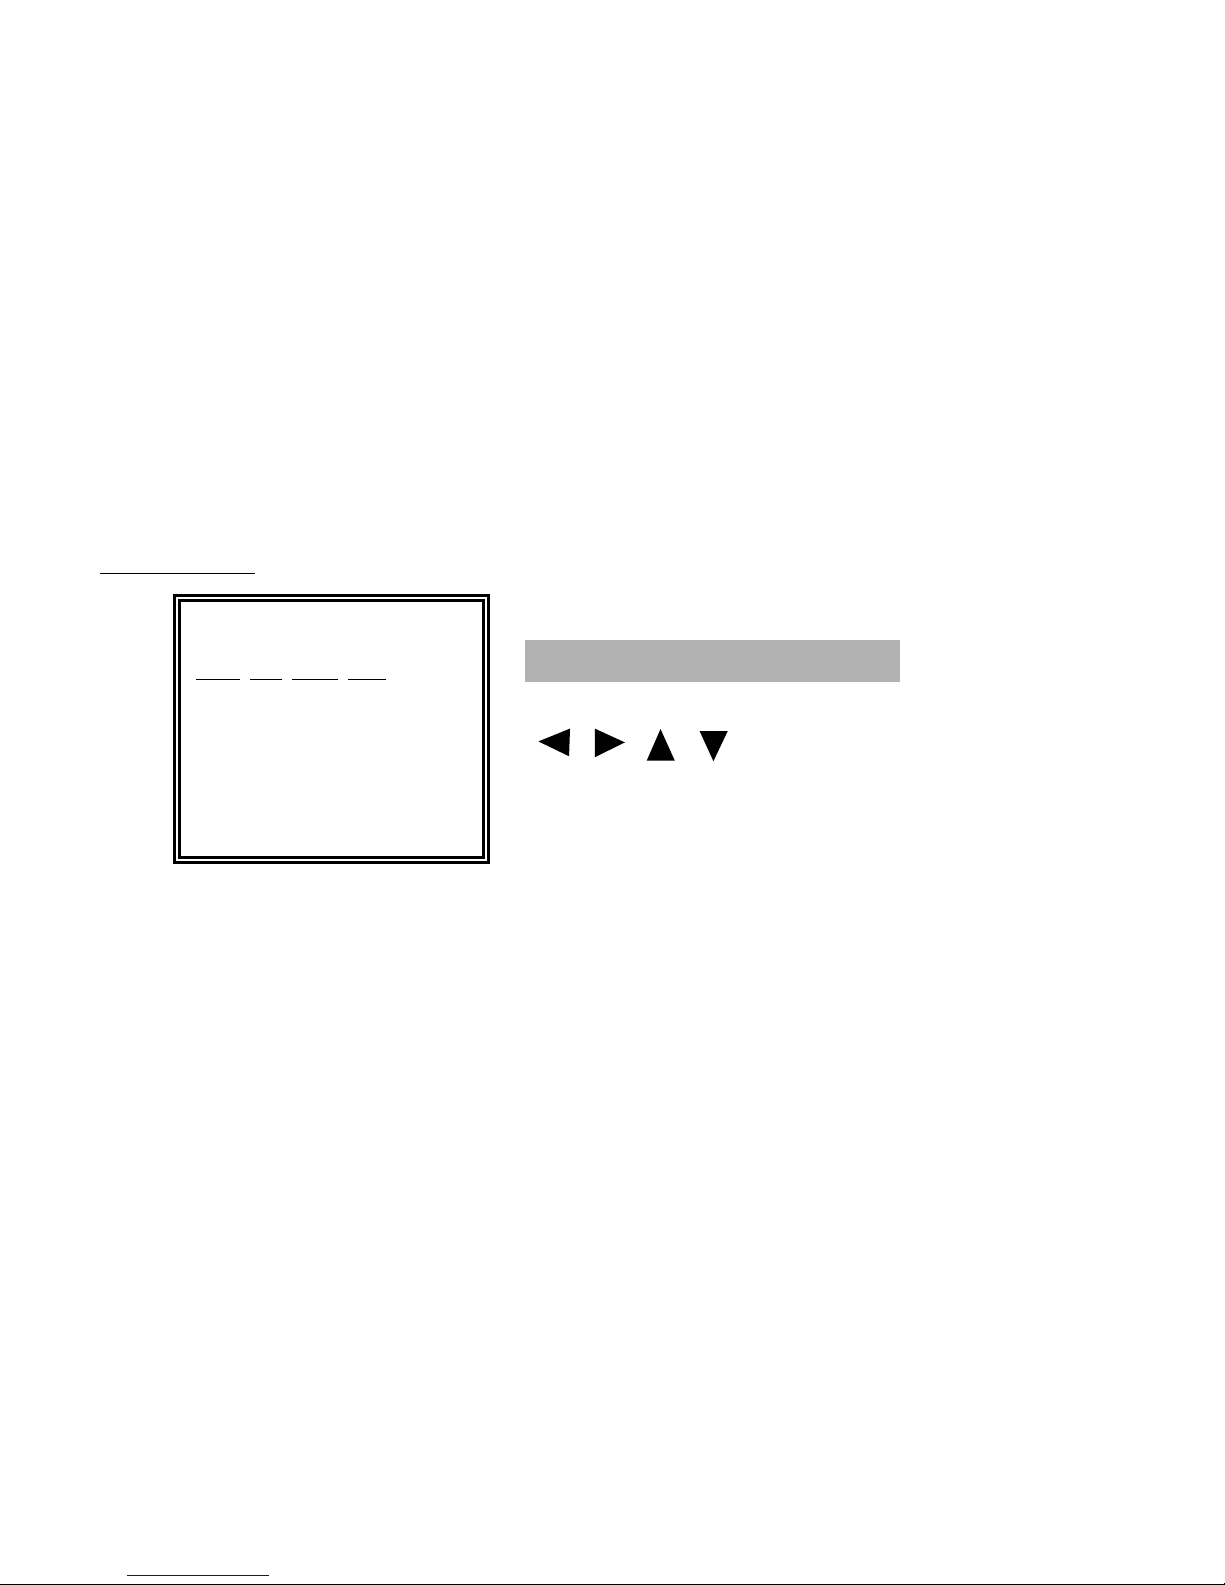
SEQUENCE
SEQUENCE
ADD INS EDIT DEL
SPEED PRESET STAY
01 : FAST 01àA 01s
02 : FAST 02àB 01s
03 : FAST 03àC 01s
AUTO : SEQUENCE PREVIEW
•“ ”” ”” ”” ”: Move the cursor.
•ENTER : Enter a submenu mode/ Choose an option under a submenu for
browsing/ Confirm the selection.
•MENU : Enter the menu mode/ Confirm the change/ Exit the menu.
•It depends on your “PRESET”, there are 3 point you have set and you can choose this 3
point to set. ( For example, there is a 3-detection-point setting and you can set the sequent
like 01à02à03à01,01à03à02à03, and so on. )
Users can set up 32 sets of sequence at most.
1. ADD
•To add the preset you had set previously.
2. INS
•To insert the preset you had set previously.
25
Page 31

3. EDIT
•To edit the preset you had set previously.
4. DEL
•To delete the preset you had set previously.
5. SPEED
•This function is to set the speed ( Fast and Slow).
6. STAY
•This function is to set the staying time. ( 01s, 02s, 03s, 05s, 10s, 20s, 30s and 60s).
7. AUTO: SEQUENCE PREVIEW
•When you enter the “SEQUENCE” menu, you can see the message “AUTO:
SEQUENCE PREVIEW”.
•Click “Auto” and the PT(Z) would detect as the sequence you set.
8. AUTO: PRESET PREVIEW
•When you add, insert, edit or delete the preset, you can see themessage “AUTO:
PRESET PREVIEW”.
•Click “Auto” and the PT(Z) would show the point you set.
26
Page 32
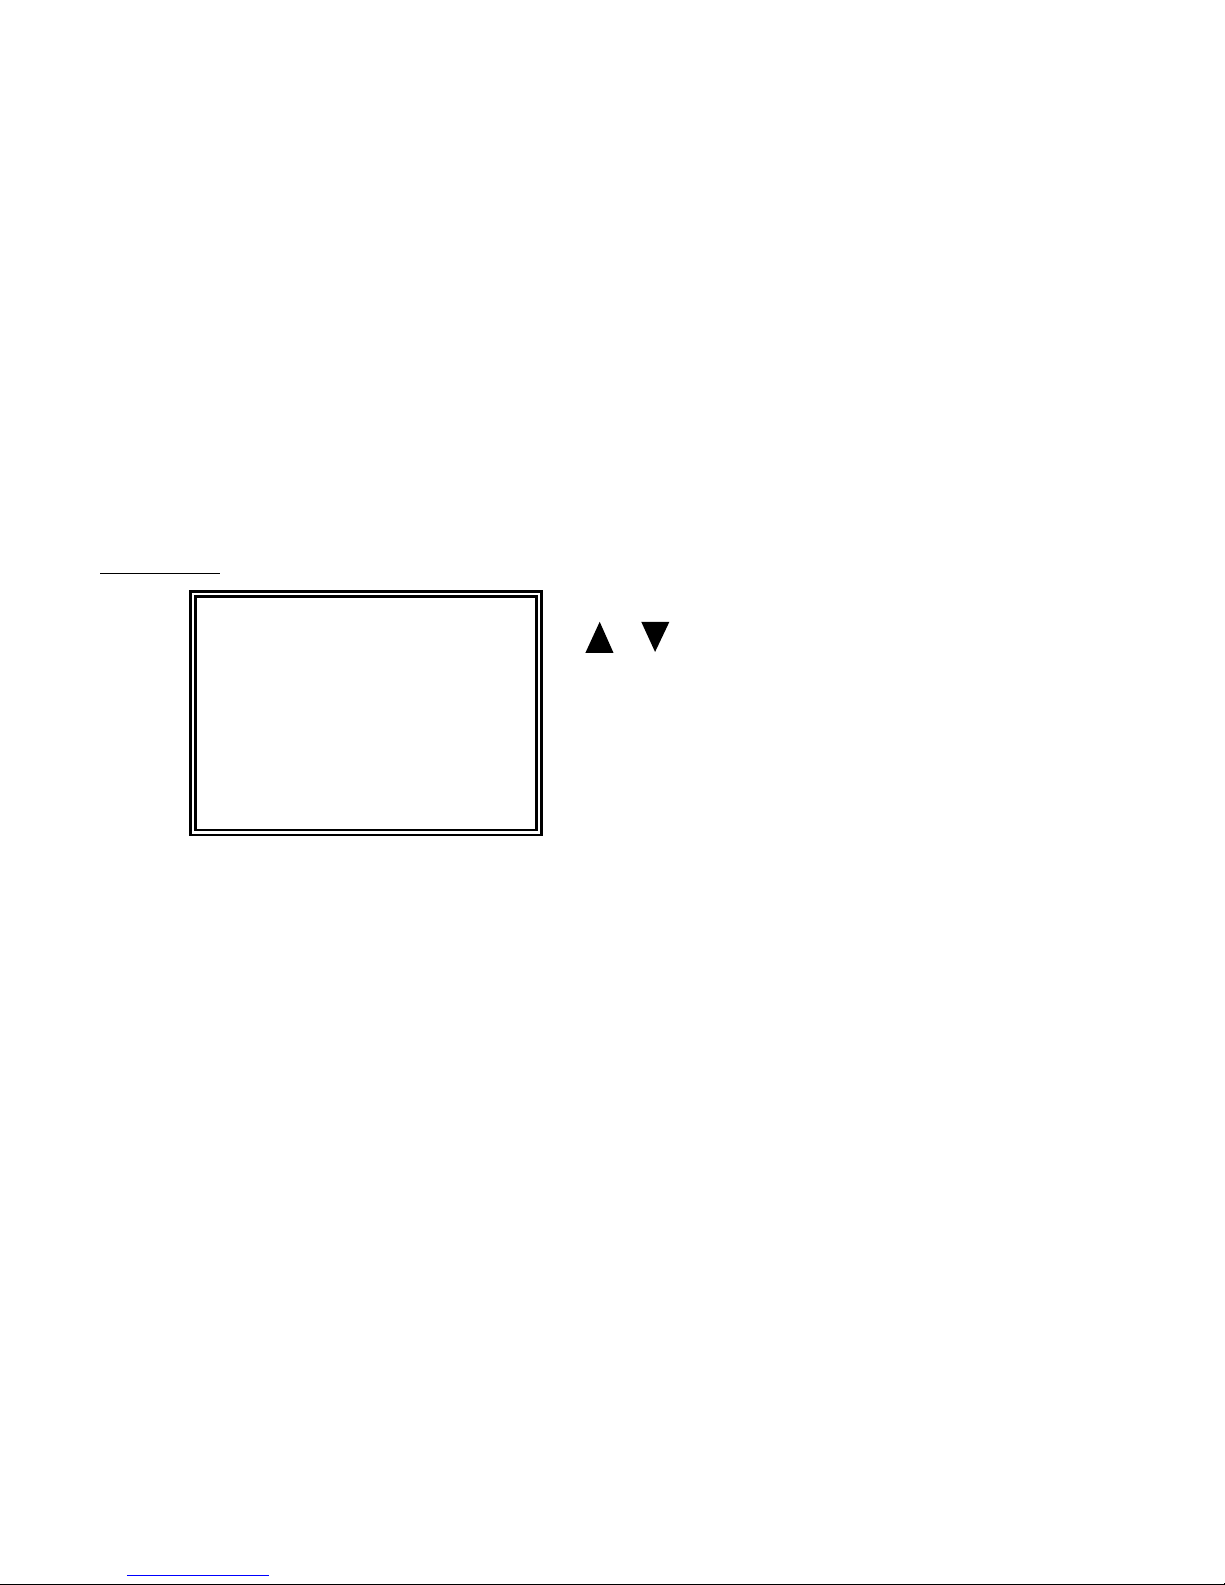
CAMERA
CAMERA
BACKLIGHT OFF
AGC MID
BRIGHTNESS NORMAL
SHARPNESS NORMAL
COLOR NORMAL
MIRROR ON
TITLE CAMERA 1
1. BACKLIGHT
2. AGC
3. BRIGHTNESS
•“ ”” ”: Move the cursor.
•ENTER : Enter a submenu mode/ Choose an option under a submenu
for browsing/ Confirm the selection.
•MENU : Enter the menu mode/ Confirm the change/ Exit the menu.
•Choose “ON” to turn on the “BACKLIGHT”.
•There are four options, MID, LOW, HIGH and OFF.
•There are 3 options, NORMAL, DARK and BRIGHT.
27
Page 33

4. SHARPNESS
5. COLOR
•There are 3 options, NORMAL, SOFT and SHARP.
•There are 3 options, NORMAL, LIGHT and COLORFUL.
6. MIRROR
7. TITLE
•ON/OFF
•Press “ ” or ” ” to set the title.
28
Page 34
SYSTEM
SYSTEM
TITLE DISPLAY ALL
TITLE POSITION U—L
PAN TILT SPEED FAST
SYSTEM RESET NO
•“ ”” ”: Move the cursor.
•ENTER : Enter a submenu mode/ Choose an option under a submenu
for browsing/ Confirm the selection.
•MENU : Enter the menu mode/ Confirm the change/ Exit a menu.
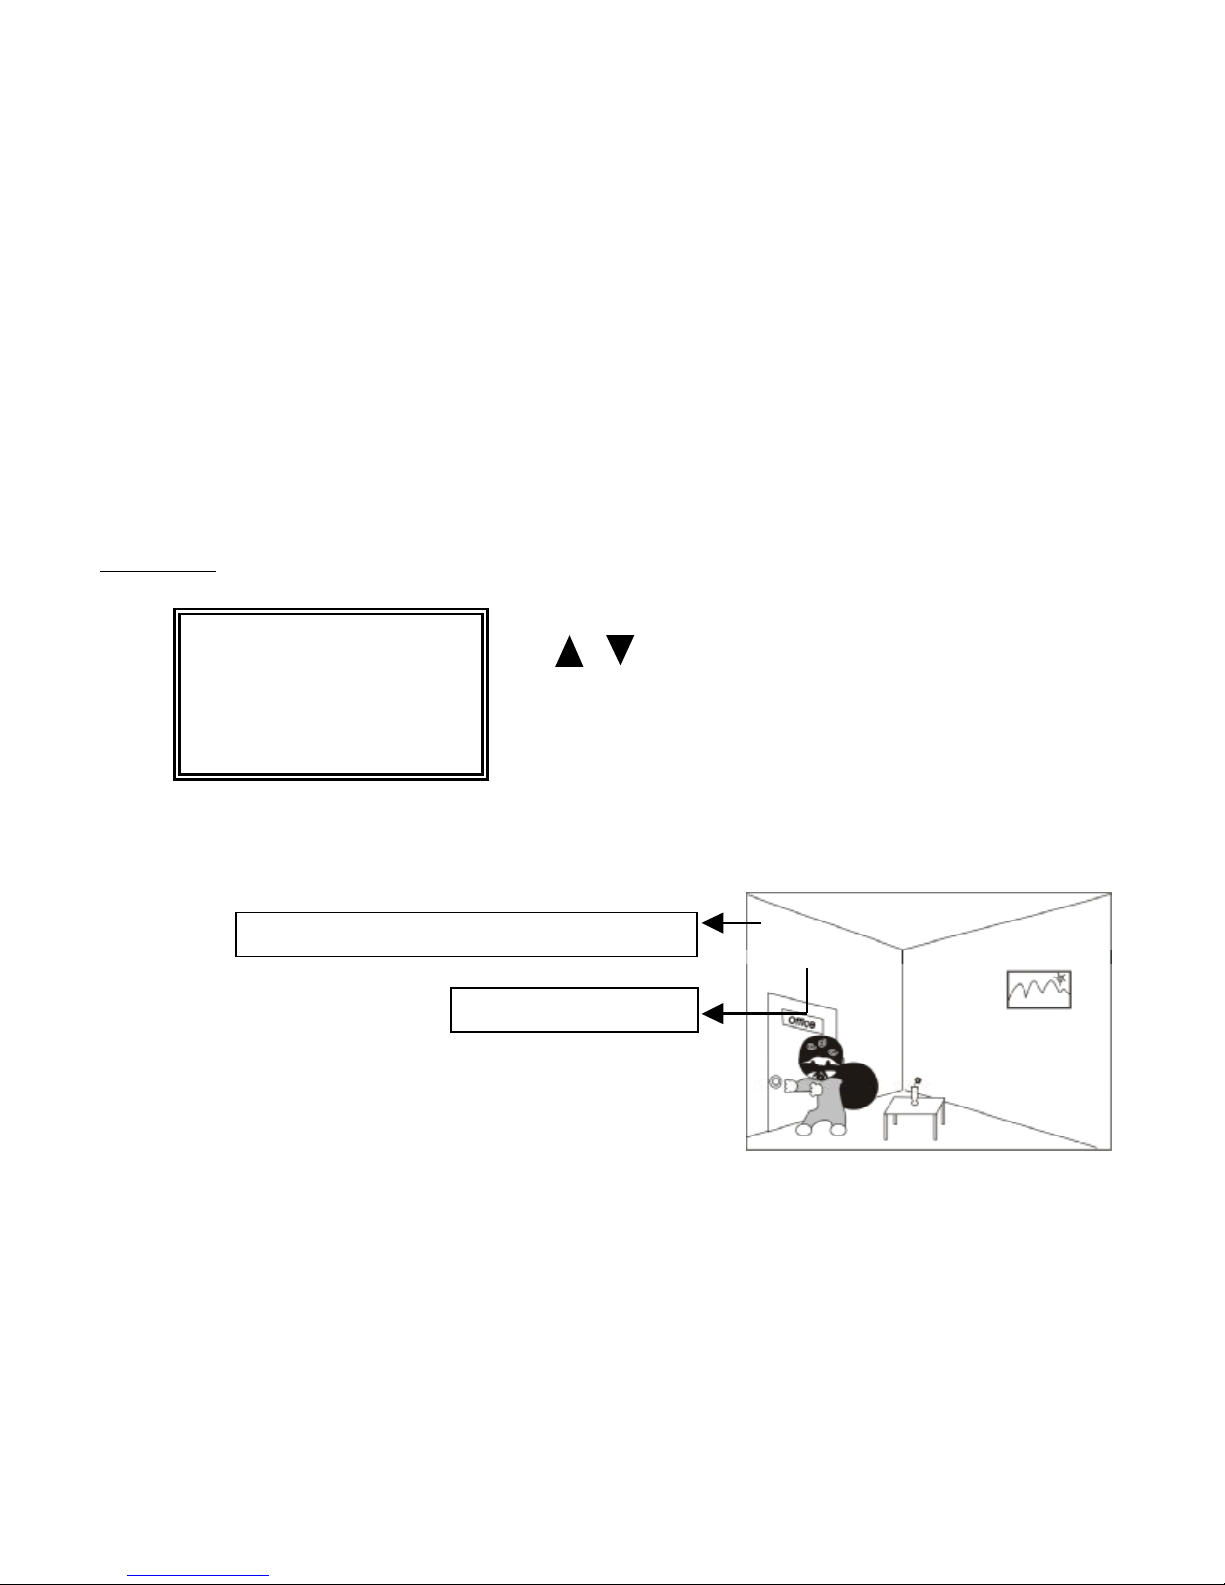
1. TITLE DISPLAY
•There are 4 options, ALL, PRESET, CAMERA and OFF. When you choice ALL,
the preset and camera title will be displayed.
Camera1
01 A
Show the title of camera which is set in CAMERA function
Show the title of preset point
29
Page 35

2. TITLE POSITION
3. PAN TILT SPEED
4. SYSTEM RESET
•Press “ ”” ” to determine the title position, U-L (Up/Left), D-R (Down/Right),
D-L (Down/Left) and U-R (Up/Right).
•Press “ ”” ” to choose the PAN TILT MANUAL SPEED, FAST or SLOW.
•If you want to reset the system, please press “ ”or ” ” to switch to “YES”, and
then press “ENTER” to confirm it. The system will notice you that “Are you sure?”.
Please press “ ”and “ “ to confirm it.
30
Page 36

Keypad
vAPPENDIX
Keypad
USE DVR TO OPERATE PT(Z)
5. FF
• LEFT. (Show on the front panel PT(Z) operation)
6. REW
• RIGHT.
7. STOP
• DOWN.
2. MENU
• MENU.
3.ENTER
• ENTER.
4.PLAY
• AUTO.
1.ENTER+ZOOM
• PT(Z)(enter & exit).
8. PAUSE
• UP.
9. ZOOM
• TELE DIGITAL ZOOM
10. /+
• ZOOM TELE.
11. /-
• ZOOM WIDE.
31
Page 37

• PT(Z) CH1.
13.NUM1
• PT(Z) CH1.
14.NUM2
• PT(Z) CH2
15.NUM3
• PT(Z) CH3
16.NUM4
• PT(Z) CH4
17.ENTER+
• LIVE QUAD.
12.MENU+SEARCH
•PRESET MENU (enter & exit).
•When enter PRESET MENU, you can
change the setting value by:
v Focus Far
v Focus Near
v Increase Preset Number
v Decrease Preset Number
32
 Loading...