

CP EBMPIR Product Manual
page
1. Description and Operation
Section Contents Page
1 Description and operation 1
2 Dimensions 2
3 Fixing 4
4 Wiring 6
5 Setup 7
6 Programming 9
7 Detection pattern diagrams 11
8 Fault finding 11
9 Specification 12
10 Part numbers 12
The EBMPIR series of miniature PIR (passive infrared) presence detectors
provide automatic control of lighting loads with optional manual control. The
miniature size together with multiple mounting options make these products
ideally suited for mounting in, or attached to, luminaires to provide local control of individual fittings. Four models are available: basic, premium, direct
dim, and analogue dim all of which will switch incandescent, fluorescent and
compact fluorescent lighting. The direct dim variant controls DSI or DALI
digital dimming ballasts whilst the analogue dim variant controls 1-10V dimming ballasts.
The unit detects movement using a PIR sensor and turns the load on. When
an area is no longer occupied the load will switch off after an adjustable time
out period. Note: the basic model has a fixed timeout of 20 minutes.
Feature EBMPIR-B
Basic
EBMPIR-PRM
Premium
EBMPIR-DD
Direct Dim
EBMPIR-AD
Analogue Dim
5m PIR sensing
3 mounting options
Lux sensor
Absence detection
Presence detection
Infrared remote setting
Infrared user handset
Push button adjustment*
Relay output
Dimming output
Absence switch input
Up/down switch input
*for lux, time and sensitivity
Contents
Miniature PIR Presence Detector
Product Guide
EBMPIR
page 2
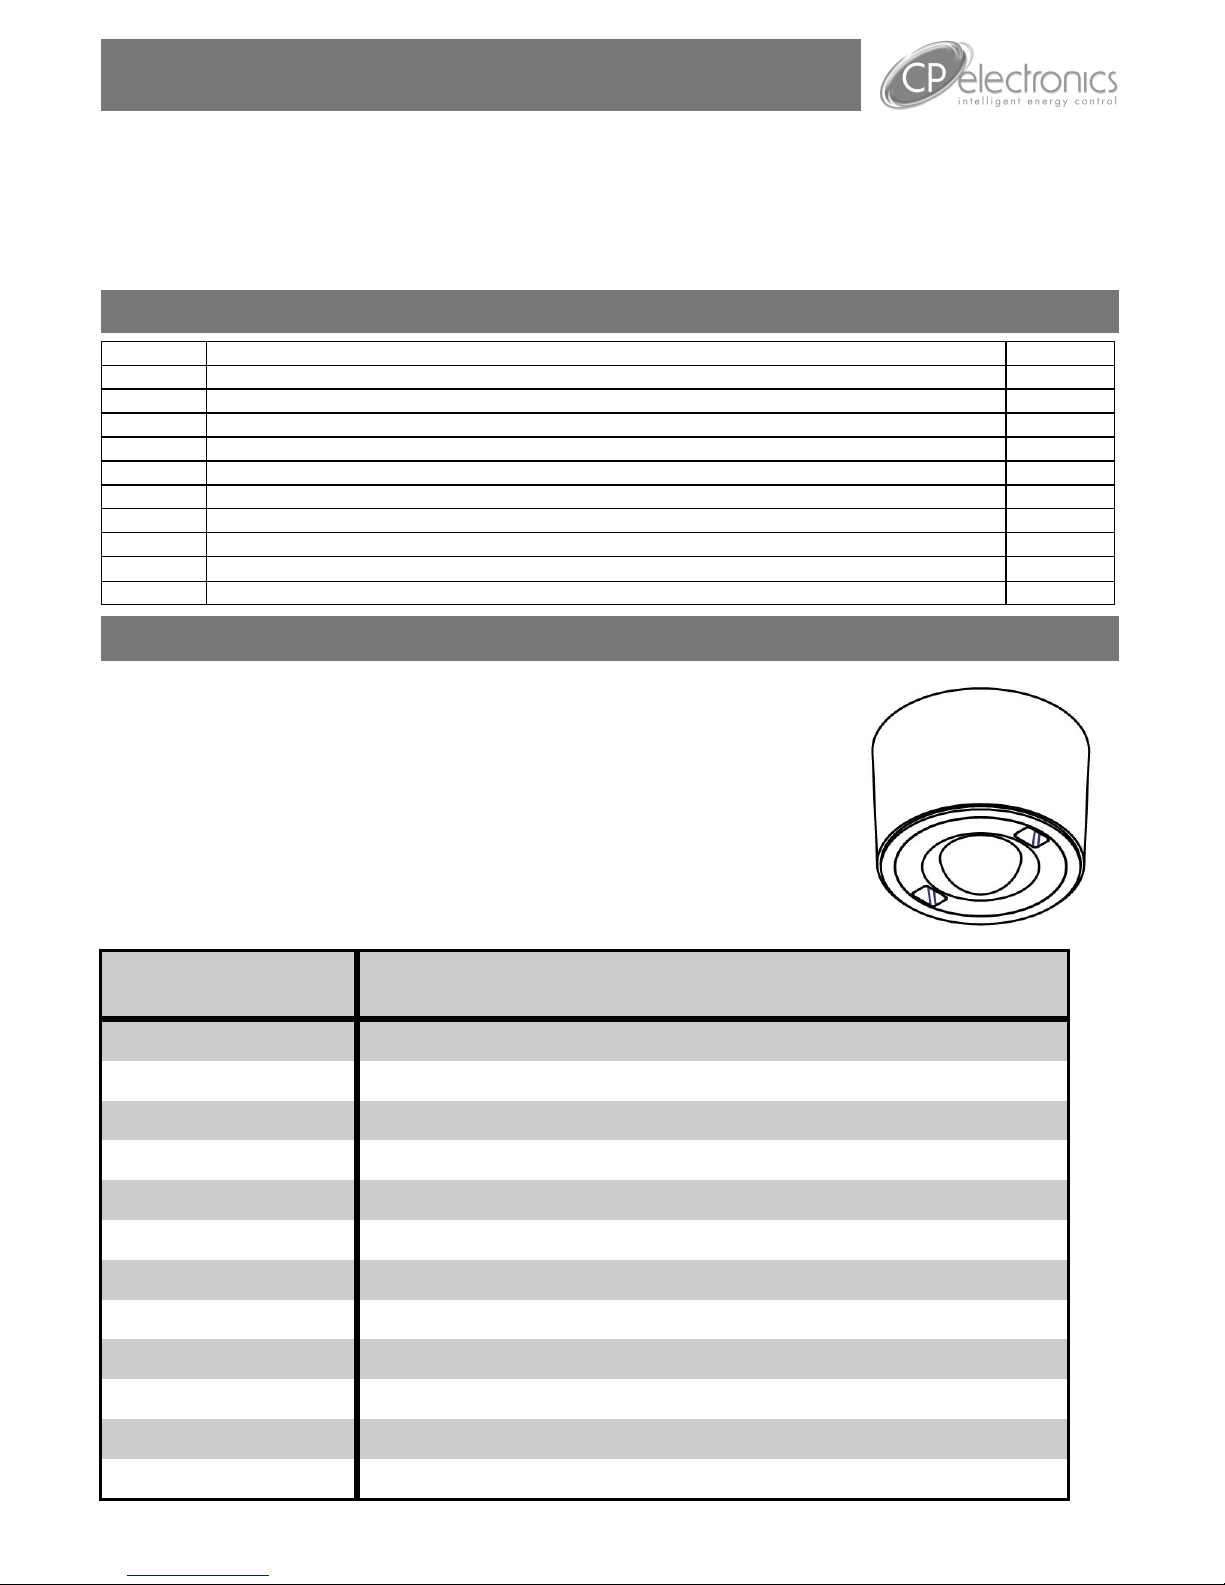
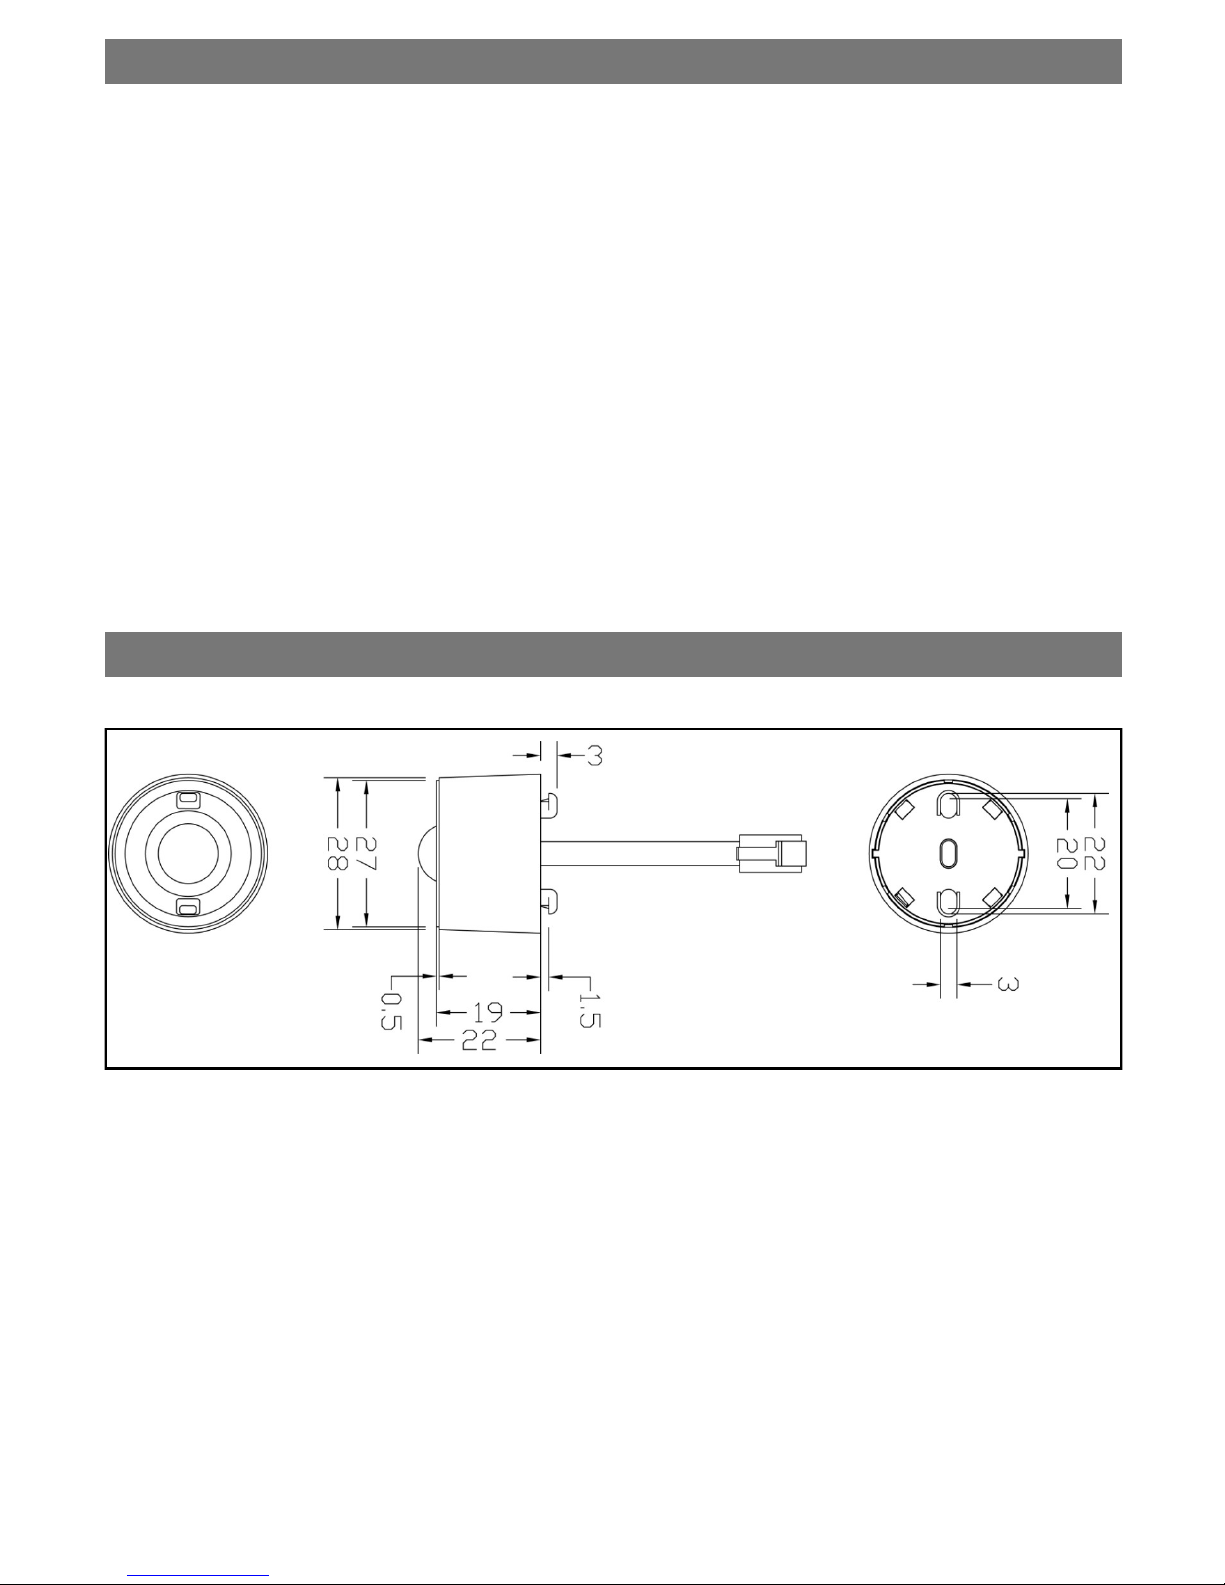
2. Dimensions
The detector head comes with a pre-wired 300mm lead which plugs into the separate power supply unit.
The direct dim and analogue dim variants of the detector have a dimming output that can be used to
control the light output of luminaires that are fitted with dimming ballasts. The detector measures the
overall light level in the detection area and calculates the correct output for the luminaires, to achieve a
preset lux level (maintained illuminance). The output level can be overridden using the switch input (see
below) or the user handset.
All products support presence and absence detection. Presence detection: when movement is detected
the load will automatically turn on; when the area is no longer occupied the load will automatically switch
off after an adjustable time period. Absence detection: the load is manually switched on; when the area is
no longer occupied the load will automatically switch off after the adjustable time period has elapsed.
Switch operation:
EBMPIR-B or -PRM single switch: short press turn on, long press turn off.
EBMPIR-DD & EBMPIR-AD single switch: short press turn on, short press turn off, press and hold cycles
dimming.
EBMPIR-DD & EBMPIR-AD two way switch: up button short press turns on, press and hold to dims up.
Down button short press turns off, press and hold dims down.
Sensor head
1. Description and Operation cont.

page 3
Side mounting
bracket
Flush holder
page 4
3. Fixing
Surface mounting
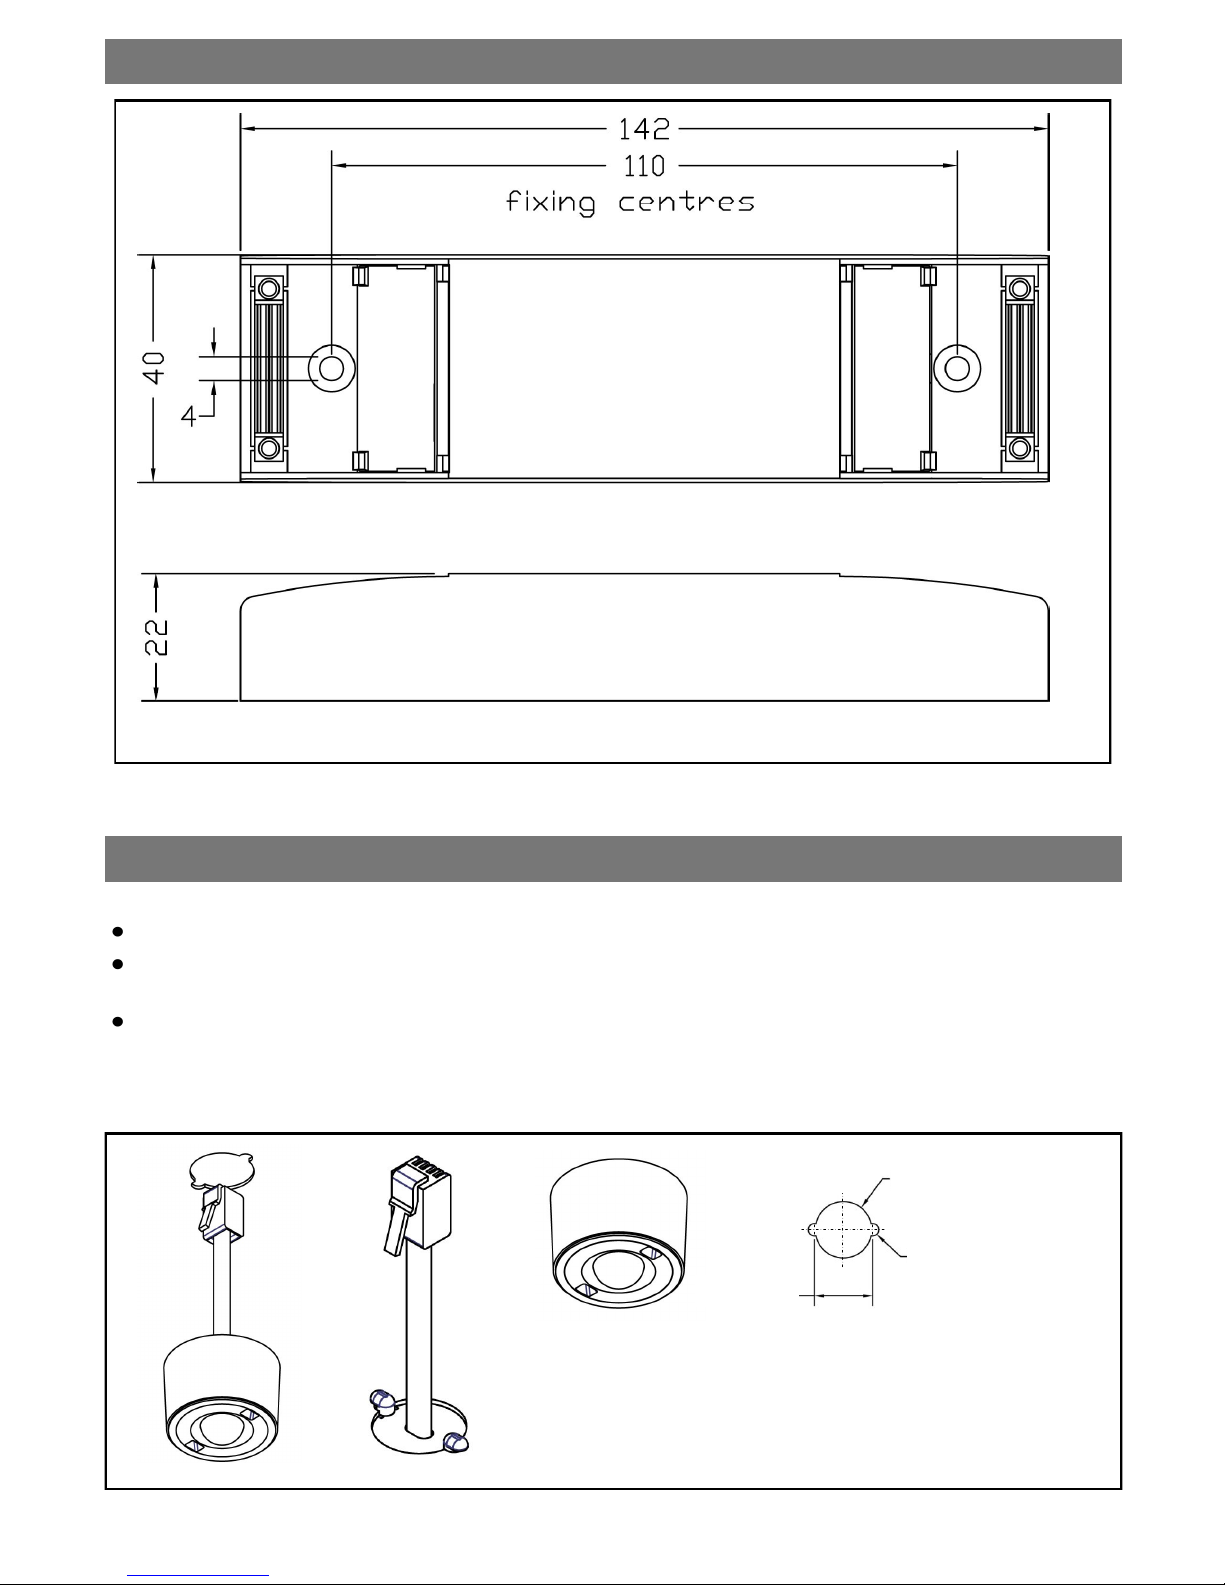
Power supply
2. Dimensions cont.
The product is designed to be mounted directly to a luminaire, either on the inside or outside.
the PIR lens must have a view outside the luminaire.
versions with a lux sensor—for optimum operation the lens must shielded as much as possible
from the light source.
If flush mounting in a panel >6mm thick, remove bottom of retention arms with side cutters.
Three mounting options are detailed below:
Ø19.5mm
Ø3.5mm
19mm
 Loading...