

Page 1
COUNTRYMAN
H6 HEADSET
Page 2
Contents
The H6 Headset Microphone 2
Microphone Care 3
Fitting the H6 Headset 4
Positioning the Microphone 5-6
Switching the Microphone Side 7
Snap-On Cables 8
Protective Caps 9
Collar Clips 10
Accessories and Replacement Parts 11
Declarations 12
1
Page 3

Thanks for choosing the Countryman H6 Headset.
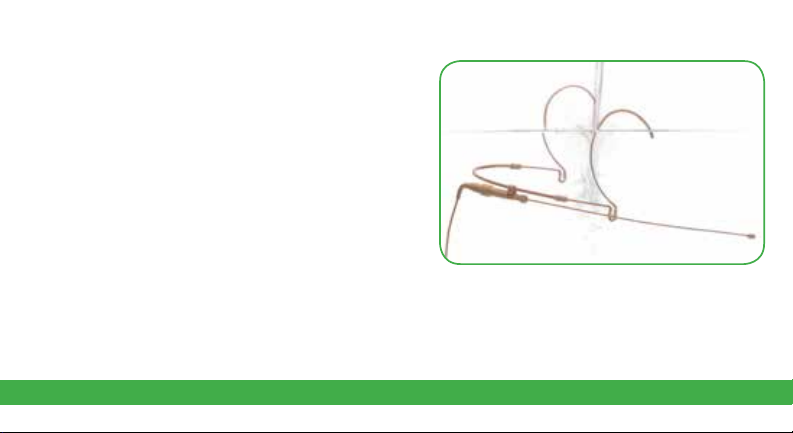
The H6 is the lowest-profile headset microphone
in the world. Combining excellent isolation and
transparent sound quality, the H6 is perfect for
a wide range of applications, including houses
of worship, broadcast, corporate presentations,
theater, and many more. The H6 uses the same
capsule as our now-industry-standard E6 Earset,
with a comfortable and lightweight headframe for
added security and adjustability.
This booklet describes how to use and protect
your H6 to get the best performance.
2
Page 4
Microphone Care
The H6 Headset is designed for exceptional audio
clarity and durability. Following some basic guidlines
will ensure you get maximum performance from
your H6 for years to come:
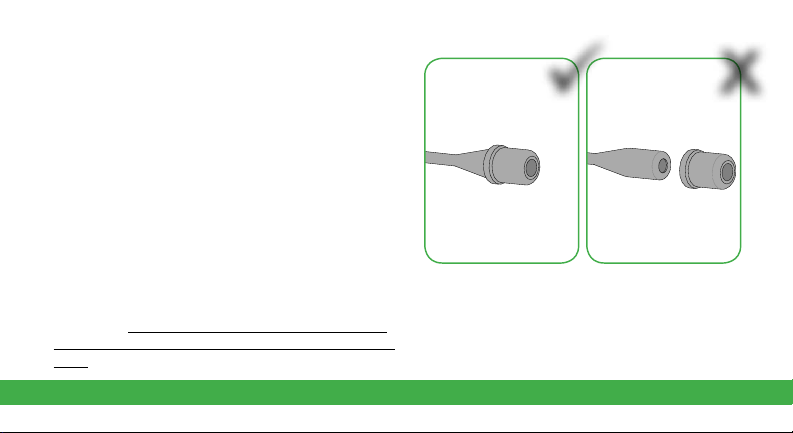
• Always use the H6 with its omni or
directional cap in place. The cap is critical to
the sound quality and also protects the capsule
from makeup, moisture, and debris.
• When a protective cap is not in place, avoid
touching the end of the capsule with fingers or
obstructing the opening with foreign substances.
• Remove the cap only for cleaning. The cable and
cap may be cleaned with alcohol wipes or soap
and water. Do not use other solvents or cleaners.
Do not use water or any chemicals on the capsule
itself.
Always use the H6
with the cap firmly in
place.
3
ONLY remove the
cap to clean it. The
H6 cap is required
for optimum audio
performance.
x
Page 5
Fitting the H6 Headset
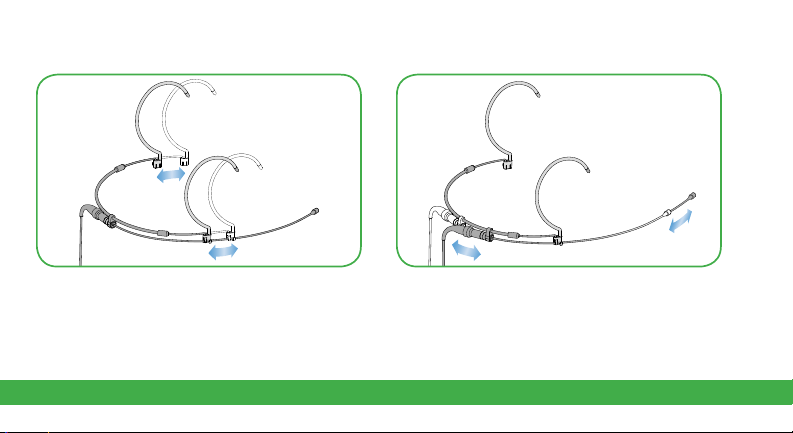
Adjust the earwires for your head size. The
headset should feel snug without pinching.
If the H6 feels loose on the head, slide the
earwires back to tighten the fit.
Slide the boom to reach your mouth.
You may need to take the headset off
momentarily to slide the boom exactly
where you want it, then put the headset
back on.
4
Page 6

Positioning the Microphone
The capsule should rest on or just off the
skin and about 0.25” to 0.5” back from the
corner of your mouth when smiling.
H6 Omnidirectional:
To avoid breath noise,
you may wish to position
the microphone slightly
below the mouth line.
5
H6 Directional:
We recommend that you
use the windscreen to
address wind noise.
Page 7
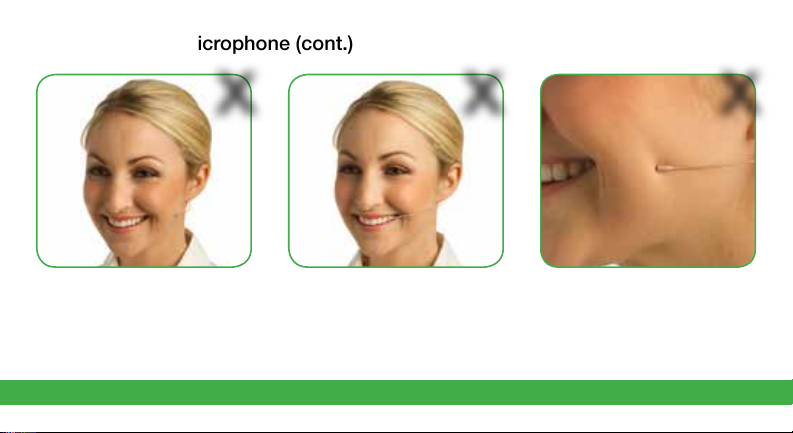
Positioning the Microphone (cont.)
x x x
If the capsule is too far back,
you will not get the maximum
isolation from your microphone.
If the capsule is too far forward,
you will get breath pops.
6
Be careful not to press the tip
of the mic into your cheek, as
this will muffle your sound.
Page 8
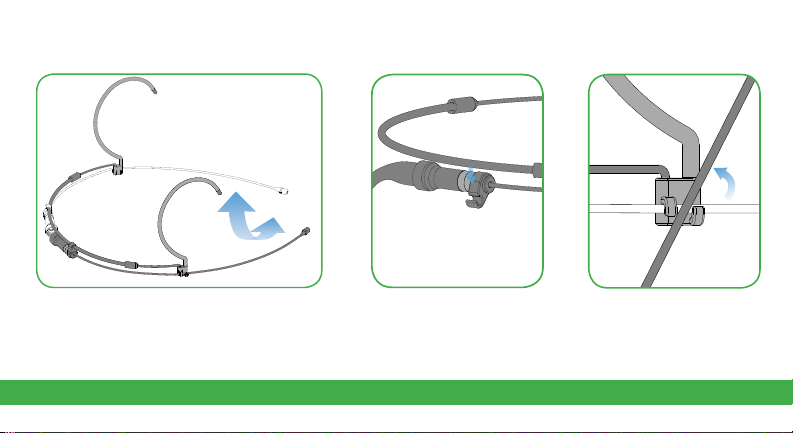
Switching the Microphone Side
The mic boom detaches from the frame and
can switch to either the left or right side: first,
remove the boom as shown to the right.
Then, place it on the opposite side.
Unclip the boom from
the clips at the back of
the headset.
7
Tip the boom to remove
it from the hooks on the
earwire.
Page 9
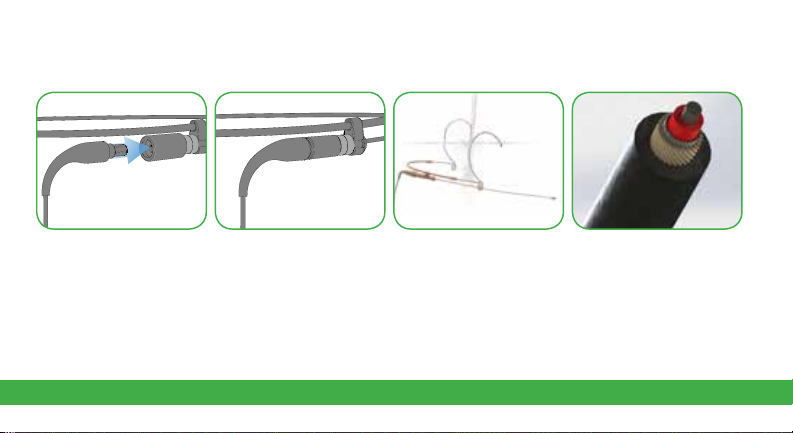
Snap-On Cables
Press the H6 Snap-On Cable firmly into the boom
connector until you feel a click. The connector will not
release accidentally.
Choose an H6 Snap-On Cable to match your wireless
transmitter, portable recorder, or XLR input with phantom
power.
The H6 Snap-On Cable
is tightly-sealed against
moisture and dust.
8
The H6 Cable uses
Aramid strength members
and engineered alloys
for extreme tensile and
flex strength. Do not use
solvents to clean the cable—
only soap and water, or
isopropyl alcohol.
Page 10
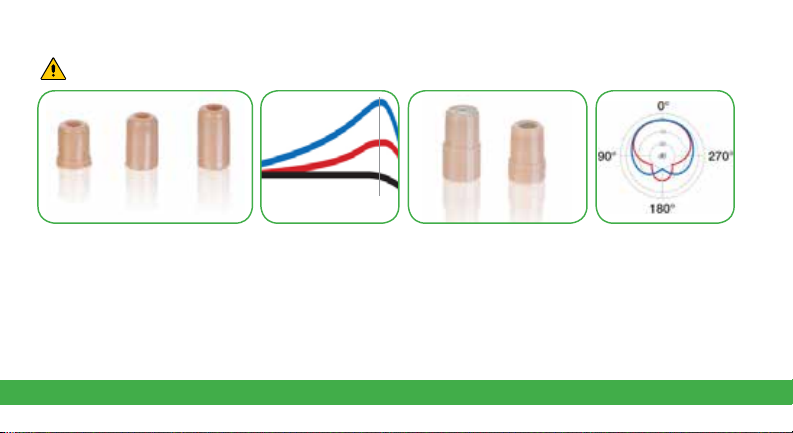
Choosing Protective Caps
Always use protective caps to keep sweat, makeup and other material out of the microphone.
+8
+4
Flat
Bright
+4dB
Very Bright
+8dB
0dB
The H6 Omni includes three protective caps
that shape the high frequency response of the
mic (at 15 kHz). The most commonly used one
is the Bright (+4dB) cap, which adds a little
extra intelligibility without any harshness. The
Flat (+0dB) cap sounds most natural, and Very
Bright (+8dB) provides extra high-end boost.
0
15kHz
H
The H6 Directional includes two protective caps
that shape the polar response of the microphone:
Hypercardioid (H) and Cardioid (C). The H cap
provides the best isolation from all directions. The
C cap is most useful for tradeshow presenters
or others who have a monitor speaker over their
shoulders or behind them.
C
9
C
H
Page 11
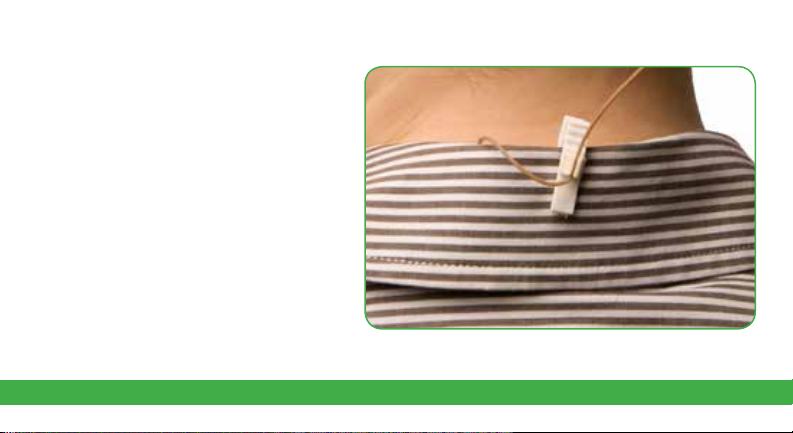
Collar Clips
The H6 Headset includes two choices of
collar clip—one black, and one white—that
provide strain relief for the cable. By using
the collar clip, even if your mic cable gets
tugged, the mic itself will remain securely in
place on your head.
Push the cable into the gripper on the
collar clip then loop it back into your shirt
or down your back to the transmitter.
Remember to leave enough slack in the
cable so that you can turn your head to
both sides without pulling on the mic.
10
Page 12
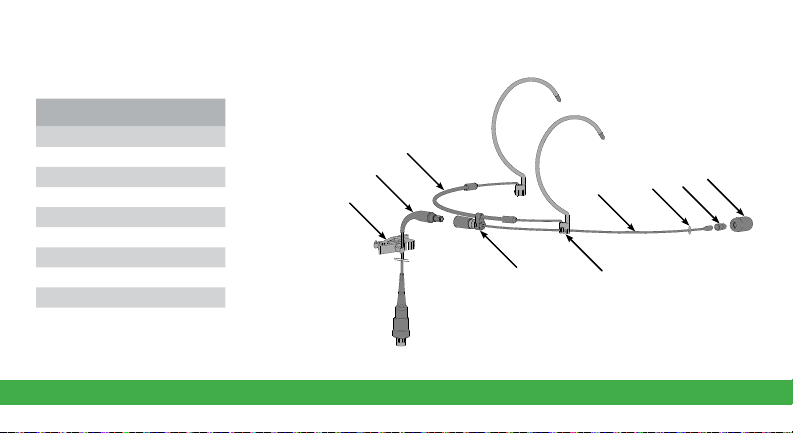
Accessories and Replacement Parts
Accessory Name
H6 Collar Clip
1
H6 Snap-On Cable
2
H6 Headframe
3
H6 Back Mic Clip
4
H6 Front Mic Clip
5
H6 Mic Boom
6
H6 Sweat Ring
7
H6 Protective Cap
8
H6 Windscreen
9
1
2
11
3
4
6
5
7
8
9
Page 13

Declarations
We, Countryman Associates Inc., declare under our
sole responsibility that the following product:
H6 Headset
To which this declaration relates is in compliance with
the essential requirements of:
2004/108/EC EMC
EN 55103-1
EN 55103-2
2002/96/EC WEEE
2003/108/EC
2015/863/EU RoHS
When used as specified.
RoHS
12
Page 14

13
Page 15

14
Page 16

Countryman Associates, Inc. 195 Constitution Drive, Menlo Park, CA 94025
Phone: (800) 669-1422 or (650) 364-9988 Fax: (650) 364-2794
Email: [email protected] Web: www.countryman.com
 Loading...