

Page 1

COUNTRYMAN
E2 EARSET
Page 2

Thanks for choosing the Countryman E2 Earset microphone. We’re confident you’ll find
it the finest, most natural sounding, and most unobtrusive earset microphone available.
The E2 provides high-quality pickup and excellent isolation with an ultra-miniature
condenser element positioned near the ear and a directional pattern tuned to pick up
the natural sound of the wearer while rejecting ambient noise. The entire assembly
weighs less than one-tenth of an ounce and disappears against the skin or in the hair, so
performers can forget it’s there and audiences barely see it.
We use innovative engineering to pack this great a sound into such a tiny mic. For this
reason, getting the best results requires some simple techniques that might not be
immediately intuitive. This booklet will help you get the most out of your E2 Earset.
1
Page 3

Contents
Handling the E2 3
Connecting E2 Snap-On Cables 5
Custom Fitting the E2 6
Using Collar Clips 10
Back Port Cleaning Procedure 11
Specifications 12
Declarations 14
2
Page 4
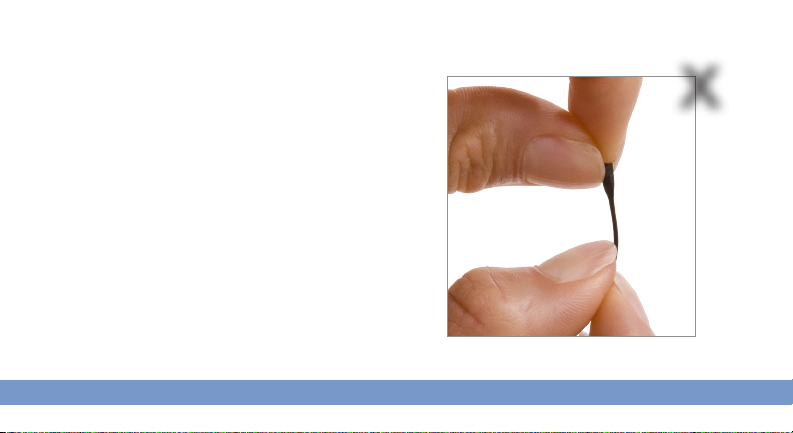
Handling the E2
While the E2 Earset is designed for durability,
moisture-resistance and flexibility, it is a highprecision instrument and we do suggest some basic
precautions to prevent damage or sonic degradation:
• Always use the E2 with its cap in place. The end
caps are critical to the sound quality and also
protect the capsule from makeup, moisture, and
debris.
• When a protective cap is not in place, avoid
touching the end of the capsule with fingers or
obstructing the opening with foreign substances.
• The earpiece, boom, and end cap may be cleaned
with alcohol wipes, spirit gum remover, or acetone.
Do not use water or chemicals on the capsule itself.
• Clean the caps separately.
x
3
Page 5
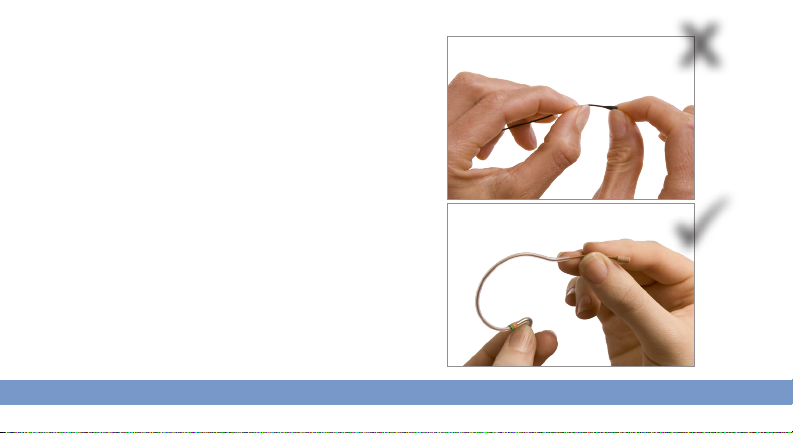
Handling the E2 (cont.)
The E2’s earpiece and boom are constructed of an
exceptionally flexible material which can be easily
shaped to the wearer’s needs. To prevent damage to
your Earset:
• Avoid bending it over sharp angles (such as the
end of your ngernail) or around a tight radius (less
than 1/2” diameter).
• Avoid bending the booms within 1/2” of the
capsule or the earpiece within 1/2” of the
connector.
• Use the side of your nger or other rounded object.
4
x
Page 6
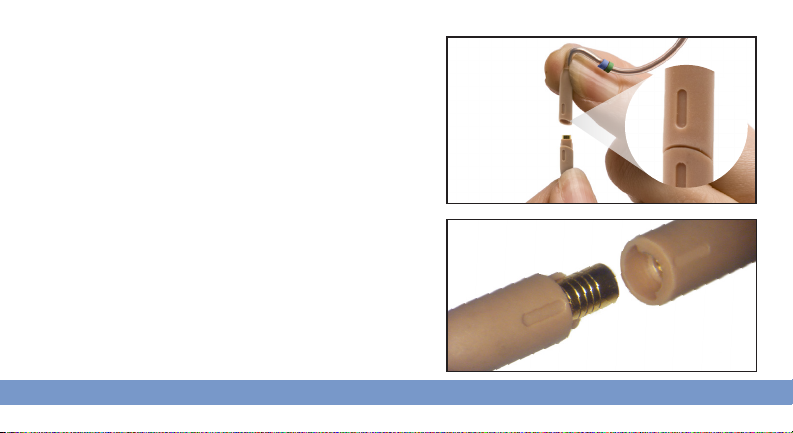
Connecting E2 Snap-On Cables
The Earset cable is easy to remove and change,
allowing you to swap transmitter types, switch colors,
or replace damaged parts in the field. Exercise care in
connecting and disconnecting the cable connector.
• Always grasp the connectors near the outer ends
of the rubber sleeves and pull the connectors
straight apart. When connecting listen for a click.
• The connectors do not unscrew—line up the marks
on the connector overmold and pull straight out to
disconnect.
• Avoid grasping the connectors where the sleeves
overlap, as this can weaken the moisture-resistant
seal and deteriorate the integrity of the connection.
• Do not pull by the cable, boom, or springy part of
the Earset.
5
Page 7
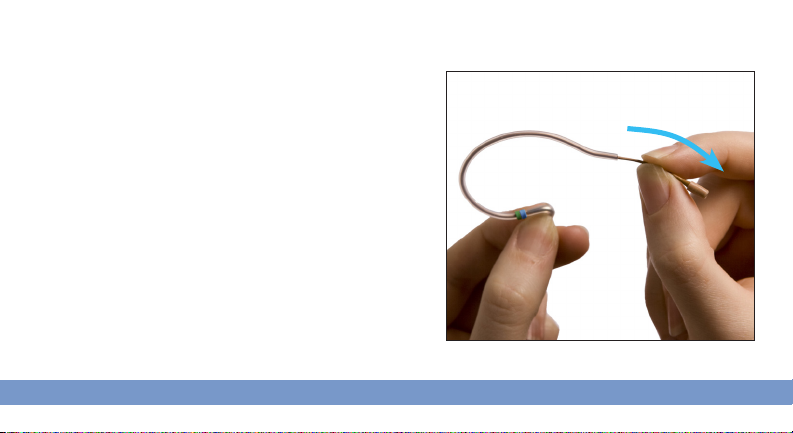
Custom Fitting the E2
Head-worn mics provide isolation by keeping the
element consistently near the mouth. The ideal
placement is with the tip of the element in front of
the ear, about 1/8” away from the face. Since every
performer’s face is different, we’ve made it easy to
custom fit the E2 Earset:
1. Curve the boom so that it will rest against your face
when worn.
6
Page 8
Custom Fitting the E2 (cont.)
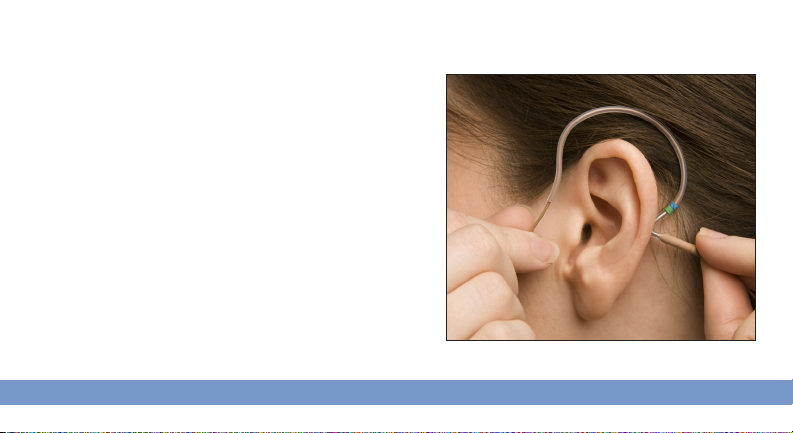
2. Put the loop over the ear with the base behind the earlobe
and the capsule toward the mouth.
7
Page 9
Custom Fitting the E2 (cont.)
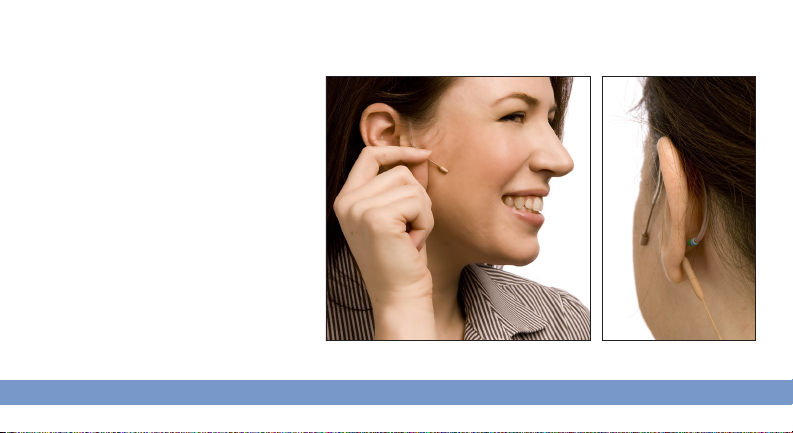
3. Tip the mic to point toward the mouth.
The mic should be barely visible,
resting about 1/8” from the face mid
cheek or completely hidden by the hair.
8
Page 10
Custom Fitting the E2 (cont.)
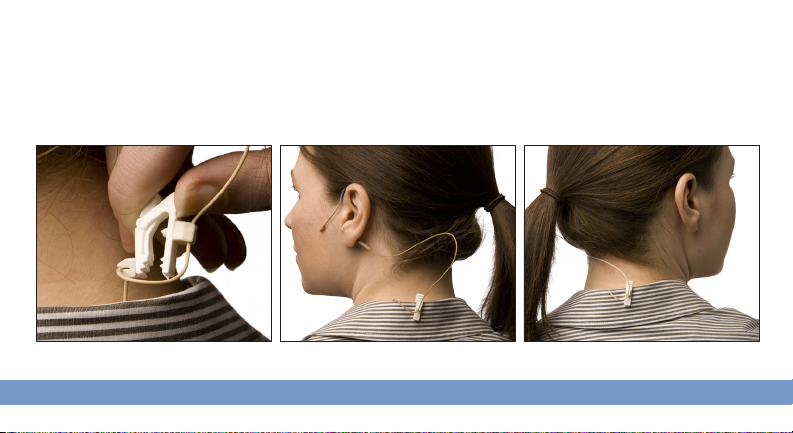
4. Always use the collar clip to reduce clothing and cable noise. Leave enough slack in the cable such that the user
can turn his/her head to both sides without tugging on the clip. Use the windscreen outdoors.
9
Page 11
Using Collar Clips
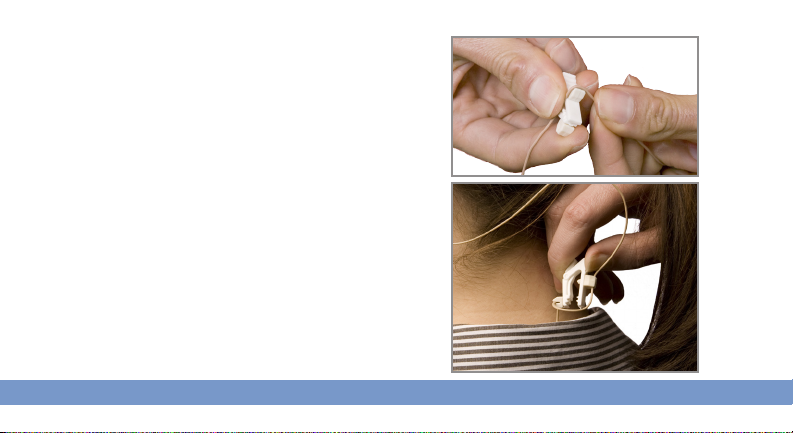
The Earset comes with two collar clips: one black and
one white. These clips prevent movement in the cable
from dislodging the Earset and can reduce cable
noise. They are specifically designed to match the
diameter of your E2 cable.
Gently pull the cable down into the opening to attach
the clip. Gently pull the cable out to remove the clip.
We recommend always using a collar clip with the
E2. Use both attachment points as shown. We
recommend leaving the clip attached to the cable
when possible to minimize repetitive strain.
10
Page 12

Back Port Cleaning Procedure
This procedure is rarely necessary, but it may help if frequency response and
directionality have deteriorated because the back ports on the element are
contaminated with dust or makeup.
Make sure your hands, the work area, the Earset’s boom and end cap are clean.
Take a 6” - 8” piece of clean painter’s or gaffer’s tape and form it into a circle,
sticky side out. Stick it down on the top of a table, near the edge. Do not use
tapes that may leave adhesive on the mic.
Remove the cable and end cap. Hold the Earset by its boom, about an inch from
the bare mic element. Lay the element down on the adhesive, with the earpiece
hanging off the edge of the table. Gently roll the mic a full 360° along the adhesive
to remove dust or debris. Replace the end cap and cable.
11
Page 13

Specifications
Frequency Response: 20Hz to 20kHz
Operating Current: 500uA
Operating Voltage: 1 to 2 Volts
Weight: 0.07oz (2g)
Supplied Accessories:
Carrying case, black and white cable clips, wind
screen, and protective cap.
Detailed information on connecting Earsets to
wireless transmitters can be found at:
http://www.countryman.com
The E2 Earset is available in two sensitivities to
match a wide range of applications:
Model E2W5 for general speaking
Sensitivity: 3.0 mV/Pascal
Equivalent Acoustic Noise: 34 dBA SPL
Overload Sound Level: 130 dB SPL
Model E2W6 for loud speaking and vocals
Sensitivity: 1.0 mV/Pascal
Equivalent Acoustic Noise: 39 dBA SPL
Overload Sound Level: 140 dB SPL
12
Page 14
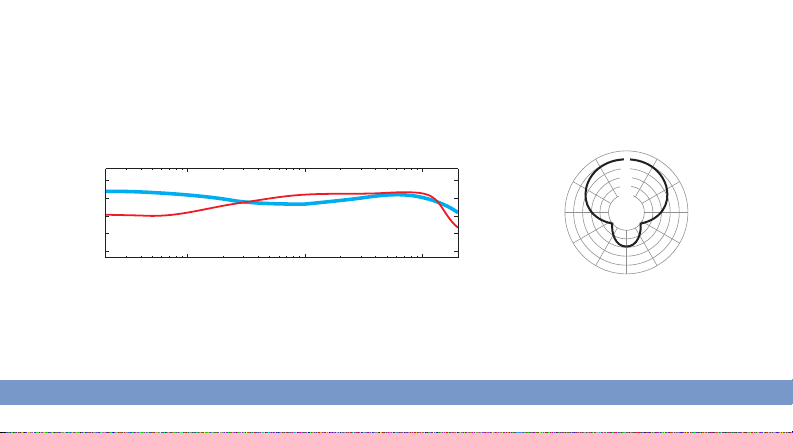
Specifications (cont.)
Countryman E2
Typical Directional Lav
Countryman E2
Typical Directional Lav
10
0
100 1k 10k
20k
-10
-20
-30
Frequency (Hz)
Gain (dB)
dB
Freq (Hz)
0
100 1k 10k
20k
-10
-20
-30
Frequency Response
1 kHz Polar Response
0°
30°
60°
90°
330°
0
-5
-10
-15
-20
dB
300°
270°
13
120°
150°
180°
240°
210°
Page 15
Declarations
We, Countryman Associates Inc., declare under our
sole responsibility that the following products:
Earset Microphone models E2*, E6*, E6D*, E6ID*,
WCE6D*, WCE6ID*
To which this declaration relates are in compliance
with the essential requirements of:
2004/108/EC EMC
EN 55103-1
EN 55103-2
2002/96/EC WEEE
2003/108/EC
2002/95/EC RoHS
When used as specified.
RoHS
14
Page 16

Countryman Associates, Inc. 195 Constitution Drive, Menlo Park, CA 94025
Phone: (800) 669-1422 or (650) 364-9988 Fax: (650) 364-2794
Email: [email protected] Web: www.countryman.com
 Loading...