

Costco 1900686, 41134, 274041 Assembly / Care & Use Instructions
REMINDER
SAVE THESE
INSTRUCTIONS
Questions, problems, missing parts?
Before returning to Costco, call our customer service department at
1-888-868-1808 ext.400, 8:30 a.m. - 5:00 p.m., PST, Monday-Friday,
or email us at abhomehelpline@gmail.com. (English & Spanish available)
ITM. / ART. 274041ITM. / ART. 1900686 ITM. / ART. 41134
ASSEMBLY CARE & USE INTRUCTIONS
IMPORTANT, RETAIN FOR FUTURE REFERENCE.READ CAREFULLY
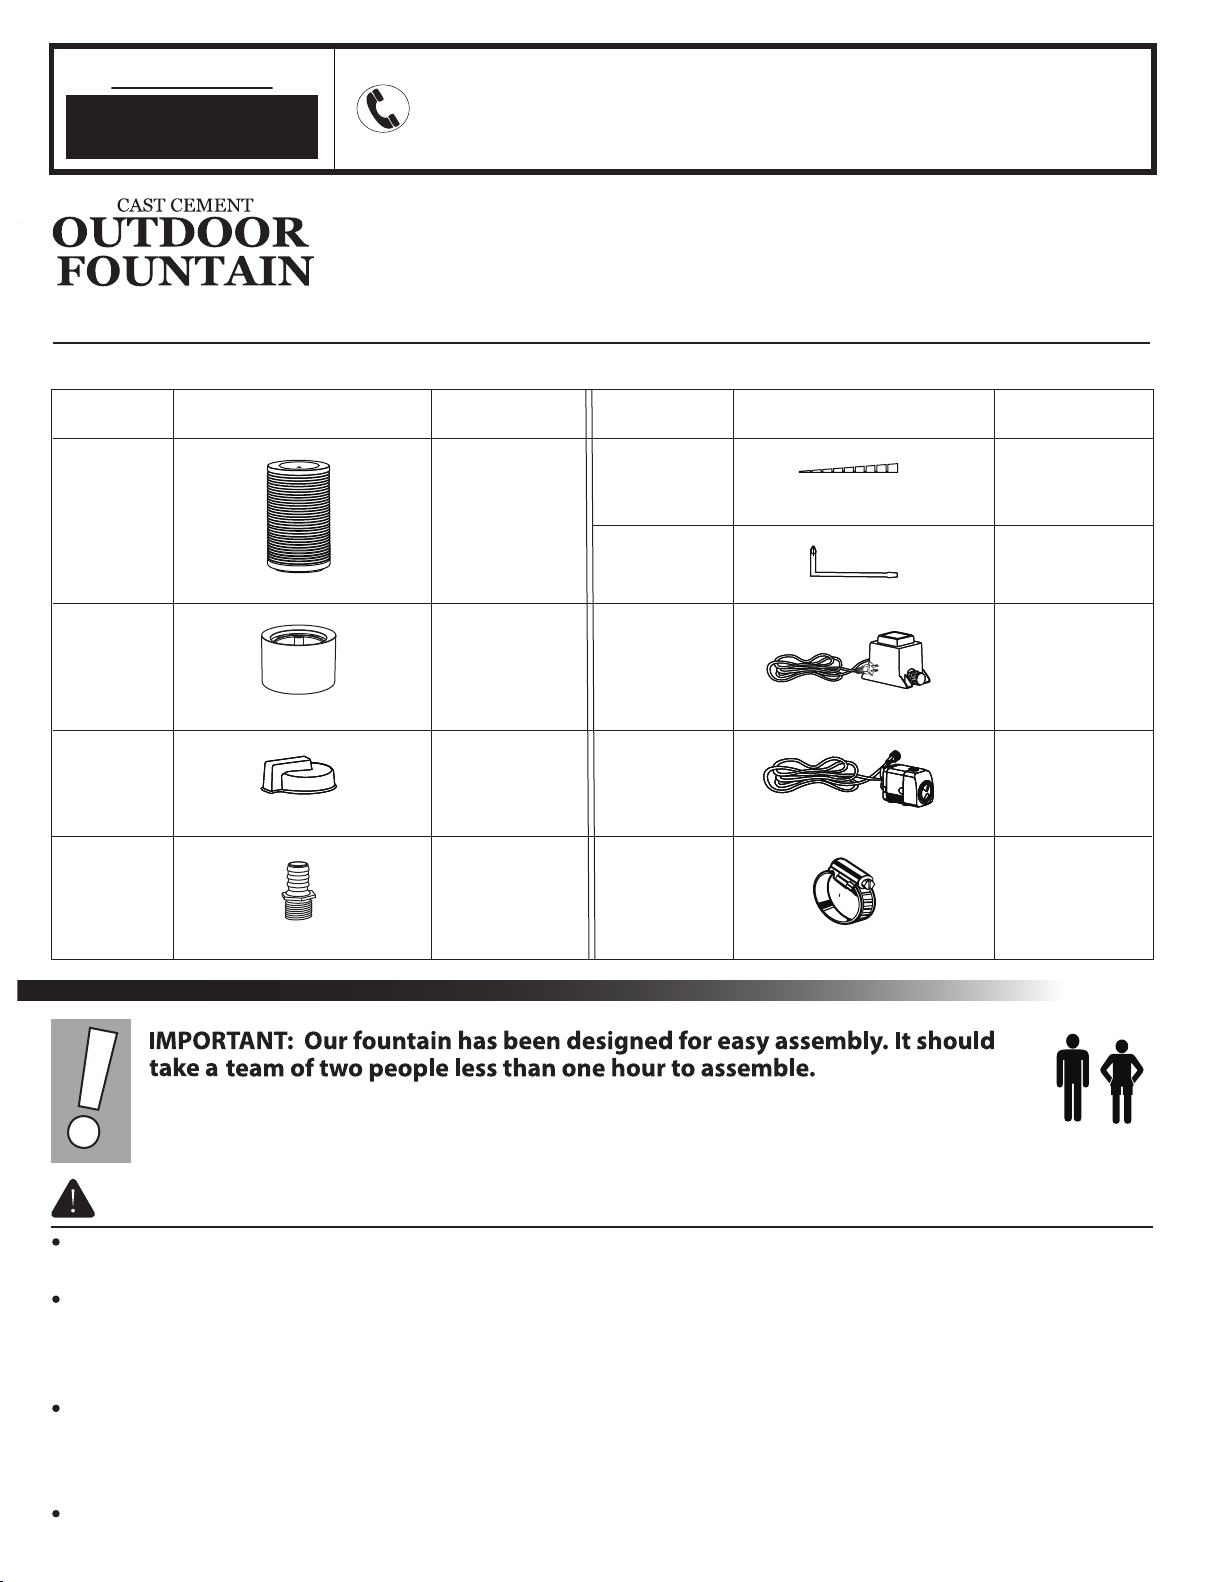
PACKAGE CONTENTS
Please lay out all parts prior to assembly or installation. Read instructions prior to assembly or installation.
PART # PART DESCRIPTION QUANTITY
RB-1
RB-3
RB-4
Tower
Base
Cap
Pump Connector
1
1
2
PART # PART DESCRIPTION QUANTITY
RB-5
RB-6
RB-7RB-2
RB-8
RB-9
Shim
Screwdriver
Transformer
Pump
Clamp
6
1
11
1
1
FOR OUTDOOR HOME USE ONLY
While installing, keep children and pets out of reach. Remember to make sure the plug is dry and clean before inserting into the
ground fault circuit interupter (GFCI) outlet.
WARNINGS AND CAUTIONS-RISK OF SHOCK
To reduce the risk of electric shock, use only on portable self-contained fountains no larger than 5 feet
in any dimension.
The National Electric Code requires that a ground fault interrupter circuit (GFCI) be installed in every branch
circuit supplying the fountain or pond equipment.
Do not immerse the plug in water. DO NOT REACH INTO THE WATER TO REMOVE THE PLUG. TURN OFF
CIRCUIT FIRST.
A "drip loop" in the cords should be used. A "drip loop" is a loop in the cord below the level of the receptacle or
plug that prevents water from traveling along the cord.
WARNING: FOR YOUR PROTECTION,ALWAYS UNPLUG THE UNIT FROM ITS POWER SOURCE BEFORE INSTALLING OR SERVICING.
DO NOT REACH, REMOVE, OR DISASSEMBLE THE PUMP BEFORE YOU DISCONNECT THE POWER.
1
CAUTION
This pump has been evaluated for use with fresh water only.
Use a proper power source as indicated on the pump label.
Keep the cord away from high temperatures or other heat sources.
Do not pump heated liquids.
Avoid heavily chlorinated water and water with high pH levels.
Do not lift the pump by its power cord.
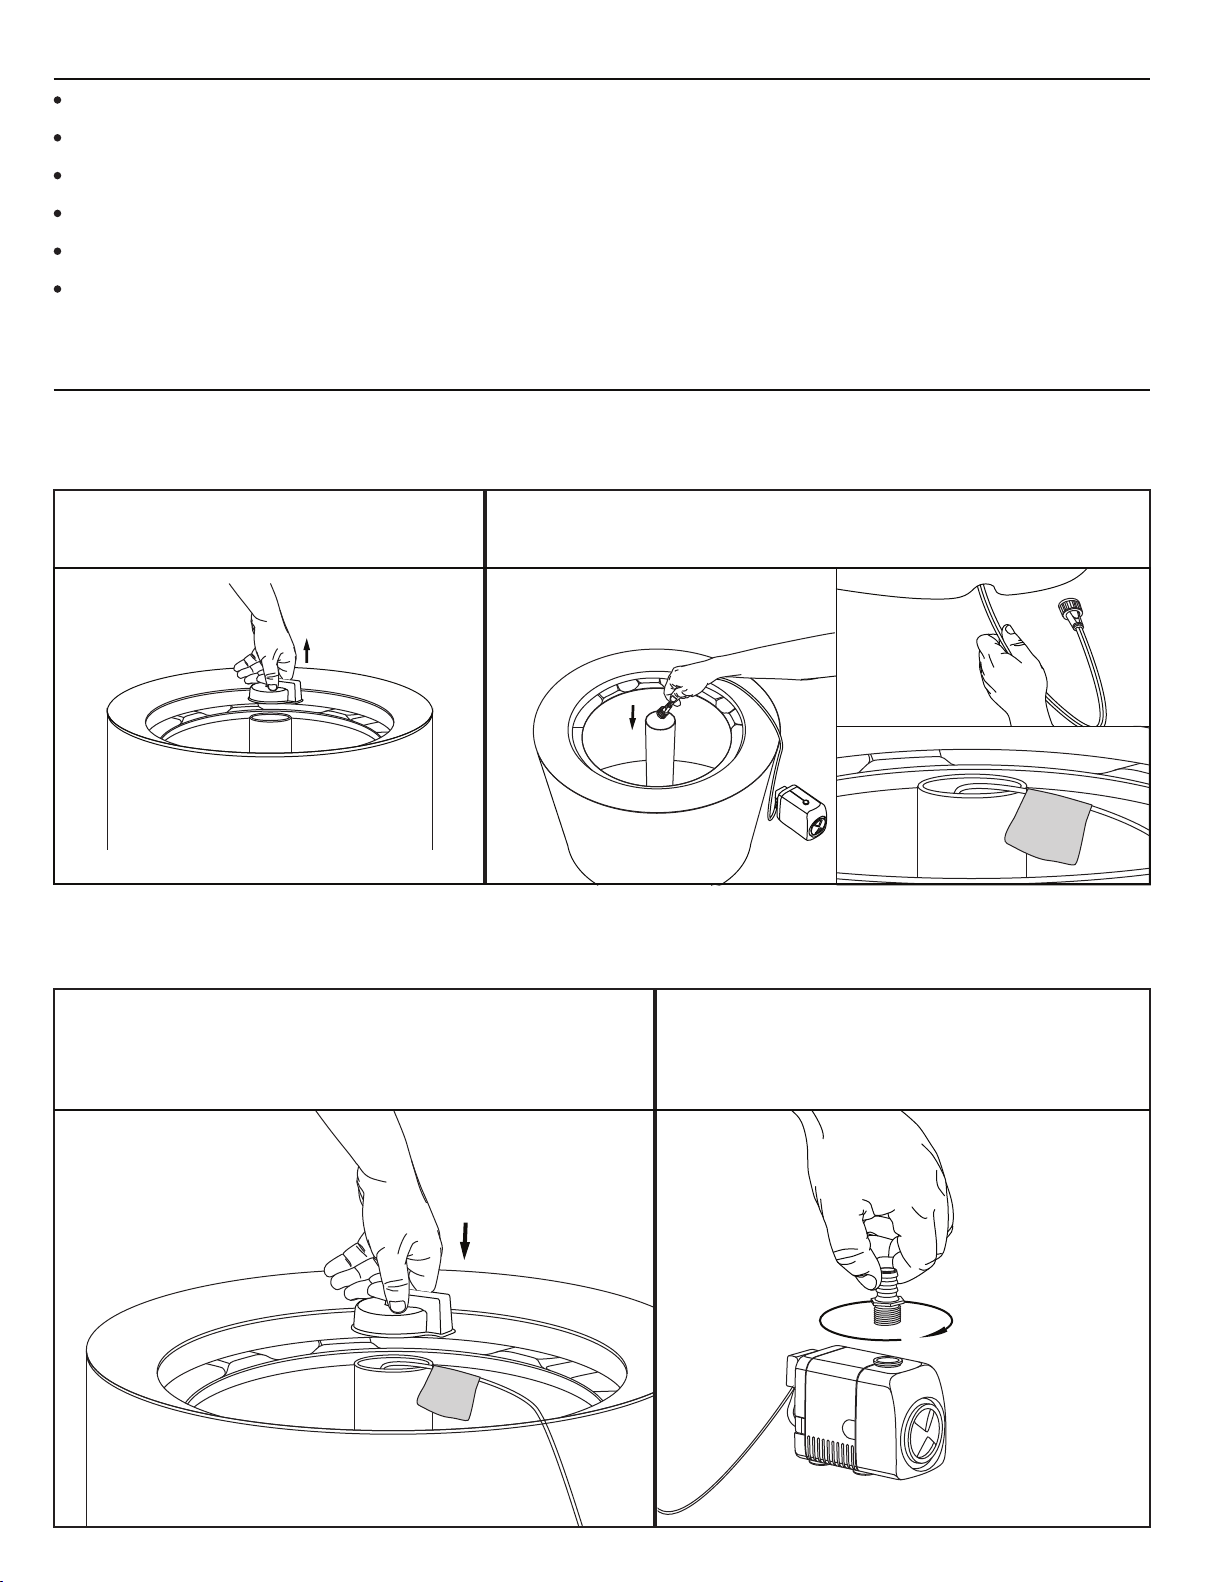
ASSEMBLY INSTRUCTIONS
Remove cap and run plug from pump through tube in base
1
a. Remove cap from tube and set aside
for step 2.
2
Replace cap, and screw hose connector to pump
b. Run cable from pump through tube and pull through notch
in base until tag showing STOP HERE.
①
a. Replace cap from step 1 on top of tube in base.
②
Arrêtez ici
Deténgase aquí
③
b.Screw hose connector onto pump
body(clockwise) and hand tighten.
stop here
stop here
Arrêtez ici
Deténgase aquí
2
 Loading...