

Page 1
To start watching the TV right away you must complete the following steps :
1. Verify you have received everything
2. Attach the stand to the TV
3. Install the batteries to the remote control
4. Connect power and a cable or antenna to the TV
5. Turn on your TV and scan for channels
6. Your TV is ready for viewing
7. oCOSMO wants to help you save energy! This HDTV meets the ENERGY STAR®
guidelines.
1. CE 2401 Package Contents
oCOSMO TV Display x 1
TV Stand x 1
User Manual x 1
Warranty / Registration Card x 1
Quick Start Guide x 1
Screws x 3
Screw Driver x 1
TV Remote Control (AAA Battery included) x 1
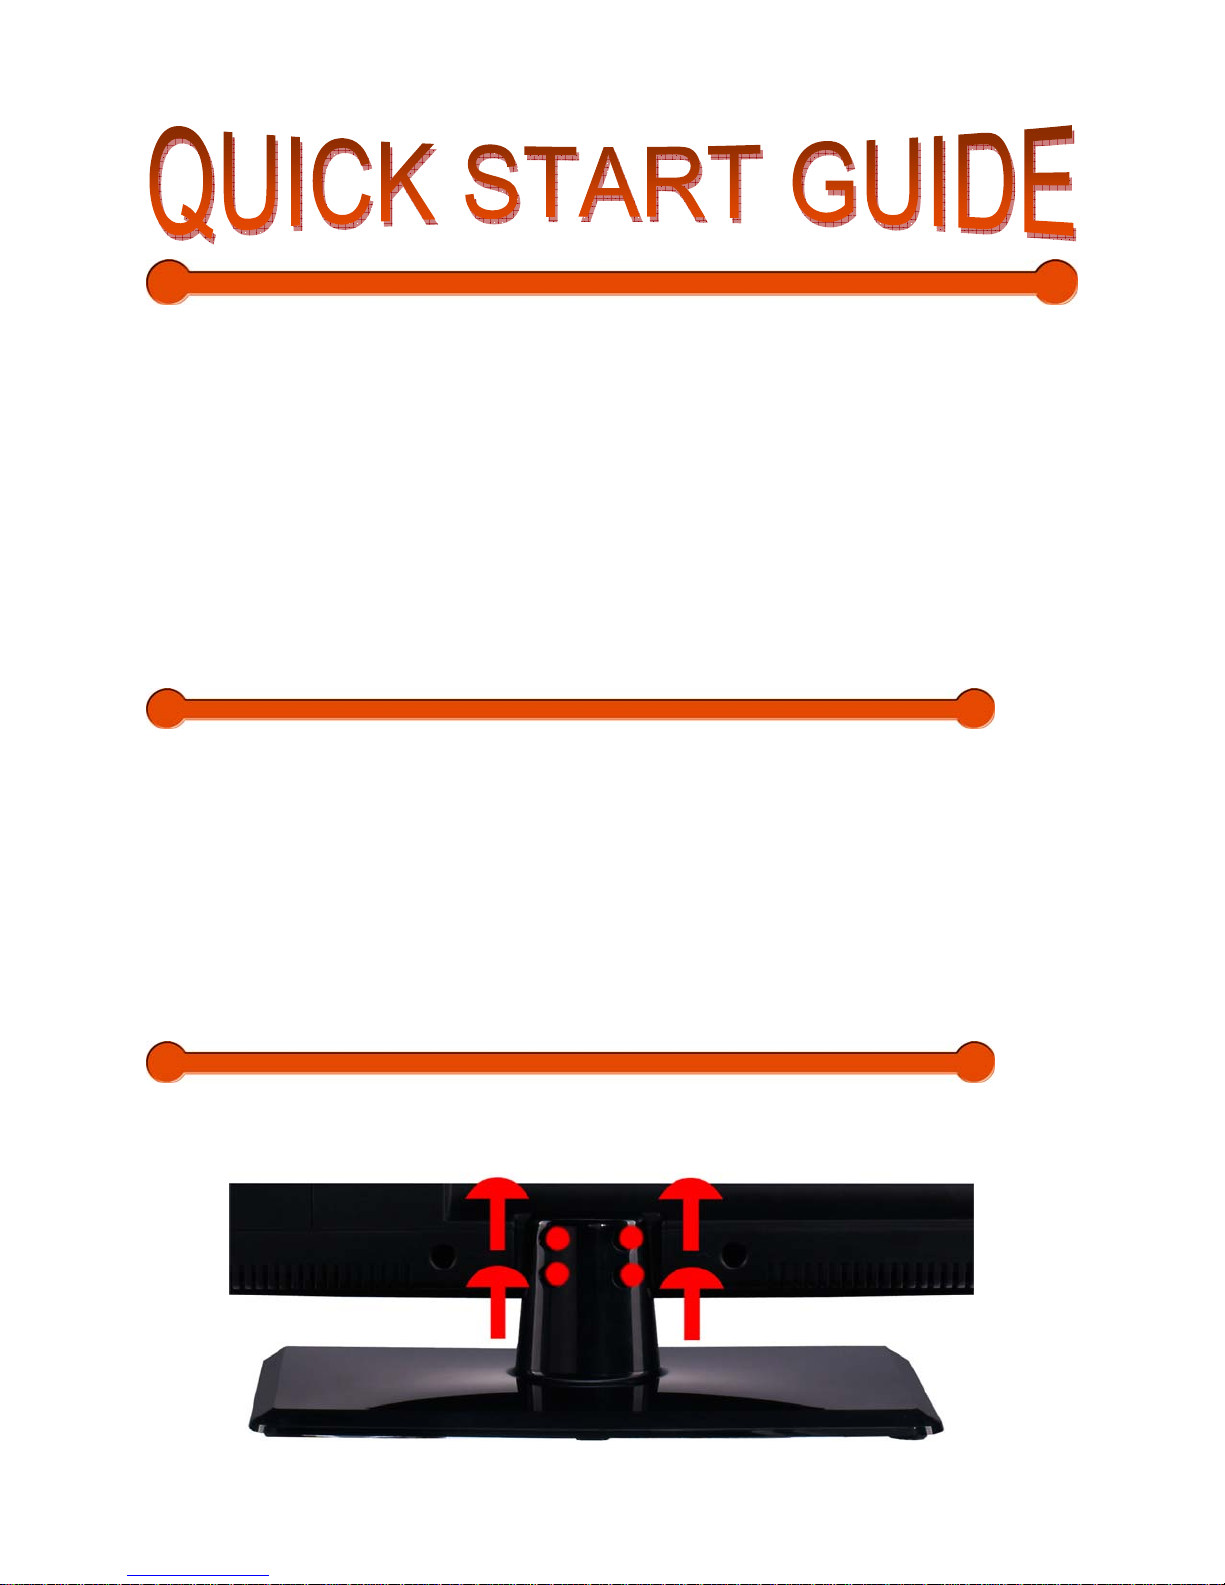
2. Attaching or Removing the TV Stand
1. To remove the stand completely, look at the back of the TV near the neck and unscrew the 4
screws shown in the picture and the neck along with the base should come off.
Page 2

T o attach the stand place the display unit flat on a table. Afterwards attach the stand onto
2.
the display and screw in the 3 screws to secure the stand.
Rear View Mounting Pattern
Mounting Specification: 10 0 mm x 100mm using screw size M4. Length of screw should not
exceed 6mm. Please Note: The 6mm length of screw refers to how deep the screw can go inside
the mounting holes. When you’re buying screws, you should add the original 6mm to the
thickness of your mounting plate in order to get the total screw length.
Page 3

3. Installing Batteries to the Remote
Please insert two AAA batteries into the remote control. Make sure that you match the
(+) and (-) symbols on the batteries with the (+) and (-) symbols inside the battery
compartment. Afterwards, re-attach the battery cover.
Please note:
• Only use AAA batteries.
• Do not mix new and old batteries. This may result in cracking or leakage that may
pose a fire risk or lead to personal injury.
• Inserting the batteries incorrectly may also result in cracking or leakage that may
pose a fire risk or lead to personal injury.
• Dispose the batteries in accordance with local laws and regulations.
• Keep the batteries away from children and pets.
• If the remote control is not used for a long time, remove the batteries.
• Keep the remote control away from moisture, sunlight, and high temperatures.
Page 4
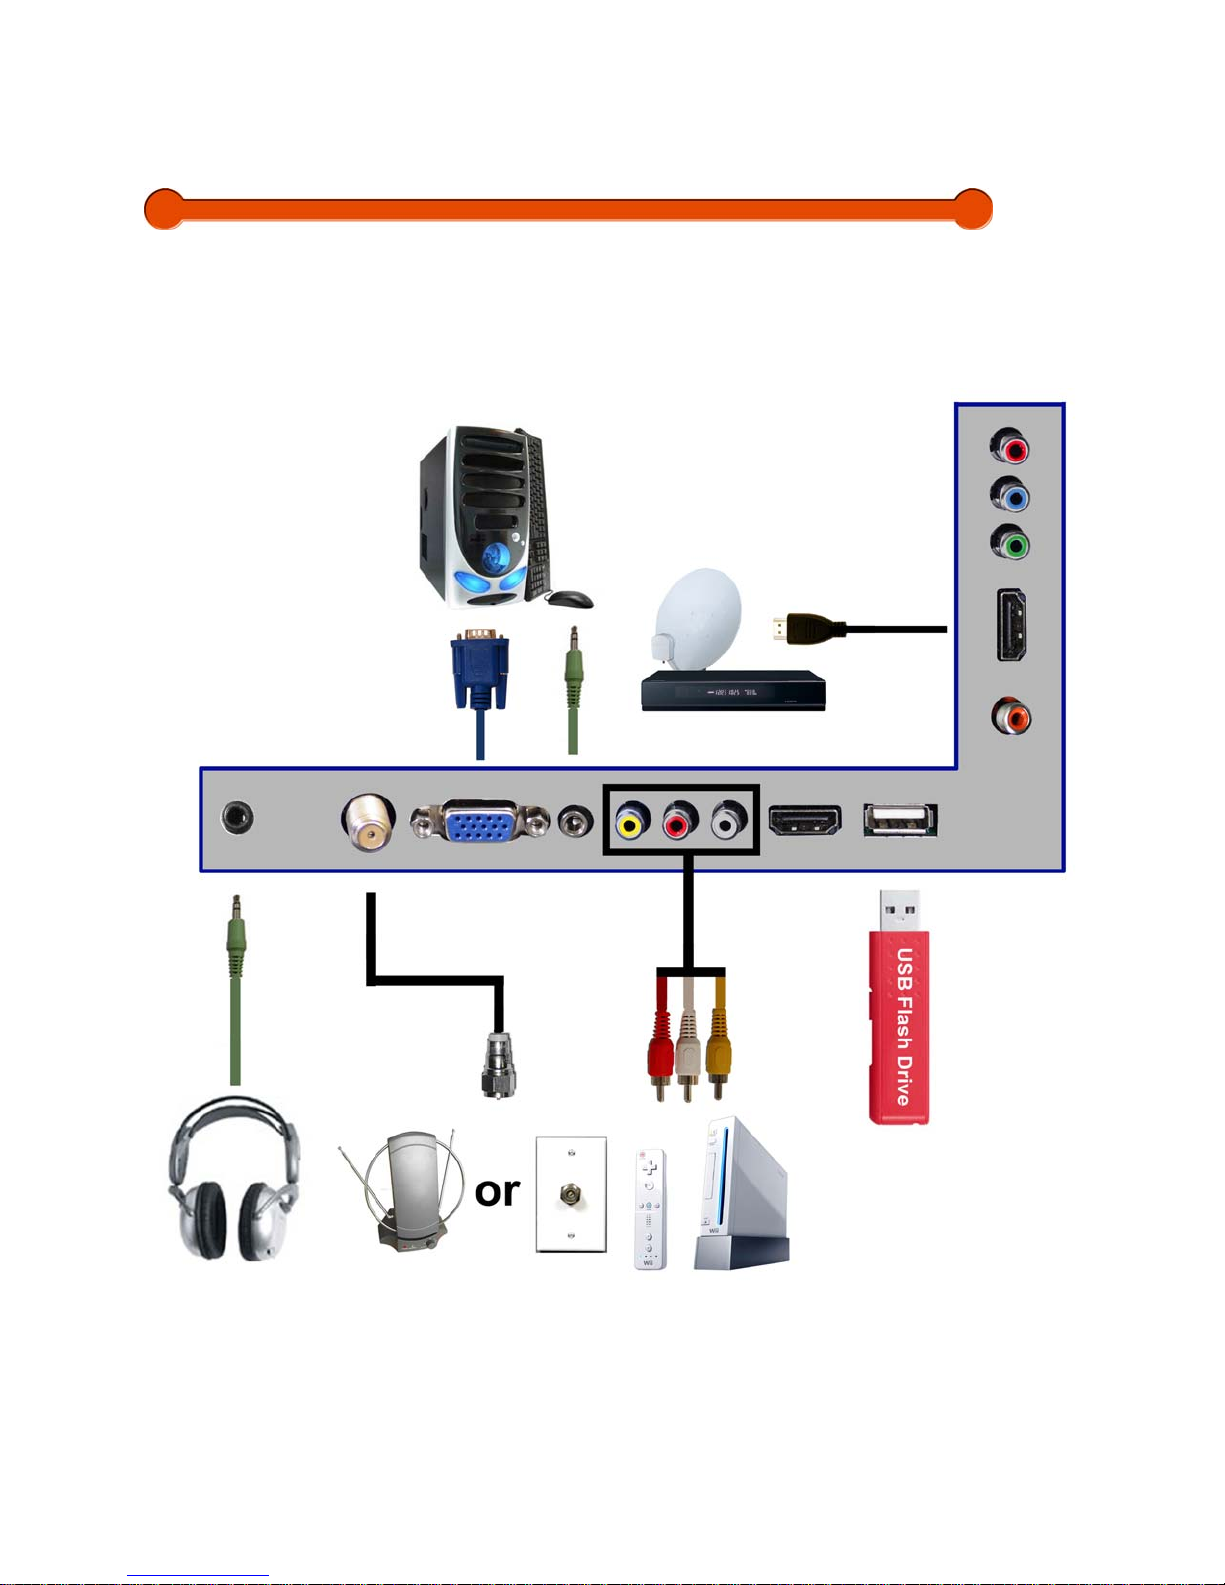
4. Connecting Your Cables
The following picture offers a suggestion for connecting most of your audio video equipment.
Page 5

5. Ready to Watch Some TV?
Starting up the HDTV
1. Make sure your power cable is connected and the standby red light in the front of the
HDTV is lit up.
2. Check all your connection cables off the side or the back of your
AV devices. Make sure they are all connected securely.
3. Turn on your HDTV and other AV devices if necessary.
4. Select the correct source according to the Connecting pages.
If You’ve Connected Antenna or Cable to the HDTV…
If an antenna or cable (without a cable box) is connected to your TV’s tuner, you will need to go
through an INITIAL SETUP process in order to watch the HDTV.
1. Press MENU to open the menu
2. Use the ◄ or ► button to select the CHANNEL icon and press
HDTV and also your
ENTER.
Page 6
3. Use the ▲ or ▼ buttons to highlight the signal type and press ◄ or ► to select your
connection either AIR or CABLE.
4. Use the ▲ or ▼ buttons to select AUTO CHANNEL SEARCH and press
ENTER to scan
for channels.
5. Once the scanning finishes, you can begin to watch
HDTV.
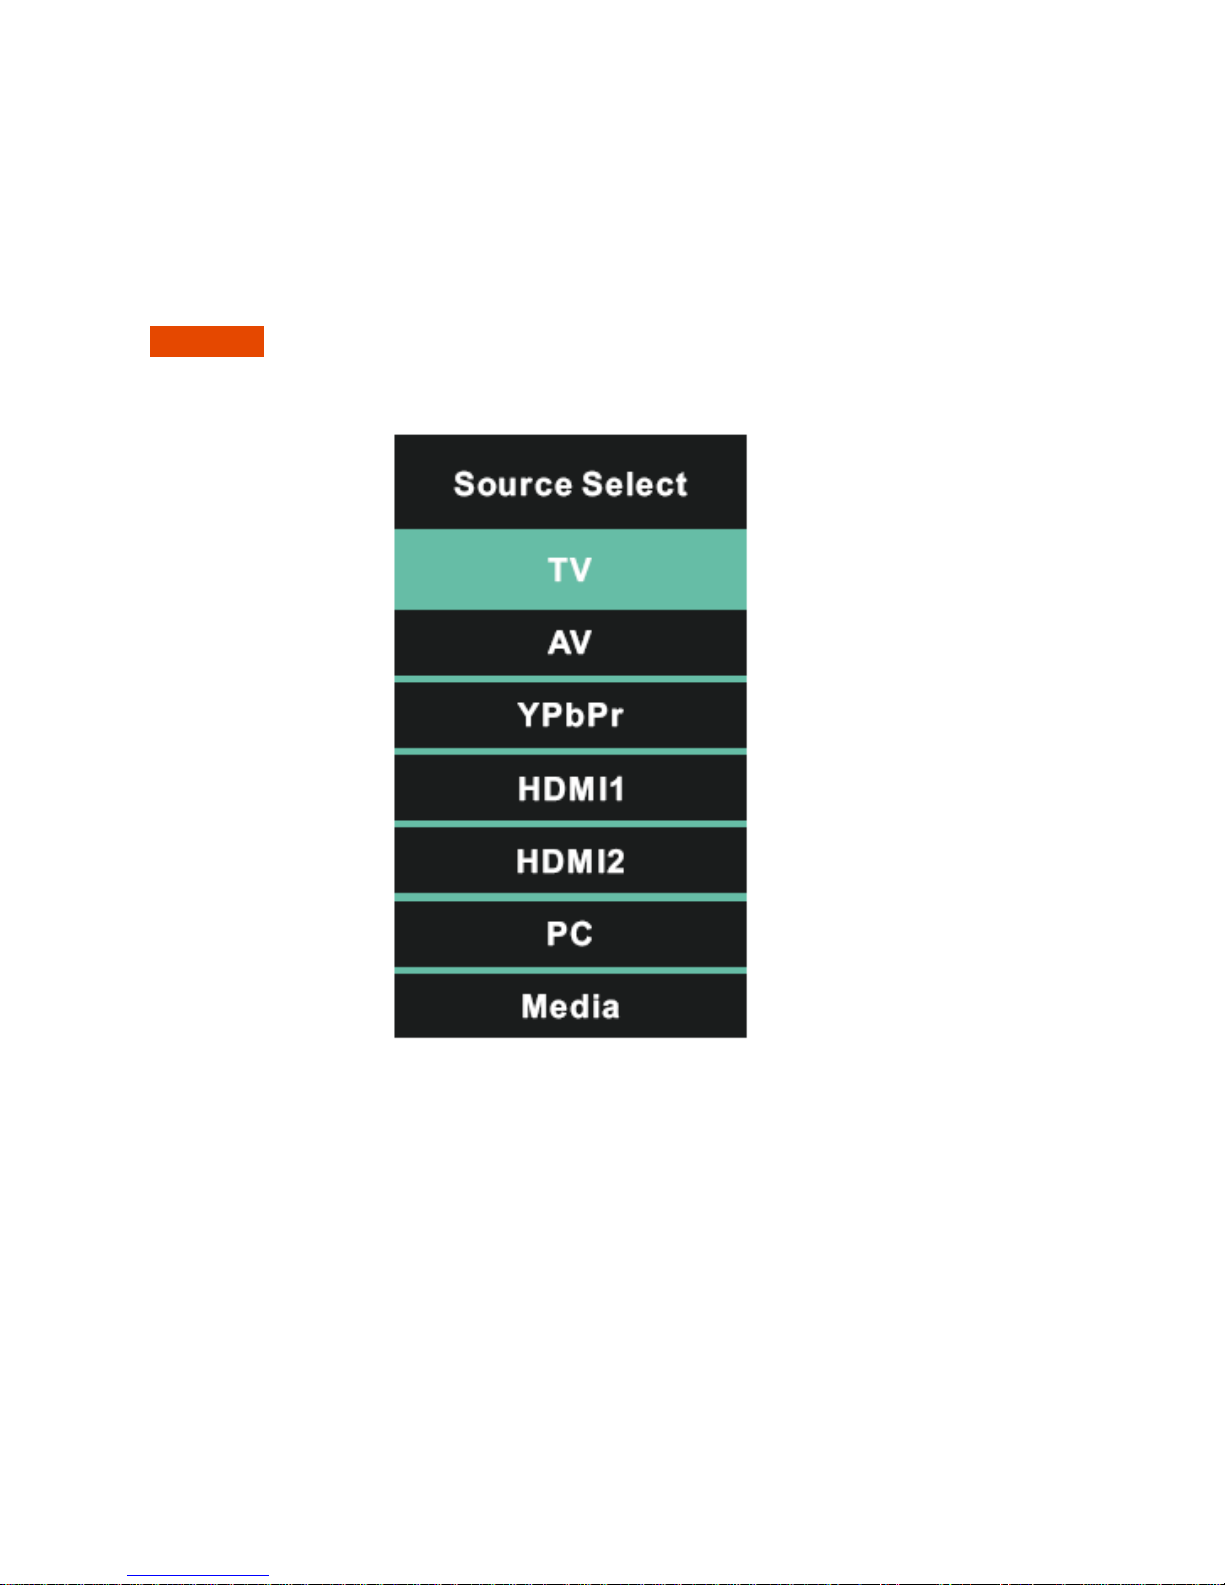
If You’ve Connected set-top boxes to the HDTV…
1. Press the S button on top of the HDTV or the SOURCE button on the remote control
and you will see the picture above.
2. Use ▲▼ buttons to select the source you want to switch to and press the ENTER
button in the middle of the ▲▼ buttons.
Please Note :
• Not all broadcasts are in High Definition (HD). Please refer to your local
broadcasting stations for more information.
• The HDTV’s tuner is designed for HDTV therefore requires a stronger
signal than normal TVs. If you cannot achieve that signal level with
your antenna or cable, your HDTV might lose picture or sound.
 Loading...