

Page 1
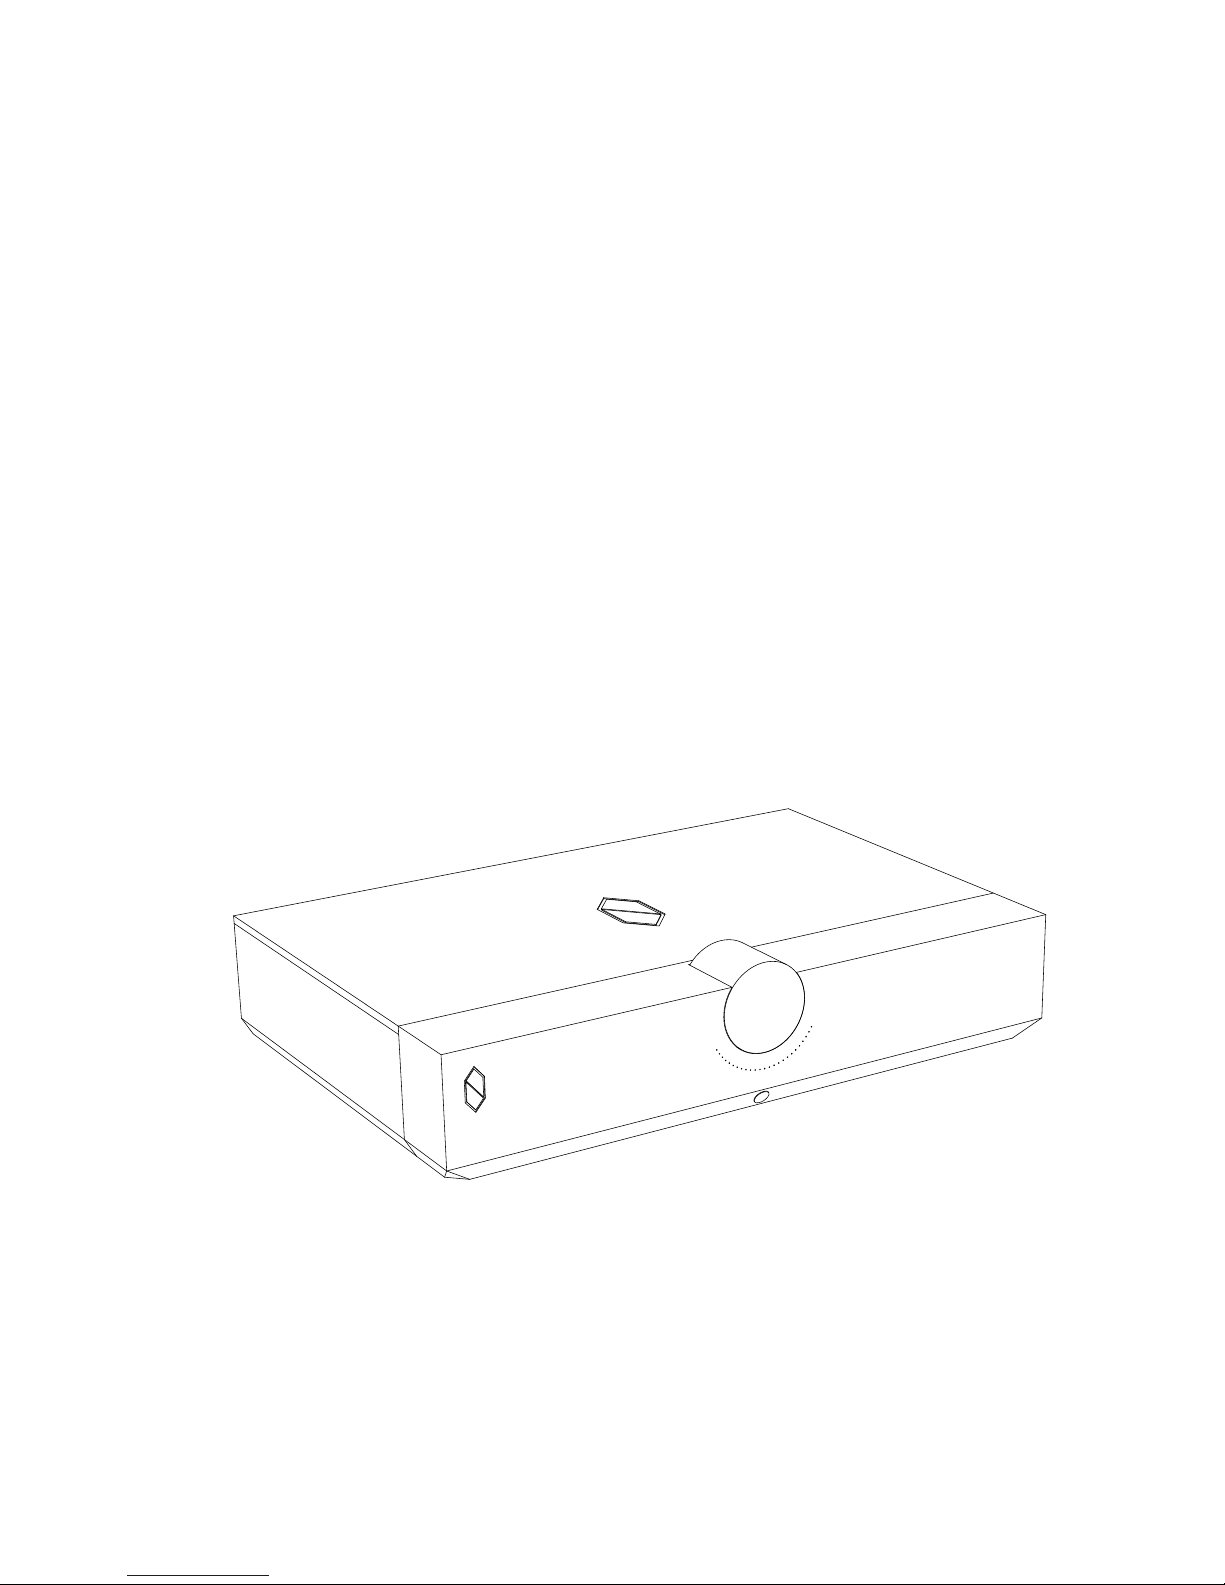
Thank you for choosing COS D1. We at COS Engineering are thrilled to
share with you the joy of soaking in music through this unit.
Please have a few minutes for this manual before powering D1 on.
WELCOME
Page 2

......................................................................................
......................................................................................
..........................................................................
..............................................................
......................................................................................
...................................................................................
..............................................................................
......................................................................
...................................................................................
...................................................................
...........................................................................
.......................................................................................
................................................................................
........................................................................................
................................................................
Getting Started
Unpacking
Placement
Connection
Mains Connection
Earth Ground Connection
Input to D1
Output of D1
Buffer Selection
USB Audio Selection
Operation
Powering On
Selecting Input Source
Adjusting Volume
Muting D1
Standby Mode
Power Off
Optimizing Performance
Specifi cation
01
01
02
03
04
05
06
07
09
09
10
10
11
11
12
13/14
CONTENTS
..........................................................................................
Page 3

You will fi nd in the D1 box the following:
• COS D1
• four spikes
• a remote control
• a power cord
• this manual.
Please keep the D1 box. In an unlikely event that maintenance is needed,
the box shall be used for protection of D1 in transit.
UNPACKING
Getting Started
PLACEMENT
D1 needs a solid and stable surface to stand firmly and four spikes
should help keep it level. D1 does not need much air to stay operational,
but suffocating it is certainly a bad idea. Where D1 is placed is not
critical, but please keeps it away from known magnetic fi elds.
The infrared window is located below the indicator LEDs at the bottom
edge of the front panel. Please remove any obstacle that might block this
window, since your remote controller needs a clear line of sight to this
window to operate your D1.
1
Page 4
2
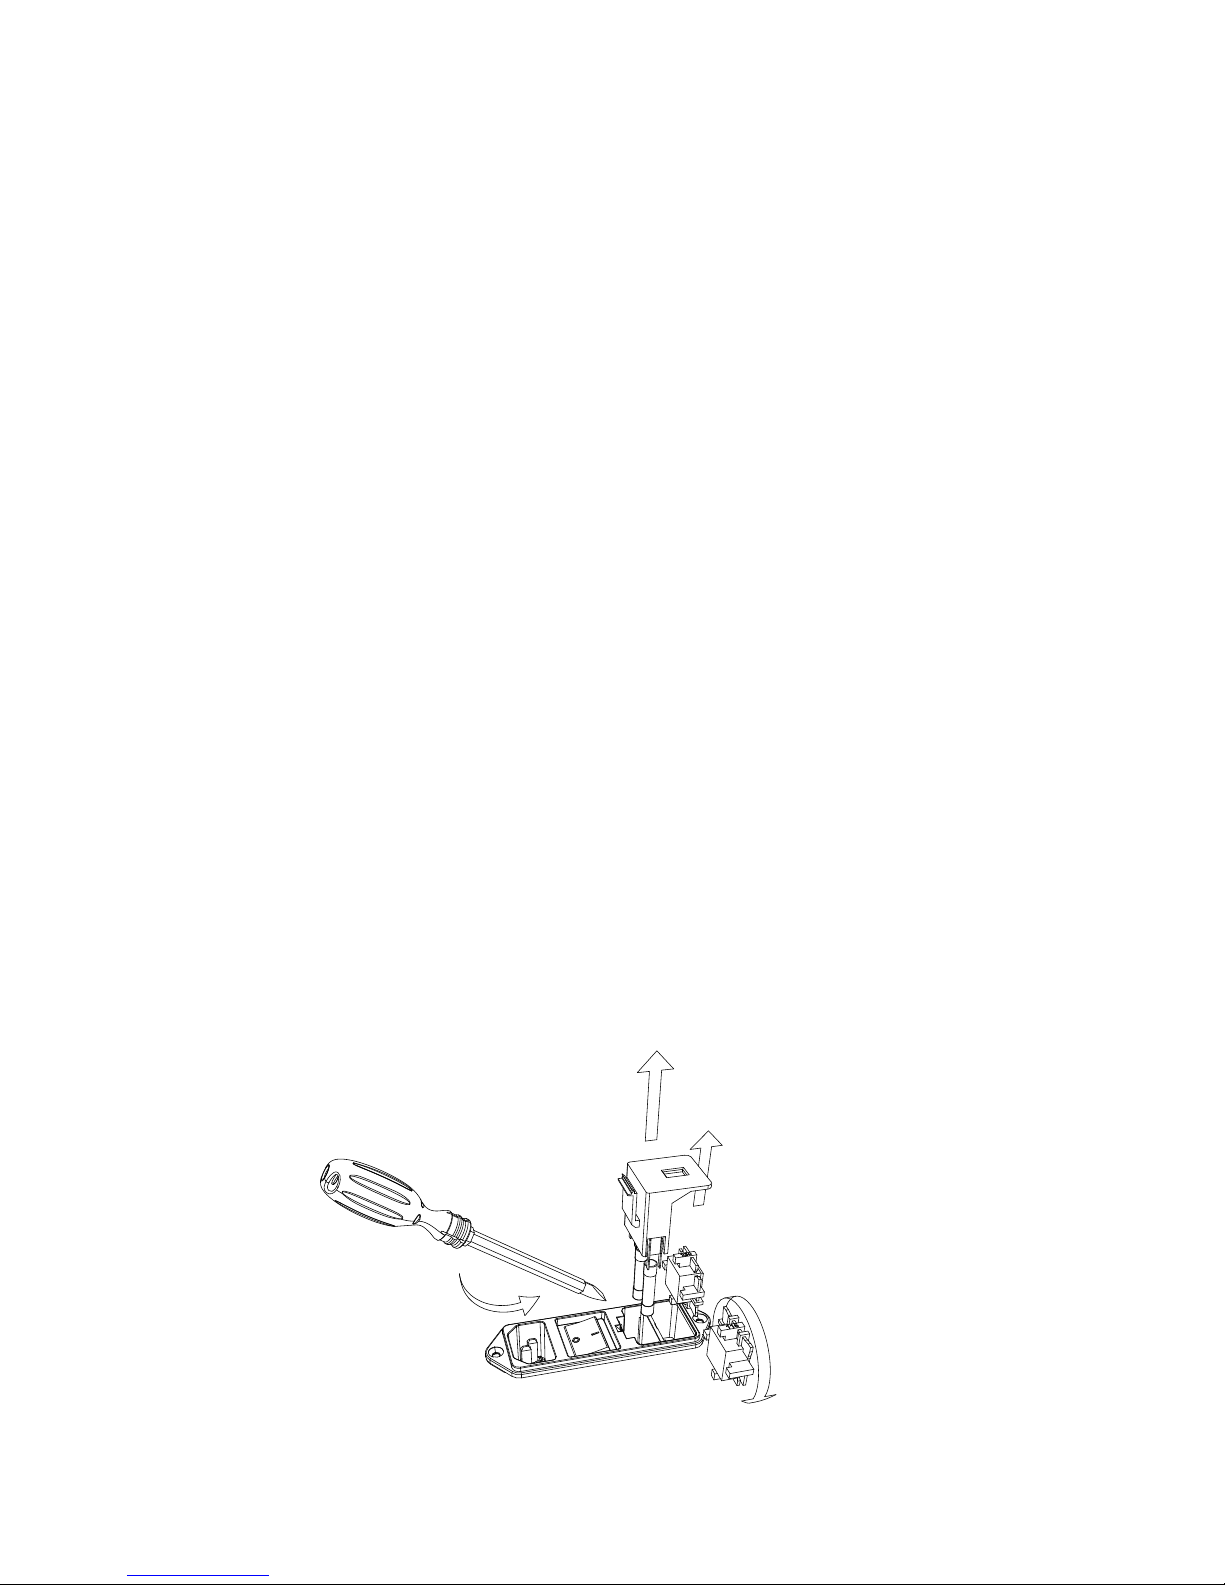
Before powering on, please make sure that the voltage selected, in the
Voltage Selection of the back panel, is the same as the AC outlet voltage
of your area. If it is not, please do the following:
1. Use a screwdriver to unlock the cover and take it out
2. Use your fi nger or a simple tool to tip out the voltage selector
3. Flip the voltage selector so that the other voltage number is on top.
Only two options available:115 (110~120VAC) and 230 (220~240VAC)
4. Insert the voltage selector in the same place till it clicks
5. Put the cover back on
When this is done, you will notice that the voltage number is upside down.
Do not panic. It is so designed.
Two fuses are located inside the cover. They are 6.3 X 32 mm(1/4 X 1 1/4”)
in size and rated for 1A, 250V AC. If replacement is needed, please use
fuses with the right spec.
Mains Connection
Connection
1
1
2
3
Page 5
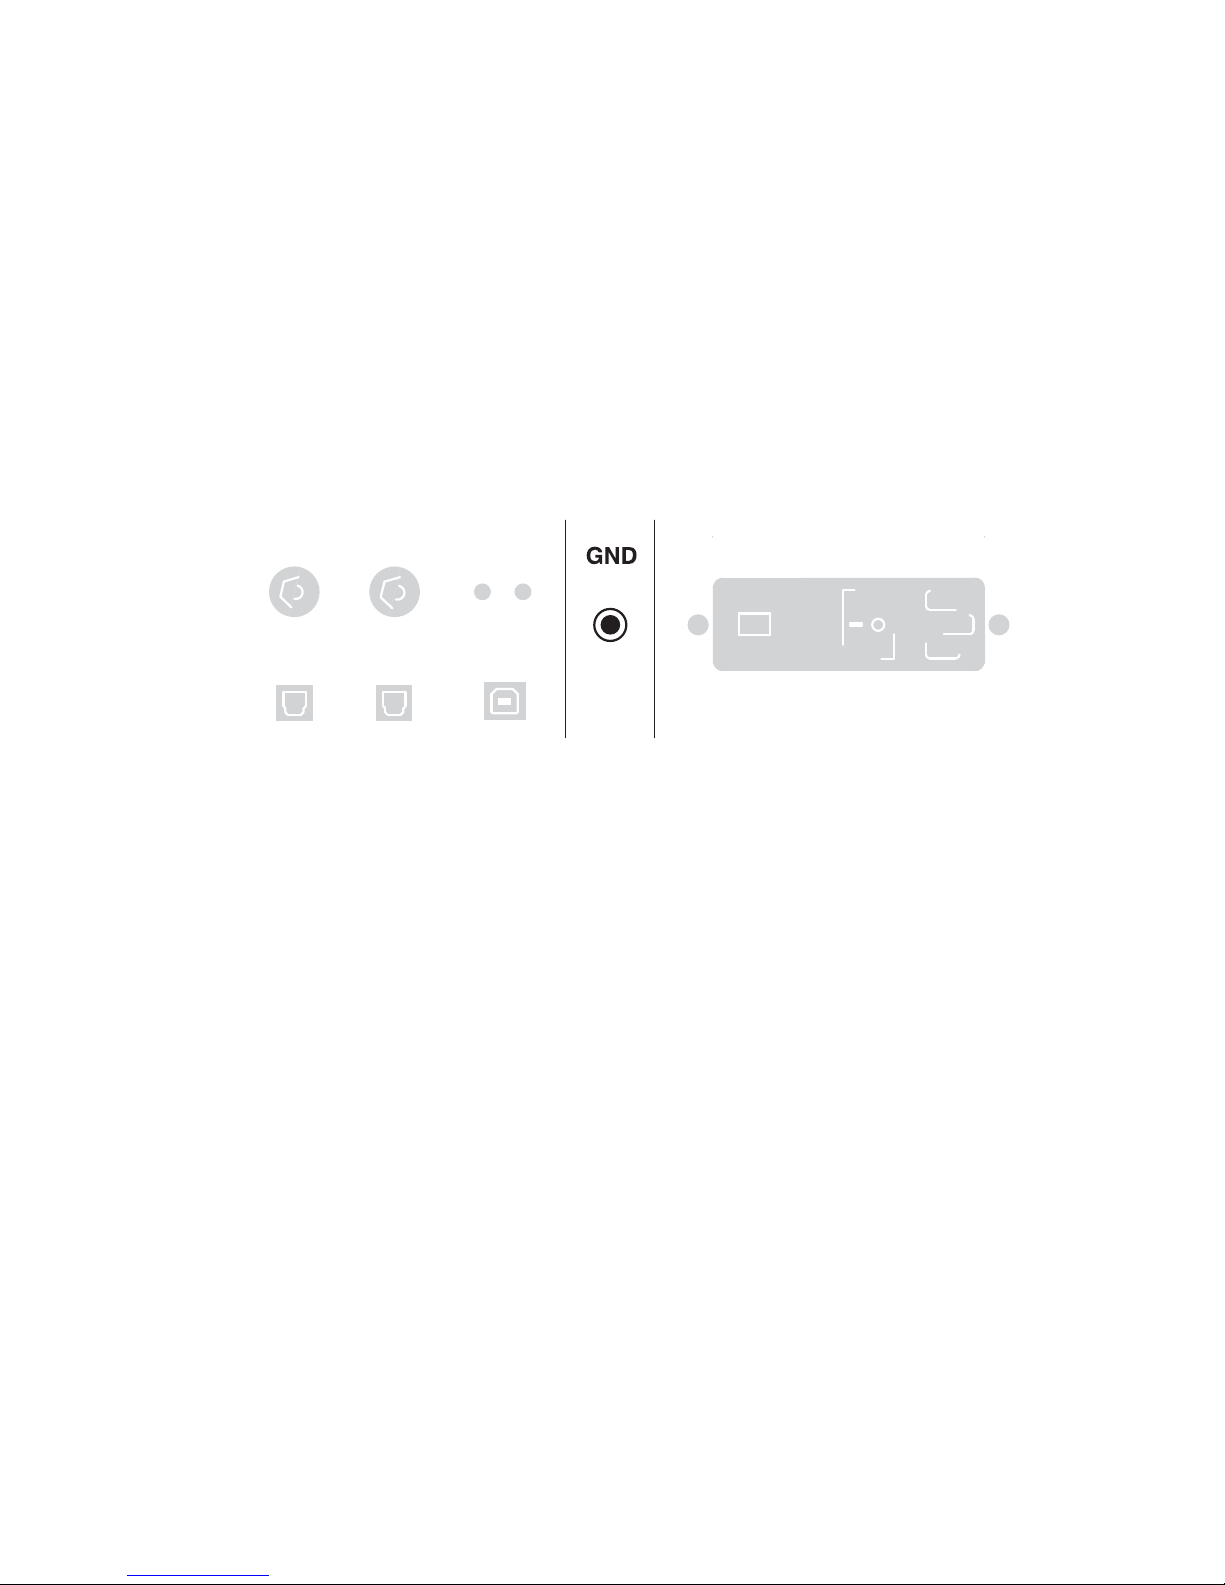
In some countries, there is no earth ground established when plugging
into AC mains. We recommend that this earth ground connection be
connected to a known earth ground (like water pipes that run through
the ground, or copper spikes that are driven into the ground for this
reason). If you are not sure about this portion, please ask your dealer
for assistance.
Caution!
It is important that all components in your system be properly grounded. Do not
defeat a three-prong AC cord with “ground-lifter” or “cheater” adaptors, since it
may allow dangerous voltages to build up, which would pose a threat to you and
your equipment.
3
EARTH GROUND CONNECTION
Connection
Page 6
4
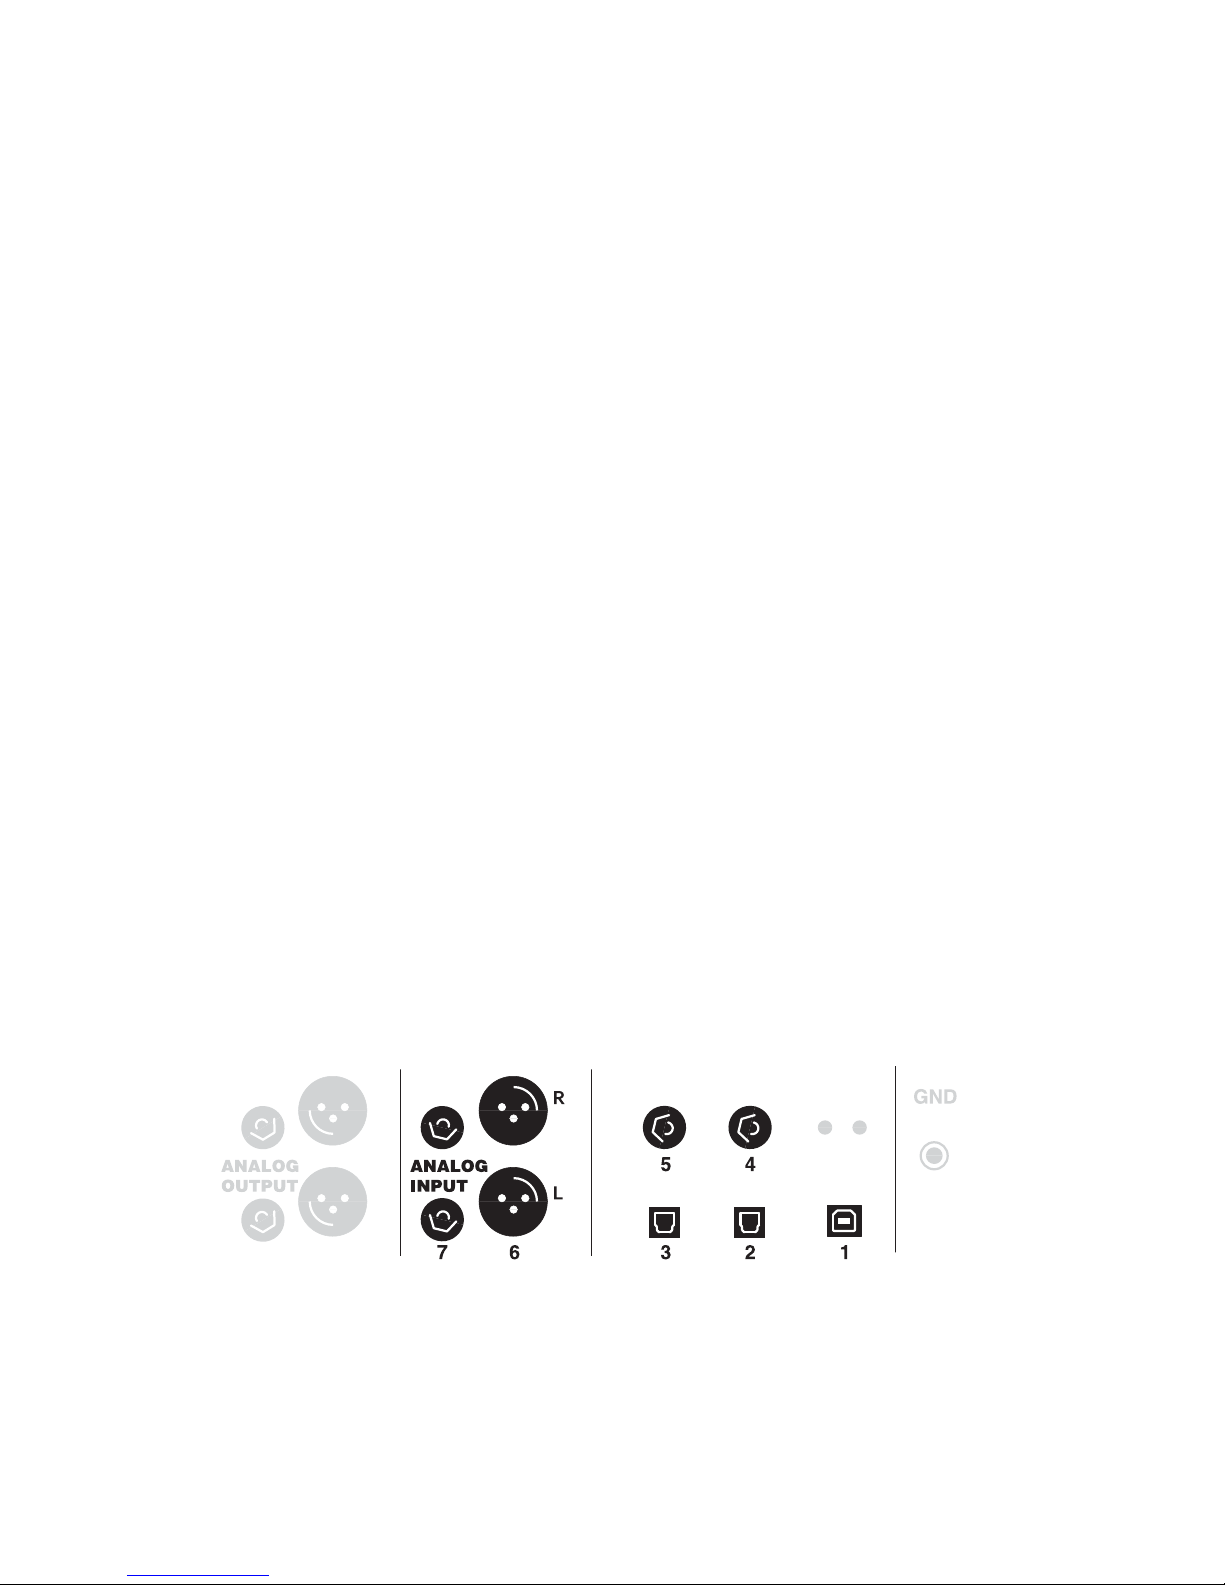
D1 has seven input connectors on the back panel, engraved as 1
through 7. The first five are used for digital signals from computer, CD
transport, DVD player, etc..., and the last two are used for analog signals
from tuner, TV, setup box, and phono amp.
The details are as follows:
#1: USB Audio (USB Type B connector)
#2: Optical Input (Toslink)
#3: Optical Input (Toslink)
#4: S/PDIF Input (RCA connector)
#5: S/PDIF Input (RCA connector)
#6: Balanced Analog Input (XRL female connector pair)
#7: Unbalanced Analog Input (RCA connector pair)
The pin assignments of XLR-type female input connectors are:
Pin 1: Signal ground
Pin 2: Signal + (non-inverting)
Pin 3: Signal – (inverting)
Connector ground lug: chassis ground
INPUT TO D
1
Connection
Page 7
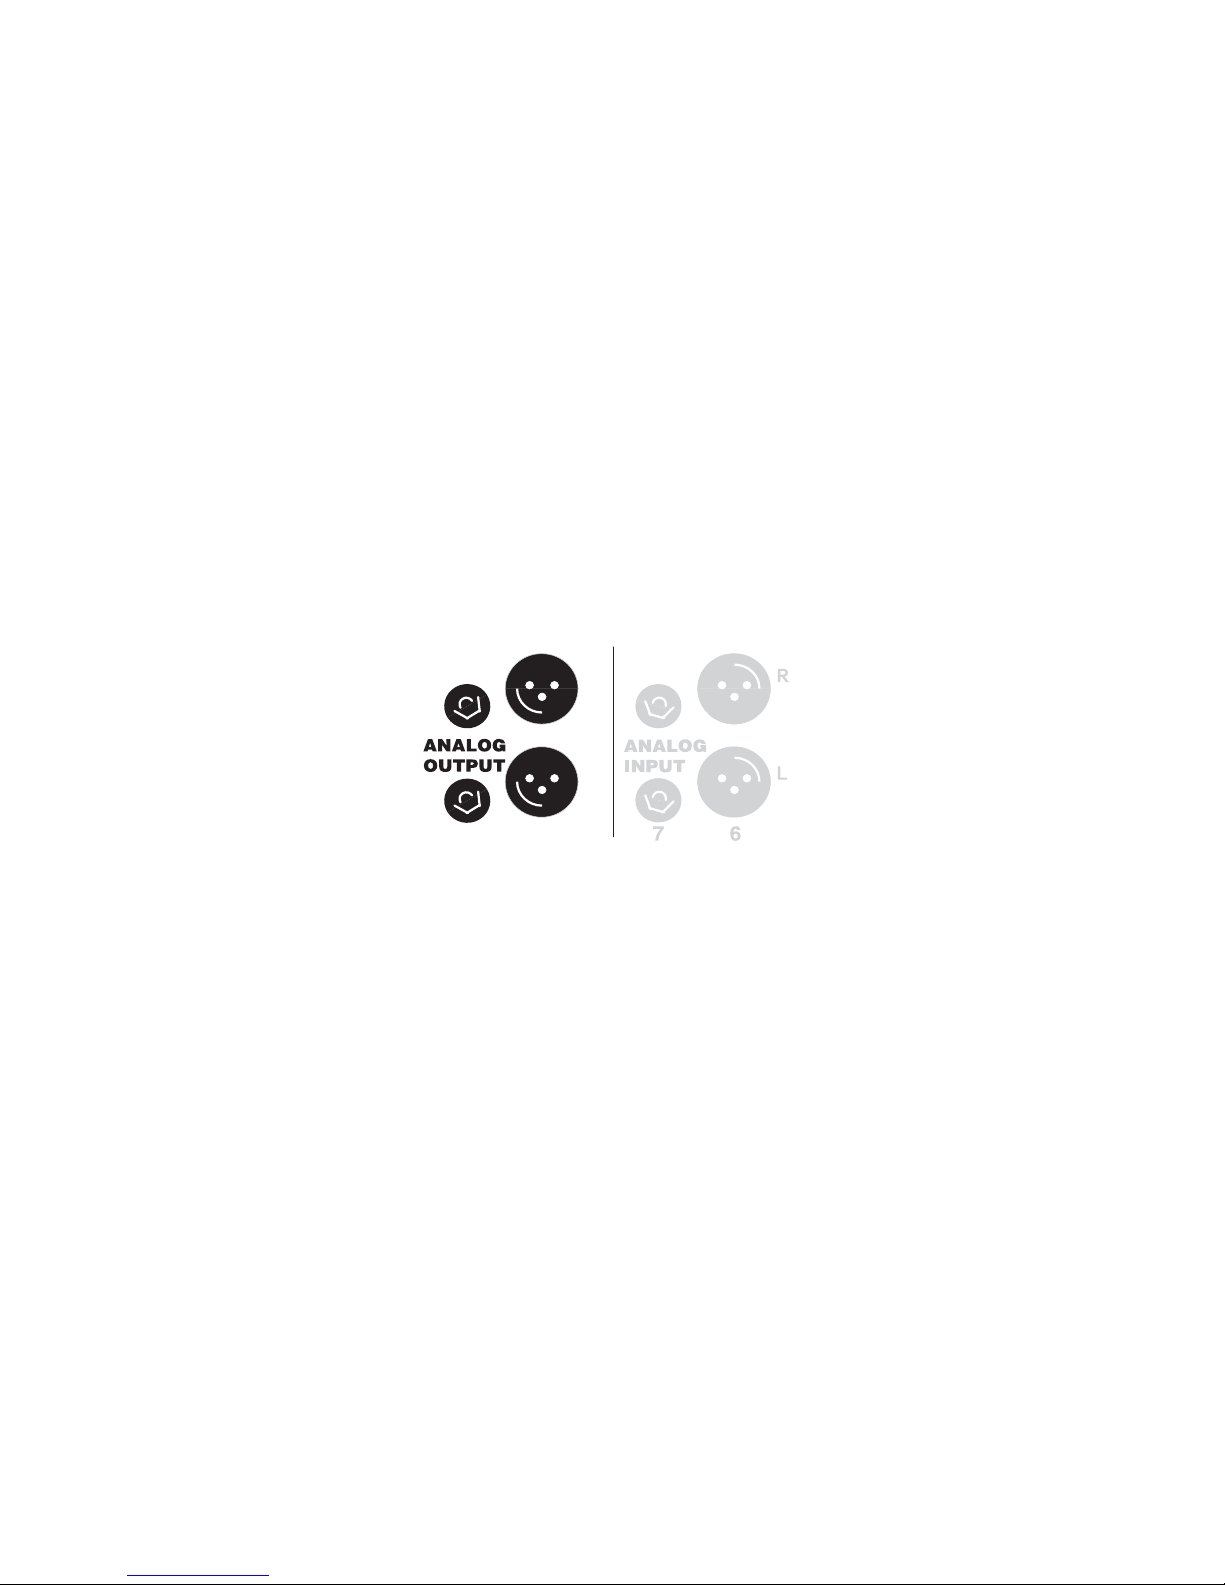
D1 provides both balanced and unbalanced outputs, with an XLR male
connector pair and an RCA connector pair, respectively.
The pin assignments of XLR-type female input connectors are:
Pin 1: Signal ground
Pin 2: Signal + (non-inverting)
Pin 3: Signal – (inverting)
Connector ground lug: chassis ground
5
OUTPUT OF D
1
Connection
Page 8
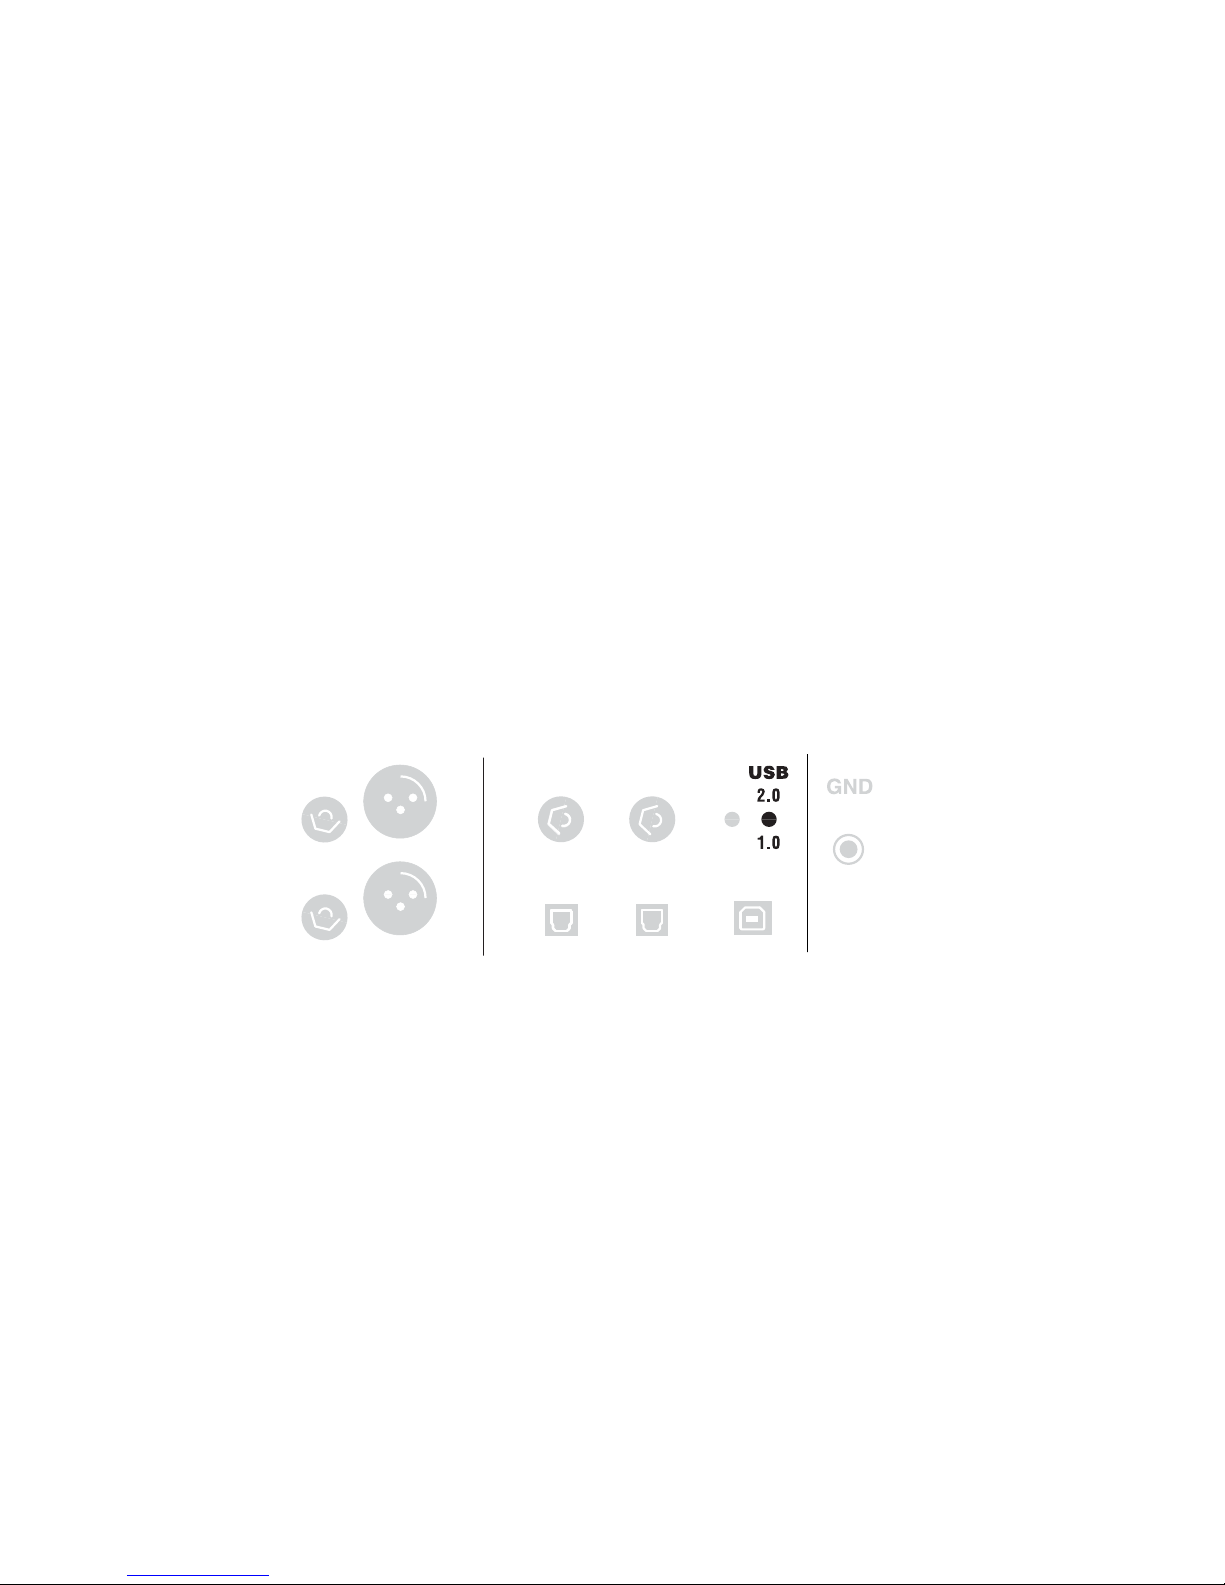
There is a buffer switch on the back panel of D1, and it should be turned
on for optimum performance. Sometimes digital music data do not move
along and get converted in perfect tandem, which causes jitters, and
even a few micros-second timing error is enough to perturb the ears and
frustrate the mind. Therefore, D1 uses one-second depth buffer, along
with an independent and accurate clock, to receive data, align them and
send them out in precise time frames for conversion.
However, the buffer should be switched off when a video is
playing, so the depth of the buffer is reduced to a little to ensure
video-audio synchronization. Switching the buffer on or off will take
effect immediately.
6
BUFFER SELECTION
Connection
Page 9

7
D1 supports both USB Audio Class 1.0 and 2.0. The selection is made
through adjusting USB switch on the back panel. The main difference
between USB Audio Class 1.0 and 2.0 is that the USB Audio Class 1.0
can’t go beyond 96K samples per second with 24 bit data depth.
Microsoft Windows supports Audio Class 1.0, whereas Mac OS X and
major Linux distributions support both Audio Class 1.0 and 2.0. No device
driver is needed for computers to communicate with D1 through USB
port. Some NAS (Network Attached Storage) devices also support USB
Audio. Please consult your NAS manufacturer for USB Audio class and
compatibility information.
Always power D1 off or put D1 into standby mode before adjusting
the USB Audio Selection switch. The selection takes effect when D1 is
powered on or leaves standby mode.
USB AUDIO SELECTION
Connection
Page 10

8
Precaution!
Before power on D1 for the first time, please double check if the
AC voltage selector is set to the correct voltage. Please refer to
“Power Supply” section for detail instructions on how to adjust the
voltage selector.
Operation
Page 11

9
After power is switched on, the LED indicators in the front panel
sequentially light up and go out as if a number of light dots running from
left to right and return to the left. After that, seven LEDs remain on and
the leftmost will blinks with extra brightness. Now the D1 is successfully
powered on and ready for input source selection.
POWER ON
A short press on the knob will choose the next input source, or you can
select the input source by pressing the upper or lower SOURCE keys on
the remote control.
SELECTING INPUT SOURCE
Operation
Page 12

10
Volume level is changed by rotating the knob or by pressing the upper
or lower VOLUME keys on the remote control. Rotating the knob
counterclockwise will bring up the volume, and vice versa.
More LEDs light up when the volume goes up, and less when the volume
goes down.
ADJUSTING VOLUME LEVEL
The sound of the music can be turned off by pressing the MUTE key on
the remote control. Hit any key (except the STANDBY key) on the remote
control or rotate/press the knob on the front panel can bring the sound
back again.
MUTING D
1
Operation
Page 13

11
Operation
A long press (about one second) on the knob or hit the STANDBY key
on remote control will put D1 into standby mode. In this mode, the
volume and output relays will be turned off, and D1 will go into low power
consumption state. Moreover, all the LEDs are off except the center one
(6 o’clock position). Another long press on the knob will bring D1 back
to operation, and the volume level and input source will stay unchanged
before D1 entered the standby mode.
STANDBY MODE
The Power Off switch is between Voltage Selection and AC Input on the
back panel. It's worth considering leaving D1 in standby mode while
music is no longer played since the power consumption is very low.
POWER OFF
Page 14

12
• Ten minutes warm up time will help D1 to reach its ultimate
performance once internal thermal equilibrium is attained.
• Switch buffer on for music playing and switch it off for video playing.
• Turn off the up-sampling feature of your player and play music at its
original sampling rate. D1's dedicated DSP with COS Engineering's
algorithms will do the job.
• Fix the volume of your player at its maximum and use D1 to
adjust volume. Failing to do so may reduce the bit-depth of music data,
which compromises music quality.
Tips for Optimum Performance
Operation
Page 15

Pre-Amplifi er
13
Specifi cation
SPECIFICATIONS
Analog Input Balanced x 1, Unbalanced x 1
Analog Output Balanced x 1, Unbalanced x 1
Residual Noise
< 2uV (-114dBV)
(20Hz~20KHz non-weighted, input terminated)
Input Overload
16V (balanced), 8V (unbalanced)
(THD < 1%)
Input Impedance 100Kohm
Output Impedance 200 (balanced), 100 (unbalanced)
Maximum Output
16V (balanced), 8V (unbalanced)
(THD < 1%)
Voltage Gain 0dB
Frequent Response
+ 0.1dB
(20Hz ~ 20KHz)
THD+N
< 0.001% (-100dB)
(20Hz ~ 20KHz non-weighted)
Signal To Noise Ratio
> 110dB
(20Hz ~ 20KHz non-weighted)
Crosstalk < -120dB
Volume
256 steps by 0.25dB/step, total range: 64dB;
< + 0.1dB accuracy
Page 16
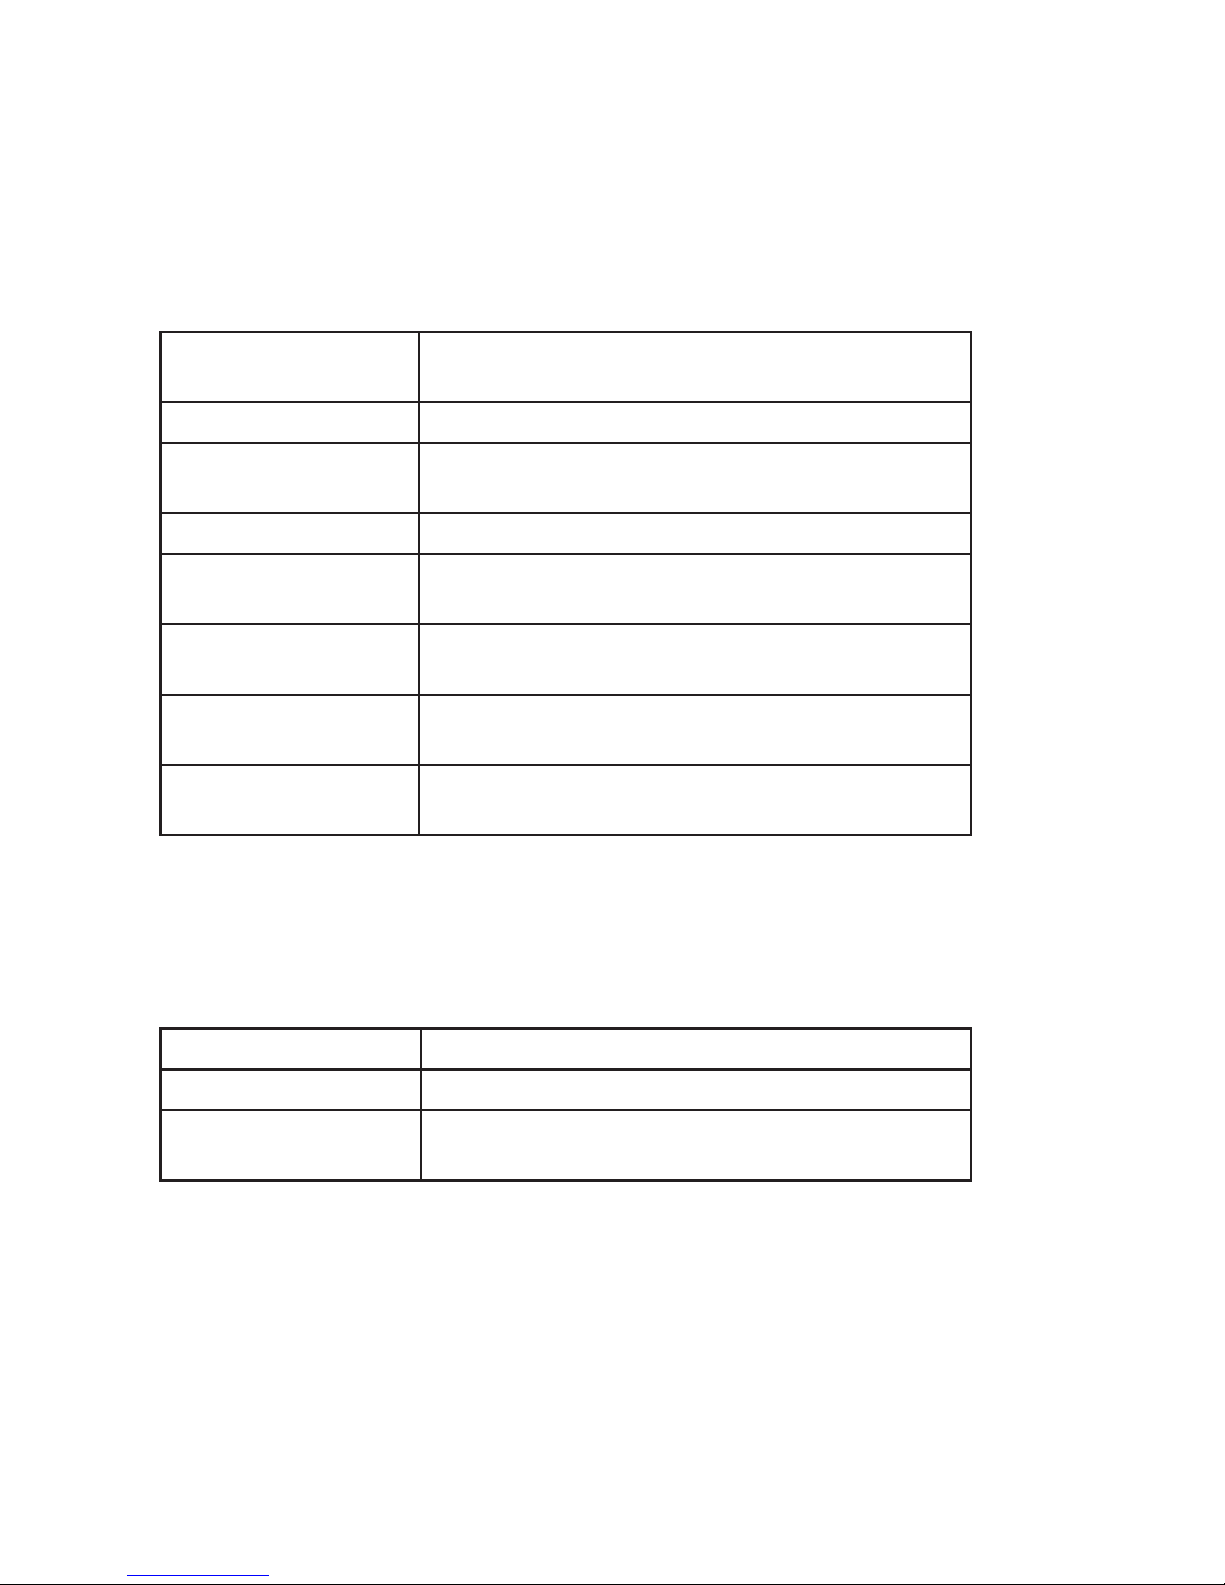
Specifi cation
DAC
General
Digital Inputs
USB x1, Asynchronous 1.0/2.0;
SPDIF x 1; TosLink x 1
Sampling Rate up to 192Ksps, 24-bit
Frequency Reponse
+ 0dB, - 0.5dB
(20Hz ~ 20KHz)
Full Scale Output 2V (unbalanced), 4V (balanced)
THD+N
< 0.001% (- 100dB)
(192Ksps, 24-bit, 20Hz ~ 20KHz, A-weighted)
Signal To Noise Ratio
> 110dB
(192Ksps, 24-bit, 20Hz ~ 20KHz, A-weighted)
Digital-to-Analog
Converter
24-bit DAC x 2
(up to 192Ksps, 24-bit)
Digital Filter
COS Proprietary
Linear Phase Delay
SPECIFICATIONS
Weight 8.6kg
Dimension 415mm (W) x 280mm (D) x 100mm (H)
Power
100 ~ 120VAC or 200 ~ 240VAC selectable
Normal Operation < 50W; Standby < 5W
14
 Loading...