

Page 1
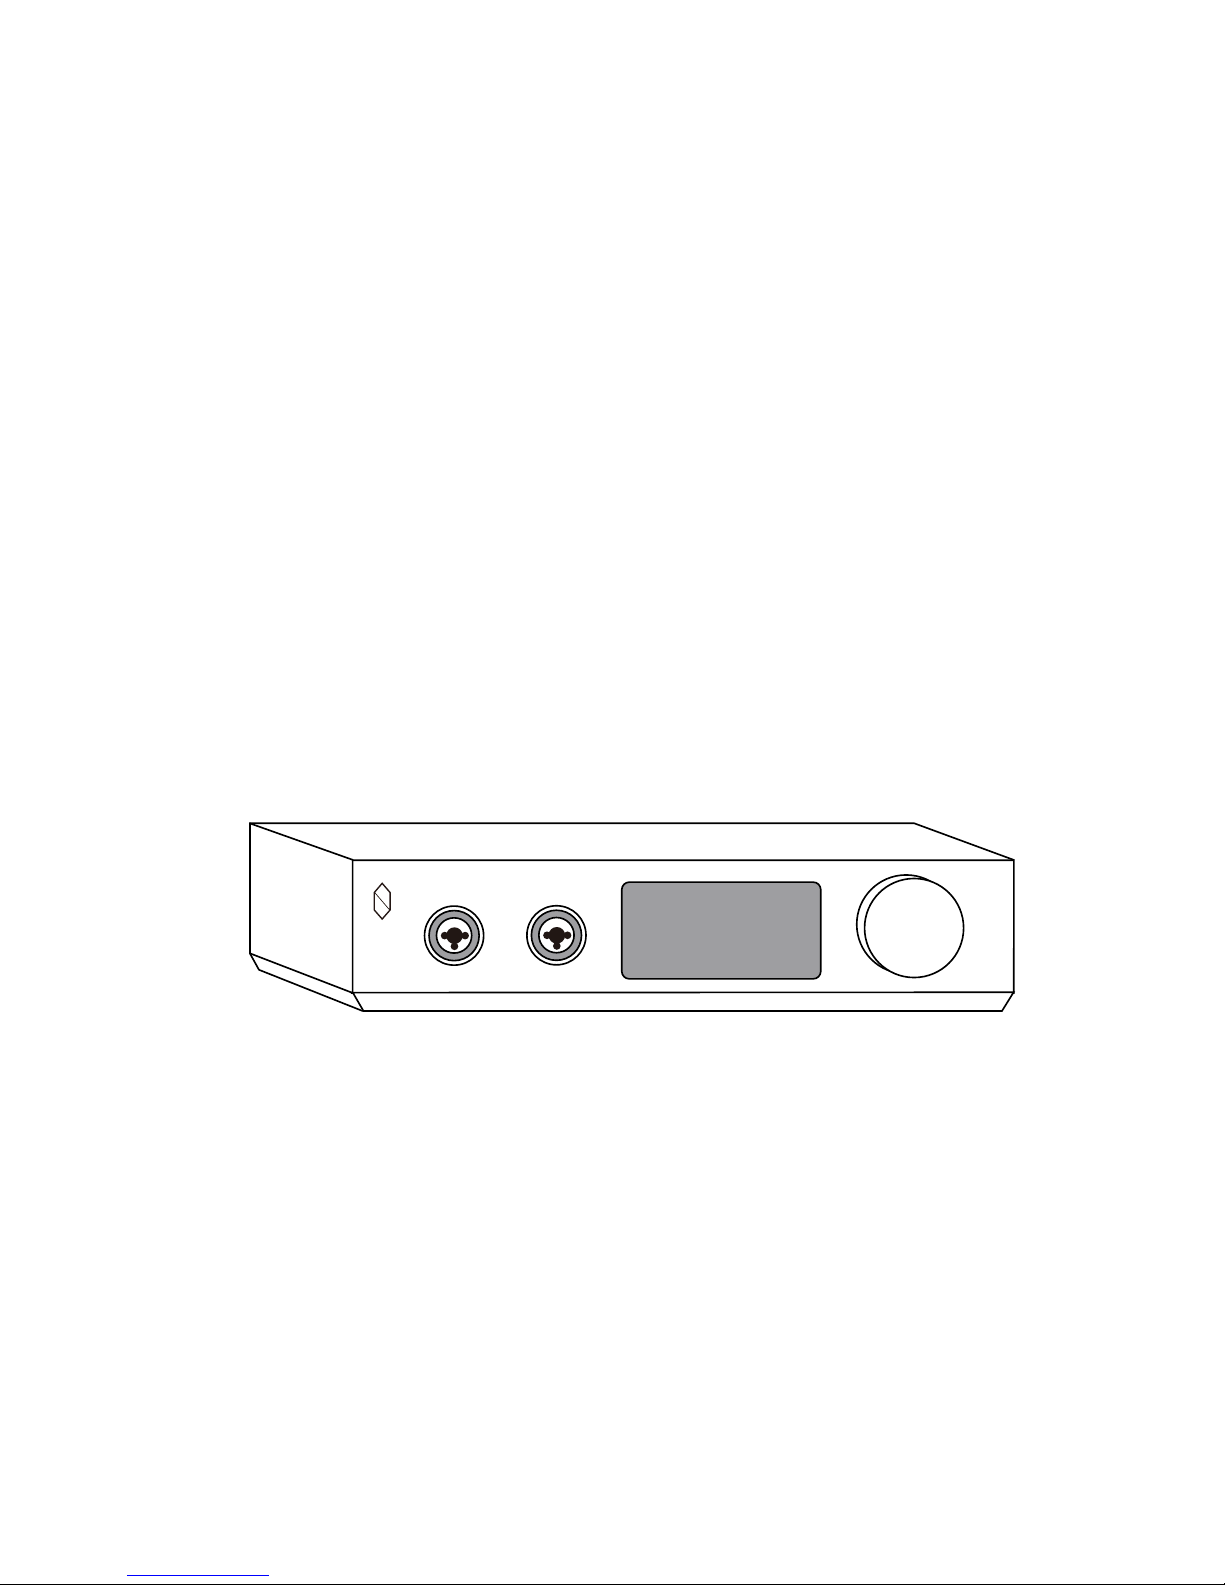
Thank you for choosing COS H1. We at COS Engineering are thrilled to
share with you the joy of soaking in music through this unit.
Please have a few minutes for this manual before powering H1 on.
WELCOME
Page 2

01
01
02
02
03
03
04
05
06
06
06
07
07
07
08
09
Getting Started
Unpacking
Placement
Connection
Mains Connection
Input
Line Out
Headphone
Buffer Selection
USB Audio Selection
Operation
Powering On
Selecting Input Source
Adjusting Volume Level
Line Out Control
Standby Mode
Powering Off
Display
Tips for Optimum Performance
Specifications
.......................................................................................
.......................................................................................
..........................................................................
................................................................................................
...........................................................................................
.....................................................................................
...............................................................................
.......................................................................
...................................................................................
...................................................................
..................................................................
..............................................................................
................................................................................
...................................................................................
.............................................................................................
......................................................
CONTENTS
Page 3

You will find in the H1 box the following:
• COS H1
• a power cord
• this manual
Please keep the H1 box. In an unlikely event that maintenance is needed,
the box shall be used for protection of H1 in transit.
UNPACKING
Getting Started
PLACEMENT
H1 needs a solid and stable surface to stand firmly, and four boots should
help keep it level. H1 does not need much air to stay operational, but
suffocating it is certainly a bad idea. Where H1 is placed is not critical,
but please keep it away from known magnetic fields.
1
Page 4
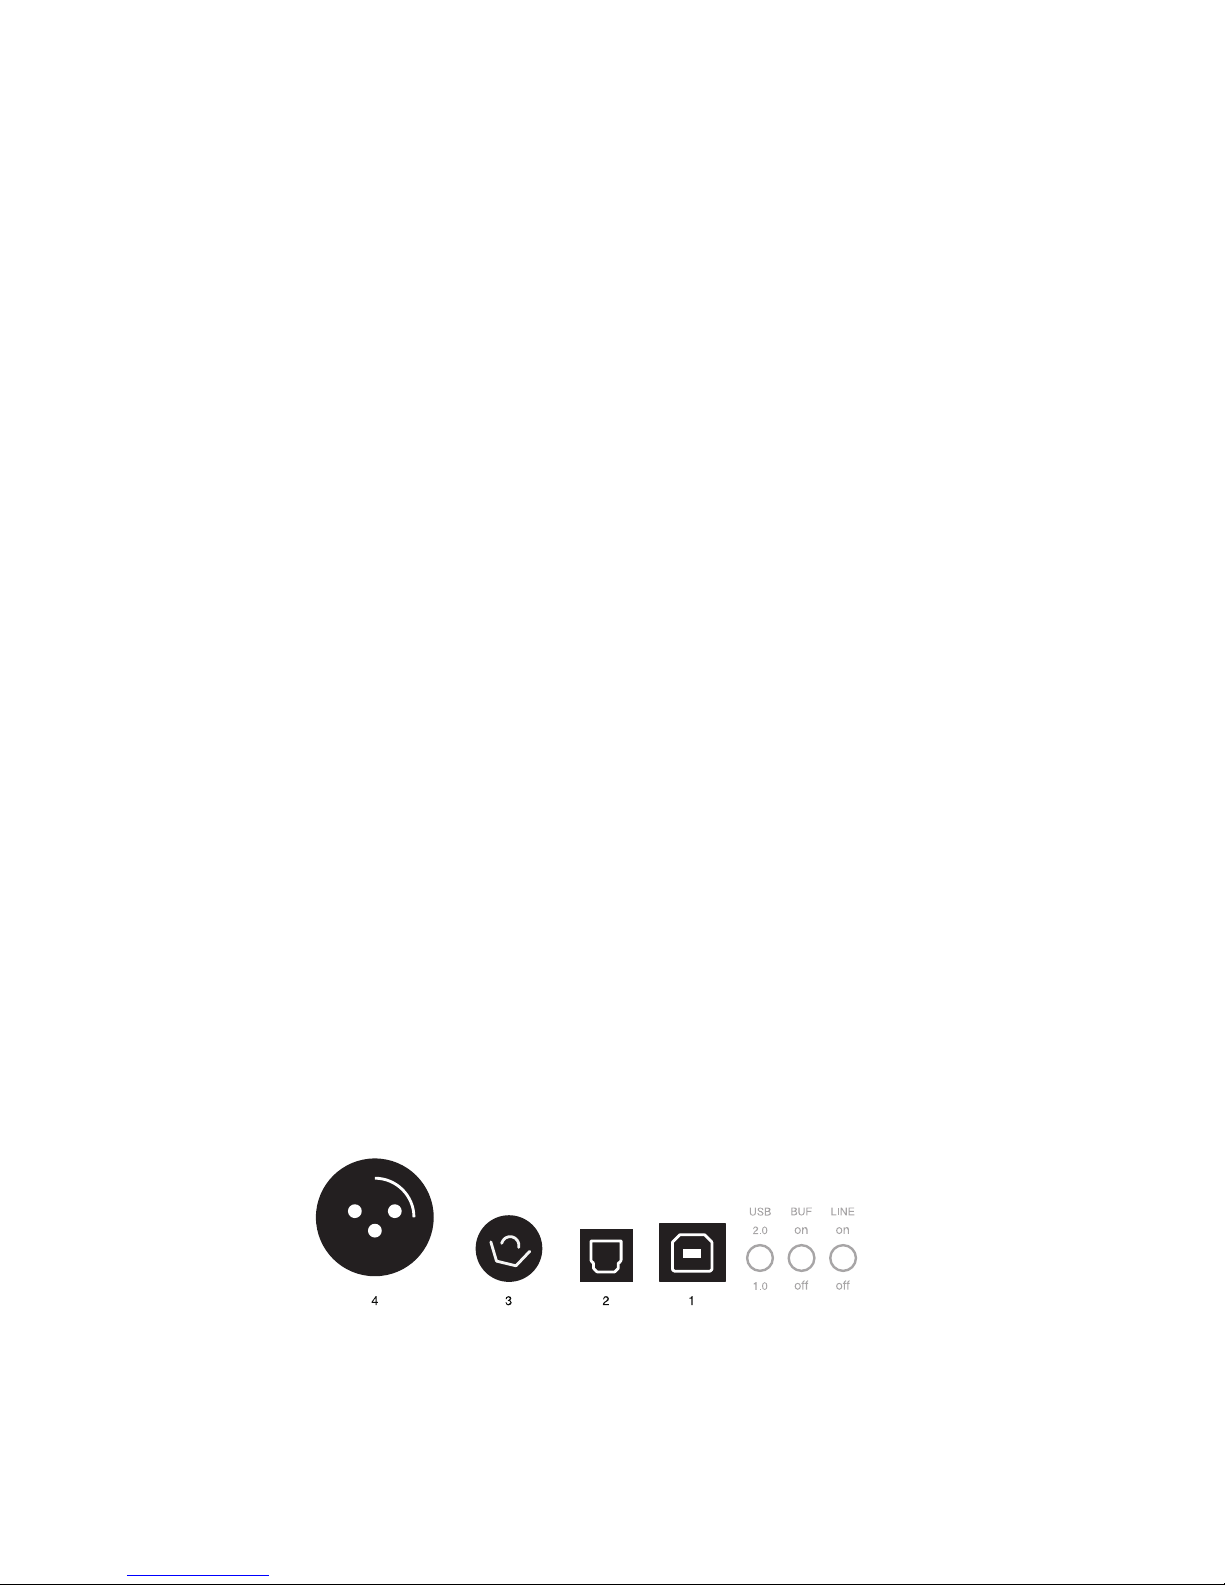
#1 USB Audio (USB Type B connector)
H1 supports both USB Audio Class 1.0 and 2.0 with the following
sampling rates and bit depths:
• Audio Class 1.0 - up to 96K samples per second, 16/24 bits depth
• Audio Class 2.0 - up to 192K samples per second, 16/24 bits
depth and DSD64/DSD128 (DoP)
#2 Optical Input (Toslink)
#3 S/PDIF Input (RCA connector)
#4 AES/SBU Input (XRL female connector pair)
2
INPUT
Connection
MAINS CONNECTION
H1 works from 100 to 240VAC mains, so voltage selection is not needed.
Please set H1 into standby mode and use the USB AUDIO switch
on the back panel to make your selection. The selected class takes
effect when H1 leaves standby mode. Both Audio Class 1.0 and 2.0
work on MAC OS, but only 1.0 works on Windows. They are natively
supported; there is no need for additional device drivers.
Page 5
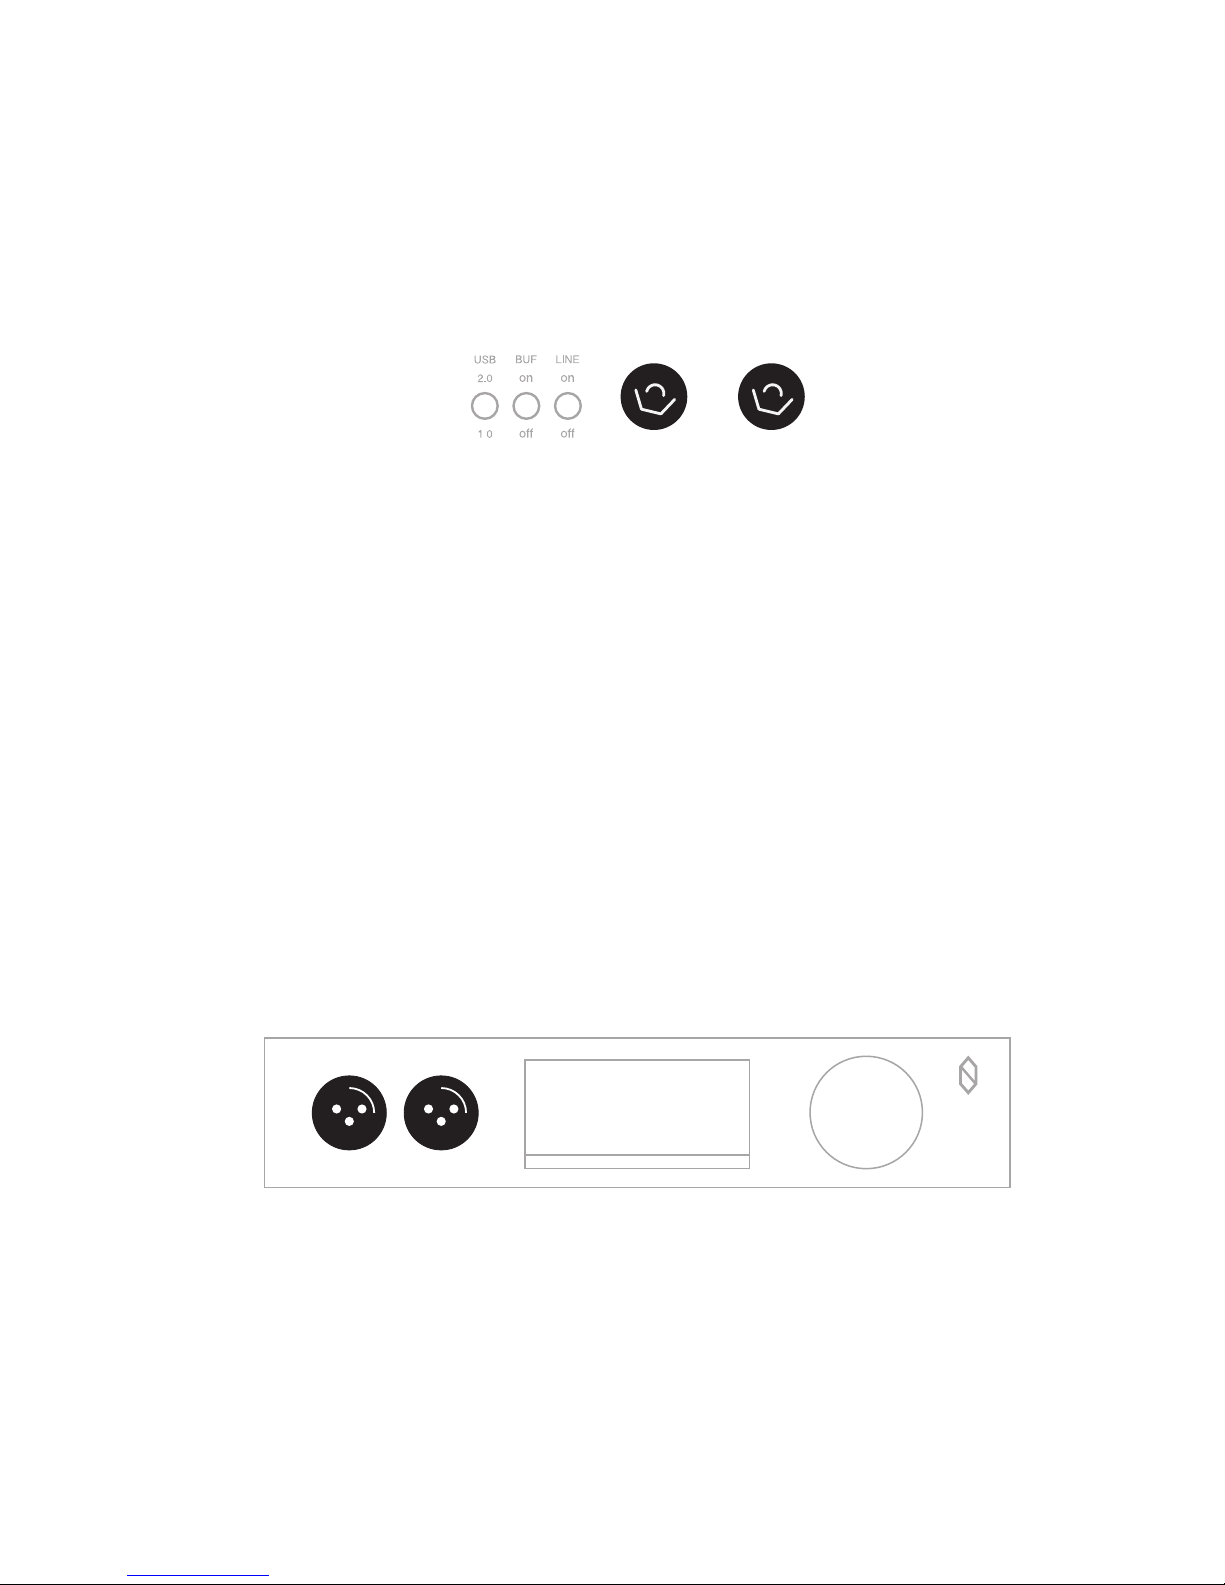
The particular connectors utilized on H1 are 3-pin female XLR + 1/4"
stereo jack combo. The centers are for 1/4" stereo jacks and provide
connections of up to 2 unbalanced headphones. Whereas the female
XLRs are for connection of a balanced headphone. The one on the left
is for the left channel and the one on the right for the right channel.
The pin assignments are,
• pin 1 : Signal Ground
• pin 2 : Signal + (non-inverting)
• pin 3 : Signal - (inverting)
Since the loudness depends on several factors such as the headphone
impedance and efficiency, it is advised to turn the volume down to
minimum (-95.5dB) for the first time. Play the music and then gradually
turn up the volume till the proper loudness is reached.
3
HEADPHONE
Connection
H1 provides a pair of RCA unbalanced output on the back panel.
LINE OUT
Page 6

There is a buffer switch on the back panel, and it should be turned on for
optimum performance. Sometimes digital music data do not move along
and get converted in perfect tandem, which causes jitters, and even a few
micros-seconds' timing error is enough to perturb the ears and frustrate
the mind. Therefore, H1 uses a buffer of one-second depth, along with an
independent and accurate clock, to receive data, align them and send
them out in precise time frames for conversion.
For videos, the buffer should be switched off. This selection makes
H1 reduce the depth of the buffer a little to ensure video-audio
synchronization. Switching the buffer on or off takes effect immediately.
4
BUFFER SELECTION
Connection
Page 7

H1 supports both USB Audio Class 1.0 and 2.0. The main difference
between USB Audio Class 1.0 and 2.0 is that the USB Audio Class 1.0
can’t go beyond 96K samples per second with 24 bit data depth.
Microsoft Windows supports Audio Class 1.0, whereas Mac OS X and
major Linux distributions support both Audio Class 1.0 and 2.0. No device
driver is needed for computers to communicate with H1 through USB
port. Some NAS (Network Attached Storage) devices also support USB
Audio. Please consult your NAS manufacturer for USB Audio class and
compatibility information.
Always power H1 off or put H1 into standby mode before adjusting
the USB Audio Selection switch. The selection takes effect when H1 is
powered on or leaves standby mode.
5
USB AUDIO SELECTION
Connection
Page 8

After power is switched on, the COS logo will appear with the firmware
version on the display for a few seconds, and the working status such as
input source will be shown afterwards. Now H1 is successfully powered
on and ready for input source selection.
POWERING ON
6
Operation
The default input source is USB 1.0 or 2.0 depending on your selection
on the back panel, and the next input source can be selected by shortly
pressing the knob. The order of the selection is USB 1.0 (or 2.0), Optical,
RCA, XLR, and back to the USB 1.0 (or 2.0) as a loop.
To avoid channel transition glitches, the headphone output and line out is
forced to 0V during the transitions, so a small click sound from the relay is
normal.
SELECTING INPUT SOURCE
H1's volume control is composed of a ladder of high precision resistors
and an array of analog switches which are low in resistance, noise, and
distortion; no mechanical parts are used. Rotating the knob clockwise
brings the volume up; counterclockwise, down. H1's display shows
volume, from -95.5dB to 0dB, with 0.5dB increments.
ADJUSTING VOLUME LEVEL
Page 9

7
Operation
A pair of RCA line outs can be used to connect to other equipment such
as power amplifiers. To enable this feature, just turn on the "Line" switch
on the back panel.
LINE OUT CONTROL
A long press (about one second) on the knob puts H1 into standby mode.
In this mode, the volume and output relays are turned off, and H1 goes
into a state of low power consumption. Another long press on the knob
makes H1 leave standby mode; music resumes and volume hops back to
the previous level.
STANDBY MODE
The Power switch sits next to the AC inlet on the back panel. Since the
power consumption is low, it is not a bad idea, when music is not played,
to leave H1 in standby mode.
POWERING OFF
Page 10
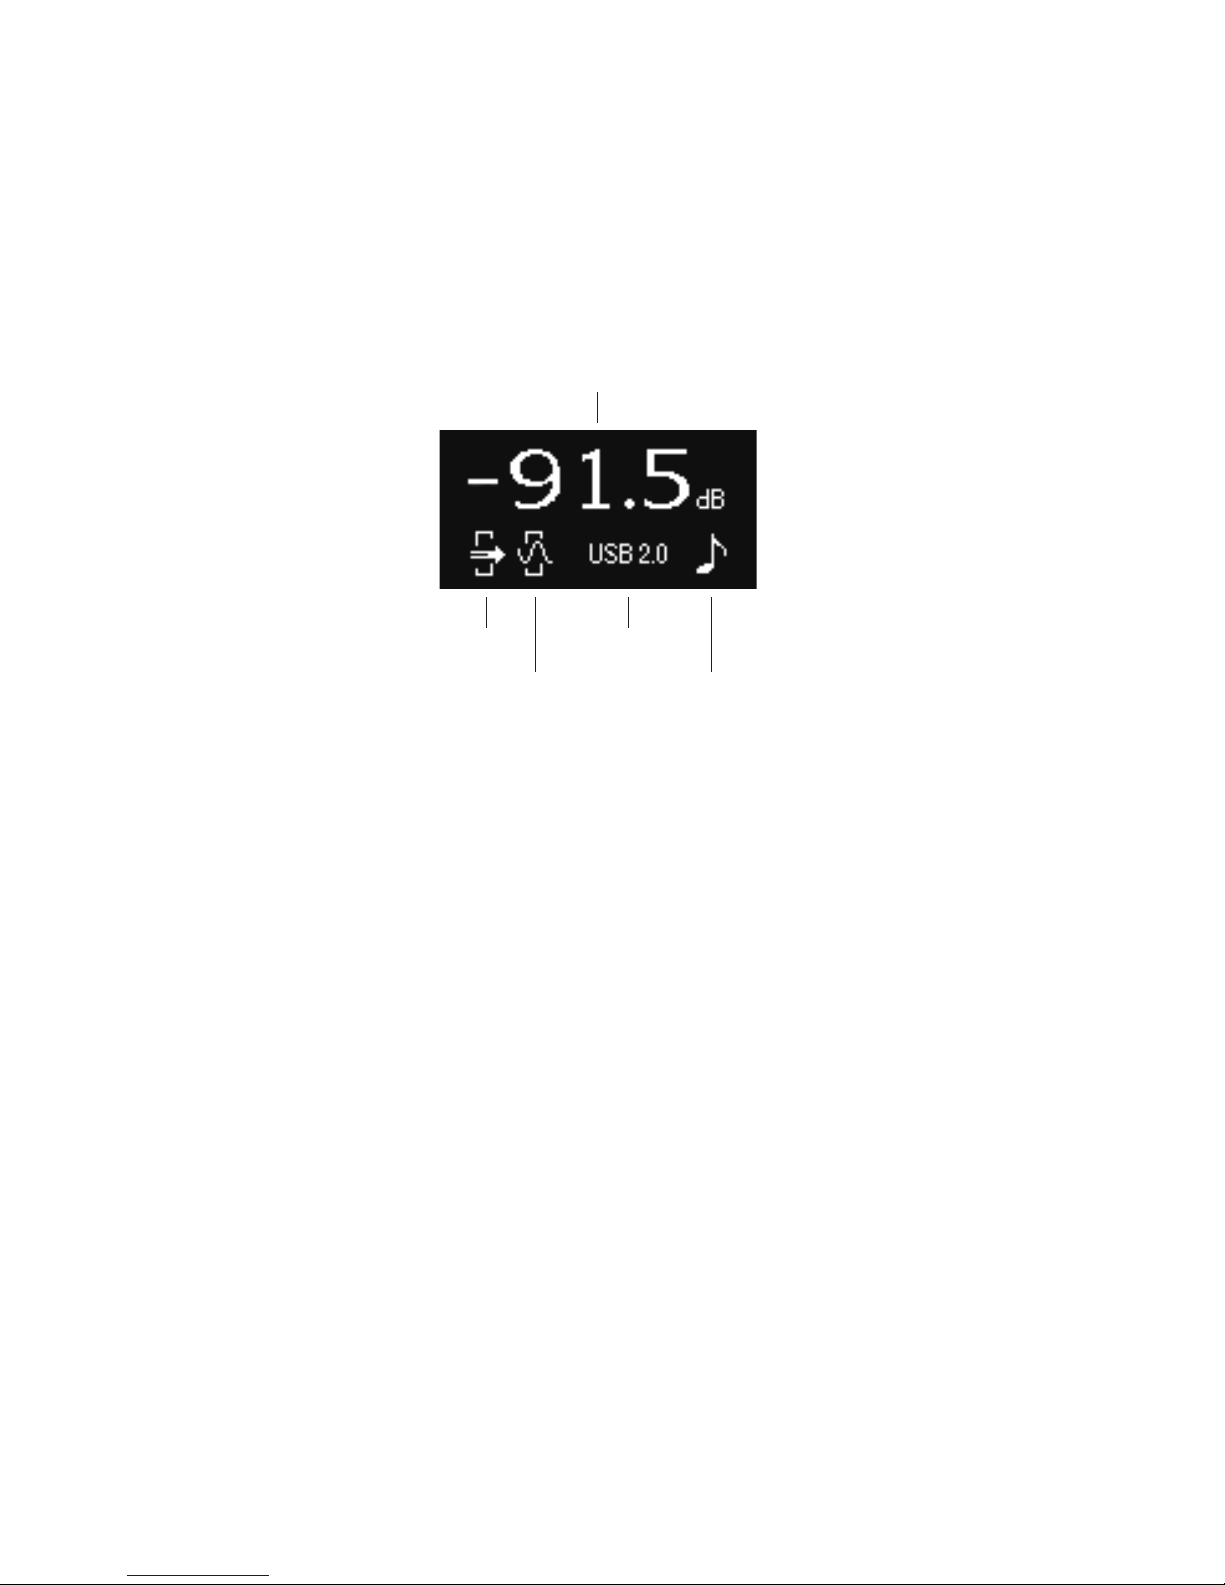
A 128 by 64 pixels white OLED display is used to show the current status.
DISPLAY
8
Operation
volume shows on the upper portion
Buffer
Line Out
Input Source
Music Status
(solid: play
blinking: mute)
Volume shown on the upper portion
Buffer
Line Out
Input Source
Music Status
(Solid: Play)
Page 11

9
Operation
• Give H1 ten minutes to warm up and attain an internal thermal
equilibrium, which ensures a seamless flow of enchanting music.
• Switch the one-second buffer on for music and off for video.
• Turn off the up-sampling feature of your player and play music at its
original sampling rate. H1's dedicated DSP with COS Engineering's
algorithms will do the job.
• Fix the volume of your player at its maximum and use H1 to adjust
volume. Failing to do so may reduce the bit-depth of music data and
compromise musicality.
TIPS for OPTIMUM PERFORMANCE
Page 12
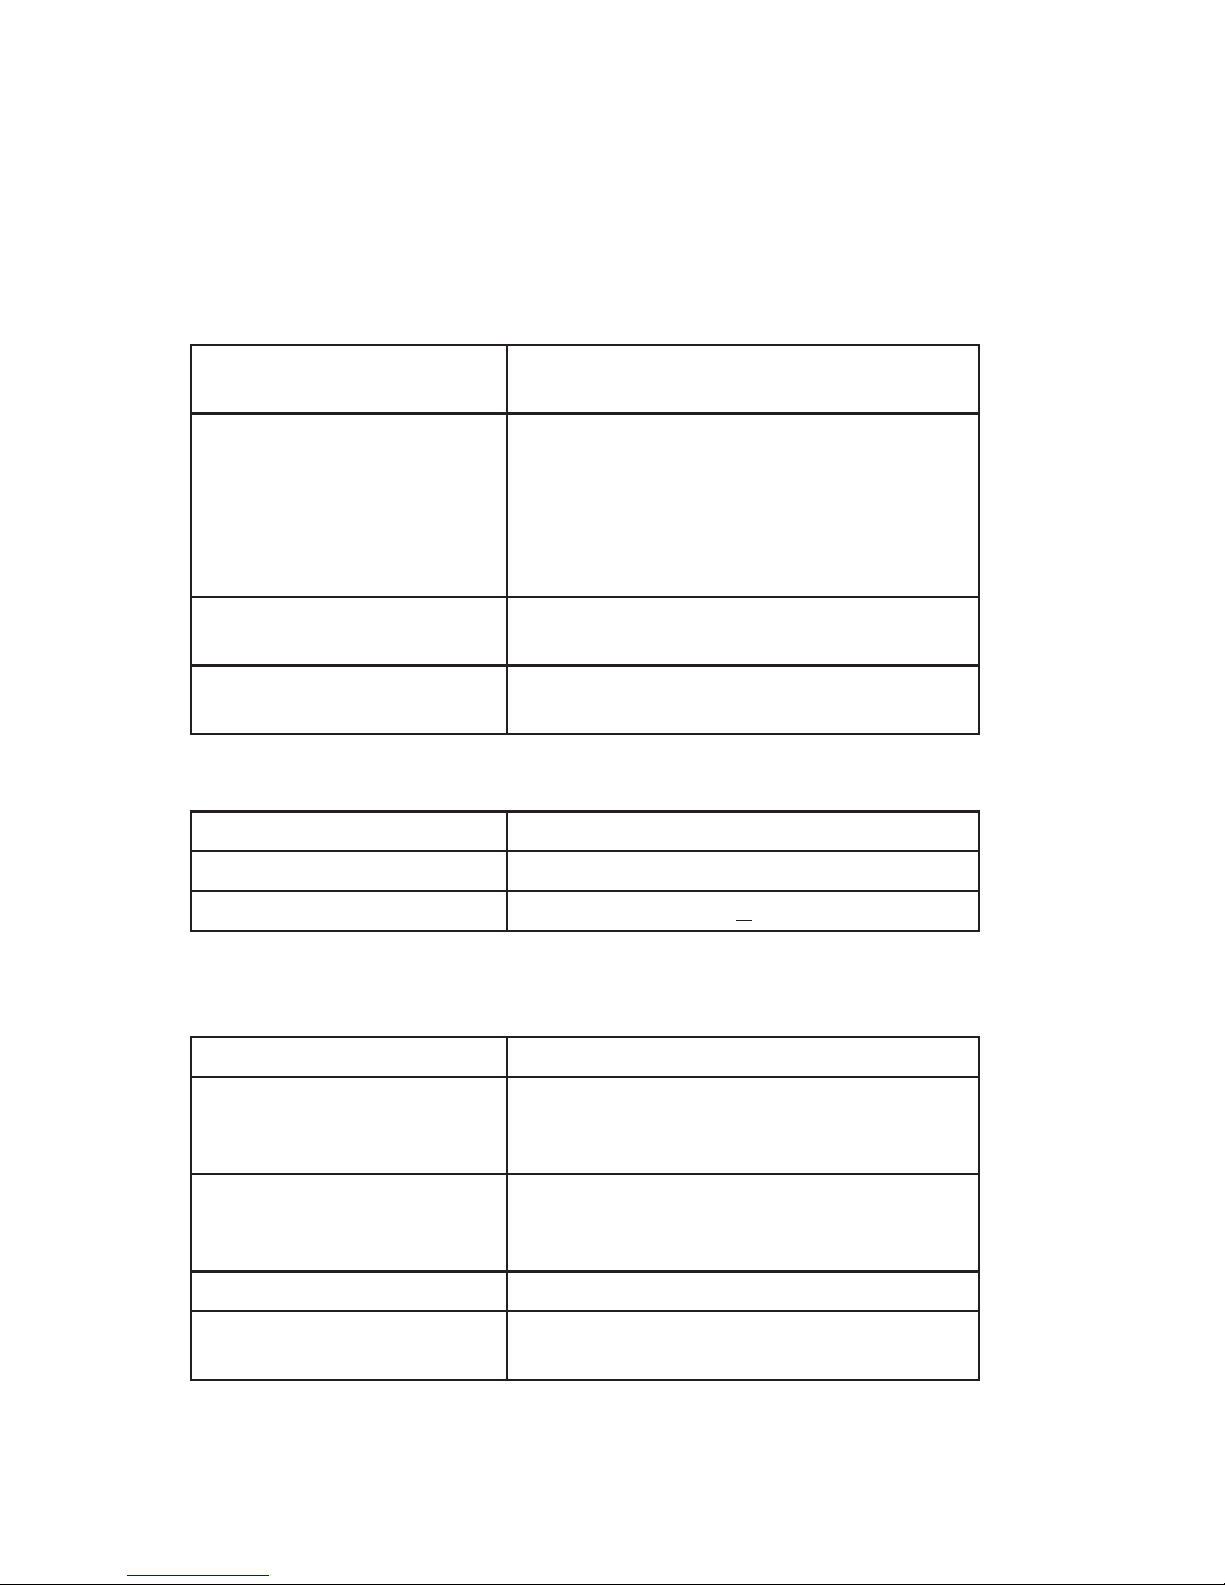
SPECIFICATIONS
Specifications
Volume
DAC
Steps 192 steps by 0.5dB/step
Total Range 96dB
Accuracy Within + 0.1dB
Digital Inputs
USB x1, Asynchronous 1.0/2.0;
SPDIF x 1; TosLink x 1; AES x 1
Sampling Rate
Optical / RCA / XLR: up to 192K PCM
24 bits & DSD64 (DoP)
USB 1.0 – up to 96K PCM 24 bits
USB 2.0 - up to 384K PCM 24 bits &
DSD64/DSD128 (DoP)
Digital-to-Analog Converter
24-bit DAC x 1
(up to 192Ksps, 24-bit)
Digital Filter
COS Proprietary
Linear Phase Delay
Headphone
Frequency Response + 0dB, - 0.5dB (20Hz ~ 20KHz)
THD+N
< 0.001% (- 100dB)
(192Ksps, 24-bit, 20Hz ~ 20KHz,
A-weighted, 16 ohm load, 2Vrms)
Signal-to-Noise Ratio
> 110dB
(192Ksps, 24-bit, 20Hz ~ 20KHz,
A-weighted, 16 ohm load, 2Vrms)
Headphone Impedance 16 ohm and up
Full Scale Output
Unbalanced : 6 Vrms
Balanced : 12 Vrms
Page 13
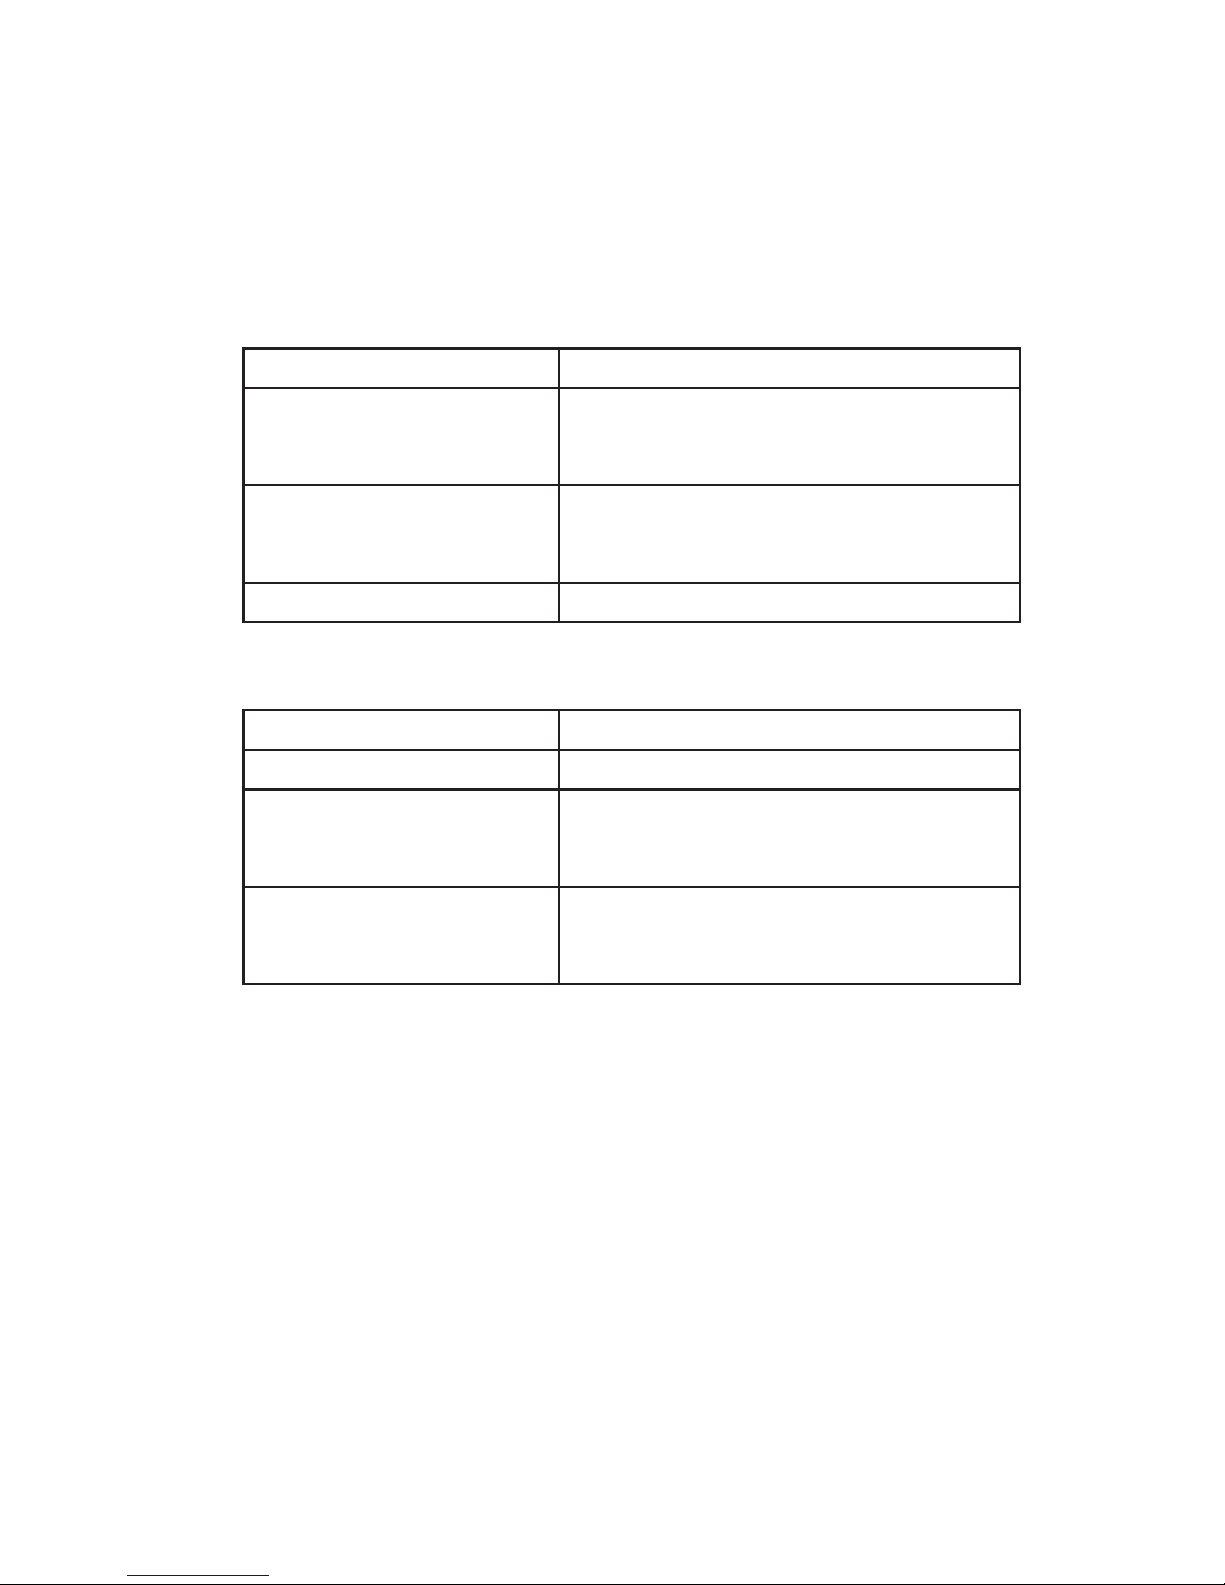
Specifications
SPECIFICATIONS
Line Out
Frequency Reponse + 0dB, - 0.5dB (20Hz ~ 20KHz)
THD+N
< 0.001% (- 100dB)
(192Ksps, 24-bit, 20Hz ~ 20KHz,
A-weighted, 2Vrms)
Signal-to-Noise Ratio
> 110dB
(192Ksps, 24-bit, 20Hz ~ 20KHz,
A-weighted, 2Vrms)
Full Scale Output 2Vrms
General
Disply 128 x 64 pixels white OLED
Weight 3 Kg
Dimension
260 mm (W) x 250 mm (D)
60 mm (H) - boots are not included
72mm (H) - boots are included
Power
100 ~ 240VAC
Normal Operation < 20W
Standby 0.5W (typical)
 Loading...