

Page 1
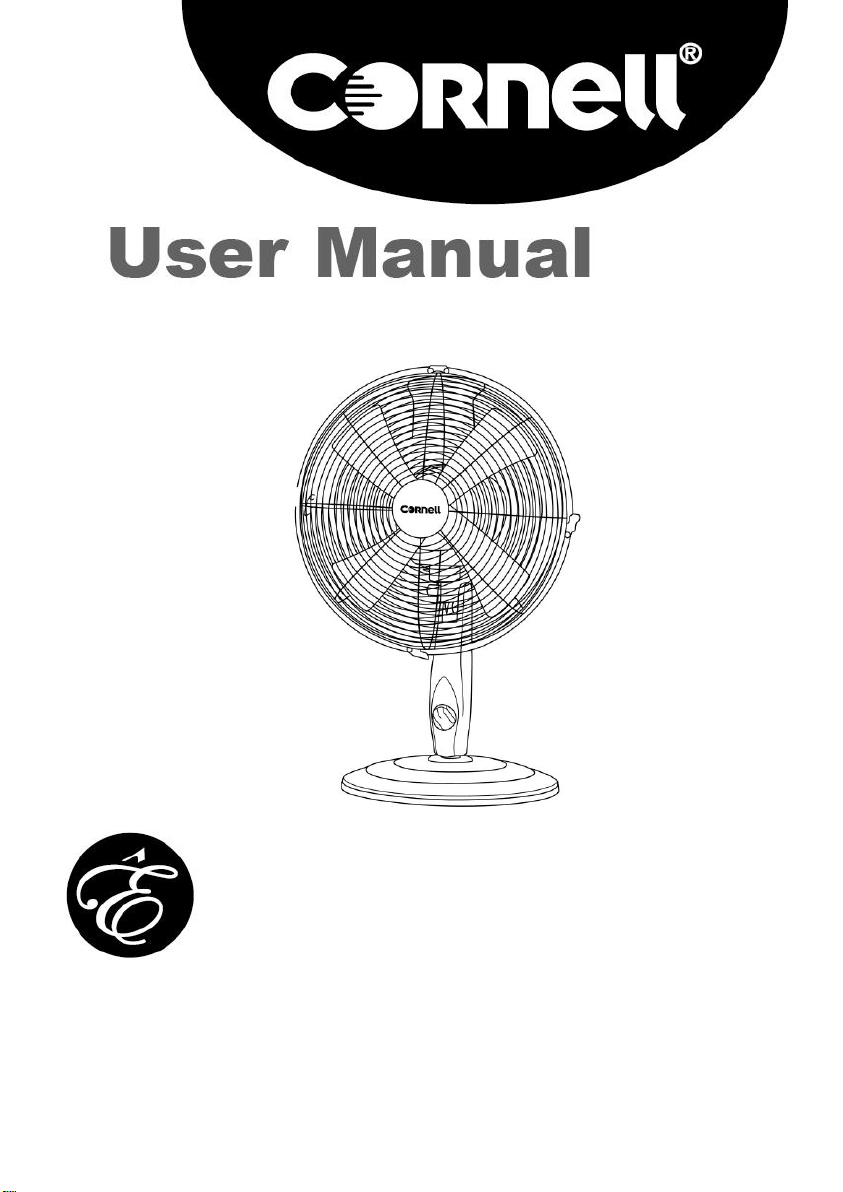
12” Classic Fan
CCF-129CP
0
Page 2
SAFETY REGULATION
Read all the instruction carefully. Keep this user manual for
future reference.
This appliance in not intended for use by persons (including
children) with reduced physical, sensory or mental
capabilities, or lack of experience and knowledge, unless
they have been given supervision or instruction concerning
the use of appliance by a person responsible for their safety.
Use only original accessories supplied.
The current voltage which indicates on the plate must
correspond to your local voltage.
The appliance should be used only on condition that the type
of power supply corresponds to the marking label. Otherwise,
it will not work or even be damaged.
Never use the appliance inside the bath, under a shower or
over a wash basin full of water.
If the appliance falls into water, pull the power plug out from
the power socket immediately.
Never use the appliance unless it is fully assembled.
Do not overload outlets or extension cords. It can result in fire
or electric shock.
Do not use the appliance if the power supply cord or plug has
been damaged.
Unplug from outlet when not in use, before putting on or
taking off parts, and before cleaning.
The use of accessory attachments not recommended by
the appliance manufacturer may cause injuries.
1
Page 3
Do not immerse the cord, plug or appliance in water or other
1.
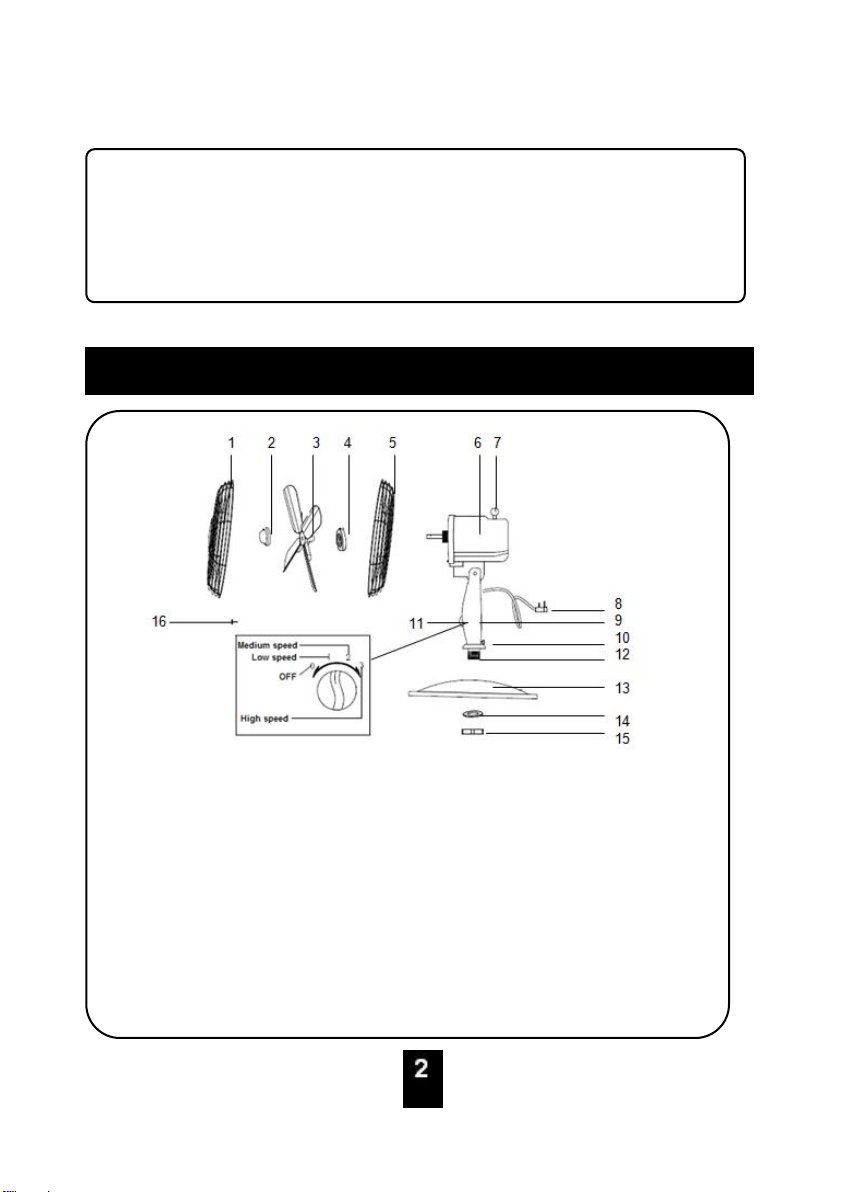
Front Guard
2.
Blade Cap
3.
Fan Blade
4.
Guard Interlocking Nut
5.
Rear Guard
6.
Motor
7.
Oscillating Knob
8.
Cord Set
9.
Fan Body
10.
Fixing Screw
PARTS IDENTIFICATION
2
types of liquid and do not pour water onto it to avoid from fire,
electrical shock or personal injury.
To protect against risk of electrical shock, do not force any
foreign objects such as pins and wires into any openings.
2
Page 4
11.
Speed Knob
12.
Base Connector
13.
Base
14.
Fixing Loop
15.
Molded Securing
Knob
16.
Safety Screw
Model
CCF-129CP
Voltage
220-240V~
Frequency
50Hz
Power
45W
Size
12”(30CM)
SPECIFICATION
OPERATING INSTRUCTIONS
Before Using
Please read these instructions carefully before using and
keep them for future reference.
Check your local main voltage whether it is the same as
stated on the rating label.
Before using for the first time, remove any protective
films or stickers from the table fan.
Ensure the power switch is at the “0” position.
3
Page 5
Always attach plug to appliance first, then plug cord into
the wall outlet. To disconnect, turn OFF any control,
then remove plug from wall outlet.
How to Assembly Table Fan
Attach the rear guard to the front side of the motor; fasten the
guard interlocking nut by turning it clockwise until the guard is
secured firmly in place.
Mount the fan blade onto the motor shaft; fasten the
blade knob by turning anti-clockwise firmly.
Installing the front guard:
- Open the front guard clip and attach the hook to the
rear guard.
- Push the round edges of front guard to fit it securely
into the rear guard.
- Lock the clip.
Installing the base:
- Fit the stand body to the base unit.
- Lead the power cord through the recess at the back of
the base. Insert the rear side of the stand body firmly
until a ‘click’ sound is heard.
- Ensure the stand body is completely interlocked with
the base unit.
4
Page 6
CARE AND CLEANING
How to Use Table Fan
Connect the plug into a power supply socket and switch
on the power.
Switch on the fan by turning the speed button at any of
the “1”, “2” or “3” settings.
Turn the “1”, “2” or “3” button to adjust the fan speed
from Low-Medium-High.
To stop the fan, turn the speed knob to the “0” position.
To tilt the fan, always ensure that the fan is at off
position and wait until the blade has completely stopped
for safety reasons. Hold the stand firmly with one hand
and move the guard gently upwards or downwards.
The oscillation knob is positioned at the top rear side of
the motor housing. Press the knob down to make the
fan oscillate or pull it up to stop the oscillation.
Always unplug the product from the wall socket and shut
down completely prior to cleaning.
Do not use abrasive sponge, scouring pads or stiff brush to
clean the appliance.
Please be cautious when cleaning the product near to the
heater housing area.
5
Page 7

Use only damp cloth to wipe the exterior surfaces of the unit.
Do not immerse the main body in water.
Do not allow the electrical components to be exposed to
water.
For proper storage, always place the unit in a low humidity
environment.
6
Page 8
7
 Loading...