

Page 1

Vitalize430
Vitalize430 Vitalize430
Vitalize430
Vitalize430
Vitalize430 Vitalize430
Vitalize430
––––
––––
User Manual
User ManualUser Manual
User Manual
User Manual
User ManualUser Manual
User Manual
Vitalize430
Vitalize430Vitalize430
Vitalize430
Vitalize430
Vitalize430Vitalize430
Vitalize430
Bag
BagBag
Bag
Bag
BagBag
Bag
----
----
Cooling Dispenser
Cooling DispenserCooling Dispenser
Cooling Dispenser
Cooling Dispenser
Cooling DispenserCooling Dispenser
Cooling Dispenser
Distributeur pour produits en BIB
Distributeur pour produits en BIBDistributeur pour produits en BIB
Distributeur pour produits en BIB
Distributeur pour produits en BIB
Distributeur pour produits en BIBDistributeur pour produits en BIB
Distributeur pour produits en BIB
User & Instruction Manual (page 1-6)
Manuel d‘instruction et d‘installation (page 7-12)
Date : May 2007
Printversion : V2.0
File : Vitalize430 Dispenser (Manual
English-French - V2.0 - 04.05.2007).ppt
J. Hoffmann - 02.05.2007
Page 2

Vitalize430
Vitalize430 Vitalize430
Vitalize430
Vitalize430
Vitalize430 Vitalize430
Vitalize430
––––
––––
User Manual
User ManualUser Manual
User Manual
User Manual
User ManualUser Manual
User Manual
Content
Page
1. Component descriptions __________________________ 2
2. Safety regulations _______________________________ 3
3. Installation and getting started ____________________4
4. Cleaning _______________________________________ 5
5. Technical Data__________________________________ 6
6. Declaration of Conformity ________________________ 6
Page 1
Please always keep this manual with the cooler and
familiarise yourself thoroughly with all features in
order to avoid any unnecessary service calls.
Carefully check the dispenser for any damages prior to installation !
adress :
_________________________________
_________________________________
_________________________________
phone :
_________________________________
Note here the contact data
of the service partner nearest
you for easy notification.
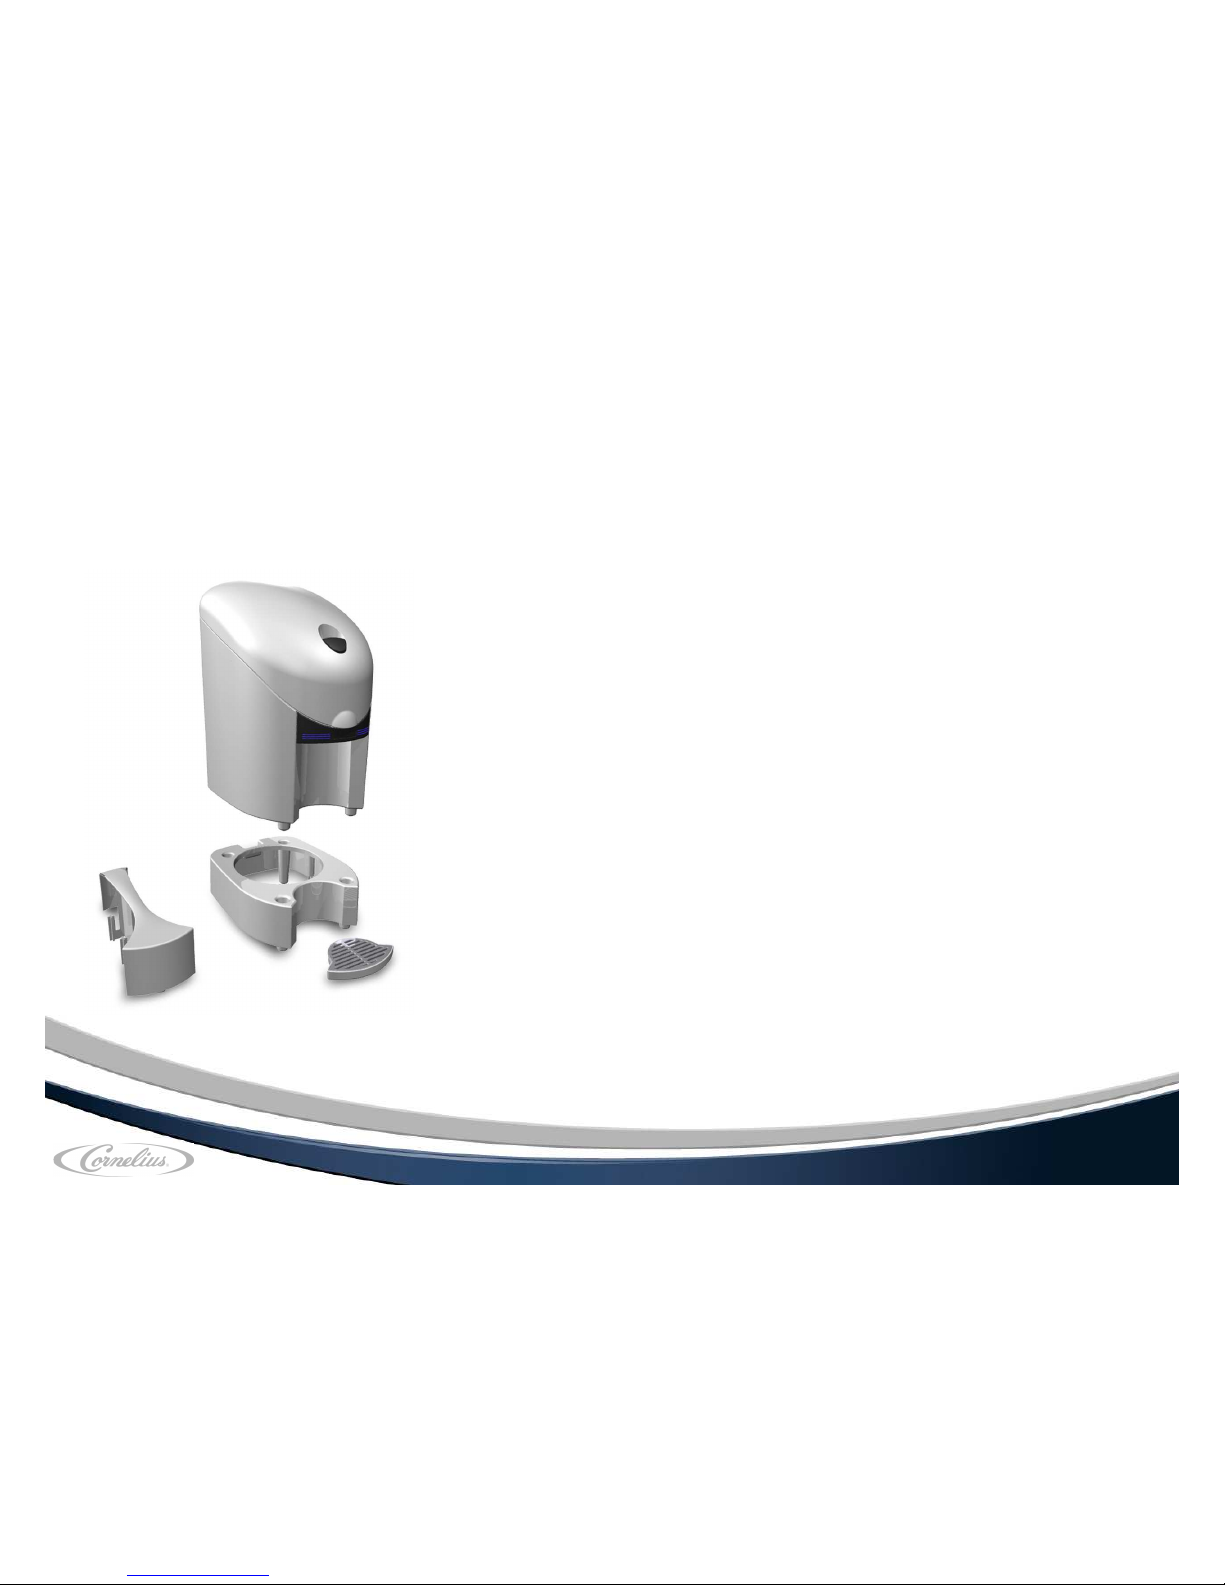
Cooling
unit
Spacer for Height
enlargement
Driptray
& Cuprest
Connection
module
The box should contain :
Page 3
Vitalize430
Vitalize430 Vitalize430
Vitalize430
Vitalize430
Vitalize430 Vitalize430
Vitalize430
––––
––––
User Manual
User ManualUser Manual
User Manual
User Manual
User ManualUser Manual
User Manual
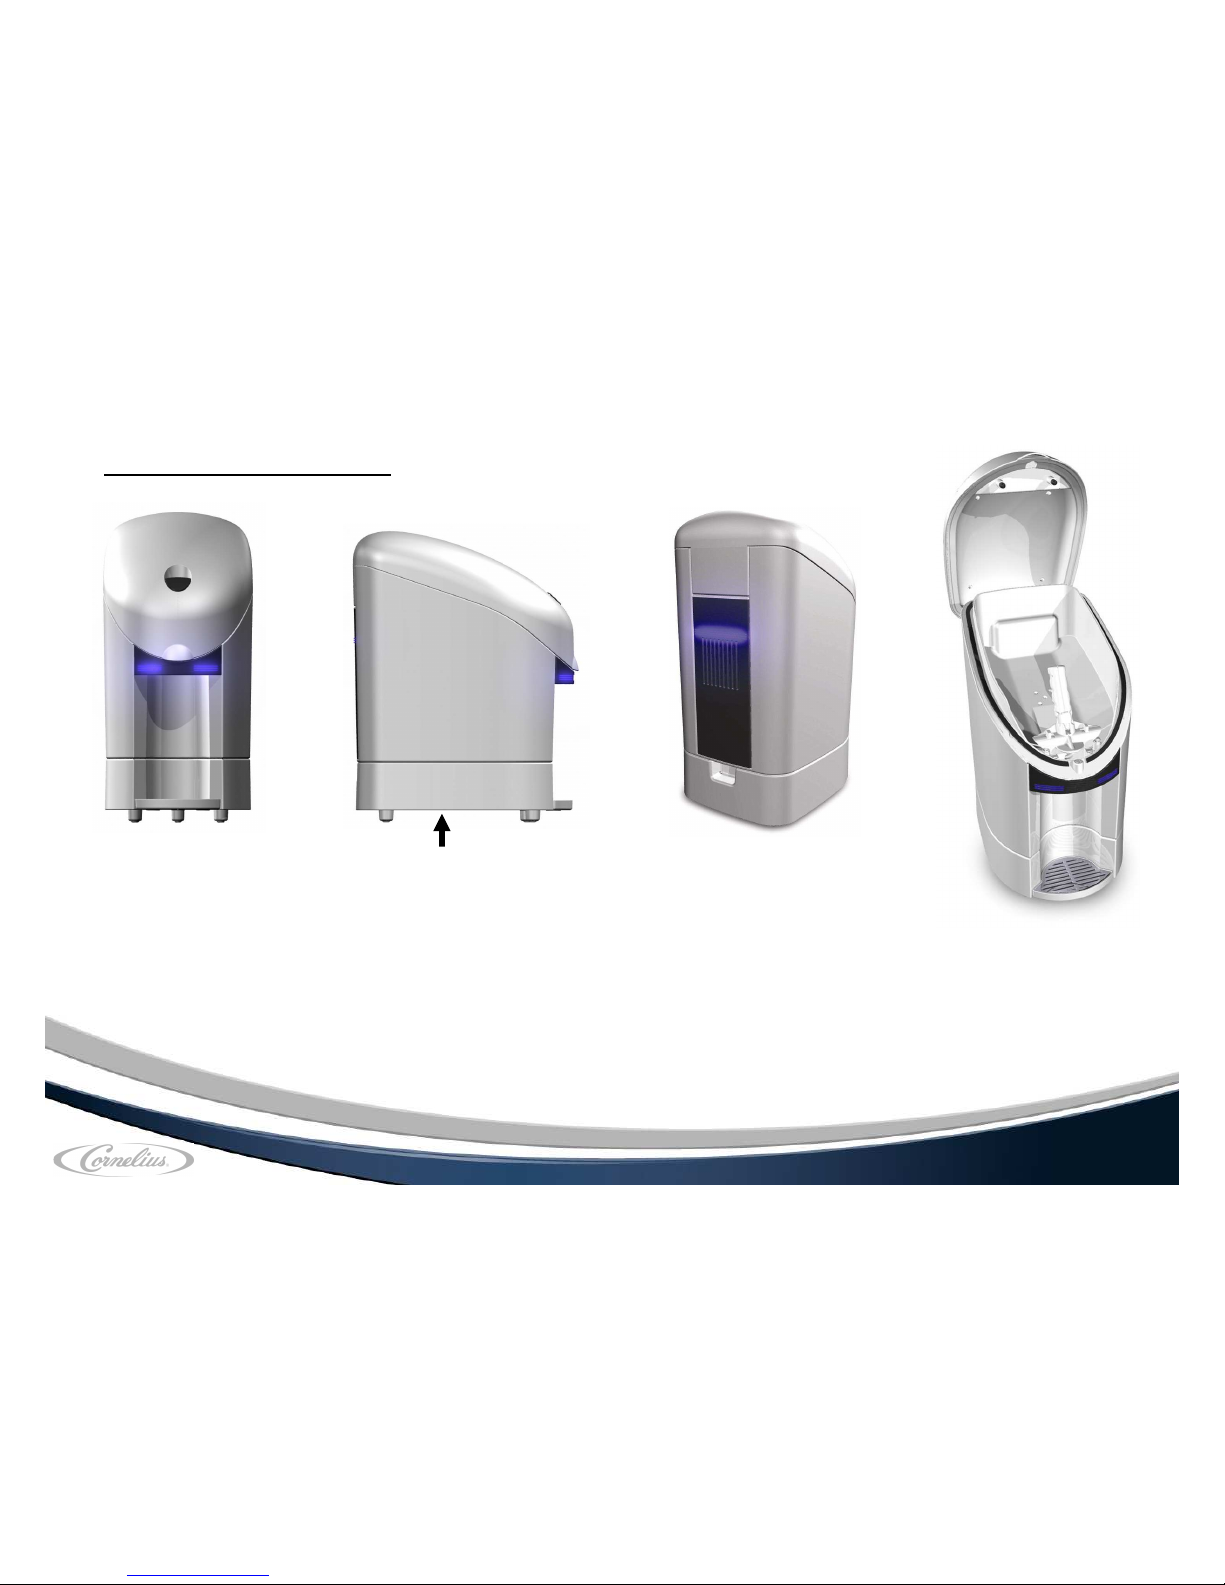
A - Cover
B - Push-Button for product dispense
C - Cover opening handle
D - Spacer (for height enlargement)
E - Removable driptray and cuprest
F - ON/OFF switch (on unit backside)
G - Ventilation grid (leave min. 10cm space to wall for ventilation)
H - Temperature adjustment knob (on unit bottom) Anti-Clockwise -> colder / ~6°C clockwise -> warmer / 14°C
I - Cold compartment for beverage bag
J - Cold Plate
K – Bag fixing clamp
A
B
E
D
C
1. Component descriptions
A
B
C
D
E
H
I
F
K
J
G
Page 2
Page 4
Vitalize430
Vitalize430 Vitalize430
Vitalize430
Vitalize430
Vitalize430 Vitalize430
Vitalize430
––––
––––
User Manual
User ManualUser Manual
User Manual
User Manual
User ManualUser Manual
User Manual
This unit is of leading-edge design and workmanship. If used and maintained in accordance with this user manual, it will be safe in use.
Please comply with the following safety instructions to avoid hazards and damage.
The unit must be in a satisfactory and safe condition when in operation. Take care that only authorised personnel work on the unit and that the
operators are trained. Make certain that no unauthorized persons change the settings on the unit or tamper with it.
- No safety devices (such as safety valves, overload protection units, etc.) are to be removed, modified or put out of operation
(risk of injury or death !)
- Immediately report modifications which affect safety and function to the service company nearest to you. Discontinue the use of the dispenser if
necessary. Always pull the mains power plug before any cleaning or service work on or near the unit.
- Before connecting the unit to mains power, check that the supply matches the voltage indicated on the unit backside (nameplate).
Connect the unit only to pains power outlets which are correctly earthed and fuse switched (10 amps).
In case the mains power plug does not fit your electrical outlet, the plug has to be changed by professionally qualified staff.
- Avoid to use any appliances like adapters, multi-outlets or extension cords. In case the circumstances do not allow differently, make
sure that the appliance meets safety regulations, taking care of max. power limits marked on the appliance itself.
- The powercord of the machine must not changed by the user. In case of a required replacement, contact your service agent.
- Use the machine only interior, keep it dry and away from any heat sources.
- Leave at least 10 cm space on the backside to allow air circulation. Inadequate ventilation will result in less cooling performance and worst case
in over-heating and unit damage. The max. ambient temperature at the place of use must not exceed 32°C.
- The manufacturer cannot be considered responsible for possible damages deriving by un-proper and wrong use or by modifications or repairs
made by not professionally qualified and not authorized people.
In case the machine malfunctions, do not try to repair it, but contact your local service provider. Any violation may void the manufacturer warranty
Note that only original CORNELIUS spare parts and accessories which have been checked and approved are to be used.
IMI Cornelius assumes no liability whatsoever for damage resulting from the use of non-original parts and accessories or from improper handling.
Please read carefully the Instruction Manual before installing
and using the unit in order to avoid any damage or harm.
2. Safety Regulations
Page 3
Page 5
Vitalize430
Vitalize430 Vitalize430
Vitalize430
Vitalize430
Vitalize430 Vitalize430
Vitalize430
––––
––––
User Manual
User ManualUser Manual
User Manual
User Manual
User ManualUser Manual
User Manual
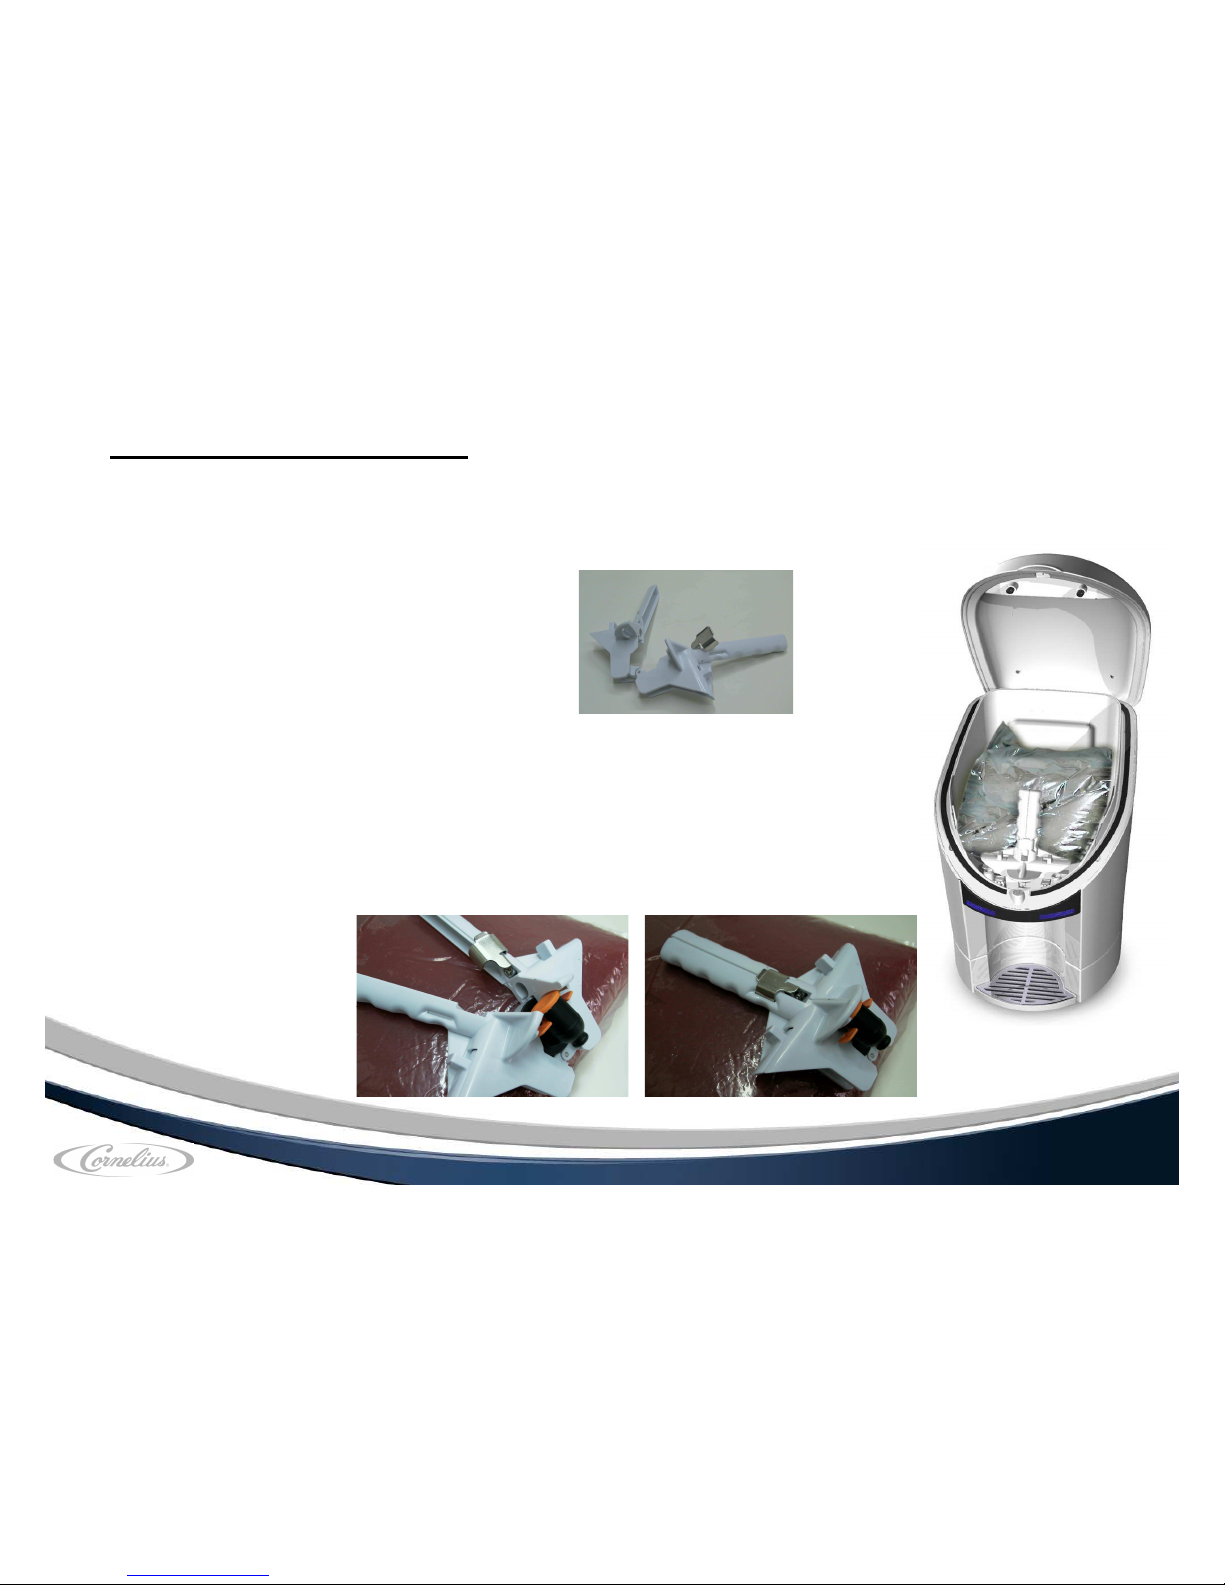
3. Installation and getting started
1. Unpack the unit and check for any visible damages
2. Connect the unit to mains voltage (see safety instructions), turn it ON and preset the temperature
anticlockwise = approx. 6°C clockwise = approx. 14°C
(also depending on ambient temperatures)
3. Open the unit, take out the bag positioning clamp
and open the metal hook on the clamp (fig. 1)
4. Put the clamp onto the dispense nozzle of the bag
and carefully close the clamp (fig. 2 and 3).
Do not use any excessive force when closing the clamp as otherwise the clamp may get damaged.
5. Lift the bag with 1 hand underneath and with the other hold the clamp while putting it into the cooler
6. Slide the clamp into position and make sure that it locks firmly into place. Watch out not to pinch
the bag with the clamp, causing it to leak (fig. 4)
7. Close the unit cover and give the unit time to chill the beverage bag (or use prechilled bags)
The required temperature can be set between approx. 6°C and 14°C by the knob underneath the unit.
Fig. 1
Fig. 2
Fig. 3
Fig. 4
Page 4
Page 6

Vitalize430
Vitalize430 Vitalize430
Vitalize430
Vitalize430
Vitalize430 Vitalize430
Vitalize430
––––
––––
User Manual
User ManualUser Manual
User Manual
User Manual
User ManualUser Manual
User Manual
• Do not use any abrasive or aggressive detergents or steam appliance
• Make sure that no water drips into the machine,
• carry out the daily cleaning at the end of the day,
• carry out a periodical cleaning at least every two weeks.
Daily Cleaning Procedure
- Keep unit turned ON
- Keep the machine closed and working,
- Clean the surfaces with a wet sponge (water and
light detergent),
- Take away all removable parts (driptray, cuprest) and
wash them with water and light detergent
- Dry off all surfaces with a cloth,
- Reassemble all the cleaned and dried parts.
The clamp that positions the bag should be cleaned every time
a new bag is being put into the unit.
4. Cleaning
Periodical Cleaning Procedure
- Turn the unit OFF with the switch on the backside
- Unplug the unit from the power supply
- Open the unit cover and remove the beverage bag
- Take away all the removable parts (driptray, cuprest) and wash them
with water and light detergent,
- Clean all the internal surfaces of the machine with a wet sponge
(water and detergent)
- Dry off all surfaces with a cloth
- Reassemble all parts again
- Place the bag as previous instructions,
- Close the cover, connect the unit to mains power again and turn ON
Page 5
Page 7
Vitalize430
Vitalize430 Vitalize430
Vitalize430
Vitalize430
Vitalize430 Vitalize430
Vitalize430
––––
––––
User Manual
User ManualUser Manual
User Manual
User Manual
User ManualUser Manual
User Manual
5. Technical Data
Power supply 230 Volt / 50 Hz
Power consumption in operation ~70 watts
Power consumption stand-by ~30 watts
Cooling technology Thermoelectric cooling
element (Peltier)
Adjustable temperature range ~ 6°C to 14°C
(by knob underneath the unit)
Weight (net, empty) ~ 6,0 kg
Cooling Capacity ~ 2-3 bags of 5 liters
each per day
Dimensions 60 cm height (incl. spacer)
50cm (excl. spacer)
30cm width,
40cm depth
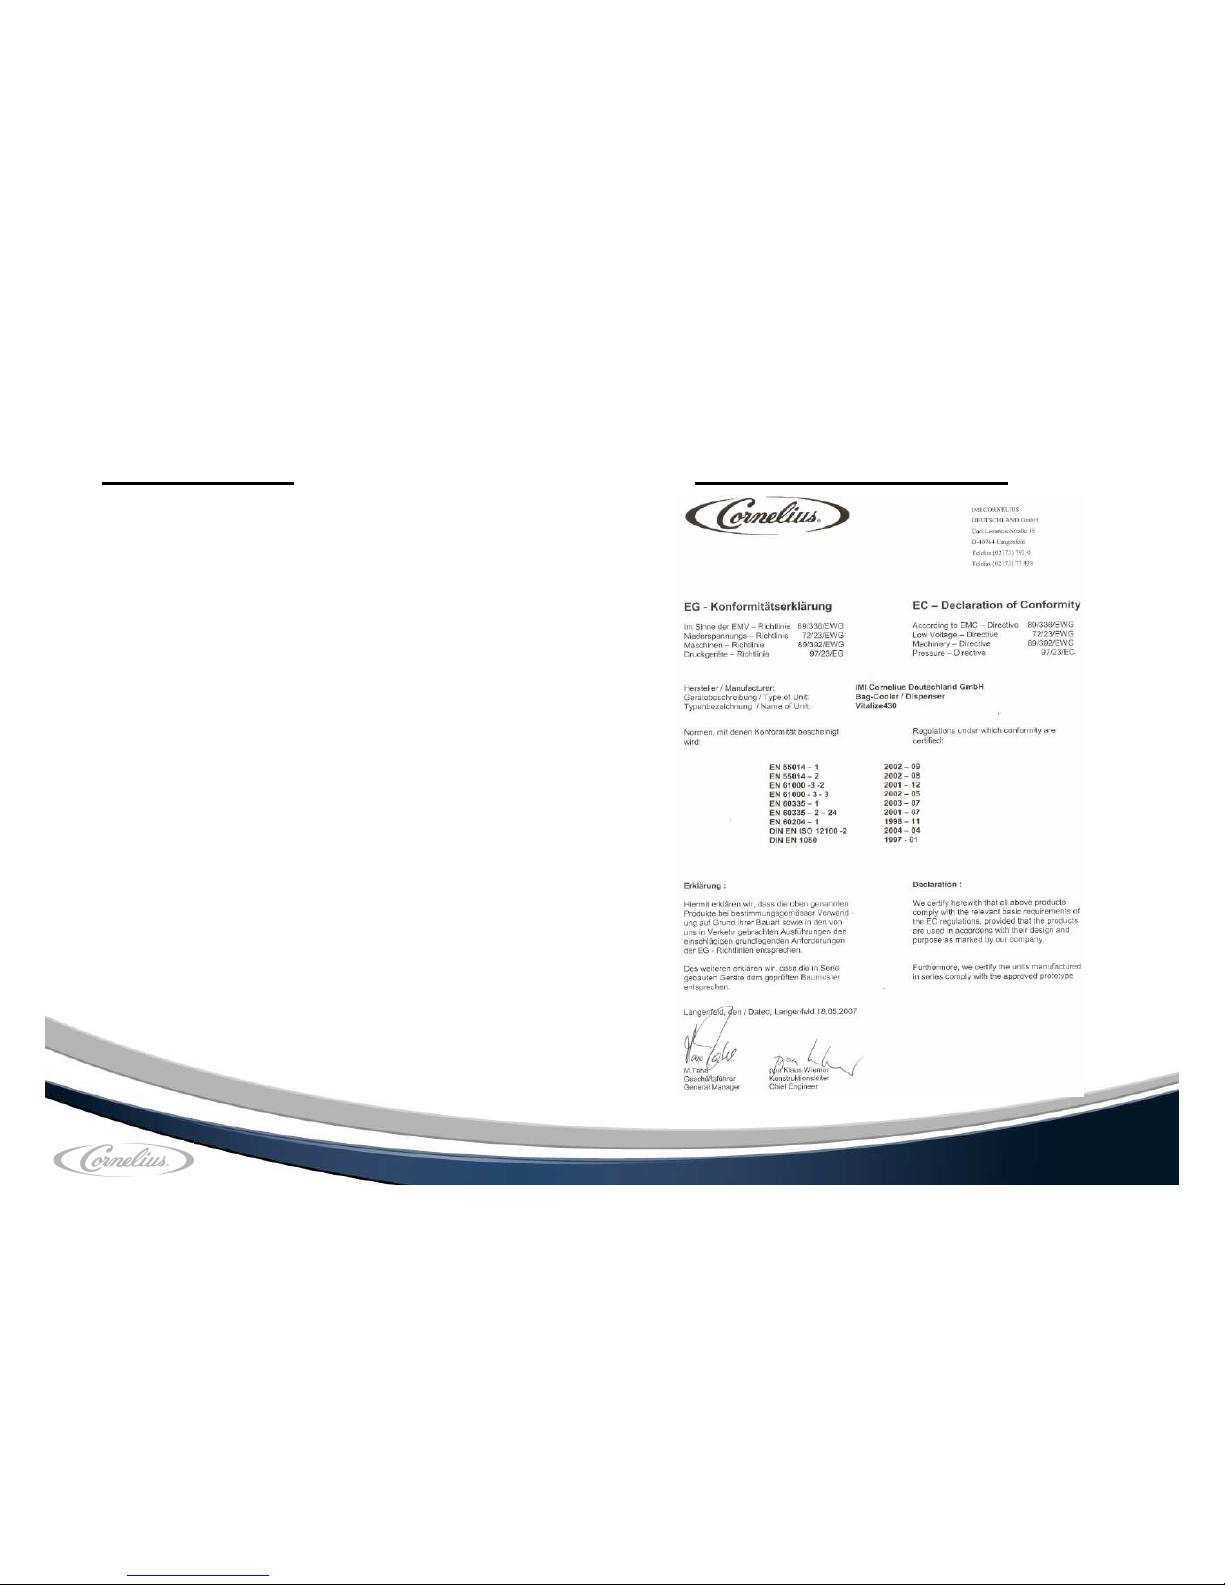
6. Declaration of Conformity
Page 6
Page 8
Vitalize430
Vitalize430 Vitalize430
Vitalize430
Vitalize430
Vitalize430 Vitalize430
Vitalize430
––––
––––
User Manual
User ManualUser Manual
User Manual
User Manual
User ManualUser Manual
User Manual
Sommaire
Page
1. Description des composants 2
2. Règles de sécurité 3
3. Installation et mise en service 4
4. Entretien 5
5. Caractéristiques techniques 6
6. Certificat de conformité 6
Lire impérativement ce manuel avant installation et toute utilisation.
Lors de la réception, vérifier que l’appareil n’a pas subit de dommages.
IMI Cornelius Europe
IMI Cornelius France Tél: 01 34 40 15 80 Fax: 01 34 40 15 81
Unité
réfrigérée
Base de
surélévation
Egouttoir et grille
Module
d’accouplement
Contenu de l’emballage
Page 7
Page 9

Vitalize430
Vitalize430 Vitalize430
Vitalize430
Vitalize430
Vitalize430 Vitalize430
Vitalize430
––––
––––
User Manual
User ManualUser Manual
User Manual
User Manual
User ManualUser Manual
User Manual
A - Couvercle
B - Bouton de distribution produit
C - Poignée du couvercle
D - Base de surélévation
E - Egouttoir et grille
F - Interrupteur Marche/Arrêt
G - Grille de ventilation (maintenir un espace mini de 10 cm entre l’appareil et le mur)
H - Thermostat (sens anti horaire +/- 6°, sens horaire +/- 14°)
I - Compartiment réfrigéré
J - Plaque réfrigérante
K - Connecteur BIB
A
B
E
D
C
1. Description des composants
A
B
C
D
E
H
I
F
K
J
G
Page 8
Page 10

Vitalize430
Vitalize430 Vitalize430
Vitalize430
Vitalize430
Vitalize430 Vitalize430
Vitalize430
––––
––––
User Manual
User ManualUser Manual
User Manual
User Manual
User ManualUser Manual
User Manual
Cette unité doit être utilisée et entretenue conformément à ce manuel.
Respecter les instructions suivantes de sécurité afin d'éviter tous dangers et dommages.
L'unité doit être installée correctement dans un endroit sec et stable.
Cet appareil ne peut être utilisé que dans des locaux intérieurs.
Toute intervention technique doit être effectuée par du personnel qualifié.
Pour toute intervention technique, contacter votre revendeur/installateur.
Cet appareil est construit suivant les normes de sécurité en vigueur.
Aucune modification de dispositif de sécurité ne doit être enlevé ou modifié.
Lors d’interventions techniques ou de nettoyages, débrancher impérativement la prise d’alimentation électrique.
Avant toute connexion électrique, vérifier que la tension d’alimentation soit 230v/50hz.
Cette alimentation électrique doit être protégée par un disjoncteur différentiel de 10 Ampères.
Une connexion à la terre est impérative.
Utiliser la prise correspondante à votre alimentation, ne pas utiliser d’adaptateur.
Maintenir un espace mini. de 10 cm entre l’arrière de l’appareil et le mur. Une mauvaise circulation d’air entraînerait un mauvais
fonctionnement de l’appareil.
La température ambiante de fonctionnement ne doit pas excéder 32°.
Toute modification technique de l‘appareil ou remplacement de pièces n‘étant pas d‘origine entrainera l‘annulation de la
garantie et la responsabilité du fabricant.
Lire correctement le mode d'emploi avant l'installation et l'utilisation de l'unité.
2. Règles de sécurité
Page 9
Page 11

Vitalize430
Vitalize430 Vitalize430
Vitalize430
Vitalize430
Vitalize430 Vitalize430
Vitalize430
––––
––––
User Manual
User ManualUser Manual
User Manual
User Manual
User ManualUser Manual
User Manual
3. Installation et mise en service
1. Déballer et contrôler que l'unité n’a pas subit dommages
2. Connecter l’unité sur la prise d’alimentation électrique. Mettre l’interrupteur en position ON.
Régler le thermostat (sens anti horaire + froid, sens horaire plus chaud)
3. Ouvrir l’appareil ainsi que le connecteur (fig1)
4. Mettre le connecteur sur le BIB et le fermer correctement
(fig. 2 et 3).
Lors de la fermeture du connecteur ne pas forcer.
5. Maintenir correctement la poche et le connecteur lors de
la mise en place dans le compartiment réfrigéré.
6. Mettre correctement le connecteur en place et s’assurer que la poche n’a pas de plis (fig. 4)
7° Fermer le couvercle et laisser refroidir le produit. Il est conseillé d’utiliser des poches pré-refroidies.
Fig. 1
Fig. 2
Fig. 3
Fig. 4
Page 10
Page 12

Vitalize430
Vitalize430 Vitalize430
Vitalize430
Vitalize430
Vitalize430 Vitalize430
Vitalize430
––––
––––
User Manual
User ManualUser Manual
User Manual
User Manual
User ManualUser Manual
User Manual
• Ne pas utiliser de produit abrasif et agressif
• Bien essuyer avec un chiffon sec le compartiment réfrigéré,
• Effectuer un nettoyage journalier,
Procédure de nettoyage journalière
- Arrêter l’appareil, interrupteur sur arrêt (OFF)
-Débrancher la prise d’alimentation électrique
- Néttoyer les surfaces internes et externes avec une éponge humide
additionner d’un détergent alimentaire non abrasif et non agressif
- Essuyer toutes les surfaces avec un chiffon sec
-Aucune trace d’humidité ne doit être présente dans le
compartiment réfrigéré
- Nettoyer l’égouttoir et la grille
-
A chaque remplacement du BIB, le connecteur doit être
nettoyé
4. Entretien
Page 11
Page 13

Vitalize430
Vitalize430 Vitalize430
Vitalize430
Vitalize430
Vitalize430 Vitalize430
Vitalize430
––––
––––
User Manual
User ManualUser Manual
User Manual
User Manual
User ManualUser Manual
User Manual
5. Caractéristiques Techniques
Alimentation électrique 230 Volt / 50 Hz
Puissance consommée en service ~70 watts
Puissance consommée au repos ~30 watts
Réfrigération Thermoélectric élément
(Peltier)
Thermostat réglable ~ 6°C/14°C
Poids vide ~ 6 kg
Capacité frigorifique ~ 2/3 BIB de 5 litres
par jour
Dimensions Hauteur 60 cm (incl. base)
Hauteur 50cm (sans base)
Largeur 30cm
Profondeur 40cm
6. Declaration de Conformité
Page 12
 Loading...