

Page 1

Millennium II-Water Inlet Replacement Installation Instructions
!
WARNING:
!
WARNING:
!
WARNING:
CAUTION:
!
INSTALLATION INSTRUCTIONS
Millennium II
SAFETY INSTRUCTIONS
Before starting installation, read and understand all safety label and warnings on the machine. Also review and
understand all safety instructions in the owners, installation and service manuals.
Failure to comply could result in serious injury, death or damage to the equipment.
QUALIFIED SERVICE PERSONNEL
Only trained and certified electrical, plumbing and refrigeration technicians should service this unit.
All wiring and plumbing must conform to national and local codes. Failure to comply could
result in serious injury, death or equipment damage.
SAFETY PRECAUTIONS
This unit has been specifically designed to provide protection against personal injury. To ensure continued
protection observe the following:
Disconnect power to the unit before servicing. Follow all lock out/tag out procedures established by the user. Verify all
power is off to the unit before performing any work.
Failure to comply could result in serious injury, death or damage to the equipment.
Always be sure to keep area around the unit clean and free of clutter.
Failure to keep this area clean may result in injury or equipment damage.
Revision Date: March 24, 2014 www.cornelius.com Revision: C
© 2002-2014, Cornelius Inc. - 1 - Publication Number: 620919561
Page 2
Millennium II-Water Inlet Replacement Installation Instructions
WATER INLET REPLACEMENT
This instruction sheet details the procedure for replacing the water inlet fitting at the valve. All necessary material to
make the change, along with this bulletin, is included in the kit. The kit contents are listed below. Note that this kit
will work for all models, regardless of voltage.
Table 1. Millennium II-Kit No. 629087501
Part number Description Qty
77050300 Fitting 6
31525003 O-Ring 6
40502 Clamp 12
50299 Tubing 18 in.
620919561 Instruction Sheet
Procedure
1. Turn off the water supply to the dispenser. Disconnect power from the dispenser. Remove the top panel
and merchandiser. Note that there are two harnesses from the top panel and one from the merchandiser
that must be disconnected. Make sure to mark the harnesses so as not to incorrectly wire them during reassembly. Next remove both side panels by sliding them towards the front of the dispenser.
2. Remove the hitch pins that secure the refrigeration deck to the waterbath housing. Carefully lift the
refrigeration deck out of the waterbath to access the manifold.
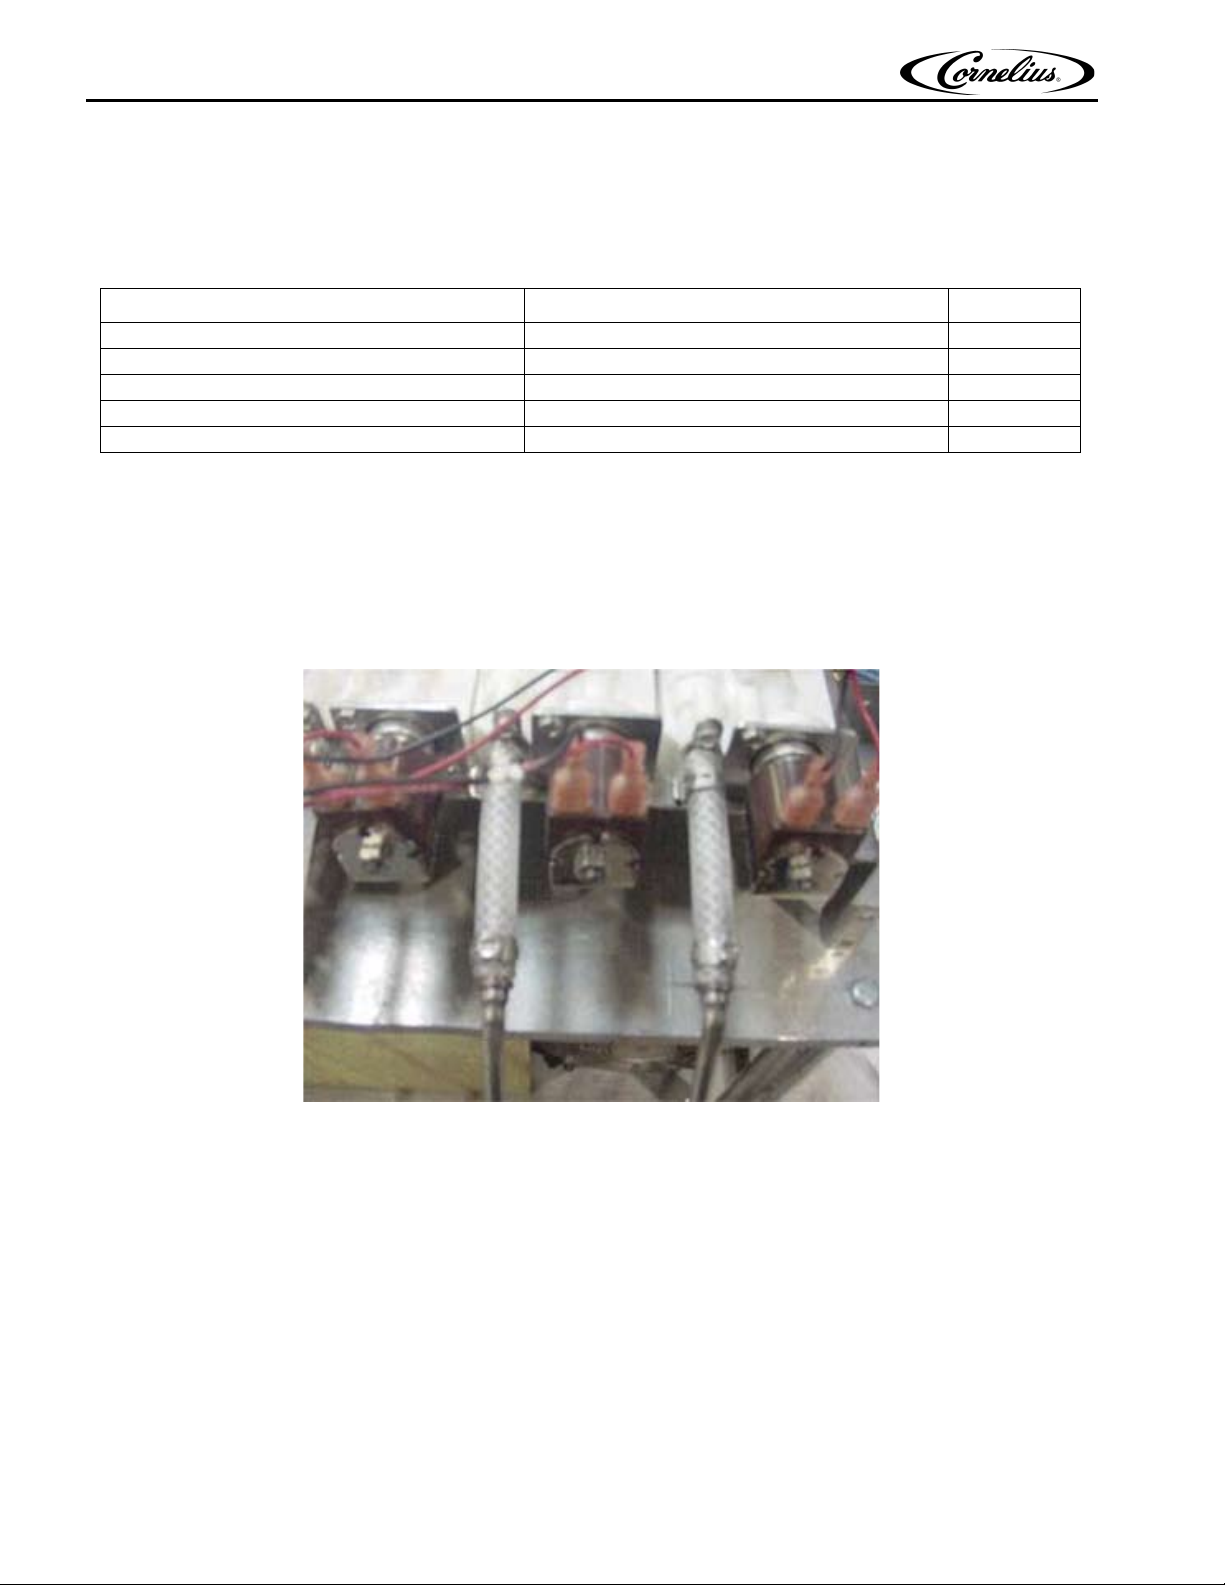
Figure 1.
3. Remove the water inlet fittings from the back of the valve (Figure 1.) These are the fittings attached to the
3-inch piece of tubing that runs from the manifold. Also remove this tubing from the manifold. Discard both
the fitting and the tubing for all valves.
4. If not already done, install the new o-ring to the new fitting. Attach this fitting to a 3-inch piece of tubing with
a clamp, and then attach this assembly to the manifold (clamps, tubing and fittings supplied in kit). Install
the fitting into the valve. Repeat for remaining valves.
5. Turn on the water supply to the dispenser and check for leaks. If any leaks are discovered, turn off supply
and re-install the fitting into the valve.
6. Install and secure the refrigeration deck into the waterbath, and install the side panels, top panel and
merchandiser. Making sure to properly connect the harnesses and interlock all cladding pieces. DO NOT
force any panels together. During proper assembly, the panels will slide together easily and remain
interlocked. Connect power to the dispenser.
Publication Number: 620919561 - 2 - © 2002-2014, Cornelius Inc.
 Loading...