

Page 1
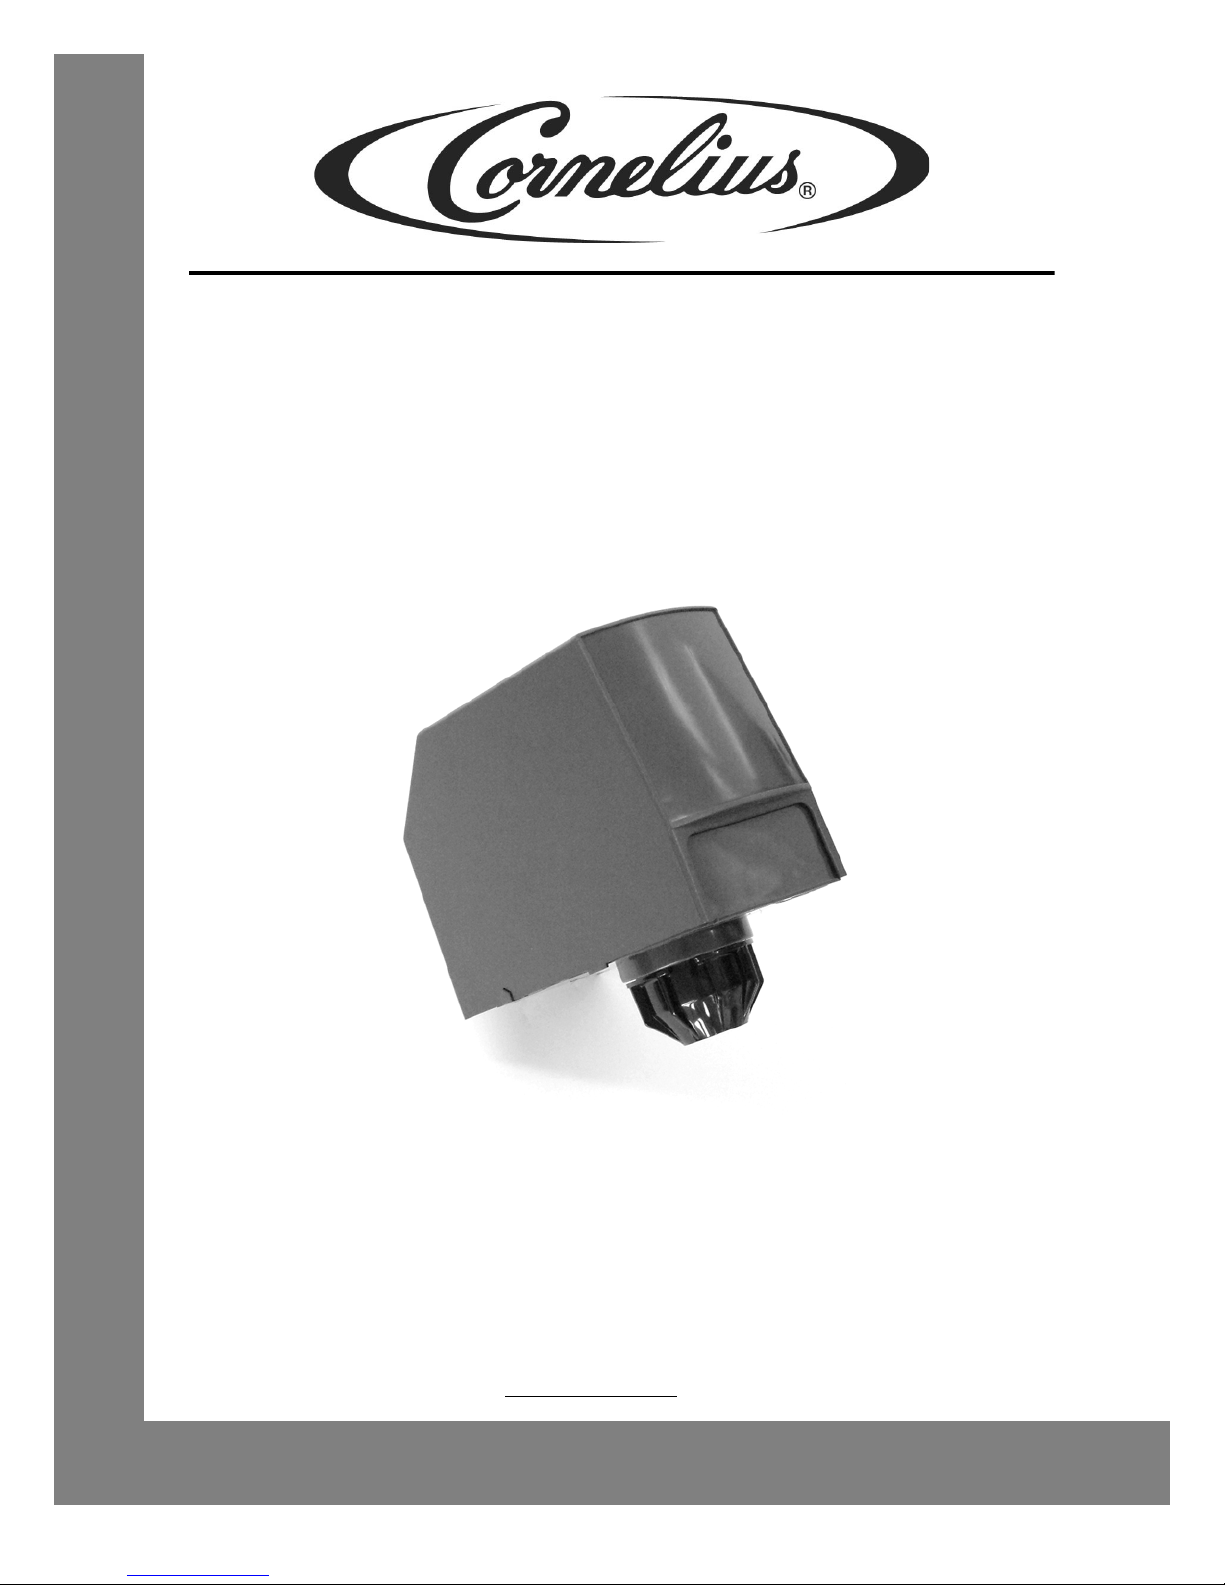
LEOPARD ERV
Operator’s Manual
™
Release Date: September 30, 2004
Publication Number: 620919579OPR
Revision Date: April 6, 2011
Revision: E
Visit the IMI Cornelius web site at www.cornelius.com
for all your Literature needs.
Page 2

The products, technical information, and instructions contained in this manual are subject to change
without notice. These instructions are not intended to cover all details or variations of the equipment,
nor to provide for every possible contingency in the installation, operation or maintenance of this
equipment. This manual assumes that the person(s) working on the equipment have been trained
and are skilled in working with electrical, plumbing, pneumatic, and mechanical equipment. It is
assumed that appropriate safety precautions are taken and that all local safety and construction
requirements are being met, in addition to the information contained in this manual.
This Product is warranted only as provided in Cornelius’ Commercial Warrant applicable to this Product and is subject to all of the restrictions and limitations contained in the Commercial Warranty.
Cornelius will not be responsible for any repair, replacement or other service required by or loss or
damage resulting from any of the following occurrences, including but not limited to, (1) other than
normal and proper use and normal service conditions with respect to the Product, (2) improper voltage, (3) inadequate wiring, (4) abuse, (5) accident, (6) alteration, (7) misuse, (8) neglect, (9) unauthorized repair or the failure to utilize suitably qualified and trained persons to perform service and/or
repair of the Product, (10) improper cleaning, (11) failure to follow installation, operating, cleaning or
maintenance instructions, (12) use of “non-authorized” parts (i.e., parts that are not 100% compatible
with the Product) which use voids the entire warranty, (13) Product parts in contact with water or the
product dispensed which are adversely impacted by changes in liquid scale or chemical composition.
Contact Information:
To inquire about current revisions of this and other documentation or for assistance with any Cornelius product contact:
www.cornelius.com
800-238-3600
Trademarks and Copyrights:
This document contains proprietary information and it may not be reproduced in any way without permission from Cornelius.
Printed in U.S.A.
Page 3

TABLE OF CONTENTS
Safety Instructions . . . . . . . . . . . . . . . . . . . . . . . . . . . . . . . . . . . . . . . . . . . . . . . . . . . . . . 1
Read and Follow ALL Safety Instructions . . . . . . . . . . . . . . . . . . . . . . . . . . . . . . . . . 1
Safety Overview . . . . . . . . . . . . . . . . . . . . . . . . . . . . . . . . . . . . . . . . . . . . . . . . . 1
Recognition . . . . . . . . . . . . . . . . . . . . . . . . . . . . . . . . . . . . . . . . . . . . . . . . . . . . . 1
Different Types of Alerts . . . . . . . . . . . . . . . . . . . . . . . . . . . . . . . . . . . . . . . . . . . . . . 1
Safety Tips . . . . . . . . . . . . . . . . . . . . . . . . . . . . . . . . . . . . . . . . . . . . . . . . . . . . . . . . 1
Qualified Service Personnel . . . . . . . . . . . . . . . . . . . . . . . . . . . . . . . . . . . . . . . . . . . 1
Safety Precautions . . . . . . . . . . . . . . . . . . . . . . . . . . . . . . . . . . . . . . . . . . . . . . . . . . 2
Shipping And Storage . . . . . . . . . . . . . . . . . . . . . . . . . . . . . . . . . . . . . . . . . . . . . . . . 2
Introduction . . . . . . . . . . . . . . . . . . . . . . . . . . . . . . . . . . . . . . . . . . . . . . . . . . . . . . . . . . . 3
Key Things To Know / Do . . . . . . . . . . . . . . . . . . . . . . . . . . . . . . . . . . . . . . . . . . . . . 3
Overview . . . . . . . . . . . . . . . . . . . . . . . . . . . . . . . . . . . . . . . . . . . . . . . . . . . . . . . . . . 3
Product Description . . . . . . . . . . . . . . . . . . . . . . . . . . . . . . . . . . . . . . . . . . . . . . . 3
Sold Out Feature . . . . . . . . . . . . . . . . . . . . . . . . . . . . . . . . . . . . . . . . . . . . . . 3
Water Feature . . . . . . . . . . . . . . . . . . . . . . . . . . . . . . . . . . . . . . . . . . . . . . . . 3
Recharge After Power Loss . . . . . . . . . . . . . . . . . . . . . . . . . . . . . . . . . . . . . 3
Valve Type . . . . . . . . . . . . . . . . . . . . . . . . . . . . . . . . . . . . . . . . . . . . . . . . . . 4
Manual Keypad Portion Control Setup
(per TomCat device instructions) . . . . . . . . . . . . . . . . . . . . . . . . . . . . . . 5
Dimensions, Capacities, and Interface Requirements . . . . . . . . . . . . . . . . . . . . 5
Water Quality . . . . . . . . . . . . . . . . . . . . . . . . . . . . . . . . . . . . . . . . . . . . . . . . . . . 6
Syrup Quality . . . . . . . . . . . . . . . . . . . . . . . . . . . . . . . . . . . . . . . . . . . . . . . . . . . 6
Maintenance and Cleaning . . . . . . . . . . . . . . . . . . . . . . . . . . . . . . . . . . . . . . . . . 6
Inspect the Valve Regularly and Perform ALL Maintenance Procedures . . . 6
Weekly Nozzle Cleaning Procedure . . . . . . . . . . . . . . . . . . . . . . . . . . . . . . . 6
Leopard ERV™ Crew Training Information . . . . . . . . . . . . . . . . . . . . . . . . . . . . . . . . . . . 7
Questions and Answers . . . . . . . . . . . . . . . . . . . . . . . . . . . . . . . . . . . . . . . . . . . . . . 7
Out of Syrup Condition . . . . . . . . . . . . . . . . . . . . . . . . . . . . . . . . . . . . . . . . . . . . 8
Daily Cleaning of Nozzle, Syrup Tube, and Diffuser . . . . . . . . . . . . . . . . . . . . . . 8
Page 4

Page 5
Leopard ERV
!
DANGER:
!
WARNING:
CAUTION:
!
!
WARNING:
!
™ Operator’s Manual
SAFETY INSTRUCTIONS
READ AND FOLLOW ALL SAFETY INSTRUCTIONS
Safety Overview
• Read and follow ALL SAFETY INSTRUCTIONS in this manual and any warning/caution labels on the unit (decals, labels or
laminated cards).
• Read and understand ALL applicable OSHA (Occupational Safety and Health Administration) safety regulations before
operating this unit.
Recognition
Recognize Safety Alerts
This is the safety alert symbol. When you see it in this manual or on the unit,
be alert to the potential of personal injury or damage to the unit.
DIFFERENT TYPES OF ALERTS
Indicates an immediate hazardous situation which if not avoided WILL result in serious injury, death or equipment
damage.
Indicates a potentially hazardous situation which, if not avoided, COULD result in serious injury, death, or equipment
damage.
Indicates a potentially hazardous situation which, if not avoided, MAY result in minor or moderate injury or equipment
damage.
SAFETY TIPS
• Carefully read and follow all safety messages in this manual and safety signs on the unit.
• Keep safety signs in good condition and replace missing or damaged items.
• Learn how to operate the unit and how to use the controls properly.
• Do not let anyone operate the unit without proper training. This appliance is not intended for use by very young children or
infirm persons without supervision. Young children should be supervised to ensure that they do not play with the appliance.
• Keep your unit in proper working condition and do not allow unauthorized modifications to the unit.
QUALIFIED SERVICE PERSONNEL
Only trained and certified electrical, plumbing and refrigeration technicians should service this unit. ALL WIRING AND
PLUMBING MUST CONFORM TO NATIONAL AND LOCAL CODES. FAILURE TO COMPLY COULD RESULT IN
SERIOUS INJURY, DEATH OR EQUIPMENT DAMAGE.
© 2002-2011, IMI Cornelius Inc. - 1 - Publication Number: 620919579OPR
Page 6

Leopard ERV
!
WARNING:
CAUTION:
!
CAUTION:
!
™ Operator’s Manual
SAFETY PRECAUTIONS
This unit has been specifically designed to provide protection against personal injury. To ensure continued protection
observe the following:
Disconnect power to the unit before servicing following all lock out/tag out procedures established by the user. Verify
all of the power is off to the unit before any work is performed.
Failure to disconnect the power could result in serious injury, death or equipment damage.
Always be sure to keep area around the unit clean and free of clutter. Failure to keep this area clean may result in
injury or equipment damage.
SHIPPING AND STORAGE
Before shipping, storing, or relocating the unit, the unit must be sanitized and all sanitizing solution must be drained
from the system. A freezing ambient environment will cause residual sanitizing solution or water remaining inside the
unit to freeze resulting in damage to internal components.
Publication Number: 620919579OPR - 2 - © 2002-2011, IMI Cornelius Inc.
Page 7

Leopard ERV
™ Operator’s Manual
INTRODUCTION
Read this manual carefully to learn how to operate and maintain this valve. Failure to do so can result in loss of
valve performance.
Consider this manual a permanent part of your equipment file.
KEY THINGS TO KNOW / DO
For quality drinks – keep nozzles and the water/syrup system clean; and have the correct ratio, temperature, and
carbonation!
Make sure the correct syrup type has been connected!
Be sure the water filters are changed regularly!
OVERVIEW
Product Description
The
Leopard ERV
dispensing machines. The
volumetric valve, which means it monitors and regulates the
volumes of water and syrup being dispensed. This allows the
valve to compensate real time to pressure changes and
maintain a constant ratio and flowrate.
As the
reacting to changes in water and syrup pressures in order to
maintain the selected finished drink ratio and flowrate. The
syrup flow is measured in real time utilizing pressure
differential and then regulated by a linear stepper motor. The
water flow is measured in real time by a flow turbine and
regulated by a second linear stepper motor. These two flow
measurements are input to a microprocessor which adjusts
the stepper motors to maintain flowrate and ratio.
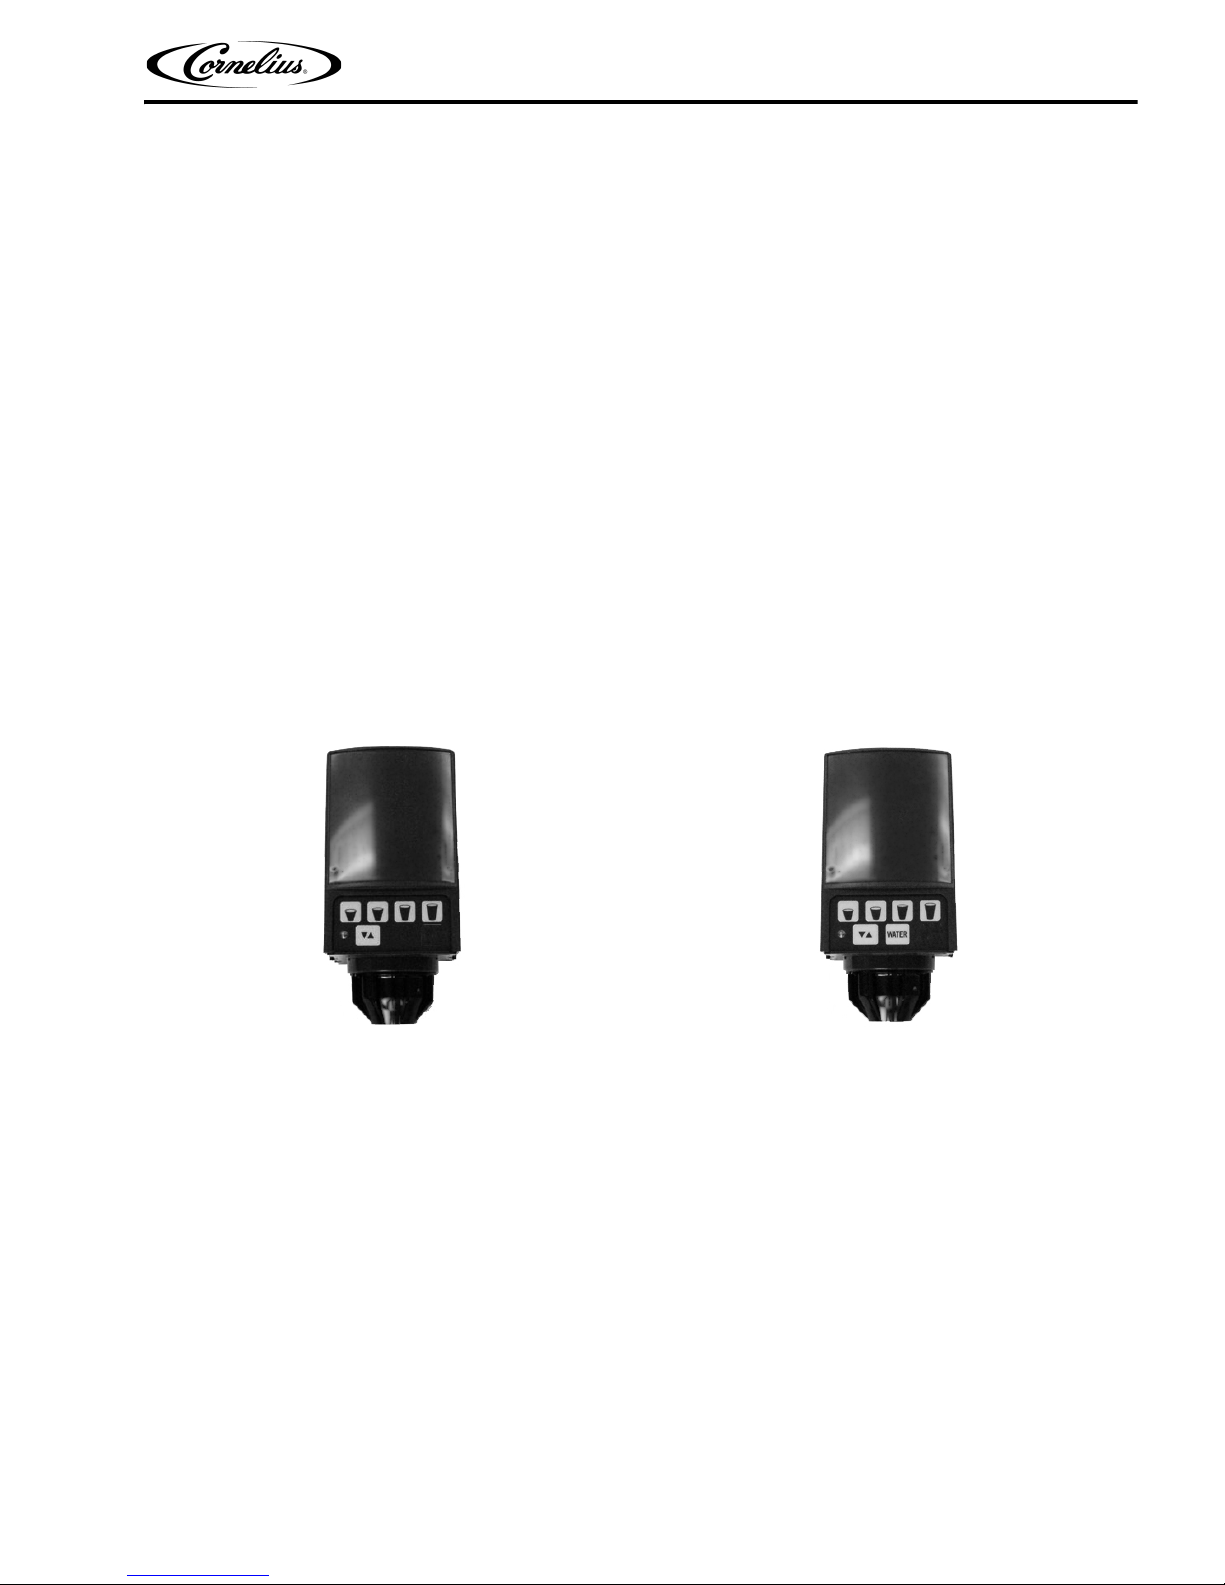
Sold Out Feature
The
The “Sold Out” light informs the operator of insufficient flow from either the water or syrup.
During the sold out condition, the valve dispenses a small amount of product (Water and Syrup) and shuts off
regardless of how long the button or lever is activated. Once the water/syrup is replenished the “Sold Out” light
turns off and the valve returns to normal operation automatically.
Leopard ERV
Leopard ERV
™ is intended for use on post-mix beverage
Leopard ERV
™ is dispensing a drink, it’s constantly
™ has a built in “Sold Out” feature on all valves. A light is located on the front keypad face .
™ is a purely
Figure 1
Water Feature
Unlike other valves the need for a separate “Water Only” lever is no longer needed. This feature is now
accomplished electronically with a “Water” button located in the keypad. The keypad option can be added to
either a carbonated drink valve or a non-carbonated drink valve.
Recharge After Power Loss
The
Leopard ERV
operation is suspended until valve is charged.
When power to the
rapidly (approximately 2 times a second). When the valve is fully charged and ready for use, the LED on the
electronics board flashes slower (approximately 1 time a second). The LED on the keypad turns off.
© 2004-2011, IMI Cornelius Inc. - 3 - Publication Number: 620919579OPR
™ requires the electronics board to charge the power backup system before operation. Drink
Leopard ERV
™ is connected, the LED on the electronics board and keypad begins to flash
Page 8

Leopard ERV
™ Operator’s Manual
An uncharged valve takes approximately 3 minutes to fully charge. When connected to a TomCat device during
this charge cycle, a status indicator “CAP” is displayed on the screen and does not allow connection until fully
charged.
This charging only occurs when power is initially connected, when the machine is turned off then back on, or
following machine turn on after power is lost to the valve.
Once the valve has fully charged following a power loss, the first dispense is a setup dispense beginning at a
low flowrate and gradually increasing to the set flowrate. This dispense is in ratio. Once the valve has reached
it’s set flowrate it continues to dispense at that flowrate. On an
Leopard ERV
™ equipped with Portion Control,
each of the sizes perform the same on the initial dispense.
Valve Type
There are three different activation methods for the
Leopard ERV
™: Cup Activated, Push Button, and Portion
Control.
Cup Actuated Valve
• Operate the cup actuated valve by pressing the cup against the lever until the cup is full; then release the
lever.
Figure 2. Lever with “Sold Out” Figure 3. Lever with Water Button and “Sold Out”
Push Button Valve
• Operate the Self–Serve by pressing the “PUSH” switch and holding until the desired amount of product
has been dispensed, then release the “PUSH” switch.
Figure 4. Push Button Figure 5. Push with Water
Publication Number: 620919579OPR - 4 - © 2004-2011, IMI Cornelius Inc.
Figure 6. Water Only Button
Page 9
Leopard ERV
™ Operator’s Manual
Portion Control Valve
• The portion control valve dispenses different size drinks by pressing the desired switch. The valve also
has a Cancel/Pour dispense function. The Portion Control valve can be programmed to dispense different
drink sizes.
• The portion control keypad contains a hidden 5
th
portion size the 5
user of the 5
size is dispensed. When activated, the LED on the keypad quickly blinks to notify the
th
size dispense.
th
button size. By pressing the Medium and Extra Large
Manual Keypad Portion Control Setup
(per TomCat device instructions)
Perform the following steps to setup or change the Portion Control button volumes:
1. Simultaneously press and hold the smallest portion button and the largest portion button until the LED
illuminates (approximately 1 second).
2. Place the appropriate size cup (with desired amount of ice) under dispensing nozzle. Press and hold
the size button that you want to set until the desired volume of drink is dispensed into the cup. Repeat
step 2 to program each drink size.
NOTE: Any drink size may be programmed as many times as desired before exiting the program
mode. It is not necessary to adjust all cup sizes while in the programming mode.
3. To return a size to the default value, press and hold the pour/cancel and that button simultaneously for 2
seconds.
4. To exit, press and release the “Pour/Cancel” button. This will save any changes. The LED switches off to
signal leaving the programming mode.
Figure 7. Portion Control Figure 8. Portion Control with Water
Dimensions, Capacities, and Interface Requirements
Finished Drink Flow Rate ...................................................................................... 1.5 to 4.5 oz./sec
Finished Drink Ratio Range.......................................................................................... 3.5:1 to 8.5:1
Operational Temperature Range ............................................................0°C (32°F) to 60°C (140°F)
Storage Temperature Range ............................................................. -30°C (-22°F) to 70°C (158°F)
Operating Humidity Range .......................................................................<75%RH @ 40°C (105°F)
Voltage Requirements ................................................................................ 22 to 27 VAC (50/60 Hz)
Power Consumption .................................................................................<50mA (in standby mode)
Valve Dimensions .......................................... 2.5” (wide) X 4.75” (long w/o backblock) X 5.5” (high)
Water/Soda (Static) ...................................................................................................... 30 to 120 psi
Syrup (Static).................................................................................................................. 30 to 90 psi
Back Block................................................... Licensed Electric Valve Style (Part number 60278110)
© 2004-2011, IMI Cornelius Inc. - 5 - Publication Number: 620919579OPR
Page 10

Leopard ERV
!
WARNING:
™ Operator’s Manual
Water Quality
• Chloramines are a combination of chlorine and ammonia which are responsible for some degradation of
rubber components. Installing and maintaining a water filtration system can minimize the affects of
Chloramines.
Syrup Quality
• Use only Coke approved quality syrups.
• Do not use syrup that is out of date.
Maintenance and Cleaning
Water, Syrup and CO2 to the system must be turned off and the system depressurized prior to performing this
service.
Failure to comply could result in serious injury, death or damage to the equipment.
Inspect the Valve Regularly and Perform ALL Maintenance Procedures
1. Check syrup supply regularly. Replace when depleted or out of date.
2. Check CO
3. Clean the valve as outlined in the maintenance section.
4. Sanitize the dispensing system as required for that model.
5. DO NOT abuse the valve.
2 supply and water filters frequently. Replace when necessary.
Weekly Nozzle Cleaning Procedure
This cleaning procedure must be performed each week or more often if needed to maintain cleanliness of the
nozzle and inner nozzle.
• McD Sanitizer (HSC)
• Sanitizing bucket
• Nylon pot brush
NOTE: To save on operating supplies, this procedure can be combined with daily utensil cleaning
that includes wash, rinse, and sanitize at the back sink.
1. Prepare a solution of 1 packet of McD Sanitizer with 2-1/2 gallon (9.5 L) of LUKEWARM water in a
sanitizing bucket.
NOTE: Use ONLY LUKEWARM water, hot water will destroy the chlorine power of the sanitizer,
and cold water will not allow the sanitizer to dissolve. LUKEWARM is warm but not hot,
approximately body temperature.
2. Remove the nozzle from the valve by turning and pulling down.
3. Remove the syrup diffuser assembly from the valve by pulling down. Place diffuser and nozzle in sanitizer
solution.
4. Repeat Steps 2 and 3 for each valve.
5. Wipe up inside nozzle diffuser area. Use bristle brush to clean underside of valve, especially area where
nozzle and diffuser are attached.
NOTE: Do Not soak the nozzles and diffusers in the sanitizing solution for more than 15 minutes.
6. Using a nylon pot brush, clean the syrup diffusers and nozzles 1 at a time and rinse with warm water.
7. Install the syrup diffusers and nozzles back in the valve.
Publication Number: 620919579OPR - 6 - © 2004-2011, IMI Cornelius Inc.
Page 11

Leopard ERV
™ Operator’s Manual
LEOPARD ERV™ CREW TRAINING INFORMATION
QUESTIONS AND ANSWERS
Q: The red light is on and the valve only dispenses a small portion.
NOTE: See the back of this card for additional information.
A: The valve knows if it does not have enough water, soda, or syrup to make a good drink. If it sees
any of these conditions, it will stop and the red light will come on to indicate the problem.
Check the syrup supply first, it may be depleted. After you replenish the syrup the valve will
return to normal operation. If the syrup is OK, check the water supply to make sure it is getting
enough water. Check the other valves to identify if they all show the same symptoms. Contact
Coca-Cola Service System if problem cannot be corrected.
Q: There is a power failure and when the power came back on the valve did not operate right away and
the light is flashing.
A: When there is a power failure, the valve makes sure it is shut off by using a small internal reserve
power supply. This function prevents spills. When the power comes back on, it may take three or
four minutes to replenish this internal power supply. Then the valve will operate normally and the
red light will shut off.
Q: When the power to the machine is shut off and turned back on the valve did not operate right away.
A: This is the same as a power failure. The valve makes sure it is shut off by using a small internal
reserve power supply. This function prevents spills. When the power comes back on, it may take
three or four minutes to replenish this internal power supply. Then the valve will operate normally.
Q: There is sometimes an audible humming noise coming from the valve when it is dispensing. When
the restaurant is quiet you can sometimes hear it.
A: This is normal. The valve contains moving parts and when the restaurant is very quiet, you may
hear these parts operating. The valve is doing what it is supposed to do, moving up and down to
dispense a quality drink.
Q: What must be cleaned on the valve?
NOTE: See the back of this card for additional information.
A: Just like the previous valves you had, the nozzle, syrup tube, and diffuser must be cleaned daily.
To remove the nozzle turn it to the left until is stops. Next pull in a downward motion to remove it.
The syrup tube and diffuser are held in place by an o-ring. Grasp the syrup tube and diffuser with
your hand and with a turning motion pull in a downward motion to remove.
With the nozzle and syrup tube, and diffuser removed it is now possible to clean under the valve
body. Wipe the under portion of the valve body with a sanitizing cloth.
Nozzle, Syrup Tube, and Diffuser must be cleaned daily. This will insure a quality drink is being
dispensed through them and reduces foaming.
Follow the normal cleaning procedures you are current doing with your existing valves.
Q: Valve is not working properly.
A: Should you encounter any problems with any of the test valves, please call into the Coca-Cola
Service System. A trained agent will respond to your call.
Q: How do I dispense “bonus” size or Extra-Extra Large size?
A: If the valve has been setup for this feature this can be dispensed by pressing the Medium and
Extra Large button at the same time. You will see the LED flash several times during the
beginning of the dispense to indicate that this is the Extra-Extra Large size.
© 2004-2011, IMI Cornelius Inc. - 7 - Publication Number: 620919579OPR
Page 12

Leopard ERV
Nozzle
Syrup Tube and Diffuser
™ Operator’s Manual
Out of Syrup Condition
There is a red Light on Left side. Out of syrup or there is a low flow of water or soda water.
Daily Cleaning of Nozzle, Syrup Tube, and Diffuser
1. Turn nozzle to left until it stops. 2. Pull nozzle in a downward motion.
3. While turning diffuser pull in a downward motion. 4. Follow your normal cleaning procedures.
Publication Number: 620919579OPR - 8 - © 2004-2011, IMI Cornelius Inc.
Reinstall the Nozzle, Syrup Tube, and
Diffuser in the reverse order of removal.
Page 13

Page 14

IMI Cornelius Inc.
www.cornelius.com
 Loading...