

Page 1

1
Smart Mobile PAD
User Manual
Page 2
2
Introduction
Statement
A370 (Class A product) may cause radio interference in the living
environment, in which case the user might be required to take
adequate measures.
Thank you for using our product.
Before the use, please read clearly the user manual.
Product standard: GAT 1011-2012 ,ISO14443 Type A/B ,
ISO15693 International Standard.
Note: * Marked terminal only for certain models, or
optional part of some terminals, or only customized
supply at certain times. Specific configuration of products
subjects to contract and list agreed by both sides.
Page 3
3
Overview
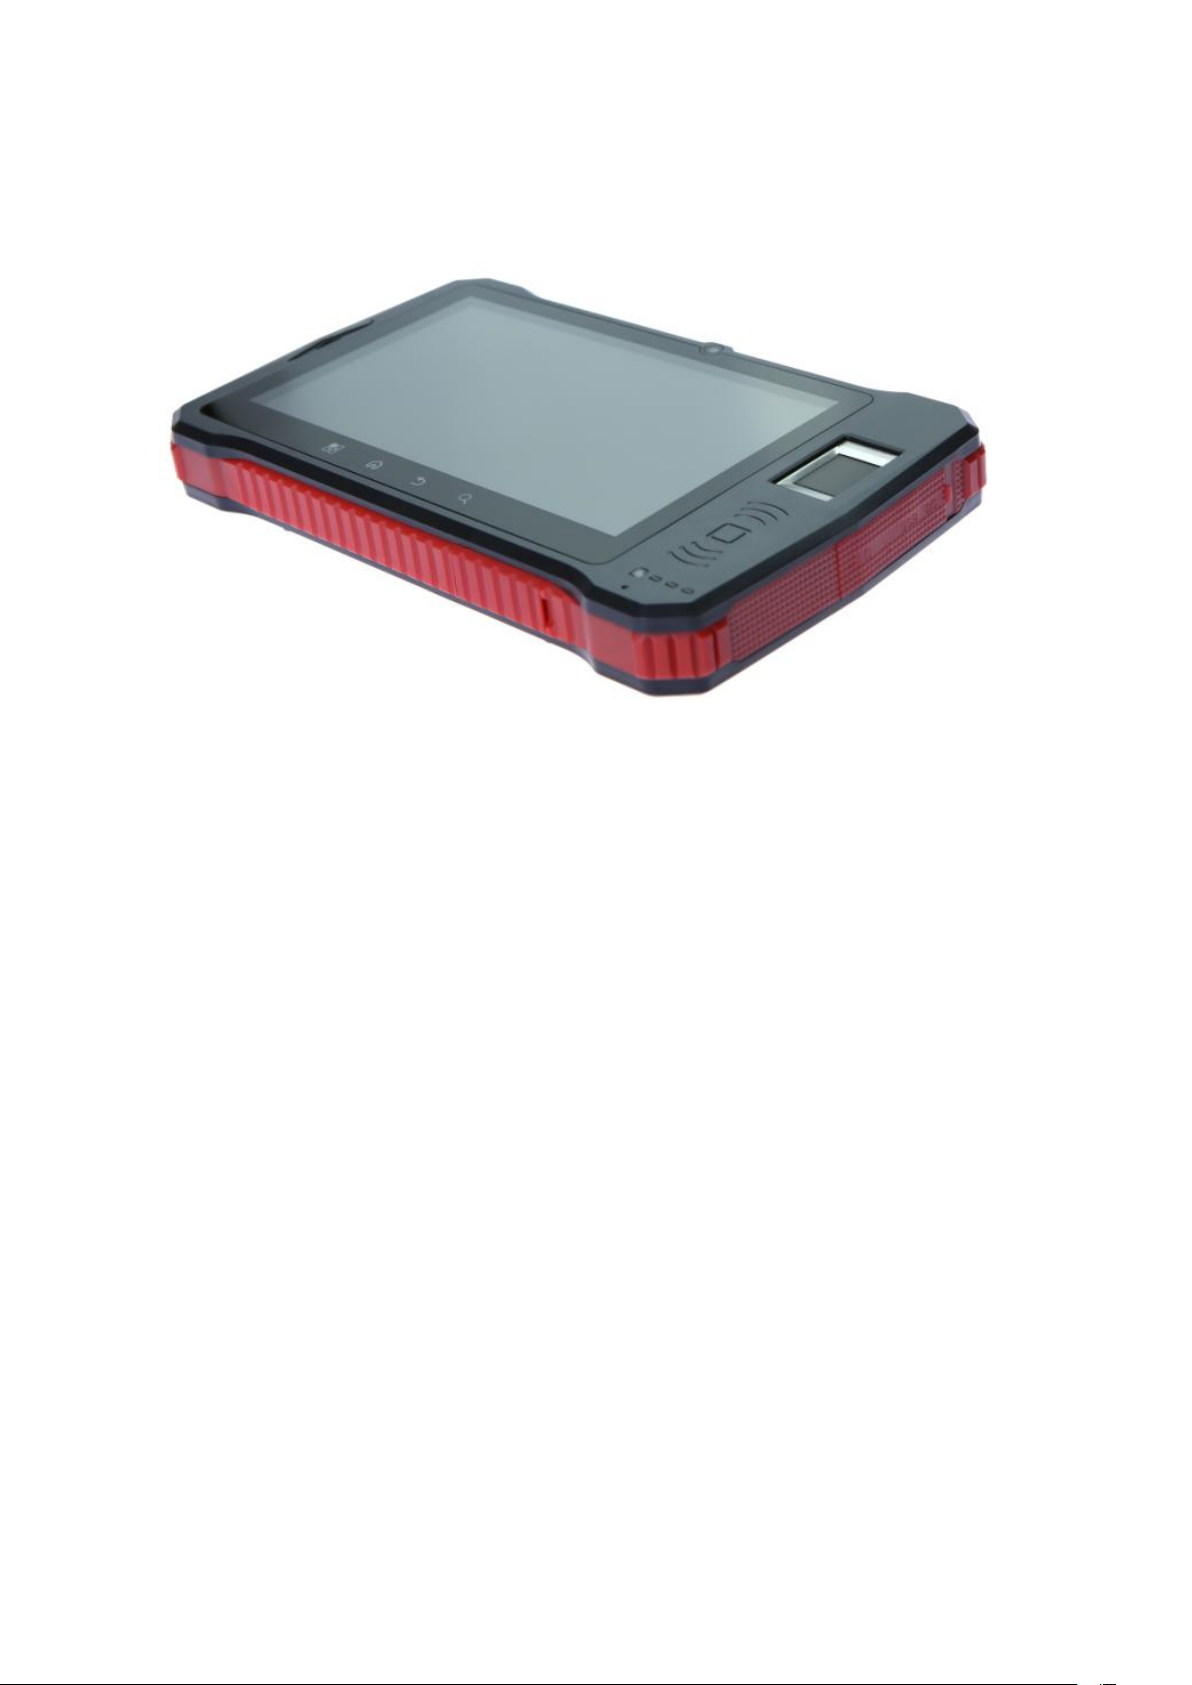
Main performance indicators
Operating System: Android 6.0
*Networks:
GSM: 850/900/1800/1900
WCDMA: B1/B2 CDMA: BC0 TD--CDMA: B34/B39
TD-LTE: B38/B39/B40/B41 FDD-LTE: B1/B3
Screen: 7 inch HD LCD (Resolution:600*1024)
Processor: 1.2G(Quad core)
*Bluetooth: BT4.0 LE
*WiFi: IEEE 802.11a/b/g/n
Camera: Rear 8.0M,auto focus,flashlight.
Page 4

4
USB interface: Mini-USB 10pin,support peripherals like
external U flash disk,keyboard,card reader,printer.
*Fingerprint resolution: Capacitive sensor,collection and
identification time <1s,508DPI.
IC card: ISO/IEC 14443 A,ISO/IEC 14443 B,ISO 15693
supported.
UHF RFID: ISO18000-6C supported; reading distance 0~5m.
*Bar code scanner: 1D/2D bar code supported(laser).
Working environment:
Temperature:0℃~50℃; Humidity: 20%~90% RH
Dimension:220*132*26.5mm
Weight: 760g
Page 5

5
Catalog
I. Product Appearance Introduction.............................................. 6
II. Status bar Icons..........................................................................9
III. Use Guide................................................................................ 10
Important notes....................................................................... 10
Battery charging...................................................................... 10
Connect the terminal to PC................................................... 10
IV. Basic Functions....................................................................... 11
Unlock and lock the screen....................................................11
Use applications...................................................................... 11
Check notifications..................................................................12
Input texts.................................................................................13
Show keyboard.................................................................14
V. Detailed Functions Introduction............................................. 15
RFID application......................................................................15
*Fingerprint collection application......................................... 15
UHF RFID tag reader............................................................. 16
QR code scanner.................................................................... 16
Photo/Video............................................................................. 17
Copy files..................................................................................17
Easy tools.................................................................................18
VI.Simple Troubleshooting Instructions..................................... 19
Page 6
6
I. Appearance Introduction
Page 7
7
Page 8

8
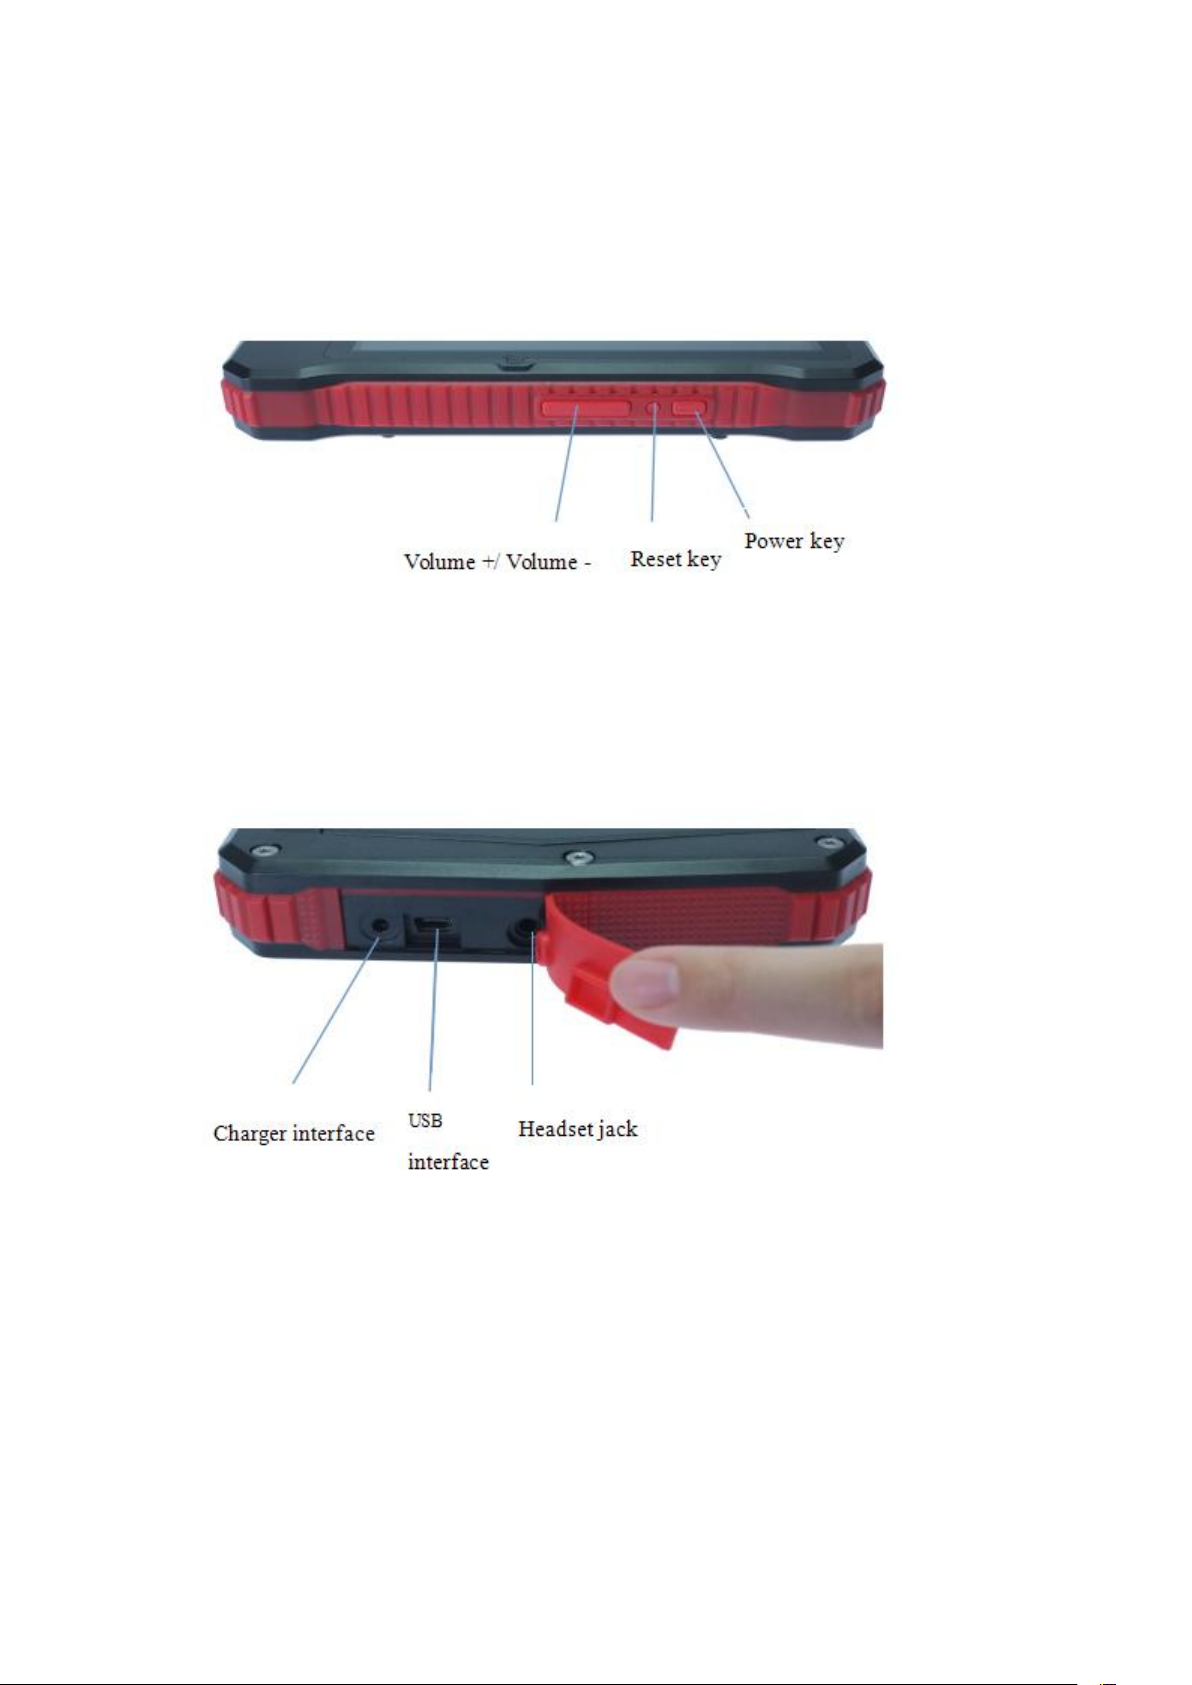
Power key: Long press to power on/off.
Volume key: Adjust volume.
Reset key: Restart the terminal.
Charger interface: Connect charger.
USB interface: Connect USB cable to PC.
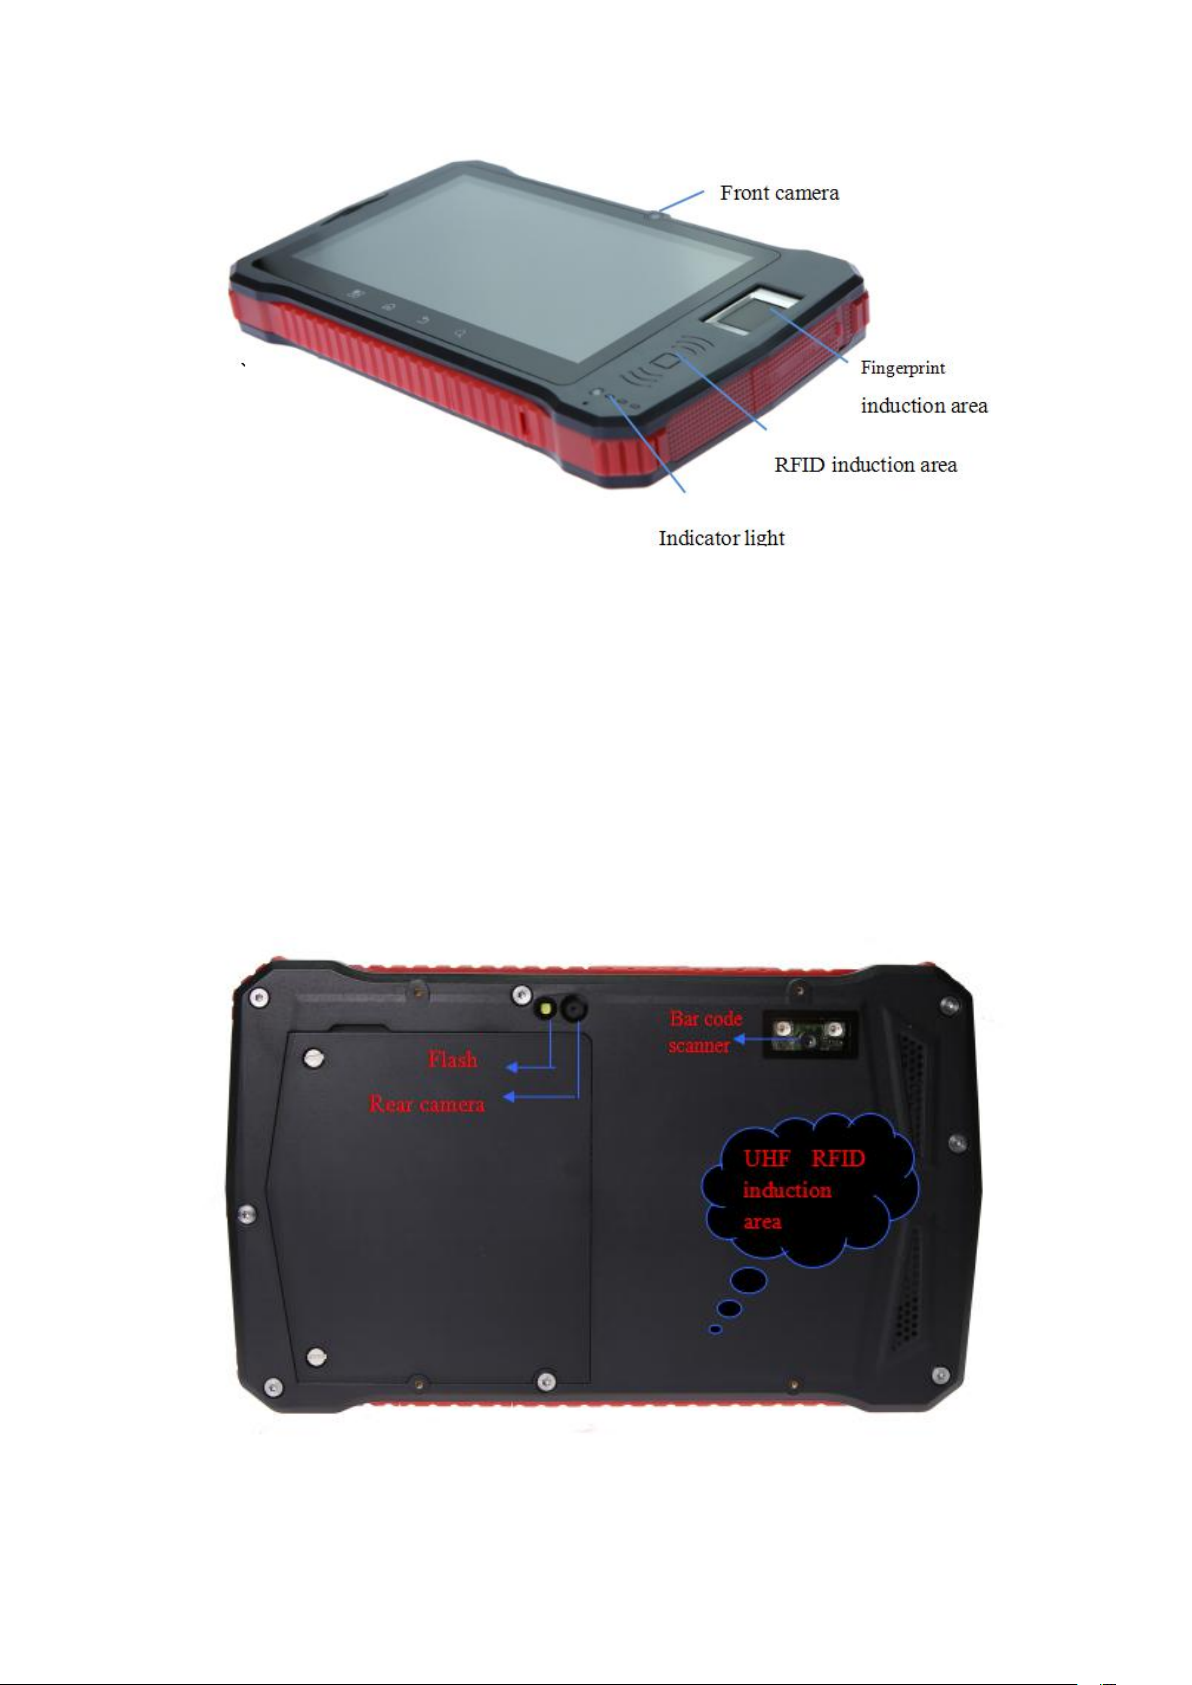
*Fingerprint induction area: Press your finger in this area when
collecting the fingerprint.
RFID induction area: Put RFID cards in this area.
Indicator light:
To display the device in a certain state;
From left to right:
→Charging indicator: Charging state is red, full charging state turns
green.
→Power-on light: Device will be powered on before using
fingerprint function,the indicator turns blue.
→*Fingerprint light: Blue light flashes in process of collecting.
→RFID light: Light flashes once in blue when reading RFID cards.
UHF RFID induction area: When reading UHF RFID tags, please
put the tags in the range of induction area, reading distance differs
from the tags you choose.
Bar code scanner: Put 1D/2D bar codes in the area to scan.
Page 9
9
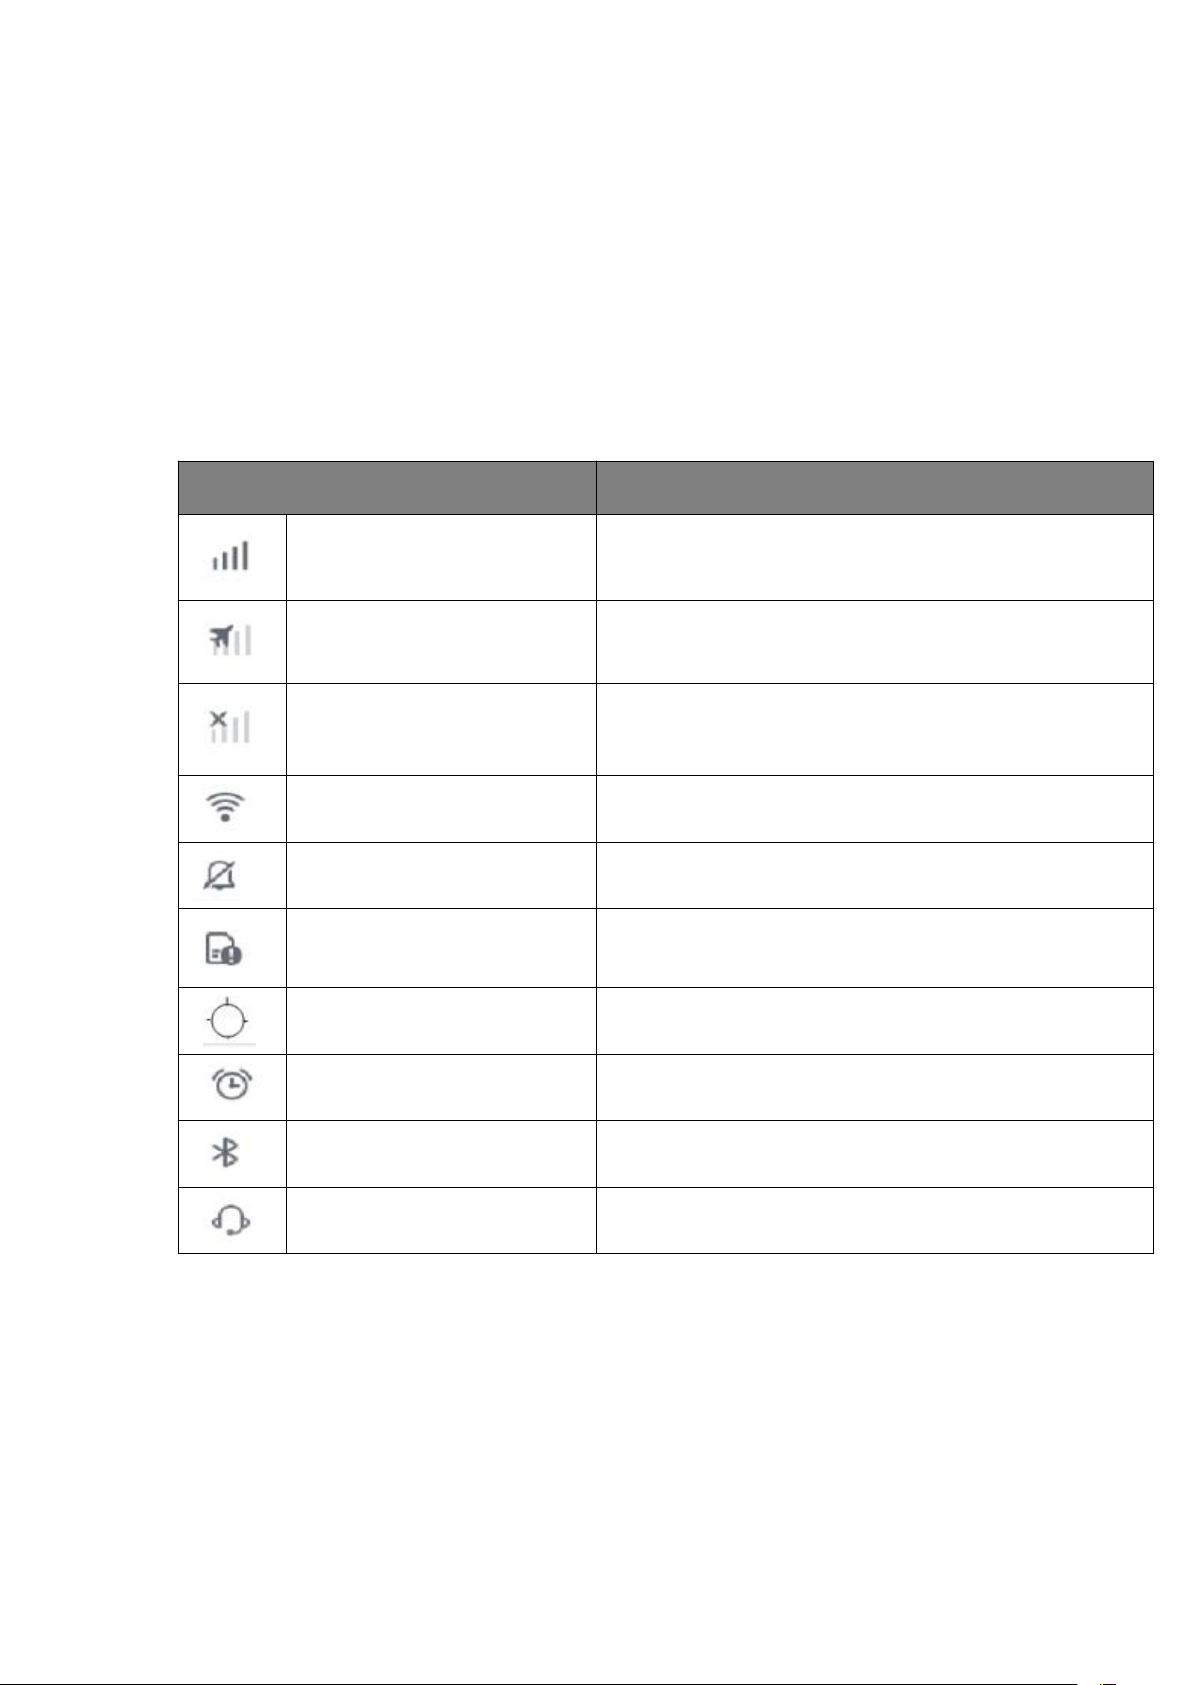
II. Status bar icons
Status bar shows time,battery status,signal strength, operator’s
name or note icons.
Status bar icon information at the top of screen:
Status icon
Meaning
Cellular signal
Show your cell phone signal strength, the more bars, the
stronger the signal.
Flight mode.
Show flight mode opened. No call, Internet and Bluetooth
devices.
No network access to the
operators
No network access to the operators, but with signal, for
emergency call only.
WiFi
Show connected to WiFi, the more bars, the stronger the
signal.
Mute
Show in the mute status currently.
SD card detected in error.
Show no SD card insert or stick to test the phone card
with failure.
GPS
Show certain application is using location-based service.
Alarm clock
Show alarm clock setted.
Bluetooth
Show bluetooth opened.
Headset
Show headset inserted.
Page 10

10
III. Use Guide
Important tips
In order to avoid unnecessary harm, please note the following
information before using the device:
• Do not power on where wireless devices are forbidden to use.
Such as in the planes, places nearby marked no using the phone
like medical facilities and medical equipments.
• Do not power on where the device may cause interference or
danger. Such as gas station, near the fuel,chemicals or bursting
point.
• Please use original accessories and batteries. Do not use
incompatible products.
• Keep the phone dry.
• Have qualified service personnel to repair the phone.
• When connecting to other devices, please refer to the connection
method in the user manual. Don’t connect to incompatible devices.
Battery Charging
With power off status, charging indicator shows battery charge
status.
With power on status, the battery at the lower right corner of the
screen displays battery or charging status.
Please use the supplied charger connecting to the power outlet or
using USB cable connecting to the PC to charge it.
Connect the terminal to PC
Use USB cable connecting to the PC, if connected successfully, the
device will show "USB Connected" prompt.
If with problems when connecting, please operate according to help
guide; According to the guide,install device drivers and tools on the
PC.
Page 11
11
IV. Basic Functions
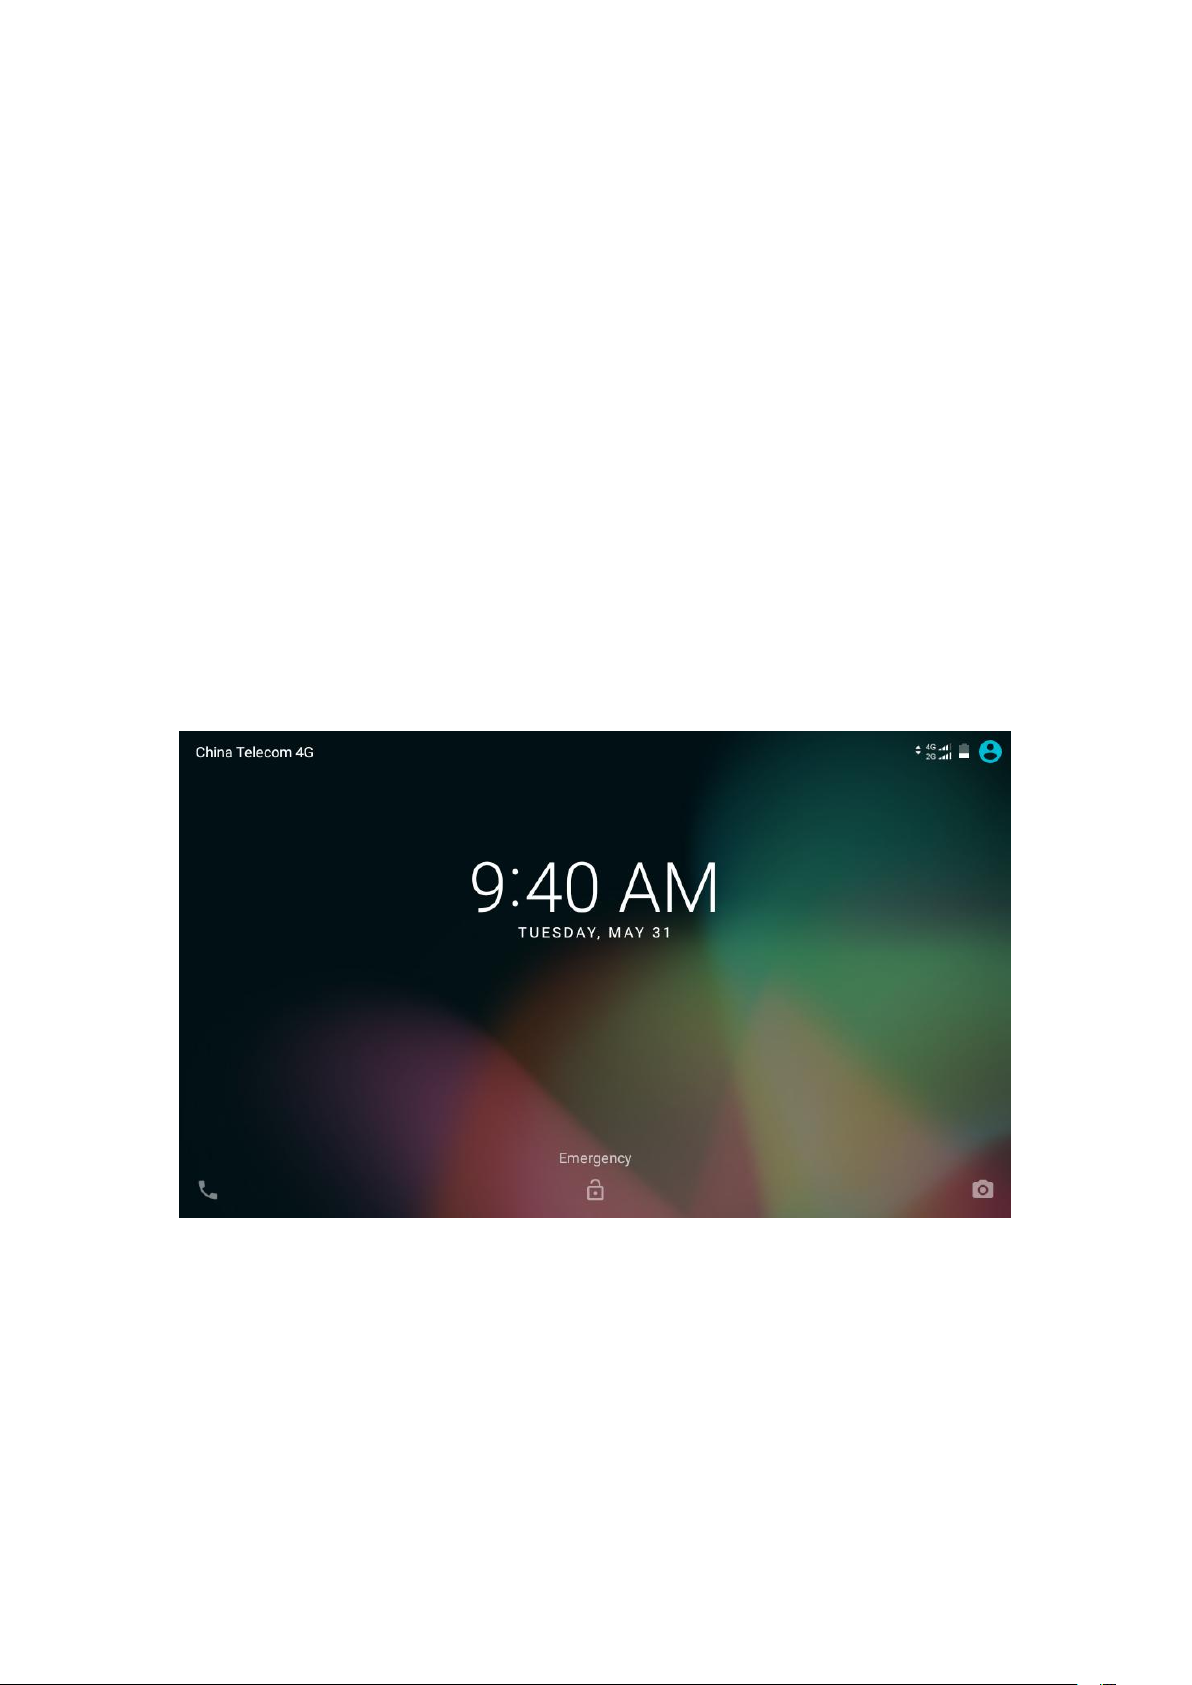
Screen unlock and lock
You could click the unlock button on the screen, and drag it to the
unlock icon or the camera icon, successfully unlock the screen and
enter into the function module. To lock the screen, simply press the
power button in any interface, then your phone will enter into sleep
mode.
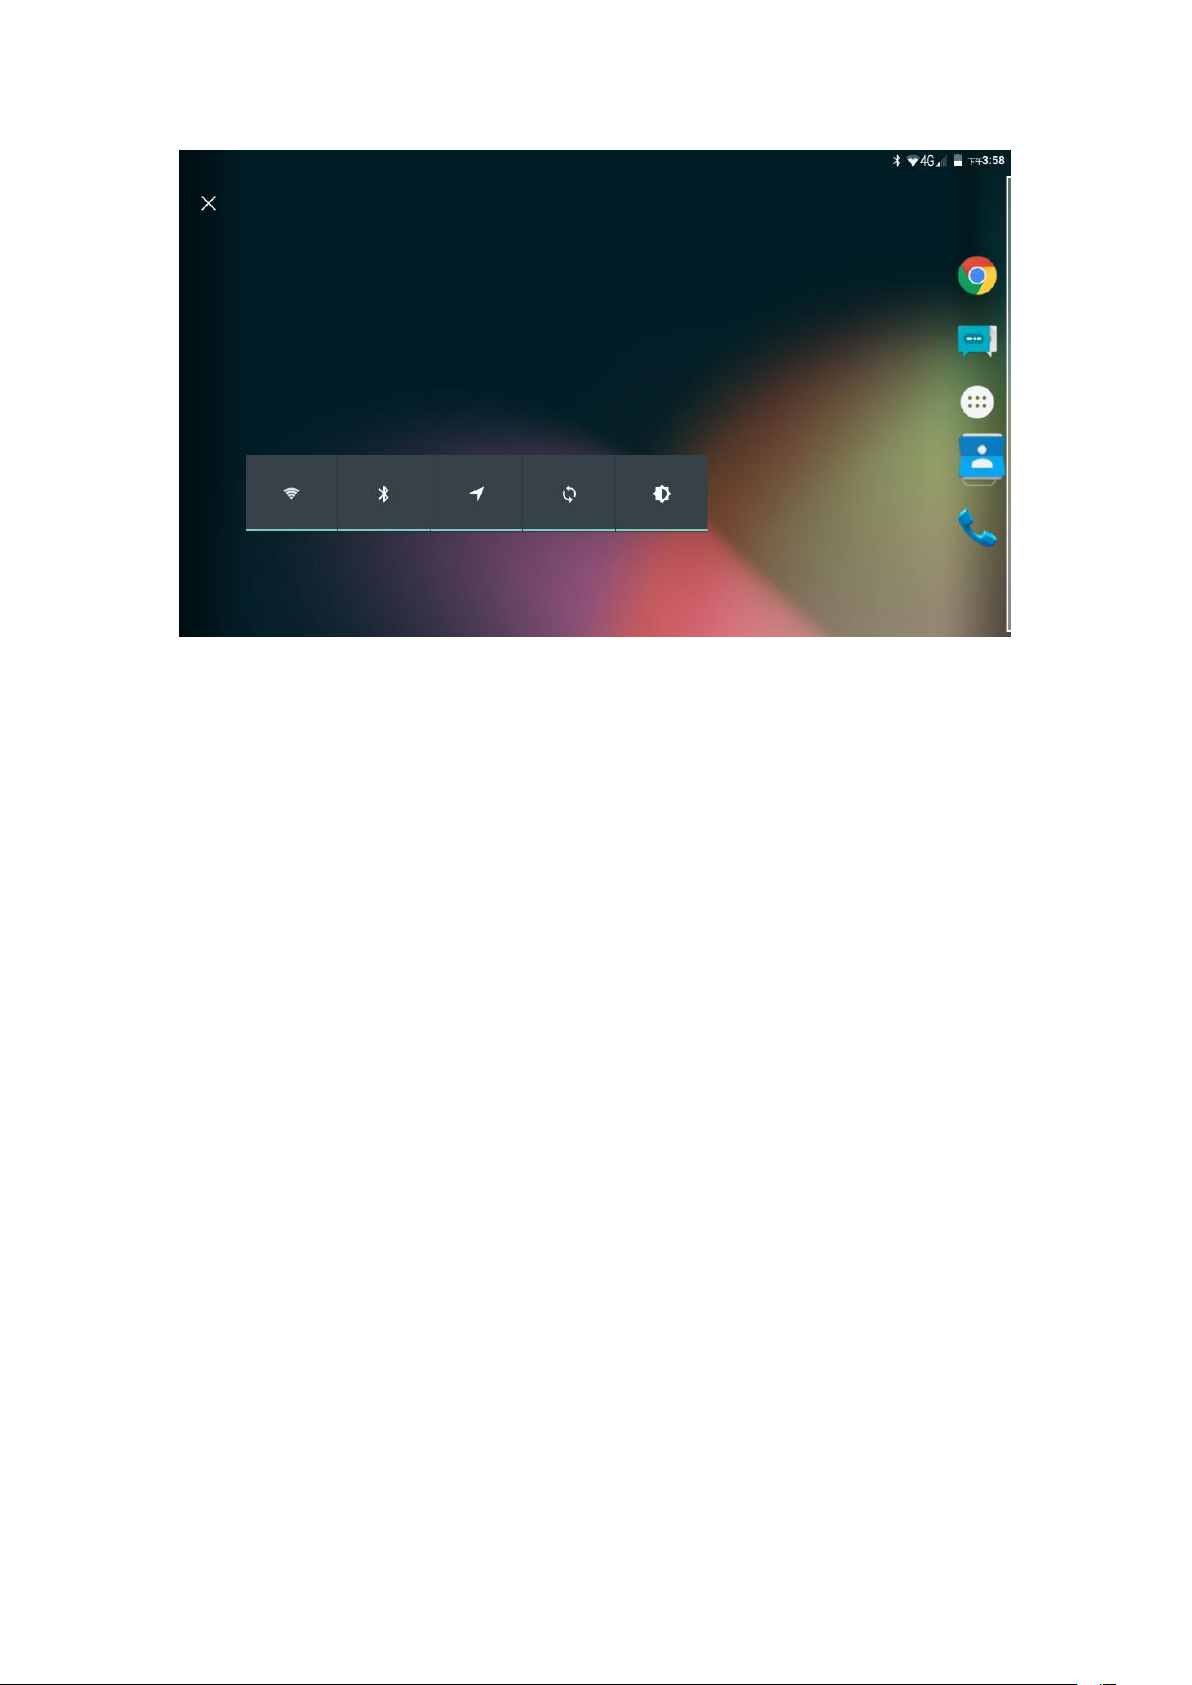
Use applications
To open an application, please click its icon on the screen.
Return to the main screen: Press the Home button below on the
screen.
Switch to other Home screen: swipe finger to the left or right, or
swipe the dot area at the bottom.
Switch to applications recently used: Long press the Home key.
Long press uncommonly used function icons to delete.
Page 12
12
Check notifications
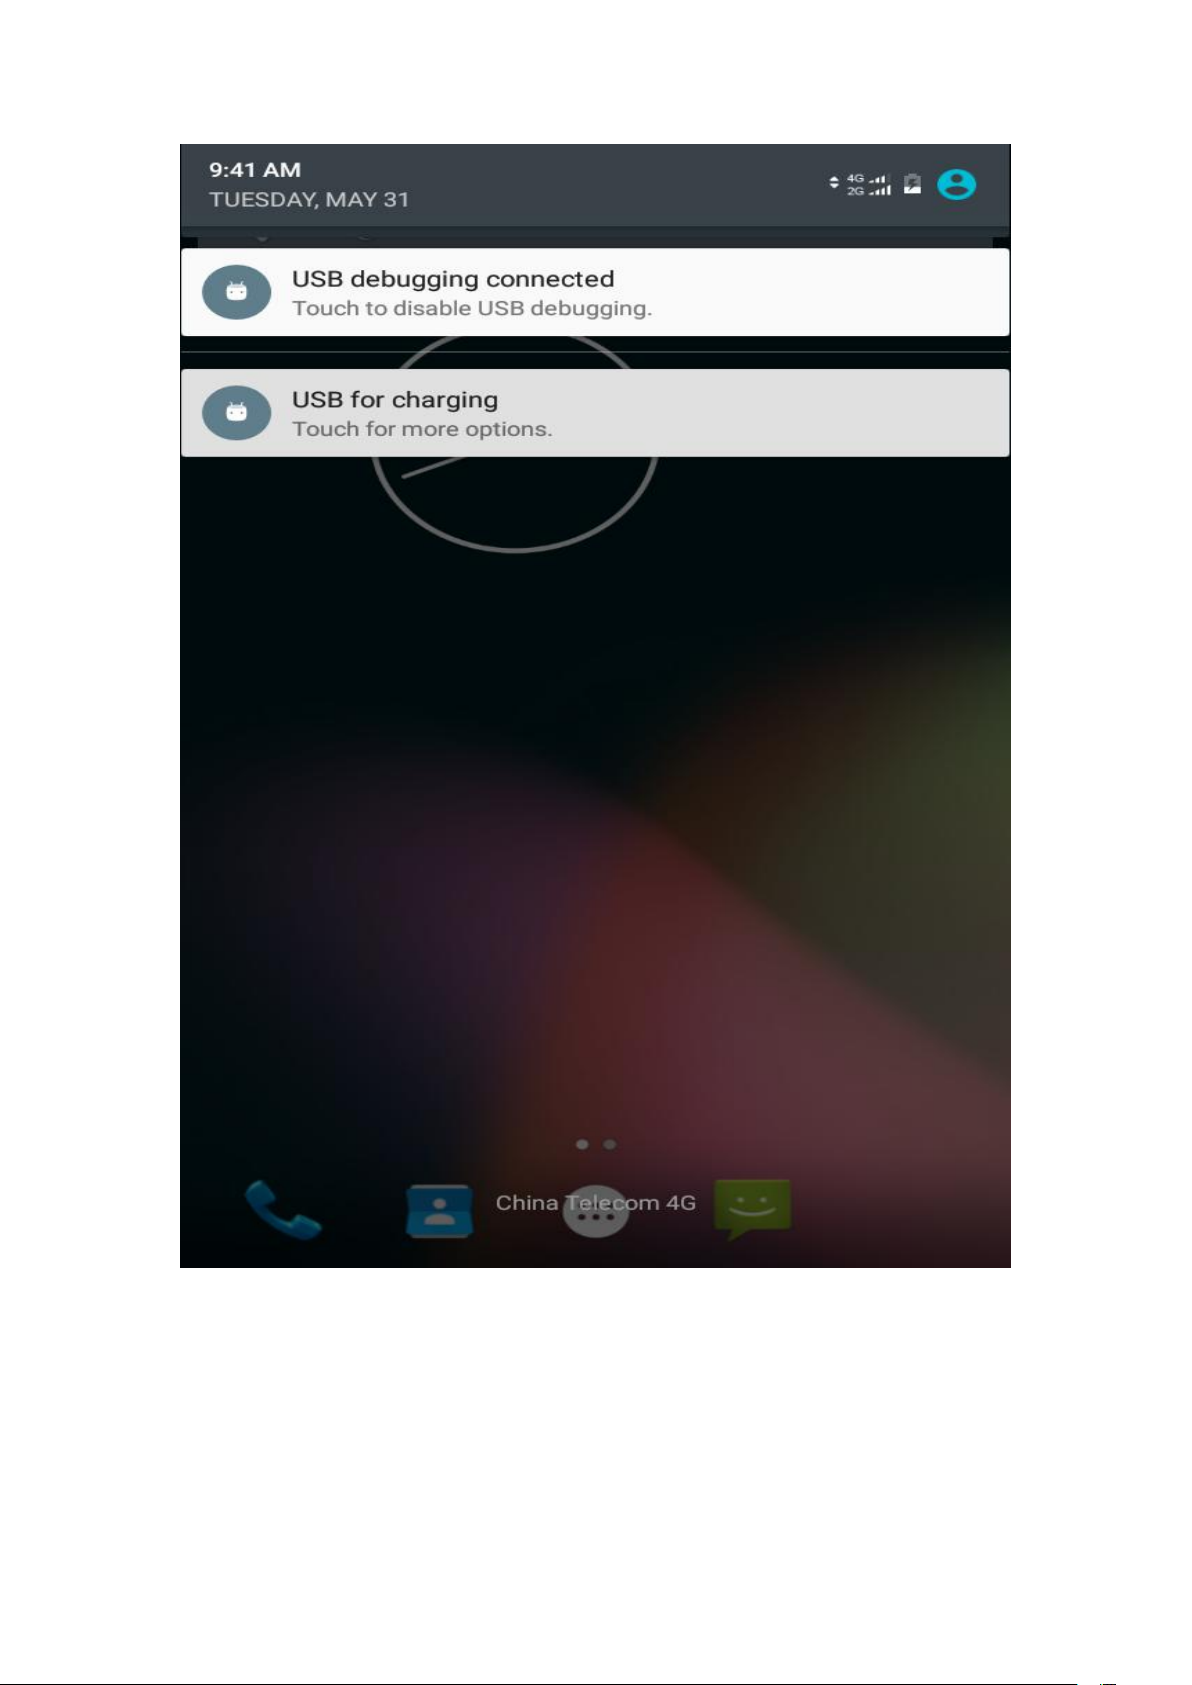
You can slide down from the status bar to view the notification
details.
Click on a certain notice to enter into the corresponding content.
Page 13
13
Input texts
You can use the virtual keyboard on the screen, to enter
Chinese ,English,symbols and numbers.Some input methods(like
Sogou,Baidu etc.)also support handwriting and stroke input.
Page 14
14
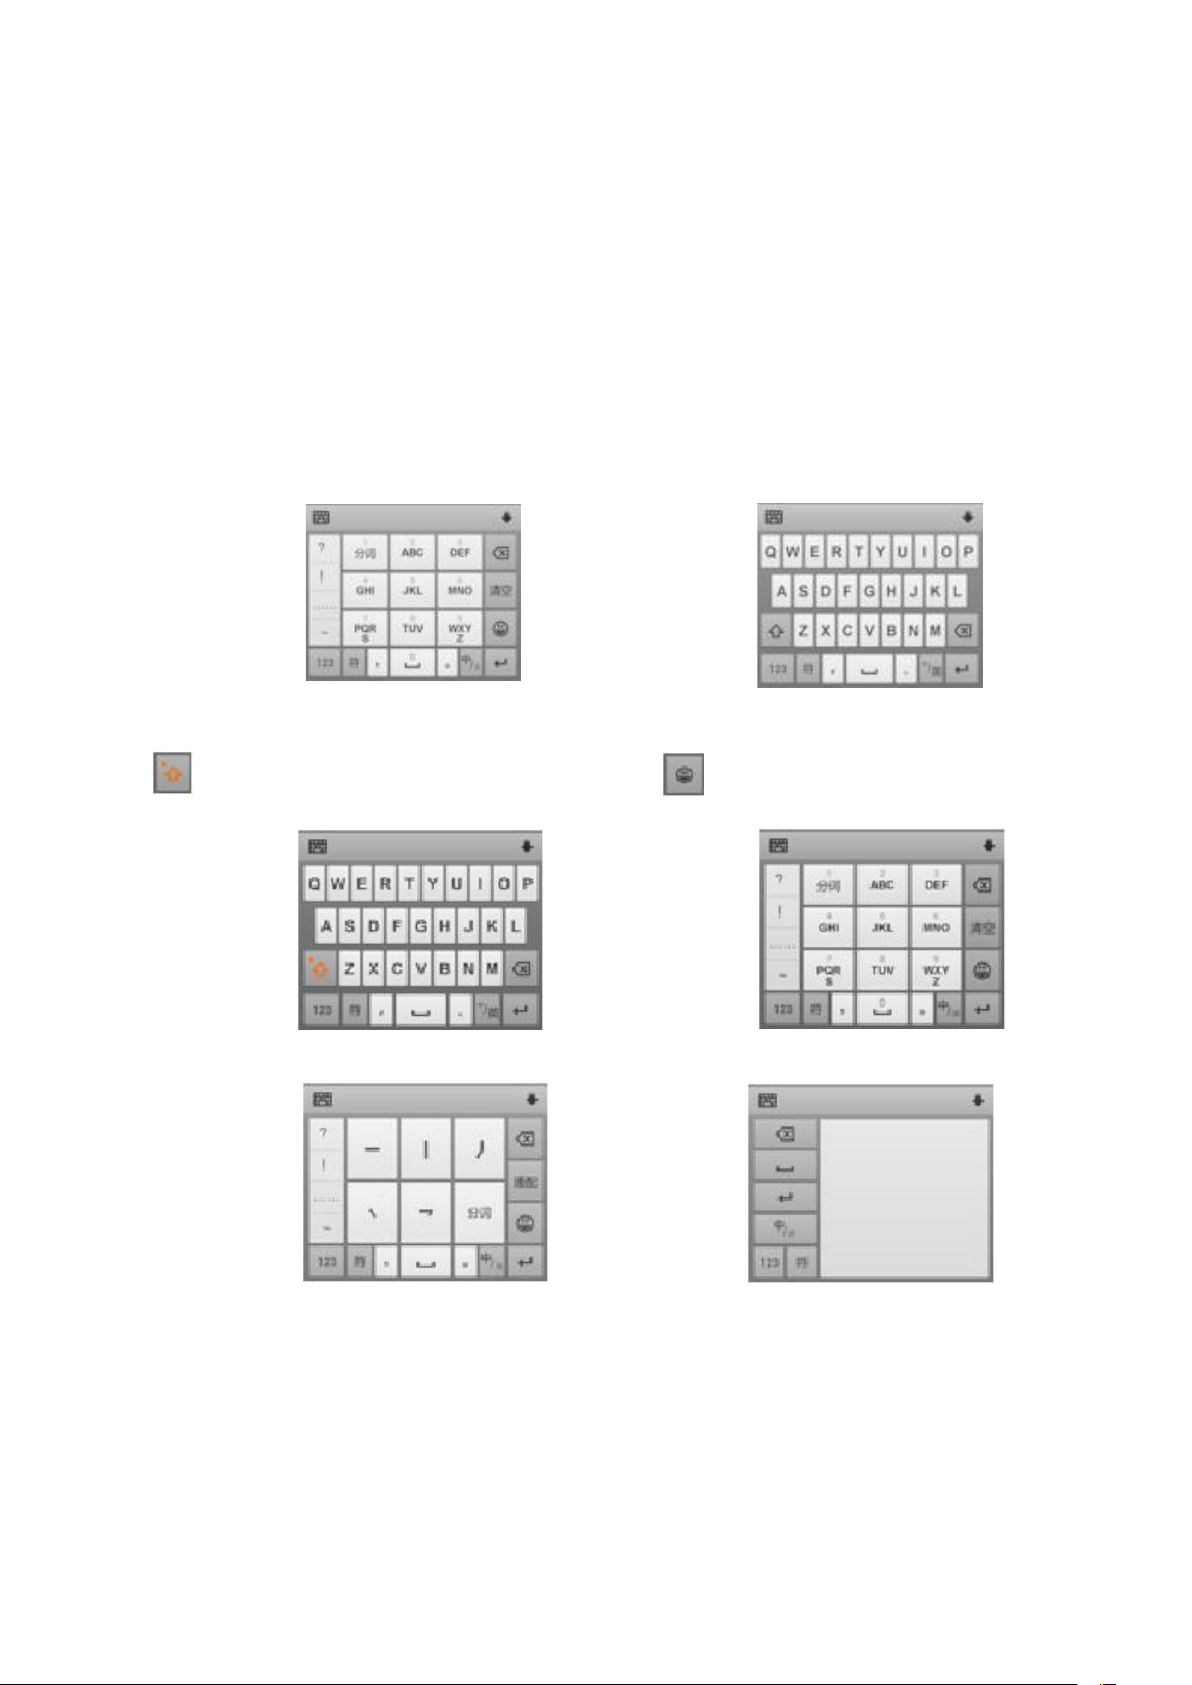
Below is an input method using example,specific interface layout
and operating mode depend on your selective input method.
Show keyboard
1.Click input box (like write message etc.)tune out the
keyboard.Now the input box with cursor flashing.
2.Click the key on the input method keyboard.
Input spelling Pin Yin Input English
Click, switch to English Capital Letters Input number symbols,click
Support stroke input. Support handwriting.
If you want to change the default input method, can slide down the
notification bar ,click “select input method ”to select different input
methods ,or you can long press the keyboard to select the input
method.
Page 15
15
V. Detailed Functions Introduction
RFID Application
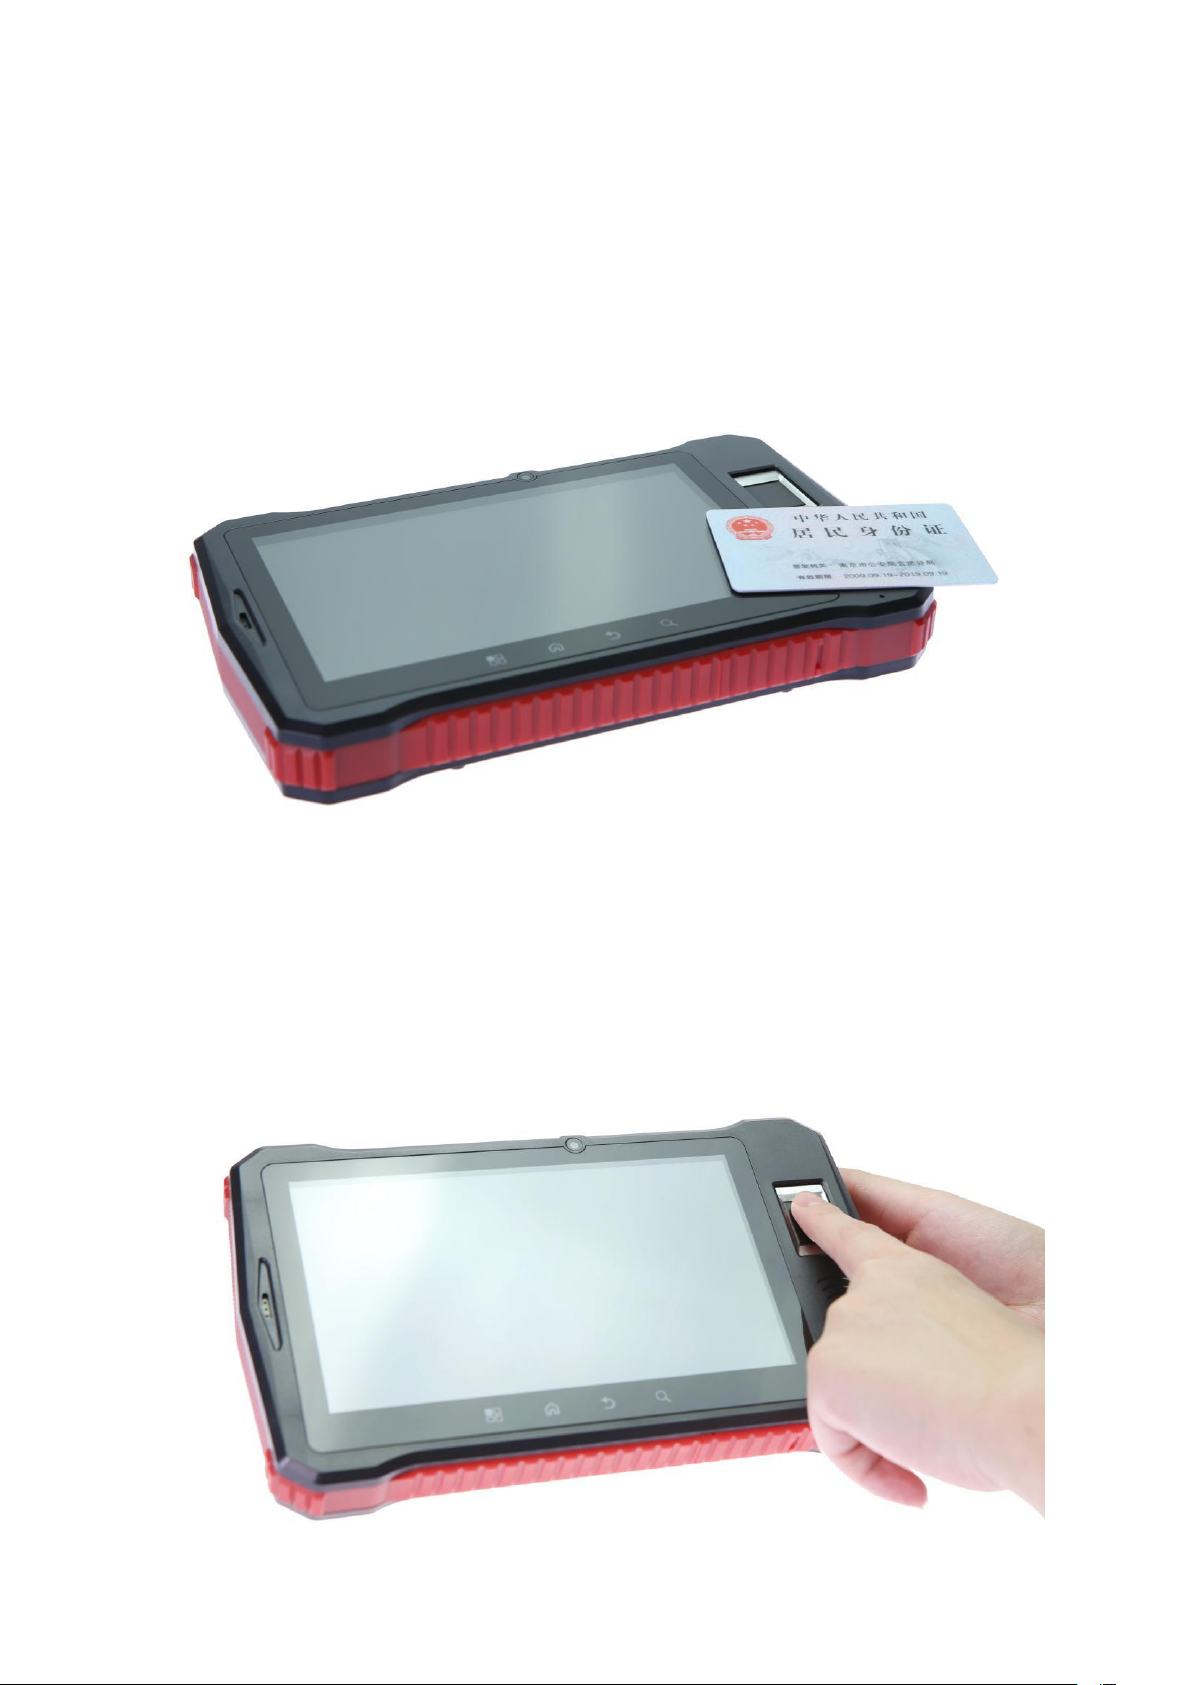
As indicated below, please put the card in card reading area, and
then read the card information by the app you use.
*Fingerprint collection application
As indicated below, put the finger in fingerprint area, start the
fingerprint collection.
Page 16
16
UHF RFID tags reading
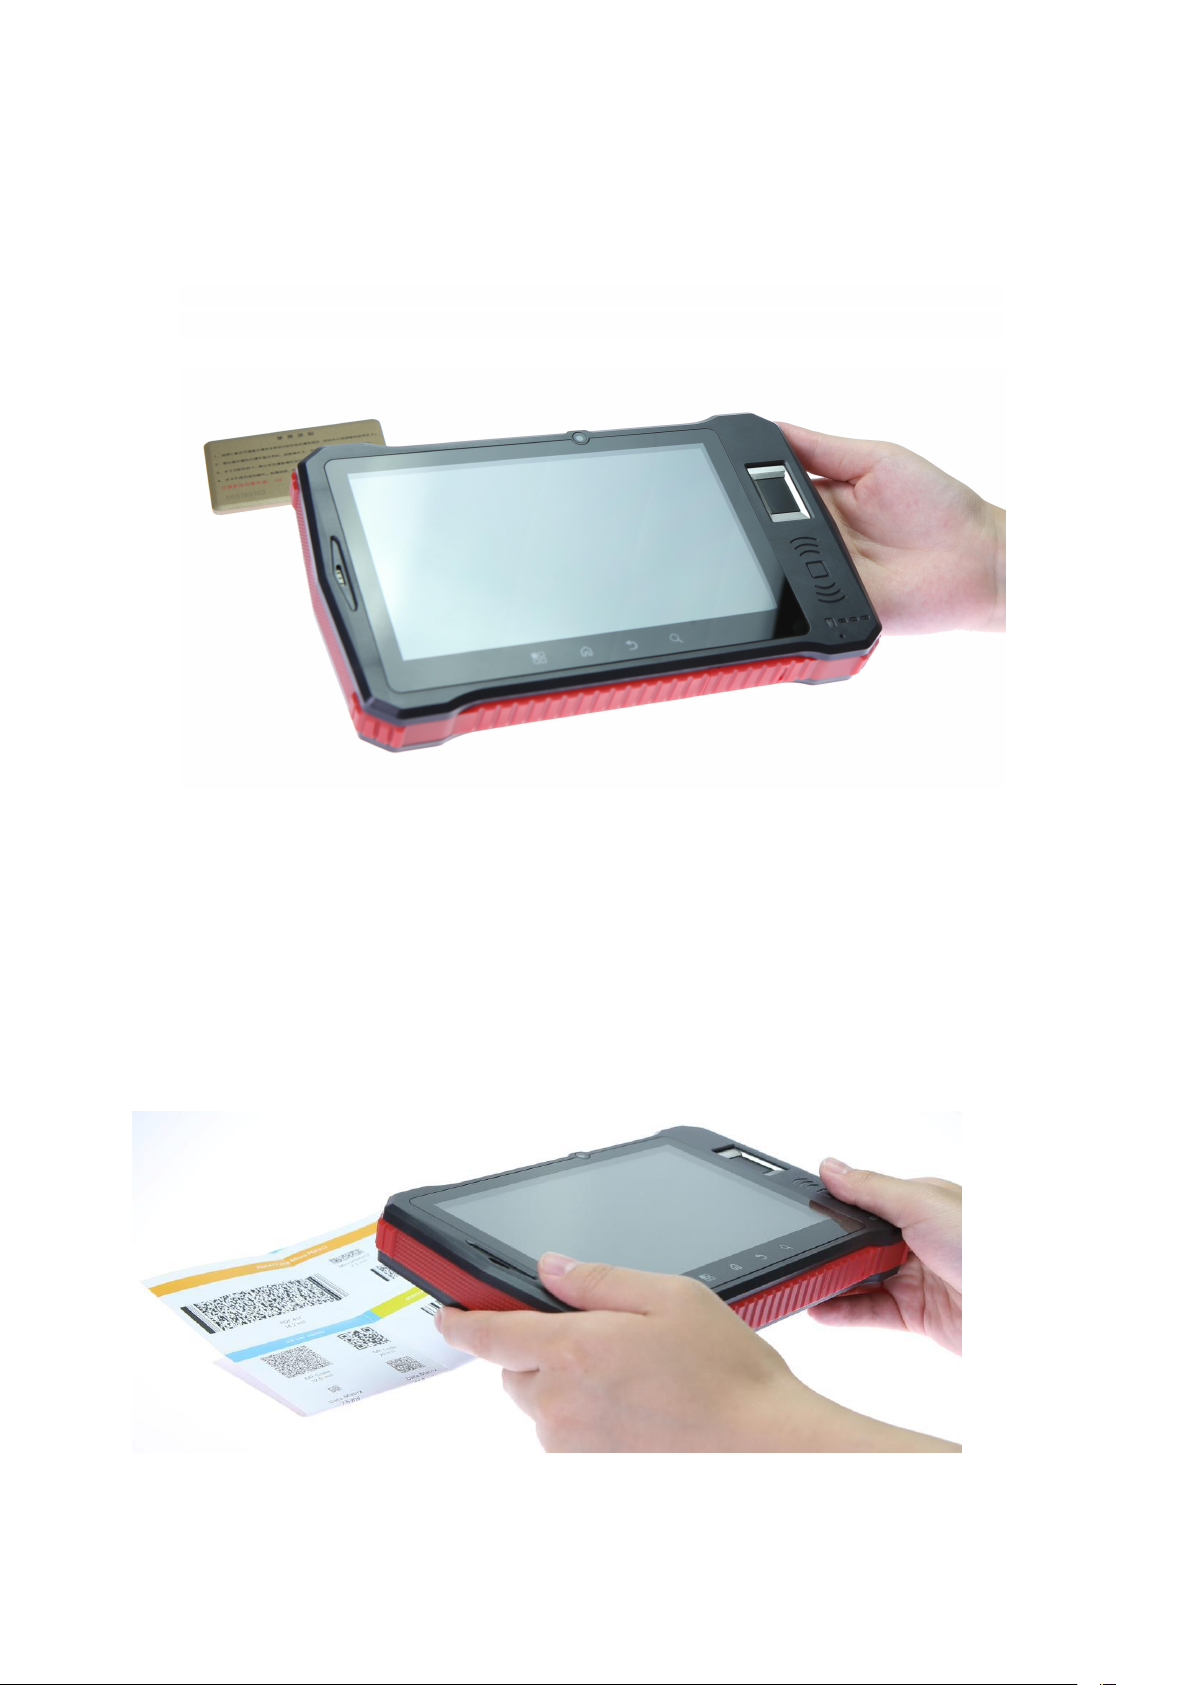
Please put UHF RFID tags in the antenna inductive area to read, as
the image below.
2D bar code scanning
Please put 1D/2D bar codes in the scanning head area to do the
scanning, as the image below.
Page 17
17
Photo or Video
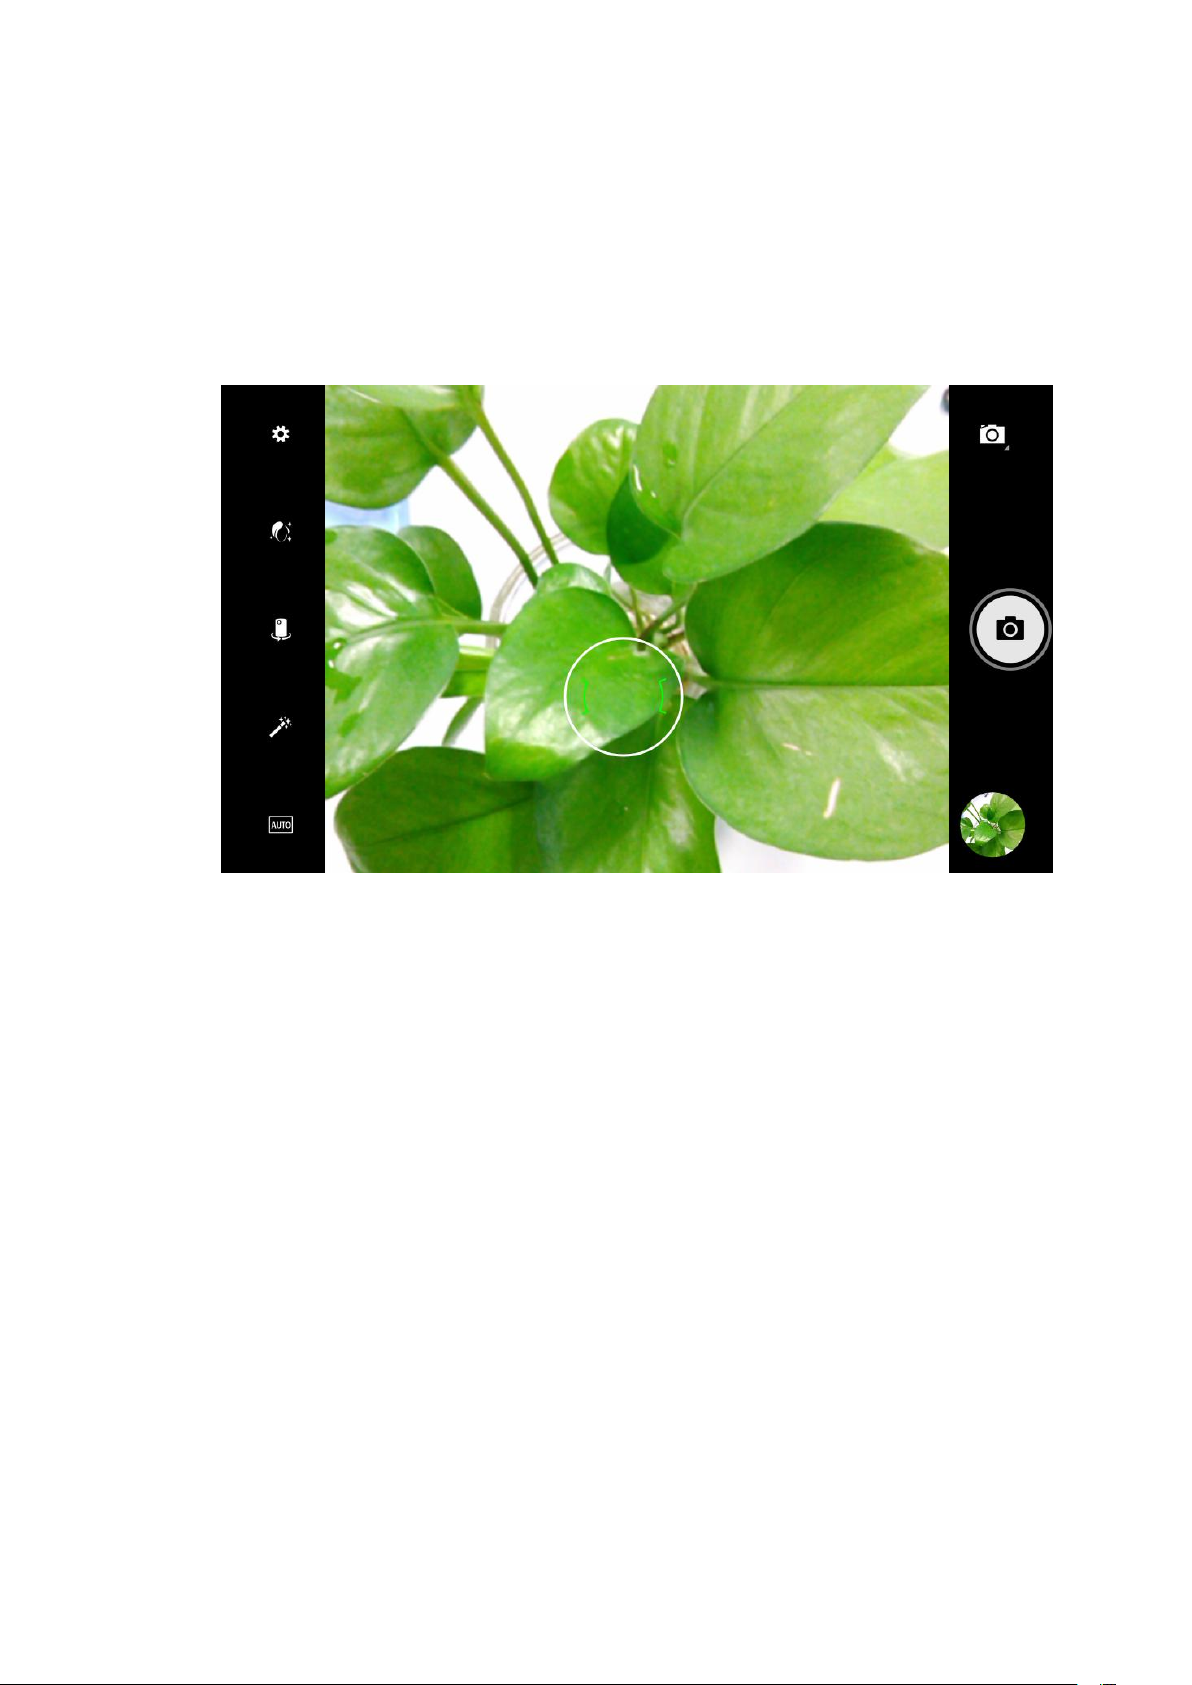
Open the camera application to take high quality photos,
comprehensive picture mode supported. Shooting video only need
to switch to video mode in the menu, high quality video recording
supported.
Copy files
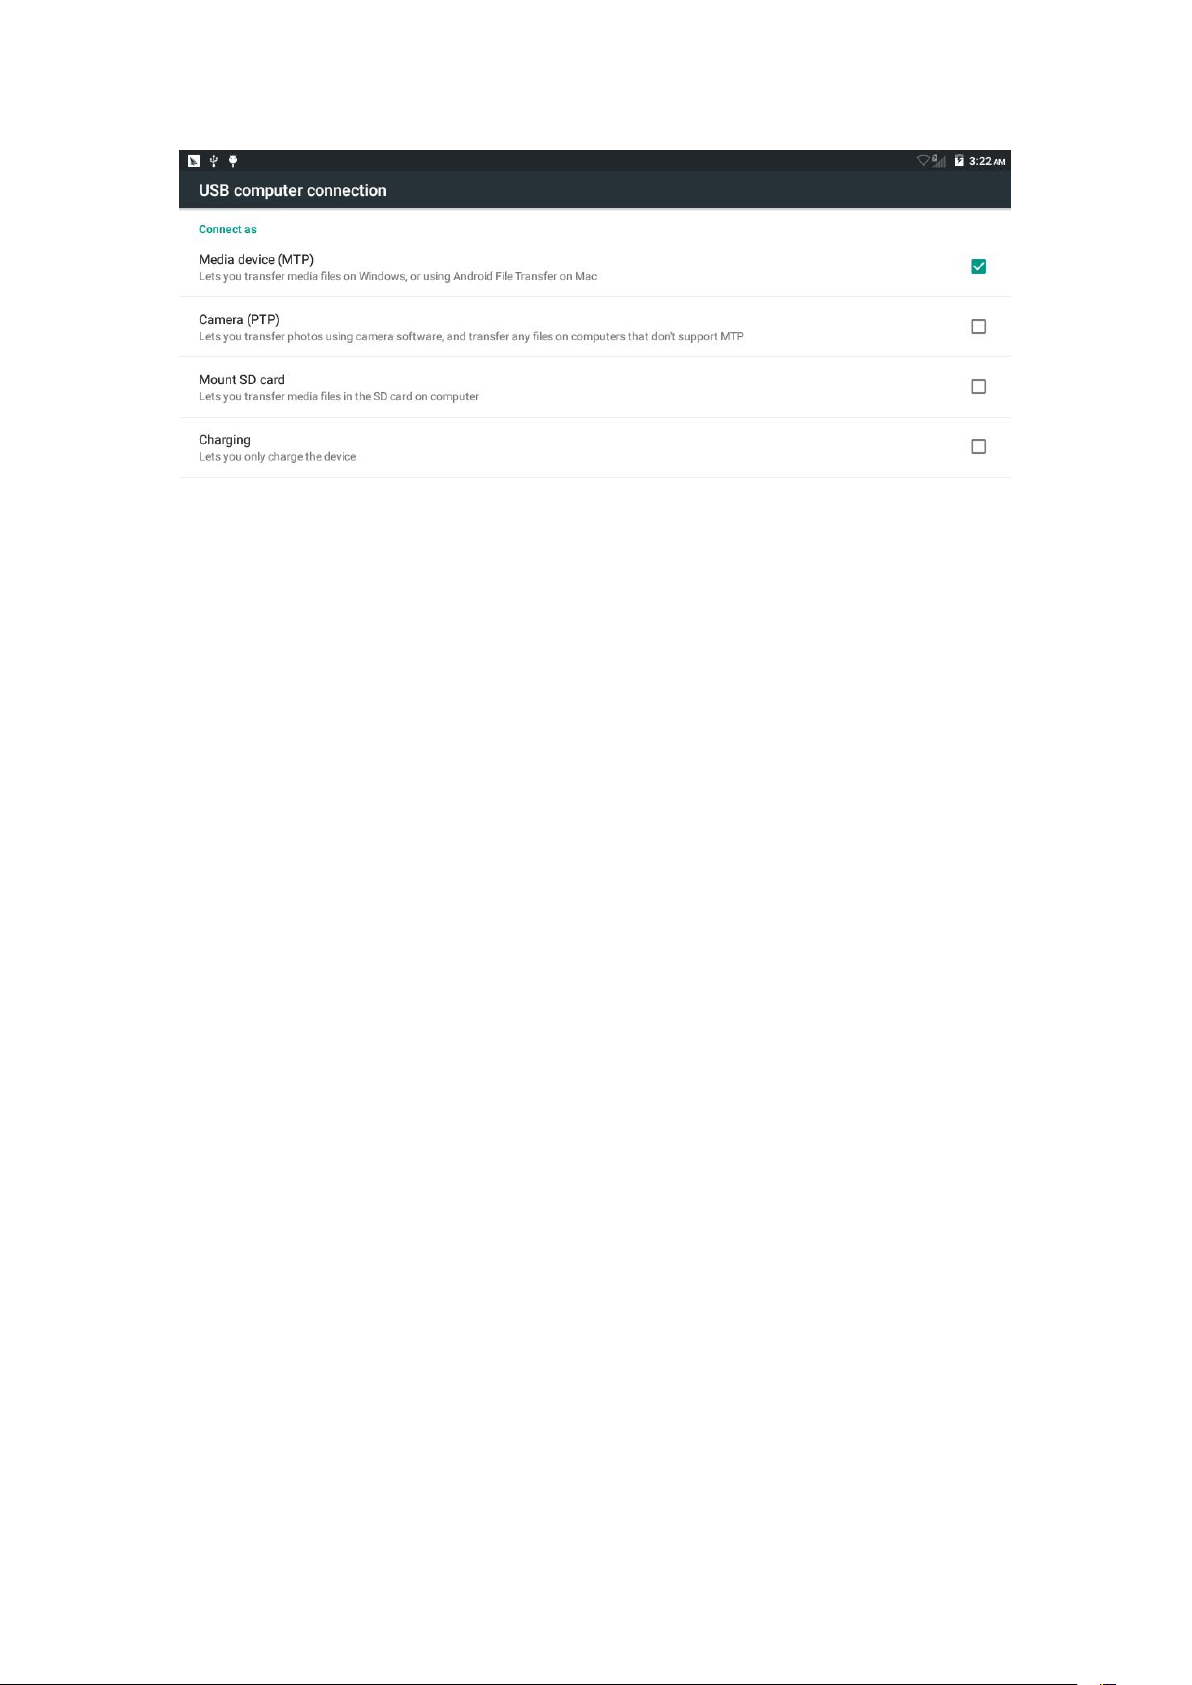
When your device connected to the computer through the USB
cable, check the notification bar to see the note of USB connected,
click and enter in to select to open the USB storage device, then
you can copy files between computers and equipment.
Check it in “ES file browser”.
Page 18
18
Easy tools
Alarm clock
Alarm clock as your good helper of time reminder, supports
repeated reminders, custom tags and alarm when shut off.
Tape recorder
Tape recorder helps you to store quickly the voice recording,
supports to save files in amr format.
Calendar
In the calendar, you can view the date and holidays, supports to
show the lunar calendar.
Others
The use method of Android operating system is the same as
android devices on the market.
Page 19

19
VI. Simple Troubleshooting Instructions
Perhaps there will be some problems you may face during using
process, following are some troubleshooting solutions. If you still
have questions after operating as the following ways, please
contact technical support or local dealer.
→Solution for power on failure:
Solution:Power on for the first time (after upgrade or restore factory
settings) ,it needs initialization operation, boot time will be longer, it
may be mistaken for not boot.
(2) Reason: Excessive discharge
Solution: If power on failure is caused by excessive discharge ,
remove the battery, and connect the PDA directly to the charger to
see whether it works, if succeeds, charging the battery for more
than 30 minutes, then power on.
→Solution for touch screen out of work:
(1) Reason: oil or water on the hands or touch screen:
Solution: wipe the surface of PDA with a dry cloth , click the power
on button twice (lock screen button), so that the touch screen to
recalibrate itself.
(2) Reason: when plugging charger , caused by the same
frequency between noise signal of charger and capacitive touch
screen.
Solutions:
1) Remove charger;
2) Click power on button twice;
3) Remove charger, take out the battery, use standard charger.
→Solution for shutdown or restart automatically:
Reason: some unstable software installed or battery loose
subjected to vibration,
Solution: restore factory settings or uninstall the software which is
not compatible with the PAD.
(1) Reason: Misunderstanding
Page 20
20
→Solution for short standby time
Solution:
1) Fully charged before use, start power saving mode.
2) Turn off following functions when not necessary:
WLAN,bluetooth,GPS or data service.
3) To save power ,close the software which isn’t used. Methods: Go
to Settings -> Applications -> running services, close appropriate
program .
→Solution for PAD turns hot when charging or using.
Reason: When surfing Internet, RF PA(power amplifier); playing
games occupies a lot of CPU , CPU running at a high frequency,
power consumption is large, the PDA will give out a certain amount
of heat, it’s a normal phenomenon.
Solution:
1)Please avoid charging or long use in direct sunlight environment.
2) Turn off background programs which aren’t used.
3) Better not to play game while charging.
4) Update to the latest version in time.
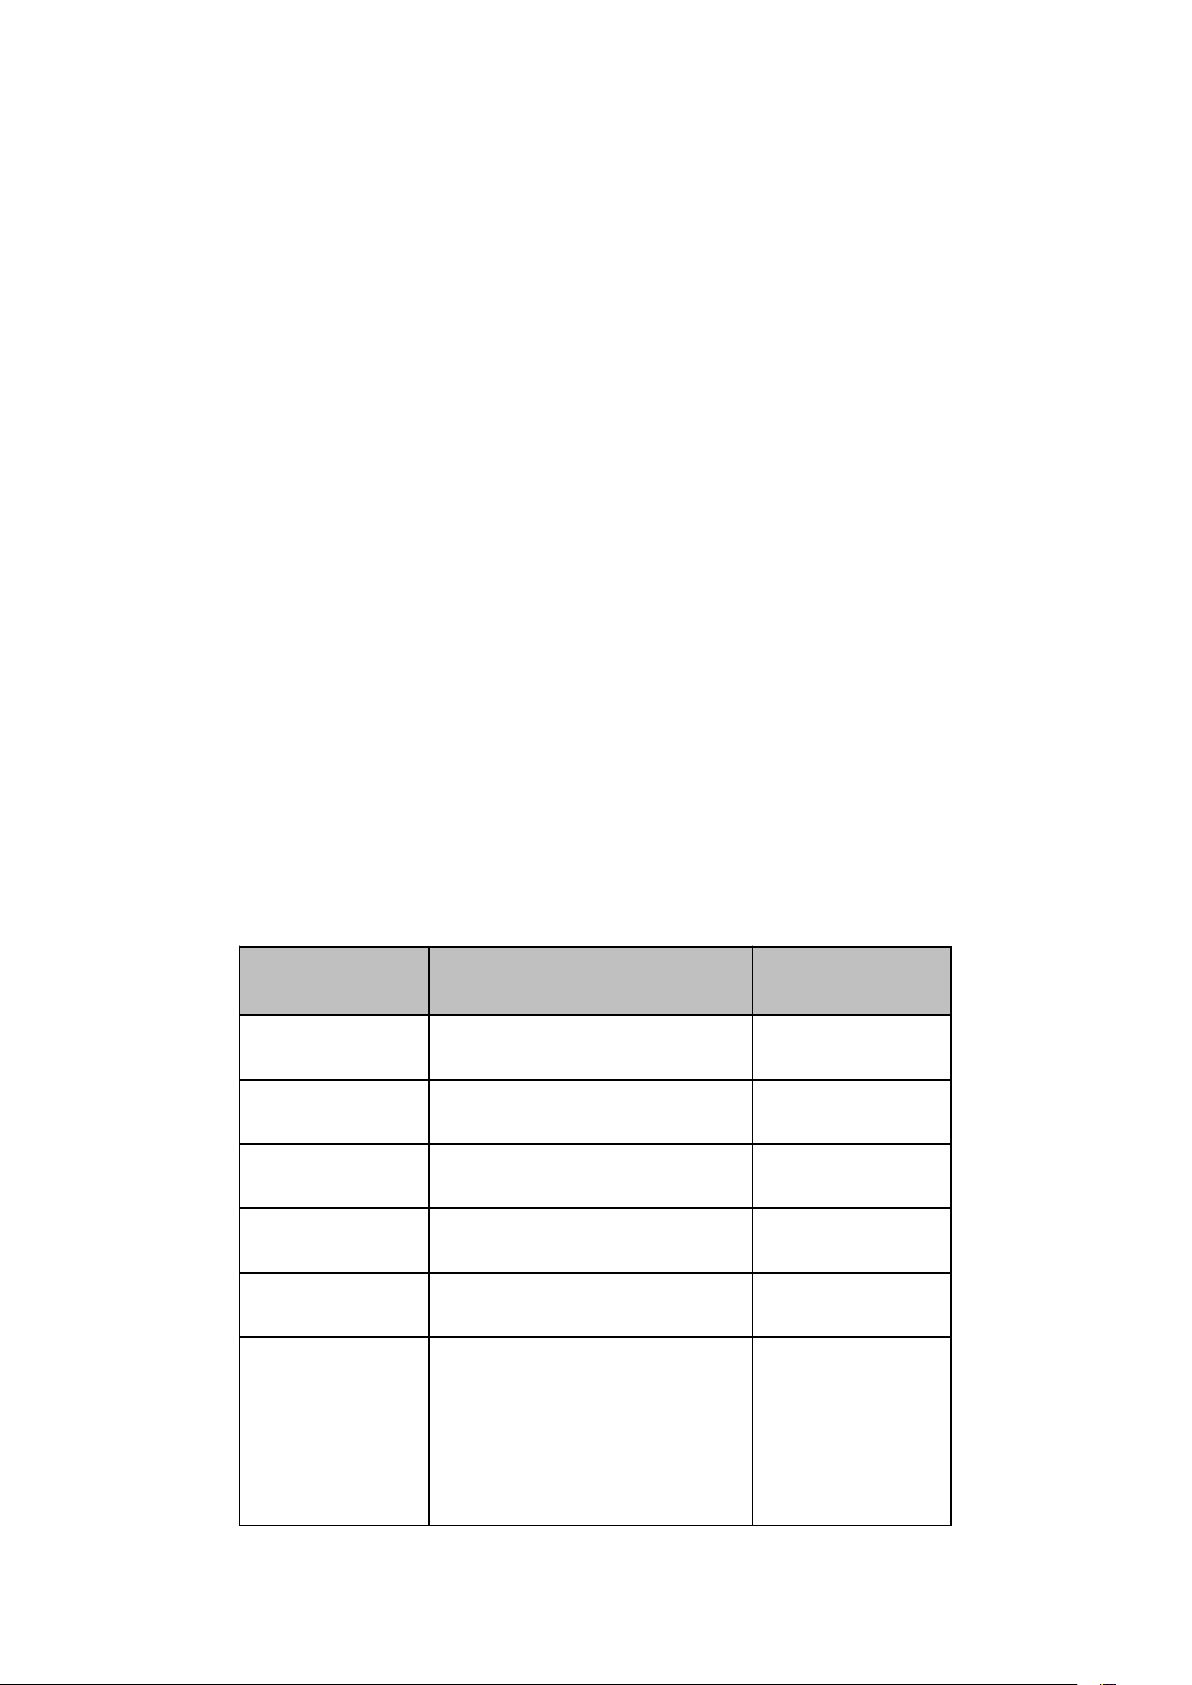
Packing list
:
Serial Nº
Component
Quantity
1
Smart PDA
1
2
Charger
1
3
Battery
1
4
USB cable
1
5
User manual
1
6
Certificate of
Approval/Warranty
card
1
 Loading...