

Page 1
User Manual
V2.1
GBR
Page 2
PAGE
2OF37
MANUFACTURER AND CUS
TOMER SERVICE:
CORETEC
-
SERVICE GMBH
ROBERT
-
BOSCH
-
STR. 4B
35440 LINDEN
GERMANY
PHONE: +49
-
6403
-
60984
-0FAX: +49
-
6403
-
60984
-44E-MAIL: INFO@CORETEC
-
SERVICE.DE
HOMEPAGE: WWW.TRAINE
R1000.COM
IMPORTANT INFORMATION
This device is not suitable for use on humans.
It is designed for training purposes only and must be kept unmistakable separate from fully operative
defibrillators.
Responsibility regarding
provision of information
Customers are responsible for ensuring that the relevant people within their organisation are provided with access to
the information and the general safety instructions and warnings provided in this manual.
Use and
purpose
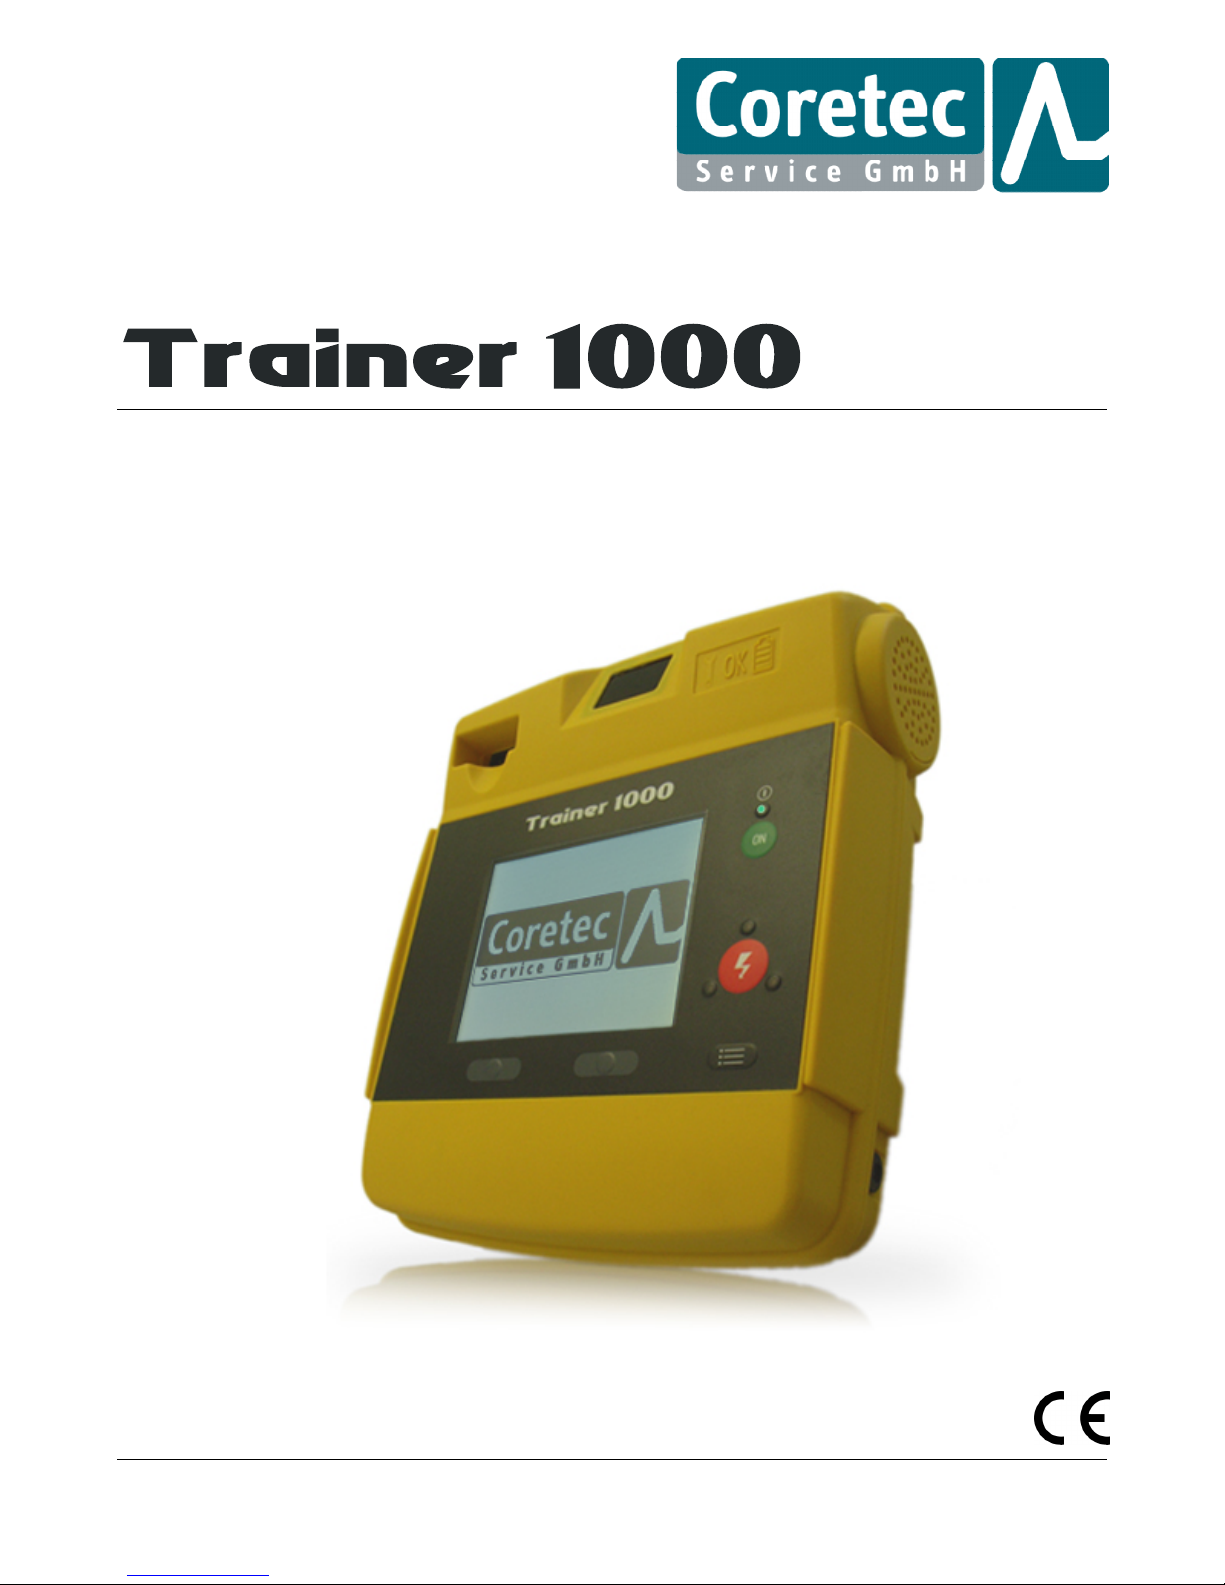
The
is a simulation and training device for realistic Advanced Life Support training on a
defibrillator (AED). Due to the similarity of its design and operating elements, the Trainer 1000 is particularly
suitable for training and instructing peo
The
does not deliver energy through adhesive electrodes, which means that it does not pose a risk
to less
-
experienced trainees. At the same time, the Trainer 1000 can be used to simulate changes
state by using the AED Trainer’s IR remote control and intervene if the Trainer is used incorrectly.
USER MANUAL TRAINER
ple in the use of the Lifepak® 1000 series defibrillators.
1000
in a patient’s
Page 3

PAGE
3OF37
PHONE: +49
-
6403
-
60984
-0FAX: +49
-
6403
-
60984
-44E-MAIL: INFO@CORETEC
-
SERVICE.COM
HOMEPAGE: WWW.TRAINE
R1000.COM
CONTENTS
Trainer 1000 AED Training System Quick Start Guide
................................
................................
................................
......5Defibrillation
................................
................................
................................
................................
................................
.....7Operating Modes
................................
................................
................................
................................
..............................
8
Safety instruction
s
................................
................................
................................
................................
............................
9
Symbols
................................
................................
................................
................................
................................
.......11Operating elements, controls and connections
................................
................................
................................
..............
13
Preparing the Trainer 1000 for use
................................
................................
................................
................................
.16Unpacking and checking components
................................
................................
................................
........................
16
Charging the battery
................................
................................
................................
................................
...................
16
Starting a training session
................................
................................
................................
................................
...............
17
Verifying or creating an AED Trainer configu
ration
................................
................................
................................
....17Connecting the training electrodes to the Trainer 1000
................................
................................
............................
17
Turning the unit On / Off
................................
................................
................................
................................
............
17
Attaching the training electrodes to the mannequin
................................
................................
................................
.18Using the remote control
................................
................................
................................
................................
................
19
Setup
mode
................................
................................
................................
................................
................................
.....21Accessing setup mode
................................
................................
................................
................................
.................
21
GENERAL SETTINGS
................................
................................
................................
................................
.....................
22
AED MODE settings
................................
................................
................................
................................
.....................
23
MANUAL MODE settings
................................
................................
................................
................................
.............
24
SERVICE MODE settings
................................
................................
................................
................................
..............
24
TRAINER SETTINGS menu
................................
................................
................................
................................
............
25
Setting options: CPRmax menu
................................
................................
................................
................................
...26Configuring the energy protocol
................................
................................
................................
................................
.28Changing settings for CUSTOMER
................................
................................
................................
...............................
28
Adjusting CPR Time
................................
................................
................................
................................
.....................
28
Turning AUTO A
NALYSE on/off
................................
................................
................................
................................
...
29
Page 4
PAGE
4OF37
Maintenance
................................
................................
Cleaning and maintaining the
Battery
................................
................................
Disposal
................................
................................
Potential errors and remedies
................................
Order
................................
................................
Models
................................
................................
Accessories
................................
................................
Certification and te
chnical data
................................
................................
................................
................................
................................
................................
................................
................................
................................
................................
................................
................................
................................
................................
................................
................................
................................
................................
................................
................................
USER MANUAL
................................
...30................................
30
................................
.........
30
................................
.......30................................
....31...............
33
................................
........
33
................................
..34................................
......
35
Page 5
PAGE
5OF37
PHONE: +49
-
6403
-
60984
-0FAX: +49
-
6403
-
60984
-44E-MAIL: INFO@CORETEC
-
SERVICE.COM
HOMEPAGE: WWW.TRAINE
R1000.COM
INFORMATION ON USING
THE TRAINER 1000 FO
R TRAINING PURPOSES
The Trainer 1000 is designed only for training people in the use a
defibrillator on adults and children over the age
of 8, weighing more than 25 kg, and using standard training electrodes (black connector).
This ensures that trainees are taught which electrodes to use on which patients right from the outset of their
train
ing.
TRAINER 1000 AED
TRAINING SYSTEM
QUICK START GUIDE
QUICK START
Turn the AED Trainer on
Press the PAUSE button on the remote control.
Select the required shock protocol from the table below and press the corresponding button on the remote
control.
Press PAUSE again in order to verify your choice. The AED Trainer will turn itself off automatically.
You can now start the training session. Use the remote control to chose a particular problem situation. Please
refer to the rear of the Quick Start Guide
for more information.
Once the AED has been switched on, it will display the message CONNECT ELECTRODES. Connect the training
electrodes and press the ELECTRODES button on the remote control to then proceed with an analysis.
Please note: The AED Trainer w
ill automatically open the shock protocol that was used last. Please refer to the
training system user manual for further information.
Remote control
button
AED Trainer shock protocol
Shock sequence
ECG sequence
F1
Fixed sequence no. 1
SSSSN
FFFFSr
F2
Fixed sequence no. 2
NNNN
AAAA
F3
Fixed sequence no. 3
SSNNNN
FFAASrSr
F4
Fixed sequence no. 4
SSNSSN
FFAFFSr
F5
Fixed sequence no. 5
SNNN
FAAA
C1*
Customer (Special)
* (S or N)
*( F or A)
S: Shock Advised
N: No Shock Advised
Sr: Sinus
Rhythm
F: Fibrillation
A: Asystole
*Customer
-
specific settings can be changed in setup mode (see user manual).
Page 6
PAGE
6OF37
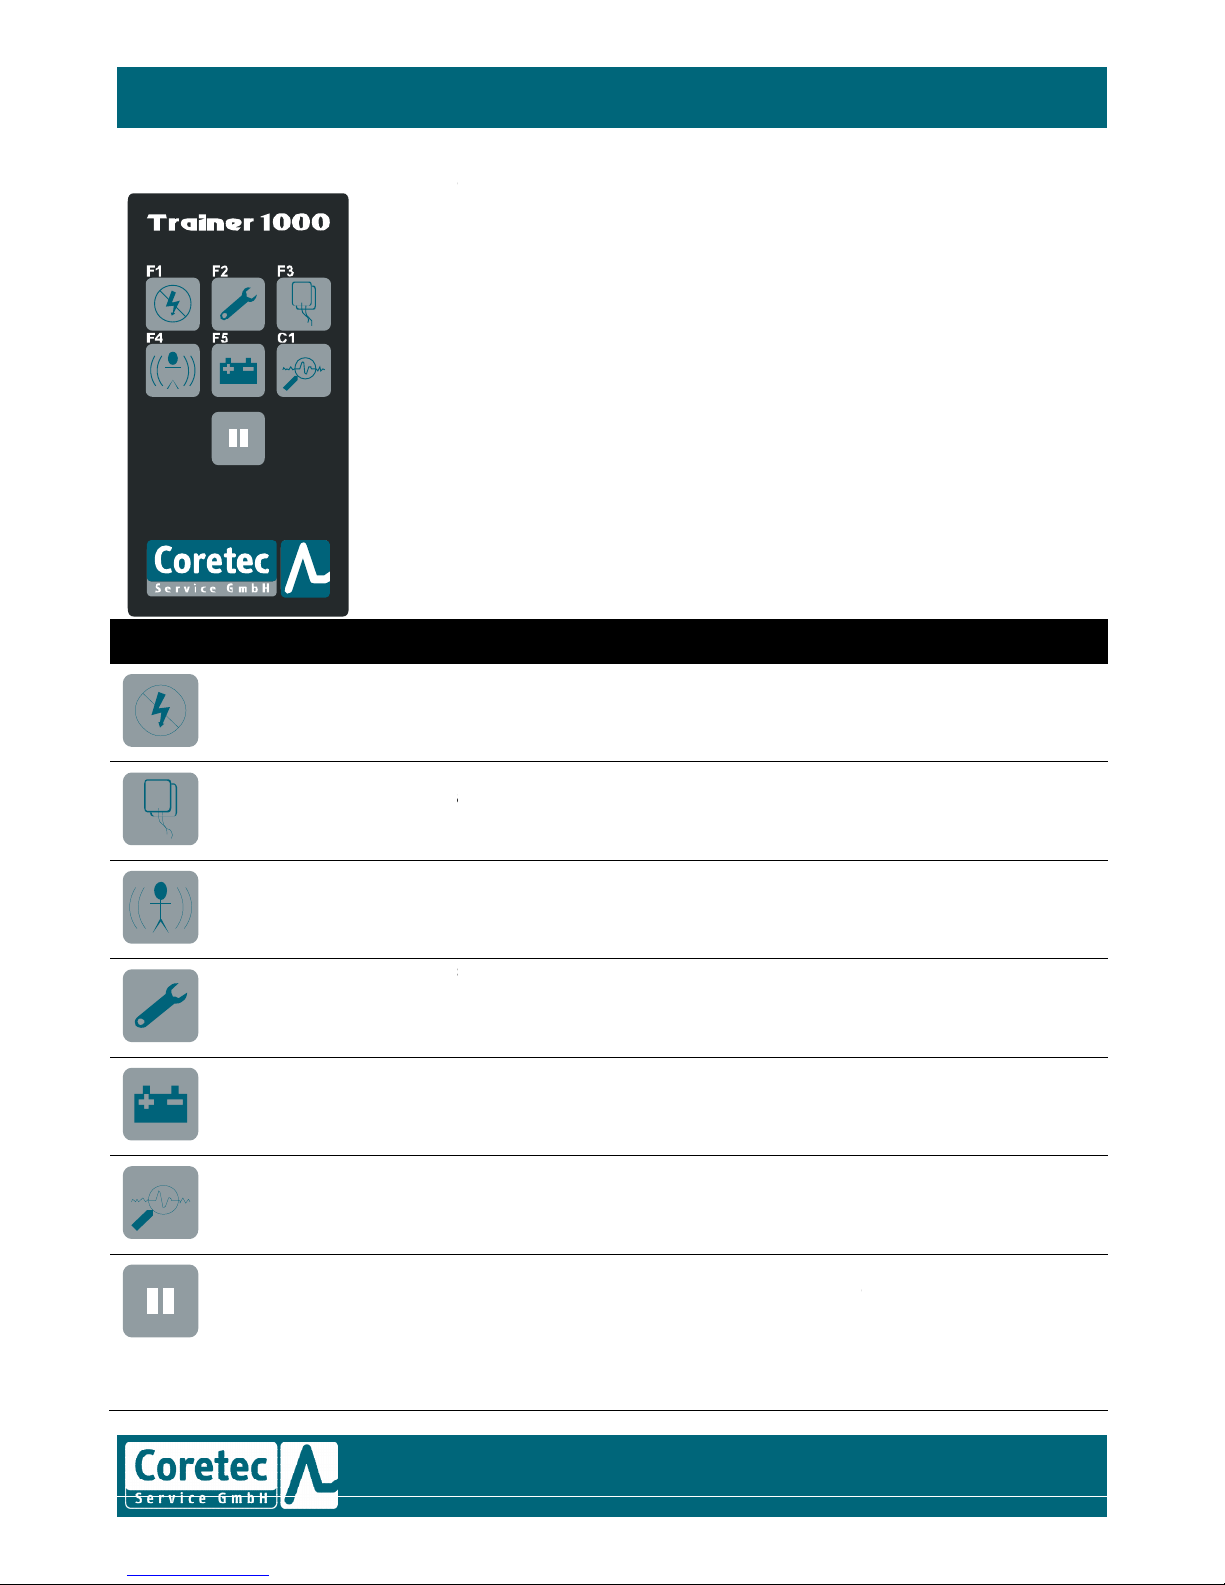
Remote control buttons and functions
Button
This button
changes all shock decisions to NO SHOCK ADVISED. This function can only be used
when the message PRESS FOR ANALYSIS or ANALYSIS IN PROGRESS, STAND CLEAR! is being
displayed.
By pressing this button you simulate the fitting of the training electrodes to the mannequin.
Pressing the button again simulates disconnection of the electrodes.
Turn the MOTION SIMULATION function On or Off. This functio
Press once to activate service alert and to display the message CALL CUSTOMER SERVICE. To
cancel, turn off the AED Trainer or press button again.
Press once to activate LOW BATTERY alert.
This button is disabled. Intended only for use on Trainers with ECG mode.
PAUSE. Can be pressed at any time to stop any
resume operation. Press F1, F2, F3, F4, F5 or C1 for changing the shock protocol while the
Trainer 1000 is set to PAUSE. Press PAUSE again to verify the change and to turn the AED
Trainer off.
n is only available during analysis.
Press again to deactivate.
of the Trainer 1000’s functions. Press again to
USER MANUAL
Page 7
PAGE
7OF37
PHONE: +49
-
6403
-
60984
-0FAX: +49
-
6403
-
60984
-44E-MAIL: INFO@CORETEC
-
SERVICE.COM
HOMEPAGE: WWW.TRAINE
R1000.COM
DEFIBRILLATI
ON
Defibrillation is a recognised method for treating certain, potentially fatal, cardiac arrhythmias, i.e. abnormal heart
beating. Defibrillation consists of delivering a therapeutic dose of electrical energy to the affected heart with a
defibrillator.
The
from Coretec
-
Service is a training and simulation device for the work
performed with an automated external d
efibrillator (AED). The Trainer 1000 is not capable of detecting cardiac
arrhythmias or of delivering a defibrillation shock, but is a traini
ng device only that allows potential users to be
trained in the use of a defibrillator by simulating corresponding sounds and visual indicators.
Defibrillation is only one of the medical treatment methods available for resuscitating patients with shockabl
e
cardiac arrhythmias. Depending on the particulars of a case, patients might also require other treatment, such as:
Cardiopulmonary Resuscitation (CPR)
Supplemental oxygen
Medication
The success of a resuscitation attempt also depends on the length of t
ime that elapses between the onset of a
cardiac arrest during which no blood is circulated (e.g. in ventricular fibrillation or pulseless ventricular
tachycardia) and defibrillation.
According to the American Heart Association (AHA), the following is criti
cal to
survival from sudden cardiac arrest:
Early access to patients and identification of the problem
Early CPR by first responders or bystanders
Early defibrillation
Early advanced treatment by emergency medical services (EMS)
A patient’s
physiological state may also affect the likelihood of successful defibrillation. Failure to resuscitate a
patient is therefore not a reliable indicator of the performance of the resources, equipment or rescuers involved in
the resuscitation attempt. Patien
ts will sometimes exhibit a muscular response (such as jumping or twitching)
during energy transfer. The absence of such a response, however, is not a reliable indicator of the actual energy
delivered or the defibrillator’s performance.
Successful defibri
llation largely depends on first aider’s confidence in administering it
-
which is why regular and
repeated theoretical and practical training in the use of defibrillators can save lives.
This is what the
is designed to help you with.
Page 8
PAGE
8OF37
OPERATING MODES
The Trainer 1000 can be used to simulate the following operating modes:
AED mode (with activatable and de
-
activatable Defi
Manual mode (with Defi
-
electrode discharge derivation)
ECG monitoring mode (requires Upgrade Kit); see
Setup mode
AED MODE
As with real live automated external defibrillators, the
issues specific instructions when detecting shockable rhythms or non
(d
efibrillation) to the simulated patient requires the active involvement of the person operating the defibrillator.
MANUAL MODE
This function allows expert users to decide on administering defibrillation shocks on the basis of the ECG analysis
derived
through the electrodes.
ECG MONITORING MODE
ECG mode simulates the monitoring of the electrical activity of a patient’s heart using conventional ECG electrodes
that are attached using snap fasteners. The readout provided on the screen represents the con
lead II. The Trainer 1000 does not issue any spoken instructions in this mode. If the CPPS (Continuous Patient
Surveillance System) has been activated (setup menu), the user will be prompted to check the patient and change
to defibrilla
tion electrodes if a shockable cardiac rhythm is detected.
SETUP MODE
Setup mode is used to select the relevant settings for specifying how the
-
electrode derivation)
separate user manual
evaluates the selected ECG rhythms and
-
shockable rhythms. The delivery of shocks
USER MANUAL
solidated data from
is to be operated.
Page 9
PAGE
9OF37
PHONE: +49
-
6403
-
60984
-0FAX: +49
-
6403
-
60984
-44E-MAIL: INFO@CORETEC
-
SERVICE.COM
HOMEPAGE: WWW.TRAINE
R1000.COM
SAFETY INSTRUCTIONS
SAFETY
-
TERMS
This manual and the
make use of the following terms:
Hazard:
Immediate hazard that will result in serious injury or death.
Warning:
Hazard or unsafe practice that could result in serious personal injury.
Caution:
Hazard or unsafe practice that could result in minor pers
onal injury, product damage or property
damage.
WARNING!
Electric shock Hazard.
The
is powered by electricity. If not used properly and as described in these instructions, this
electrical energy may cause serious injury and death. Users must be thoroughly familiar with these operating
instructions and all of the Trainer 1000’s operating
controls, indicators, connections and accessories’ functions
before operating the device.
Electric shock hazard.
Do not disassemble the
. It contains no responder
-
serviceable components and may carry
dangerous voltages. Always contact Customer Services f
or repairs.
Fire and electric shock hazard.
Do not immerse any part of the
in water or other fluids. Avoid spilling any fluids onto the device
and its accessories. Do not clean with ketones or other flammable agents. Unless specified otherwise, do not
a
utoclave or sterilise the
. Clean only using a slightly damp cloth and mild detergent.
Fire and explosion hazard.
Do not use defibrillators in the presence of flammable gasses or anaesthetics. Particular care must be taken when
using a defibrillator in c
lose proximity to sources of oxygen (e.g. anaesthesia bags or respirator hoses). Turn off
gas source or remove source before defibrillation. Please instruct users to observe this safety precaution before
use of the
; observe whenever possible for training
purposes.
Possible electrical interference.
The use of cables, electrodes or accessories not explicitly specified for use with this training unit can affect the
Trainer 1000’s performance. Do not use any of the
’s accessories with fully operational def
ibrillators that are
used to treat patients and vice a verse. The Trainer 1000 must only be used with the components and accessories
specified in this user manual.
Potential device failure.
Always carry the charger when taking the device to training event
s and courses held outside your premises in
order to prevent the battery from running out of power.
Page 10

PAGE
10OF37
WARNING!
Potential device malfunction.
The use of cables, electrodes or batteries from other manufacturers can cause the Trainer 1000 to malfunction,
and could void your warranty. The Trainer 1000 must only be used with the accessories specified in this user
manual.
Only use the original charg
er with the original cable supplied with the Trainer 1000 for connecting it to the mains.
Only use manufacturer
-
approved accessories.
Safety risk and potential device damage.
Monitors, defibrillators, training devices and their accessories (including tra
ferromagnetic materials. As with all ferromagnetic equipment, this training device must not be used in the
presence of the high electromagnetic fields generated by Magnetic Resonance Imaging (MRI) devices. The high
magn
etic field created by an MRI device will attract the device with a force sufficient to cause death or serious
injury to persons located between the two. This magnetic attraction may also cause damage to the device. Please
contact the MRI device’s manufactu
rer for more information. The device should, in general, never be exposed to
magnetic fields as, e.g. emanate from annual magnets commonly used in medicine. Any spaces designated ‘Do not
bring your credit card into this area’ are not suitable for setting u
Route the power cables in such a way that they are not at risk of being damaged. Never use damaged cables!
Damaged cables can cause fire and potentially fatal electric shocks.
CAUTION!
Potential device damage.
Incorrect or improper
mechanical use i.e. immersing into water or dropping, can damage the device. Do not
continue using the device following such an incident. Please contact Coretec
such a case.
Please note:
The Trainer 1000, the training
Please keep this manual for future reference.
ining electrodes and cables) contain
p the Trainer 1000.
-
Service GmbH’s technical services in
electrodes and cables do not contain any latex.
USER MANUAL
Page 11
Symbols
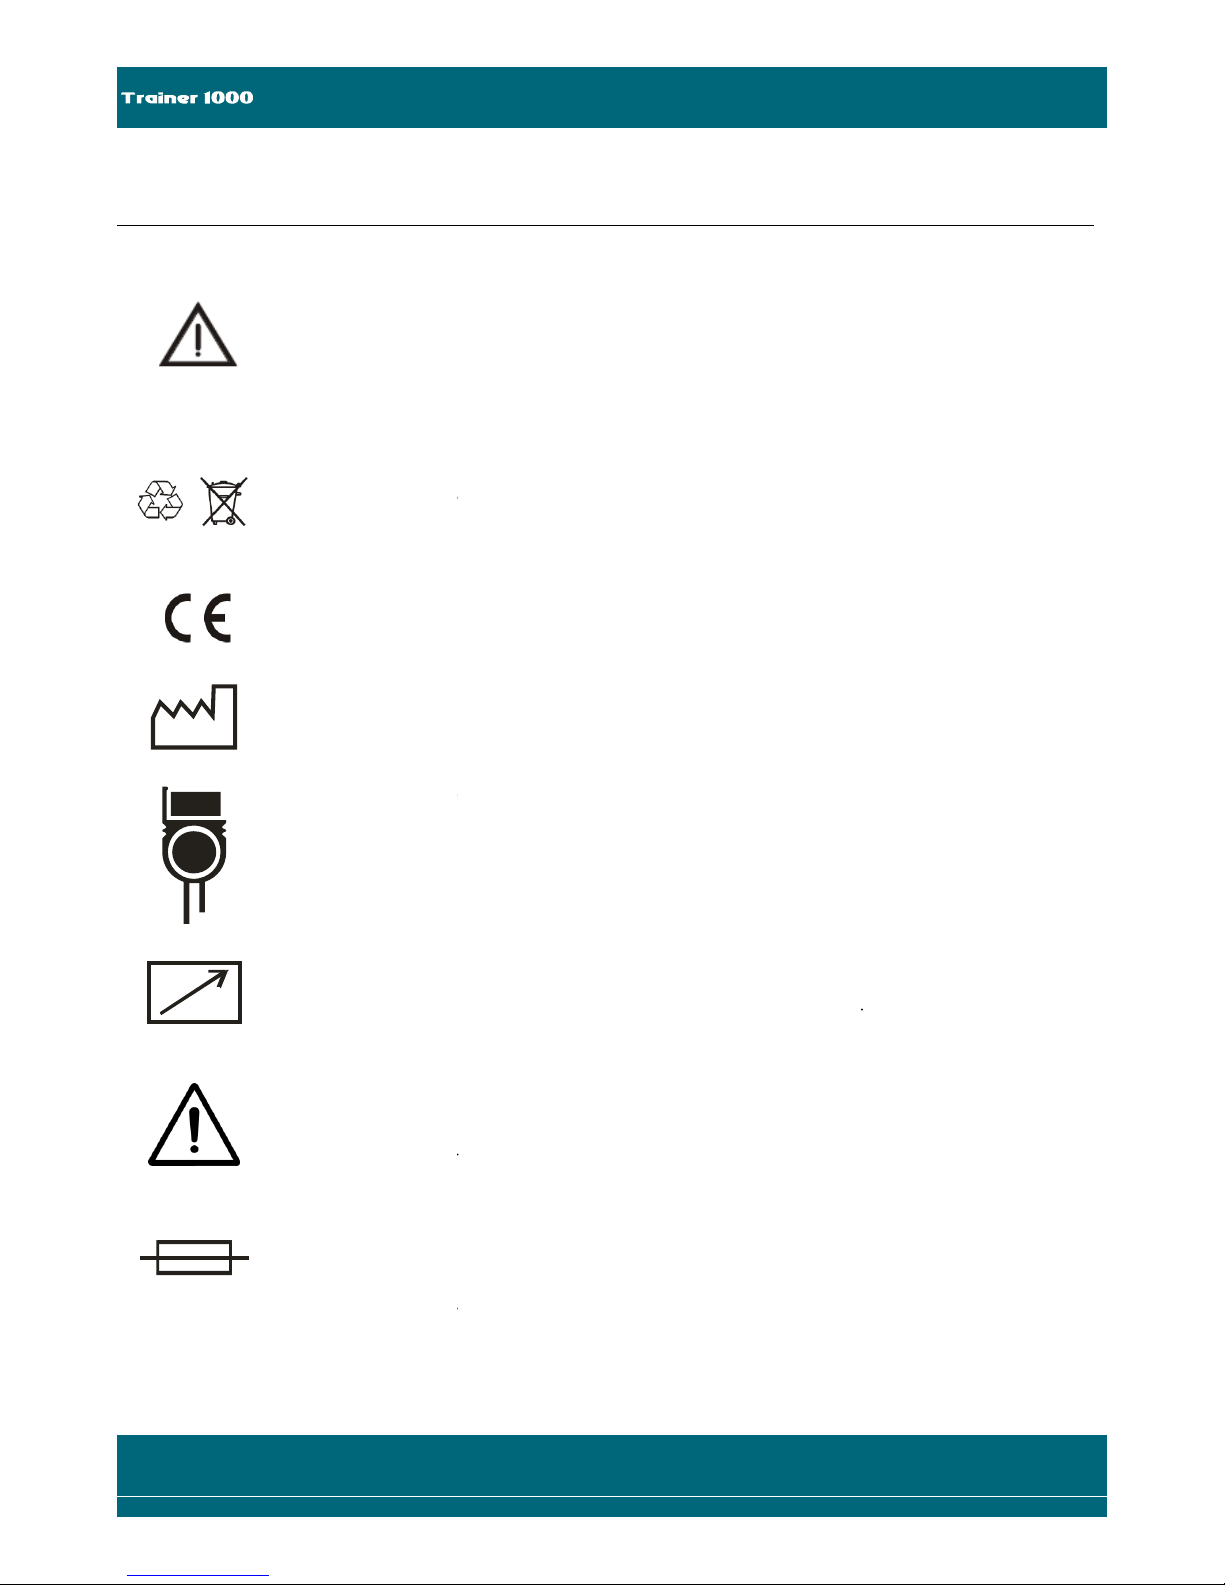
The Trainer 1000 features the following symbols with the following meanings:
Read the user manual
Read this user manual before using the Trainer
Observe the safety instructions.
Do not dispose of as household waste
Do not dispose of the Trainer 1000 and its packaging as
household waste.
CE Mark
CE certification provided by the manufacturer
Year of manufacture
The number behind the symbol is the year of manufacture.
Electrode connector symbol
This is where the electrodes are connected
Remote control symbol
This is where the cable for the remote control is connected and where the infrared receiver for
the
remote control is located.
CHARGER
ONLY !
Charger socket
Socket for the charger. Caution! Only use the supplied charger.
Do not connect a power supply plug or a different charger.
Fuse symbol
This is where the fuse is located and where it can be
Available as a spare part.
The fuse can also be replaced with a standard micro fuse with the following specifications:
G fuse pack 1.25A slow blow (250V) 20 x 5 mm
E-MAIL: INFO@CORETEC
HOMEPAGE: WWW.TRAINE
1000 for the first time.
replaced.
PAGE
11OF37
PHONE: +49
-
6403
-
60984
-0FAX: +49
-
6403
-
60984
-44-
SERVICE.COM
R1000.COM
Page 12
PAGE
12OF37
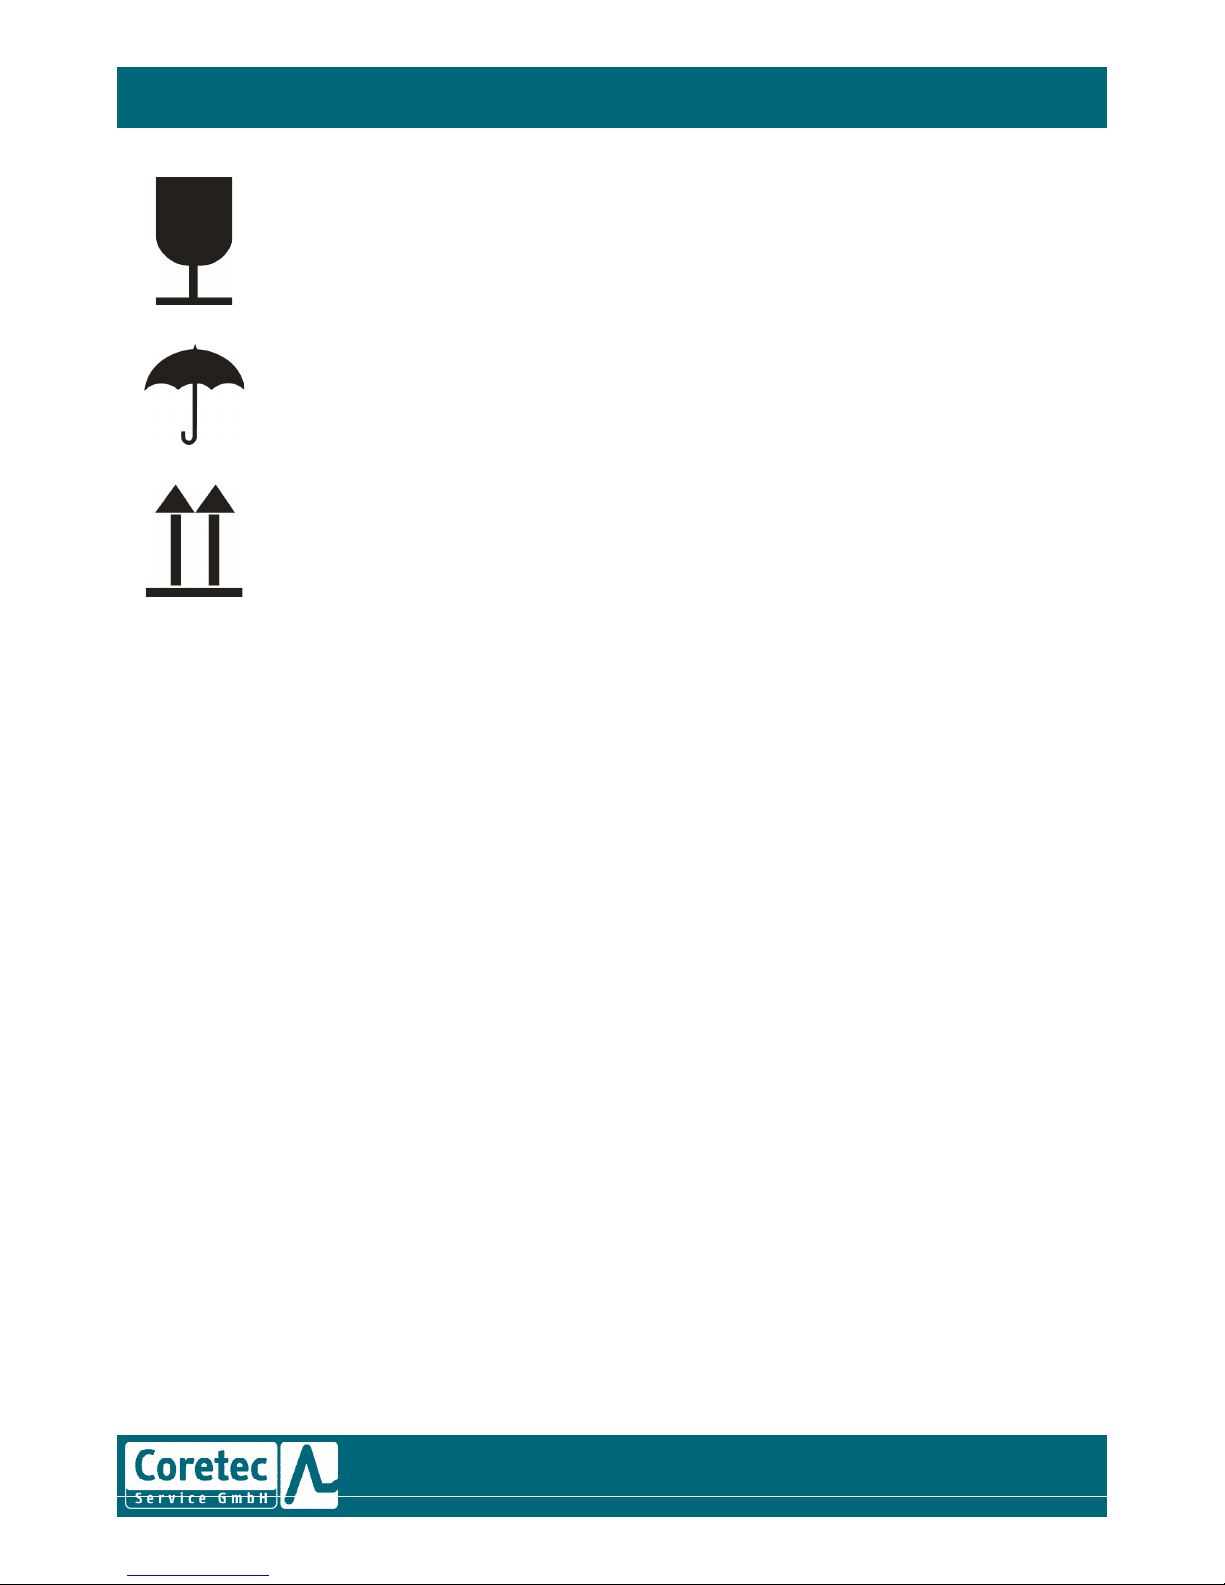
Fragile! Do not throw!
Handle with care
Protect from moisture
Do not
store in a wet or damp location and protect from moisture during transport
Top
This side up!
USER MANUAL
Page 13

PAGE
13OF37
PHONE: +49
-
6403
-
60984
-0FAX: +49
-
6403
-
60984
-44E-MAIL: INFO@CORETEC
-
SERVICE.COM
HOMEPAGE: WWW.TRAINE
R1000.COM
OPERATING ELEMENTS,
CONTROLS AND CONNECT
IONS
1
Readiness display
This indicator comprises three symbols that indicate whether the
defibrillator is ready for operation or whether there is a problem.
The
meaning of each of these symbols and the place / time it will be shown
will be explained in the following section. Please note that the Trainer
1000 is equipped with a plastic indicat
or placeholder instead of a display.
This means that, for training purposes, all of these symbols will be visible
at all times.
The spanner symbol indicates a condition that might or is preventing the
defibrillator from being used normally. The corres
ponding indicator and
audio signal can be activated by pressing the symbol key on the remote
control.
The OK symbol indicates that the defibrillator is ready for use.
This symbol
will only be shown when de defibrillator is turned off.
The standby
indicator will display the battery symbol only when the
defibrillator is turned off. If the battery symbol is shown with one bar inside
it, the battery is running low. If the symbol is empty, the battery is running
very low and the OK symbol will subsequen
tly not be displayed when the
defibrillator is turned off. The corresponding indicator and audio signal can
be activated by pressing the symbol key on the remote control.
2
Speaker
Issues voice prompts and audio signals.
3
ON / OFF button
The green
ON/OFF button turns the power supply on and off. The green LED
above this button will always light up when the Trainer 1000 is turned on.
Page 14

PAGE
14OF374SHOCK button
Pressing this red button will cause the device to simulate a delivery of a
shock to the patient
5
Menu button
For selecting the operating mode (manual or AED).
6
Charger socket
Socket for the charger.
7
Softkeys
The two softkeys work in conjunction with the screen and can be used to
make selections while using the
softkeys depends on the action undertaken at the time and will be indicated
by their corresponding labels as shown on the screen.
9
Display
Displays pertinent information for use during all modes of
10
Electrode socket
For connecting training defibrillation electrodes (black) and training ECG
cables (green).
(when flashing).
defibrillator.
The relevant function of the
USER MANUAL
operation.
Page 15

PAGE
15OF37
PHONE: +49
-
6403
-
60984
-0FAX: +49
-
6403
-
60984
-44E-MAIL: INFO@CORETEC
-
SERVICE.COM
HOMEPAGE: WWW.TRAINE
R1000.COM
Heart rate meter
The heard rate meter will display heart rates between 20 and 300 beats per minute. This meter will only be shown
in AED mode
during AED monitoring, in manual mode and when using the 3
-
pin ECG cable.
Battery status symbol
The battery status symbol on the screen indicates the relative charge held by the battery when the Trainer 1000 is
turned on, and can be adjusted through the r
emote control. This symbol can be displayed in two ways: 1. With
four solid bars inside it, indicating that the battery is fully charged. 2. Blank, indicating that the battery is running
very low, and accompanied by the message REPLACE BATTERY.
ECG
The E
CG readout shown on the screen is a non
-
diagnostic ECG that is generated with the aid of the training
electrodes or lead II of the ECG cable. The ECG rhythm is either specified by the instructor through the remote
control, or as part of one of the pre
-
prog
rammed scenarios. Please notify trainees that the presence of an ECG is
not a reliable indicator that the patient has a pulse.
Softkey label
This label defines the respective function of the relevant softkey. Examples of those are ANALYSE and
DISCHARGE.
Herzfrequenz
-
Indikator
Schock
-
Indikator
Discharge
Analyse
Manual mode
SHOCK
button
Menu button
Softkey function
Prompts
Battery status symbol
Elapsed time
ECG
readout
Softkeys
Heart rate meter
Shock indicator
Page 16

PAGE
16OF37
PREPARING THE TRAINE
R 1000 FOR USE
This section describes how to prepare the AED Trainer for use. Please check whether the device has been supplied
with all of the components specified below in order to prevent later complications.
Unpacking and check
ing components
Remove the AED Trainer from its box. Check the device and all of its accessories for signs of transport damage.
Keep the box for potential later use.
The box the AED Trainer is supplied in should contain:
Trainer 1000
Remote control
Remote control cable
2 AAA batteries (for the remote control)
Plug-in charger
Training electrodes
Soft or hard bag, depending on order
User manual (CD version)
Spare fuse
Declaration of conformity
Charging the battery
The AED Trainer is fitted with a
rechargeable lithium ion battery. This battery requires little attention and can hold
sufficient charge for running the Trainer 1000 for approx. 4 hours of non
Once empty, this battery can be recharged from the mains usi
Only use the supplied charger for operating the Trainer 1000 and charging the battery. Other mains adapters
might damage the Trainer 1000.
When switched off, the Trainer 1000 will fully recharge within approx. 2.5 hours (using th
The Trainer 1000’s battery can also be charged while it is switched on, although it will then take longer to charge.
Batteries age. This aging process depends on such factors as time and charge/discharge cycles. We recommend
having t
he Trainer 1000’s batteries replaced by our customer services once the battery no longer provides
sufficient power to operate the Trainer 1000 for a full two hours in battery mode.
-
stop simulation when used properly.
ng the supplied charger.
USER MANUAL
e European charger).
Page 17

PAGE
17OF37
PHONE: +49
-
6403
-
60984
-0FAX: +49
-
6403
-
60984
-44E-MAIL: INFO@CORETEC
-
SERVICE.COM
HOMEPAGE: WWW.TRAINE
R1000.COM
STARTING A TRAINING
SESSION
Verifying or creating an AED Trainer
configuration
To simulate a LIFEPAK 1000 S with Defi
-
electrode ECG monitoring and manual mode, select “YES” under the setup
options ECG READOUT and “YES” under MANUAL ACCESS.
Check the AED Trainer settings and configure as required. Please refer to the re
levant sections of this manual for
detailed information on the setup options and configurations.
Connecting the training electrodes to the Trainer 1000
Push the electrode connector into the relevant socket on the AED Trainer until it engages.
To remove
, take a firm hold of the connector and carefully, but firmly, pull out of the socket. Never try to unplug
the training electrodes by pulling on the cable! Do not use any tools to unplug the electrodes, since these could
damage the Trainer 1000’s housing a
nd electronics.
Turning the unit On / Off
Press the ON / OFF button on the AED Trainer to turn it on/off.
Once turned on, the AED Trainer will run a four
-
to five
-
second check routine. While running this routine, all of the
indicators will blink once,
and the following message will be briefly shown:
CORETEC
-
SERVICE GmbH
Once this check routine has been successfully run, the green ON/OFF indicator will light up permanently and the
AED Trainer will automatically start up.
Depending on the AED Trainer’s c
onfiguration and electrode contact, the screen will now display one of the
following prompts:
PUSH ANALYZE
STAND CLEAR! ANALYSIS, STAND CLEAR
CONNECT ELECTRODES
Please note:
The AED Trainer cannot be turned on if the Li
-
ion battery is low on charge.
In
this case, connect it to the charger. It should take no more than a few minutes for the Trainer to be charged
sufficiently for it to be turned on. However, the AED Trainer must always remain connected to the charger until
the battery has been sufficiently
recharged. (The charge indictor LED will go out when the battery is fully
charged).
Page 18

PAGE
18OF37
Attaching the training electrodes to the mannequin
The illustration below shows where to position the training electrodes on the mannequin.
Figure: Attaching the tra
ining electrodes to the mannequin
Once the electrodes have been attached to the mannequin, the instructor must signal the device accordingly by
pressing the ELECTRODES button on the remote control. This will automatically activate the selected scenario wi
the relevant settings.
This training scenario will only start running if the training electrode connector has been properly inserted into the
socket on the AED Trainer and the instructor has verified that the electrodes have been correctly attached thro
the remote control.
If, while using the AED Trainer:
-
the training electrodes are removed from the device, it will display the message CONNECT ELECTRODES
-
the training electrodes, on the other hand, come off the mannequin, it will not display this m
ELECTRODES).
This message function can be turned on/off by the instructor by pressing the electrode button on the remote
control.
Please note:
Never use defibrillator electrodes intended for use on patients. The Trainer 1000 will not reco
electrodes and they could damage the outer skin of the mannequin or leave behind stubborn residues.
USER MANUAL
th
ugh
essage (CONNECT
gnise these
Page 19

PAGE
19OF37
PHONE: +49
-
6403
-
60984
-0FAX: +49
-
6403
-
60984
-44E-MAIL: INFO@CORETEC
-
SERVICE.COM
HOMEPAGE: WWW.TRAINE
R1000.COM
USING THE REMOTE CON
TROL
The remote control requires 2x AAA batteries.
To fit and replace batteries, proceed as follows:
Press hard onto the
battery compartment cover on the rear of the remote control with your thumb and push open.
Insert two AAA batteries; make sure that the batteries’ (+) and (
-
) poles are correctly aligned.
Replace the battery compartment cover and make sure it engages.
Du
ring a training session, the remote control can be used to create realistic training scenarios, i.e. can be used by
the instructor to:
stop the AED Trainer from operating
call up pre
-
configured routines that involve the messages NO SHOCK ADVISED, CONNECT E
LECTRODES, MOTION,
CALL SERVICE and REPLACE BATTERY
select one of the six existing shock protocols (only possible while the device in PAUSE MODE)
(if applicable) select the ECG readout to be displayed on the screen.
The AED Trainer and remote control can e
ither communicate with one another through a wireless connection,
using infrared signals, or a remote control cable.
When using the remote control with a wireless connection, the instructor will have to stand behind the AED
Trainer. The remote control shou
ld always be held horizontally rather than aimed straight at the AED Trainer.
When the AED Trainer is turned on, all of the remote control settings from the previous training session, with the
exception of the current shock protocol, which will be saved, w
ill be deleted.
Remote control cable
If the remote control is used with the cable, insert the cable’s right
-
angled connector into the corresponding
socket on the remote control. Connect the other end of the cable to the corresponding socket on the AED Tr
ainer’s
side. To remove, take hold of the cable’s connectors on both sides and pull out carefully.
Page 20

PAGE
20OF37
Remote control buttons and functions
Button
This button changes all shock
when the message PRESS FOR ANALYSIS or ANALYSIS IN PROGRESS, STAND CLEAR! is being
displayed.
By pressing this button you simulate the fitting of the training electrodes to the mannequin.
Pressing the button again simulates disconnection of the electrodes.
Turn the MOTION SIMULATION function On or Off. This functio
Press once to activate service alert and to display the message CALL CUSTOMER SERVICE. To
cancel, turn off the AED Trainer or press button again.
Press
once to activate LOW BATTERY alert.
This button is disabled. Intended only for use on Trainers with ECG mode.
PAUSE. Can be pressed at any time to stop any of
resume operation. Press F1, F2, F3, F4, F5 or C1 for changing the shock protocol while the
Trainer 1000 is set to PAUSE. Press PAUSE again to verify the change and to turn the AED
Trainer off.
decisions to NO SHOCK ADVISED. This function can only be used
n is only available during analysis.
Press again to deactivate.
the Trainer 1000’s functions. Press again to
USER MANUAL
Page 21

PAGE
21OF37
PHONE: +49
-
6403
-
60984
-0FAX: +49
-
6403
-
60984
-44E-MAIL: INFO@CORETEC
-
SERVICE.COM
HOMEPAGE: WWW.TRAINE
R1000.COM
SETUP MODE
This
section describes how to:
access setup mode
select or change the Energy Protocol, Auto Analyse and CPR
-
time setting options.
select the required language for the voice prompts and text messages, and to use other device options.
These settings will not be
deleted when the device is turned off and will even be saved if the battery runs
completely empty.
Accessing setup mode
Make sure that the AED Trainer is turned off.
Press both softkeys at the same time and simultaneously press the AED Trainer ON/OFF b
utton.
The screen will now display the configuration menu (set up mode).
The Trainer 1000’s setup mode is not password protected, as this is not relevant to a training device.
You will now be presented with 4 different menus in which to adjust the
Trainer 1000’s settings to suit your
requirements:
GENERAL
This menu can be used to configure the audio settings.
AED MODE
This menu can be used to select the settings that correspond to your CPR algorithm and the display options
available to users in sem
i-automatic mode.
Manual mode
Chose between AED operation only or manual operation for specialist personnel. You can also active the analysis
function for use in manual mode as a useful tool for the user.
Service mode (not accessible for customer)
Trainer
settings
These settings are used to adapt the Trainer 1000’s functions to mimic those of your defibrillator. This is also
where the language for the voice prompts, text messages and training scenarios can be adjusted.
Page 22

PAGE
22OF37
GENERAL SETTINGS
Menu / submenu
Menu item
General
Device ID
Device ID
General settings
Date / Time
Date / Time
General settings
Audio
Prompt volume
Shock Tone
Service alert
General settings
Device data
Device Data
General settings
Delete After send
Delete After Send
Description
The Device ID is your Trainer
1000’s serial number and is
specific to your device, which
is why it cannot be changed.
In fully operational
defibrillators, the date and
time are only used for data
storage and recording
purposes. Since the Trainer
1000 is not equipped with
these functions, the date and
time setting has been included
in the menu for demonstration
purposes only and cannot be
chan
ged.
This option can be used to set
up the audio signals issued by
the Trainer 1000, and to
select one of 3 volume
settings.
Depending on the area of
application, this
option can be
used to turn the audio alert
that accompanies the delivery
of defibrillation shocks on or
off.
Can be used to specify
maintenance intervals in fully
operational devices.
This is where you can find the
Trainer 1000’s software
version
A data management option
only available in fully
operational devices.
USER MANUAL
Options
None
None
Volume:
High
, Medium,
Low
Shock Tone:
On,
Off
None
None
None
Page 23

PAGE
23OF37
PHONE: +49
-
6403
-
60984
-0FAX: +49
-
6403
-
60984
-44E-MAIL: INFO@CORETEC
-
SERVICE.COM
HOMEPAGE: WWW.TRAINE
R1000.COM
AED MODE settings
Menu /
submenu
Menu
item
Description
Options
AED MODE
Energy Protocol
Energy 1
You can select the energy to
be delivered during the 1
st
and 2
nd
shock individually,
and that to be delivered
during the 3
rd
and all
subsequent ones. The
selected energy settings
must always be at least
equal or greater than that of
any preceding shocks.
Select from
150,175,200,225,250,300,325
or 360 joules
(Standard:
200, 300, 360
joules)
Energy 2
Energy 3
Flexible Protocol
As a measure of care, the
energy delivered by a shock
will not be increased if the
last heart rhythm was not
shockable.
Flexible protocol: On,
Off
Stacked Shocks
In consideration of the
latest, internationally
recognised findings on the
effectiveness of consecutive
shocks of equal or higher
intensity, the option of
delivering consecutive
shocks has been excluded.
None
AED MODE
CPR
Confirmation (only for SW
versions later than 1.10)
Maximise the amount of CPR
being administered by using
the advanced CPR settings.
Also see CPRmax.
Confirmation: On,
Off
Time 1
CPR Time 1: 15s, 30s, 45s,
60s, 90s,
120s,
180s
Time 2
CPR Time 2: 15s, 30s, 45s,
60s, 90s,
120s,
180s
Initial CPR
(Later than 1.10)
Initial CPR:
Off,
initial analysis,
initial CPR
Initial CPR (time)
Initial CPR (time):
Off,
15s,
30s, 45s, 60s, 90s, 120s, 180s
PreShock CPR
PreShock CPR:
Off,
15s, 30s
CPR prompt
The device will repeatedly
prompt the user to perform
CPR.
CPR prompt: On,
Off
AED MODE
Pulse
Pulse Check
Select the times the rescuer
should be prompted to
check the patient.
Check pulse: Always,
Never,
After every NSA (No Shock
Advised, i.e. analysis result: No
Shock Advised)
Later than SW 1.10:
Never,
After every second
NSA, after every NSA, Al
ways
Pulse Check prompt
Select voice prompts for
pulse checking.
Voice prompt:
Check Pulse
,
Check Breathing, Check vital
signs, Open Airway
AED Monitoring
For using the CPPS
(Continuous Patient
Surveillance System) to
monitor the patient for
shockable
heart rhythms.
AED monitoring: On,
Off
Page 24

PAGE
24OF37
Monitoring Repeat
AED MOD
E
ECG Display
ECG Display
AED MODE
Auto Analyse
Auto Analyse
AED MODE
Motion Detection
Motion detection
MANUAL MODE settings
Menu / submenu
Menu item
Manual
Manual Access
Manual Access
Manual
Analyze
Analyze
SERVICE MODE settings
The Service Mode menu of this device cannot be changed.
For specifying the frequency
with which the CPPS
(Continuous Patient
Surveillance System) is to
monitor the patient for
shockable heart rhythms.
Monitoring:
3 min, 5 min
Optimise your device for
your target rescuer group
by making the device
display the ECG readout in
AED mode.
ECG Display: On,
Specify to what extent the
device will require user
-
input. The
device will start
to analyse the ECG
automatically if on.
Auto Analyse:
Shock, Off
The device is able to
recognise patient
movements and can reject
an analysis, thus increasing
safety of the
patient.
Motion detection:
Description
Options
Enables or disables
manual defibrillation
modes.
Manual access: On,
As a
decision
-
making aid
enable the analysis
function for use in manual
mode.
Analysis:
USER MANUAL
Off,
1 min, 2 min,
Off
On,
After 1
st
On,
Off
Off
On,
off
Page 25

PAGE
25OF37
PHONE: +49
-
6403
-
60984
-0FAX: +49
-
6403
-
60984
-44E-MAIL: INFO@CORETEC
-
SERVICE.COM
HOMEPAGE: WWW.TRAINE
R1000.COM
TRAINER SETTINGS menu
Menu / submenu
Menu item
Description
Options
TRAINER
SETTINGS
Option: ECG Display
Option: ECG Display
Select the level of function
of your defibrillator:
LIFEPAK 1000 (AED) or
LIFEPAK 1000 S (AED,
Defi-electrode monitoring
and manual). Depending
on this setting, certain
options will not be
available in the
setup
menu.
Monitoring:
On,
off
TRAINER SETTINGS
Language
Language
Select the language for
the voice prompts and
text message in
correspondence with the
target group the training
is to be delivered to.
Language: Depends on
version
TRAINER SETTINGS
Tra
ining scenario
Training scenario
Select a sequence of heart
rhythms that are
shockable and those that
are not shockable in order
to devise a realistic
training scenario.
(see Quick Start Guide).
Scenario:
Fix 1 (SSSSN)
Fix 2 (NNNN)
Fix 3 (SSNNNN)
Fix 4
(SSNSSN)
Fix 5 (SNNN)
Customer (freely
configurable)
(S: shock, N: No Shock
Advised)
Page 26

PAGE
26OF37
Setting options: CPRmax menu
The cprMAX technology has the following setup options:
Initial CPR time.
Only applies to the first analysis. Prompts for CPR
Pre-Shock CPR time.
Prompts for CPR after a shockable ECG rhythm is detected and while the defibrillator is
charging. Only applies to second and subsequent analyses if a SHOCK ADVISED. The SHOCK button will only be
ena
bled once the charging process has completed and the CPR Time has elapsed.
Confirmation analysis.
For an abbreviated rhythm analysis after Initial CPR Time or Pre
Stacked Shocks.
Eliminates analysis after each shock and inserts a CPR prompt
This eliminates the three
-
shock stack.
Pulse Check.
Eliminates Pulse Check prompts after shocks, but only if shock is advised.
The duration of CPR can be increased by selecting the following setup options:
Initial CPR Time: 15 seconds
or longer
Pre-Shock CPR Time: 15 seconds or longer
Confirmation Analysis: Off
Stacked Shocks: Off
Pulse Check: Off
Please note: It is not necessary to activate all options in order to maximise the quantity of CPR administered
during treatment with an AED
.
If the Initial CPR Time is set to 15 seconds or longer, a CPR will be prompted by the time the electrodes have been
attached to the patient and the first analysis has been completed.
Once the electrodes have been attached, the AED will prompt
followed by
START CPR
.
The display will now show a CPR Countdown Timer. The CPR time displayed by the timer is determined by the time
that was chosen in the setup options.
If the AED detects a shockable ECG rhythm, it will prompt to start CPR immediately and will then prompt
WITNESSED THE ARREST, PUSH CANCEL.
If you witnessed the arrest, you should proceed with the defibrillation. If you did not witness the arrest, you
should perform CPR. To proceed with the defibrillation, press the CANCEL softkey. This will end the CPR time and
will be followed by the voice p
rompt
SHOCK ADVISED
shock in accordance with your AED your training.
To proceed with CPR, do not press the CANCEL softkey. The Initial CPR Time will then correspond to the time
selected in the setup
options, for example, 90 seconds. The elapsing of the CPR Time will be followed by the voice
prompt
SHOCK ADVISED.
Proceed with the delivery of the shock in accordance with your AED training.
If the AED detects a non
-
shockable ECG rhythm, it will prompt
should proceed to perform CPR for the time shown by the countdown timer.
immediately after the first analysis.
after each shock.
STAND CLE
AR, ANALYSING NOW, STAND CLEAR
and the charging tone. Proceed with the delivery of the
to start CPR. There will be no other prompt. You
USER MANUAL
-
Shock CPR Time.
,
IF YOU
Page 27

PAGE
27OF37
PHONE: +49
-
6403
-
60984
-0FAX: +49
-
6403
-
60984
-44E-MAIL: INFO@CORETEC
-
SERVICE.COM
HOMEPAGE: WWW.TRAINE
R1000.COM
Pre-Shock CPR Time
If the Pre
-
Shock CPR Time is set to 15 seconds or longer, you will be prompted to start CPR immediately after a
shockable rhythm is detected, before the shock is delivered and while the AED is charging.
Please note:
The Pre
-
Shock CPR Time refers to the second and any subsequent shocks.
If the AED determines that a rhythm is shockable after completion of the analys
is, it will display the following
message:
START CPR.
The CPR Time will then correspond to the time selected in the Pre
-
Shock CPR Time setup
options, such as, for example, 15 seconds. The elapsing of the CPR Time will be followed by the voice prompt
SHOCK
ADVISED.
Proceed with the delivery of the shock in accordance with your AED training.
Stacked shocks and Pulse Checks
Stacked Shocks
If STACKED SHOCKS have been set to OFF, the amount of CPR that will be administered will increase because you
will be
prompted to perform CPR after each shock as opposed every third shock. Once a shock has been delivered,
the AED will prompt you to check the pulse and start CPR as opposed to starting an analysis. Once the CPR Time
has elapsed, the AED will prompt you star
t an analysis.
Pulse Check
If the PULSE CHECK option is set to OFF, the time available for performing CPR increases since the PULSE CHECK
prompt after delivery of a shock will have been eliminated. If the PULSE CHECK option is set to OFF, the AED will
pr
ompt you to immediately start CPR after delivery of three consecutive shocks without performing a pulse check.
Combining Stacked shocks and Pulse Checks
If both the STACKED SHOCKS and PULSE CHECK options are set to OFF, the AED will proceed as follows:
The AED will not perform an analysis after delivering a shock.
The AED will not prompt for a PULSE CHECK after delivering a shock.
The AED will prompt you to START CPR, as detailed above.
Following the elapsing of the CPR Time, the AED will
prompt you to p
erform an analysis. If the subsequent analysis determines that NO SHOCK is ADVISED, the AED
will prompt you to perform a PULSE CHECK.
Confirmation analysis
If the CONFIRMATION ANALYSIS option is set to ON, the AED will perform an abbreviated rhythm analys
is
immediately before the delivery of a shock to confirm that there is still a shockable rhythm. Confirmation analyses
are only performed if the Initial CPR Time or Pre
-
Shock CPR Time options are enabled.
If the Initial CPR Time or Pre
-
Shock CPR time opti
ons are enabled, the AED will start a confirmation analysis and
prompt you to
STAND CLEAR. ANALYSING NOW, STAND CLEAR
as soon as the countdown timer reaches 0.
If the rhythm has changed, the confirmation analysis will cancel the shock and the AED will pr
ompt
NO SHOCK
ADVISED.
If the rhythm is still shockable, the previous decision of SHOCK ADVISED will be confirmed and the AED
will prompt to
PUSH SHOCK BUTTON.
Page 28

PAGE
28OF37
Configuring the energy protocol
Open setup mode (described in preceding sections above).
Keep pressing NEXT to go through the different shock protocol options. You can select the energy to be delivered
during the 1
st
and 2
nd
shock individually, and that to be delivered during the 3
can b
e set to either: 150,175,200,225,250,300,325 and 360 joule
Press SELECT to save the required energy setting when it comes up and move to the next setup screen or press
ON/OFF to close the setup menu and to turn off the Trainer 1000 with the new settings.
Please note:
The AED’s default shock energy settings start with 200, escalate to 300, and are then followed by 360 joules for all
subsequent shocks, which, in studies conducted by Medtronic Physio
Defibrillators with Ada
ptiv-Biphasic™ technology, have proven to be the most effective and safe.
Changing settings for
CUSTOMER
Press
SELECT
when CUSTOMER1 is shown on the display.
The first S will then be shown with a cursor. While the cursor is on the first S:
Press
NEXT
to change between S and N (S = Shock, N = No Shock).
For all successive Ss’: Press
NEXT
to change between S, N and the space character.
Press
NEXT
to move the cursor to the right.
Press
NEXT
to finish. Your scenario will be saved.
Adjusting CPR Time
Setup option
Description
CPR TIME
The CPR Time is the period of time for which the AED Trainer will prompt the user to
perform a CPR. There are two different CPR Times, each of which can be set to any of seven
different periods of time (in seconds): 15,
for both CPR Time 1 and CPR Time 2 are 120 second.
CPR Time 1
CPR Time after delivery of shocks.
CPR Time 2
CPR Time for CPRs if NO SHOCK is ADVISED.
In consideration of the latest, internationally
equal or higher intensity, the option of delivering consecutive shocks has been excluded. Please contact Coretec
Service GmbH if you would like to receive any additional information on this.
Select ENERGY PROTOCOL.
rd
and all subsequent ones. These
-
Control with the Medtronic Impulse
30, 45, 60, 90, 120, and 180. The default settings
recognised findings on the effectiveness of consecutive shocks of
USER MANUAL
-
Page 29

PAGE
29OF37
PHONE: +49
-
6403
-
60984
-0FAX: +49
-
6403
-
60984
-44E-MAIL: INFO@CORETEC
-
SERVICE.COM
HOMEPAGE: WWW.TRAINE
R1000.COM
Turning AUTO ANALYSE on/off
Auto Analyse is a function that enables the input required from users to be reduced to a minimum. When this
function is enabled, the Trainer 1000 will automatically start an ECG analysis as soon as the adhesive electrodes
have been attached to the patient. This minimises the chances of the AED being used incorrectly when operated
by laypersons.
Page 30

PAGE
30OF37
MAINTENANCE
Cleaning and maintaining the
Always disconnect the Trainer 1000 from the charging voltage supply by pulling ou
The Trainer 1000’s surfaces can be cleaned with a conventional, mild all
make sure before use that the cleaner will not damage the Trainer’s surfaces.
Do not allow any liquid to find its way into
For safety reasons, we recommend not to switch on the device and not to reconnect it to the mains until it has
fully dried.
Do not use any easily flammable solvents such as Acetone, ethyl alcohol or white spirit for
fire hazards and can corrode the Trainer 1000’s surfaces.
Please note:
The Trainer 1000 cannot be sterilized.
Battery
Batteries age. This aging process depends on such factors as time and charge/discharge cycles.
We recommend
having the Trainer 1000’s batteries replaced by our customer services once the battery no longer
provides sufficient power to operate the Trainer 1000 for a full two hours in battery mode.
Disposal
Recycle the packaging and the Trainer 1000, when it ha
regulations and laws.
Do not dispose of the Trainer 1000 and its packaging as household waste.
Please contact our customer services from more information on environmentally friendly disposal.
t the mains plug.
-
purpose cleaner and a damp cloth.
the Trainer through slots or connectors.
s reached the end of its life, in accordance with the local
USER MANUAL
Please
cleaning as these are
Page 31

PAGE
31OF37
PHONE: +49
-
6403
-
60984
-0FAX: +49
-
6403
-
60984
-44E-MAIL: INFO@CORETEC
-
SERVICE.COM
HOMEPAGE: WWW.TRAINE
R1000.COM
Potential errors and remedies
Error
Potential cause
Remedy
The Trainer doesn’t start
The battery charge is so low
that there is not sufficient
current to start the Trainer.
Plug in the charger and wait a few minutes.
Now switch on the Trainer and
use it as normal but
leave the charger in. When the charging LED goes
out, the battery is full and the charger can be
disconnect.
Your USB stick is not
licensed
Only use the Trainer with the supplied USB stick or
a software update that has been specific
ally
configured for your Trainer.
The fuse is not properly
screwed in.
Check whether the fuse holder on the bottom of the
Trainer contains a fuse and whether the fuse is
properly screwed in.
Once you have finished, start the Trainer 1000.
The fuse is
broken
Replace the fuse using only
G fuse packs 1.25 A/250 V, slow blow DIN 415671
as replacements and then start the Trainer 1000.
Wrong language setting
No error
To change the language setting when you do not
speak the language currently in place, pr
oceed as
follows:
-
Press down both of the soft keys while pressing
the ON button.
You will now be in the setup menu.
-
Keep pressing the left soft key until the frame is on
the bottom menu item.
-
Press the right soft key. A submenu will open.
-
Press the lef
t soft key. You are now in the second
line-Press the right soft key. The language menu
opens.
-
Keep pressing the left soft key until you get to the
required language
-
Press the right soft key to confirm your selection
-
Switch off the Trainer
For more info
rmation, please refer to the
description of the setup menu
Page 32

PAGE
32OF37
Error
Potential cause
The remote control
doesn’t work
It doesn’t have any
batteries.
Batteries inserted incorrectly
Batteries empty
No visual contact
Out of range
Remote cable is connected
at one end only
Pressed button twice
The training electrodes are
not connected.
Wait.
This button does
function in this setup
If none of the above remedies work, the Trainer 1000 might have a fault. In this case, please contact the
manufacturer and the manufacturer’s customer services.
Remedy
Insert batteries (2x AAA).
The remote control only works with batteries, even
when used with a
cable. The cable is only a signal
cable, not a power cable.
Check whether the batteries are inserted the right
way round. Insert as specified in the battery
compartment.
Insert fully charged batteries.
Since infrared does not use radio but optical
signals, the infrared transmitter (glass ball at the
front of the remote control) must be within the
visual range of the receiver (behind black disk) on
the Trainer 1000.
When connecting th
e remote control to a cable,
there is no need to take into account the infrared
transmitter’s direction.
Move closer to the Trainer or use cable.
Either connect at both ends or disconnect from bo
ends.
When the remote control cable is connected, the
infrared function is deactivated, which is why the
remote control will not work if it is connected at one
end only.
With some buttons, pressing them once will switch
on a
function and pressing them again will switch
the function off again, e.g. connect electrodes, call
customer services, change batteries, pause.
Press this button only once.
When the Trainer 1000 is switched on,
electrodes must be connected and the
corresponding remote control button pressed ONCE
in order for the message “Connect electrodes” to
disappear.
All of the functions will become active only after a
short delay.
not have a
Not all of the buttons have functions in all setups.
USER MANUAL
th
the training
Page 33

PAGE
33OF37
PHONE: +49
-
6403
-
60984
-0FAX: +49
-
6403
-
60984
-44E-MAIL: INFO@CORETEC
-
SERVICE.COM
HOMEPAGE: WWW.TRAINE
R1000.COM
ORDER
Models
Item no.
Version
Languages included
8724637
-10Trainer1000
–
American version
Spanish, French, Portuguese, US English
8724637
-20Trainer1000
–
Central European version
German, French, British English, Italian, Dutch,
US English
8724637
-30Trainer1000
–
Northern European
version
Danish, Finish, British English, Norwegian,
Swedish
8724637
-40Trainer1000
–
Southern European
version
Spanish, British English, Greek, Italian,
Portuguese
8724637
-50Trainer1000
–
Southeast Europe
version
British
English, Greek, Croatian, Hungarian,
Serbian, Slovenian
8724637
-60Trainer1000
–
Eastern European
version
Czech, British English, Lithuanian, Polish,
Russian, Slovenian
When placing an order, please also specify:
-
The required bag (soft or hard bag).
If no bag is specified, the Trainer 1000 is supplied with a soft bag.
-
The required charger (please see under accessories for available models)
Please note:
The Trainer 1000 is always supplied with an AED and a manual mode by default. If you also require
an ECG
simulation mode, please place a separate order for an ECG upgrade kit. If ordered together with a new Trainer
1000, the Trainer will be supplied with ECG mode ready installed.
Page 34

PAGE
34OF37
Accessories
Item no.
Accessories
1004001
Soft bag
-
Trainer 1000
1004002
Hard bag
-
Trainer 1000
1005001
Charger EUR (C)
-
Trainer 1000
1005002
Charger USA (A)
-
Trainer 1000
1005003
Charger GBR (G)
-
Trainer 1000
1005004
Charger AUS (I)
-
Trainer 1000
1007001
Remote control
-
Trainer 1000
1007003
AED Training electrodes
1008001
Spare fuse
-
Trainer 1000
1008002
User manual
-CD-
Trainer 1000
1008003
ECG Upgrade Kit without cable
1000
1008004
ECG Upgrade Kit with
cable
1008005
USB stick with language upg
1000
1007007
ECG remote control
–
Trainer 1000Trainer
1000
1008006
ECG cable
–
Trainer 1000
Information
Remote
control, remote control cable and batteries
-
Trainer 1000
Also suitable for use with the training electrodes
from the Lifepak 500
-
Trainer.
–
Trainer
USB stick with upgrade, ECG remote control with
remote control cable and batteries.
To configure the upgrade, please state the
Trainer’s serial number and language version.
–
Trainer 1000
USB stick with upgrade, ECG remote control with
remote control cable and batteries, 3
ECG cable.
To configure the upgrade, please state the
Trainer’s serial number and language version.
rade–Trainer
To configure the upgrade, please state the
Trainer’s serial number and required language
version.
ECG remote control, remote control cable and
batteries.
3-pin ECG cable for use with a Trainer 1000 with
ECG mode.
USER MANUAL
-
pin training
Page 35

PAGE
35OF37
PHONE: +49
-
6403
-
60984
-0FAX: +49
-
6403
-
60984
-44E-MAIL: INFO@CORETEC
-
SERVICE.COM
HOMEPAGE: WWW.TRAINE
R1000.COM
CERTIFICATION AND TE
CHNICAL DATA
Software versions
Trainer 1000
Lifepak 1000
Properties
SW–V 1.0x
1.5
LIFEPAK 1000 Software status while the Trainer 1000
was developed
The
software version is shown under Device Data in
the setup menu in the Trainer
SW-V 1.10
2.2x
Change to the LIFEPAK 1000 software that was taken
over to the Trainer 1000:
Removal of the confirmation analysis.
During the initial CPR, it is possible to spec
ify that the
user will be prompted to perform CPR before the first
analysis.
“Check pulse” can now also be set to “After second
NSA” in addition to the former options.
There is no need to protect the Trainer’s setup menu
with a password.
The Trainer’s set
up menu responds significantly faster
in SW 1.10.
Page 36

PAGE
36OF37
USER MANUAL
Page 37

USER MANUAL TRAINER
1000
PHONE: ++49
-
6403
-
60984
-0FAX: ++49
-
6403
-
60984
-44E-MAIL: INFO@CORETEC
-
SERVICE.DE
HOMEPAGE: WWW.TRAINE
R1000.COM
DEFIBRILLATOR:
The Trainer 1000
has the operation extent
and menu navigation of the LIFEPAK® 1000,
but without delivery of shocks. So displayed
energies are only simulated.
Energy Sequence:
User configurable, 150
–
360 joules. Default energy output settings
are 200, 300, 360 joules.
36
0 joules for
every shock thereafter.
REMOTE CONTROL
Transmission:
Wireless infrared signal: Range 4 meters
Cable: 2 m
Size:
8.4 cm (3.3 in) x 4.6 cm (1.8 in) x 1.6
cm (0.6 in)
Batteries:
3 volts supplied by two AAA
alkaline batteries
Weight:
33 g (.07 lb)
without batteries,
55 g (.12 lb) with batteries
Buttons:
7-key membrane switch pad
labled for the following functions: shock
decision, electrode pad contact, motion,
service required, replace battery, pause and
change of scenario
DEVICE SETTINGS
Modes
:
• AED
–
Provides operating capability for
basic users
• Manual
–
Provides operating capability
for advanced users
•
ECG mode
–
Medically trained personnel
can obtain the simulation of the ECG lead II
with 3
-
pin cable as an upgrade
• Setup
–
Allows user to configure the
device
Controls:
On/Off, Shock, Menu, Two (2)
configurable soft keys
User Defined Options:
• Energy Sequence
–
User configurable
from 150 to 360 joules
• Flexible Energy
–
Increases only after a
lower energy was unsuccessful
• Auto Analyze
–
User can
configure device
to auto analyze, auto analyze after first
shock, or promt user to
push analyze key
before each analysis period
• CPR Time
(post shock or after no shock
advised)
–
User configurable
–
15, 30, 45,
60, 90, 120, 180 s
econds
• Voice Promt Volume
–
Allows user to
change speaker volume
• ECG Display
(if option set in setup menu)
–
Turns display on/off for AED mode
• Motion Detection
–
User defined ON/OFF
• Service Alert
–
Audio alarm if the device
needs servicing.
Configurable on/off
• Manual Access
–
(if ECG display option
set in setup menu)
–
Devices configured
with an ECG display may be set up to allow
user to initiate a charge and shock without
analysis.
cprMAX Technology Settings:
• Initial
-
CPR–User defined
time for CPR
after first analysis regardless of analysis
decision. Can be set to OFF, 15, 30, 45, 60,
90, 120 or 180 seconds.
• Pre-shock-CPR–Allows for CPR while
device is charging. Can be set to OFF, 15 or
30 seconds.
• Confirmation Analysis
–
Confirms
shockable rhythm after completion of Inital
CPR or Pre
-
shock CPR periods and prior to
Push to Shock promt (default Off)
• Stacked Shocks
–
(ON/OFF) When Off,
allows for provision of CPR after each shock
• Pulse Check
–
(Always, After Every NSA,
Never) All
ows device to promt for a pulse
check either after each shock, after every
NSA, or never promt for a pulse check
(default Never)
TRAINER SETTINGS
LIFEPAK® 1000 Version
-
It can be selcted in
the setup whether a LIFEPAK(R) 1000 with
or without ECG option
is simulated.
Training scenarios
-
There are different
training scenarios which can be selected in
the setup or alternatively by remote
control.
Languages
–
The Trainer 1000 is delivered
in different language versions. There are
several languages contained
in one trainer,
which can be changed in the setup menu.
The following language combinations are
available.
America: Spanish, French, Portuguese, US
English
• Central Europe: German, French, British
English, Italian, Dutch, US English
• Northern Europe: Da
nish, Finish, British
English, Norwegian, Swedish
• Southern Europe: Spanish, British English,
Greek, Italian, Portuguese
• Southeast Europe: British English, Greek,
Croatian, Hungarian, Serbian, Slovenian
• Eastern Europe: Czech, British English,
Lithuani
an, Polish, Russian, Slovenian
• Can also potentially be provided in other
languages upon request
DISPLAY
Backlit LCD displays number of shocks
delivered, elapsed time, text and graphics
of heart rhythm and optional ECG
Size:
120 mm (4,7 in) x 89 mm (3,5 in)
Display Resolution: 320 x 240
ECG option:
• Waveform Sweep Speed
ECG, nominal
• Waveform Amplitude
nominal
• Heart Rate
dispaly, Display „…“ if heart rate is less than
20
bpm. Heart symbol flashes for each QRS
detection.
ECG information is a simulated signal from
electrodes in anterior
INTERNAL BATTERY
Nominal voltage: 7.2 V
Fully charged batteries run the device for at
least 3 hours. There is a warnin
device is turned off at low battery.
A plug
-
in charger is delivered with the
Trainer 1000.
ENVIRONMENTAL
Device designed for low impact, low stress
environments. For use in temperature
controlled areas protected from
precipitation. Capable of
heavy useage and prolonged periods of
operation.
Operating Temperature: 0°C to 50
Humidity:
Storage temperature:
Humidity:
Storage Temperature:
+60°C (140
EMC:
Emission: EN 55011 Class B
Immunity: EN 61000
Housing:
UL 94-V0
PHYSICAL CHARACTERIS
High:
8.7 cm (3.4 in)
Width:
23.4cm (9.2 in)
Depth:
27.7 cm (10.9 in)
Weight:
1.2 kg (2.6 lb)
With bag and accessories:
PAGE
37OF37
–
25 mm/sec for
–
1cm/ mV,
–
20 to 300 BPM digital
-
lateral position.
g before the
withstanding
℃
15% to 85 %, non
-
condensing
-
30℃to +70
℃
15% to 85 %, non
-
condensing
-
20°C (0°F) to
°F)-6-2
Flame Protection according
to
TICS
1.2 kg (2.6 lb)
1.9 kg (4.2 lb)
 Loading...