

Cordes Haussicherheit CC-410 User manual
SOLAR POWER CAMERA ALARM
WITH REMOTE CONTROL
MODEL: CC-410
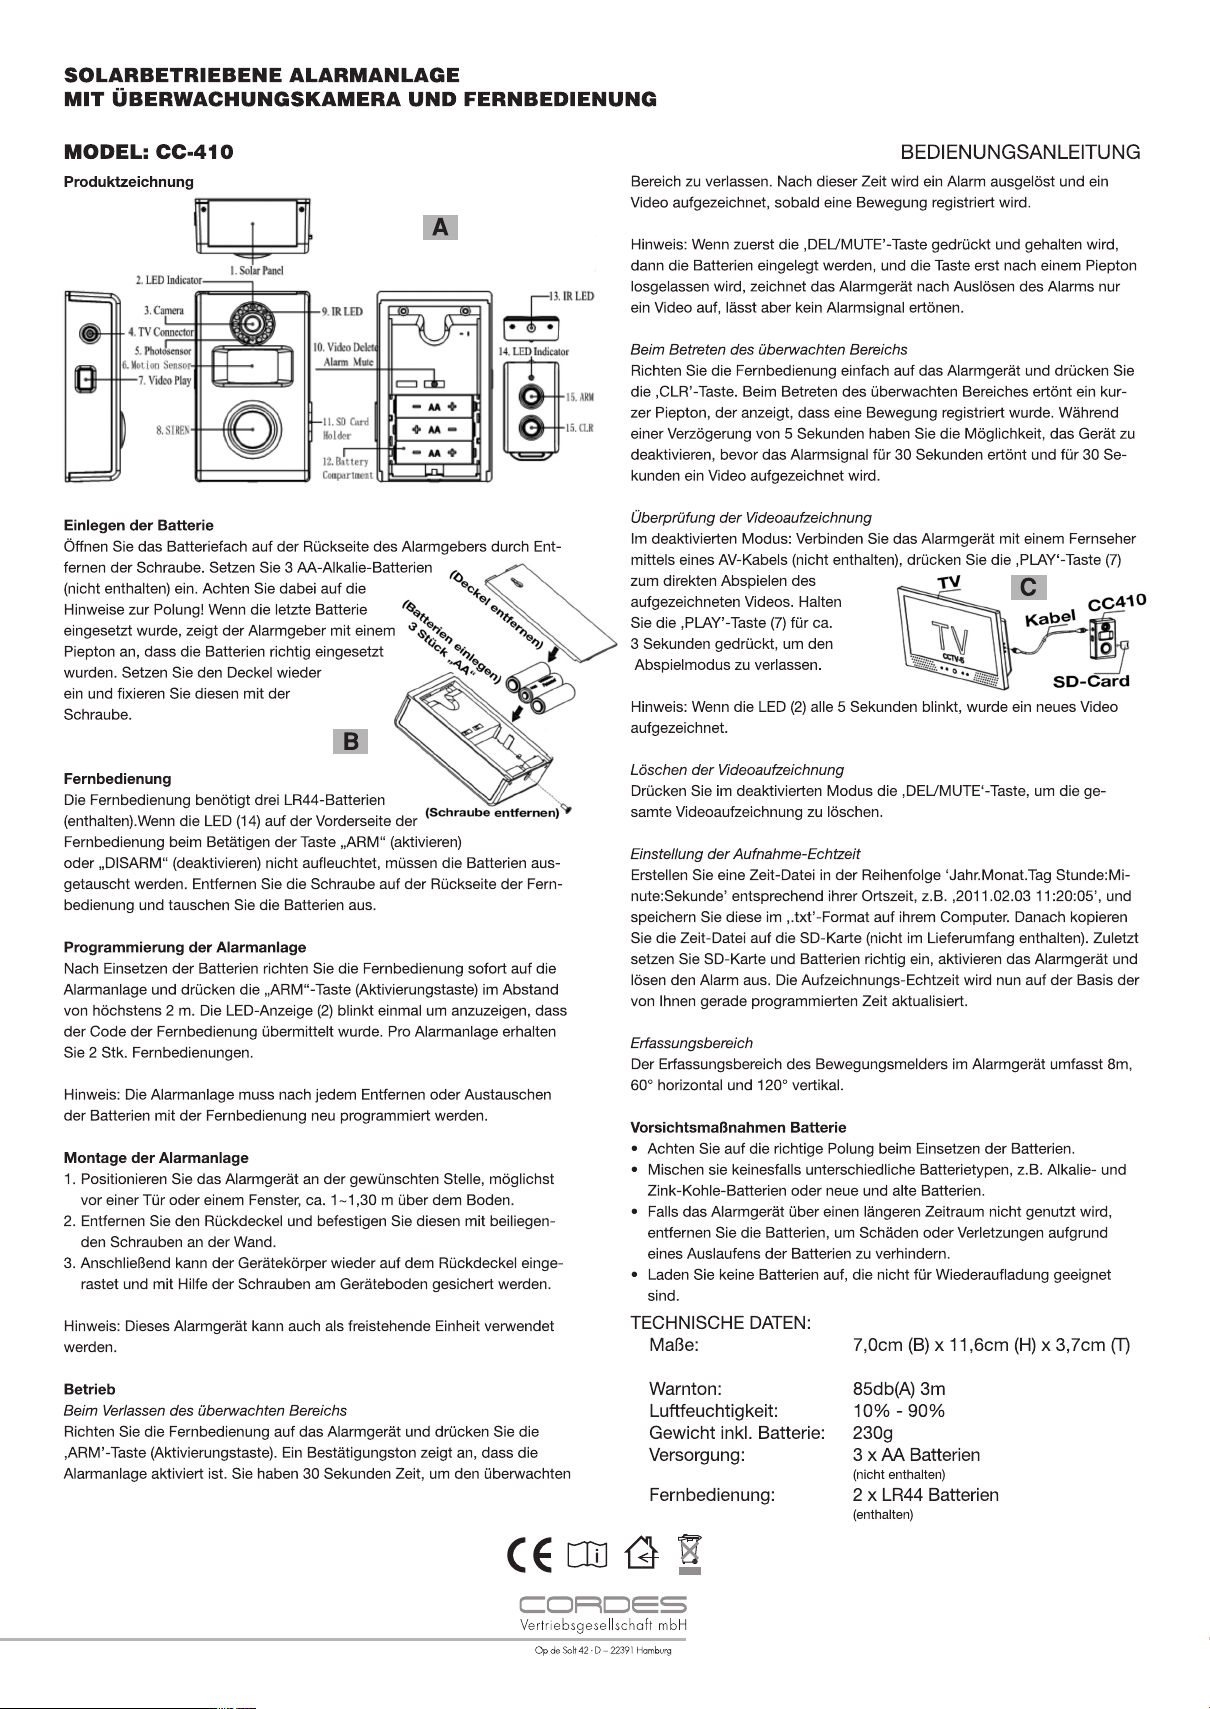
Production diagram
A
Battery installation
he battery compartment is accessed from the rear of alarm unit by
T
emoving screw. Insert 3 ‘AA’ alkaline batteries (not included) following
r
olarity sign. When the last battery is inserted the alarm will beep to
p
ndicate the batteries are installed properly. Replace the back cover and
i
ix with screw.
f
INSTRUCTION MANUAL
onfirmation tone will indicate that the alarm is armed and you have 30
c
enconds in which to vacate the protected area. After this time, if motion
s
s detected, alarm will be triggered and video will be taken.
i
ote: If press and hold ‘DEL/MUTE’ button at first, then install batteries,
N
ree hands after a ‘beep’ tone, alarm will only take video, no siren once
f
riggered.
t
When entering the protected area
Simply point the remote control at the alarm unit and press the ‘CLR’
button. When entering the protect area, there is a short beep to indicate
that motion has been detected and a 5s delay before the alarm will sound
0 seconds and video will be taken 30 seconds, allow it to be disarmed.
3
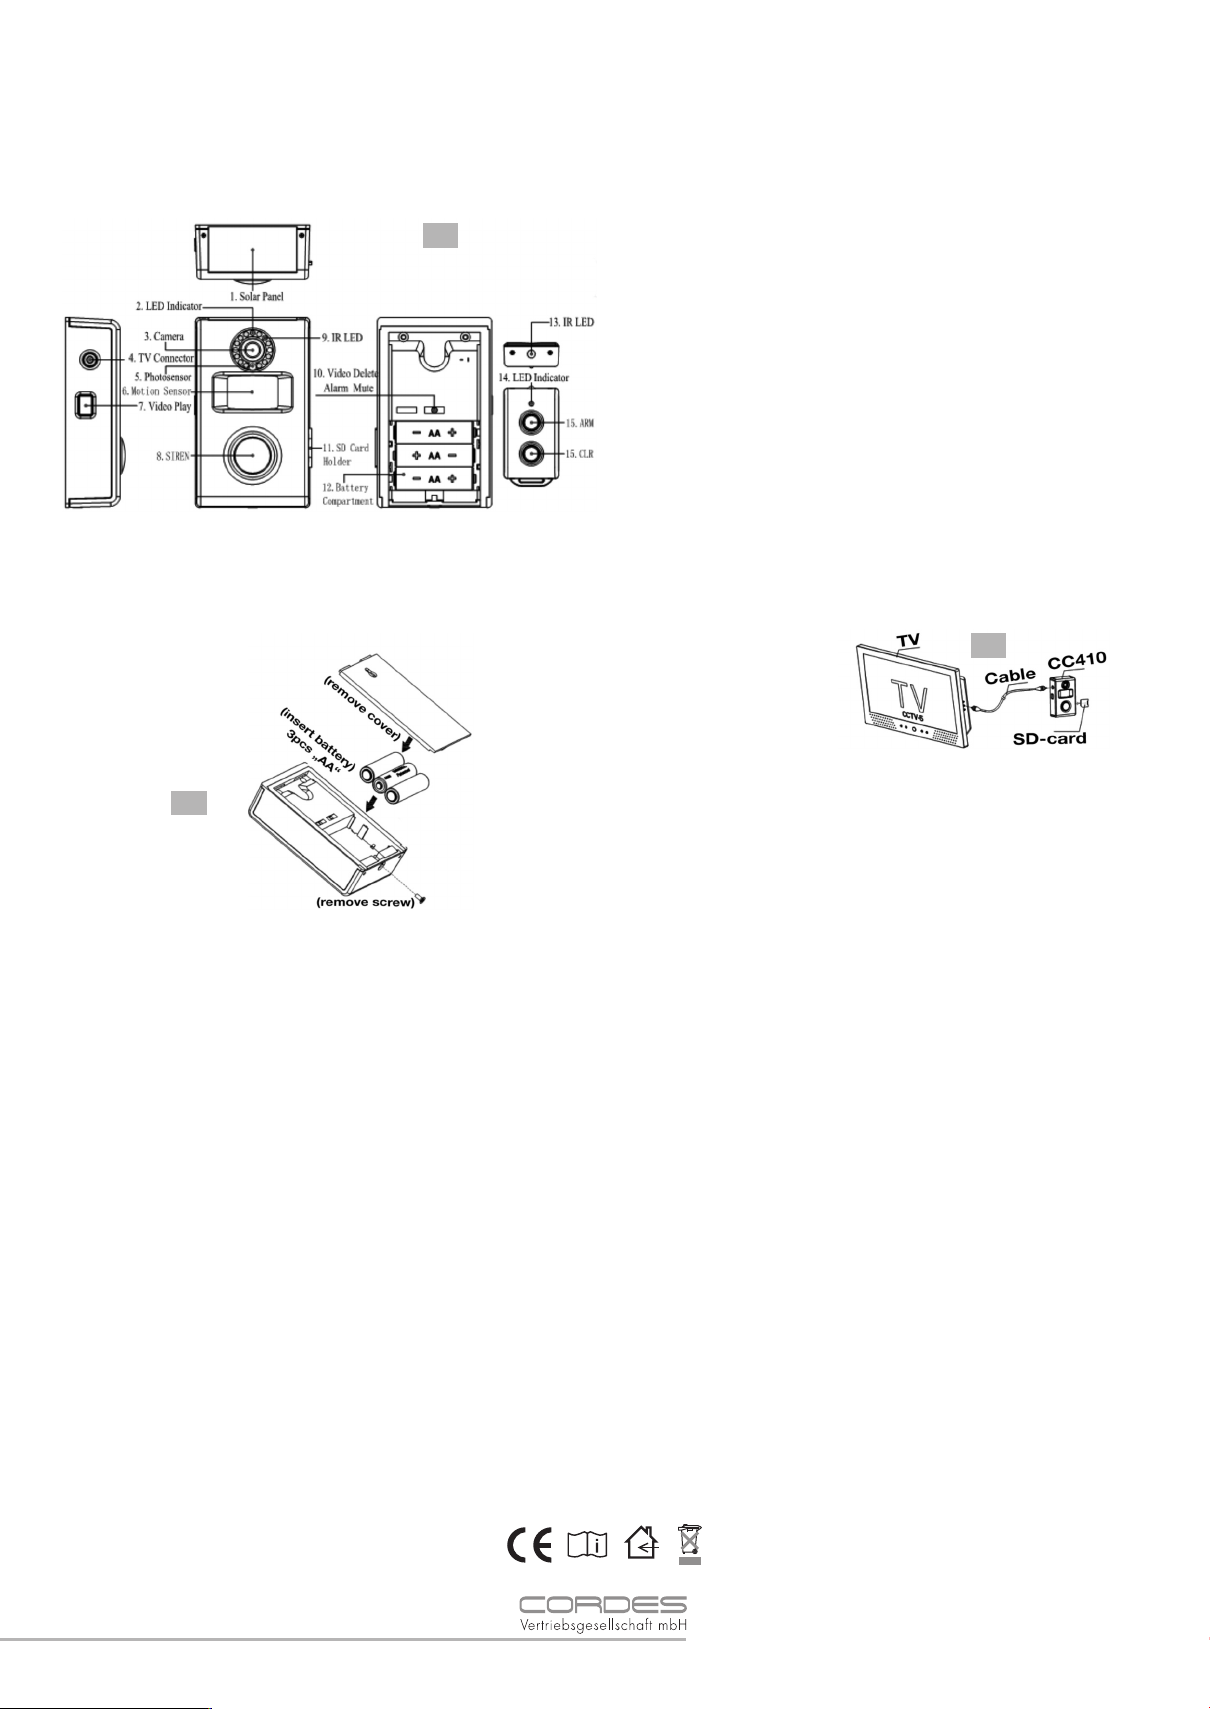
heck the video record
C
nder disarm mode, connect alarm unit with TV via AV line(not included),
U
ress ‘PLAY’ button (7) to play the recorded video directly. Press and hold
p
PLAY’ button (7) around 3 seconds to be out of mode of video playing.
‘
Note: If the led (2) light flashes every other 5s, it indicates the new video
as been recorded.
h
C
B
Remote control
The remote control uses three LR44 batteries (included). If the LED (14) light
on remote control does not come on when either ‘arm’ or ‘disarm’ button is
pressed, then batteries need to be replaced. Removing screw at back of
remote and replace batteries.
Programming the alarm
After inserting batteries immediately point remote control at alarm and press
the ‘ARM’ button within 2M, the LED indicator (2) will flash once to indicate
that it has learnt the code of remote. Total 2pcs remotes for each alarm unit.
Note: The alarm must be re-programmed with remote control each time
when batterires are removed or replaced.
Alarm installation
1. Place the alarm in the desired location, preferably front the door or
window about 1~1.3m above floor.
2. Remove the back cover and fix it to the wall using the screws supplied.
3. Then the alarm body can be snapped into place on to the back cover and
secured using the screw at the base.
Note: This alarm unit also can be used as free standing.
Operation
When existing from the protected area
Point the remote control at the alarm and press the ‘ARM’ button. A
elete the video record
D
Under disarm mode, press the ‘DEL/MUTE’ button to delete all the video
record.
Set the recording real-time
Create a time file in the sequence of ‘year.month.date hour:minute:second’
at your local time, for example ‘2011.02.03 11:20:05’, and store it in ‘.txt’
format in your computer. Then, copy the time file to SD card (included).
Lastly, install batteries and SD card properly, arm the alarm and trigger the
alarm, the recording real-time will be updated base on the time you just programmed.
Detection range
The motion detector area of the alarm unit has 8m far away, 60° horizontal
and 120° vertical.
Battery precautions
• Follow correct polarity when installing batteries.
• Do not mix different types of battery such as Alkaline and Carbon-zinc or
old batteries with new.
• If alarm unit is not used for a long period of time, remove batteries to prevent damage or injury from posssible battery leakage.
• Do not recharge batteries not intended to be recharged.
SPECIFICATION:
Measure: 7,0cm (W) x 11,6cm (H) x 3,7cm (T)
Horn Level: 85db(A) 3m
Ambient Humidity: 10% - 90%
Weight incl. battery: 230g
Power Source: 3 x AA batteries
(not included)
Remote: 2 x LR44 batteries
(included)
Op de Solt 42 · D – 22391 Hamburg
 Loading...