

Page 1
UNDERMOUNT SINK INSTALLATION
IMPORTANT!
READ ALL INSTRUCTIONS CAREFULLY
DO NOT DESTROY OR DISCARD ORIGINAL PACKING MATERIALS
It is imperative that you inspect your order as soon as your product has been received. CopperSmith
cannot, under any circumstances, accept returns on products that have been installed. If a product
arrives damaged, please save all original packing materials. Please photograph immediately and
email the images to [email protected].
WORLDCOPPERSMITH.COM
1-888-431-4677
Disclaimer
Installation must be performed by a licensed professional only.
Installation must comply with all local building and safety codes.
Installation should not be scheduled until the product is received
and inspected for damage or defect.
CopperSmith is not responsible for any installation delays or
damages incurred as a result of installation.
CopperSmith is not responsible and does not supply any hardware
or tools necessary for installation.
Undermount Sink Instructions
Guidelines
CopperSmith sinks should be installed according to all plumbing and building codes by a licensed
contractor.
PLAN AHEAD - Because CopperSmith sinks are constructed from solid, heavy-gauge metals; they are
considerably heavy. When unpacking your sink, make sure to place protective material (cardboard, packing
foam, a throw rug, etc.) between your sink and the floor to avoid any damage. You may also need some
assistance when moving or lifting your sink to avoid risk of personal injury.
Because CopperSmith products are hand-made, the specified dimensions of your sink may be approximate
(+/- ⁄ inch). It is always best to use the actual basin of your sink as a template for any cutout requirements.
Make sure all drain connections have a secure, water-tight seal.
Always use non-water based, 100% silicone adhesive.
Make sure to leave enough space behind the basin for your back-splash, faucet, faucet handles, and any
other accessories. Also make sure to accommodate a full range of motion for any moving parts.
CLEANUP - When cleaning up after the installation, DO NOT use abrasive cleaners or scouring materials that
might damage or alter the sink’s finish. Instead, use warm water and a soft cloth with a non-abrasive soap,
such as dish soap.
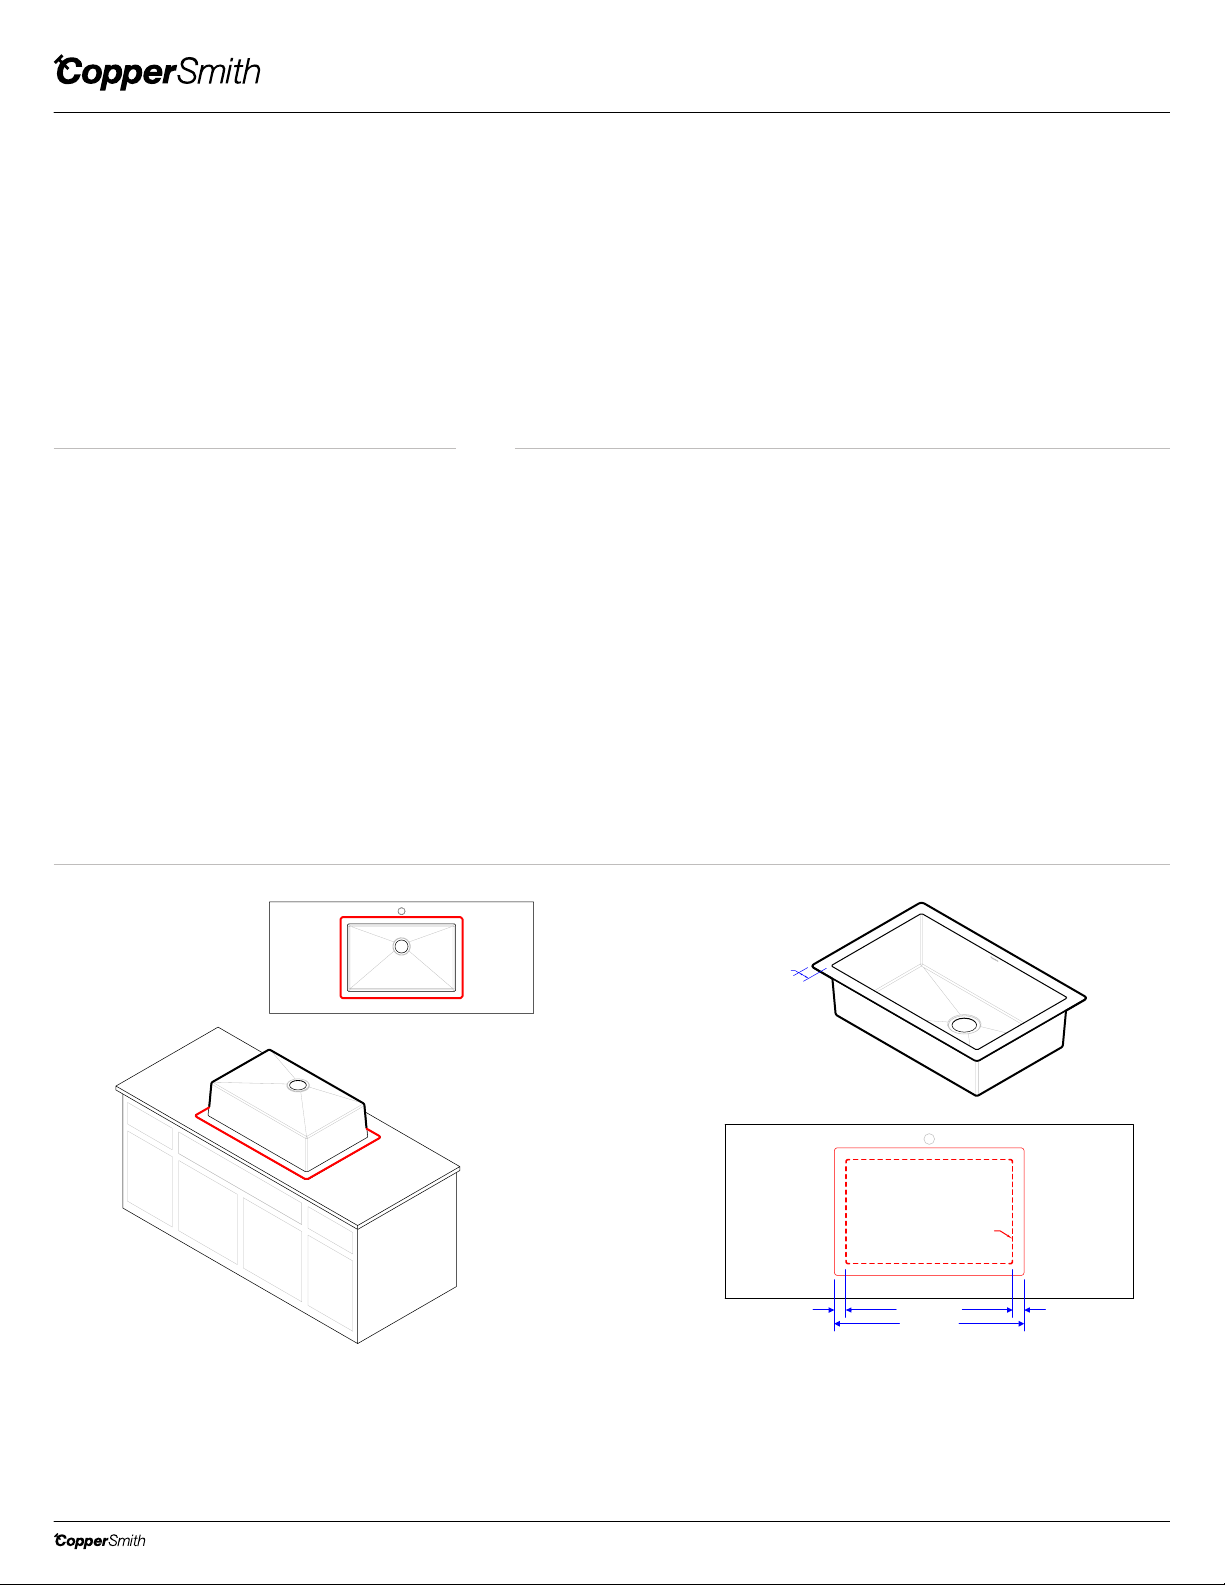
RIM WIDTH
Place the basin of the sink upside down on the counter top surface and
1. 2.
mark the surface of the counter top by tracing around the outside edge
of the rim. Make sure to provide clearance for your faucet or any other
fixtures (including clearance for full range of motion on all moving parts).
Make sure to account for mounting studs and clips.
WORLDCOPPERSMITH.COM | RANGE HOODS | SINKS | TUBS | TABLES | FIRE PITS | PLANTERS | COOKWARE
CUT LINE
RIM WIDTH RIM WIDTH
Measure the distance between the inside edge of the bowl and the outer
edge of the rim. Mark the counter top inside of the first tracing. The distance
between the two lines should be equal to the width of the rim. Cut the
counter top along the inner line. Confirm a proper fit by temporarily placing
sink under the cut-out.
BOWL WIDTH
SINK WIDTH
Page 2
UNDERMOUNT SINK INSTALLATION
WORLDCOPPERSMITH.COM
1-888-431-4677
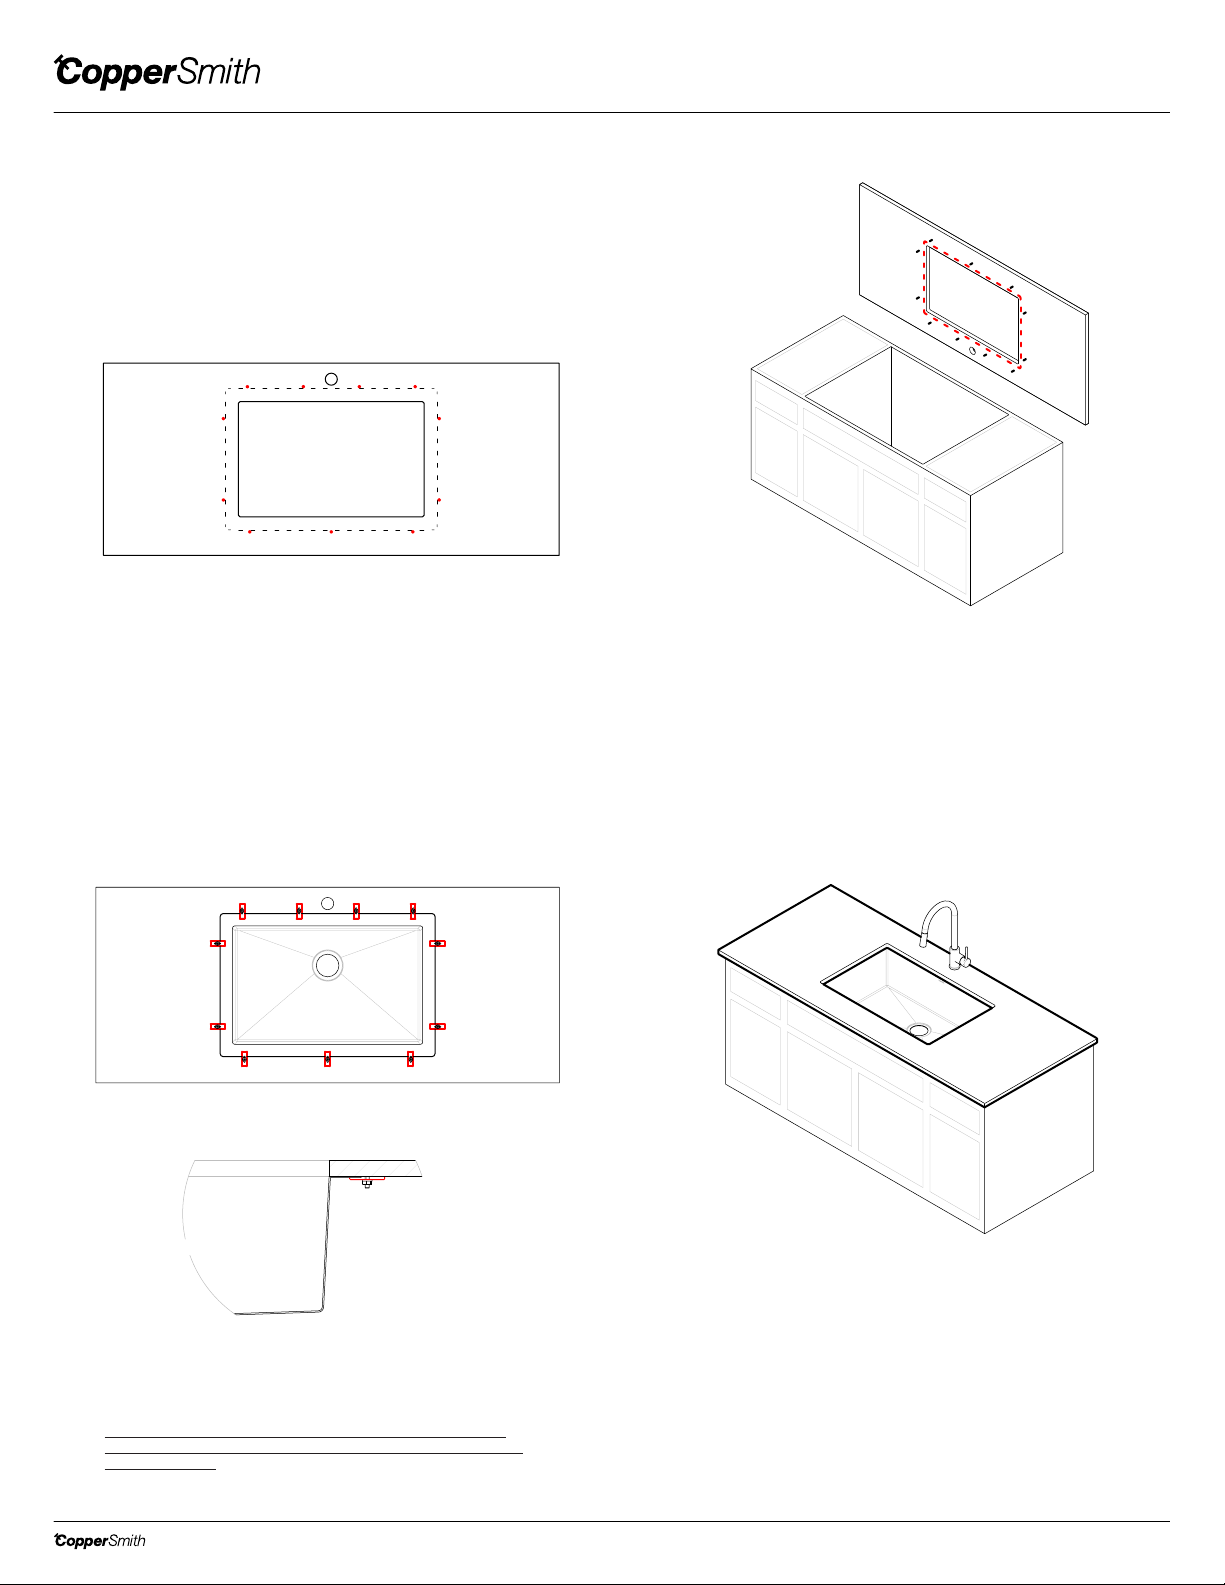
Install studs for mounting clips on the underside of the counter top,
3.
leaving sufficient clearance for the sink rim.
Apply 100% non-water-based silicone underneath the counter top around the
4.
cut-out area.
Position the sink under the counter top and secure it in place using
5.
mounting clip fasteners.
IMPORTANT NOTE: Additional framing may be needed to support
the sink. Please consult a professional installer to ensure the sink has
adequate support.
Confirm the basin is sitting level in all directions while pressing to seal.
6.
Remove all excess silicone.
WORLDCOPPERSMITH.COM | RANGE HOODS | SINKS | TUBS | TABLES | FIRE PITS | PLANTERS | COOKWARE
 Loading...