

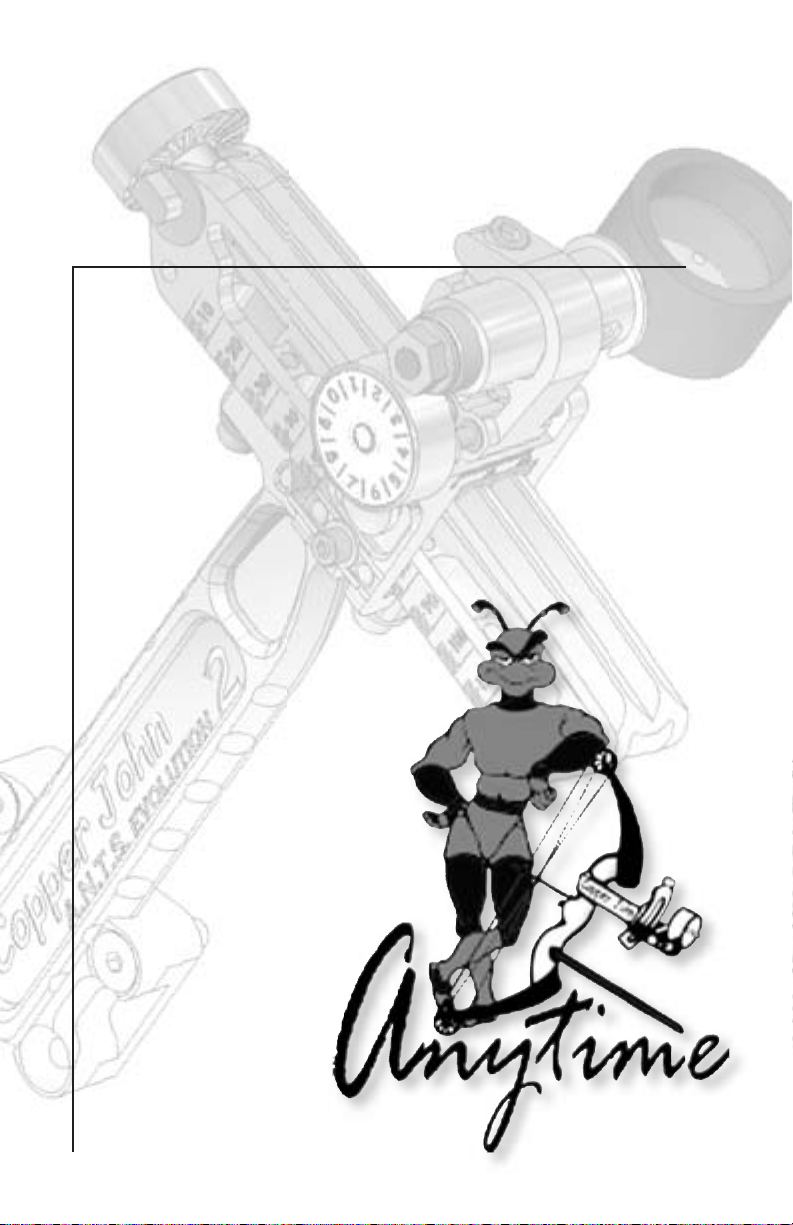
A.N.T.S.
A l w a y s N o r m a l T a r g e t S i g h t
Technical
Manual
Copper John Corp
1 7 3 S t a t e S t .
A u b u r n , N Y 1 3 0 2 1
3 1 5 - 2 5 8 - 9 2 6 9
sales @copperjohn .com
www.copperjohn.com
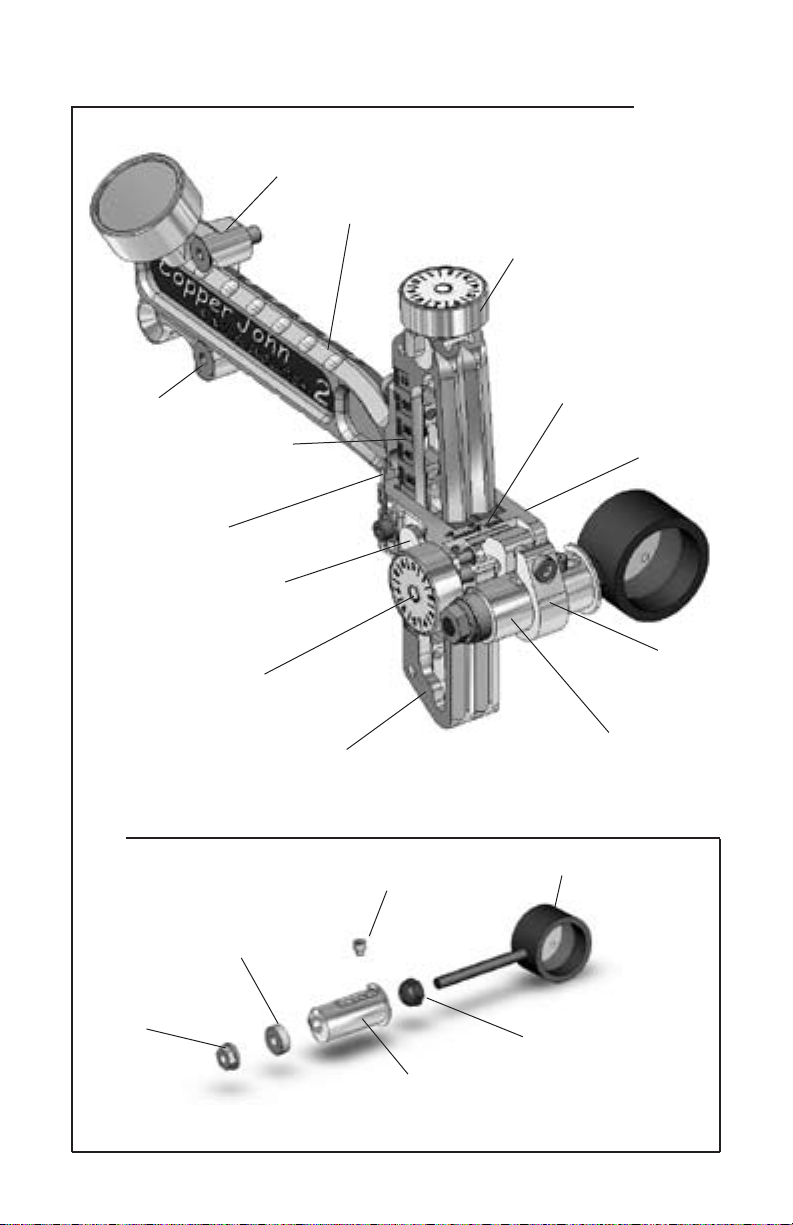
Parts of the A.N.T.S System
Extension block
Extension
Elevation Knob
Mounting Screws
Elevation Scale
Elevation
Indicator Needle
Elevation Block
Quick Release
Windage Knob
Frame
Windage Scale
Elevation Block
Windage Block
Scope Mounting Block
Parts of the Double Axis Adjustment
Horizontal Stop
Screw
Radiused Washer
Scope
Flange nut
Pivot Nut
Scope Mounting
Barrel
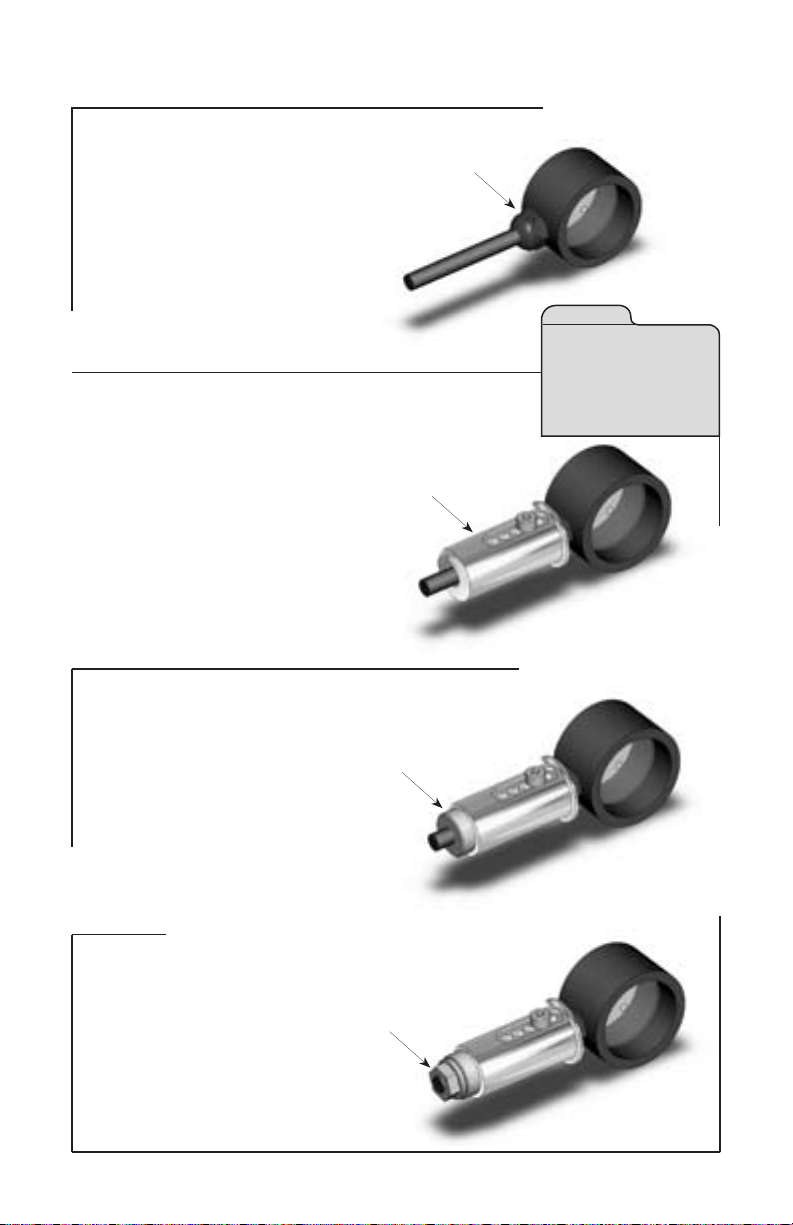
A.N.T.S Assembly
Step 1
Screw the Pivot Nut on to
your scope’s threaded rod.
Using a 7/16 wrench, securely
snug the nut against the
scope housing.
Step 2
Slide on the scope mounting barrel. Make sure that
the pivot nut seats fully in its
socket. Test that the sight rotates properly by moving the
scope thread back and forth.
Make sure it glides smoothly.
Step 3
H i n t
Always use a open end
wrench that is the proper size
when making adjustments in
this area. Pliers or adjustable
wrenches can damage the nut
and ruin your sight.
Slip the Radiused Washer into
place. Orient the “cave” side
of the washer to the Scope
Barrel. Test it and make sure
it glides over the end of the
Scope Barrel properly.
Step 4
Screw on the ange nut
and snug it in place with a
3/8 wrench. Initially, you will
want to leave this just nger
tight. You will need to adjust
your scope level later during
set up.

A.N.T.S Assembly cont.
Step 5
Insert the Double Axis assembly into the Windage Block.
Make sure the horizontal stop
screw is all the way against
the Windage Block. Tighten
the Windage Block Locking
screw
Step 6
Mount the sight block to the
bow with the screws provided
and securely tighten the
mounting screws. Slide the
A.N.T.S. bar into the block
and choose your desired distance setting.
Horizontal Block
Stop Screw
H i n t
The horizontal stop screw
will be useful when you are
disassembling your sight
for travel in its case. The
stop screw makes sure your
scope locates perfectly every
time you reassemble your
sight, keeping your windage
dead on.
Windage Block
Locking Screw
H i n t
Once you have chosen your
desired distance, it is helpful
to mark your bar where the
knob contacts it. This will aid
you in setting the sight back
to the your chosen position
after you have removed your
sight for travel.

A.N.T.S Level Setup
It is important when using any range adjustable sight that
your scope is perpendicular with the frame (3rd Axis) and the
scope is level with the earth (2nd Axis). The frame can also be
leveled with the shooting string (1st Axis), but this is not crucial. It is common that shooters will adjust their 1st Axis so that
it matches, or is level, with their natural cant or bow tilt while
at full draw.
Setting the 2nd Axis
You must set the 2nd Axis rst.
Using a line level or similar device against the frame, hold the
frame level and note the level
in the scope. Raise or lower the
ange nut on the end of the
Double Axis Adjustment until
both levels show that they are
perfect. Note, the diagram to
the left is perfect. If your sight
looks like this, You are ready to
move on to the next step.
Flange Nut
Compare and
tighten screws.
Leveling Device

Setting the 3rd Axis
The third axis
45° down
adjustment makes
sure the scope is
perpendicular
to the bar, bow,
and plane of the
shooting string.
With your level still
attached to your
scope bar, draw your bow and point your bow
down at around a 45 degree angle. Both bubbles
should match as they do in the diagram to the
right. Move the ange nut to the rear or to the
front to make the bubbles match. Once this is set,
you can tighten the ange nut completely.
Setting the 1st Axis
It is not critical for your rst axis to be set, but some shooters prefer it. Some prefer it to match their natural cant. To
set this, you will draw your bow to full draw with your eyes
closed. Allow it to settle and then open to see if the bubble is
level. Tilt the frame on the bar until this test comes out level.
If you would like to level the frame with the string, put your
bow on a at table and level the string by shimming the bow.
Then put your level on the sight. Tilt the frame into position
and tighten the screws. Once the screws are tight, recheck.
Compare and tighten
Shooting String

Getting the most out of your A.N.T.S
Using the Adjustment Knobs and the Scale
Both the Elevation Knob and the Windage Knob have a
number scale and they are labeled up/down, left/right for
your convenience. The numbers on your knobs are related
to the hash marks on the scale. If you start with the knob on
Zero, and rotate it one full turn, it will move one number or
hash mark on the scale. There are 20 clicks between each
number. When getting
sight marks, note the
number on the scale and
the number on the knob.
This will help you get the
tightest marks possible
and it will get you right
back to the perfect spot
everytime
Adjusting your sight and counting clicks
It is handy to know how much distance a click represents when you are
using your sight. This will help you get
on target faster and stay on target
with a minimum of guesswork. The
distance is expressed in Minute Of
Angle or MOA. The MOA is 5/32 of an
inch at 100 yards on an A.N.T.S. This
means that one click on windage or
elevation equals 5/32 of an inch at
100 yards. Therefore at 20 yards one
click equals 20% of 5/32” or 1/32 of an
inch. 50 yards would be 50% of 5/32”
or 5/64 of an inch.
H i n t
At twenty yards, one click
will move your arrow 1/32”.
It will take 25 clicks to move
your sight from dead center
of the X ring line to the exact
center of the X ring.

General Maintenance
Keep your A.N.T.S. clean and dry. If it gets wet, towel it
off and allow it to dry completely before storing in its case.
Lubrication is normally not necessary, but if you should feel
the need to lube your sight, use only synthetic, non water
soluble grease such as SuperLube®. Lube only the Brass Rear
Bearings by putting a line of lube in their slots and running
the elevation block up and down to distribute the lube, or
you can lube the underside of the adjustment knobs by putting a drop on the knob and spinning the knob to distribute
the lube. No other part of the sight should be lubed. Be very
sparing with the lubrication because excessive amounts of
lube will attract dirt and grime which could hamper the performance of your sight.
Lifetime Warranty
Your A.N.T.S. Sight is warranted against defects in materials or workmanship to the original
owner for the lifetime of the product*.
The warranty is conditioned upon proof of purchase and other conditions listed below. IT
IS IMPORTANT THAT YOUR SALES RECEIPT BE FILED IN A SAFE PLACE FOR FUTURE
REFERENCE, AS REPAIRS WILL NOT BE PERFORMED UNDER WARRANTY WITHOUT A
COPY OF THE DATED SALES RECEIPT. Copper John Corp. warrants that you’re A.N.T.S.
will perform its intended function if used in accordance with the instructions provided.
This Lifetime Warranty covers only the replacement parts, labor, and return ground
transportation costs performed by Copper John Corp. to the customer. Transportation
for the return of the Sight to Copper John Corp. is not covered. No C.O.D. shipments will
be accepted by Copper John Corp. Copper John Corp. makes no other warranty either
expressed or implied, whether of tness or of marketability, except as stated above. Any
such additional warranty is expressly disclaimed. No agent, employee, or representative
of Copper John Corp. or its dealers has the authority to bind Copper John Corp. to any
agreement not herein stated. Buyer agrees that the sole and exclusive remedies for breach
on any warranty concerning Copper John A.N.T.S. Sights shall be repair or replacement of
defective parts. Copper John Corp. shall not be liable for injury or property other than the
A.N.T.S. Sight itself. Copper John Corp. reserves the right to replace defective parts according
to availability with compatible replacement parts.
(*The lifetime of a sight is determined according to the production cycle of the model
and on-hand supply of replacement components. Should a sight model no longer be in
production and supply of components be exhausted, an upgrade fee may be charged in
order to supply the customer with a newer, updated model.)
 Loading...