

Copper Fit STEP FX Quick Start Manual
• Remove Display Module from wrist strap (see Features, page 2)
• Install battery underneath copper tab (see Installing/Changing the
Battery, page 3)
• You will be prompted to set Time and Date (see Setting Time and
Date, page 5)
Basic Unit
Quick Start Guide
See full
instructions inside
For more accurate tracking and to customize (see Personal Profile, page 7)
SET
RESET
SET
RESET
SET
RESET
COPPER TAB
DECREASE(-)
VALUE
ENTER VALUE
and go to next item
Underside of Band
Push
Up
INCREASE (+)
VALUE
SET
RESET
(MODE)
1 2
The Copper Fit Step FX lets you maximize your personal goals by
tracking:
• Steps
• Distance
• Calories Burned
Set your own goals, then push to meet and exceed your personal
best – the Copper Fit Step FX does all the work.
With built-in precision memory, it records your daily and weekly
activity and delivers accurate information at your fingertips in the
easy-to-read display.
Instruction Manual
Thank you for your purchase of the Copper Fit Step FX, the new way
to track your activities, set your fitness goals, and instantly measure
your accomplishments. It’s like having a personal trainer on your
wrist, pushing you to your full potential.
The sleek, comfortable wristband design gives you the freedom to go
anywhere while still monitoring your progress – even at work.
Start tracking and see yourself in a different way!
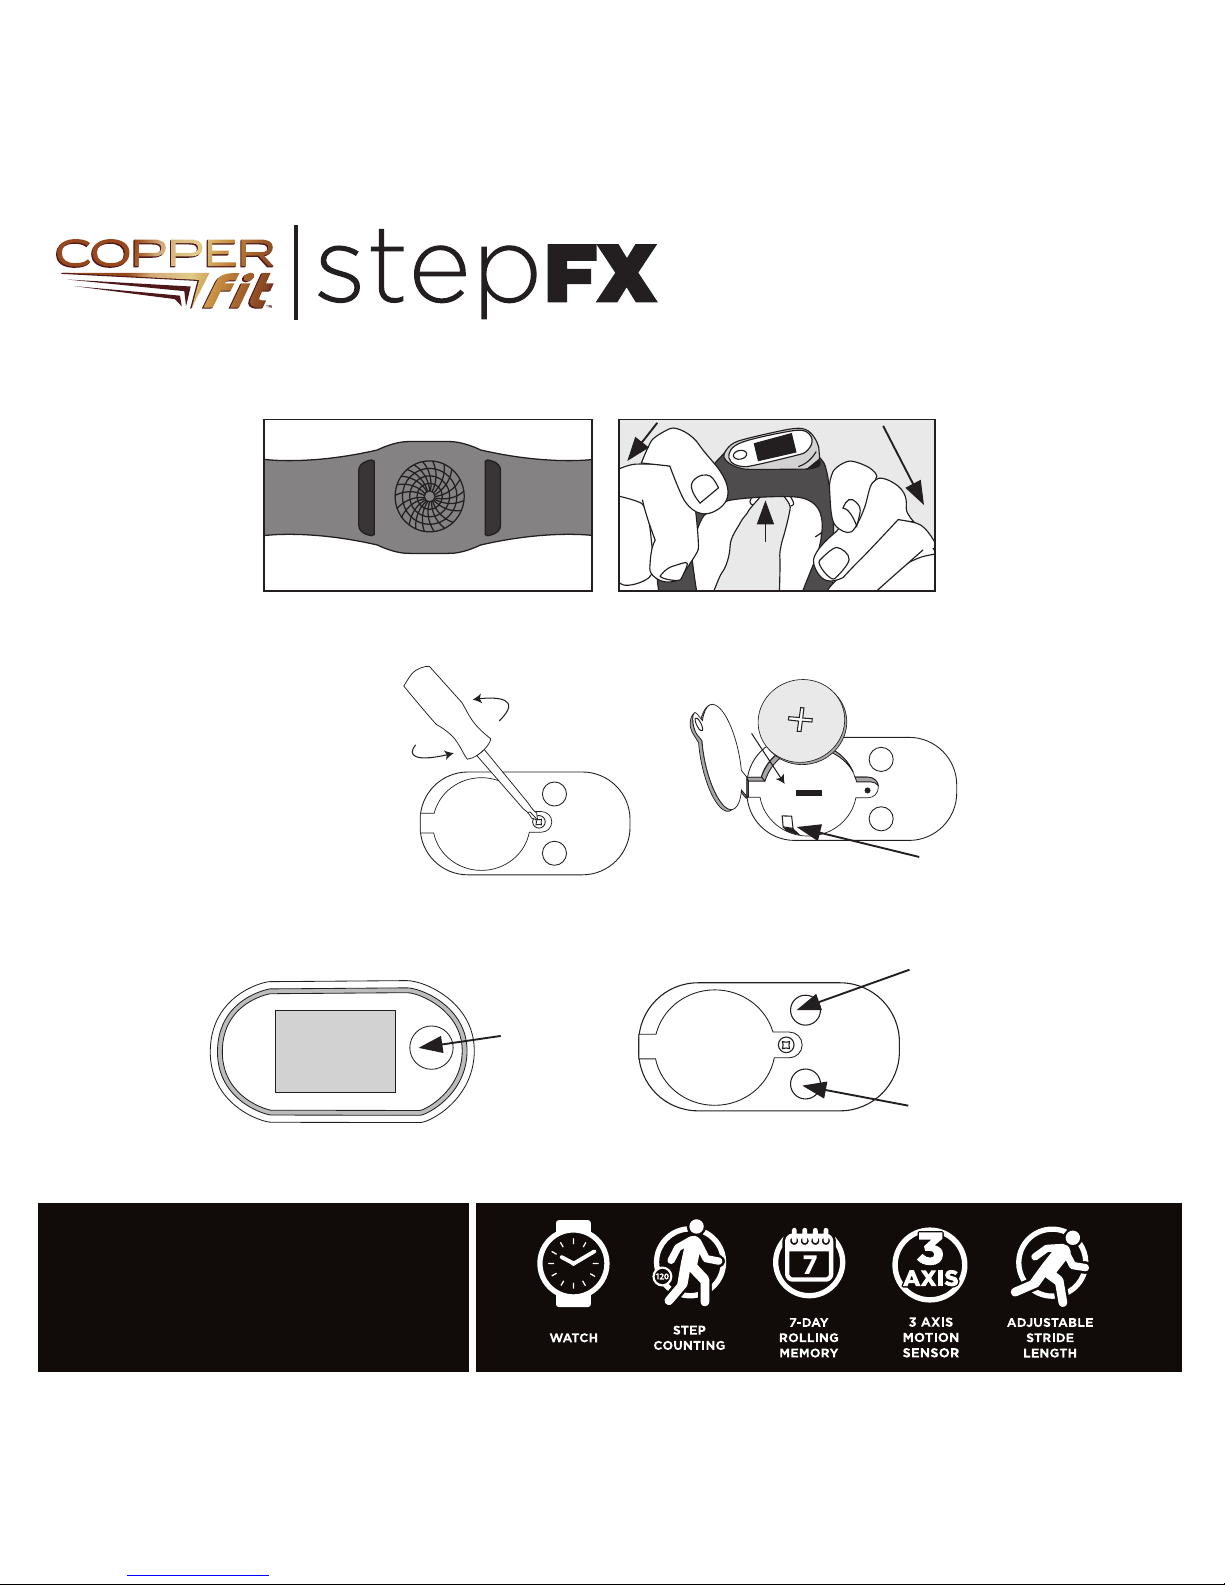
Features
The Copper Fit Step FX can be worn as a Watch, with Date
and Time features. It also tracks Steps, Distance and Calories
Burned. Wear the display module alone in your pocket, in the
wristband, or in the optional clip (if purchased).
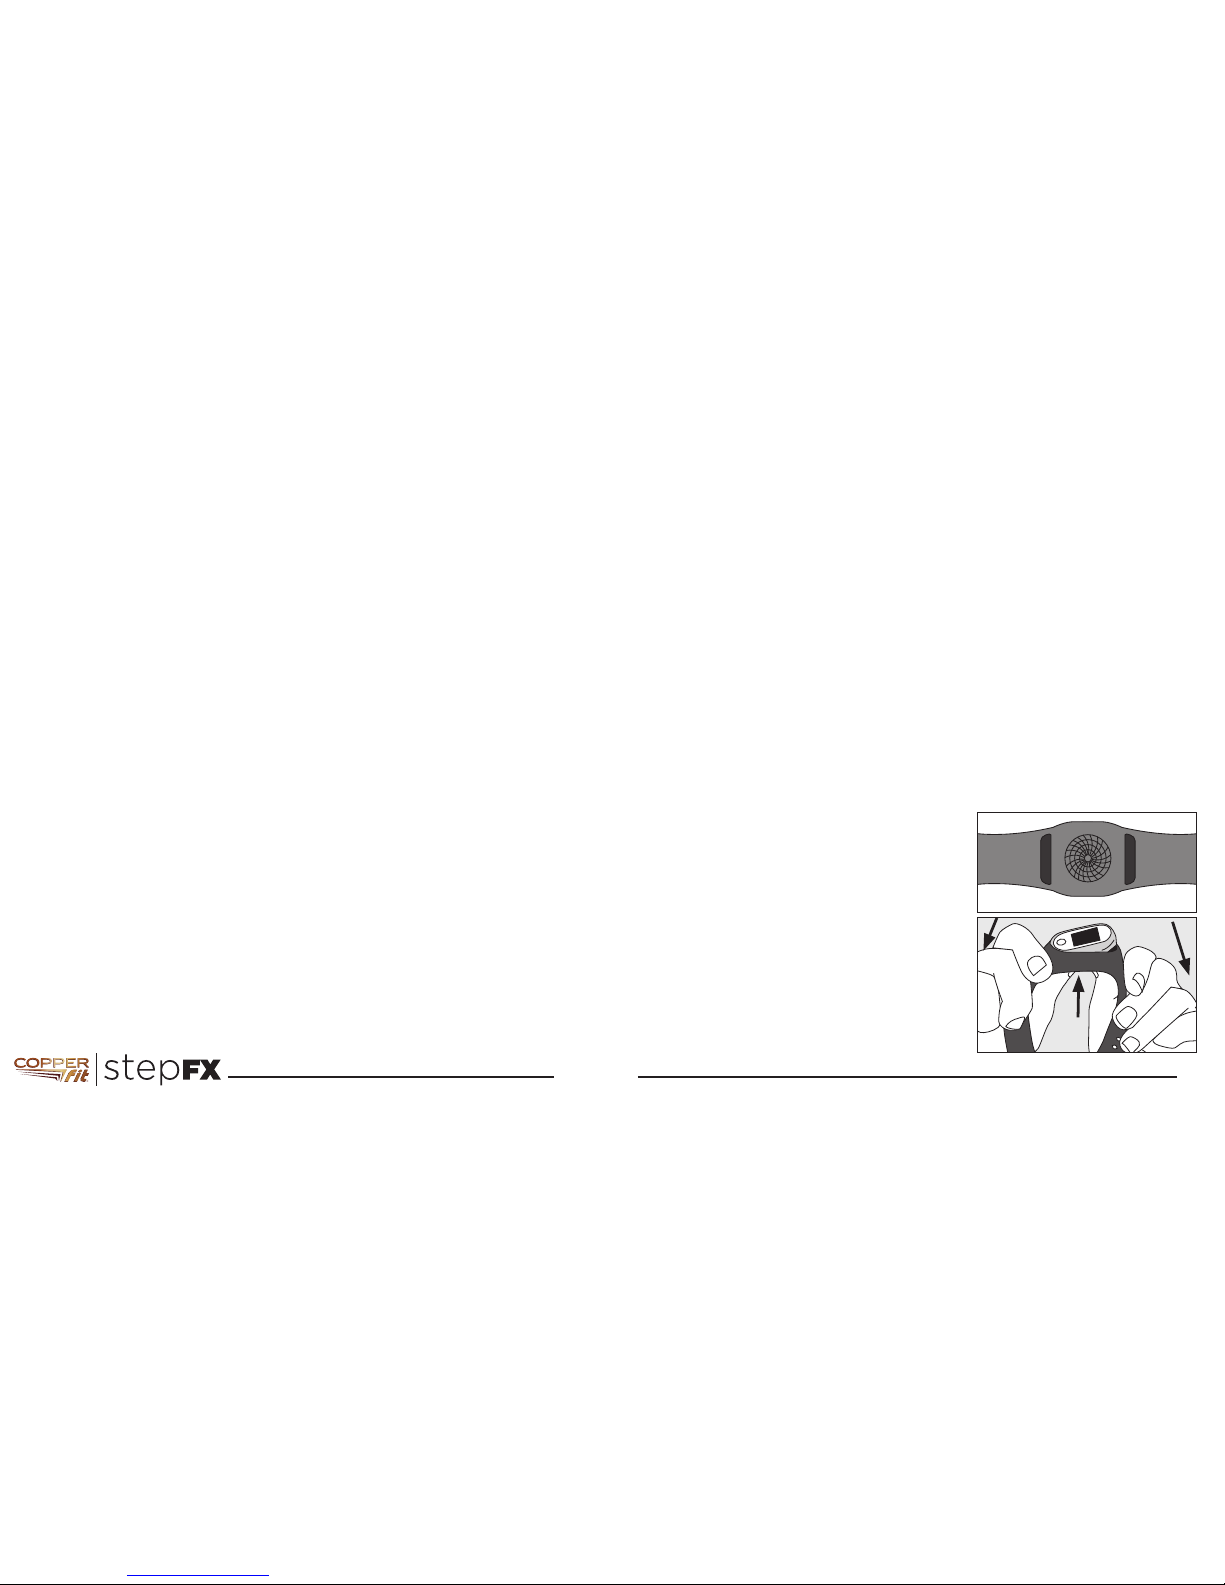
HOW TO REMOVE DISPLAY
MODULE FROM THE WRIST BAND
Hold the wrist band with two hands
(one strap in each hand). Place both
thumbs on the circle (Image A)
found in the center of the bottom
of the wristband and push up and
outward (Image B).
Image A
Underside of Band
Push
Up
Image B
3 4
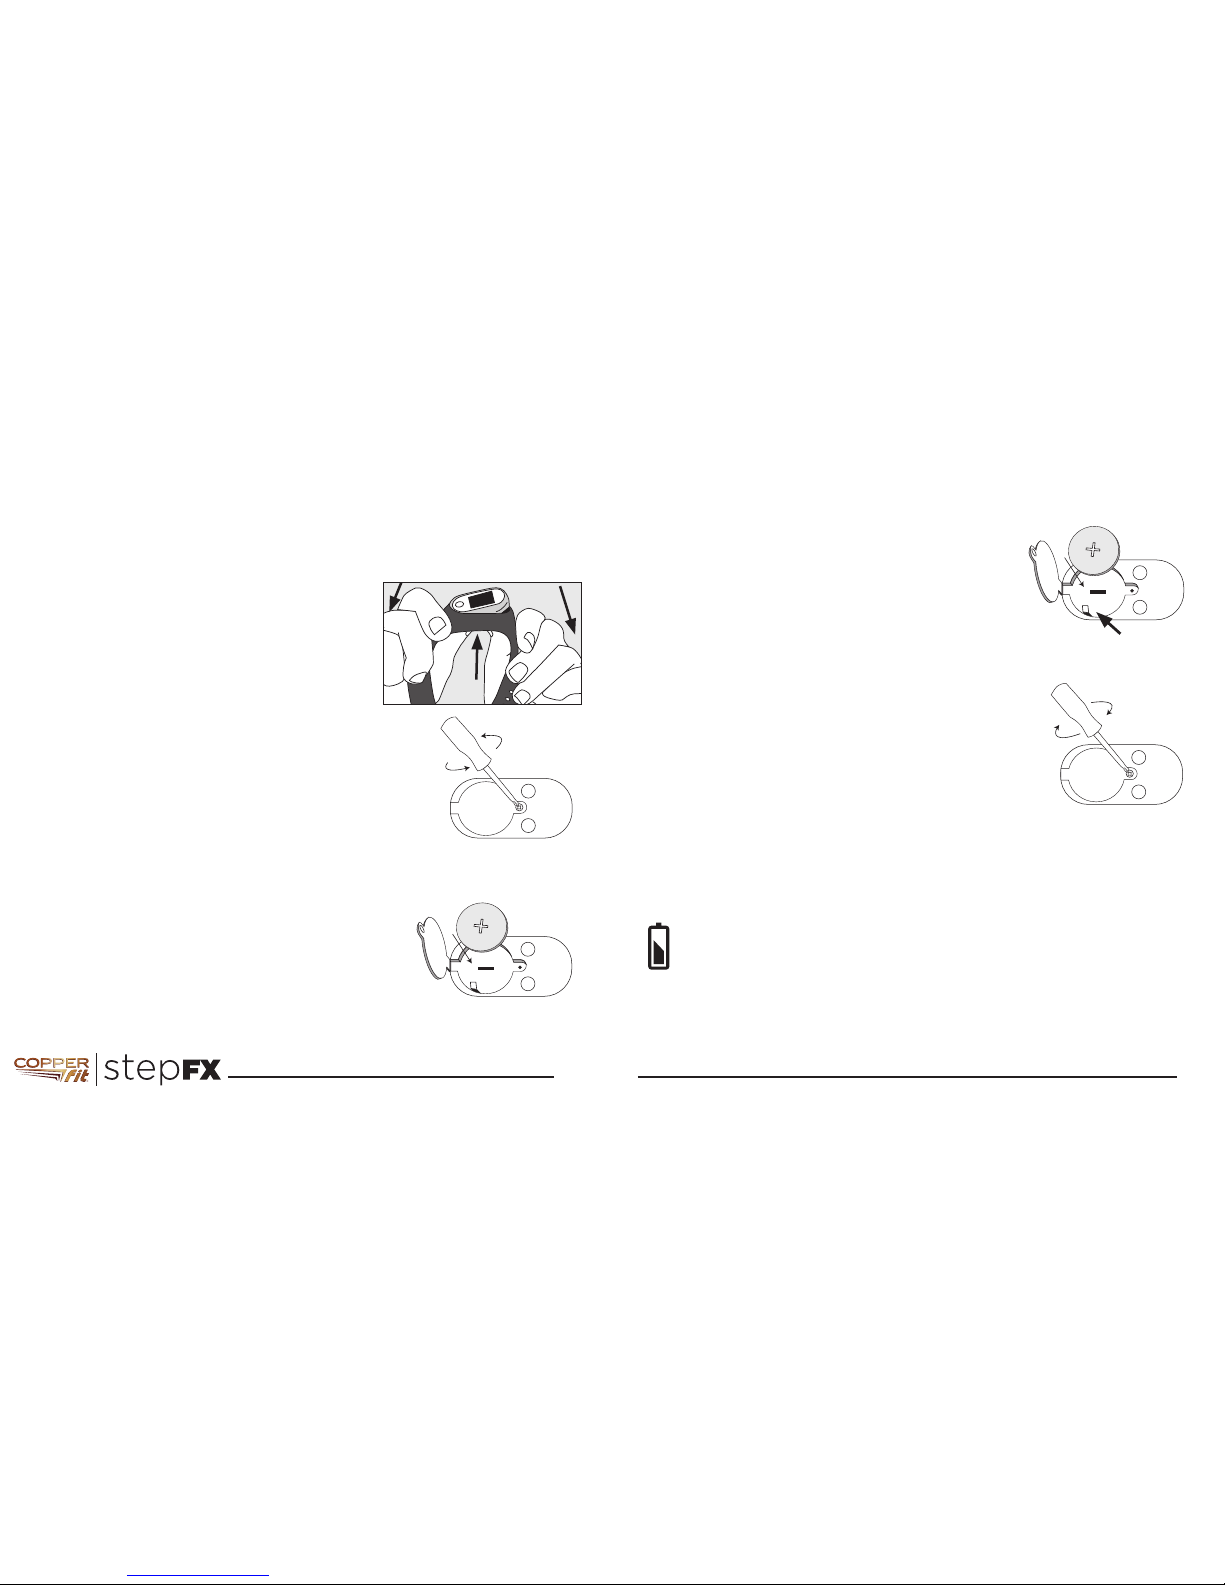
Installing/Changing the Battery
1. To install/change the battery, remove
the Copper Fit Step FX display
module from the band (see page 2).
2. Turn display module over to bottom side
then use the Philips screwdriver (included
in the package) to remove the screw in the
center of the display module (next to the
SET and RESET buttons).
3. Open the hinged door and replace the
battery with a new CR1620 Lithium cell
battery (included in the package) with the
plus side (+) facing out.
SET
RESET
SET
RESET
SET
RESET
SET
RESET
SET
RESET
SET
RESET
When the Low Battery symbol is displayed, the battery
needs to be replaced.
WARNING: Button cells can be extremely harmful to small
children. Properly dispose of used cells immediately upon
removal. Keep all button cell batteries away from children.
COPPER
TAB
4. Insert battery underneath copper tab.
5. Close the hinged door and turn screw
clockwise to secure.
NOTE: After battery has been installed or changed, the unit will
automatically prompt you to set the date and time (see Setting
Time and Date, page 5).
5 6
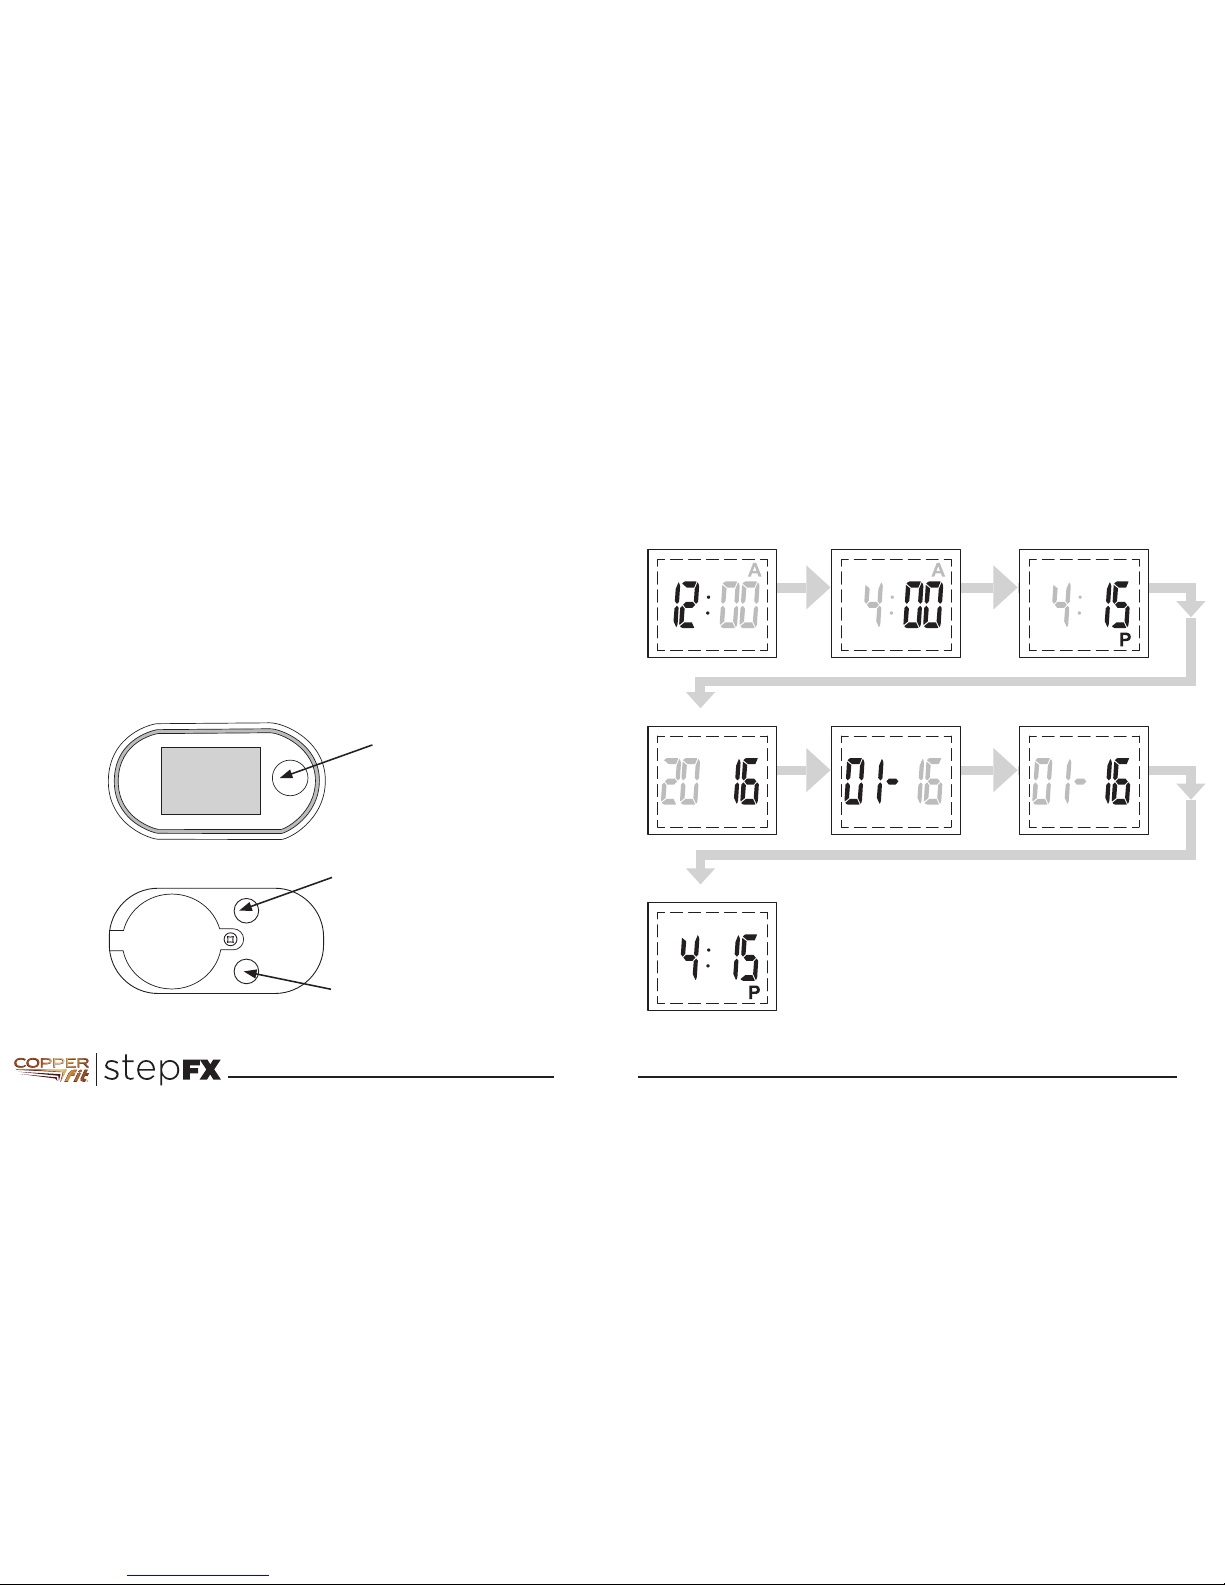
Setting Time and Date
After Installing or replacing the battery, the display module will
automatically come on with Hours flashing. Use the buttons as
indicated in the picture to set the value, then press SET to enter
the selected value and go to the next item.
Press SET Press SET Press SET
Press RESET (to increase)
or MODE (to decrease)
to adjust Minute
Press MODE or RESET
to set AM/PM
Press SET Press SET Press SET
Press RESET (to increase)
or MODE (to decrease)
to adjust Hour
Press SET Press SET Press SET
Press RESET (to increase)
or MODE (to decrease)
to adjust Minute
Press MODE or RESET
to set AM/PM
Press SET Press SET Press SET
Press RESET (to increase)
or MODE (to decrease)
to adjust Hour
Press RESET (to increase)
or MODE (to decrease)
to adjust Month
Press RESET (to increase)
or MODE (to decrease)
to adjust Day
Press SET Press SET Press SET
Press RESET (to increase)
or MODE (to decrease)
to adjust Year
HOUR
YEAR
FINISHED
MINUTE
MONTH
AM/PM
DAY
DECREASE(-) VALUE
ENTER VALUE
and go to next item
INCREASE (+)
VALUE
SET
RESET
 Loading...