

Page 1
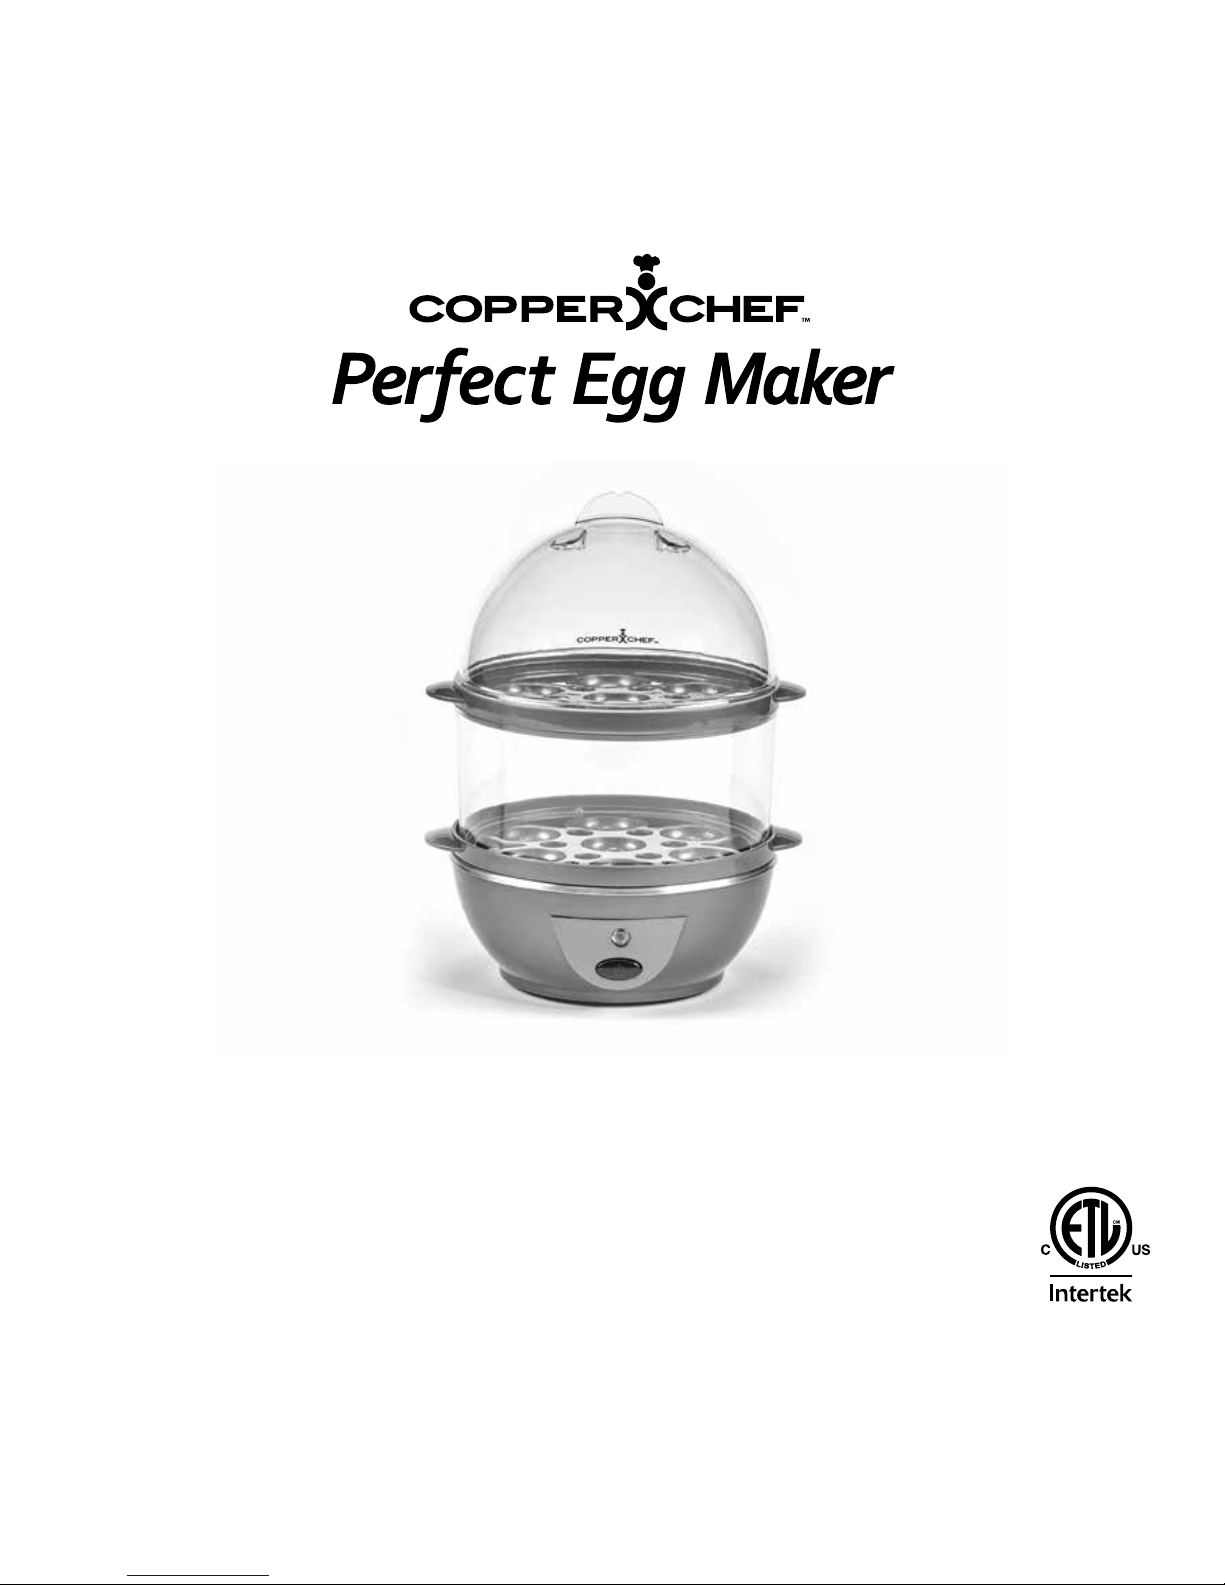
When using electrical appliances, basic safety precautions should always be followed.
Do not use the Perfect Egg Maker until you have read this manual thoroughly.
Save These Instructions – For Household Use Only
Owner’s Manual
Warranty Information Inside
MODEL: ZDQ-206
Page 2

2 Perfect Egg Maker | Model: ZDQ-206
Before You Begin
It is very important that you read this entire manual, ensuring that you are
totally familiar with its operation and precautions.
Supply Power Rated Power Power Cord
AC 120V 60Hz 360W 27.6 in. (length)
Unit Specications
Page 3

Perfect Egg Maker | Model: ZDQ-206 3
Table of Contents
IMPORTANT SAFEGUARDS 4
Parts & Accessories 6
General Operating Instructions 8
Care & Cleaning 12
Warranty 13
Page 4

4 Perfect Egg Maker | Model: ZDQ-206
IMPORTANT SAFEGUARDS
When using electrical appliances, basic safety
precautions should always
be followed, including:
• Read and follow all instructions carefully.
• This appliance IS NOT INTENDED for use
by persons with reduced physical, sensory,
or mental capabilities or lack of experience
and knowledge unless they are under
the supervision of a responsible person
or have been given proper instruction in using
the appliance. This appliance is not intended
for use by children.
• Always BE SURE the Steam Vents are clear of
all food debris before use. A clogged Vent may
cause steam and excess pressure to build up.
• DO NOT TOUCH hot surfaces. Use pot holders
or oven mitts.
• To protect against electric shock, DO NOT
IMMERSE or rinse cords or plugs in water
or other liquids.
• UNPLUG FROM OUTLET when not in use
and before cleaning. ALLOW TO COOL before
handling components.
• DO NOT OPERATE any appliance
with a damaged cord or plug or after
the appliance malfunctions or has been
damaged in any manner. If damage occurs,
contact customer service.
• DO NOT USE any attachments or utensils
that were not recommended or supplied
by the manufacturer. The use of attachments not
recommended for use by the manufacturer may
cause serious hazardous situations, including
personal injury.
• DO NOT USE outdoors.
• DO NOT LET Power Cord hang over edge
of table or counter or touch hot surfaces.
• DO NOT PLACE on or near a hot gas
or electric burner or in a heated oven.
• EXTREME CAUTION must be used when moving
an appliance containing hot contents.
• DO NOT USE appliance for anything other than
its intended use.
• This appliance cooks using extreme heat.
Improper use MAY RESULT IN scalding injury.
Do not operate without Lid.
• ALWAYS CHECK the Steam Vents for clogs
before use.
• This appliance has been designed for use
with a 120V electrical outlet only. DO NOT USE
any other electrical outlet.
• The Unit generates high heat and steam during
operation. All necessary precautions MUST BE
TAKEN TO AVOID fire, burns, and other personal
injury during operation.
• When in operation, the Perfect Egg Maker
requires sufficient air space on all sides,
including top and bottom. NEVER OPERATE the
unit near any flammable materials, such as dish
towels, paper towels, curtains, or paper plates.
Page 5

Perfect Egg Maker | Model: ZDQ-206 5
IMPORTANT SAFEGUARDS
• Always plug the Power Cord directly into the wall
outlet. NEVER USE this Unit with an extension
cord of any kind.
• Anyone who has not fully read and understood
all operating and safety instructions contained
in this manual is NOT QUALIFIED TO OPERATE
or clean this appliance.
• If this Unit falls or accidentally becomes
immersed in water, unplug it from the wall outlet
immediately. DO NOT REACH into the water!
• DO NOT OPERATE this appliance on
an unstable surface.
• If this appliance begins to malfunction during
use, immediately unplug the Cord. DO NOT USE
or attempt to repair a malfunctioning appliance!
• If the appliance has a POLARIZED PLUG
(one blade is wider than the other): This plug
is intended to fit into a polarized outlet only
one way. If the plug does not fit into the outlet,
reverse the plug. If it still does not fit, contact an
electrician. DO NOT attempt to modify the plug.
Caution
Hot surfaces: This appliance generates heat and
escaping steam during use. Proper precautions
must be taken to prevent the risk of personal injury,
res, and damage to property.
Electric Power
If the electrical circuit is overloaded
with other appliances, your appliance may not
operate properly. It should be operated on a
dedicated electrical circuit.
SAVE THESE INSTRUCTIONS – FOR HOUSEHOLD USE ONLY
Page 6
6 Perfect Egg Maker | Model: ZDQ-206
Parts & Accessories
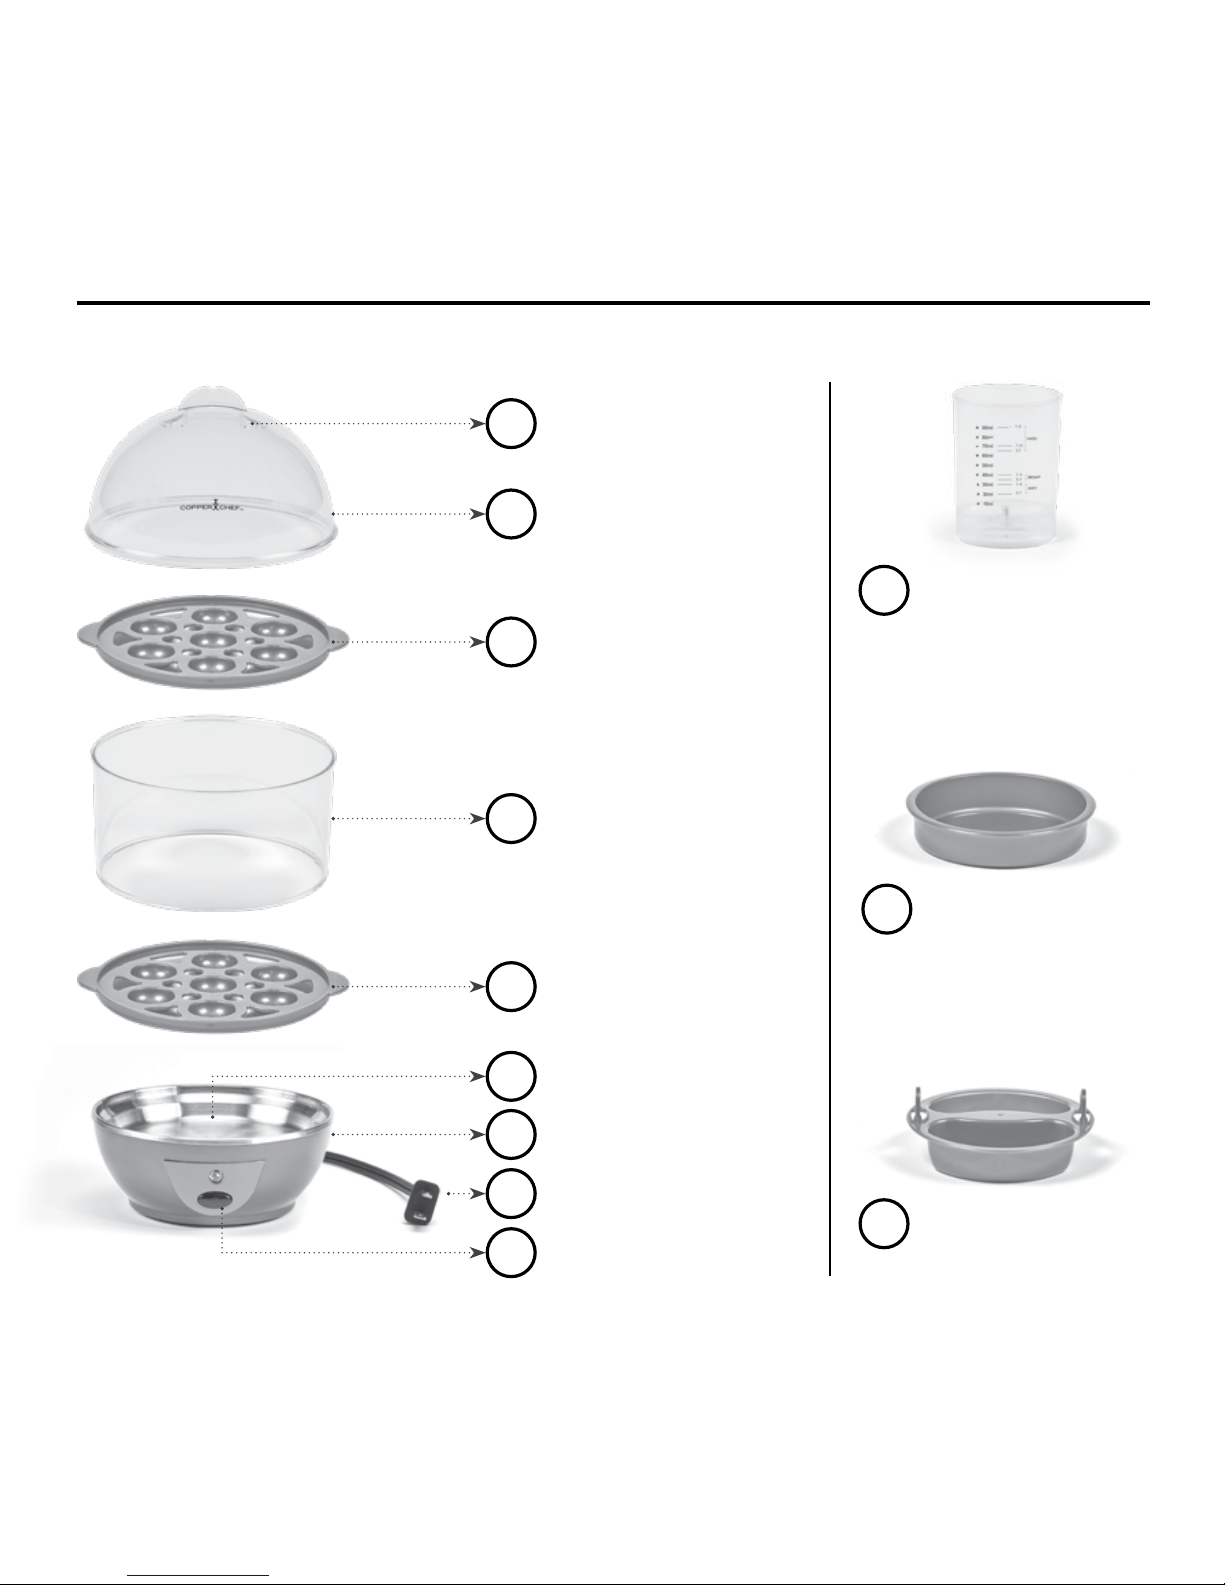
A
B
C
D
E
F
K
C
H
G
J
I
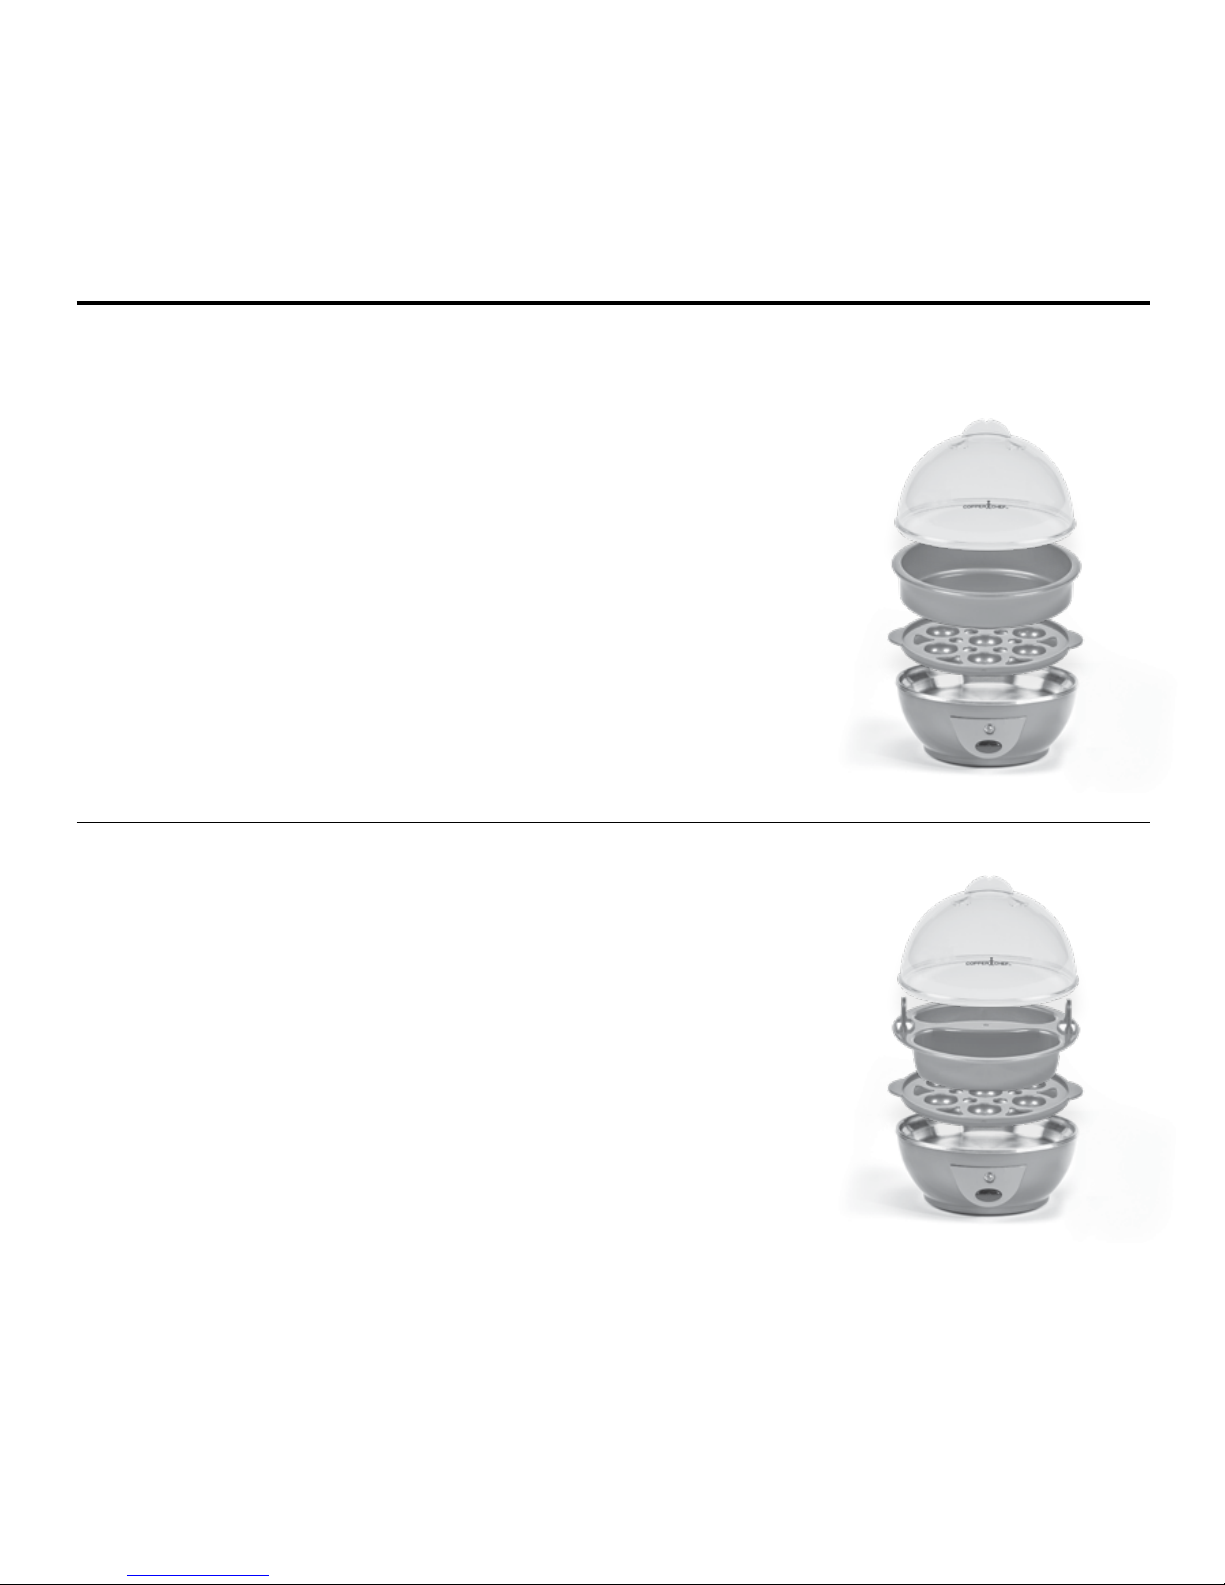
SEE-THROUGH LID
STEAM VENTS
EGG TRAY
MEASURING CUP
OMELETTE TRAY
POACHING TRAY
EXTENSION RING
EGG TRAY
POWER BASE
HEAT SURFACE
POWER CORD
POWER BUTTON
Page 7

Perfect Egg Maker | Model: ZDQ-206 7
Parts & Accessories
A. See-Through Lid: Must always
be used during the cooking process.
B. Steam Vents: Allow excess steam
to be released during the cooking
process. Avoid touching the Vents
during cooking. Extreme heat will
cause serious harm to exposed skin.
C. Egg Trays (2): Use both Trays to hard
boil up to 14 eggs at once. Cooking
more than seven eggs at once
for soft- or medium-boiled eggs is not
recommended. This component must
always be used during the cooking
process. Trays should not come
in direct contact with Heat Surface.
D. Measuring Cup: Used to measure
water amount for each recipe.
E. Omelette Tray: Holds up to two large
eggs plus other ingredients
for delicious omelettes.
F. Poaching Tray: Poaches two eggs
at a time to perfection.
G. Heat Surface: Do not cook directly
on this surface. This surface
is used for steaming only. Avoid skin
contact during cooking. Allow to cool
thoroughly before cleaning. Never
submerge in water or any other liquid.
H. Power Base: Houses the electronics
that control the cooking process.
Never submerge this part in water
or any other liquid.
I. Power Button: Once Unit is totally
set up for cooking, select the ON
position. When the cooking cycle
is complete, the Unit will automatically
shut off.
J. Power Cord: Place Cord in proper
120V receptacle once unit is all set
up for cooking. When cooking is
complete, remove Cord from the outlet
and allow to cool before cleaning.
K. Extension Ring: Use this Ring to
support the second Egg Tray when hard
boiling more than seven eggs at once.
IMPORTANT: Your Perfect Egg Maker has
been shipped with the components shown in
this section. Check everything carefully before
use. If any part is missing or damaged, do not
use this product and contact the shipper using
the customer service number located
on the back cover of the owner’s manual.
Page 8
8 Perfect Egg Maker | Model: ZDQ-206
General Operating Instructions
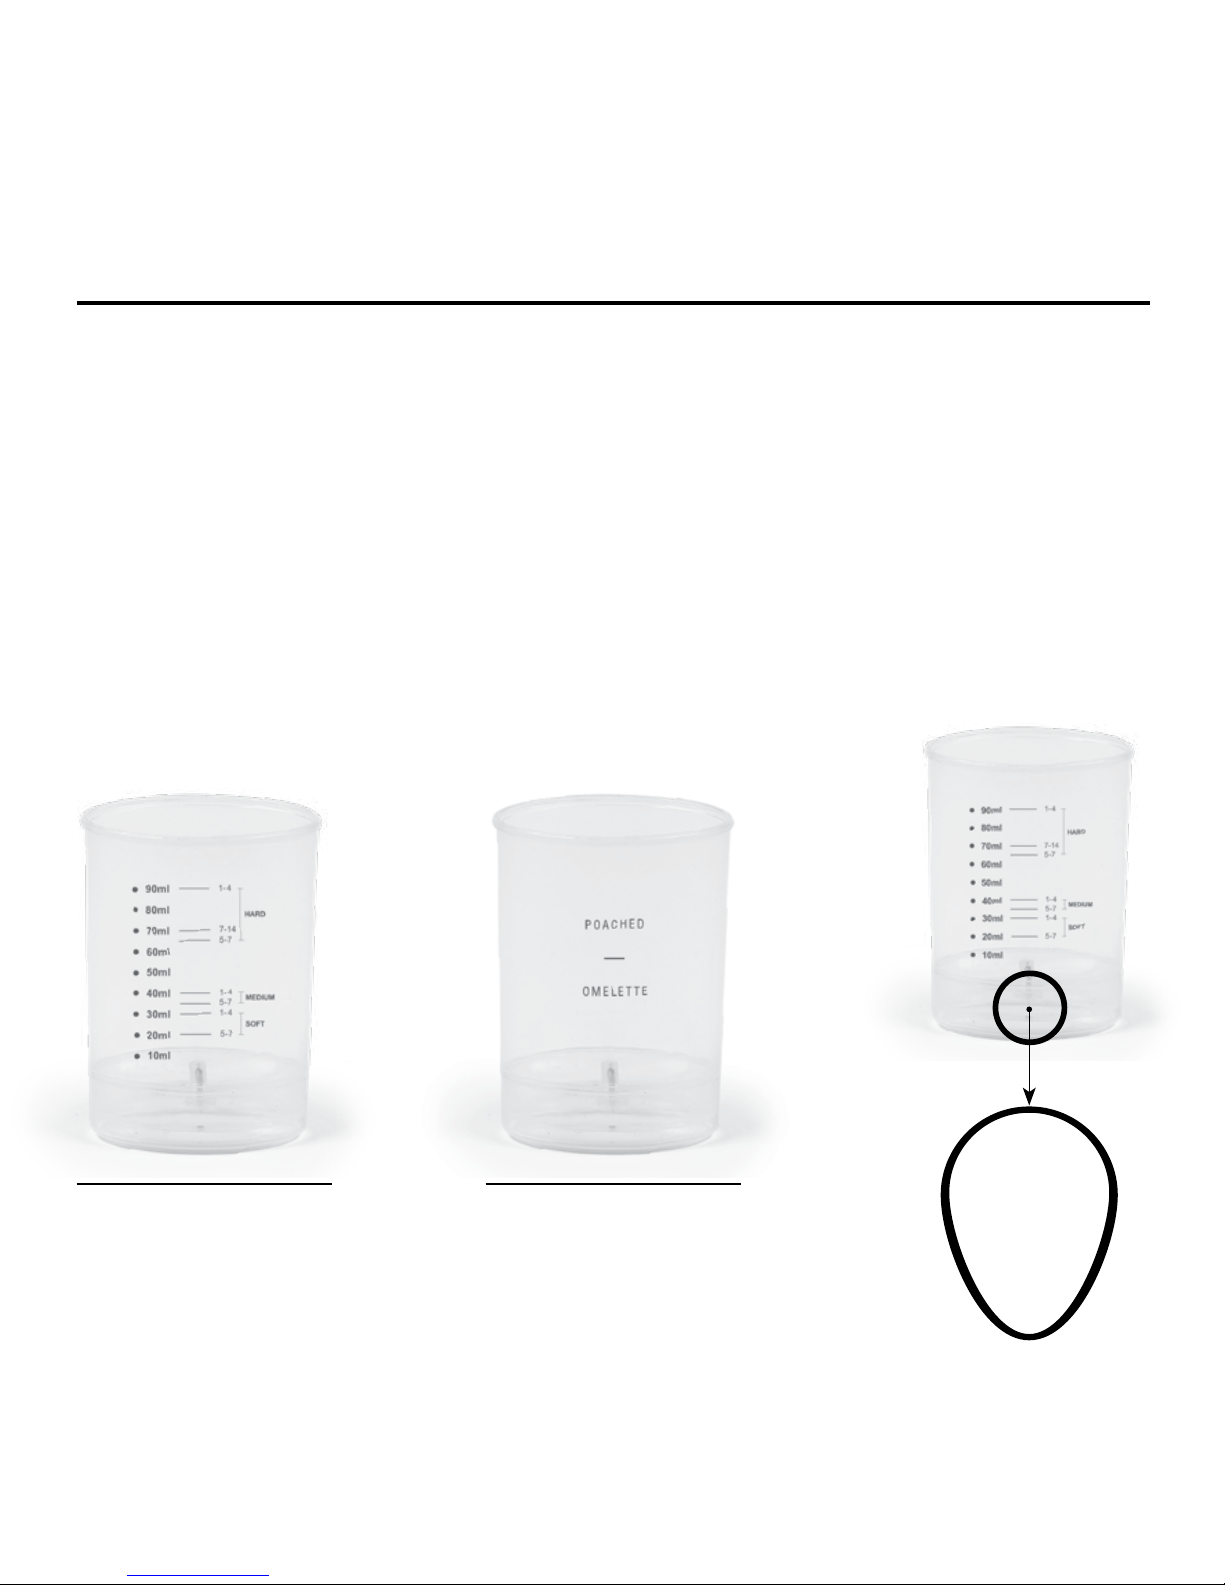
The Measuring Cup
Using the proper amount of water during
the cooking process is the key to perfect
results. The cup is clearly marked for
soft-, medium-, and hard-boiled eggs.
The reverse side has the measurement
for omelettes and poached eggs.
When cooking eggs in the shell (hard,
medium, and soft), rst pierce
the bottom of the egg with a small hole.
Then, place the eggs with the puncture
facing up. Afterward, place the cap back
on the Measuring Cup.
CAUTION: The pin is very sharp.
Use caution when puncturing the egg.
FRONT VIEW BACK VIEW
Pierce the
bottom of the
egg with the
pin.
Page 9

Perfect Egg Maker | Model: ZDQ-206 9
General Operating Instructions
Tips & Tricks
• Piercing the eggs prevents them from cracking and results in uniform cooking.
• The easiest way to peel hard-boiled eggs is to blanch them in ice water to stop the cooking process.
Then, crack the shell by gently tapping on a countertop or sink. Rinse the egg with cold tap water while
gently peeling the shell.
Before First Use
Before using the Perfect Egg Maker for the rst time, wash the components except
the Power Base and Power Cord using a dish cloth or nonabrasive sponge with warm, soapy
water. Rinse the components with clean water and dry thoroughly.
CAUTION: Do not submerge Heat Surface and Power Base in water or liquid of any kind.
After use, you may wipe Heat Surface with a damp, nonabrasive cloth.
The chart is for large eggs. Time and water levels will change when cooking more
than four eggs.
Egg Style 1–4 Eggs 5–7 Eggs 7–14 Eggs Time
Soft Eggs
30 mL or
2 tbsp. water
20 mL or
4 tsp. water
Not Recommended 6 mins.*
Medium Eggs
40 mL or
2 tbsp. water
35 mL or
7 tsp. water
Not Recommended 9 mins.*
Hard Eggs
75 mL or
4.5 tsp. water
65 mL or
4 tbsp. water
75 mL or
4.5 tbsp. water
18–23
mins.*
Page 10
10 Perfect Egg Maker | Model: ZDQ-206
General Operating Instructions
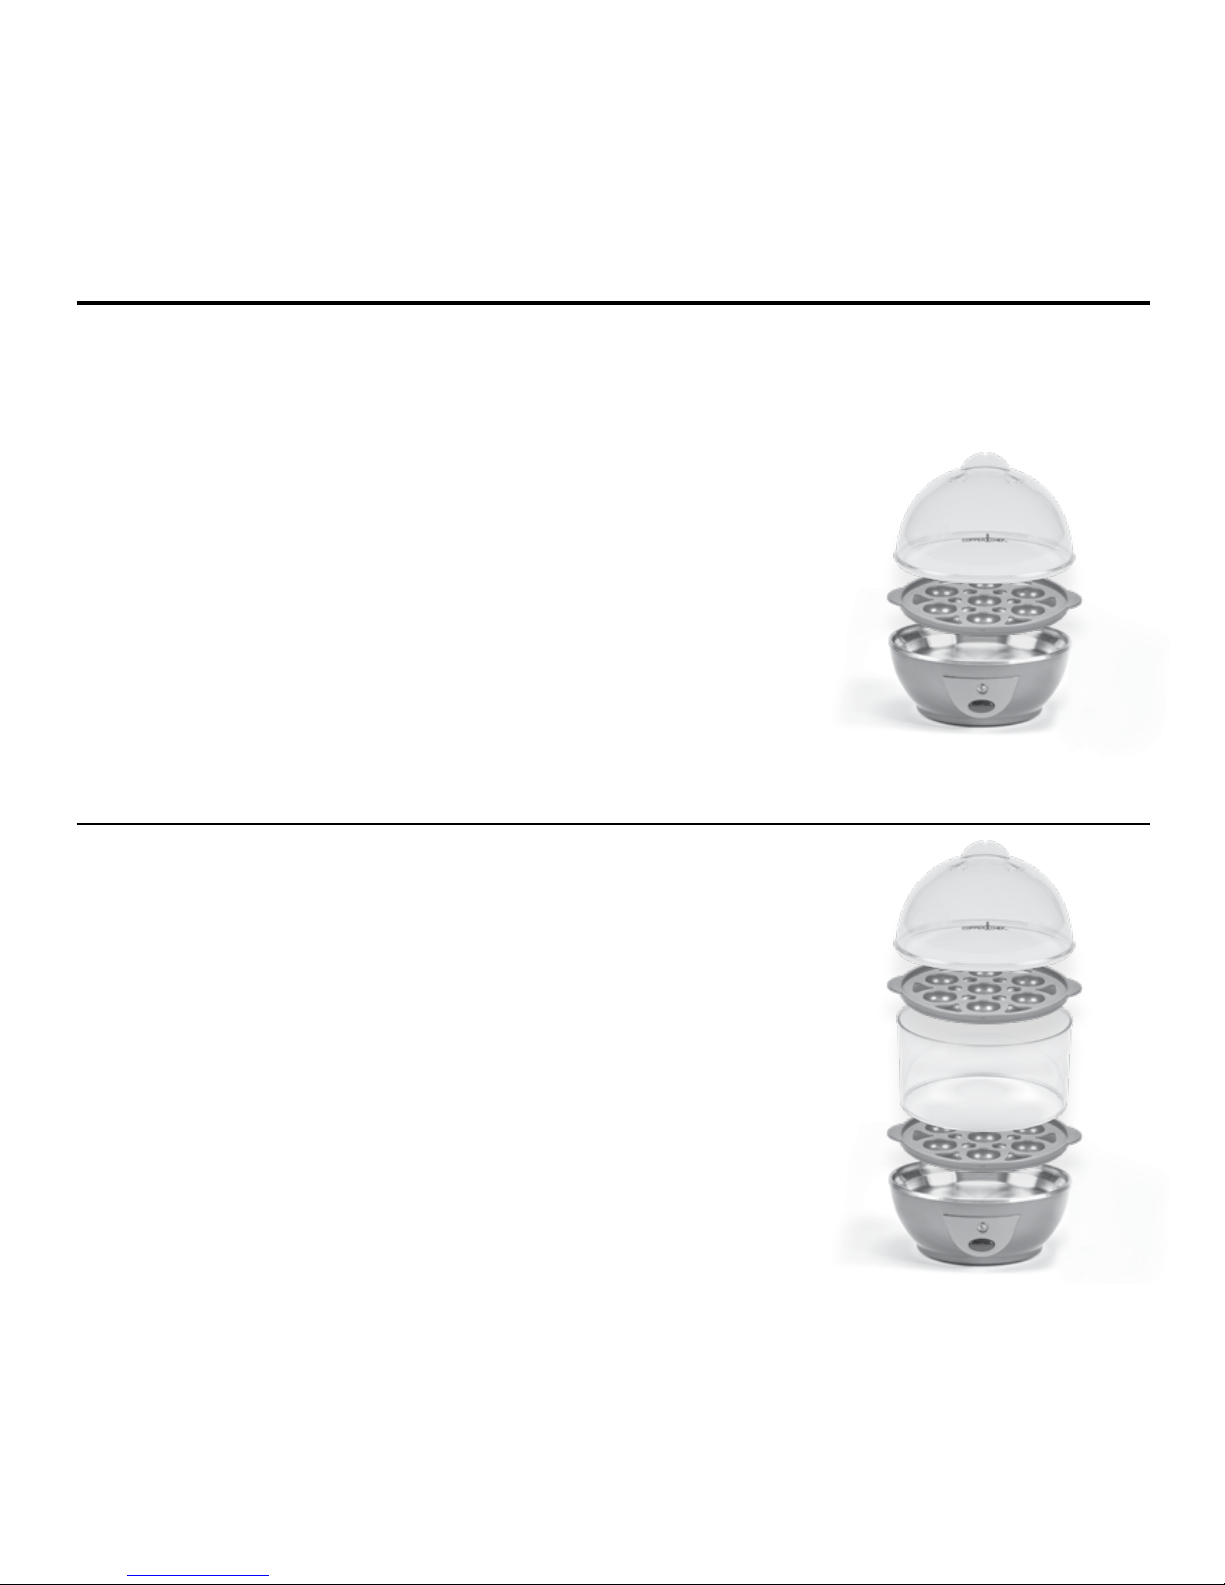
For Up to 14 Hard-Boiled Eggs
1. Add water to the Heating Element using Measuring Cup.
2. Pierce the egg bottoms with the pin located
at the bottom of the Measuring Cup.
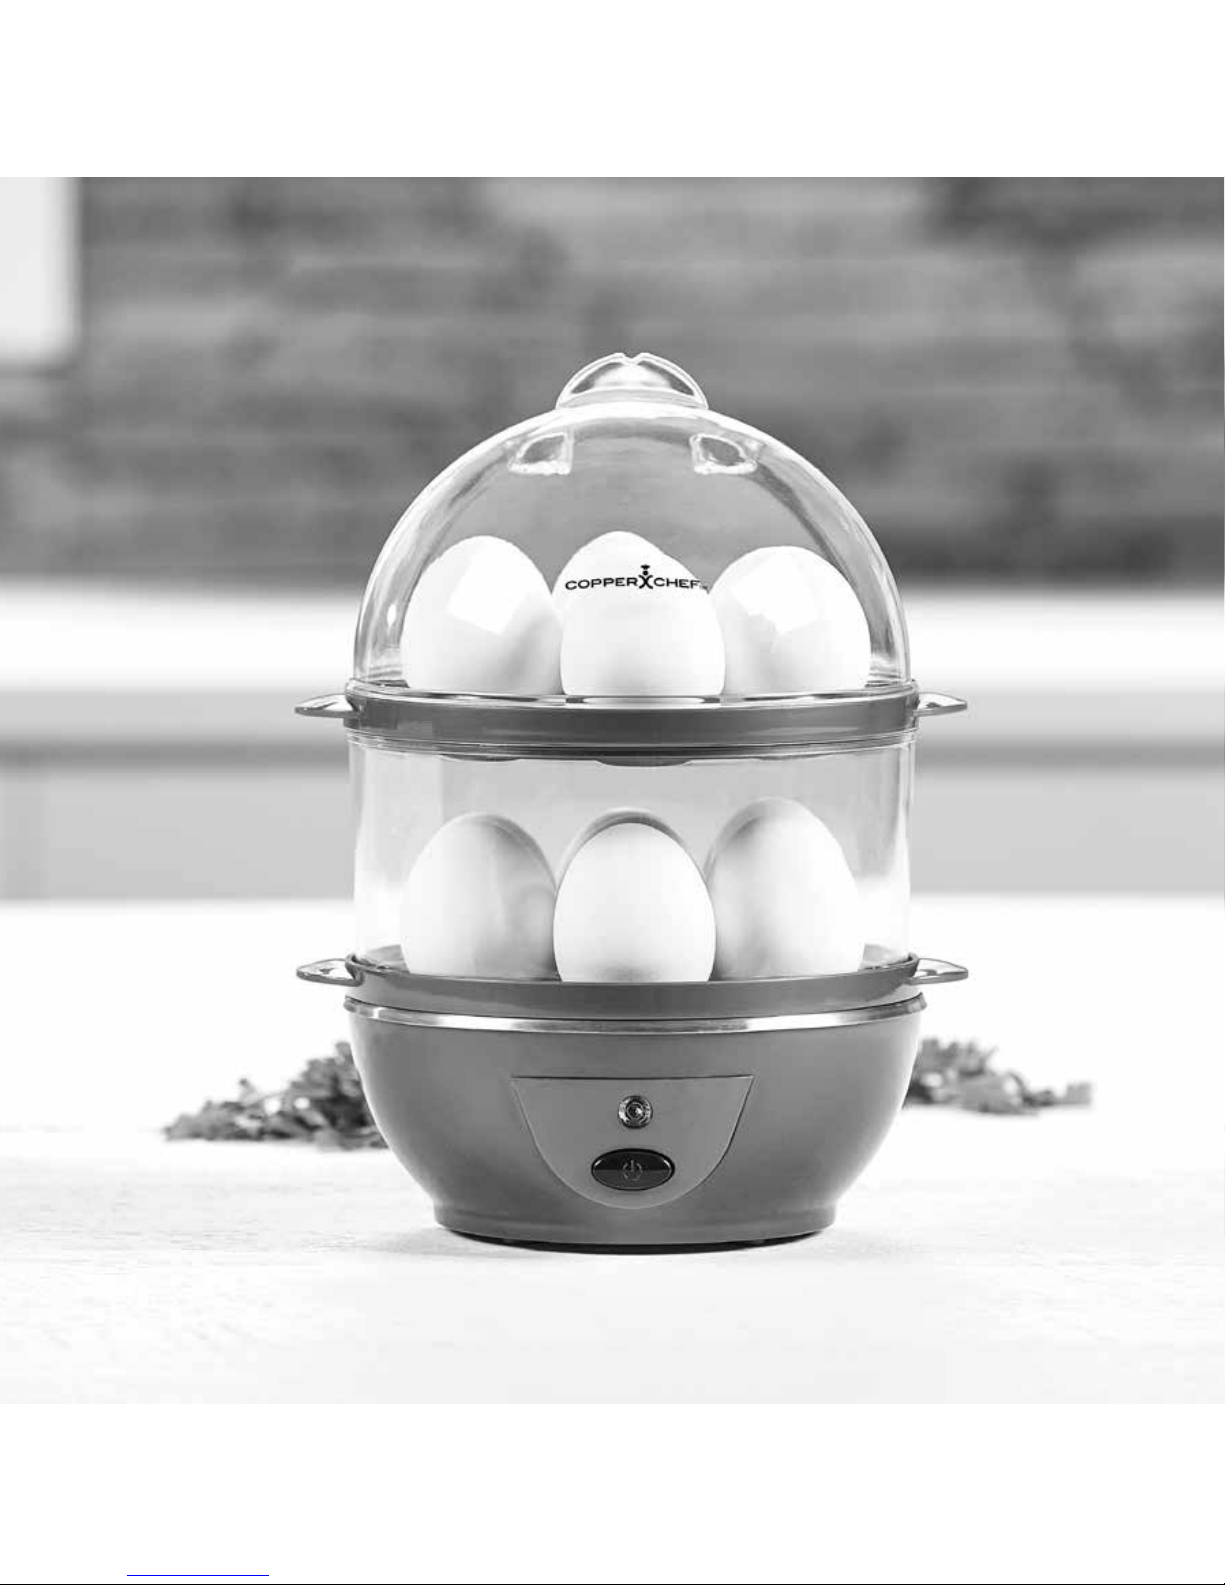
3. Place up to 14 eggs in the Trays with the holes facing up
to prevent the egg contents from leaking out.
4. Place Trays in the Unit separated by Extension Ring.
5. Cover. Plug in the Unit and press the Power Button.
6. The Unit will shut off once complete.
For Seven or Fewer Soft-, Medium-,
or Hard-Boiled Eggs
1. Add water to the Heating Element using Measuring Cup.
Pierce the egg bottoms with the pin located
at the bottom of the Measuring Cup.
2. Place up to seven eggs in the Tray with the holes facing
up to prevent the egg contents from leaking.
3. Cover. Plug in the Unit and press the Power Button.
4. The Unit will shut off once complete.
Page 11
Perfect Egg Maker | Model: ZDQ-206 11
General Operating Instructions
For Omelettes
1. Add water to the Heating Element using Measuring Cup.
2. Mix one or two eggs with any other ingredients
in a separate bowl.
3. Lightly spray the Omelette Tray with oil and then add
ingredients.
4. Place the Egg Tray with the Omelette Pan on top
of the Heating Element.
5. Cover. Plug in the Unit and press the Power Button.
6. The Unit will shut off once complete.
For Poached Eggs
1. Add water to the Heating Element using Measuring Cup.
2. Lightly spray the Poaching Tray with oil. Then, add one
or two eggs to the Tray. Add seasoning if desired.
3. Place the Egg Tray with the Poaching Tray on top
of the Heating Element.
4. Cover. Plug in unit and press the Power Button.
5. The Unit will shut off once complete.
Page 12

12 Perfect Egg Maker | Model: ZDQ-206
Care & Cleaning
Over time, minerals from hard water that collect on the heat surface have a negative
effect on the functioning of the appliance. Use a sponge with warm water and soap
to remove any mineral deposits from the Perfect Egg Maker.
Caution: Do not submerge Heat Surface and Power Base in water or liquid of any
kind. After use, you may wipe the Heat Surface with a damp, nonabrasive cloth.
Cleaning And Maintenance
• This Unit is not dishwasher safe.
• Let the appliance cool completely before
cleaning.
• Unplug the appliance from the wall socket.
Drain any excess liquid.
• When cooled, wipe off the excess water
and food debris with a wet sponge
or towel.
• Rinse the Trays, accessories (be aware
of the sharp needle at the base
of the Measuring Cup), and the Lid
with water and a mild detergent.
• Clean the housing and the metallic heat surface
with a damp cloth. Never use abrasive cleaners.
DO NOT immerse the main body in water.
• Place clean accessories inside the Perfect Egg
Maker for storage. All accessories should fit
inside the Unit.
Page 13

Perfect Egg Maker | Model: ZDQ-206 13
Manufacturer’s 60-Day Limited Warranty
The manufacturer warrants that all parts and components are free of defects
in materials and workmanship for 60 days. This warranty is valid only in accordance
with the conditions set forth below:
1. The warranty extends only to the original consumer purchaser and is not
transferable. In addition, proof of purchase must be provided for the 60-day
warranty to be applicable.
2. This limited warranty is the only written or express warranty given by the manufacturer.
Any implied warranty of merchantability or tness for a particular purpose on this
product is limited to the duration of this warranty. Some states do not allow limitations
on how long an implied warranty lasts, so the above limitation may not apply to you.
3. This warranty gives you specic legal rights, and you may also have other rights which
may vary from state to state.
Procedure for Replacement or Return within 60 Days:
To return the product within the 60-day money-back guarantee period, the original
purchaser must package the product securely and include the following information:
name, address, reason for return and request of refund or replacement, and either proof
of purchase or order number. Place the information inside an envelope inside the package
with the unit and mail to the following address:
Tristar Products, Inc.
500 Returns Road
Wallingford, CT 06495
Page 14

Page 15
Page 16
We are very proud of the design and quality
of our Perfect Egg Maker.
This product has been manufactured to the highest standards.
Should you have any problem, our friendly customer service
staff is here to help you.
973-287-5169
Distributed by:
Tristar Products, Inc.
Faireld, NJ 07004
© 2018 Tristar Products, Inc.
Made in China
CCPEM_IB_TP_ENG_V5_180322
 Loading...