

Page 1
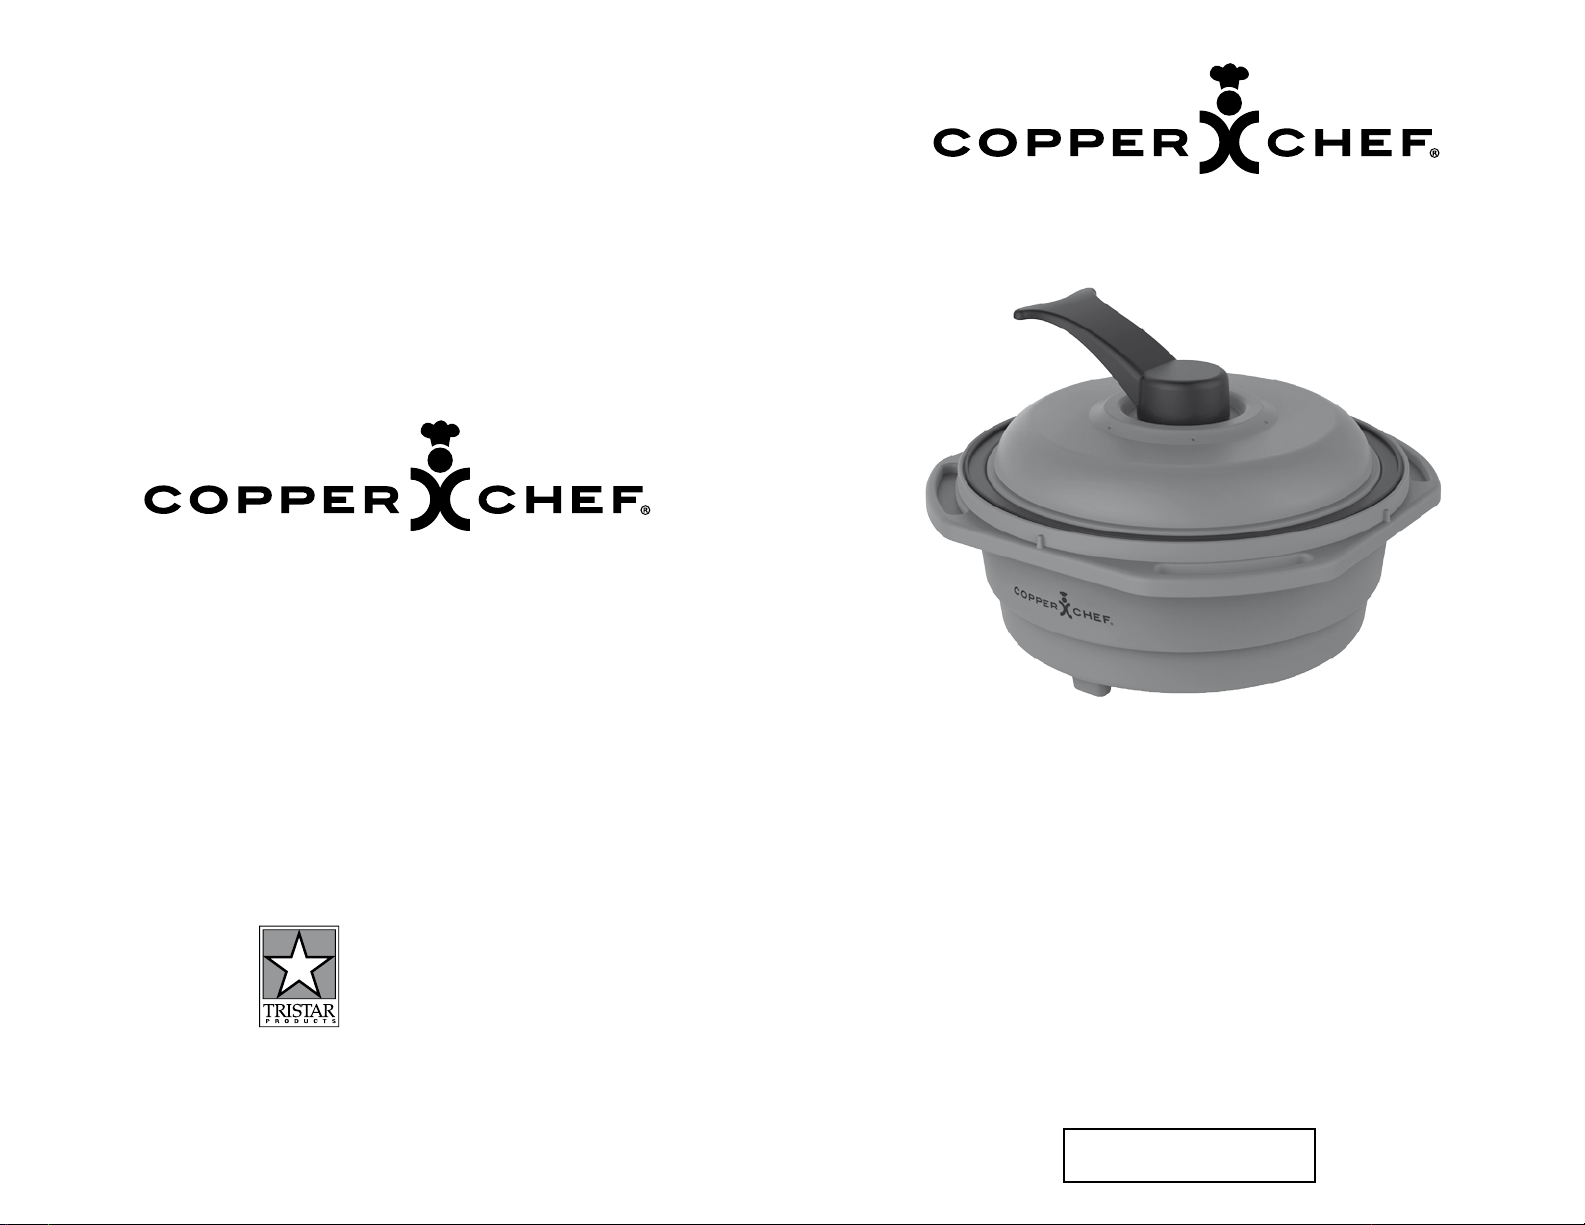
Microwave Grill
with Grill Press Lid
Should you have any problem,
our friendly customer service staff is
here to help you.
973-287-5176
Microwave Grill
with Grill Press Lid
Microwave Grill
CCMG_IB_Q_ENG_V1_170512
Distributed by:
Tristar Products, Inc.
Faireld, NJ 07004
© 2017 Tristar Products, Inc.
with Grill Press Lid
OWNER’S MANUAL
For Model #KK-1502
IMPORTANT:
Do not use the Copper Chef Microwave Grill with Grill Press Lid until
you have read this entire manual thoroughly.
FOR HOME USE ONLY
Page 2
Index
Topic Page
Important Safeguards 1
Parts and Accessories 3
Using the Microwave Grill 5
Food Temperature Cooking Charts 5
Before First Use (Important Information About Using the Lid) 6
Cook Time Conversion Charts (Cooking Chart) 7
Care and Cleaning 7
Page 3
Important Safeguards Important Safeguards
1. Read everything contained in this manual before using the Copper
Chef Microwave Grill with Grill Press Lid.
2. When using this Microwave Grill, handle all hot surfaces with
dry pot holders or cooking mitts. Handling hot surfaces with wet cooking
mitts or pot holders can produce steam causing serious burns to skin.
3. Children should not be permitted to use this or any kitchen appliance.
4. The Microwave Grill may generate extreme heat and steam
during operation. All necessary precautions must be taken to avoid
personal injury or accidental re.
5. The Copper Chef Microwave Grill with Grill Press Lid
with nonstick or ceramic coatings. If this coating appears to be
missing, damaged or even scuffed, discontinue use immediately and
contact customer service.
6. The use of kitchen utensils other than those made of plastic or wood
might damage the system.
7. The Microwave Grill operates with home microwave ovens only.
Never use the Copper Chef Microwave Grill with Grill Press Lid
components with any other cooking appliance.
8. After use, do not clean or store the Microwave Grill until it has
thoroughly cooled. The Microwave Grill
may require as much as 60 minutes to thoroughly cool down for
storage.
9. Always lift the unit by the handles located on its base using dry oven
mitts or pot holders.
10. Maximum preheat time for unit is 3 minutes … do not exceed.
Preheat the Grill Press Lid with the Base Unit only (never by itself).
11. NEVER exceed 15 Minutes Maximum Accumulated Cooking Time.
If additional “cook time” is needed, allow 8 minutes for cooling.
12. Should sparking, arcing, or any other unusual malfunction occur
during cooking operation, cut power to microwave immediately and
discontinue all further use of the Microwave Grill unit.
Contact customer service.
13. NEVER use the Microwave Grill with a microwave oven that
has a power rating exceeding 1350W.
Base Unit and Grill Press Lid
is protected
14. Avoid overlling the unit with liquids that might expand or boil over
the top. A “boil over” could damage the Base Unit and cause possible
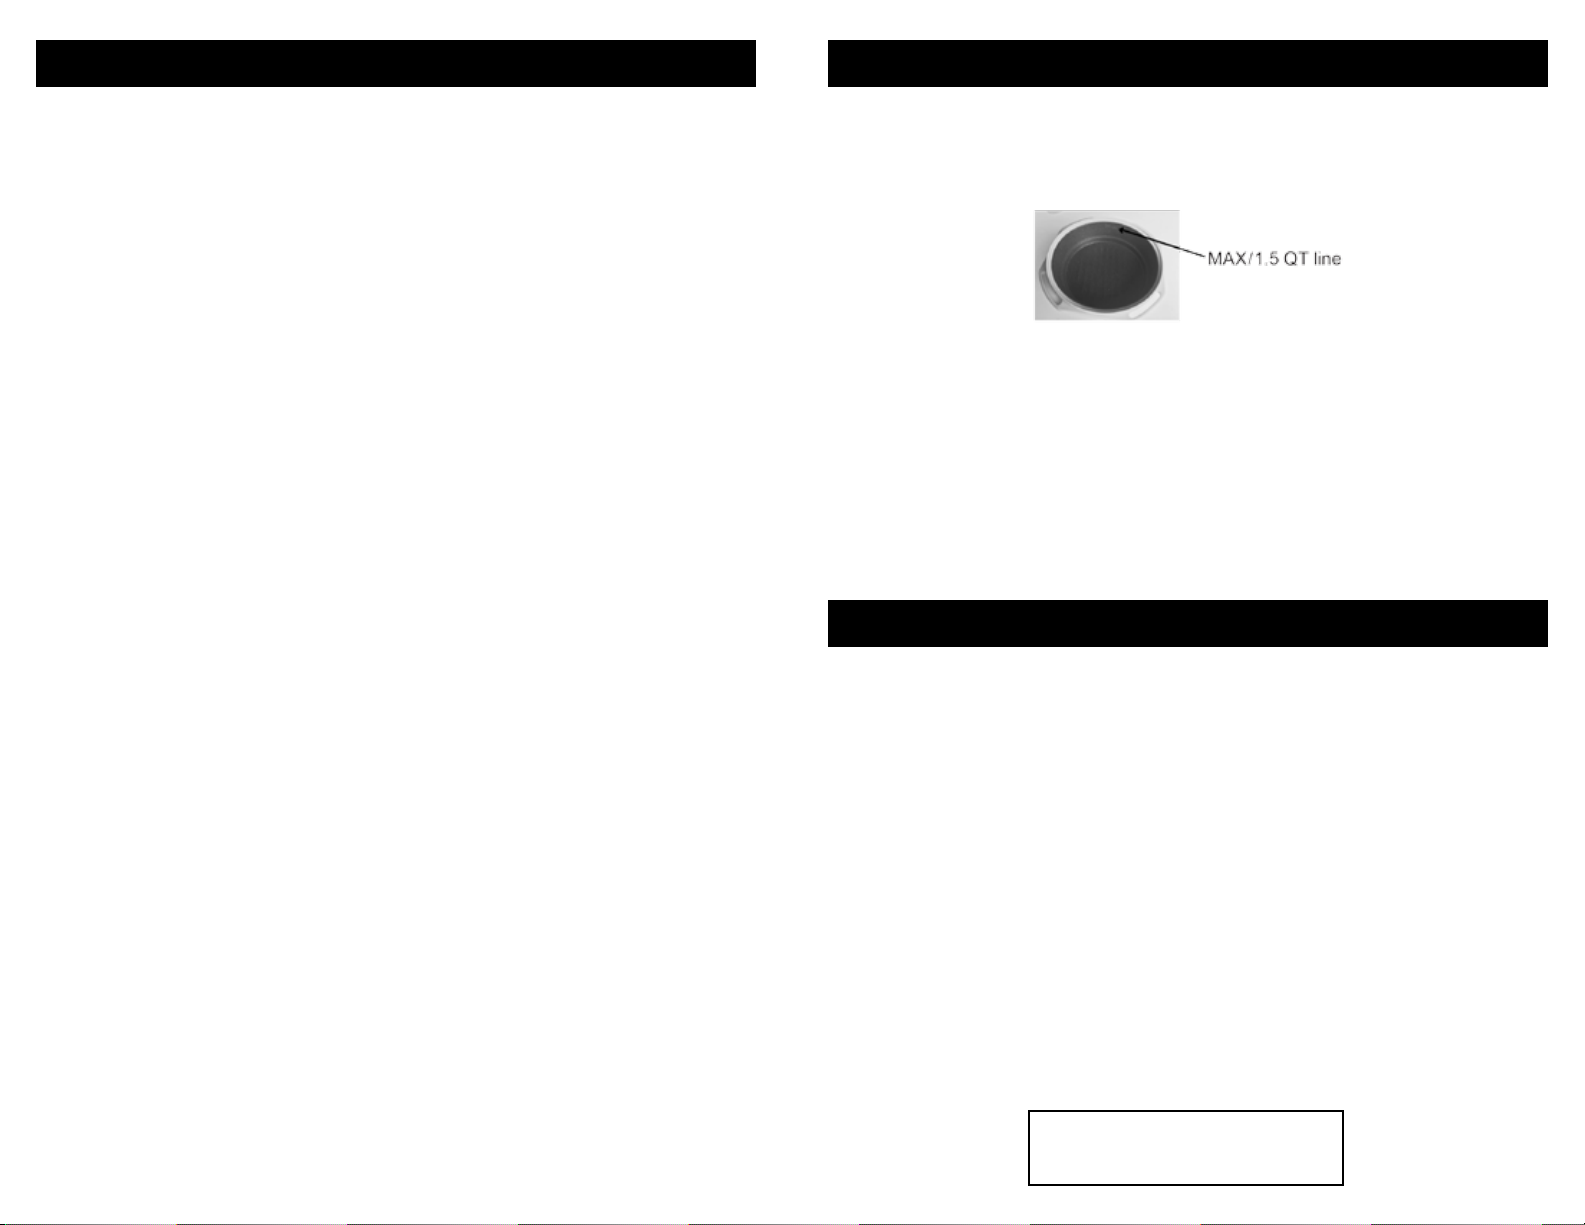
per sonal injury. Never ll the base above the MAX/1.5 QT line.
15. The Microwave Grill is designed for home use only.
16. Never use the Microwave Grill in a microwave that does not
have a turntable.
17. Remove all metal racks or shelves from microwave interior before
using the Microwave Grill.
18. CAUTION: The lid is hot – do not place grill side down on the counter.
19. WARNING: The baking insert and steam tray will be hot – use dry
oven mitts or pot holders, and place on heat resistant surface.
Countertop Warning
During the cooking process, the Base Unit and Grill Press Lid can reach
temperatures as high as 500 degrees Fahrenheit. When removing unit from
microwave oven always place on heat resistant surface.
NOTE: The Base Unit and Grill Press Lid contain heat elements that work
with your microwave oven to generate the unique cooking power for the
system. Allow Base Unit and Grill Press Lid to cool completely between
recipes. Avoid skin contact while hot.
CAUTION: Never saturate or submerge the Microwave Grill Base Unit or
Grill Press Lid in water or any other liquid.
Cleaning of the Base Unit and Grill Press Lid should only be done with
a slightly damp soft cloth. To clean, use a damp cloth or sponge to remove
spatters or food particles, then wipe clean with dry towel. Never place the
Base Unit Or Grill Press Lid in a dishwasher.
Do not disassemble the Base Unit or Grill Press Lid. Doing so will
disable the unit and void the product warranty.
1
SAVE THESE INSTRUCTIONS
FOR HOUSEHOLD USE ONLY
2
Page 4
Microwave Grill Parts & Accessories Microwave Wattage
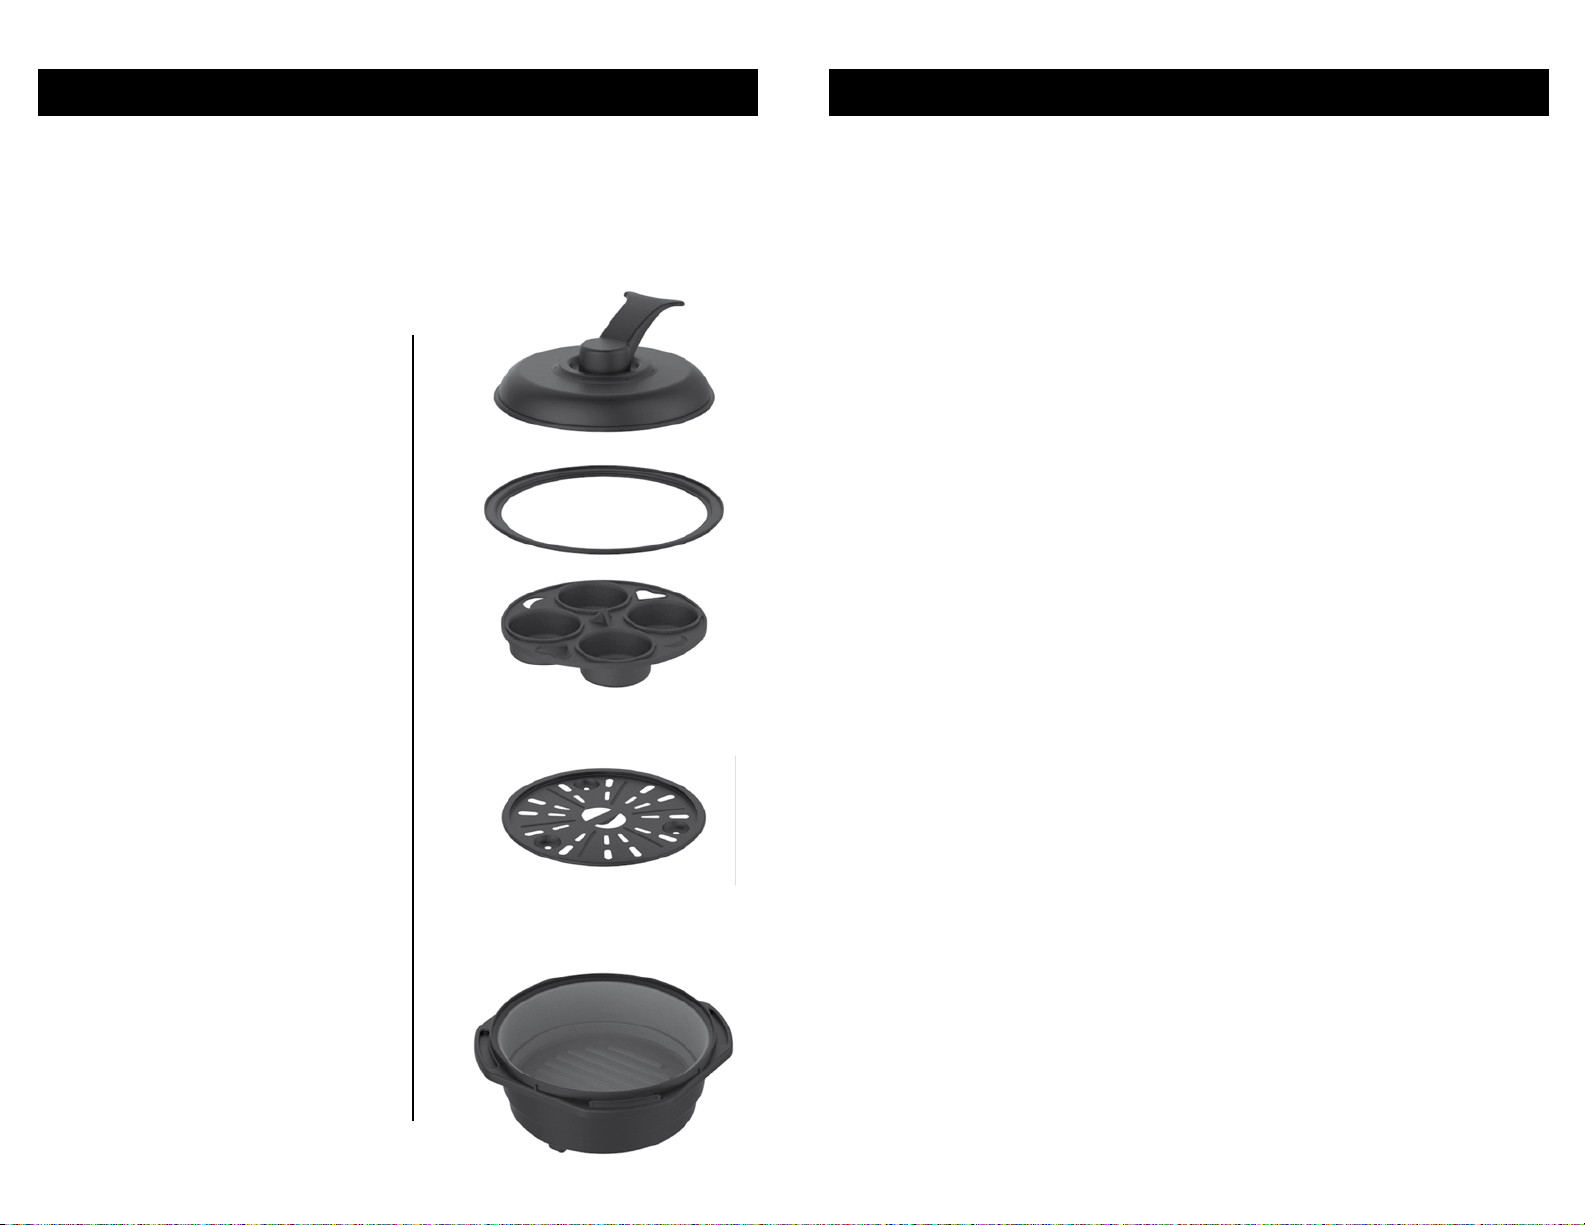
IMPORTANT: Your Microwave Grill has been shipped with the components
shown below. Check everything carefully before use. If any part is missing
or damaged do not use this product and contact shipper using the customer
service number located on the back page of this owner’s manual.
A. Grill Press Lid (GPL)
Contains microwave
activated heat
element.
B. Support Ring
(Refer to the ‘ This Side Up’
indicator on support ring) Not
used when GPL is used to
make contact with food.
C. Silicone Baking/Mufn Insert
D. Steam Tray
Use for a variety of foods
including mufns, cupcakes,
omelets, and poached eggs.
Paper cupcake liners can be used
but are not necessary. Always
add approximately 1 cup water
into the Base Unit before inserting
the Steam Tray and Silicone
Baking/Mufn Insert. When using
a batter, ll only 3⁄4 full. Many
foods will bake in 6-8 minutes.
For microwave use only.
A.
B.
C.
D.
IMPORTANT:
Micowave Oven Wattage
Similar to conventional cooking, the “Wattage” of your microwave might
be compared to the “Height” of the ame. The higher the wattage the
hotter the cooking environment ... “wattage” determines the time needed
to complete the process. Therefore, it is critical to determine the
wattage of your microwave oven. Most microwaves have a label or
small plate that states the wattage. Your microwave’s instruction manual
should also list the wattage. You may also contact the manufacturer or
retailer for this information. Our recipes have been written for an 1100
Watt microwave oven. Please adjust your “cook times” accordingly
(see chart page 7). Your Microwave must have a revolving turntable
and the interior must measure 14” wide x 14” deep x 7 3/4” high.
3
E. Base Unit
Contains microwave
activated heat element.
E.
4
Page 5
Using the Microwave Grill Using the Microwave Grill
After reviewing all the information in this Owner’s Manual, you’ll be
ready to try some of the quick and easy recipes that will familiarize
you with the “set up” and operation of the Microwave Grill.
Remember, for health reasons, great care should be taken to make certain
that all food is cooked properly.
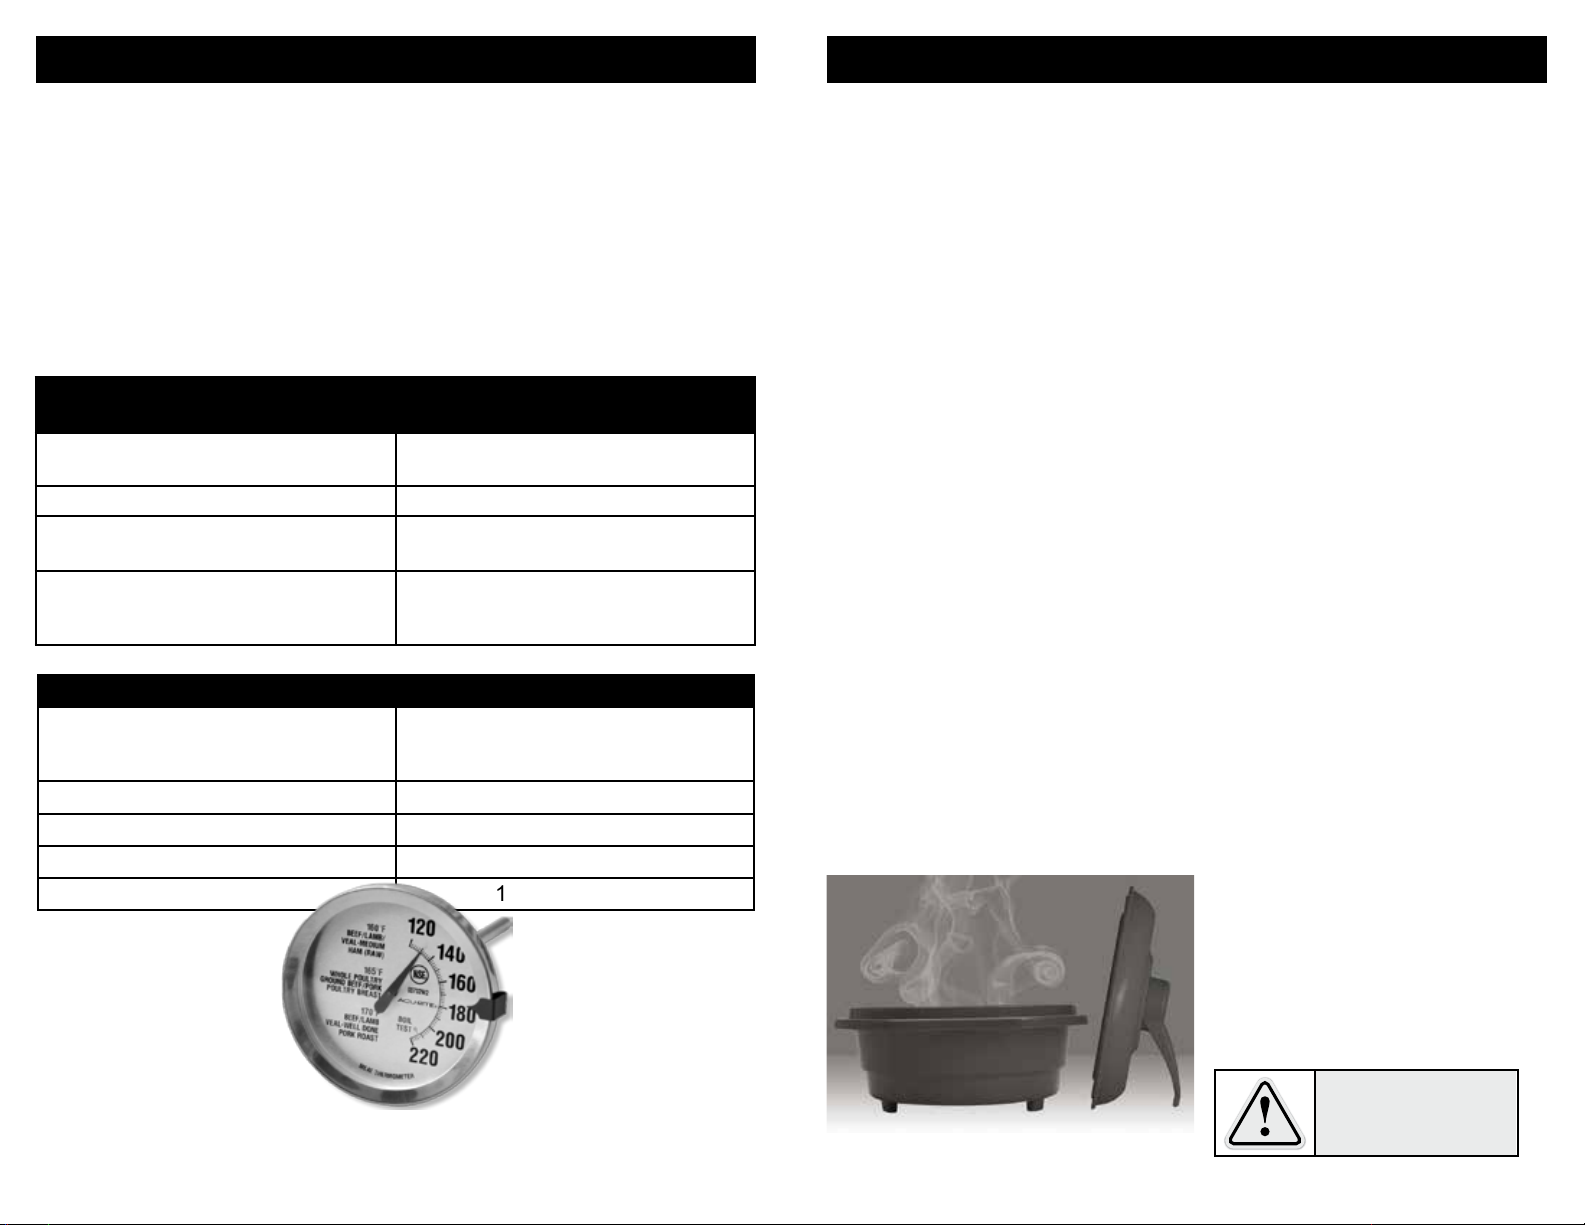
Cook all food to these minimum internal temperatures as measured with a
food thermometer before removing food from the heat source. For reasons
of personal preference, consumers may choose to cook food to higher
temperatures.
PRODUCT
Beef, Pork, Veal & Lamb
Steaks, chops, roasts
Ground Meats 160 °F (71.1 °C)
Ham (Uncooked)
fresh or smoked
Fully Cooked Ham
(to reheat)
Minimum Internal Temperature &
Rest Time
145 °F (62.8 °C) and allow to rest for
at least 3 minutes
145 °F (60 °C) and allow to rest for at
least 3 minutes
Reheat cooked hams pack- aged in
USDA-inspected plants to 140 °F (60
°C); all others to 165 °F (73.9 °C).
PRODUCT Minimum Internal Temperature
All Poultry (breasts, whole bird, legs,
thighs, and wings, ground poultry, and
stufng)
Eggs
Fish & Shellsh
Leftovers
Casseroles
165 °F (73.9 °C)
160 °F (71.1 °C)
145 °F (62.8 °C)
165 °F (73.9 °C)
165 °F (73.9 °C)
Before rst use ...
• Before making the rst meal in your Microwave Grill, be sure to wash all
pans with warm soapy water and a soft, non-abrasive sponge to assure
clean, safe cooking.
• For quick searing, preheat your Base Unit with the Grill Press Lid 2.5
minutes in your microwave.
• When using cooking oil or butter for avoring your foods, use half the
amount suggested for a regular recipe.
• Always let meats rest after cooking as per chart on page 5 before serving
to retain all the avors and juices.
• When grilling, do not turn the food repeatedly. Let the foods sit on the pan
surface to sear. Remove and lift a corner to determine if it is grilled to your
liking. This will help seal all the natural juice and avors on the inside.
Always...
• Always allow your Microwave Grill to cool completely before
cleaning. Use a damp cloth and wipe dry.
• Always use plastic or wooden utensils when cooking on any nonstick
surface to prevent scratching.
Never...
• Never clean any part of your Microwave Grill with abrasive or
metal scouring pads.
• Never submerge your Base Unit or Grill Press Lid into water.
• Never use metal utensils on your Microwave Grill.
• Never use if protective coatings are scratched, damaged or missing.
• Before storing, allow 60 minutes for cooling.
Stand Up Lid
THE LID IS HOT– DO NOT
PLACE GRILL SIDE DOWN ON
THE COUNTER. It will ruin coun-
ter surfaces. Handles on the Grill
Press Lid should be used to stand
it as shown here, preventing dripping or heat damage to counter top
surfaces.
Source: United States Department. Of Agriculture Food Safety and Inspection Service
5
CAUTION:
Hot Surface When Heated.
Read All Instructions and
Safeguards Before Use.
6
Page 6
Using the Microwave Grill
Using the Microwave Grill
Important Information About Using the Lid
When Preheating
• Place the lid at in the base and preheat in the microwave for up to 3 minutes.
When Grilling
• Put the grill press lid directly onto the food,without the support ring.
• The lid must be inside the unit. Do not over ll the grill.Refer to the MAX/1.5
QT line in the base.
When Cooking
• Place the support ring directly on top of the base and then place the lid directly
on top of the support ring so that it is secure. Refer to the ‘This Side Up’
indicator on the support ring.
• Do not allow the lid to sit loosely. Do not over ll the grill. Refer to the MAX/1.5
QT line in the base.
When Baking
• Place the steam tray into the base of the unit and then place the silicone
baking/mufn insert on top of the tray.
• Place the support ring directly on top of the base and then place the lid directly
on top of the support ring so that it is secure. Refer to the ‘This Side Up’
indicator on the support ring.
• Do not allow the lid to sit loosely. Do not overll the grill. Refer to the Max/1.5
QT line in the base.
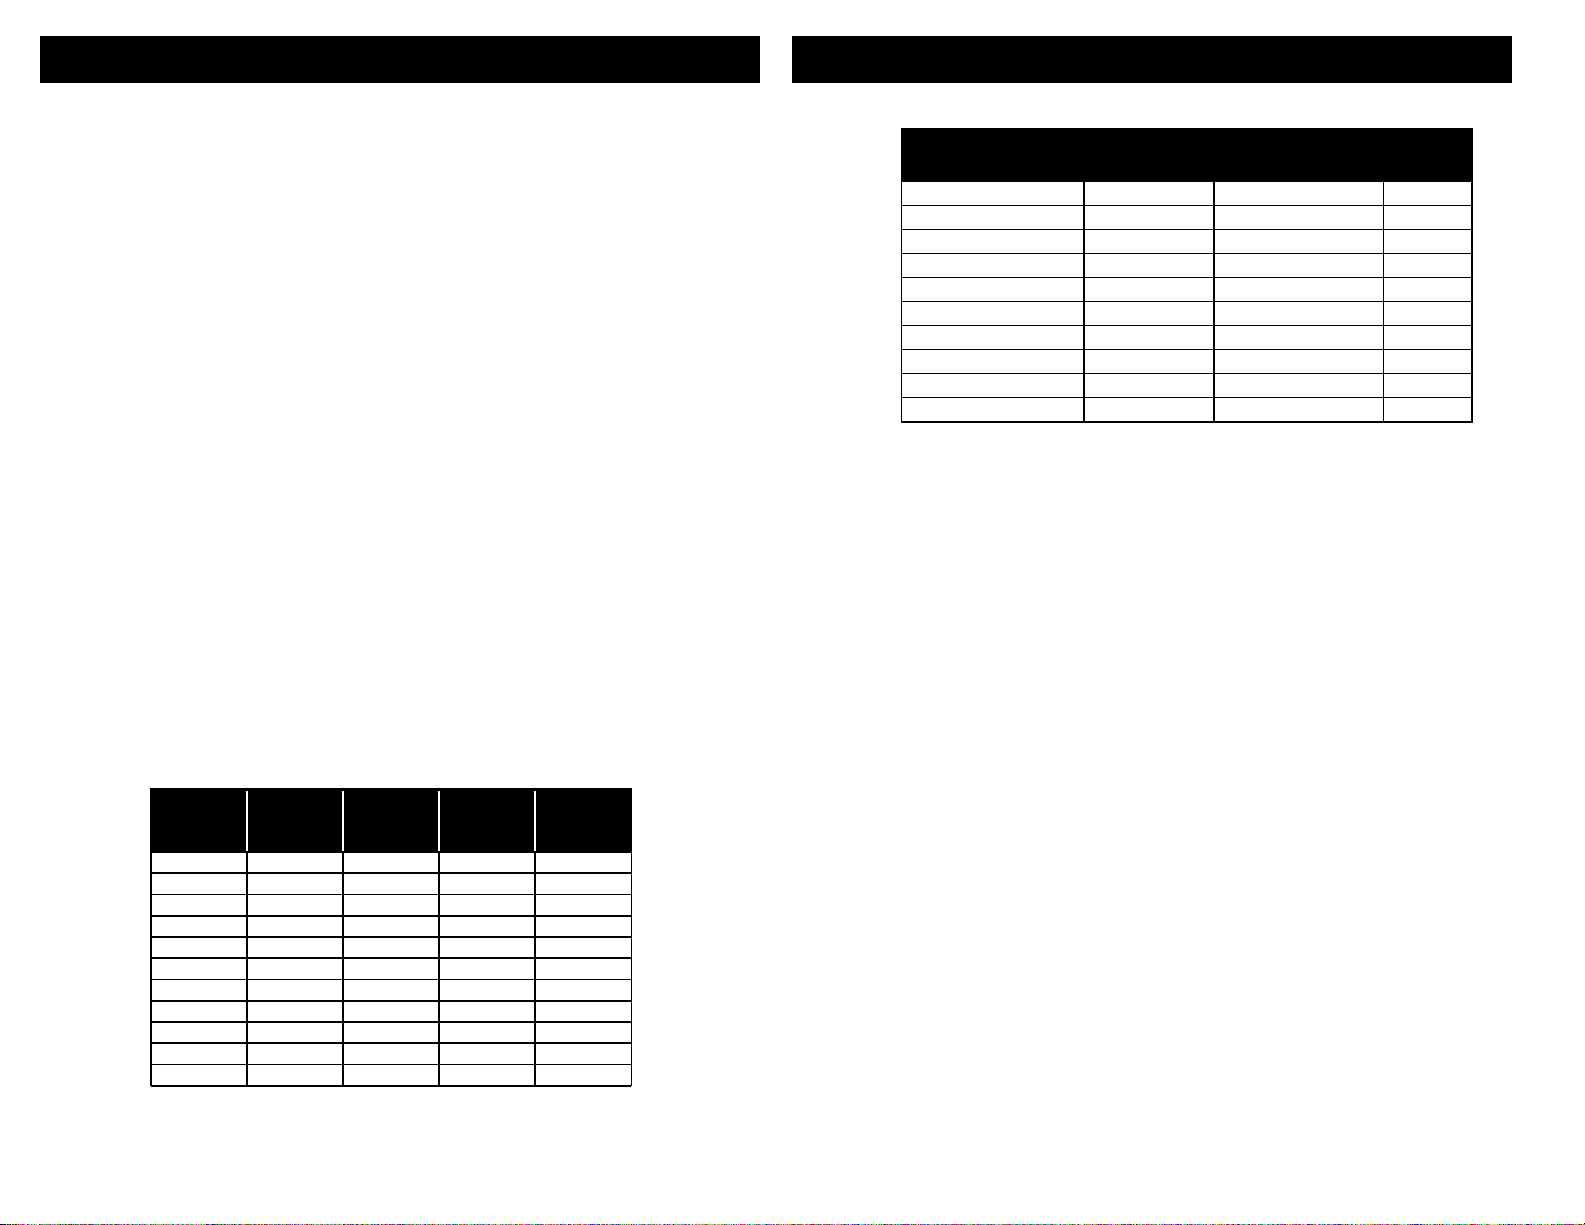
Timing Is Everything...
We have created our Recipe Guide using a microwave oven that is 1100
watts. The following chart will help you adjust your “cook times” according
to the wattage of your microwave oven.
Note: Microwave must have a revolving turntable and the interior must
measure 14” wide x 14” deep x 7 3/4” high.
Recipe
Time 1100
WATTS
MIN:SEC MIN:SEC MIN:SEC MIN:SEC MIN:SEC
01:00 01:22 01:13 01:00 00:49
02:00 02:45 02:27 01:50 01:38
03:00 04:08 03:40 02:45 02:27
04:00 05:30 04:53 03:40 03:16
05:00 06:53 06:07 04:35 04:04
06:00 08:15 07:20 05:30 04:53
07:00 09:38 08:33 06:25 05:42
08:00 11:00 09:47 07:20 06:31
09:00 12:23 11:00 08:15 07:20
10:00 13:45 12:13 09:10 08:09
NOTE: Cook times on microwaves will vary. Please refer to this conversion
chart, and add or subtract time depending on your preference.
Convert to
800
WATTS
Convert to
900
WATTS
Convert to
1200
WATTS
Convert to
1350
WATTS
Food Type
(fresh thawed)
Hamburger 3 minutes 3 minutes (per burger) 1100
Chicken Breasts 3 minutes 4 minutes 1100
Pork Chops 3 minutes 4 minutes 1100
Salmon Filets 3 minutes 4 minutes 1100
White Fish Filets 3 minutes 4 minutes 1100
Sausage 3 minutes 8 minutes 1100
Steak 3 minutes 3 minutes 1100
Hot Dogs 3 minutes 3 minutes 1100
Shrimp NA 7 minutes 1100
Turkey Burger 3 minutes 3 minutes (per burger) 1100
Preheat Time Cooking Time Wattage
Care & Cleaning
Before handling the Microwave Grill allow the unit to cool down thoroughly. Only the Support
Ring is “top shelf” dishwasher safe. Clean all other components as described below.
Base Unit, Grill Press Lid and Steam Tray
• Place the cooking surface of the Base Unit, Grill Press Lid or Steam Tray
under a slow stream of warm running water. Scrub gently with a soft cloth
or non-abrasive sponge and mild detergent to remove all food residue.
• The ridged base of the Grill Press Lid, the Base Unit, and Steam Tray
may require extra care to remove any particles that might collect between
the ridges.
• Never use abrasive scouring pads as they will harm the coating.
• While the Microwave Grill is made of extremely durable materials, avoid
rough handling to prevent scratching of ceramic or non-stick cooking
surfaces.
• Dry thoroughly and store assembled to save space.
Silicone Baking/Mufn Insert
• Although the silicone bakeware is dishwasher safe, we recommend cleaning
by hand.
• Wash with warm water, nonabrasive soap, and a nonmetallic sponge or
cloth.
• Do not use baking soda, detergents, or other harsh soaps or solutions.
• In order to retain proper shape, position silicone bakeware upside down in
stacks of two during storage. Do not over stack.
• We recommend submerging silicone bakeware in warm, soapy water
immediately after use. Let soak before removing any remaining debris.
Rinse and allow to dry completely. Wipe again before storage if necessary.
Avoid oily cooking sprays to prevent buildup.
NOTE: Never submerge the Base Unit or Grill Press Lid in water as holes
may ll and ruin the heat element
.
7
8
 Loading...