

Copernicus XS005 User Manual
XS005-2008-E
Expanded Storage
Royal®Reading / Writing Centre
If parts are missing or you require assistance, please call:
1-800-267-8494
Have your packing slip ready for reference
or email info@copernicused.com
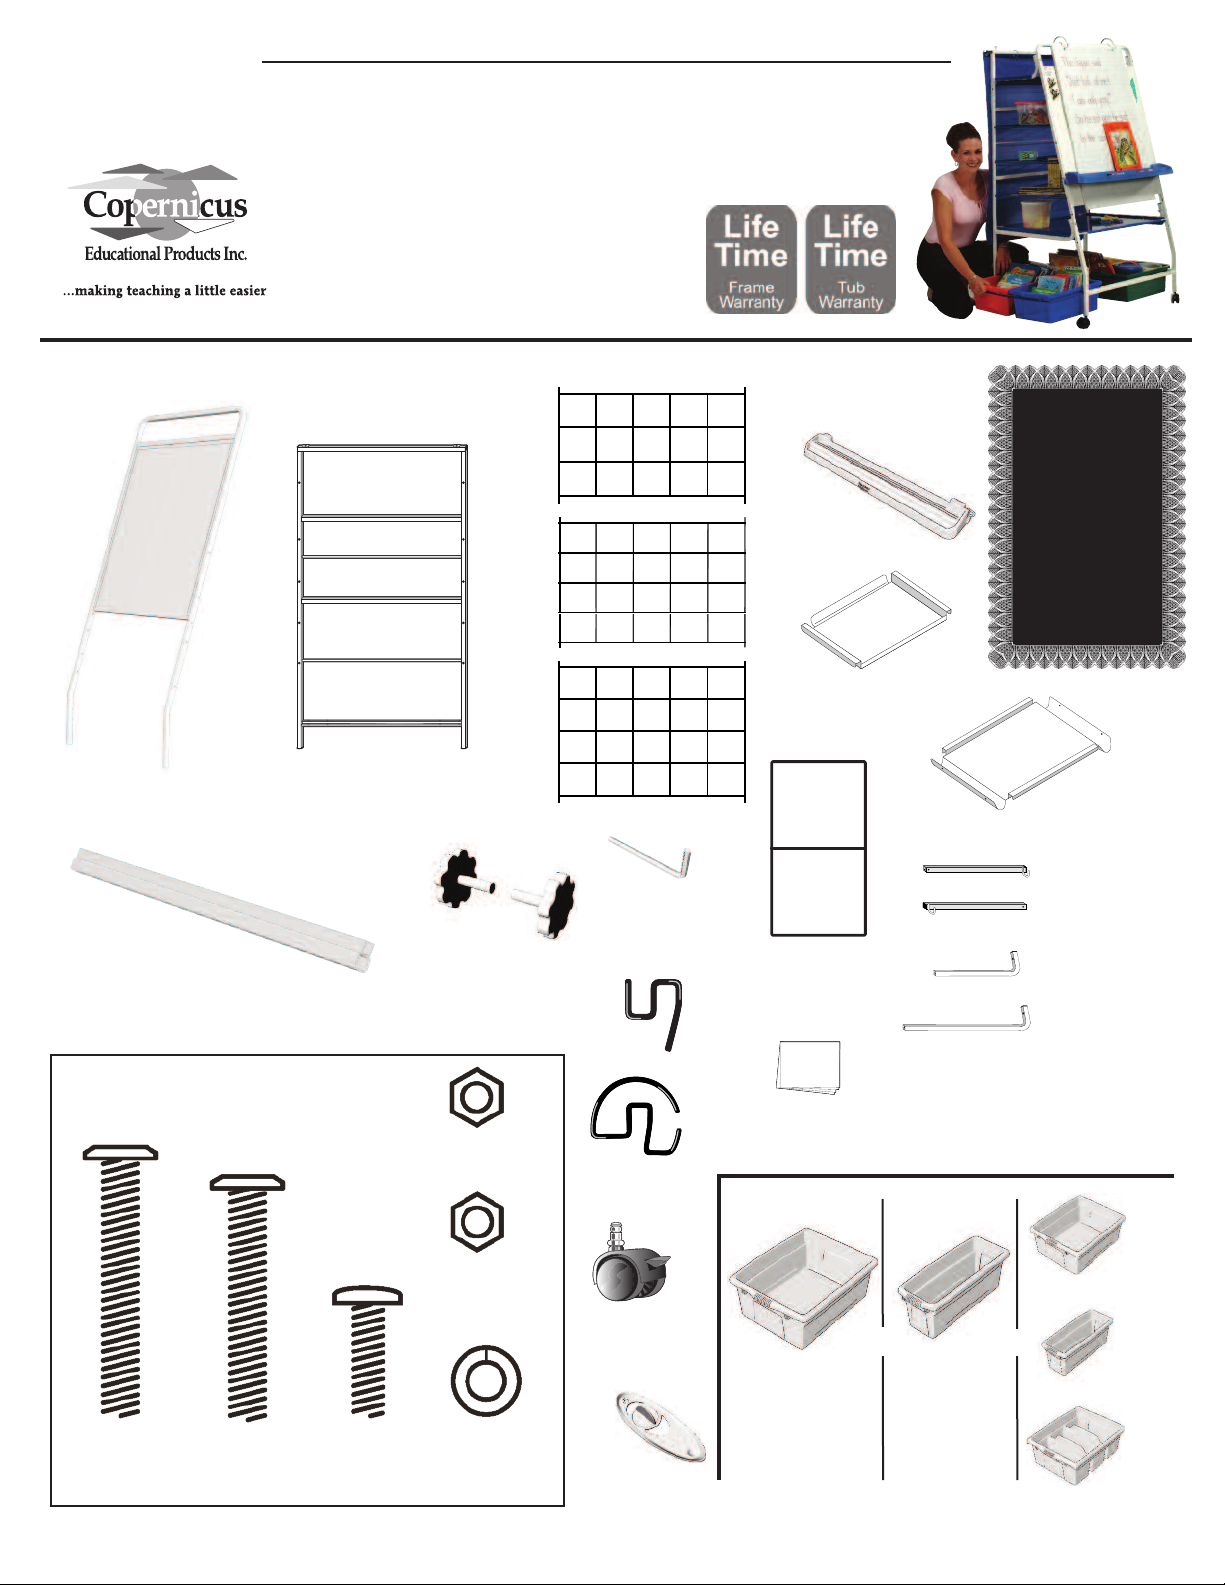
Box 1
Front Frame
1x
bot to m s tretc he r
Rear Frame
1x
x 1
Save your plastic
hardware bag for hook assembly.
ACTUAL SIZE
Knobs
2x
M6 Nut
4x
assembly wrench
x 1
pper wire rack
u
x 1
middle wire rack
x 1
ottom wire rack
b
x 1
bottom rack
accessory
hooks
x 2
x 3
loop hooks
x 2
Contents of Box 2
Ultra-Safe book ledge
PABL 30
x 1
op metal shelf
t
x 1
Instructions
x 1
To validate your ten year
frame warranty and life
time tub warranty, submit
the ON-LINE form at
www.copernicused.com
User name: quality
Password: safety#1
bottom metal shelf
x 1
telescoping units
(left and right)
x 1
each
short bent arm
x 2
long bent arm
x 2
M6 x 45mm
bolt
4x
Visit
www.copernicused.com
M6 x 40mm
Bolt
6x
M6 x 20mm
Bolt
8x
to browse our entire line of educational aids
M6 Lock
Nut
8x
M6 Lock
Washers
10x
2" twin wheel casters
with brakes
x 4
page paw
x 2
Open Tub
4x
OR
Small Tub
8x
OR
Open
Tub 1x
Small
Tub
2x
Divided
Tub
2x
XS005-2008-E
September 30, 2008
1 of 4
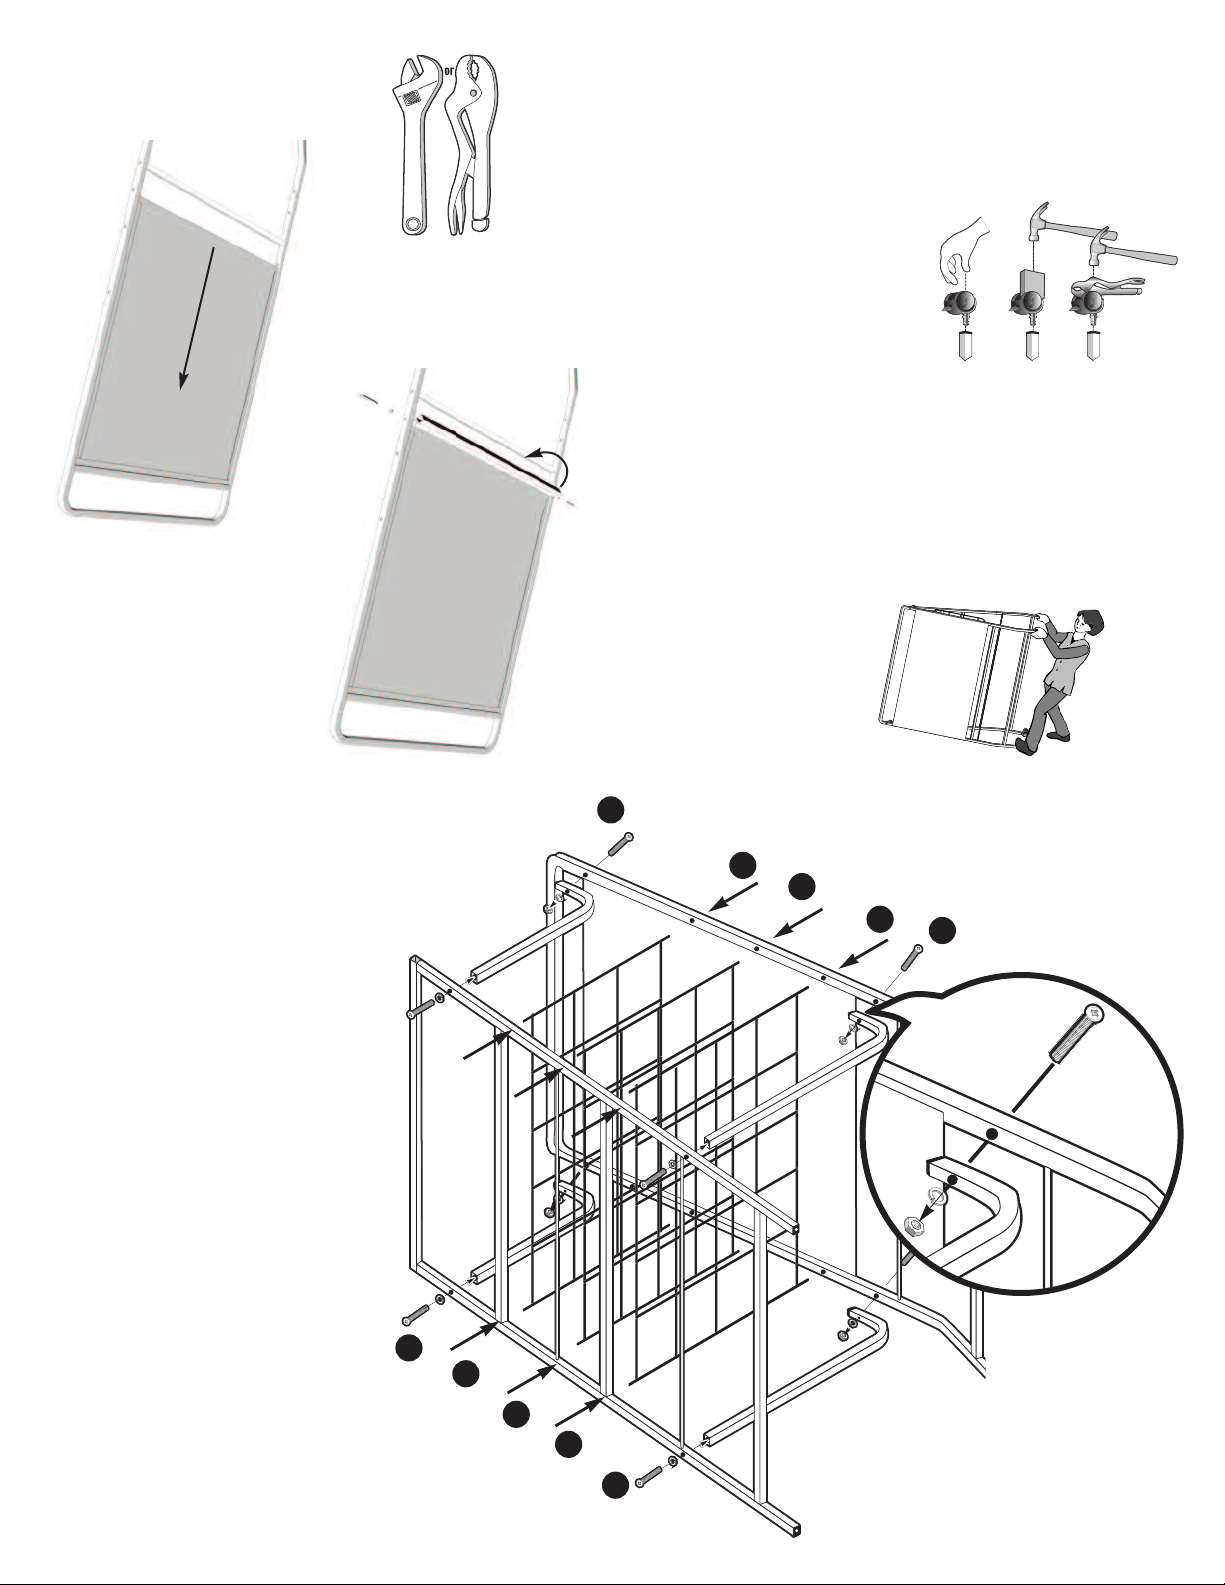
Tools required:
Adjustable wrench or vice grips.
1a. Remove packaging &
Assembly:
1a.Turn Front Frame upside down,
remove the packaging material
and carefully slide the
Whiteboard all the way into the
channel at the top of the Front
Frame.
1b. Position the Bottom Stretcher
Angle the Bottom Stretcher into
the bottom of the Whiteboard
and rotate into position to align with
bolt holes Fasten with two
M6 x 40mm Bolts & Lock Washers
slide to top of frame
1b. Rotate into
position
3. Working from the top, place
upper, middle and lower wire
rack prongs into the
corresponding holes.
NOTE: Long bars on racks
are to be on top making
items slide easier.
4. Now attach long bent arms to
both back and front frame as in
step one and shown in inset.
5. Insert caster stems into black
caster inserts on frames. Push
casters in by hand until they
bottom out against lip on caster
stem. If you find they are hard to
push in, place a piece of wood or
vice-grips between the two
wheels directly over stem and
tap the wood or vice grips with a
hammer until caster bottoms out
against lip on caster stem.
6. Lock casters. Turn upright by
placing your foot on caster that
is on the floor and pivot. Pull the
unit upright by the top legs.
Pull upright by pivoting on bottom locked caster.
2
2. Place front and back frames on
sides making sure holes for wire
racks are to inside. Attach short
bent arms to back frame using
M6 x 40mm bolts and lock
washers. For front frame
use M6 x 45mm bolts, lock
washers and nuts as shown.
Hand tighten only.
3a
3b
3c
4
2 & 4
2
3a
3b
3c
4
XS005-2008-E
September 30, 2008
2 of 4
 Loading...