

Copernicus SOSE1 User Manual
SOSE
SOSE1
Soft Organizer Station - Assembly Guide
SOSE2
If parts are missing or you require assistance,
please call:
1-800-267-8494 or email info@copernicused.com
Have your packing slip ready for reference
SOSE_2009_E
This assembly guide provides instructions to build the Soft Organizer Station.
Check out our full line of products at www.copernicused.com
This product is meant to be assembled by an Adult.
WARNING
In its unassembled state, small parts present a hazard.
This product to be used under the direct supervision of an adult.
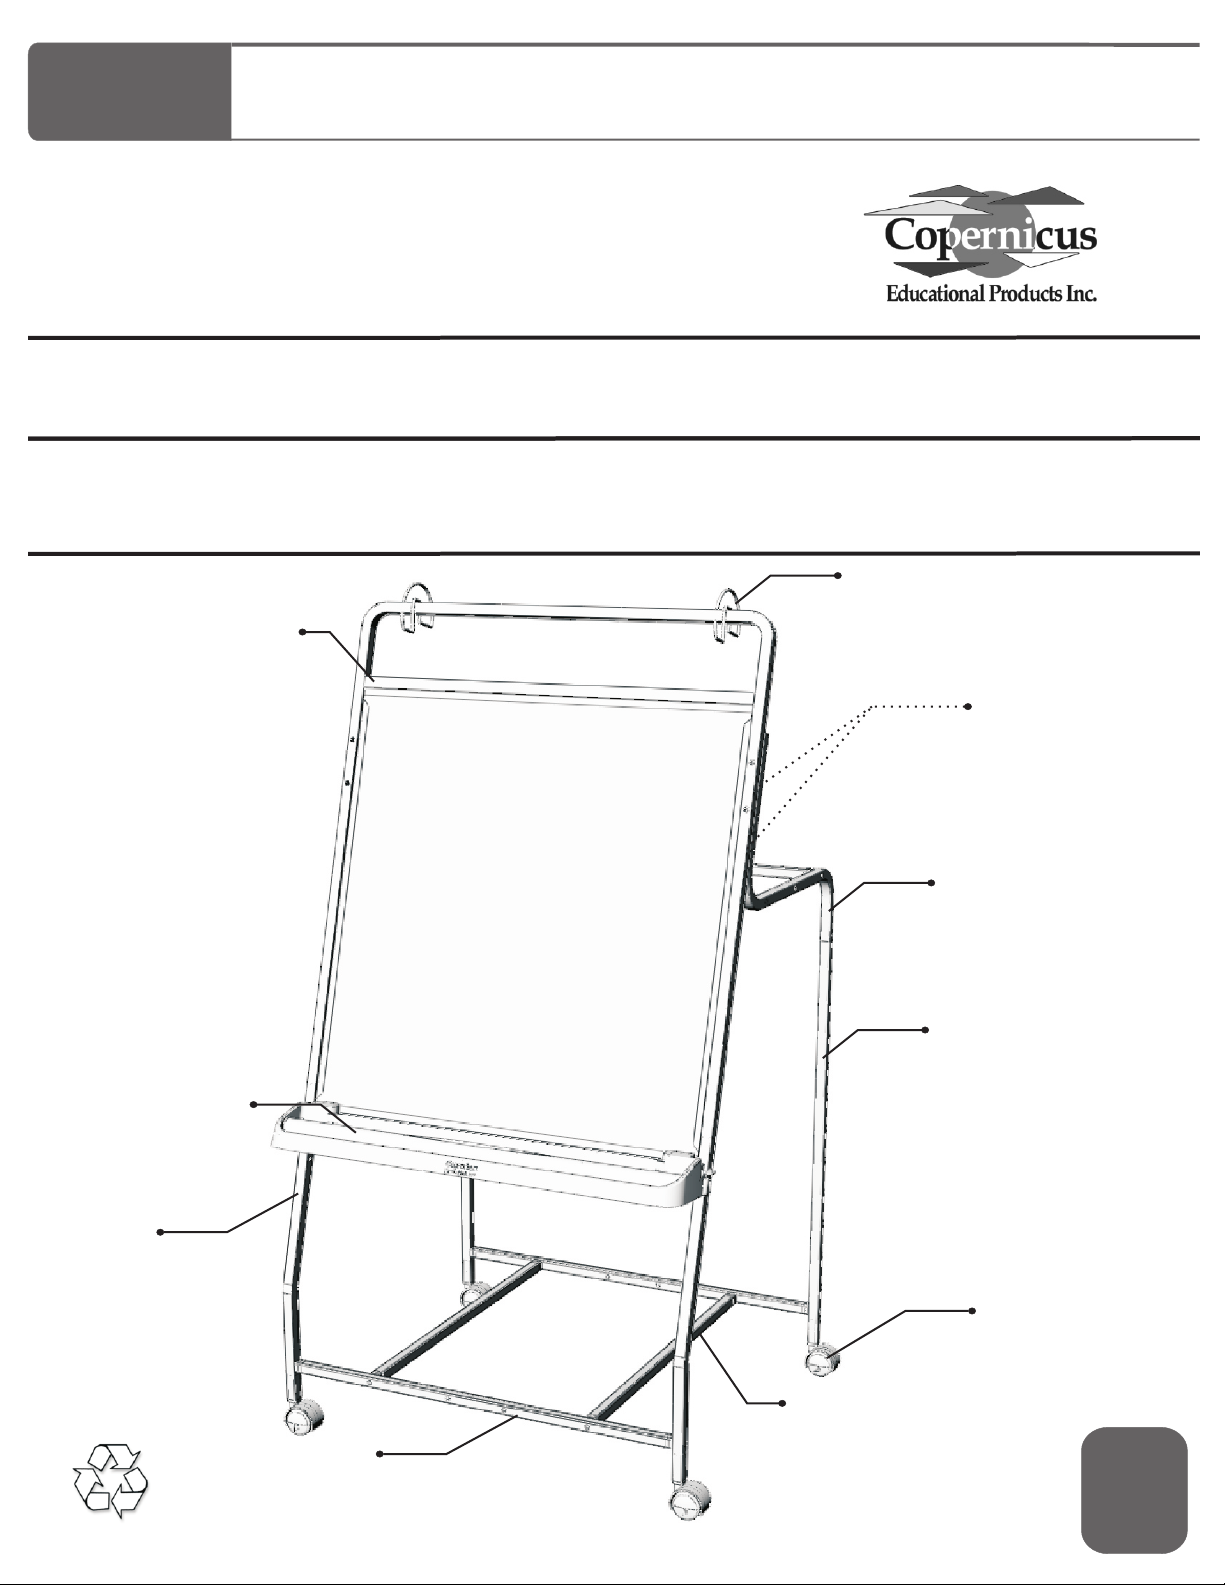
Front Frame Assembly (1)
Chart Paper Hook (2)
Ultra Safe Premium
Bookledge (1)
Front Frame
Lower Leg (2)
1 Left, 1 Right
Hanger Bar (2)
(hidden)
Rear Frame Upper (2)
Rear Frame Lower (2)
Please Recycle
Stretcher (4)
(4 thru holes)
SOSE - Version E - 1 June 2009 - Copernicus Educational Products Inc.
Bottom Stretcher (2)
(no thru holes)
Caster (4)
5
Year
Frame
Warranty
Soft Organizer Station - Parts
Before beginning, you should have:
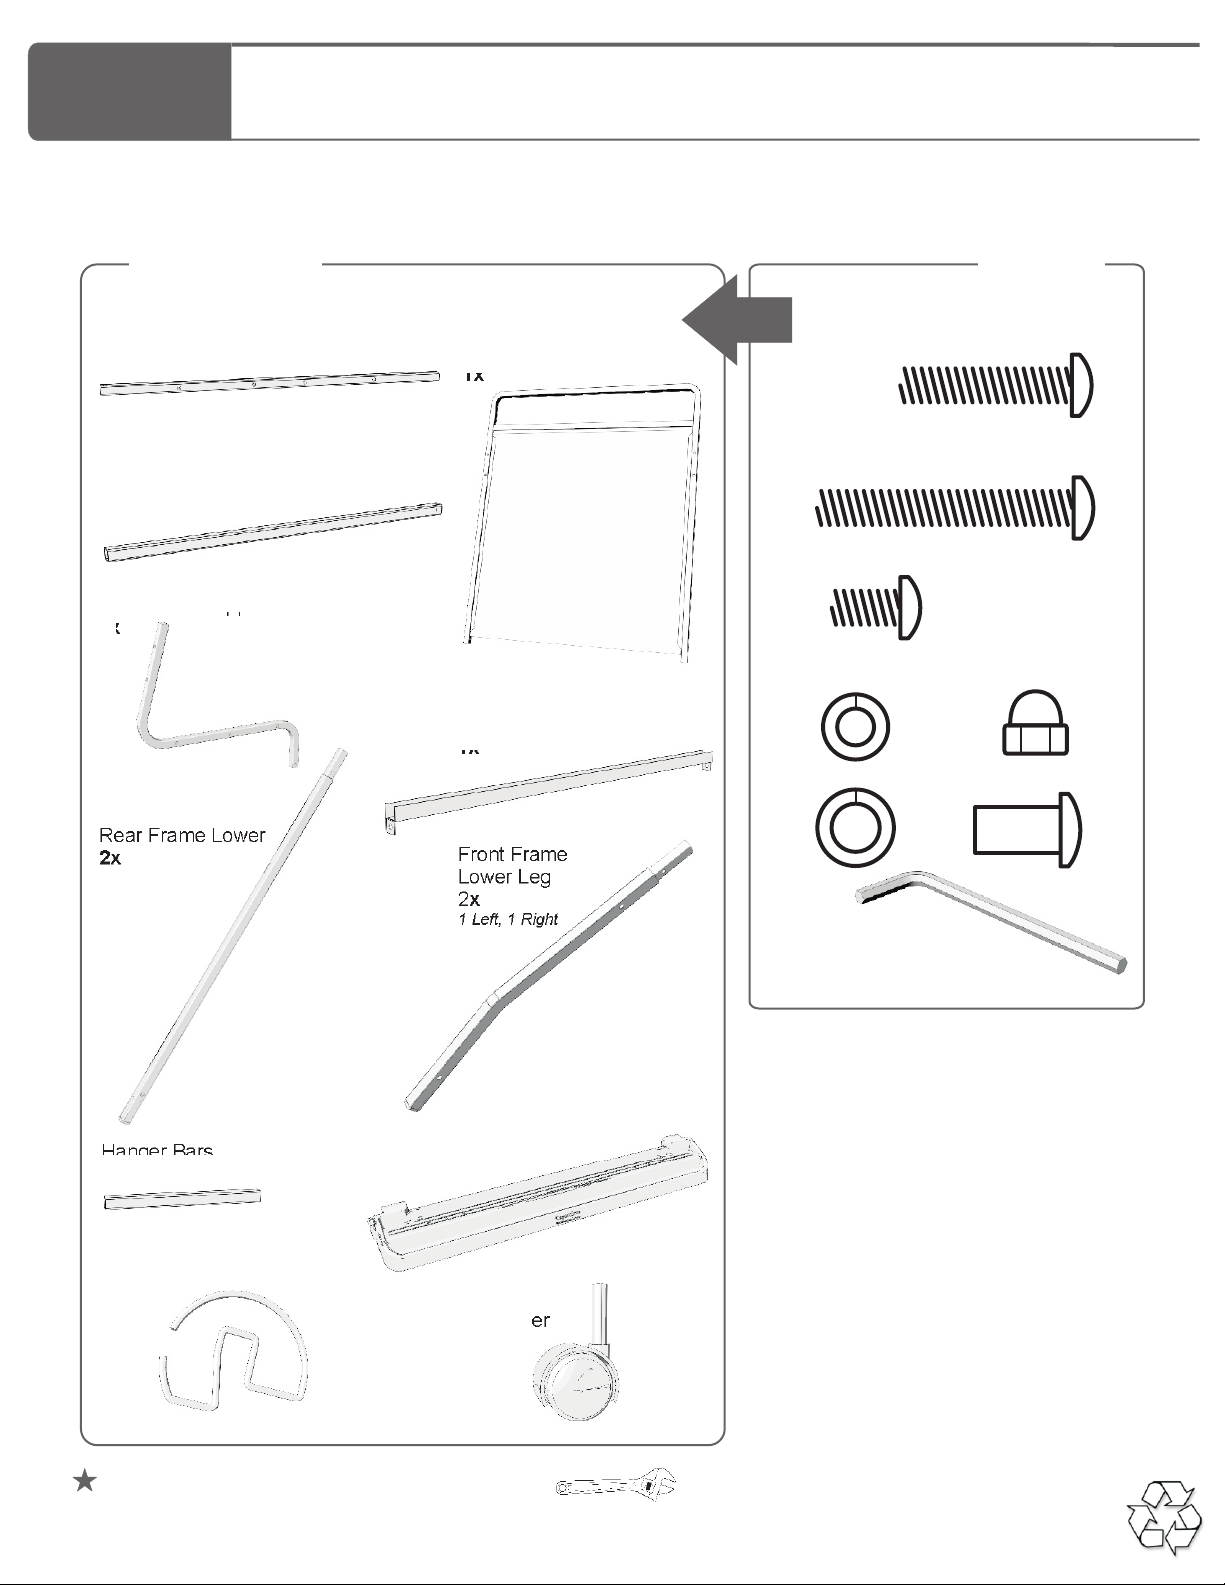
Contents - Box 1
Stretcher (4 through holes)
4x
Bottom Stretcher (no thru holes)
2x
Rear Frame Upper
2x
Rear Frame Lower
2x
Front Frame
Assembly
1x
Whiteboard Channel
1x
Front Frame
Lower Leg
2x
1 Left, 1 Right
In Box 1
A
16x
B
4x
C
4x
D
24x
F
4x
Hardware
Actual Size
E
8x
G
4x
H
(Not to Scale)
2x
Ultra Safe Premium
Hanger Bars
2x
Chart Paper Loop Hook
2x
Additional tools required: Adjustable wrench
Bookledge
1x
Caster
4x
SOSE - Version E - 1 June 2009 - Copernicus Educational Products Inc.
Tips for Assembly - Using this Manual
Watch for These Helpful Symbols
This symbol denotes a 2 Person Task. For safety, please ensure that there are two
people working on steps displaying this symbol
Watch for this symbol throughout the Assembly Instructions. Wherever you see it, pay
close attention. The symbol denotes a step needing extra attention to ensure it is done
correctly
The Star symbol highlights an advisory note
Before You Begin
Layout and identify all of the included parts
The hardware has been packed according to size, separate them based on those sizes
2 Person Task
!
Read the assembly instructions over once to familiarize yourself with them
Please note that in its unassembled state, this product contains parts that can be a
hazard to small children; it should be assembled by an adult
As You Assemble the Unit
Follow the steps in sequence
Before beginning each step, find the part(s) that you need for that step
Pay attention to the labeling on the parts, they are there to help direct you at certain stages
The title of each step states what you will be doing. Review the text and the pictures as you
build the unit
After Assembly; Before Use
Remove the plastic film from the Whiteboard before writing on it
Clean the Whiteboard surface well with soapy water and then rinse clean
SOSE - Version E - 1 June 2009 - Copernicus Educational Products Inc.
Do not tighten any fasteners, unless instructed
Actual Size:
1
You will need: (Not to Scale)
Front Frame Assembly x 1
C
x 2
F
x 2
Whiteboard Stretcher x 1
G
x 2
Build Front Frame Assembly
Turn the Front Frame Assembly upside down and slide the Whiteboard securely into the frame.
1
Slide the Front Frame Lower Legs into the Front Frame Assembly
2
Align the Whiteboard Channel with the holes connecting the Lower Legs & Frame Assembly
3
- Note that there is a Left & Right side Lower Leg - the holes on these pieces should face outwards
- Rotate the Whiteboard Channel into position, so that it surrounds the Whiteboard surface
- Fasten with two Bolt C’s, Washer F’s & Barrel Nut G’s
- Tighten bolts
Front Frame Lower Leg x 2
1 Left, 1 Right
1
Note: hole
facing out,
no hole
!
toward the
inside
Note: hole
facing out
!
2
3
Bolt C
Washer F
Barrel
Nut G
SOSE - Version E - 1 June 2009 - Copernicus Educational Products Inc.
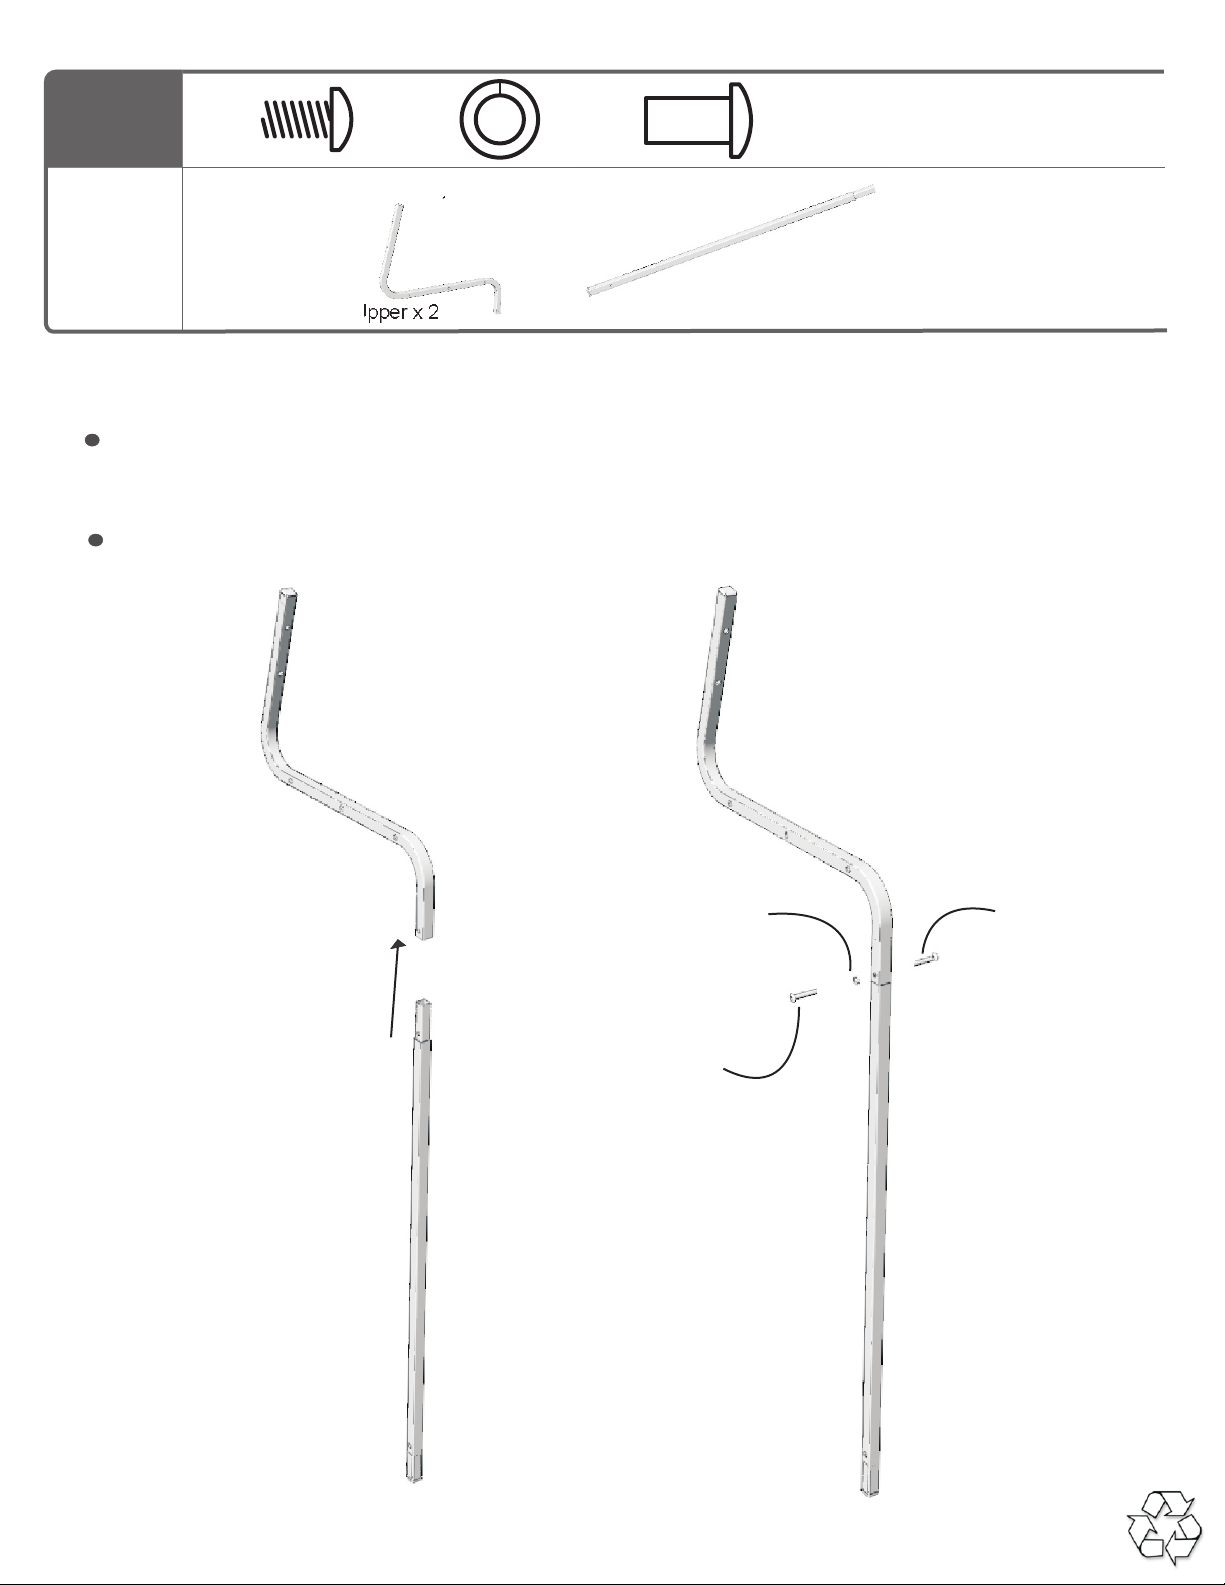
2
Actual Size:
C
x 2
F
x 2
You will need: (Not to Scale)
Rear Frame Upper x 2 Rear Frame Lower x 2
Build Rear Frame Legs
Insert the narrow end of one Rear Frame Lower into the Rear Frame Upper
- Fasten together with one Bolt C, Washer F & Barrel Nut G
- Tighten bolts
Repeat to build other Rear Leg
G
x 2
Washer F
Barrel
Nut G
Bolt C
SOSE - Version E - 1 June 2009 - Copernicus Educational Products Inc.
 Loading...