

Copernicus Regal RC107, Regal RC108, Regal RC109, Regal RC110 Assembly Manual
RC107, RC108,
RC109, RC110
™
Regal Reading/Writing Center
Assembly Guide
RC107_2014_D
Check out our other products online at
www.copernicused.com
?This product is meant to be assembled by an adult.
WARNING
?In its unassembled state, small parts present a hazard.
?To be used under direct supervision of an adult.
Don’t forget to check out our tips for your whiteboard at:
Check out some of our
other great products!
For assistance, please contact us:
1-800-267-8494
Email info@copernicused.com
Have your packing slip ready for reference
www.copernicused.com
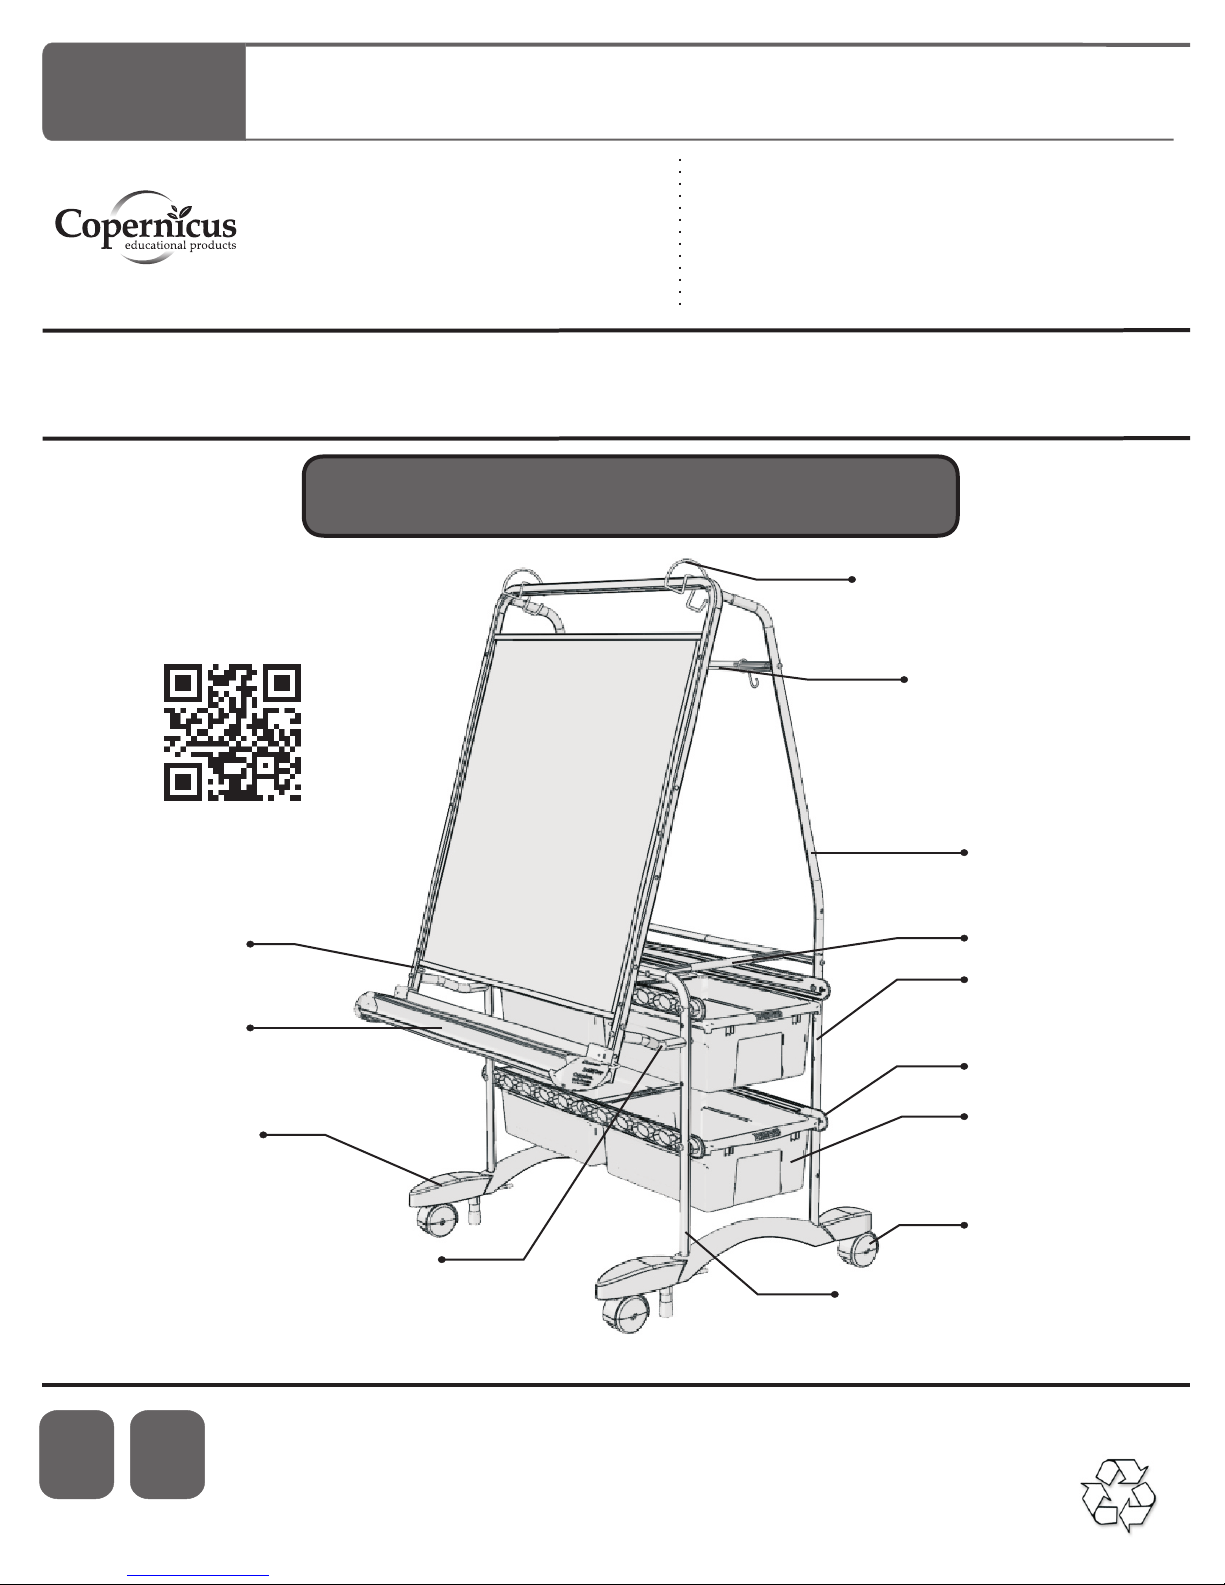
Chart Loop Hook (2)
Stretcher (2)
www.copernicused.com
Front Frame (1)
Safety Cap Premium
Bookledge (1)
Base (2)
Front Frame Support (2)
1 Left, 1 Right
Upper Frame (2)
Spacer (2)
Lower Frame (2)
Tub Channel (4)
Open Tub (4)
Caster (4)
Center Frame (1)
Life
Time
Tub
Warranty
10
Year
Frame
Warranty
Validate Your Warranty On-Line
To validate your warranty submit the ON-LINE form at www.copernicused.com
RC107 - Version D - 3 June 2014 - Copernicus Educational Products Inc.
Please Recycle
RC107, RC108,
RC109, RC110
Regal Reading/Writing Center
™
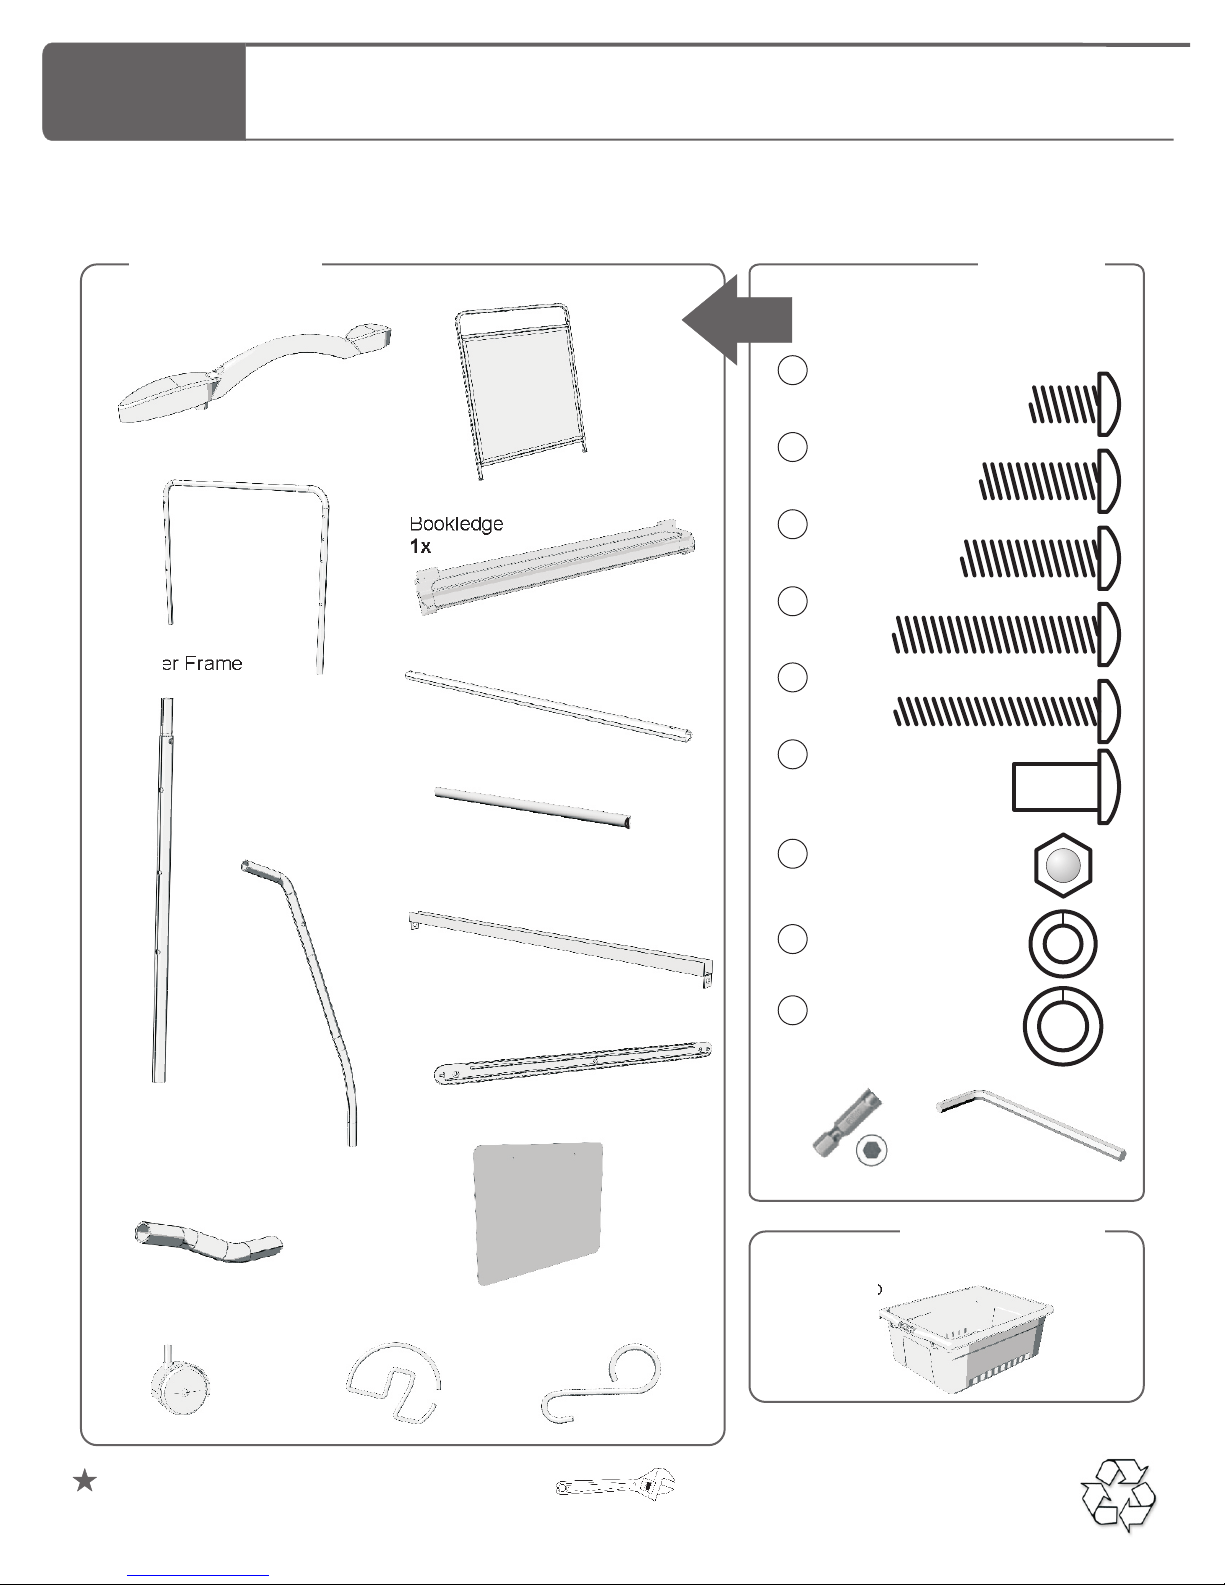
Before beginning, you should have:
- Parts
Contents - Box 1
Base
2x
Center Frame
1x
Lower Frame
1 Left, 1 Right
2x
Upper Frame
1 Left, 1 Right
2x
Front Frame
1x
Safety Cap Premium
Bookledge
1x
Stretcher
2x
Spacer
No Thru Holes
2x
Whiteboard Channel
1x
In Box 1In Box 1
M6 x 15mm
A
10x
M6 x 20mm
B
2x
M6 x 25mm
C
2x
M6 x 35mm
D
16x
M5 x 35mm
E
2x
M6 Barrel Nut
F
12x
M6 Acorn Nut
2x
G
M6 Lock Washer
20x
H
Hardware
Actual Size
Tub Channel
4x
Front Frame Support
1 Left, 1 Right
2x
3” Caster
4x
Additional tools required: Adjustable wrench
Chart Loop Hook
2x
Removable Rear Whiteboard
1x
Rear Whiteboard Hook
2x
RC107 - Version D - 3 June 2014 - Copernicus Educational Products Inc.
M8 Lock Washer
12x
ii
x1
Open Tub
4x
(Not to scale)
x2
Contents - Box 2
RC107, RC108,
RC109, RC110
2 Person
Tips for Assembly - Using this Manual
Watch for These Helpful Symbols
lThis symbol denotes a 2 Person Task. For safety, please ensure that there are two people
working on steps displaying this symbol
lWatch for this symbol throughout the Assembly Instructions. Wherever you see it, pay close
attention. The symbol denotes a step needing extra attention to ensure it is done correctly.
lThe Star symbol highlights an advisory note
Before You Begin
Layout and identify all of the included parts
l
The hardware has been packed according to size, separate them based on those sizes
l
Read the assembly instructions over once to familiarize yourself with them
l
Please note that in its unassembled state, this product contains parts that can be a hazard
l
to small children; it should be assembled by an adult.
As You Assemble the Unit
lFollow the steps in sequence
lBefore beginning each step, find the part(s) that you need for that step
lPay attention to the labeling on the parts, they are there to help direct you at certain stages
lThe title of each step states what you will be doing. Review the text and the pictures as you
build the unit.
After Assembly; Before Use
lRemove the plastic film from the Whiteboard before writing on it
lClean the Whiteboard surface well with soapy water and then rinse clean
Suggested Products
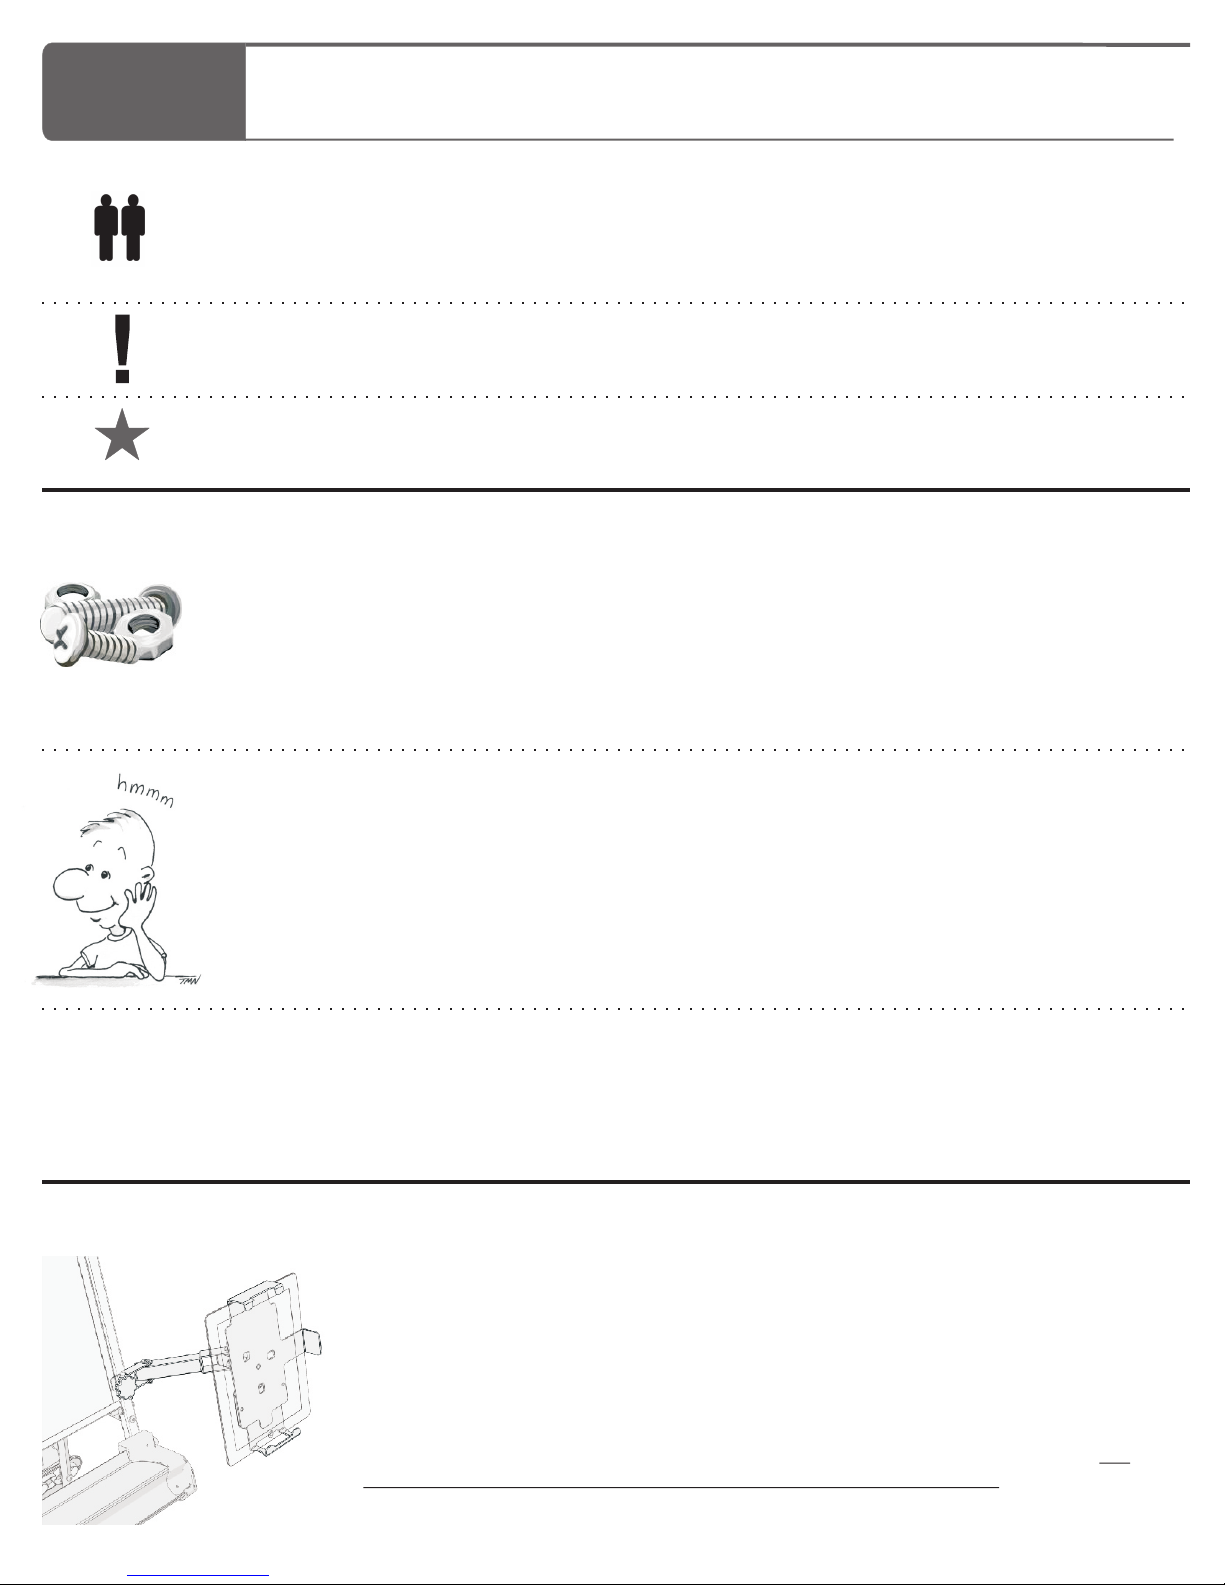
®
iPad Mount
Securely attach your iPad® to this easel for group learning activities, to give students the
opportunity to share their work with classmates, create guided reading centers, story board
presentations, literacy activities, allow students to record themselves and even for creating
class podcasts.
Works with new RC105, 106, 107 models. Included with RC108, 109, 110 models. For
more information visit: www.copernicused.com or call 1-800-267-8494.
RC107 - Version D - 3 June 2014 - Copernicus Educational Products Inc.
Actual Size:
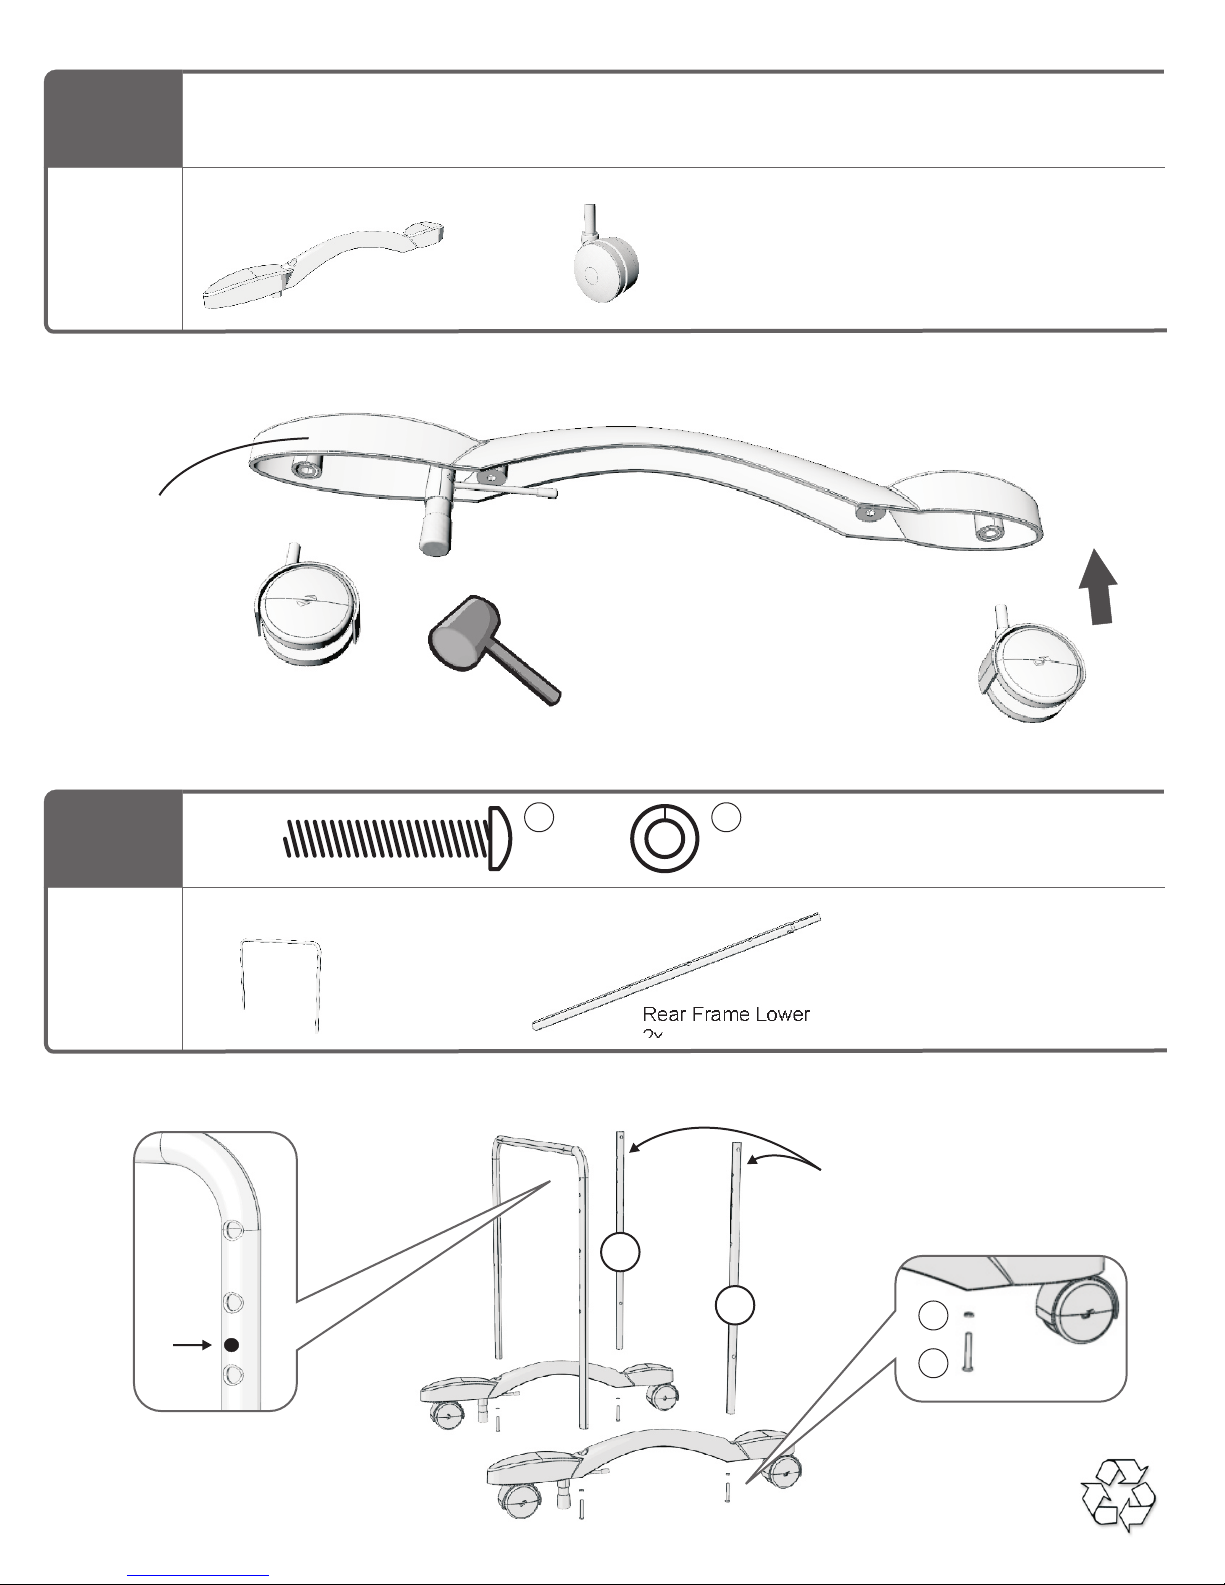
1
You will need: (Not to Scale)
Install Casters
Front
Actual Size:
2
Base
2x
M6x35mm
Caster
4x
You should begin the installation with the brakes in the UP Position
Press Casters firmly into the Base:
?Casters will click into place
?If necessary, tap the caster in
using a rubber mallet.
D
4x 4x
H
You will need: (Not to Scale)
Center Frame
1x
Install Center Frame & Rear Frame Lower
L
Black sticker & indents
always face outward
!
Rear Frame Lower
2x
R
Note - Left & Right
stickers on the frames
!
H
D
Tighten bolts
!
RC107 - Version D - 3 June 2014 - Copernicus Educational Products Inc.
 Loading...