

Copeland Furniture Veneer, Clapboard, Upholstery Assembly Instructions Manual
Assembly Instructions for Moduluxe Plinth Beds
Headboard
Instructions for the bed types
pictured below. Please identify the
following items.
Hardware included:
35mm – 4mm bolt (Q 26 / K 28 / CK 28)
Components included:
Headboard (1)
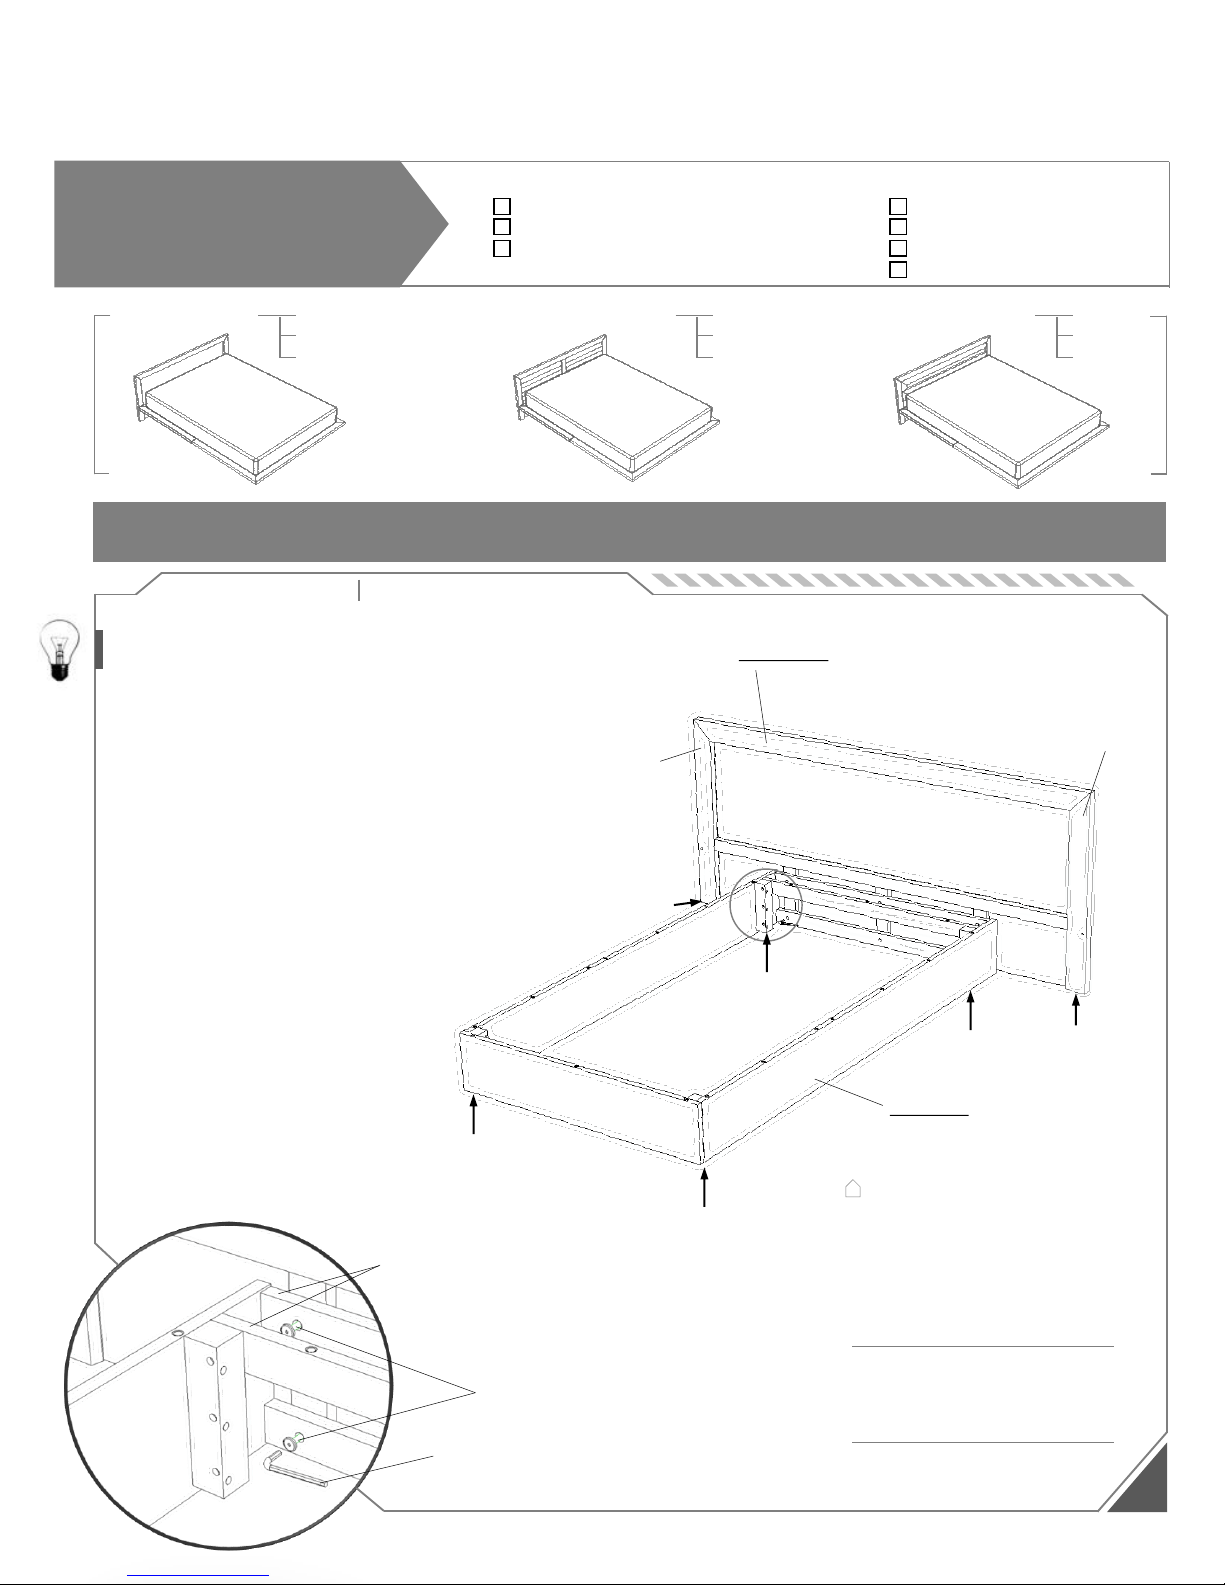
Stand the headboard upright and align
the holes in plinth box ribs with the
holes in headboard. Insert and loosely
tighten 2” – 4mm bolts by using the
provided 4mm Allen wrench. Tighten all
the bolts. Level the HDBD (2 leveling
points) and the plinth base by turning
the leveling bolts underneath each
HDBD leg and the plinth box corner
blocks. (Figure 1).
Step 1: Attach plinth base to the
2” – 4mm bolt
Plinth box (1)2” – 4mm bolt (Q 8 / K 10 / CK 10)
Plinth box
HDBD deck / FTBD deck
Veneer HDBD
Queen
King
Cal-King
Clapboard HDBD
Queen
King
Cal-King
Upholstery HDBD
Queen
King
Cal-King
Cal-King
4mm Allen wrench (provided)
HDBD
Leveling
point
HDBD
Leveling
point
Plinth
leveling
corner
block
Plinth
leveling
corner
block
Plinth
leveling
corner
block
Number of bolts for HDBD
Queen
King
6
8
8
Plinth box ribs
HDBD leg
HDBD leg
4mm Allen wrench (1)
headboard (HDBD)
Tools required Allen wrench (provided)
1
Notice: Beds must be disassembled before moving to avoid damage. Never attempt to move the bed while it is
assembled. Failure to do so would void the warranty.
Figure 1. Connect plinth base
with HDBD
Deck spine (1)
Plinth
leveling
corner
block
Tools required Allen wrench
2
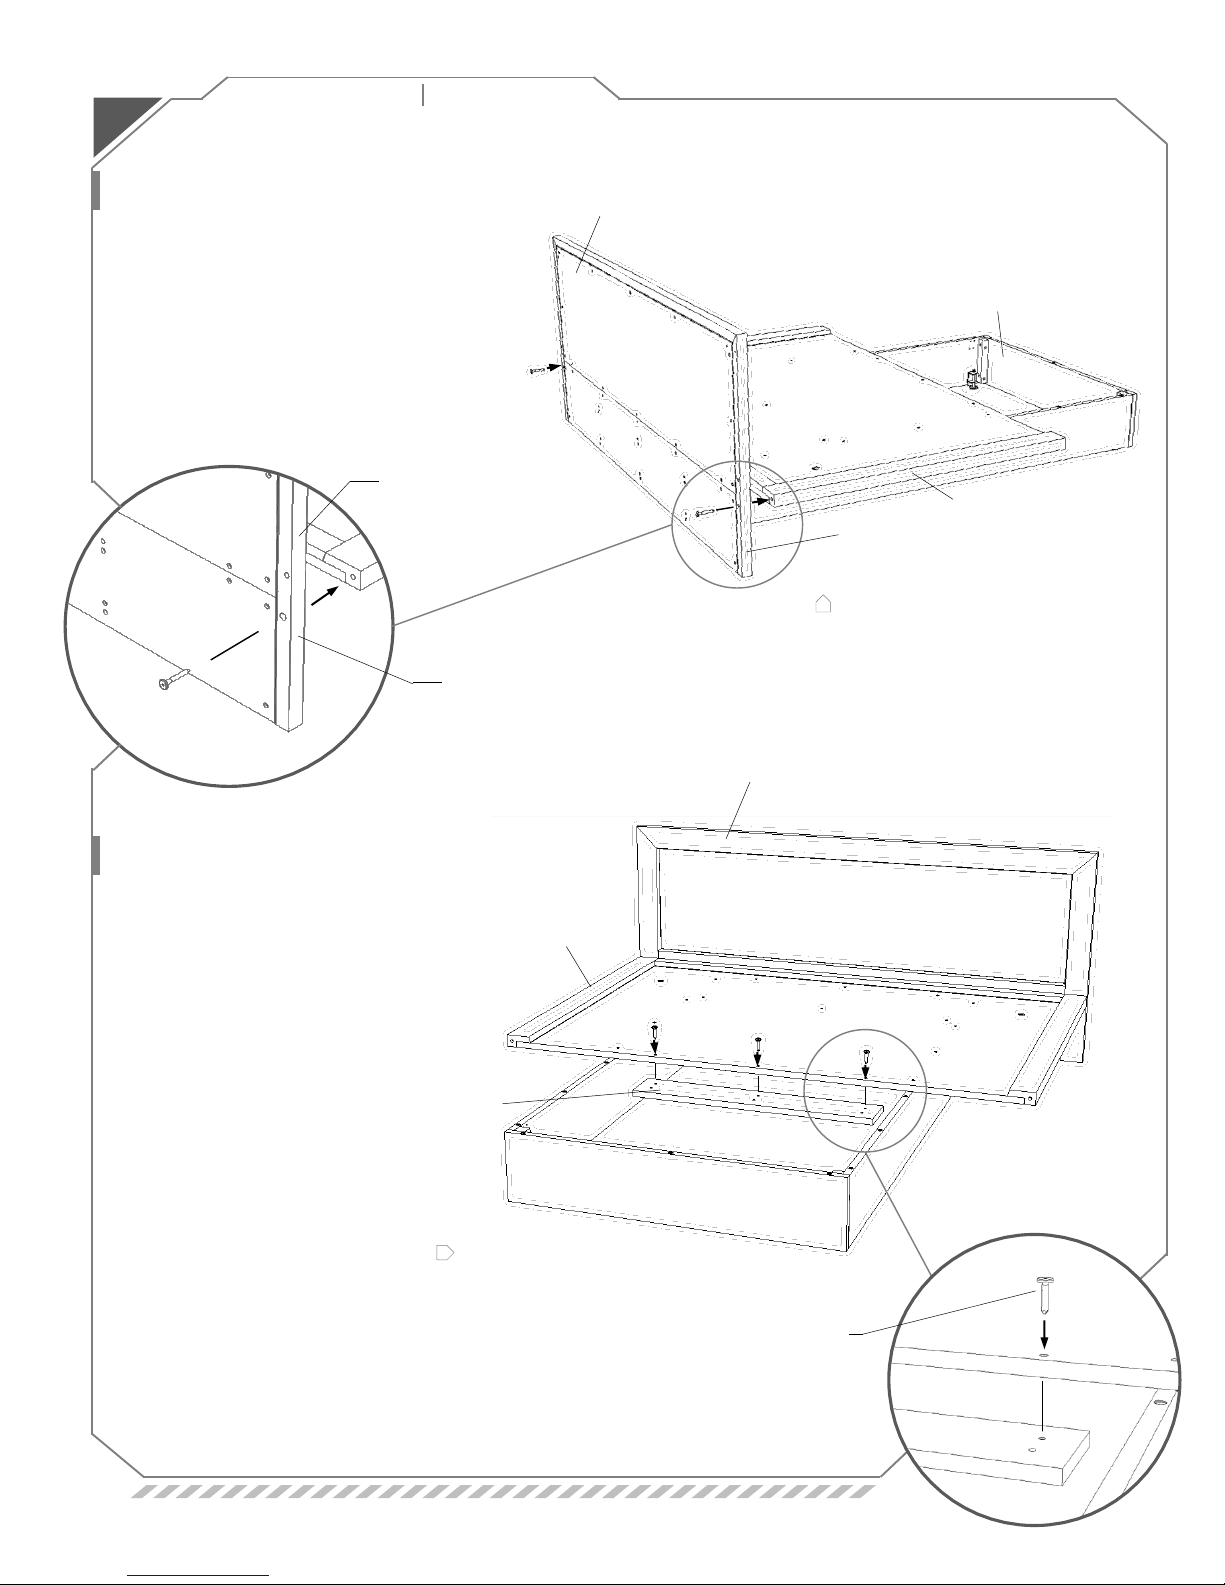
Figure 2. Connect HDBD
HDBD Leg
Connection
hole
with deck
Figure 3.
Attach Deck Spine
Plinth
HDBD deck
HDBD
HDBD leg
Align the HDBD deck with the
HDBD legs. Insert and loosely
tighten 2” – 4mm bolts through
the connection holes from the
back of the HDBD legs (Figure
2).
Step 2: Attach headboard (HDBD)
deck to headboard (HDBD)
Align the Deck Spine with the
holes at the end of the HDBD
Deck. Screw the Deck Spline
with three 35mm – 4mm bolts
(Figure 3).
Step 3: Install the Deck Spine
HDBD deck
HDBD
Deck spine
35mm – 4mm
hex bolt
 Loading...