

Page 1
Assembly Instructions for Moduluxe Plinth Beds
Headboard
Instructions for the bed types
pictured below. Please identify the
following items.
Hardware included:
35mm – 4mm bolt (Q 26 / K 28 / CK 28)
Components included:
Headboard (1)
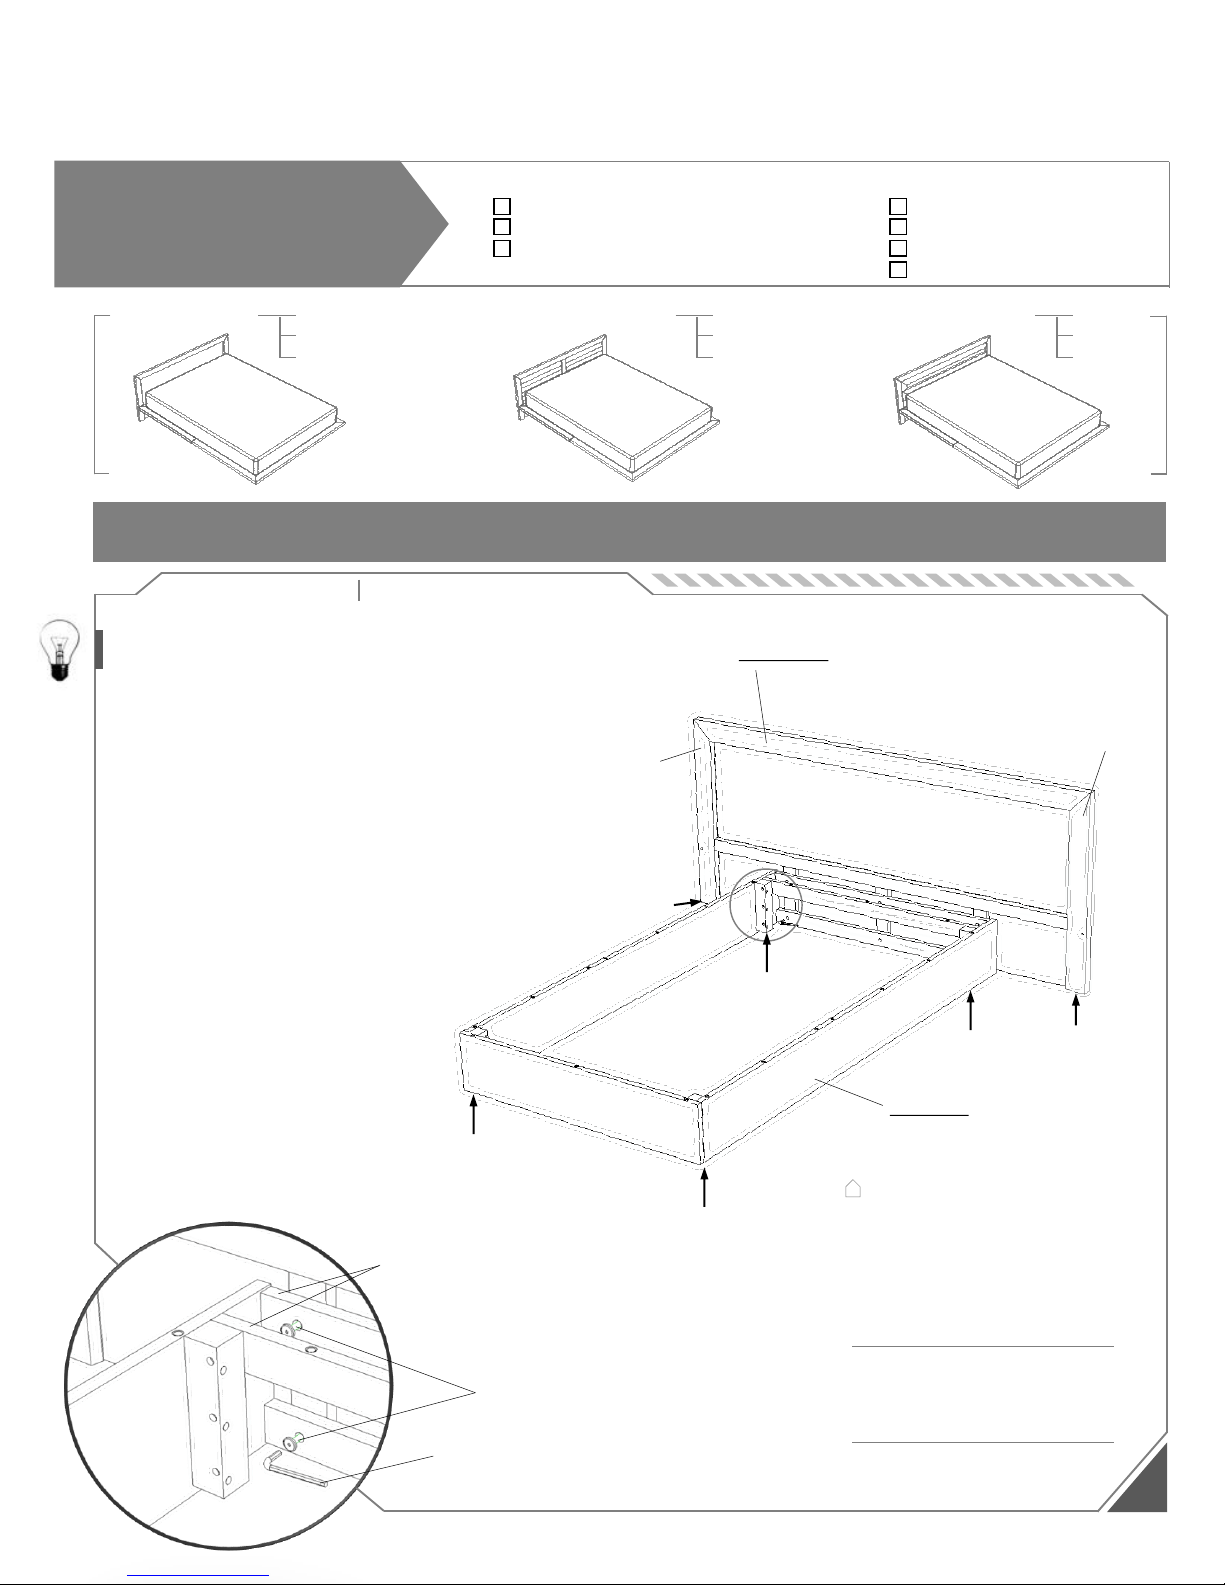
Stand the headboard upright and align
the holes in plinth box ribs with the
holes in headboard. Insert and loosely
tighten 2” – 4mm bolts by using the
provided 4mm Allen wrench. Tighten all
the bolts. Level the HDBD (2 leveling
points) and the plinth base by turning
the leveling bolts underneath each
HDBD leg and the plinth box corner
blocks. (Figure 1).
Step 1: Attach plinth base to the
2” – 4mm bolt
Plinth box (1)2” – 4mm bolt (Q 8 / K 10 / CK 10)
Plinth box
HDBD deck / FTBD deck
Veneer HDBD
Queen
King
Cal-King
Clapboard HDBD
Queen
King
Cal-King
Upholstery HDBD
Queen
King
Cal-King
Cal-King
4mm Allen wrench (provided)
HDBD
Leveling
point
HDBD
Leveling
point
Plinth
leveling
corner
block
Plinth
leveling
corner
block
Plinth
leveling
corner
block
Number of bolts for HDBD
Queen
King
6
8
8
Plinth box ribs
HDBD leg
HDBD leg
4mm Allen wrench (1)
headboard (HDBD)
Tools required Allen wrench (provided)
1
Notice: Beds must be disassembled before moving to avoid damage. Never attempt to move the bed while it is
assembled. Failure to do so would void the warranty.
Figure 1. Connect plinth base
with HDBD
Deck spine (1)
Plinth
leveling
corner
block
Page 2
Tools required Allen wrench
2
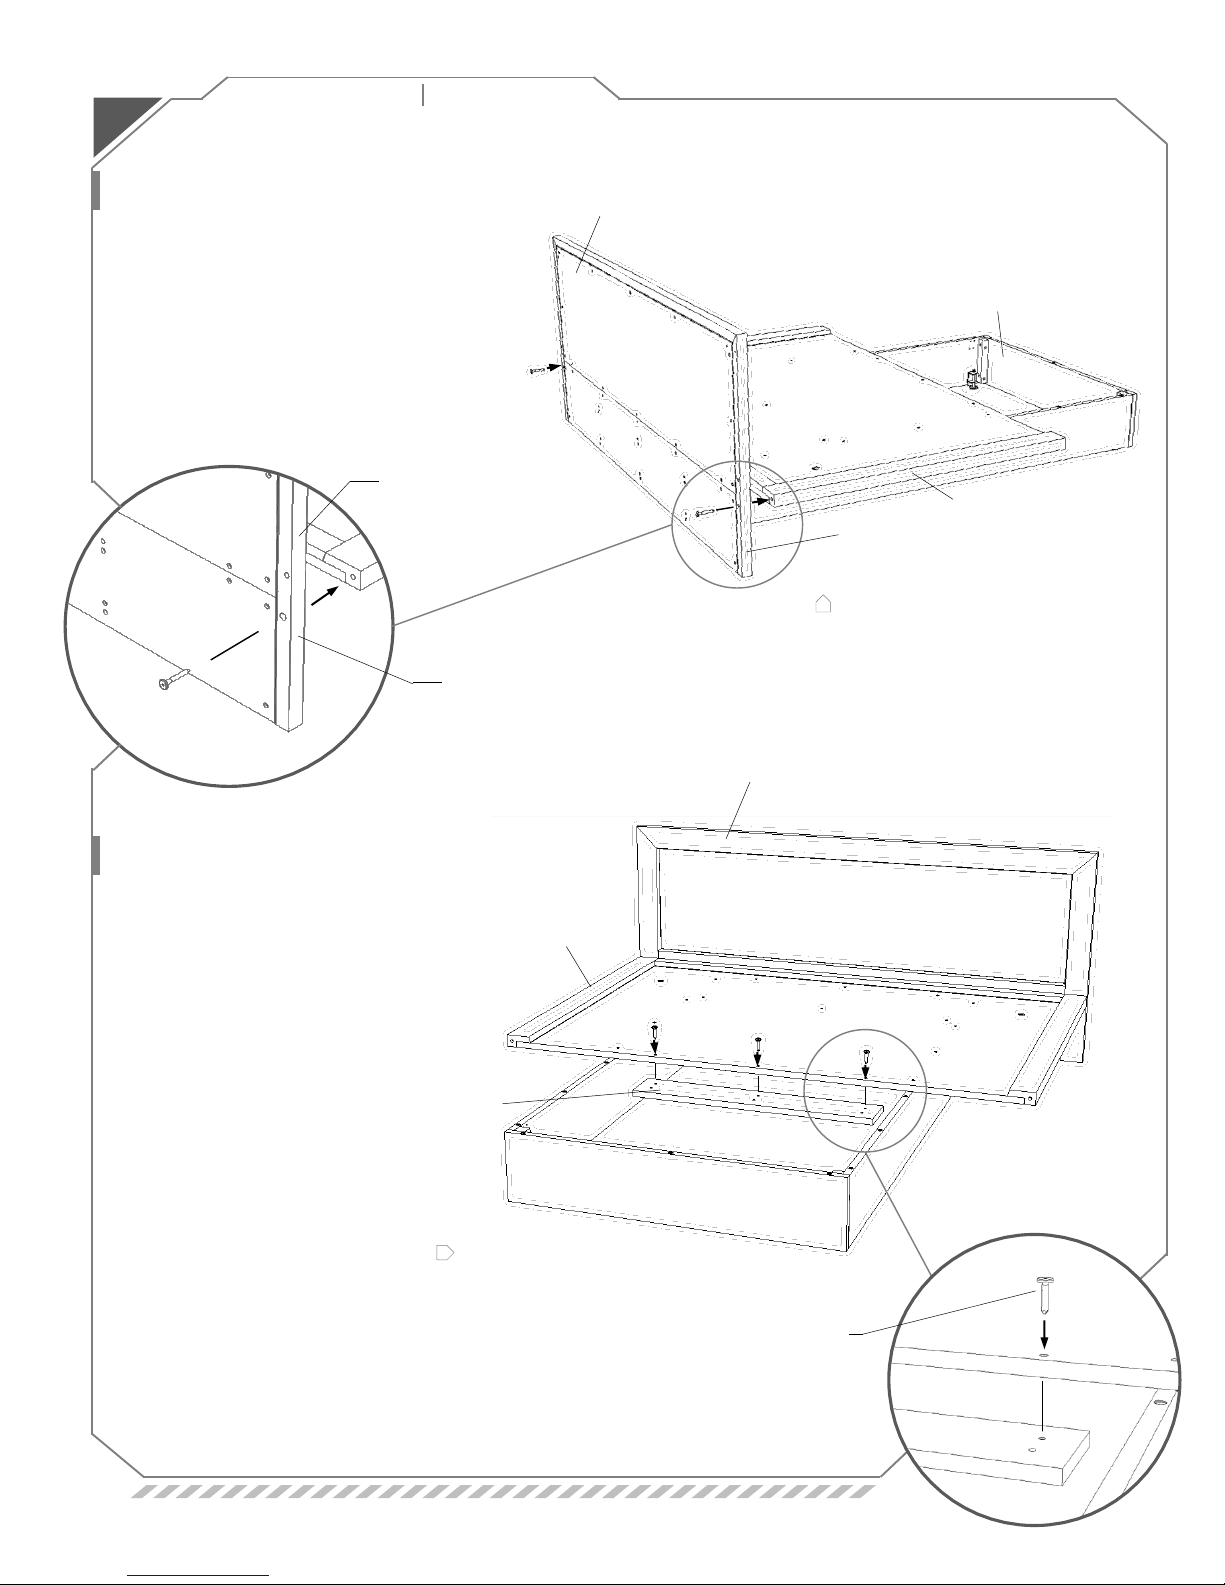
Figure 2. Connect HDBD
HDBD Leg
Connection
hole
with deck
Figure 3.
Attach Deck Spine
Plinth
HDBD deck
HDBD
HDBD leg
Align the HDBD deck with the
HDBD legs. Insert and loosely
tighten 2” – 4mm bolts through
the connection holes from the
back of the HDBD legs (Figure
2).
Step 2: Attach headboard (HDBD)
deck to headboard (HDBD)
Align the Deck Spine with the
holes at the end of the HDBD
Deck. Screw the Deck Spline
with three 35mm – 4mm bolts
(Figure 3).
Step 3: Install the Deck Spine
HDBD deck
HDBD
Deck spine
35mm – 4mm
hex bolt
Page 3

Tools required
Attach the FTBD deck to the
HDBD deck by aligning the
connection dowels on each side
of the HDBD deck. Screw FTBD
deck and deck spine with three
35mm – 4mm hex bolts (Figure
4).
Step 4: Install the footboard (FTBD)
Allen wrench
Step 5: Attach the decks to the
Insert and loosely tighten the 35mm –
4mm bolts into the marked holes shown
on the right, using the provided Allen
wrench. Finally, tighten all the
screws (Figure 5).
Figure 4. Connecting headboard deck and
3
plinth box
FTBD Deck
Deck Spine
footboard deck with deck spine
deck
Connection
Dowel
HDBD Deck
HDBD
Figure 5.
Final tighten the decks
Plinth Box
Headboard
Cal-King
HDBD deck
FTBD deck
Number of bolts for decks
Queen
King
26
28
28
35mm – 4mm bolt
Allen
wrench
Page 4

Care Instructions
To care for and preserve the finish on your new Copeland Furniture piece, please keep the following
recommendations in mind.
While our furniture has been finished with a durable top coat, the surface may be sensitive to
dents and abrasions during the first 30 days in your home.
Treat the surface finish gently so it does not dent or chip. Tape or stickers should not be put on
the finish.
For general care use a soft cloth to dust the furniture.
Use damp cloth with a mild soap to clean-up spills or dirt. Dry the surface thoroughly.
Please do not use any polishes, waxes or solvents to clean the surface of the furniture. This
holds true for new Copeland Furniture pieces as well as items you may already have in your
home.
Please do not place any candles directly on the surface of your furniture. The perfumes and
dyes in the candles may penetrate the finish.
Beds must be disassembled before moving to avoid damage. Never attempt to move the bed
while it is assembled.
Special Care Instructions for Cherry Furniture
Furniture crafted from cherry wood darkens with age. This change in color, from a reddish tan to a reddish
brown, results from the natural oxidation of the wood when it is exposed to light. Objects left on a piece of
cherry furniture for an extended period will retard this oxidation process and when removed, may leave a lighter
colored outline of the object on the surface. With continued exposure to light, this color difference will eventually
disappear and the wood will reach a mature even tone.
If you have any questions or difficulties, please call us at the number below between the hours of 8:00 am and 4:30 pm eastern time.
156 Industrial Drive, Bradford, VT 05033 Tel: 802.222.9282 Fax: 802.222.9285 www.copelandfurniture.com
 Loading...