

Page 1
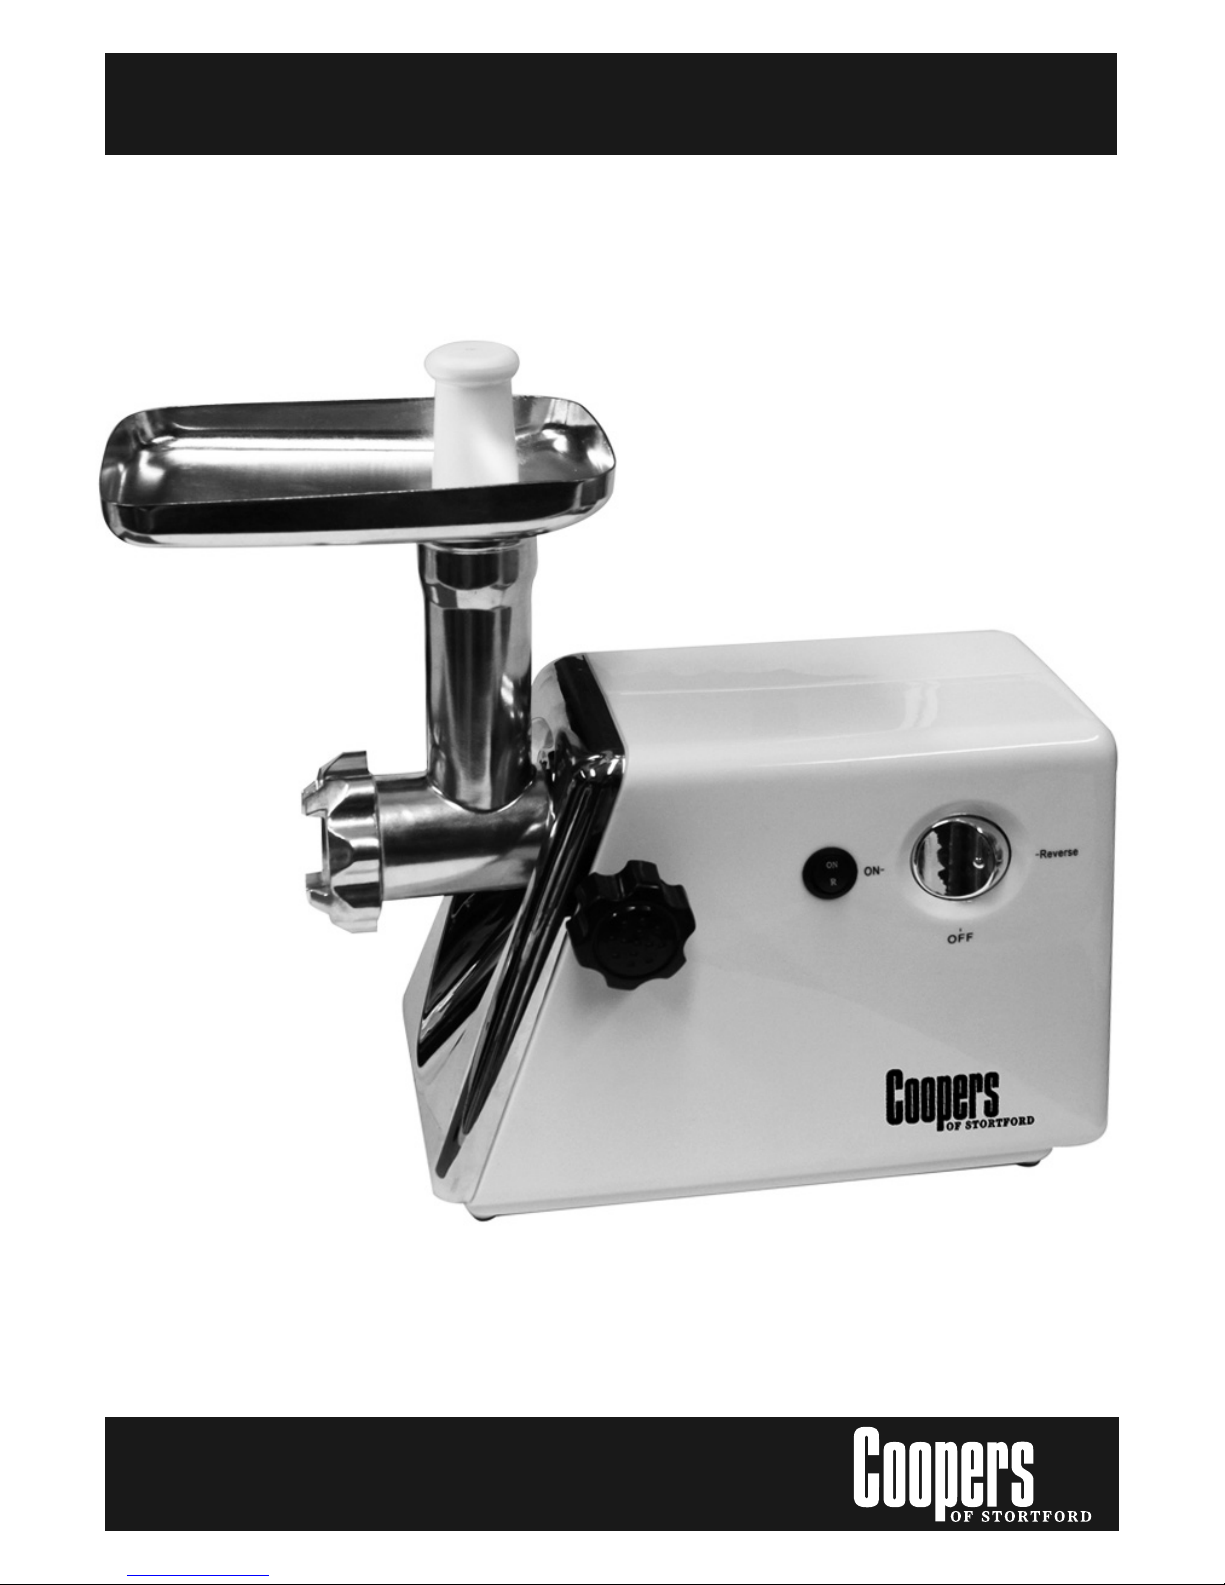
Food and Meat Grinder 9021
Instructions
Page 2
IMPORTANT SAFEGUARDS
• Read these instructions carefully before switching on the appliance and
keep for future reference. Failure to follow and observe these instructions
could lead to an accident and/or damage to the machine.
• Before first use clean all parts of the product that will be in contact with
food as described in the cleaning section.
• Do not allow the main motor housing to get wet at any time. Do not
immerse in water.
• For domestic household use only.
• Unplug from outlet when assembling and disassembling the unit.
• Close supervision is necessary when any appliance is used near children.
Do not allow children to operate the machine.
• When carrying the unit be sure to hold the motor housing with both
hands. Do not carry the unit by holding only the hopper plate or head.
• Do not pull on the cord to unplug the machine. Always use the plug to
disconnect the appliance from the mains.
• Do not use outdoors.
• Stand the appliance on a level stable work surface.
• Do not operate the appliance with wet hands.
• Do not overfill or force the machines capacity.
• Do not insert utensils into the machine while it is working.
• Never feed food into the machine by hand. Always use the food pusher.
• Do not grind hard food such as bones, nuts, etc.
• Do not grind ginger and other materials with hard fibre.
• The meat grinder should not be run continuously for more than 10
minutes. The following 10 minutes the machine should be rested to allow
the motor to cool.
• After use, there may be a little food left in the grinder head. This is normal.
Clean after each use.
• To avoid jamming, do not force the machine to operate with excessive
pressure.
• Never try to replace any part or repair the unit. If any part is damaged in
any way, especially the power cord, do not use.
FOR THE FIRST TIME
• Check that voltage indicated on the rating label corresponds to the mains
voltage in your home.
• Wash all parts that will come in contact with food in warm soapy water. Do not
put in the dishwasher. Do not allow the main motor housing to become wet.
• Before plugging in, ensure the “ON/OFF/ Reverse” switch is turned to "OFF"
position.
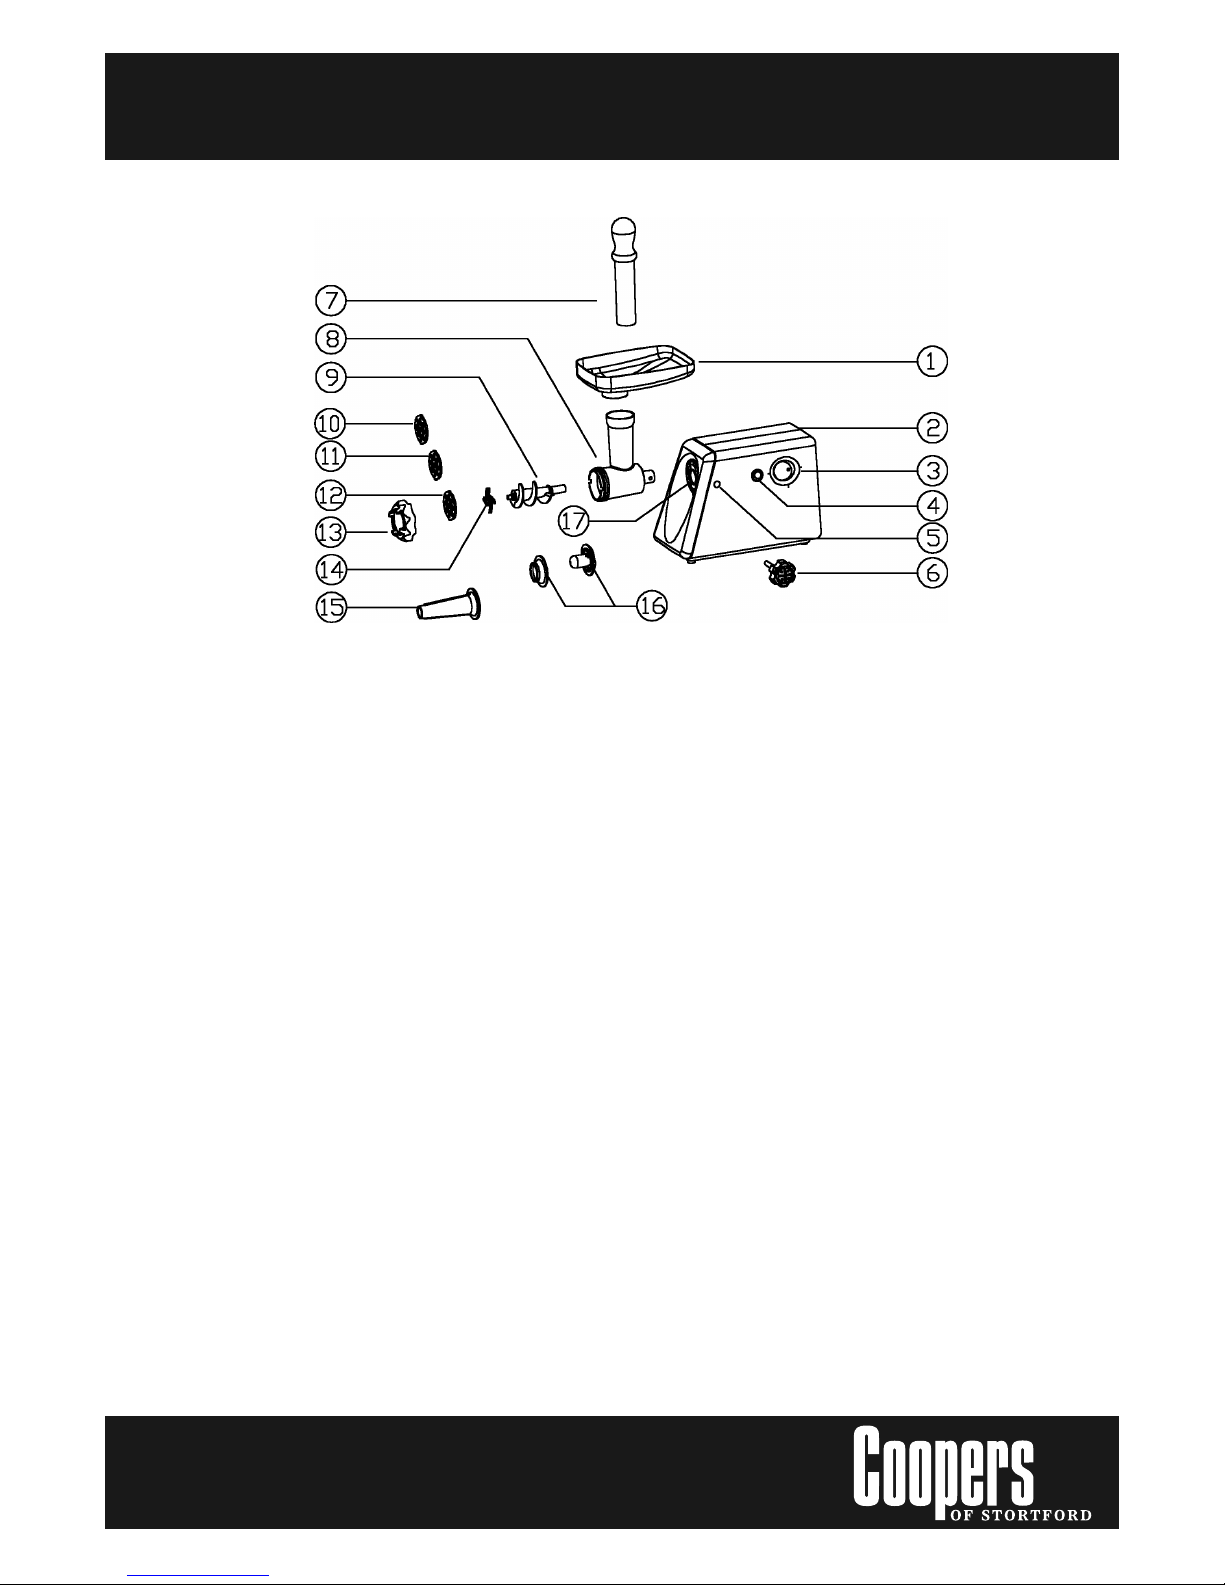
Food pusher
Hopper plate
Motor housing
ON/OFF/ Reverse
R / ON switch
Locking knob hole
Locking knob
Kibbe attachment
Head
Feed screw
Cutting plate (fine)
Cutting plate (medium)
Cutting plate (coarse)
Fixing ring
Cutting blade
Sausage attachment
Head inlet
Food and Meat Grinder 9021
Page 3
INSTRUCTION FOR USE
ASSEMBLING
• Ensure the machine is unplugged.
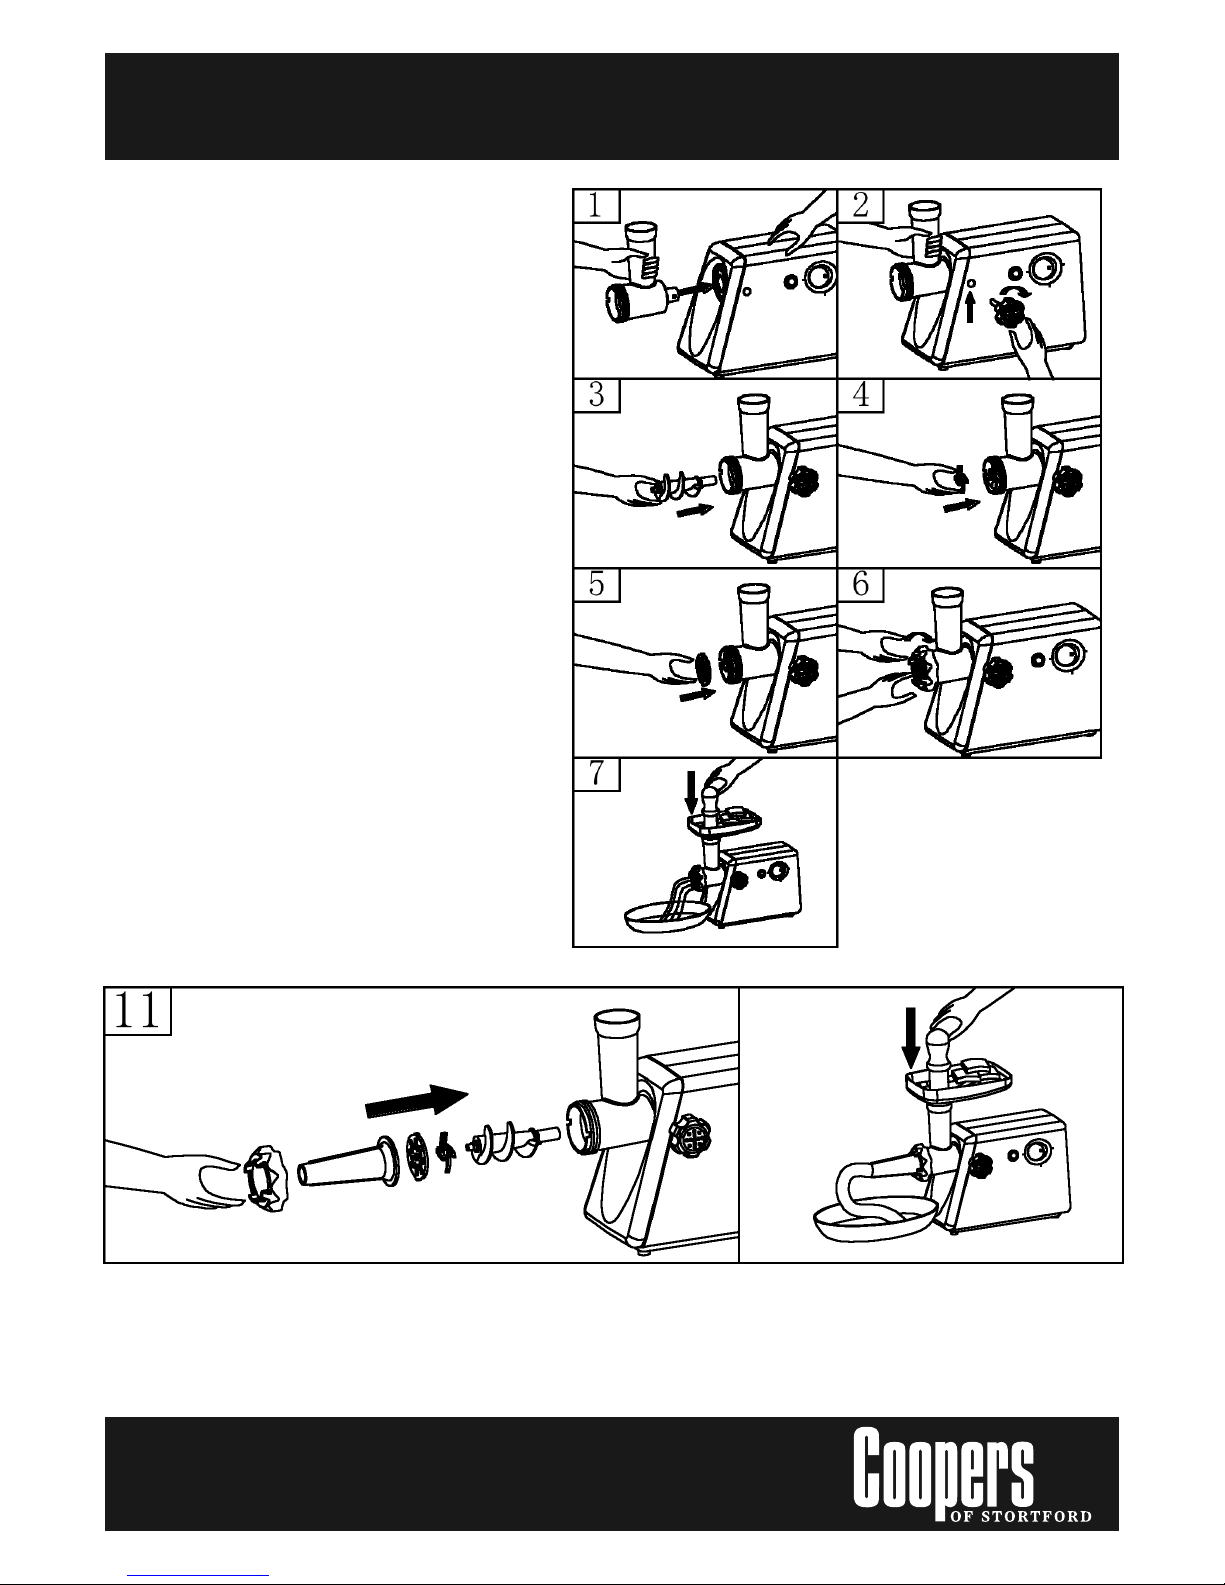
• Hold the head and insert it in the inlet with one hand, locate
the locking knob into the hole on the side of the motor (fig.1)
housing, tighten it clockwise to secure the head (fig.2).
• Place the feed screw into the head, long end first and turn until
it is set into the motor housing (fig.3).
• Place the cutting blade onto the feed screw shaft with the blade
facing away from the machine as illustrated (fig.4). Take care as
the blade is sharp.
• Place the desired cutting plate next to the cutting blade, fitting
the side protrusions in the slots provided (fig.5).
• Press the centre of the cutting plate with one finger then screw
the fixing ring until tight with another hand (fig.6). Do not over
tighten.
• Place the hopper plate on the head and fix into position.
• The air passage at the bottom and the side of the motor
housing should be kept free and not blocked at any time.
MINCING MEAT
• Cut all foods into pieces (sinewless, boneless and fatless meat is
recommended, approximate size :2cm x2cm x6cm) that fit easily
into the hopper opening.
• Plug in and turn the “R / ON” switch to "ON" position, then
turn the “ON/OFF/ Reverse” switch to "ON" position.
• Feed foods into the hopper plate. Use only the food pusher
(fig.7).
• After use switch the unit off and unplug it from the power
supply.
REVERSE FUNCTION
• If the appliance jams, turn the “R / ON” switch to "R" position
and “ON/OFF/ Reverse” switch to "R" position.
• Feed screw will be rotating in the opposite direction, and the
head will release some of the trapped food.
• If it doesn't work, switch the unit off and clean it thoroughly.
MAKING SAUSAGES
• Assemble sausage attachment as per (fig.11)
• Hold the sausage skin over the end of the attachment and feed the
filling into the hopper plate.
Page 4
KIBBE ATTACHMENT
Kibbe is a Lebanese dish and the meat grinder has an attachment that will make
the kibbe outer shape for you to stuff. Use with your favourite recipe or check the
internet for ideas.
Disassemble by reversing the steps from fig 5-3 to remove the cutting plate and
cutting blade.
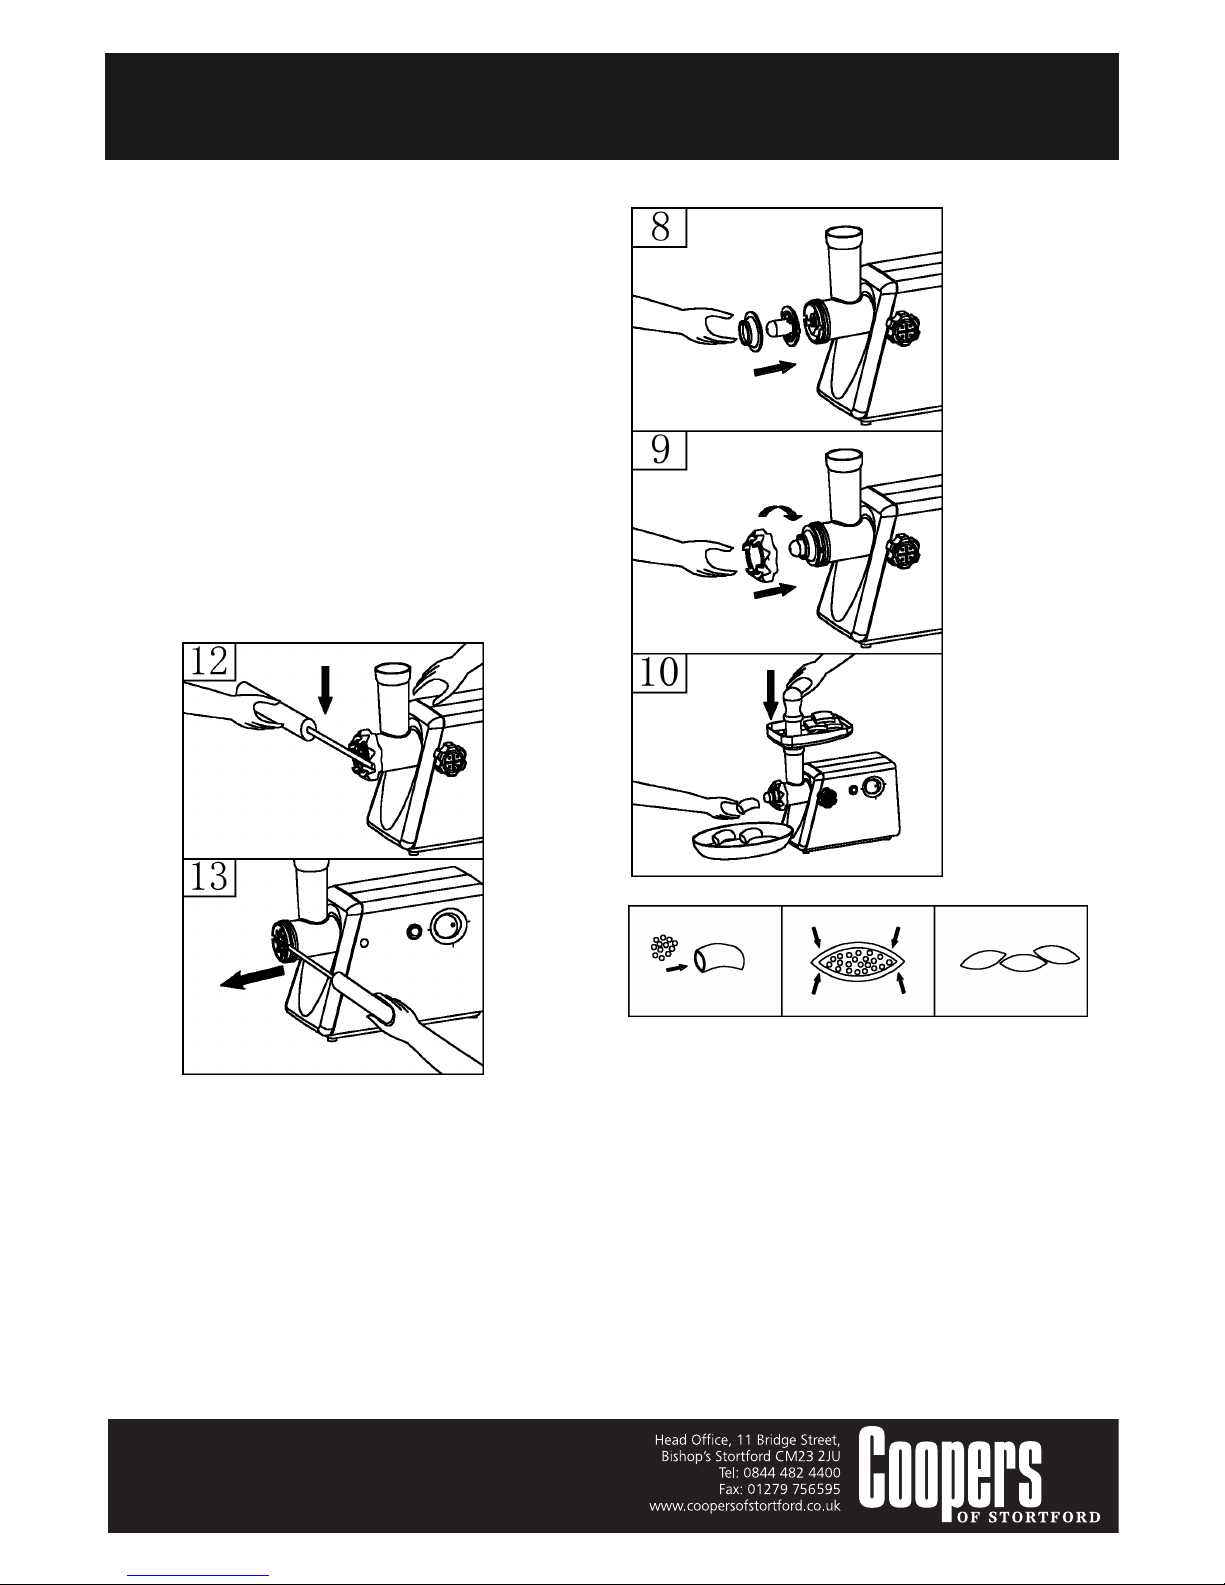
• Place kibbe attachments onto the feed screw shaft, fitting protrusions in the
slots (fig.8).
• Screw fixing ring into place until tight. Do not over tighten (fig.9).
• Make the cylindrical kibbe outers (fig.10).
• Stuff the kibbe outer as illustrated below or according to your recipe.
CLEANING AND MAINTENANCE
DISASSEMBLING
• Make sure that the motor has stopped completely.
• Disconnect the plug from the power outlet.
• Disassemble by reversing the steps from fig 6-1
• If the fixing ring is not easily removed by hand, please use a tool to lever off
such as a screwdriver (fig.12) .
• To remove the cutting plate easily, place a screwdriver between the cutting
plate and the head as illustrated and lift it up (fig.13).
CLEANING
• Remove meat, etc. Wash each part in warm soapy water. Do not clean any part
in a dishwasher.
• Only use washing up liquid or mild non-abrasive cleaning solutions.
• Do not immerse the motor housing in water; surface wipe with a damp cloth
only.
ACCESSORY PACK
Coopers of Stortford also sell an accessory pack. It contains two sizes of grater,
one slicer, and one tomato juice maker. To order (while stocks last) please go to
www.coopersofstortford.co.uk or telephone Customer Services on 0844
4824400. Ask for item 9022.
PACKAGING DISPOSAL:
• Dispose of the packaging at your local recycling centre.
• Dispose of paper and carton separately from plastic bags at your local
recycling centre.
• Dispose of the item at the end of its lifespan at your local authorised
household waste recycling centre.
 Loading...