

Page 1
SAVINGS
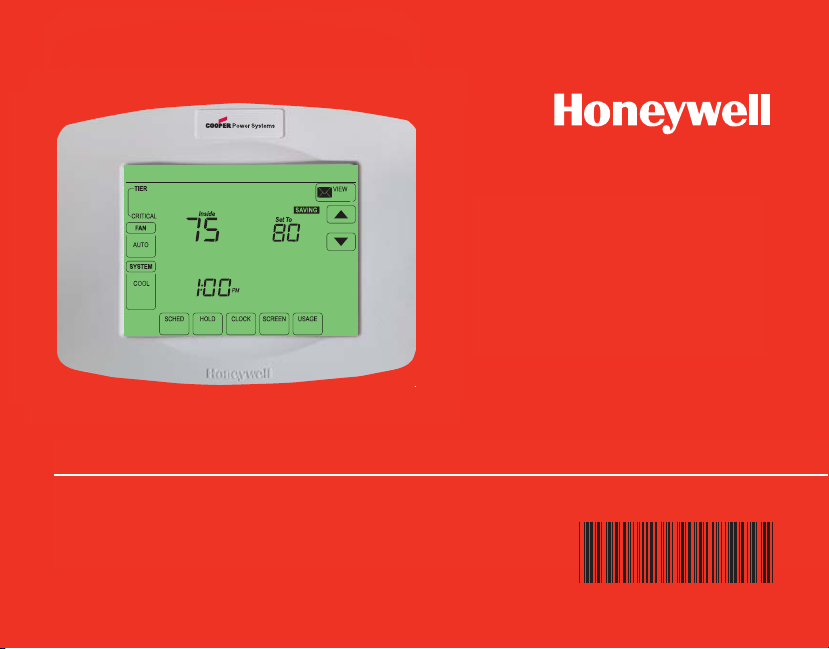
Operating Manual
Fri
UtilityPROTM Series
Touchscreen Programmable Demand Control Thermostat
85-3126-2
Page 2
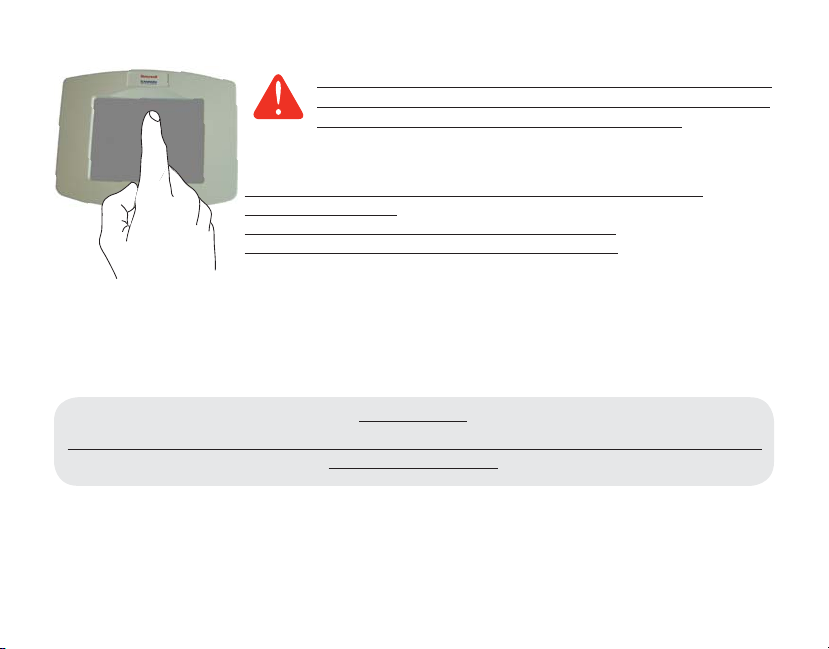
BE CAREFUL! Never use sharp instruments, such as a pencil
or pen, to press touchscreen keys. To prevent damage to the
thermostat, always press keys with your fingertip.
This thermostat contains a Lithium battery which may contain
Perchlorate material.
Perchlorate Material—special handling may apply,
See www.dtsc.ca.gov/hazardouswaste/perchlorate
Need Help?
For assistance or warranty information please call your local Utility at the number found on the
front of the thermostat.
Read and save these instructions.
® U.S. Registered Trademark.
Copyr ight © 20 09 Honeywell I ntern ational Inc. Al l right s rese rved.
US Patents pending.
Page 3
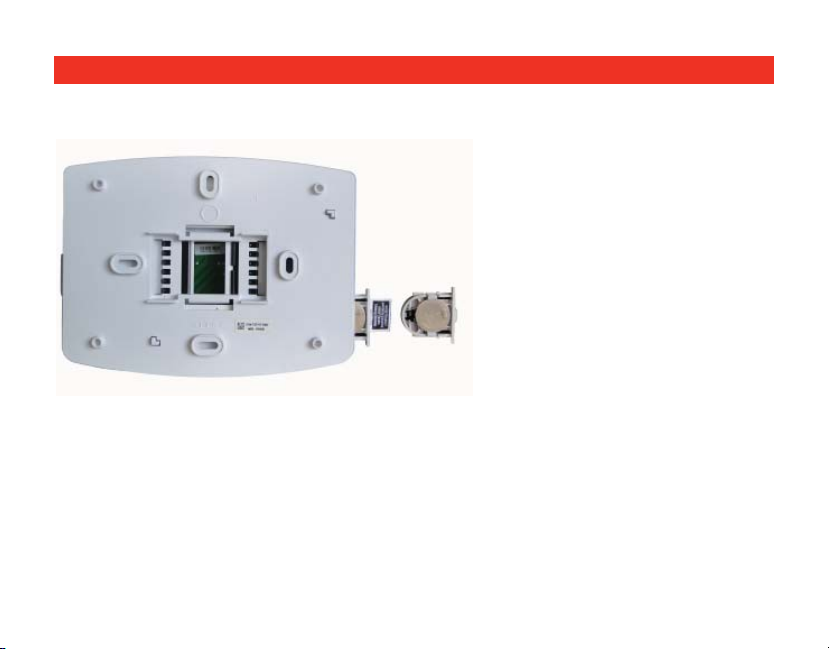
Battery Replacement
Battery Cover
Assembly
The UtilityPRO has a coin cell
battery that retains the time
and date during a power failure.
Under normal circumstances the
Coin cell
battery tray
coin cell should last five years.
Should the time and date need
to be reset after a power failure,
this is an indication that the coin
cell needs to be replaced. You
should replace the battery every
five years, or before leaving
Insert the coin cell battery in the coin cell battery
tray and push it inside the battery cover assembly
home for an extended period.
The UtilityPRO is shipped from the factory with the coin cell installed. To keep the
battery from discharging during shipment and storage, the UtilityPRO is shipped
from the factory with a plastic tab inserted in the battery holder. This tab must be
removed before the thermostat is mounted on the wall. Simply pull the plastic tab
out of the thermostat. To replace the battery, remove the battery tray using a screw
driver. Place a new coin cell (type CR2032 or equivalent) observing the correct
polarity and push the battery tray into the battery cover assembly.
Page 4

FCC Part 15 Notice
This equipment has been tested and found to comply with the limits for a Class B digital device, pursuant to part 15 of the FCC
Rules. Operation is subject to the following two conditions:
1) This device may not cause harmful interference.
2) This device must accept any interference received, including interference that may cause undesired operation.
Class B limits are designed to provide reasonable protection against harmful interference in a residential installation. This
equipment generates, uses, and can radiate radio frequency energy, and, if not installed and used in accordance with the
instructions, may cause harmful interference to radio communications. However, there is no guarantee that interference will not
occur in a particular installation. If this equipment does cause harmful interference to radio or television reception, which can be
determined by turning the equipment off and on, the user is encouraged to try to correct the interference by one or more of the
following measures:
• Reorient the receiving antenna.
• Increase the distance between the equipment and the receiver.
• Connect the equipment into an outlet on a circuit different from that to which the receiver is connected.
• Consult the installer or an experienced radio/TV technician for help.
Industry Canada Requirements
Operation of this device is subject to the following two conditions:
1) This device may not cause interference.
2) This device must accept any interference, including interference that may cause undesired operation of the device.
Page 5
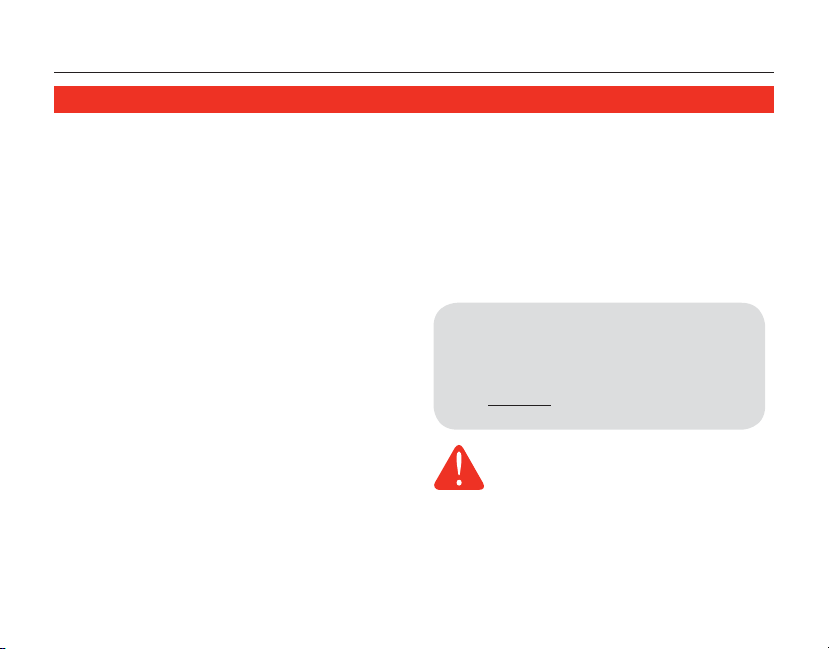
Table of contents
UtilityPROTM Series
About your new thermostat
Thermostat Features .................................. 2
Getting Started
Quick Reference to Controls ..................... 3
Quick Reference to Status Display ........... 4
Subscription Services
Demand Control ......................................... 5
Utility Usages ............................................. 6
Utility Messages ......................................... 6
View Message ............................................ 7
Usage & Billing ........................................... 8
Settings
Fan Settings ............................................... 9
System Settings ....................................... 10
Schedule Settings ....................................11
Program Schedule Override (Temp) ........ 12
Schedule Override (Permanent) .............. 13
Clock Settings ..........................................14
Programming & Operation
Program Schedules ............................15-16
1
Special Features ......................................17
Screen Lock .............................................18
Screen Cleaning ....................................... 19
Advanced Functions ...........................20-23
Troubleshooting ..................................24-25
This thermostat is ready to go!
Your new thermostat is preprogrammed and ready to go.
See page 15 to check settings.
CAUTION: EQUIPMENT DAMAGE
HAZARD. To p rev e nt p ossi b le
compressor damage, do not
operate cooling system when
outdoor
temperature is below 50˚F (10˚C).
Page 6

Operating Manual
UtilityProTM Features
Congratulations! You’ve just purchased the world’s most advanced, easy-to-use
thermostat. It has been designed to give you many years of reliable service and
touchscreen climate control.
Features
• Provides Utility information messages.
• Provides Utility billing information.
• 5/1/1 and 5/2-day program schedules maximize comfort and economy.
• Demand response thermostat programmed to aid you in your savings.
• One-touch temp control overrides program schedule at any time.
• Precise comfort control keeps temperature within 1°F of the level you set.
• Provides demand control messages.
• Large touchscreen display with backlight is easy to read—even in the dark.
2
Page 7

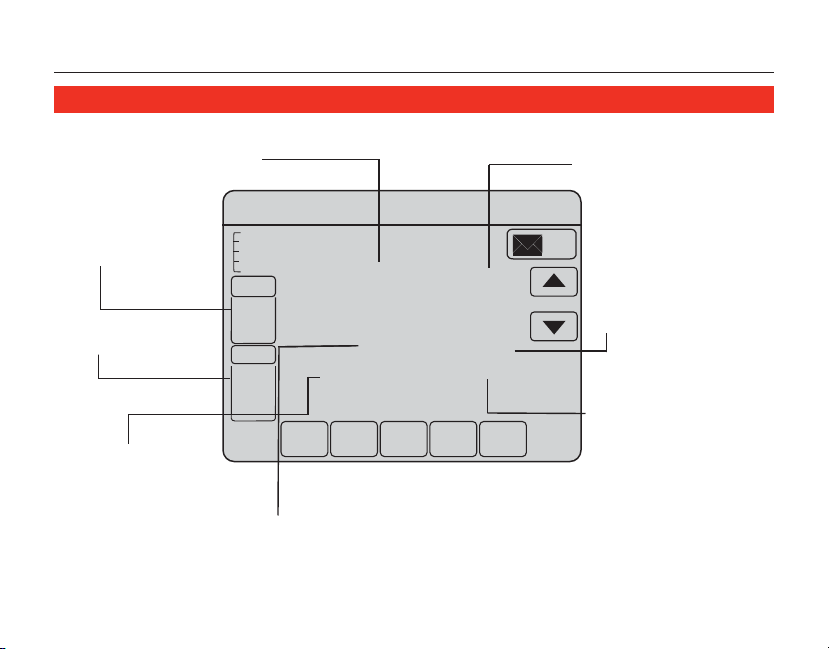
Quick Reference to Controls
UtilityPROTM Series
Press day(s) to set program schedule (see page 11)
Displays the current
tier rate
TIER
Press to select fan
MEDIUM
operation
Press to select system
type
SUN
Press to set program
schedule
Press to override
program schedule
Press to set clock
3
Press to view
messages
Press to adjust
temperature settings
Press to view the
subscribed service
messages
Press to lock keypad for 30
seconds to clean screen
Page 8
Operating Manual
Quick Reference to Status Display
Current inside temperature
Fan setting
System setting
Current time
Current day of week
SYSTEM
TIER
MEDIUM
FAN
AUTO
HEAT
SCHED HOLD CLOCK SCREEN USAGE
Inside
75
SUN
8:10
Other display messages:
• Cool ON: Cooling system is activated
• Heat ON: Heating system is activated
• Aux Heat ON: Auxiliary heating system is activated
AM
Temperature setting
VIEW
Set To
70
Following
Schedule
Recovery
4
Program schedule ON
(does not display
when off)
Adaptive Intelligent
Recovery in effect
(see page 17)
Page 9

UtilityPROTM Series
Demand Control
This is an energy saving device. At times, thermostat operation may be temporarily adjusted
by a small amount as outlined in your energy provider’s associated program literature. This is
normal operation and is part of the program for which you have enrolled.
Thank you for your participation.
5
Page 10

Operating Manual
UtilityPro® Features
Utility Usages
Usage is a service provided by the utility provider. Depending on the various services
provided by the utility provider, Usage may contain vital information for your use. It
may display your electricity bill, water consumption bill, gas bill, and so on. Usage
also has a feature wherein you can compare your present consumption against
your last year’s consumption for the same time period. For example, it displays
your current electricity bill along with the previous year’s electricity bill for the same
month.
Usage also displays the rate of electricity at peak times and off peak times. Thus you
can adjust your electricity consumption accordingly.
Utility Messages
Messages are also a part of the services provided by the service utility provider.
Messages are sent by the service provider to assist you with additional information.
These messages may contain weather warnings, greetings, reminders, information
about discounts running at a shop, system maintenance messages, and so on.
6
6
Page 11

Getting Started
View Messages
UtilityPROTM Series
Good Morning!
EXIT
Press on your screen.
The message icon blinks when you
receive a new message.
The Message screen appears.
Use the arrow buttons to view the
messages. There can be a maximum
of five messages. The message
scrolls automatically if it has more
than 21 characters.
In case there are no messages, the
message icon does not appear.
Press Delete to delete the displayed
message.
Press Exit to go to the main screen.
7
7
Page 12

Operating Manual
UtilityProTM Features
Usage and Billing
Press on your screen.
The Usage screen appears. Navigate
using the arrow buttons to view the
billing consumption of water, gas,
electricity, and so on*.
In case there are no utility
messages, the utility message icon
does not appear.
Press Exit to go to the main screen.
* subject to Contract Agreement with
the Utility Provider.
ELECTRICITY BILL
$
52
8
8
$
61
EXIT
Page 13

Getting Started
UtilityPro® Features
Fan Settings
Inside
FAN
70
AUTO
SYSTEM
HEAT
Note: If a fan schedule is programmed,
“Auto” runs the fan schedule.
WED
6:01
SCHED HOLD CLOCK SCREEN USAGE
AM
Press FAN
Set To
70
Following
Schedule
UtilityPROTM Series
Press FAN to select fan operation, then press
DONE.
• ON: Fan is always on.
• Auto: Fan runs only when the heating or
cooling system is ON.
• Circ: Fan runs randomly, about 35% of the
time, not counting any run time with the
heating or cooling system.
You can press FAN to override the fan settings
you’ve programmed for different time periods.
If you select ON or Circ, the setting you select
remains active until you press FAN again to
select Auto.
9
9
9
Page 14

Operating Manual
System Settings
FAN
AUTO
SYSTEM
HEAT
Inside
70
WED
6:01
SCHED HOLD CLOCK SCREEN USAGE
Press SYSTEM
AM
Set To
Following
Schedule
70
Press the SYSTEM button to select one of the
following, then press DONE.
• Heat: Thermostat controls only the
heating system.
• Cool: Thermostat controls only the
cooling system.
• Off: Heating and cooling systems are
OFF.
• Auto: Thermostat automatically selects
heating or cooling depending on the
indoor temperature.
• Em Heat (only for heat pumps with
auxiliary heat): Thermostat controls
Emergency and Auxiliary Heat.
1010
Page 15

Schedule Settings
UtilityPROTM Series
Press SCHED
SCHED HOLD CLOCK SCREEN USAGE
Press EDIT
DONE WAKE LEAVE RETURN SLEEPEDIT CANCEL
Select day(s) Set heat/cool levels
EDIT SCHEDULE
SET SCHEDULE
SAT SUN
MON-FRI
CANCEL
PERIOD
6:00
DONE WAKE LEAVE RETURN SLEEP CANCEL
Set time for program
period to start
AM
70
78
HEAT
COOL
1. Press SCHED, then EDIT.
2. Press day buttons to select day(s). There
are three groups (MON-FRI), (SAT), and (SUN).
3. Press
or to set Wake time for selected
day(s).
4. Press
or to set Heat and Cool
temperature for this time period.
5. Press other time periods (LEAVE, RETURN,
SLEEP) to set time and temperatures for
each.
6. Press DONE to save & exit (or press CANCEL
to exit without saving changes).
Note: You can press CANCEL PERIOD to eliminate any
unwanted time period.
Note: Press FAN to customize fan settings for any
time period.
11
Page 16

Operating Manual
Program Schedule Override (Temporary)
Inside
FAN
AUTO
SYSTEM
HEAT
Press to set timer
70
8:00
HOLD
SCHED CLOCK SCREEN USAGE
Press CANCEL (or SCHED) to
resume program schedule
Adjust temperature
Set To
73
FRI
AM
Heat On
Press or to immediately adjust the
temperature. This temporarily overrides the
temperature setting for the current time period.
The new temperature is maintained only until
the next programmed time period begins
(see page 15). For example, if you want to
turn up the heat early in the morning, it will
automatically be lowered later, when you leave
for the day.
To cancel the temporary setting at any time,
press CANCEL (or SCHED). The program schedule
CANCEL
resumes.
12
Page 17

Program Schedule Override (Permanent)
UtilityPROTM Series
Adjust temperature
Inside
FAN
AUTO
SYSTEM
HEAT
Press HOLD
70
Permanent
FRI
8:00
HOLD
SCHED CLOCK SCREEN USAGE
Set To
73
Heat On
Hold
AM
Press CANCEL (or SCHED) to
resume program schedule
Press HOLD to permanently adjust the
temperature. This turns off the program
schedule.
Whatever temperature you set is maintained
24 hours a day until you manually change it or
press CANCEL (or SCHED) to cancel “Hold” and
resume the program schedule.
CANCEL
13
Page 18

Operating Manual
Clock Settings
Press CLOCK
WED
AM
6:01
SCHED HOLD CLOCK SCREEN MORE
Adjust time, then press DONE
WED
AM
6:02
DONE CANCEL
To set the current time display, press CLOCK,
then press
and hold
or to adjust the time. Press
or to advance the time more
quickly.
Press DONE to save & exit (or press CANCEL to
exit without changing the time).
Note: The real-time clock should never require
adjustment since it automatically updates for
daylight savings time, and stores all date/time
information.
Note: To change the current week day display, see
page 21.
Note: If the clock button is not visible, the time
displayed is being controlled by the utility. If the time
displayed ever varies from the actual local time by
more than a few minutes, please contact your utility
as this may indicate a communications problem.
14
Page 19

UtilityPROTM Series
Save Money by Setting Program Schedules
It is easy to program your system for maximum energy savings. You can program four
time periods each day, with different settings for weekdays and weekends.
WAKE
6:00 am
°
70
LEAVE
8:00 am
°
62
RETURN
6:00 pm
°
70
SLEEP
10:00 pm
°
62
Set to the time you awaken and the temperature you want
during the morning, until you leave for the day.
Set to the time you leave home and the temperature you
want while you are away (usually an energy-saving level).
Set to the time you return home and the temperature you
want during the evening, until bedtime.
Set to the time you go to bed and the temperature you want
overnight (usually an energy-saving level).
15
Page 20

Operating Manual
Recommended Settings for Maximum Cost Savings
We recommend these settings, since they can reduce your heating/cooling expenses
by as much as 33%.
Cool (Mon-Fri)Heat (Mon-Fri) Heat (Sat-Sun) Cool (Sat-Sun)
Wake
(6:00 am)
Leave
(8:00 am)
Return
(6:00 pm)
Sleep
(10:00 pm)
70
62
70
62
°
°
°
°
78
85
78
82
16
°
°
°
°
70
62
70
62
°
°
°
°
78
85
78
82
°
°
°
°
Page 21

UtilityPROTM Series
Special Features
Auto Changeover: When set to Auto, the thermostat automatically selects heating or
cooling depending on the indoor temperature.
Adaptive Intelligent Recovery™: This feature allows the thermostat to “learn” how
long the furnace and air conditioner take to reach programmed temperature settings,
so the temperature is reached at the time you set. For example: Set the Wake
time to 6 am, and the temperature to 70°. The heat comes on before 6 am, so the
temperature is 70° by the time you wake at 6. The message “Recovery” is displayed
when the system is activated before a scheduled time period.
Compressor Protection: This feature forces the compressor to wait a few minutes
before restarting, to prevent equipment damage. During the wait time, the message
“Wait” is displayed on screen.
17
Page 22

Operating Manual
Screen Lock
WED
FAN
Inside
AUTO
SYSTEM
See advanced function
0670 (page 23) for
screen lock options
70
HEAT
6:00
SCHED HOLD CLOCK SCREEN MORE
PM
SCREEN LOCKED
Set To
70
Following
Schedule
To prevent tampering, the screen can be
partially or fully locked.
When partially locked, the screen displays
SCREEN LOCKED for several seconds if a locked
key is pressed. To unlock the screen, press any
unlocked key while SCREEN LOCKED appears on
the screen.
When the screen is fully locked, no keys
function. To lock or unlock the screen, see
advanced function 0670 on page 23.
18
Page 23

Screen Cleaning
UtilityPROTM Series
Press SCREEN
WED
6:00
SCHED HOLD CLOCK SCREEN USAGE
Screen lock timer (30 seconds)
PM
Clean Screen?
Press SCREEN to go to the cleaning screen.
Press OK to lock the screen for cleaning. The
screen remains locked for 30 seconds so you
can clean the screen without disturbing any
settings.
After 30 seconds, press CANCEL to resume
normal operation, or press OK if you require
more time for cleaning.
Note: Do not spray any liquid directly on the
thermostat. Spray liquids onto a cloth, then use
the damp cloth to clean the screen. Use water or
household glass cleaner. Avoid abrasive cleansers.
19
Page 24

Operating Manual
Advanced Functions
1. Press SYSTEM.
SYSTEM
HEAT
2. Press and hold
blank center key
until the display
HEAT
6:01
SUN
AM
changes.
DONE CANCEL
SUN
Function Setting
3. Change settings as
required (see pages
21-23).
4. Press DONE to exit &
save changes.
0120
DONE
Press
/to
select function
20
/to
Press
change setting
20
Page 25

Advanced Functions
Year setting (first two digits)
Function
0120
Options:
Year setting (second two digits)
Function
0130
Options:
Month setting
Function
0140
Options:
Date setting
Function
0150
Options: 01 - 31
Press /to change the first two digits of the year:
20 = Yea r 20xx
21 = Yea r 21xx
Press /to change the last two digits of the year:
01 - 99 (i.e., 2001 - 2099)
Press /to change the current month:
01 - 12 (i.e., January - December)
Press /to change the current date:
UtilityPROTM Series
21
Page 26

Operating Manual
Advanced Functions
Program schedule ON/OFF
Function
0160
Options:
Temperature format (°F/°C)
Function
0320
Options:
Backlight Settings
Function
0280
Options:
Daylight savings time ON/OFF
Function
0330
Press /to turn the program schedule ON or OFF:
1 5/2 [programmable weekdays and weekends].
2 5/1/1 [weekdays, Saturday, and Sunday programmable].
Press /to set the temperature display format:
0 Fahrenheit
1 Celsius
Press /to change the backlight settings:
0 Backlight ON for approx. 8 seconds after keypress
1 Backlight always on low intensity, with full brightness after keypress (requires
24VAC connection)
The thermostat is pre-programmed to automatically adjust to daylight savings time.
Press /to select an option:
22
Page 27

Advanced Functions
Options: 0 OFF: No adjustment for daylight savings time
Program schedule periods
Function
0540
Options:
Clock format
Function
0640
Options:
Screen lock
Function
0670
Options: 0 Screen is unlocked (fully functional)
1 ON: Auto-change to daylight savings time (through 2006, and for areas that do
not use the new 2007 DST calendar)
2 ON: Auto-change to daylight savings time (2007 and beyond, for areas that
use the new 2007 DST calendar)
Press /to set the number of program periods:
4 4-4 program periods (WAKE, LEAVE, RETURN, SLEEP)
2 2-2 program periods (WAKE and SLEEP)
3 3-2 program periods (LEAVE and RETURN)
Press /to set the clock display format:
12 12-hour clock (i.e., “3:30 pm”)
24 24-hour clock (i.e., “15:30”)
Press /to choose a screen lock setting (see page 18):
1 All functions locked except temperature controls and CANCEL key
2 Screen is fully locked
23
UtilityPROTM Series
Page 28

Operating Manual
Trou b lesh o oti n g
If you have difficulty with your thermostat, please try the following.
Most problems can be corrected quickly and easily.
Display is blank • Check circuit breaker and reset if necessary.
• Make sure power switch at heating & cooling system is ON.
• Make sure furnace door is closed securely.
No response to
key presses (or
temperature
does not
change)
Backlight is dim • If thermostat is AC powered, a dim display is normal. The backlight
No “CLOCK”
button
• Check to make sure the thermostat is not locked (see page 18).
• Make sure heating and cooling temperatures are set to acceptable
ranges:
• Heat: 40° to 90°F (4.5° to 32°C)
• Cool: 50° to 99°F (10° to 37°C)
remains ON at a low level, and brightens when a key is pressed.
• If the clock button is not visible, the time displayed is being controlled
by the utility. If the time displayed ever varies from the actual local
time by more than a few minutes, please contact your utility as this
may indicate a communications problem.
24
Page 29

Trou b lesh o oti n g
UtilityPROTM Series
Heating or cooling
system does not
respond
Display shows Fan
Auto and ON or
Auto and Circ at
the same time
Thermostat shows
the calendar
screen (year,
date, & month)
when the power is
restored
• Press SYSTEM to set system to Heat. Make sure the temperature is set
higher than the Inside temperature.
• Press SYSTEM to set system to Cool. Make sure the temperature is set
lower than the Inside temperature.
• Check circuit breaker and reset if necessary.
• Make sure power switch at heating & cooling system is ON.
• Make sure furnace door is closed securely.
• If “Wait” is displayed, the compressor protection timer is ON. Wait
5 minutes for the system to restart safely, without damaging the
compressor.
• This is normal operation. Auto indicates the thermostat is following the
programmed fan setting. If Auto and ON is shown, the fan is scheduled
for “ON” during this period (see page 9).
• This indicates that the coin cell battery has drained out. Replace the
coin cell battery immediately.
25
Page 30

Automation and Control Systems
Honeywell International Inc.
1985 Douglas Drive North
Golden Valley, MN 55422
Printed in U.S.A. on recycled
paper containing at least 10%
post-consumer paper fibers.
® U.S. Registered Trademark.
© 2009 Honeywell International Inc.
US Patents pending
85 - 312 6—2 Rev. M .S . 12-10
Honeywell Limited-Honeywell Limitée
35 Dynamic Drive
Toronto, Ontario M1V 4Z9
 Loading...