

Page 1
R
Y
SparSpar
Spar
SparSpar
e pare par
e par
e pare par
tsts
ts
tsts
COOPER PEGLE
SPRAYING TECHNOLOG
FF
ALAL
AL
ALAL
CONCON
CON
CONCON
F
FF
SpecifSpecif
Specif
SpecifSpecif
The containers incorporate a charge pump, pressure gauge,
and pressure relief valve which is set to operate above 6 bar
(85psi).
AssembAssemb
Assemb
AssembAssemb
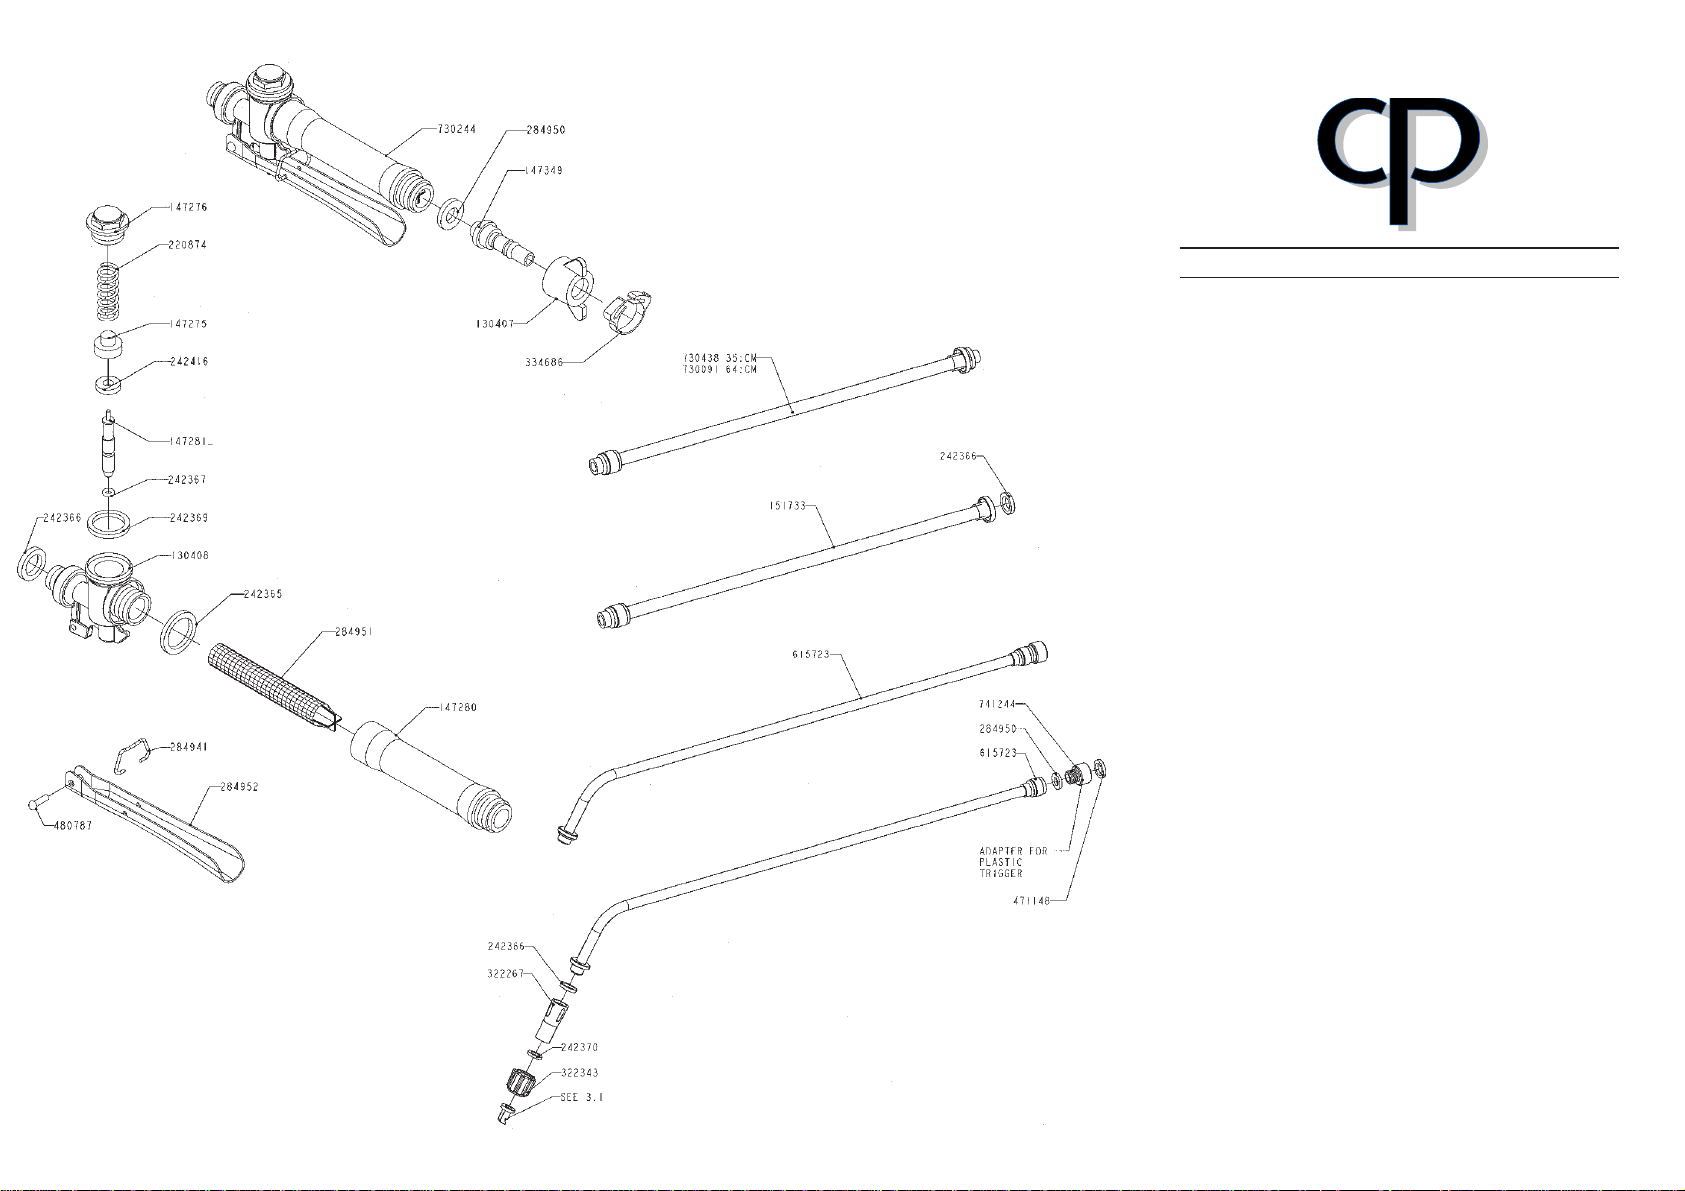
Fit lance to trigger valve and connect hose to the outlet of
container, ensuring that all washers are in place. Following
the operating instructions below, test the machine with water
to ensure that it is in correct working order.
OperOper
Oper
OperOper
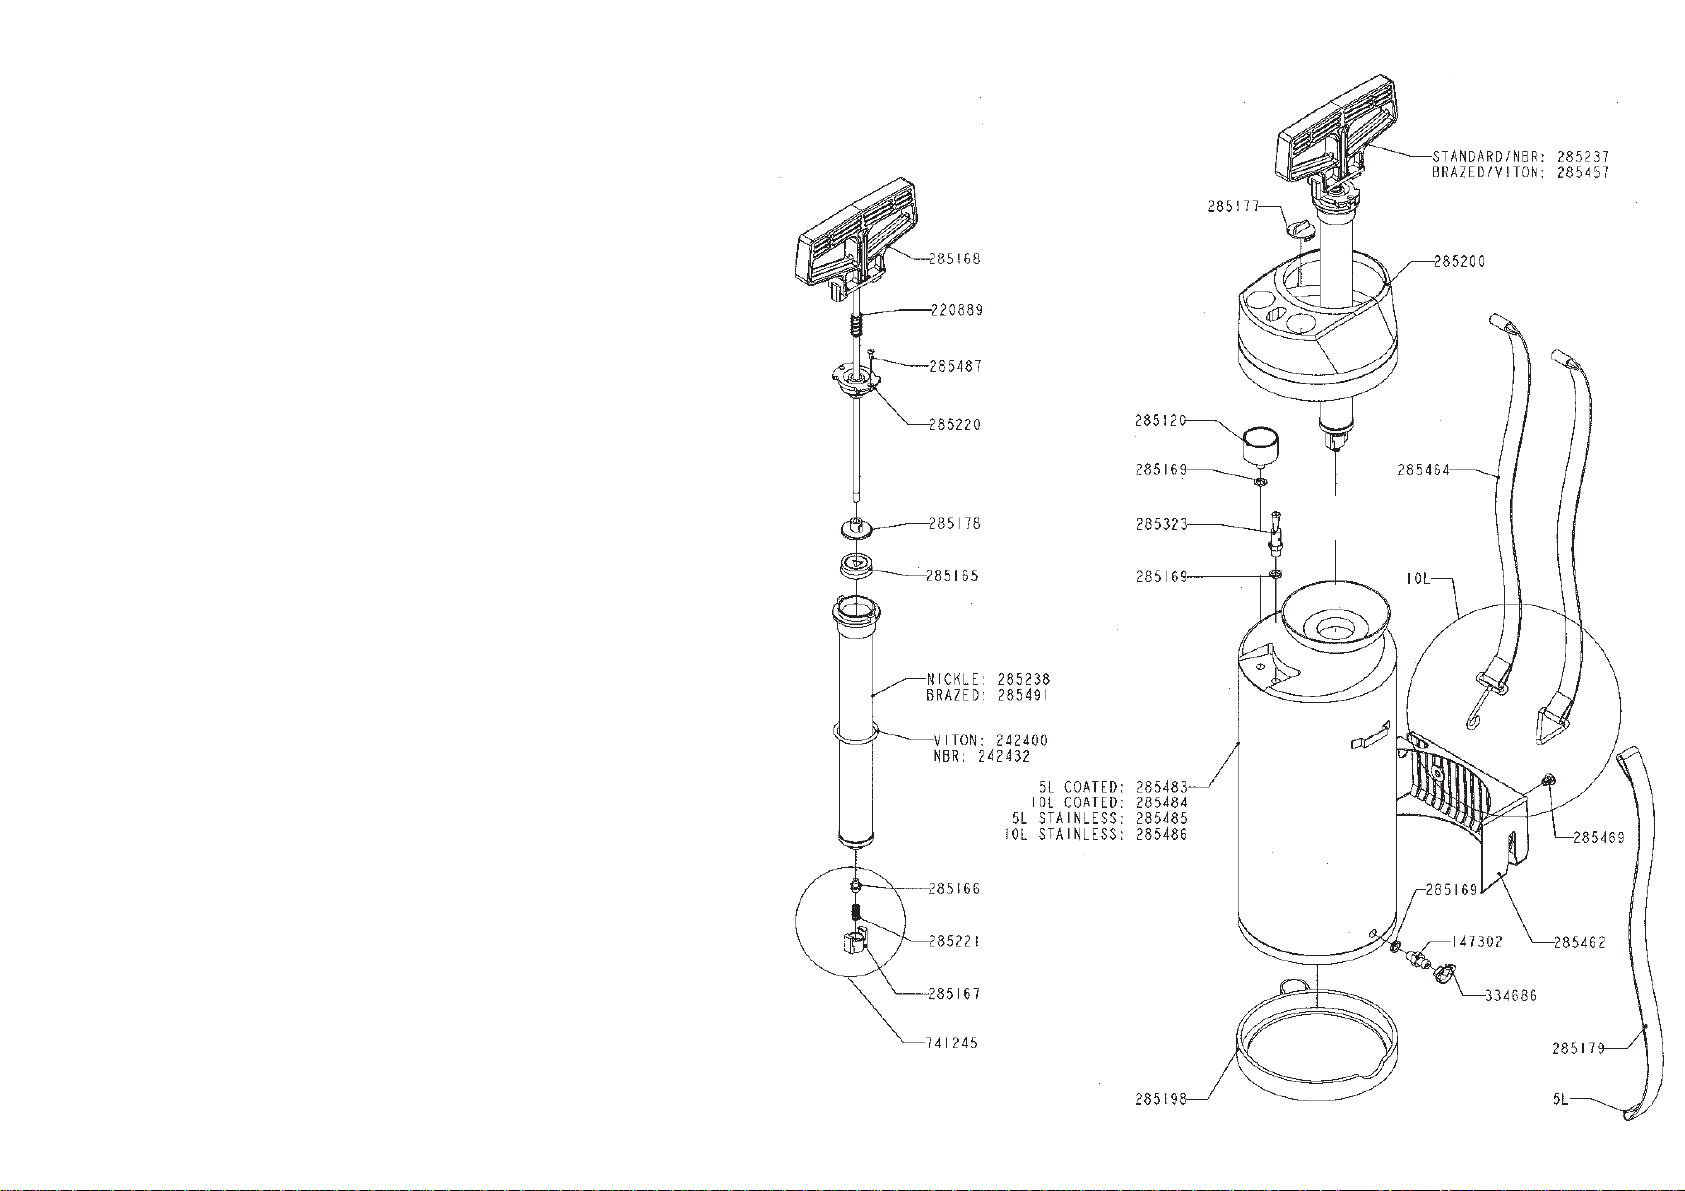
Remove the pump assembly by pressing down on the pump
handle to disengage the lugs; then continue to turn handle
anti-clockwise to unscrew the pump assembly from the
container.
Pour in up to, but not more than, 5 litres or 10 litres of liquid.
Replace pump assembly, screwing home firmly. Charge with
air until pointer of pressure gauge reaches the red line (6
bar). Lower pressures can be used if desired. The sprayer is
now ready for use.
aa
tiontion
a
tion
aa
tiontion
icaica
ica
icaica
lyly
ly
lyly
tiontion
tion
tiontion
In order to depressurise the container, pull up the pressure
relief valve. When no more air is heard to escape, it is safe
to remove the pump assembly.
679029-GB-2002/11
Page 2
If in doubt, or if the machine does not give complete
satisfaction, please contact us.
NozzlesNozzles
Nozzles
NozzlesNozzles
The standard machine is provided with a variable spray
nozzle, which provides a fine mist spray, adjustable from a
wide cone to a straight jet of 6 metres (20’) or more by
turning the cap.
MaintenanceMaintenance
Maintenance
MaintenanceMaintenance
THIS SPRAYER MUST BE WASHED OUT THOROUGHLY
IMMEDIATELY AFTER USE with warm water and a little
soda, shaking the machine well and spraying the water out.
Remove the nozzles to save time. After using creosote,
wash out with a weak solution of detergent. The piston
washer (285165) should be oiled from time to time. To
withdraw piston rod with plunger, remove both screws
holding cylinder cap. When reassembling care should be
taken to avoid bending or damaging the piston washer. If the
piston washer has to be replaced, the open side of the
washer must face downwards.
The foot valve (285166) at the bottom of the cylinder
prevents liquid from entering the pump. If liquid leaks into
the pump, the valve should be inspected and cleaned. The
plastic cover of the tank is easily detachable for servicing
pressure gauge and safety valve. To remove cover, give a
sharp, upward pull. When replacing, be careful that catches
on plastic cover engage with outer rim of filling funnel and
push down.
SafSaf
ety vety v
alvalv
Saf
ety v
SafSaf
ety vety v
Valve should be checked every three months if the machine
is used continuously, or every six months if only used
periodically. The test should be
conducted as follows:
1. Ensure that the
trigger valve is
closed.
2. Fill machine
completely with clean
water to exclude all air.
3. Pressurise the container
using the hand pump
until the relief valve
opens. This should occur
between 6 and 7 bar (85
and 100psi). If the valve
does not operate
between these
pressures, it must be
replaced before the
machine is used.
e testinge testing
alv
e testing
alvalv
e testinge testing
SparSpar
Spar
SparSpar
e pare par
e par
e pare par
tsts
ts
tsts
PP
ossibossib
P
ossib
PP
ossibossib
Loss of pressure – Check sealing washers (285169).
Check ‘0’ Seal (242400) and its seating. If any parts are
damaged or worn, replace immediately.
Piston rises after pumping – Renew foot valve (285166)
by removing parts (285221) and (285167).
Difficulty in pumping – Check foot valve (285166) as
above. Examine piston washer (285165). If damaged,
replace.
le causes ofle causes of
le causes of
le causes ofle causes of
tr tr
tr
tr tr
ouboub
oub
ouboub
lele
le
lele
 Loading...