Page 1

LKCP 410 Operator’s Guide
GENERAL:
The LKCP 410 series is a compact load cell utilizing foil strain gage technology. Where space is a premium, the LKCP
410 provides for force measurements in a small package. Stainless steel construction provides for excellent long-term
reliability.
MOUNTING:
In order to achieve the rated accuracy specifications, the LKCP 410 must be mounted properly. The unit is designed to
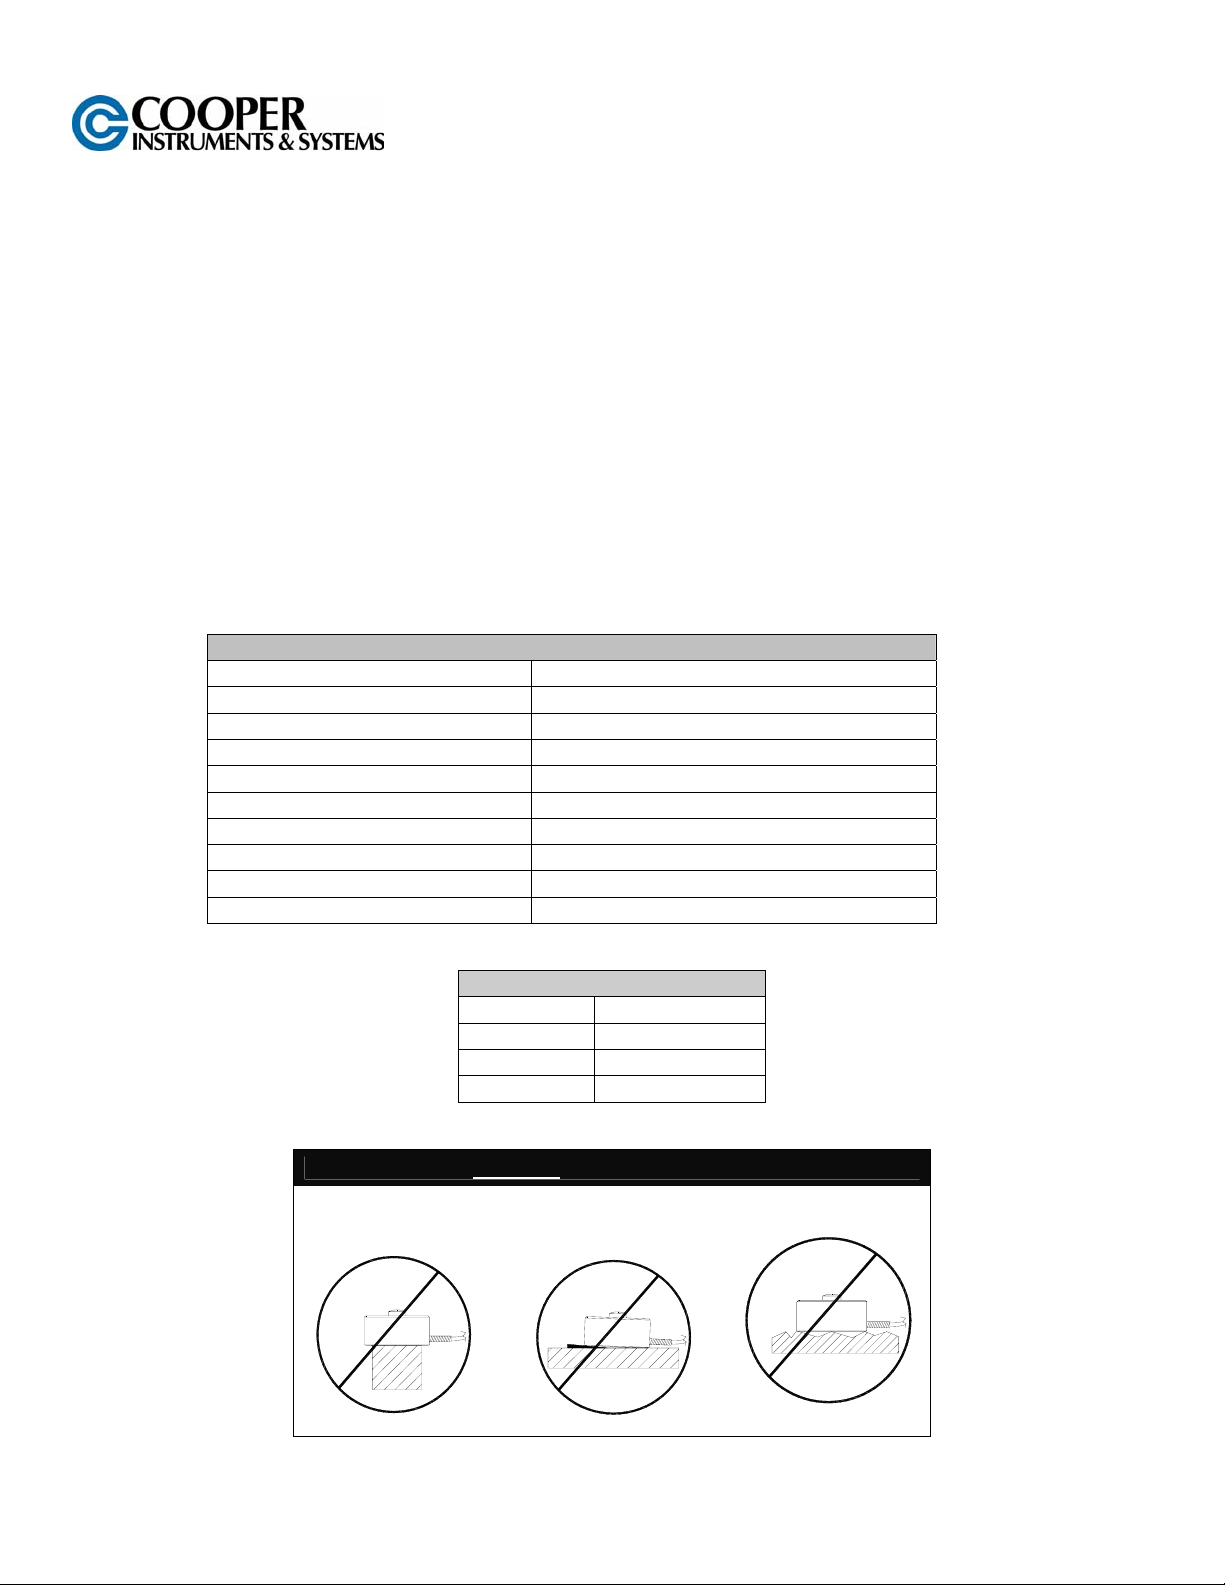
be mounted to a flat, parallel, hardened surface using the three threaded mounting holes on the bottom of the cell. The
base must extend to the full diameter of the body! Supporting only a portion of the bottom will result in damaging the cell.
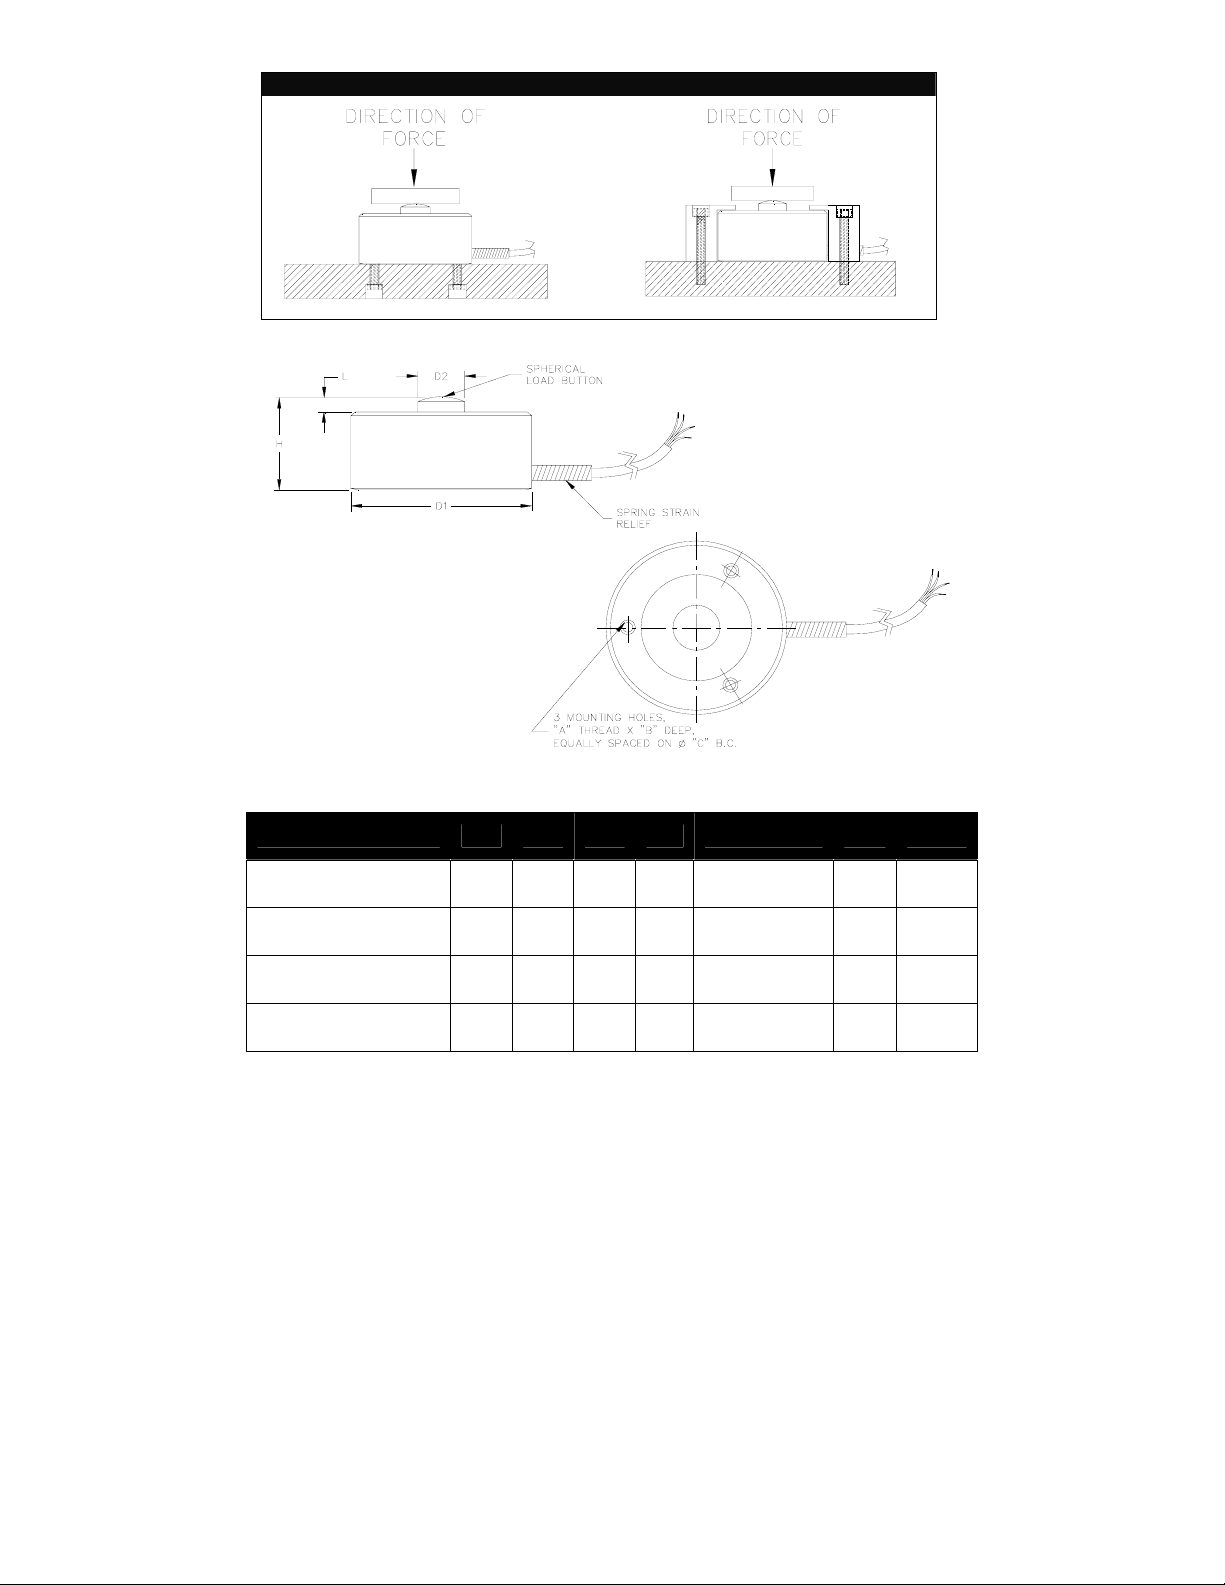
Securely fasten the load cell to a mounting base and apply force directly to the spherical radius of the load cell. If the
mounting screws are not used, the body of the cell may “spread” under load and strain is not transmitted to the gauges.
Typically this is seen in the lower capacity units as linearity error greater than 0.25% of full scale.
Forces should be applied to the load button of the cell with a flat surface. If forces are applied with a pinned point, radial
or curved surface, repeatability errors and/or deformation of the load button may result.
SPECIFICATIONS
Signal Output: 2 mV/V nominal
Linearity 0.25%
Hystersis 0.30%FS
Zero Balance ± 2%
Compensated Temp. Range 60°F to 160°
Operating Temperature Range -60°F to 250°F
Bridge Resistance 350 ohm foil strain gage
Excitation Voltage 10 V
Safe Overload 150% of full scale
Electrical Connection 5 feet of shielded cable with pigtail end
CABLE COLOR CODE
+Excitation Red
-Excitation Black
+Signal White
-Signal Green
Improper Load Cell Mounting
Surface should support
the full diameter
Surface should be parallel
Surface should be flat
CF 86A 6/5/02
Page 2

Proper Load Cell Mounting
RANGES DI D2 H L A B C
500 to 2,000 lb 1.25 .32 .39 .07 #6-32 UNC .25 1.00
3000 to10000 lb 1.50 .43 .63 .08 #6-32 UNC .25 1.25
15000 to 20000 lb 2.00 .60 1.00 .12 #6-32 UNC .25 1.62
50000 lb 3.00 .78 1.50 .18 #6-32 UNC .25 2.37
CF 86A 6/5/02
 Loading...