

Cooper and Hunter CH24SPH230V, CH12SPH230V, CH12SPH115V, CH09SPH115V, CH18SPH230V User Manual
SOPHIA
HIGH-WALL DUCTLESS
AIR CONDITIONING &
HEATING SYSTEM
OWNER'S MANUAL
Models:
CH-09SPH-115VI/CH-09SPH-115VO (115V)
CH-12SPH-115VI/CH-12SPH-115VO (115V)
CH-09SPH-230VI/CH-09SPH-230VO (230V)
CH-12SPH-230VI/CH-12SPH-230VO (230V)
CH-18SPH-230VI/CH-18SPH-230VO (230V)
CH-24SPH-230VI/CH-24SPH-230VO (230V)
CH-30SPH-230VI/CH-30SPH-230VO (230V)
CH-36SPH-230VI/CH-36SPH-230VO (230V)
IMPORTANT NOTE:
Read this manual carefully before installing
or operating your new air conditioning
unit. Make sure to save this manual for
future reference.
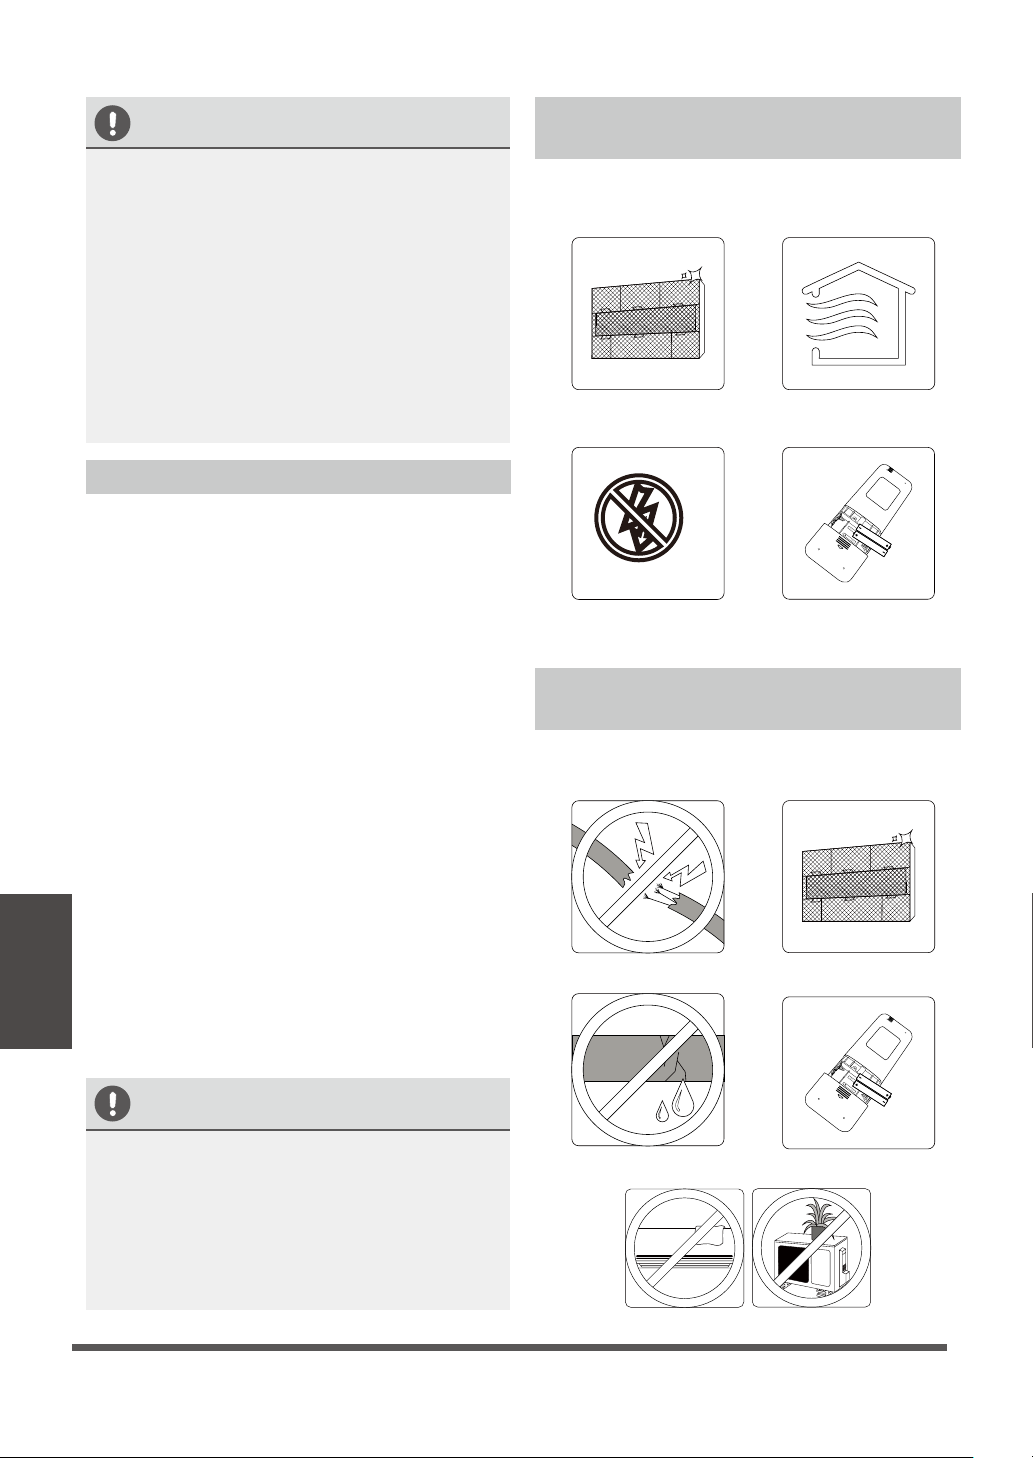
Precautions
WARNING
Operation and Maintenance
This appliance can be used by children aged from 8
years and above and persons with reduced physical,
sensory or mental capabilities or lack of experience
and knowledge if they have been given supervision or
instruction concerning use of the appliance in a safe
way and understand the hazards involved.
Children shall not play with the appliance.
Cleaning and user maintenance shall not be made by
children without supervision.
Do not connect air conditioner to multi-purpose socket.
Otherwise, it may cause fire hazard.
Do disconnect power supply when cleaning air
conditioner. Otherwise, it may cause electric shock.
.
If the supply cord is damaged, it must be replaced by
the manufacturer, its service agent or similarly qualified
persons in order to avoid a hazard.
Do not wash the air conditioner with water to avoid
electric shock.
Do not spray water on indoor unit. It may cause electric
shock or malfunction.
After removing the filter, do not touch fins to avoid injury.
Do not use fire or hair dryer to dry the filter to avoid
deformation or fire hazard.
Page 1
WARNING
Maintenance must be performed by qualified
professionals. Otherwise, it may cause personal injury
or damage.
Do not repair air conditioner by yourself. It may cause
electric shock or damage. Please contact dealer when
you need to repair air conditioner.
Do not extend fingers or objects into air inlet or air
outlet. It may cause personal injury or damage.
Do not block air outlet or air inlet. It may cause
malfunction.
Do not spill water on the remote controller, otherwise the
remote controller may be damaged.
When below phenomenon occurs, please turn off air
conditioner and disconnect power immediately, and then
contact the dealer or qualified professionals for service.
● Power cord is overheating or damaged.
● There’s abnormal sound during operation.
● Circuit break trips off frequently.
● Air conditioner gives off burning smell.
● Indoor unit is leaking.
If the air conditioner operates under abnormal conditions,
it may cause malfunction, electric shock or fire hazard.
When turning on or turning off the unit by emergency
operation switch, please press this switch with an insulating
object other than metal.
Do not step on top panel of outdoor unit, or put heavy
objects. It may cause damage or personal injury.
Page 2
WARNING
Attachment
Installation must be performed by qualified professionals.
Otherwise, it may cause personal injury or damage.
Must follow the electric safety regulations when installing
the unit.
According to the local safety regulations, use qualified
power supply circuit and circuit break.
Do install the circuit break. If not, it may cause malfunction.
An all-pole disconnection switch having a contact separation
of at least 1/8in(3mm) in all poles should be connected in
fixed wiring.
Including an circuit break with suitable capacity, please
note
magnet buckle
the circuit-short and
the following table.Air switch should be included
and heating buckle function, it can protect
overload.
Air Conditioner should be properly grounded. Incorrect
grounding may cause electric shock.
Don't use unqualified power cord.
Make sure the power supply matches with the
requirement of air conditioner.Unstable power supply or
incorrect wiring or malfunction. Please install proper power
supply cables before using the air conditioner.
Properly connect the live wire, neutral wire and
grounding wire of power socket.
Be sure to cut off the power supply before proceeding
any work related to electricity and safety.
Page 3
WARNING
Do not put through the power before finishing installation.
If the supply cord is damaged, it must be replaced by
the manufacturer, its service agent or similarly qualified
persons in order to avoid a hazard.
The temperature of refrigerant circuit will be high, please
keep the interconnection cable away from the copper
tube.
The appliance shall be installed in accordance with
national wiring regulations.
Installation must be performed in accordance with the
requirement of National Electrical Codes (NEC) and
local electrical codes by authorized personnel only.
The air conditioner is the first class electric appliance. It
must be properly grounding with specialized grounding
device by a professional. Please make sure it is always
grounded effectively, otherwise it may cause electric shock.
The yellow-green wire in air conditioner is grounding
wire, which can't be used for other purposes.
The grounding resistance should comply with national
electric safety regulations.
The appliance must be positioned so that the plug is
accessible.
All wires of indoor unit and outdoor unit should be
connected by a professional.
If the length of power connection wire is insufficient, please
contact the supplier for a new one. Avoid extending the
wire by yourself.
Page 4
WARNING
WARNING
For the air conditioner with plug, the plug should be reachable after
finishing installation.
For the air conditioner without plug, an circuit break must be
installed in the line.
If you need to relocate the air conditioner to another place, only the
qualified person can perform the work. Otherwise, it may cause
personal injury or damage.
Select a location which is out of reach for children and far away from
animals or plants.If it is unavoidable, please add the fence for safety
purpose.
The indoor unit should be installed close to the wall.
Instructions for installation and use of this product are
provided by the manufacturer.
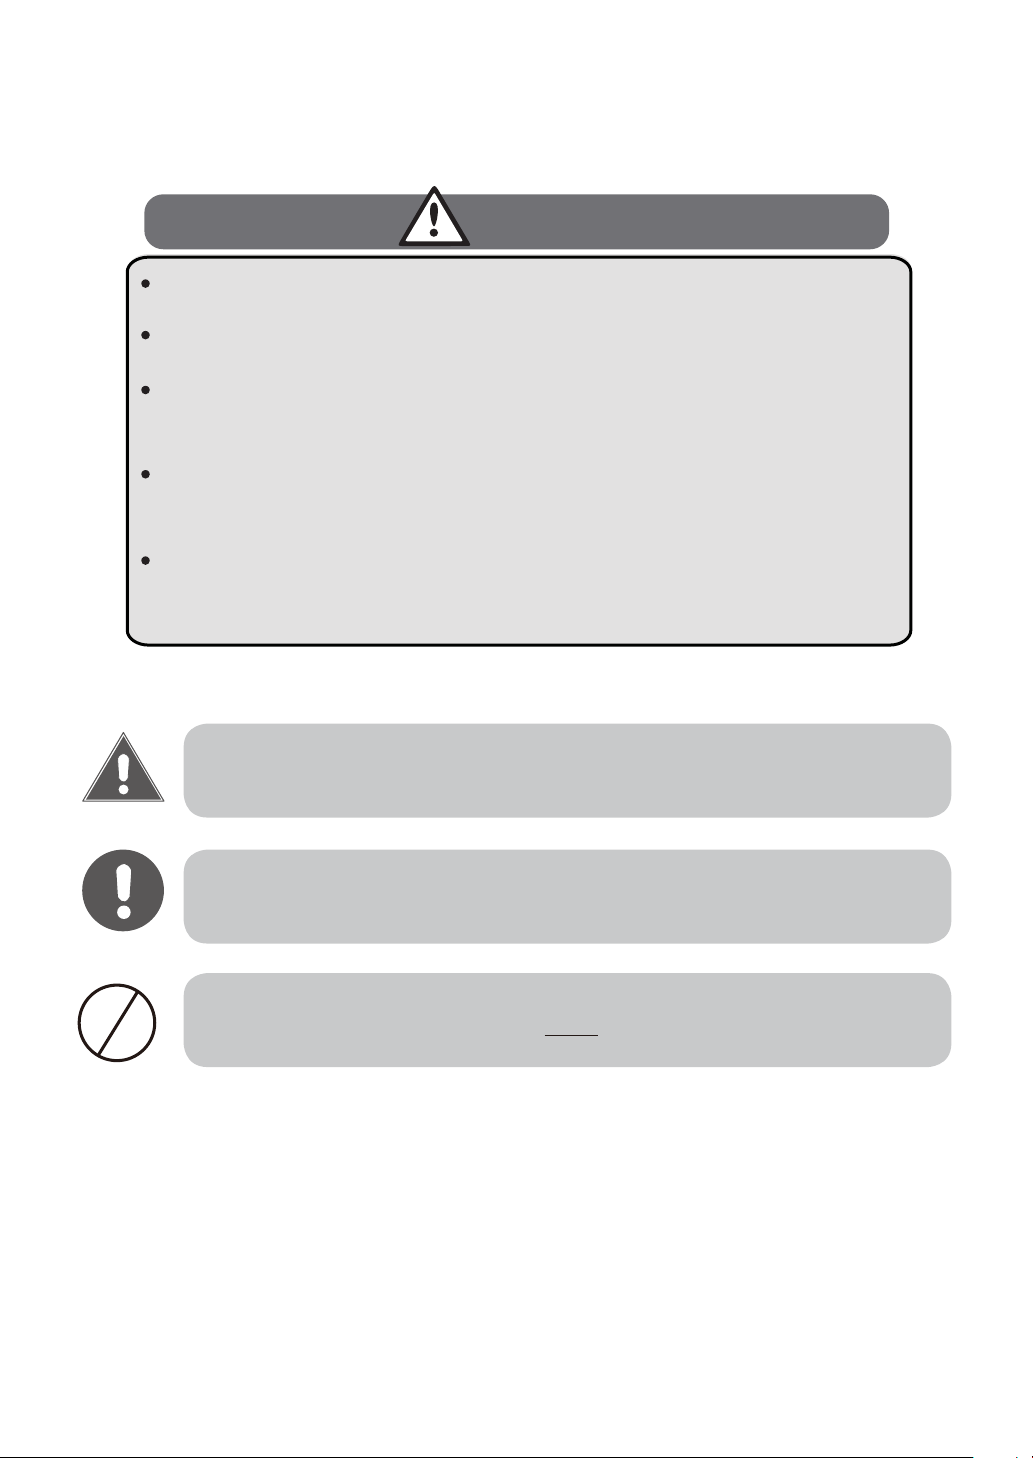
This symbol indicates that ignoring instructions may cause death or serious
injury.
CAUTION
This symbol indicates that ignoring instructions may cause moderate injury
to your person, or damage to your unit or other property.
This symbol indicates that you must never perform the action indicated.
Page 5
Unit Specications and Features
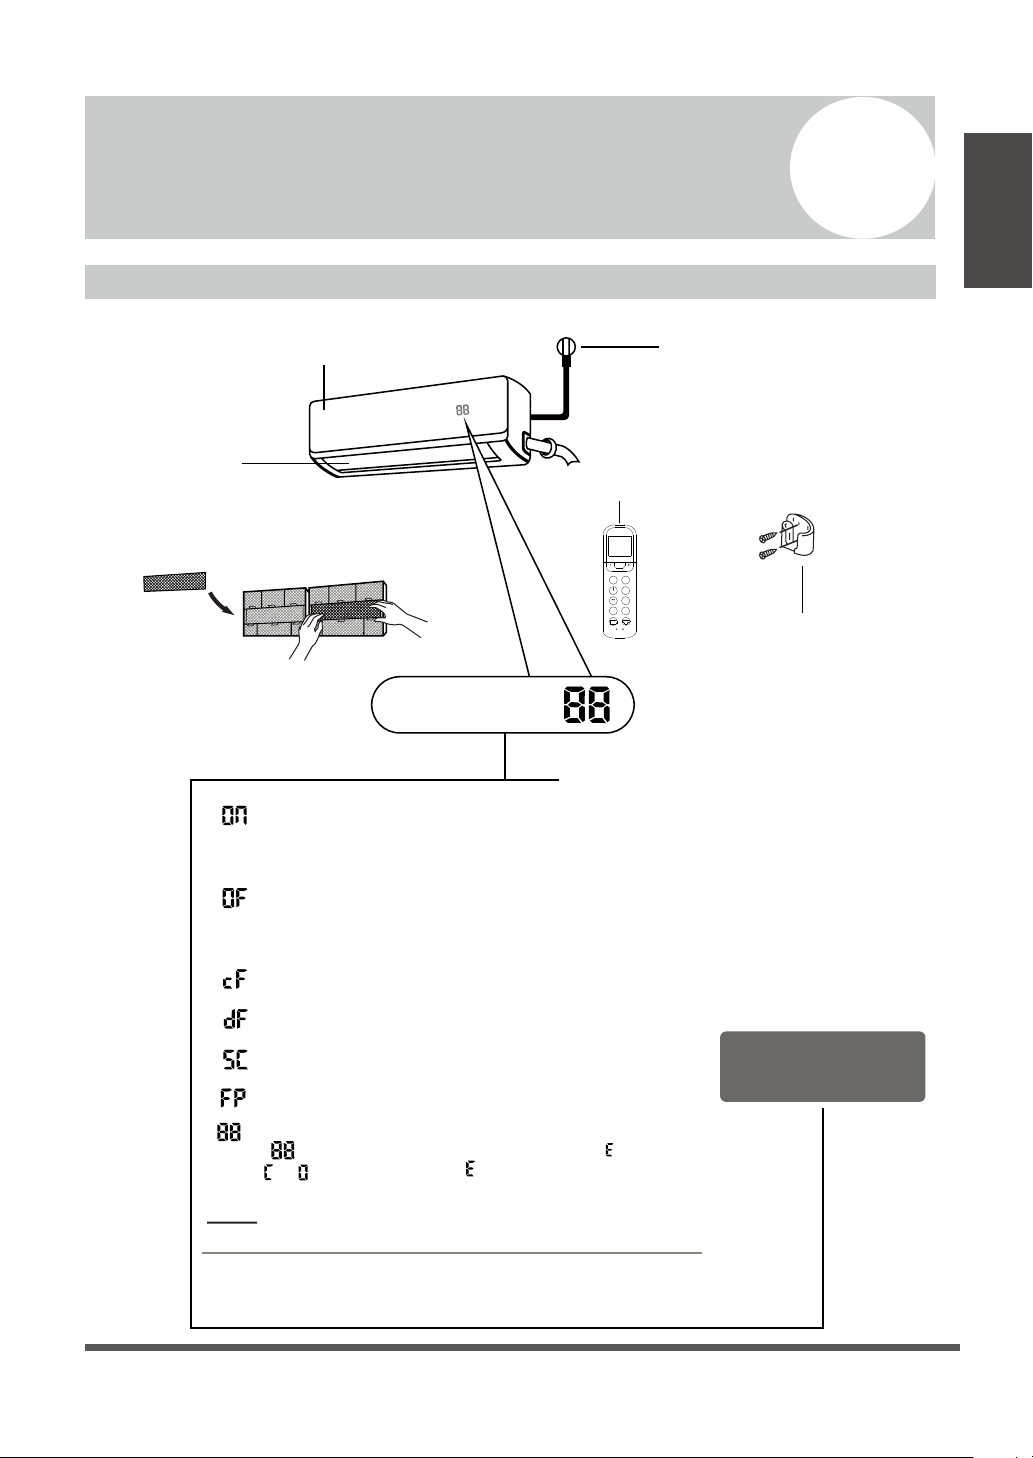
Unit Parts
1
Specifications
and Features
Unit
Front Panel
Louver
Functional Filter
(On Front of Main Filter - Some Units)
Display window
“ ” for 3 seconds when:
• TIMER ON is set
• FRESH, SWING, TURBO, or SILENCE features are turned on
“ ” for 3 seconds when:
• TIMER OFF is set
• FRESH, SWING, TURBO, or SILENCE features are turned off
Power Cable (Some Units
Remote Control
ON/OFF
TEMP
MODE
SILENCE
FP
FAN
SPEED
SWING
TIMER
SWING
ON
TIMER
SLEEP
OFF
TURBO
LED
SELF
FOLLOW
CLEAN
ME
RESET
LOCK
Remote Holder (Some Units)
)
“ ” when anti-cold air feature is turned on
“ ” when defrosting
“ ” when unit is self-cleaning
“ ” when freeze protection is turned on
“ ”
When ECO function(optional) is activated, the
,
,
illuminates gradually one by one as --
-- --set temperature-- ...... in one second interval.
NOT E:
A guide on using the infrared remote is not
included in this literature package.
In Fan mode, the unit will display the room temperature.
In other modes, the unit will display your temperature setting.
Display Code
Meanings
Page 6

Specifications
and Features
Optimal performance for the COOL, HEAT, and DRY modes can be achieved in the following
temperature ranges. When your air conditioner is used outside of these ranges, certain safety
Unit
protection features will activate and cause the unit to perform less than optimally.
Achieving Optimal Performance
Inverter Split Type
COOL mode HEAT mode DRY mode
Room Temperature
32°F - 122°F
(0°C - 50°C)
Outdoor
Temperature
5°F - 122°F
(-15°C - 50°C)
(For models with
low temp. cooling
systems.)
Fixed-speed Type
COOL mode
Room
Temperature
Outdoor
Temperature
(For models with low-temp cooling systems)
63°-90°F (17°-32°C) 32°-86°F (O°-30°C) 50°-90°F (10°-32°C)
64°-109°F (18°-43°C)
19°-109°F (-7°-43°C)
64°-126°F (18°-52°C)
(For special tropical models)
63°F - 90°F
(17°C - 32°C)
32°F - 86°F
(0°C - 30°C)
5°F - 86°F
(-15°C - 30°C)
19°-75°F (-7°-24°C)
50°F - 90°F
(10°C - 32°C)
32°F - 122°F
(0°C - 50°C)
HEAT mode
FOR UNITS WITH
AUXILARY ELECTRIC
HEATER
When outside
temperature is below 0°C
(
32°F ), we strongly
recommend keeping the
unit plugged in at all
timers to ensure smooth
ongoing performance.
DRY mode
52°-109°F (11°-43°C)
64°-109°F (18°-43°C)
64°-126°F (18°-52°C)
(For special tropical models)
To further optimize the performance of your unit, do the following:
• Keep doors and windows closed.
• Limit energy usage by using TIMER ON and TIMER OFF functions.
• Do not block air inlets or outlets.
• Regularly inspect and clean air lters.
Page 7

For a detailed explanation of each function,
refer to the Remote Control Manual.
• Wi-Fi Control (some units)
Wi-Fi control allows you to control your air
conditioner using your mobile phone and a
Wi-Fi connection.
Other Features
• Auto-Restart
If the unit loses power, it will automatically
restart with the prior settings once power has
been restored.
• Anti-mildew (some units)
When turning o the unit from COOL, AUTO
(COOL), or DRY modes, the air conditioner will
continue operate at very low power to dry up
condensed water and prevent mildew growth.
NOTE ON ILLUSTRATIONS
Illustrations in this manual are for explanatory purposes. The actual shape of your indoor unit may be
slightly dierent. The actual shape shall prevail.
• Louver Angle Memory(some units)
When turning on your unit, the louver will
automatically resume its former angle.
• Refrigerant Leakage Detection (some
units)
The indoor unit will automatically display “EC”
when it detects refrigerant leakage.
For a detailed explanation of your unit’s
advanced functionality (such as TURBO mode
and its self-cleaning functions), refer to the
Remote Control Manual.
Specifications
and Features
Unit
Page 8

Specifications
and Features
Unit
While the unit is on, use the SWING /DIRECT
button to set the direction (vertical angle) of
airflow.
1. Press the SWING /DIRECT button once to
2. To make the louver swing up and down
Setting horizontal angle of air ow
•
Setting Angle of Air Flow
Setting vertical angle of air ow
activate the louver. Each time you press
the button, it will adjust the louver by 6°.
Press the button until the direction you
prefer is reached.
continuously, press and hold the SWING/
DIRECT button for 3 seconds. Press it
again to stop the automatic function.
The horizontal angle of the airow must be set
manually. Grip the deector rod (See Fig.2.3)
and manually adjust it to your preferred direction.
For some units, the horizontal angle of the airow
can be set by remote control. please refer to the
Remote Control Manual.
NOTE ON LOUVER ANGLES
When using COOL or DRY mode, do not set
louver at too vertical an angle for long periods
of time. This can cause water to condense on
the louver blade, which will drop on your floor
or furnishings. (See Fig. 2.2 )
When using COOL or HEAT mode, setting the
louver at too vertical an angle can reduce the
performance of the unit due to restricted air
flow.
Do not move louver by hand. This will cause the
louver to become out of sync. If this occurs, turn
o the unit and unplug it for a few seconds,
then restart the unit. This will reset the louver.
Fig. 2.2
CAUTION
Do not put your ngers in or near the blower
and suction side of the unit. The high-speed
fan inside the unit may cause injury.
Page 9
Fig. 2.3

•
Sleep Operation
The SLEEP function is used to decrease energy
use while you sleep (and don’t need the same
temperature settings to stay comfortable). This
function can only be activated via remote control.
Press the SLEEP button when you are ready to
go to sleep. When in COOL mode, the unit will
increase the temperature by 2°F ( 1°C) after 1
hour, and will increase an additional 2°F (1°C)
after another hour. When in HEAT mode, the unit
will decrease the temperature by 2°F (1°C) after
1 hour, and will decrease an additional 2°F ( 1°C)
after another hour.
It will hold the new temperature for 7 hours, then
the unit will turn o automatically.
Note: The SLEEP function is not available in
FAN or DRY mode.
Specifications
and Features
Unit
Set
temperature
SLEEP Operation
+/- 2 F/1 C
1hr
Energy saving during the night
+/- 2 F/1 C
1hr
Fig. 3.1
7 hours
timer o
Page 10
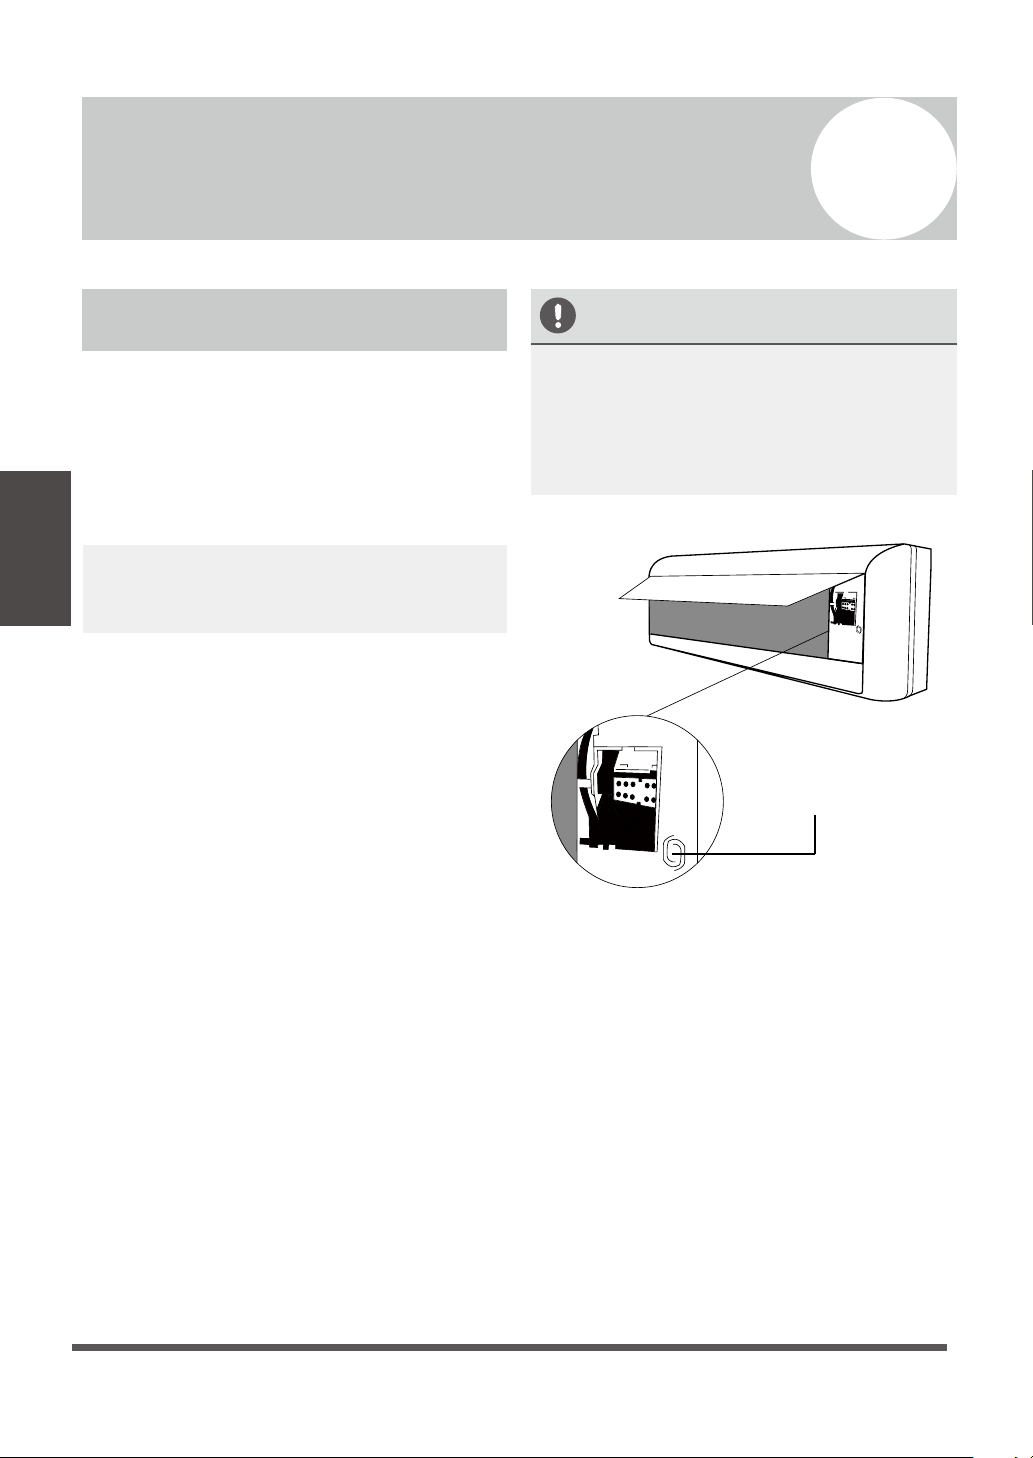
Manual Operation (Without Remote)
2
How to operate your unit without
the remote control
In the event that your remote control fails to
work, your unit can be operated manually with
the MANUAL CONTROL
the indoor unit. Note that manual operation is
Manual Operation
(Without Remote)
not a long-term solution, and that operating
the unit with your remote control is strongly
recommended.
BEFORE MANUAL OPERATION
Unit must be turned o before manual
operation.
To operate your unit manually:
1. Open the front panel of the indoor unit.
2. Locate the MANUAL CONTROL button on
the right-hand side of the unit.
3. Press the MANUAL CONTROL button one
time to activate FORCED AUTO mode.
4. Press the MANUAL CONTROL again
to activate FORCED COOLING mode.
5. Press the MANUAL CONTROL button a third
time to turn the unit o.
6. Close the front panel.
button located on
CAUTION
The manual button is intended for testing
purposes and emergency operation only. Please
do not use this function unless the remote is
lost and it is absolutely necessary. To restore
regular operation, use the remote control to
activate the unit.
Manual control button
Page 11

Care and Maintenance
3
Cleaning Your Indoor Unit
BEFORE CLEANING OR
MAINTENANCE
ALWAYS TURN OFF YOUR AIR CONDITIONER
SYSTEM AND DISCONNECT ITS POWER SUPPLY
BEFORE CLEANING OR MAINTENANCE.
CAUTION
Only use a soft, dry cloth to wipe the unit clean.
If the unit is especially dirty, you can use a cloth
soaked in warm water to wipe it clean.
• Do not use chemicals or chemically treated
cloths to clean the unit
• Do not use benzene, paint thinner,
polishing powder or other solvents to clean
the unit. They can cause the plastic surface
to crack or deform.
• Do not use water hotter than 104°F(40°C)
to clean the front panel. This can cause the
panel to deform or become discolored.
6. Rinse the lter with fresh water, then shake
o excess water.
7. Dry it in a cool, dry place, and refrain from
exposing it to direct sunlight.
8. When dry, re-clip the air freshening lter to
the larger lter, then slide it back into the
indoor unit.
9. Close the front panel of the indoor unit.
Filter Tabs
Cleaning Your Air Filter
A clogged air conditioner can reduce the cooling
efficiency of your unit, and can also be bad for
your health. Make sure to clean the filter once
every two weeks.
1. Lift the front panel of the indoor unit.
2. Grip the tab on the end of the lter, push it
up slightly, then pull it a little towards yourself.
3. Now pull down to extract the lter.
4. If your lter has a small air freshening lter,
unclip it from the larger lter. Clean this air
freshening lter with a hand-held vacuum.
5. Clean the large air lter with warm, soapy
water. Be sure to use a mild detergent.
Remove air freshening filter from back of
larger filter (some units)
Fig. 5.1
CAUTION
Do not touch air freshening (Plasma) lter for
at least 10 minutes after turning o the unit.
Page 12
Maintenance
Care and
CAUTION
• Before changing the lter or cleaning,
turn o the unit and disconnect its power
supply.
• When removing lter, do not touch metal
parts in the unit. The sharp metal edges can
cut you.
• Do not use water to clean the inside of the
indoor unit. This can destroy insulation and
cause electrical shock.
• Do not expose lter to direct sunlight when
drying. This can shrink the lter.
Air Filter Reminders (Optional)
Air Filter Cleaning Reminder
After 240 hours of use, the display window on
the indoor unit will ash “CL.” This is a reminder
to clean your lter. After 15 seconds, the unit will
revert to its previous display.
Maintenance –
Long Periods of Non-Use
If you plan not to use your air conditioner for an
extended period of time, do the following:
Clean all lters
Turn o the unit and
disconnect the power
Remove batteries
Turn on FAN function until
unit dries out completely
from remote control
To reset the reminder, press the LED button
on your remote control 4 times, or press the
MANUAL CONTROL button 3 times. If you don’t
reset the reminder, the “CL” indicator will ash
again when you restart the unit.
Air Filter Replacement Reminder
After 2,880 hours of use, the display window on
the indoor unit will ash “nF.” This is a reminder
to replace your lter. After 15 seconds, the unit
Maintenance
will revert to its previous display.
Care and
To reset the reminder, press the LED button
on your remote control 4 times, or press the
MANUAL CONTROL button 3 times. If you don’t
reset the reminder, the “nF” indicator will ash
again when you restart the unit.
CAUTION
• Any maintenance and cleaning of outdoor
unit should be performed by an authorized
dealer or licensed service provider.
• Any unit repairs should be performed
by authorized dealer or licensed servic e
provider.
Maintenance –
Pre-Season Inspection
After long periods of non-use, or before periods
of frequent use, do the following:
Check for damaged wires Clean all lters
Check for leaks Replace batteries
Page 13
Make sure nothing is blocking all air inlets and outlets

Troubleshooting
4
SAFETY PRECAUTIONS
If ANY of the following conditions occurs, turn o your unit immediately!
• The power cord is damaged or abnormally warm
• You smell a burning odor
• The unit emits loud or abnormal sounds
• A power fuse blows or the circuit breaker frequently trips
• Water or other objects fall into or out of the unit
DO NOT ATTEMPT TO FIX THESE YOURSELF! CONTACT AUTHORIZED SERVICE PROVIDER
IMMEDIATELY!
Common Issues
The following problems are not a malfunction and in most situations will not require repairs.
Issue Possible Causes
Unit does not turn
on when pressing
ON/OFF button
The unit changes
from COOL/HEAT
mode to FAN
mode
The indoor unit
emits white mist
Both the indoor
and outdoor units
emit white mist
The Unit has a 3-minute protection feature that prevents the
unit from overloading. The unit cannot be restarted within
three minutes of being turned o.
The unit may change its setting to prevent frost from forming
on the unit. Once the temperature increases, the unit will start
operating in the previously selected mode again.
The set temperature has been reached, at which point the
unit turns o the compressor. The unit will continue operating
when the temperature fluctuates again.
In humid regions, a large temperature dierence between the
room’s air and the conditioned air can cause white mist.
Troubleshooting
When the unit restarts in HEAT mode after defrosting, white
mist may be emitted due to moisture generated from the
defrosting process.
Page 14

Issue Possible Causes
A rushing air sound may occur when the louver resets its
position.
The indoor unit
makes noises
A squeaking sound may occur after running the unit in HEAT
mode due to expansion and contraction of the unit’s plastic
parts.
Low hissing sound during operation: This is normal and is
caused by refrigerant gas flowing through both indoor and
outdoor units.
Both the indoor
unit and outdoor
unit make noises
The outdoor unit
makes noises
Dust is emitted
from either the
indoor or outdoor
unit
The unit emits a
bad odor
The fan of the
outdoor unit does
not operate
Low hissing sound when the system starts, has just stopped
running, or is defrosting: This noise is normal and is caused by
the refrigerant gas stopping or changing direction.
Squeaking sound: Normal expansion and contraction of
plastic and metal parts caused by temperature changes during
operation can cause squeaking noises.
The unit will make dierent sounds based on its current
operating mode.
The unit may accumulate dust during extended periods of
non-use, which will be emitted when the unit is turned on.
This can be mitigated by covering the unit during long periods
of inactivity.
The unit may absorb odors from the environment (such as
furniture, cooking, cigarettes, etc.) which will be emitted
during operations.
The unit’s filters have become moldy and should be cleaned.
During operation, the fan speed is controlled to optimize
product operation.
Troubleshooting
NOTE: If problem persists, contact a local dealer or your nearest customer service center.
Provide them with a detailed description of the unit malfunction as well as your model number.
Page 15
Operation
is erratic,
unpredictable,
or unit is
unresponsive
Interference from cell phone towers and remote boosters may
cause the unit to malfunction.
In this case, try the following:
• Disconnect the power, then reconnect.
• Press ON/OFF button on remote control to restart operation.

Troubleshooting
When troubles occur, please check the following points before contacting a repair company.
Problem Possible Causes Solution
Temperature setting may
be higher than ambient
room temperature
The heat exchanger on the
indoor or outdoor unit is
dirty
Lower the temperature setting
Clean the aected heat exchanger
Poor Cooling
Performance
The air lter is dirty
The air inlet or outlet of
either unit is blocked
Doors and windows are
open
Excessive heat is generated
by sunlight
Too many sources of heat
in the room (people,
computers, electronics,
etc.)
Low refrigerant due to leak
or long-term use
SILENCE function is
activated
Remove the filter and clean it
according to instructions
Turn the unit o, remove the
obstruction and turn it back on
Make sure that all doors and
windows are closed while
operating the unit
Close windows and curtains
during periods of high heat or
bright sunshine
Reduce amount of heat sources
Check for leaks, re-seal if
necessary and top o refrigerant
SILENCE function can lower
product performance by reducing
operating frequency. Turn o
SILENCE function.
Page 16
Troubleshooting

Problem Possible Causes Solution
The unit is not
working
The unit starts and
stops frequently
Power failure
The power is turned o Turn on the power
The fuse is burned out Replace the fuse
Remote control batteries are
dead
The Unit’s 3-minute protection
has been activated
Timer is activated Turn timer o
There’s too much or too little
refrigerant in the system
Incompressible gas or
moisture has entered the
system.
The compressor is broken Replace the compressor
The voltage is too high or too
low
Wait for the power to be
restored
Replace batteries
Wait three minutes after
restarting the unit
Check for leaks and
recharge the system with
refrigerant.
Evacuate and recharge the
system with refrigerant
Install a manostat to
regulate the voltage
Troubleshooting
Poor heating
performance
Indicator lamps
continue flashing
Error code appears in
the window display
of indoor unit:
• E0, E1, E2…
• P1, P2, P3…
• F1, F2, F3…
The outdoor temperature is
lower than 44.5°F (7°C)
Cold air is entering through
doors and windows
Low refrigerant due to leak or
long-term use
The unit may stop operation or continue to run safely. If
the indicator lamps continue to flash or error codes appear,
wait for about 10 minutes. The problem may resolve itself.
If not, disconnect the power, then connect it again. Turn
the unit on.
If the problem persists, disconnect the power and contact
your nearest customer service center.
Use auxiliary heating
device
Make sure that all doors
and windows are closed
during use
Check for leaks, re-seal
if necessary and top o
refrigerant
NOTE: If your problem persists after performing the checks and diagnostics above, turn o your
unit immediately and contact an authorized service center.
Page 17

SYSTEM OPERATION
COOLING OPERATION
How it works:
In cooling mode, your Sophia indoor unit will absorb heat from the room,
then the Sophia outdoor unit will discharge the heat to the outdoors. The
sophia cooling capacity decreases as the outdoor temperature increases.
This causes the ali ce to work harder and longer to hold the selected room
temperature.
Indoor Coil Freeze Protection:
Frost may form on the indoor coil during cooling operations when the
outdoor temperature below 50°F (10°C). Prolong operation may cause ice
Sophia indoor unit
microcomputer detects ice on the indoor coil it will stop the compressor to
defrost the coil and protect the unit.
HEATING OPERATION
How it works:
In heating mode, your Sophia outdoor unit will absorb heat from the outdoor
ambient, then the Sophia indoor unit will discharge the heat to the room. The
Sophia heating capacity decreases as the outdoor temperature decreases.
During extreme cold outdoor temperatures, you may need an additional
heating source to supplement the Sophia heating output.
Defrost Function:
In heating mode, frost may form on the outdoor coil during humid and low
outdoor temperature conditions. Prolong operation may cause ice to form
Sophia’s
heating capacity.
If the sophia microcomputer detects ice on the outdoor coil, it will switch
automatically to defrost mode to melt the ice and clear the coil. During
defrost mode, heating will be discontinued and the Sophia indoor unit will
and outdoor fans will stop. It is normal to see steam or vapor coming from
the outdoor unit during defrost mode. Defrost mode will terminate 12
minutes after initiation of defrost cycle or when the outdoor coil temperature
is 50°F (10°C) or greater.
Page 18

ENERGY SAVING TIPS
1. Relaxing room temperature at night is OK: During the nighttime
hours you don’t require the same level of conscious cooling or heating.
Try using Sleep Mode to gradually relax room temperature and allow the
unit to run less and save energy.
2. Curtains and shades: In the summer, you need to block the effects of
the sun. Close window curtains and shades on the south and west side
of your home to help block solar heat. In winter, the sun is your friend.
Open curtains and shades to allow solar heat into your room.
3. Close doors: If you don’t need to heat and cool your whole home,
confine the heating and cooling to one room by closing doors. Limit the
space you’re heating and cooling to specified capability of the unit.
4. Service the unit: Some basic maintenance might be all you need. The
outdoor unit will greatly benefit from a good hosing out, especially in
treed areas where seeds and other debris can stick to coil fins and make
the unit work up to 15% harder!
5. Rearrange the room: Furniture that obstructs airflow means you could
be heating and cooling the back of a chair or the front of a sofa instead
of the actual living space. Use the Swing Louvers to help direct the air in
the right direction for the room; remove or rearrange obstacles blocking
airflow.
6. Lighting: Turning lights off can help reduce your heat. Each light bulb is
a tiny heater. Your air conditioner must waste energy overcoming the
heat from your lights to reach and hold your desired room temperature.
7. Is anyone home? If possible, while you’re away turn your unit to Auto
mode and make sure windows and drapes are closed. Although the
room temperature will be uncomfortable for a few minutes when you
come home, the unit will have the room back to your desired
temperature in no time.
8. Don’t forget the fan: The fan is much like a car. The faster it
more energy is uses. Sometimes we need the car to go fast, but slow is
good enough most of the time. Try saving money by using the
comfortable quiet low fan speed as much as possible.
runs, the

www.cooperandhunter.us
LIMITED WARRANTY STATEMENT
Ductless Heat Pump Split System
This warranty should be registered on our web-site www.cooperandhunter.us
The warranty is only valid when installed by a Licensed HVAC Technician
FOR WARRANTY SERVICE OR REPAIR:
Contact your installing contractor. You may find the installer’s name on the equipment or in your Owner’s packet.
Complete product registration below and send back by e-mail at
PRODUCT REGISTRATION:
Model No.: ______________________________________________________________________________________________
Serial No.: _______________________________________________________ Date of Installation: ______________________
Owner Name: ____________________________________________________________________________________________
Address of Installation:_____________________________________________________________________________________
Installing Contractor: __________________________________________________________________________
Address: ________________________________________________________________________________________
Phone No. / E-mail: _______________________________________________________________________________
C&H distributor (hereinafter “Company”) warrants this product against failure due to defect in materials or workmanship
under normal use and maintenance as follows. All warranty periods begin on the date of original installation. If the date cannot
be verified, the warranty period begins one hundred twenty (120) days from date of manufacture. Damage resulting from
failure to use, install or maintain the product in a manner consistent with our/manufacturer’s recommendations shall render the
warranty void. Cooper&Hunter, at its option, may request a report from a qualified technician prior to honoring a warranty
claim. If a part fails due to defect during the applicable warranty period Company will provide a new or remanufactured part, at
Company’s option, to replace the failed defective part at no charge for the part. This limited warranty is subject to all
provisions, conditions, limitations and exclusions listed below.
● A warranty period of Seven (7) years on compressor to the original registered end-user.
● A warranty period of Five (5) years on all parts to the original registered end user.
● A warranty period of One (1) year on the remote control provided with the original unit.
● Limited warranty applies only to systems that are properly installed by a state certified or licensed HVAC contractor,
under applicable local and state law in accordance with all applicable building codes and pe
and operation instructions and good trade practices.
● Warranty applies only to products remaining in their original installation location.
● Defective parts must be returned to the distributor through a registered servicing dealer for credit.
rmits; C&H installation
____________

LIMITATIONS OF WARRANTIES:
CONDITIONS OF MERCHANTABILITY AND FITNESS FOR A PARTICULAR USE OR PURPOSE) ARE LIMITED TO THE DURATION OF
THIS LIMITED WARRANTY, SOME STATES OR PROVINCES DO NOT ALLOW LIMITATIONS ON HOW LONG AN IMPLIED WARRANTY
OR CONDITION LASTS, SO THE ABOVE MAY NOT APPLY TO YOU. THE EXPRESS WARRANTIES MADE IN THIS WARRANTY ARE
EXCLUSIVE AND MAY NOT BE ALTERED, ENLARGED, OR CHANGED BY ANY DISTRIB
WHATSOEVER.
ALL IMPLIED WARRANTIES AND/OR CONDITIONS (INCLUDING IMPLIED WARRANTIES OR
UTOR, DEALER, OR OTHER PERSON,
THIS WARRANTY DOES NOT COVER
1. Labor or other costs incurred for diagnosing, repairing, removing, installing, shipping, servicing or handling of either
defective parts, or replacement parts, or new units.
2. Product cleaning required prior to warranty service and repair.
3. Normal maintenance as outlined in the installation and servicing instructions or Owner’s Manual, including filter
cleaning and/or replacement and lubrication.
4. Failure, damage or
alteration or improper operation.
5. Failure to start due to voltage conditions, blown fuses, open circuit breakers, or damages due to the inadequacy or
interruption of electrical service.
6. Failure or damage due to floods, winds, fires, lightning, accidents, corrosive environments (rust, etc.) or other
conditions beyond the control of the Company.
7. Failure or damage of coils or piping due to corrosion on i
body.
8. Parts not supplied or designated by Company, or damages resulting from their use.
9. Products installed outside continental USA and Canada.
10. Electricity or fuel costs, or increases in electricity or fuel costs from any reason whatsoever, including additional or
unusual use of supplemental electric heat.
11. Any cost to replace, refill or dispose of refrigerant, including the cost of refrigerant.
12. Shipping damage or damage as a result of transporting th
13. Accessories such as condensate pumps, line sets and so forth are not covered.
14. Any special, indirect or consequential property or commercial damage of any nature whatsoever. Some states or
provinces do not allow the exclusion of incidental or consequential damages, so the above limitation may not apply to
you.
repairs due to faulty installation, misapplication, abuse, improper servicing, unauthorized
:
nstallations within one (1) miles of sea coast or corrosive
e unit.
This warranty gives you specific legal rights, and you may also have other rights which vary from state to state or province to
province.
CS368U-AB
16122000002334
20150820
 Loading...