

Page 1
Sectionalizers
Type GWC
Installation Instructions
Applicable to serial number 1088 and above
Cooper Power Systems
Service Information
S270-21-1
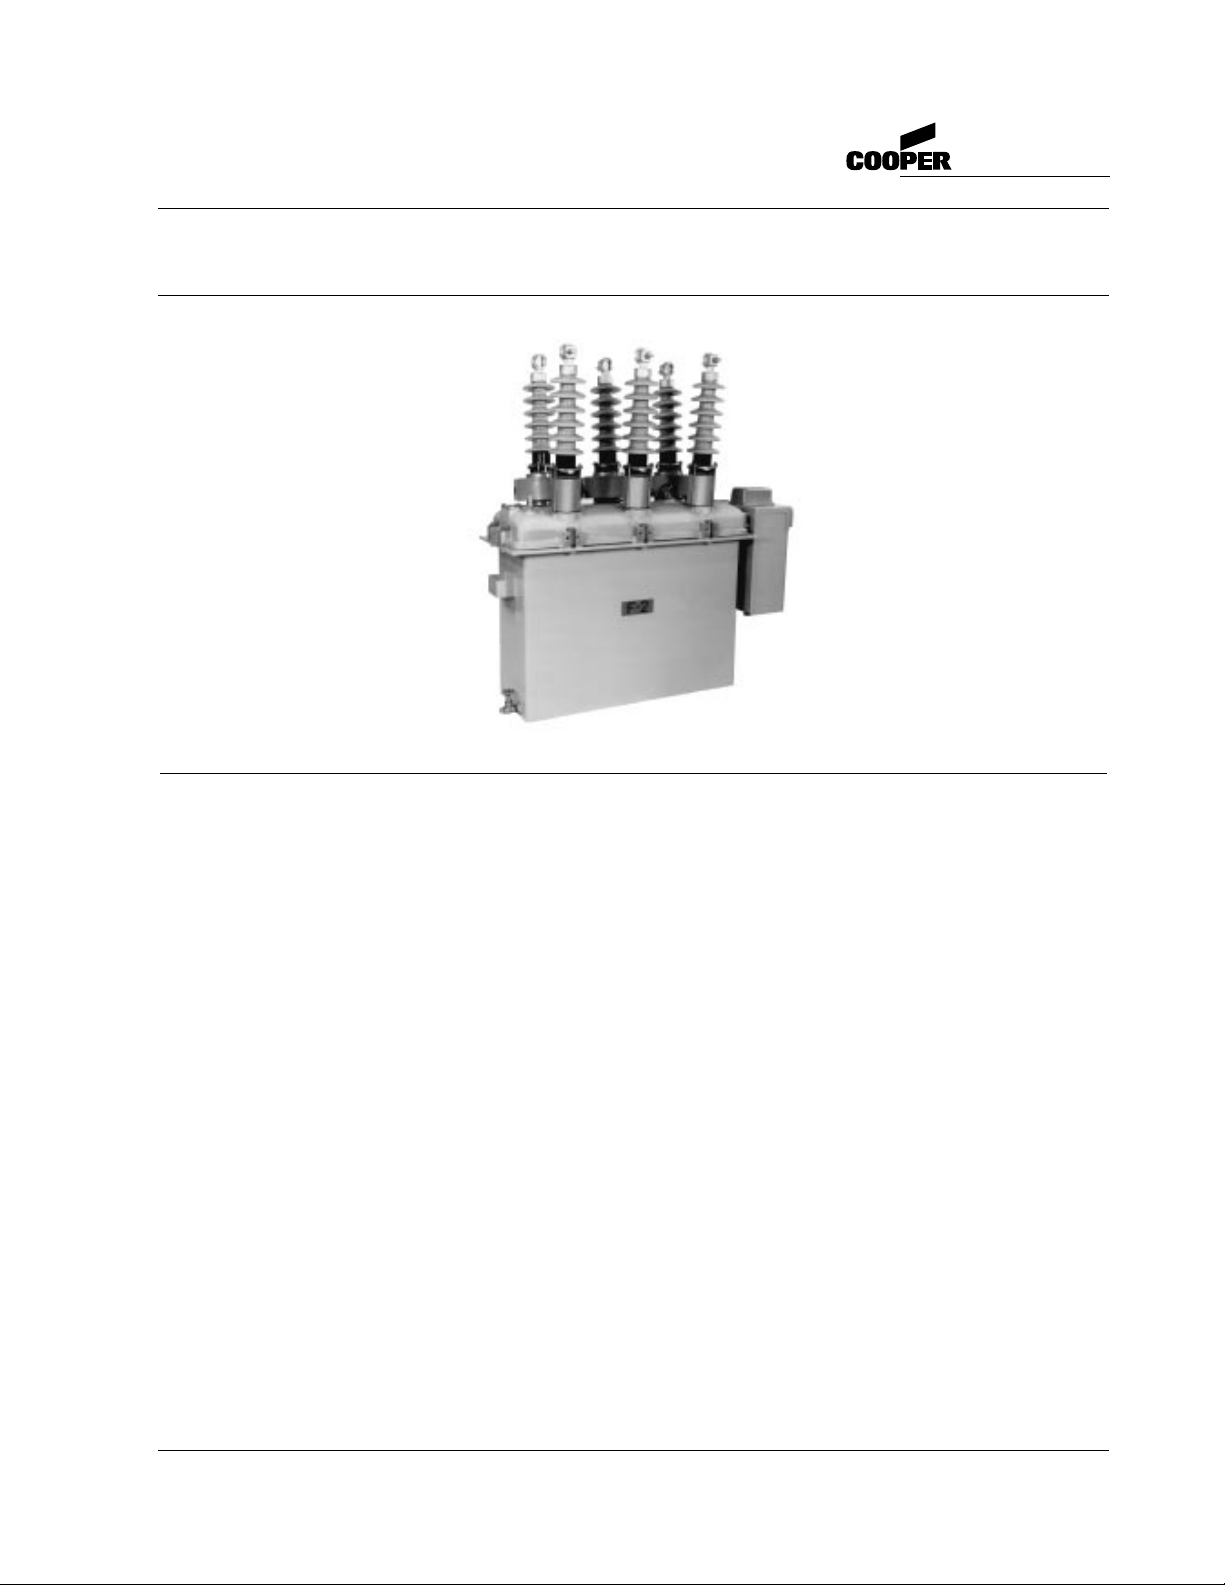
Figure 1.
Kyle®Type GWC Sectionalizer.
Contents
Safety Information.................................................. 2
Hazard Statements.............................................. 2
Safety Instructions ............................................... 2
Additional Information.......................................... 2
Shipment and Acceptance..................................... 2
Handling and Storage ............................................ 2
General................................................................ 2
Control Battery Charging and Storage................. 3
Description.............................................................. 3
Ratings .................................................................... 3
Dimensions and Weights....................................... 4
Operating Controls................................................. 4
Remote Control Switch........................................ 4
115Vac - 5 amp Breaker Switch........................... 4
Manual Control Switch......................................... 4
One Count to Open Switch.................................. 5
Lamp Test Contact Position Switch ..................... 5
Battery Test Terminals ......................................... 5
Battery Load Test................................................. 5
Manual Trip Lever................................................ 5
Indicating Devices.................................................. 5
Settings ................................................................... 5
Minimum Actuating Current ................................. 6
Counts-to-Open ................................................... 6
Count Reset......................................................... 6
Count Restraint.................................................... 6
Inrush-Current Restraint ...................................... 6
Response Time.................................................... 6
88973KMA
Installation............................................................... 7
Preliminary Checks.............................................. 7
Lifting the Sectionalizer........................................ 7
Mounting the Sectionalizer .................................. 9
Mounting the Control ........................................... 9
Grounding the Control ......................................... 9
Control Cable....................................................... 9
Auxiliary Power....................................................... 9
Main Wiring.......................................................... 9
Interconnection Wiring Diagram...........................11
Interconnection Wiring Diagram, Control............12
Accessories ............................................................13
Auxiliary Switch....................................................13
Bushing-Type, Multi-Ratio Current Transformers 14
Operating Instructions...........................................14
Automatic Operation............................................14
Manual Electrical Operation.................................15
Manual Non-Electrical Operation.........................15
Control Battery .......................................................15
Battery Connections ............................................15
Battery Check ......................................................15
Testing.....................................................................16
Test Circuit and Equipment..................................16
Pre-Test Procedures............................................16
Test Procedures...................................................16
Post-Test Procedures ..........................................19
November 1991• Supersedes 12/88
Printed in USA
Page 2

Type GWC Installation Instructions
SAFETY INFORMATION
Following is important safety information. For safe installation and operation of this equipment, be sure to read
and understand all cautions and warnings.
Hazard Statements
This manual contains two types of hazard statements:
WARNING: Refers to hazards or unsafe practices
!
which could result in severe personal injury, or
death, and equipment damage.
CAUTION: Refers to hazards or unsafe practices
!
which could result in damage to equipment or in
personal injury.
Safety Instructions
Following are general caution and warning statements
that apply to this equipment. Additional statements, related to specific tasks and procedures, are located throughout the manual.
WARNING: Before installing, operating, main-
!
taining, or testing this equipment, carefully read
and understand the contents of this manual. Improper
operation, handling or maintenance can result in death,
severe personal injury, and equipment damage. G101.0
WARNING: This equipment is not intended to
!
protect human life. Follow all locally approved procedures and safety practices when installing or operating
this equipment. Failure to comply may result in death,
severe personal injury and/or equipment damage. G102.0
WARNING: High voltage. Contact with high volt-
!
age will cause severe personal injury or death.
Follow all locally approved safety procedures when working around high voltage lines and equipment. G103.0
WARNING: Do not operate this equipment out
!
of oil. Oil is the electrical insulating medium within
this equipment; operation out of oil will result in
flashovers that will damage the equipment and may
cause severe personal injury. G104.0
WARNING: Follow all locally approved proce-
!
dures and safety practices when installing or
operating this equipment. Failure to comply may
result in death, severe personal injury, and/or equipment damage. G111.0
CAUTION: This equipment requires routine inspec-
!
tion and maintenance to ensure proper operation. If it
is not maintained it may fail to operate properly. Improper
operation may cause equipment damage and possible
personal injury. G105.0
CAUTION: Follow all locally approved safety
!
practices when lifting and mounting the equipment. Use the lifting lugs provided. Lift the load
smoothly and do not allow the load to shift. Improper
lifting may result in equipment damage. G106.0
CAUTION: Radiation. At voltages up to the
specified test voltages, the radiation emitted by
the vacuum interrupter is negligible. However, above
these voltages, radiation injurious to personnel may
be emitted. See
Vacuum Interrupter Radiation Warning
information. G109.0
Service Information S280-90-1,
, for further
Additional Information
These instructions do not claim to cover all details or
variations in the equipment, procedures, or process
described, nor to provide directions for meeting every
possible contingency during installation, operation, or
maintenance. When additional information is desired to
satisfy a problem not covered sufficiently for the user's
purpose, please contact your Cooper Power Systems
sales engineer.
SHIPMENT AND ACCEPTANCE
Each sectionalizer is completely assembled, inspected,
tested, and adjusted at the factory and is filled to the correct level with insulating oil. It is in good condition when
accepted by the carrier for shipment. Upon receipt of a
sectionalizer:
1. Inspect the sectionalizer thoroughly for damage and
loss of parts or oil incurred during shipment. If damage or loss is discovered, file a claim with the carrier
immediately.
2. Check for oil leakage and tighten all bolts that may
have been loosened during shipment, especially the
bolts attaching the head to the tank.
2
HANDLING AND STORAGE
General
If the sectionalizer is to be stored for an appreciable time
before installation, provide a clean, dry storage area.
Locate the sectionalizer so as to minimize the possibility of
mechanical damage. In particular, protect the bushings and
keep the operator cabinet closed to protect the electronic
control components.
Page 3

S270-21-1
Control Battery Charging and Storage
The control battery is fully charged just prior to shipment and
is ready for use. However, storage for the length of time will
cause the battery to gradually lose its storage. Loss of
charge accelerates with increase in ambient temperature.
For trouble-free performance, it is highly recommended that
the battery be kept on trickle charge (approximately 15mA)
until the control is put into service, especially if it is to be in
transit and/or storage for more than 30 days. The battery can
tolerate a continuous trickle charge of 15mA indefinitely without damage.
Unless the battery is known to be fully charged, it is recommended that it be charged 50mA for 48 hours and then
maintained at 15mA until the control is out of service.
Like the control cabinet heater, the battery can be kept
charged by energizing the battery charger in the control with
120Vac applied to Terminals 5 and 6 of the input terminal
strip.
NOTE: When shipped from the factory, the battery is discon-
nected and the output plug is taped to the side of the
battery, Connect the battery plug into the mating receptacle below the battery to complete the battery circuit.
CAUTION: Electrical shock hazard. Be sure
!
the grounded side of the 120 Vac auxiliary
power circuit is connected to the terminal labeled
COMMON AC GND (usually terminal 5). A 120 Vac
short-to-ground will exist if the input connections are
reversed. Failure to comply could result in personal
injury and equipment damage. T219.0
If it is not convenient to apply 120Vac power to a stored
control, the battery can be removed from the control cabinet and charged on the bench with a dc source which
supplies approximately 15mA charging current to the battery. A dual-rate portable trickle charger, Catalog No.
KA1142ME3, is available for this purpose. It provides a
selectable output of either 15mA for maintaining a
charged battery. This unit plugs into a standard 120Vac
receptacle and has an output plug at the end of a 4-foot
cord which mates with the battery plug.
val of the backup device. For this reason, it must always be
used in series with a fault-interrupting backup protective
reclosing device. Also, it will reset counts that do not reach
the counts-to-open setting within the selected reset time
due to clearing of temporary faults.
A minimum of 0.5 amps of load current flowing through
the sectionalizer will block the generation of a count pulse.
This “count-restraint” feature prevents the sectionalizer
from counting overcurrents interrupted by down-line
devices.
The sectionalizers are also equipped with an inrush-current restraint feature which distinguishes between inrush
currents and fault currents. If it is determined that the overcurrent through the sectionalizer is inrush current, the
phase and ground current levels of the sectionalizer are
blocked for a duration of 3 seconds upon current detection.
Ratings
Tables 1 and 2 show rating information for the Type GWC
sectionalizer.
Table 1
Basic Sectionalizer Ratings
Type GWC
Nominal Voltage (kV)........................................................ 34.5
Rated Maximum Voltage (kV)........................................... 38.0
Impulse Withstand 1.2 x 5.0 microsecond wave
BIL (kV) .............................................................................. 150
60 hertz withstand
Dry, 1 minute (kV)............................................................ 70
Wet, 10 seconds (kV)...................................................... 60
Continuous Current Rating (amps) ....................................400
Rated symmetrical interrupting current (amps rms)........... 880
Rated making current, asymmetrical (amps rms) .......... 15000
DESCRIPTION
The sectionalizer is a self-contained, circuit-opening device
used in conjunction with source-side protective devices
such as reclosers or circuit breakers, to automatically isolate faulted sections of electrical distribution systems. The
sectionalizer senses current flow above a preset level, and
when the source-side protective device opens to de-energize the circuit, the sectionalizer counts the overcurrent
interruption. Depending upon the coordination scheme, the
sectionalizer will open during the first, second, and third
open interval of the fault interrupting device to isolate permanent faults and confine outages to smaller sections of
line.
The sectionalizer does not interrupt fault current but can
be closed into a faulted line. It opens during the open inter-
Short-time ratings (amps rms)
10-seconds symmetrical ............................................ 3500
1-second symmetrical................................................ 10000
Momentary maximum, asymmetrical (amps rms) .......... 15000
Table 2
Operating Data
Phase-minimum-actuating 16, 24, 40, 56, 80, 112, 160,
current (amps) 224, 256, 296, 320, 448, 480, 640
Ground-minimum-actuating 3.5, 7, 16, 20, 28, 40, 56, 80
current (amps) 112, 160, 224, 320, BLOCK
Number of counts to open 1, 2, 3
Count reset (seconds) 15, 30, 60, 90, 120, 180
3
Page 4

Type GWC Installation Instructions
Dimensions and Weights
Figure 2 shows essential dimensional information for a
Type GWC sectionalizer, along with its weight and oil
capacity.
Operating Controls
The operating controls of the sectionalizer are located on
the front panel, within the control cabinet, as shown in
Figure 3.
Remote Control Switch
In the ON position, this switch permits the sectionalizer
to be operated by remotely located “dry” contacts which
are wired to a terminal block in the control cabinet.
Separate normally-open contacts are required for the
open and close operation.
In the OFF position, this switch disables remote control but
means of the control panel switches).
An extra set of contacts on this switch can provide
switch position information to the remote location.
does not
prevent automatic operations (by
115Vac - 5amp Breaker Switch
In the ON position, this switch energizes all 115Vac
power to the control cabinet and the operating housing
of the sectionalizer.
Manual Control Switch
While in the TRIP position, the sectionalizer main contacts are open and the closing circuit is disabled.
When placed in the CLOSE position, the sectionalizer
closing circuit is energized, the closing solenoid will be
momentarily energized and the sectionalizer will close.
Figure 2.
Type GWC Sectionalizer.
4
Page 5

S270-21-1
One Count-to-Open Switch
When set to the ONE COUNT TO OPEN position, the sectionalizer will open on the completion of the first overcurrent count.
This feature provides added safety during downline hot-line
work. The operation of this switch also cancels out any accumulated memory time and resets the count to zero.
Lamp Test Contact Position Switch
When set to CONTACT POSITION, this momentary contact, center-off switch energizes the appropriate lamp to indicate the position of the main contacts in the sectionalizer;
green lamp indicates open, the red lamp indicates closed.
In the LAMP TEST position, both lamps are energized
to check their condition.
Battery Test Terminals
The battery test terminals enable convenient checking of
the battery voltage, charging rate and battery quiescent
drain current.
Battery Load Test
This switch is used in conjunction with the BATTERY TEST
TERMINALS. While checking battery voltage, pressing this
button connects a 10 ohm load resistor over the battery,
allowing measurement of loaded battery voltage.
Manual Trip Lever
In addition to the controls described above, a manually
operated trip lever is located on the underside of the
operator cabinet. Capable of being operated with a hookstick, this lever will mechanically trip the operating mechanism to open the sectionalizer.
Once pulled down, the lever stays down and disables the
closing circuit to block closing of the sectionalizer. The lever
must be returned manually to its “UP” position to re-activate
the closing circuit.
INDICATING DEVICES
In addition to the contact position indicator lamps on the control panel; a contact position indicator and an operations
counter are located under the sleet hood, on the mechanism
operator cabinet.
The yellow contact position indicator is pinned to the
main operating shaft of the sectionalizer to indicate the
OPEN and CLOSED condition of the main contacts.
The operations counter gives a visual indication of the
cumulative number of openings of the unit.
SETTINGS
The operating characteristics are preset to customer
specifications and tested prior to shipment from the factory. However, if the sectionalizer is relocated or the coordination scheme is modified, the operating characteristics
can be easily changed in the field. The settings should be
checked before the unit is put into service. All settings
are located on the printed circuit board mounted on the
control front panel. See Figure 3.
NOTE: Before changing the trip resistor settings, the section-
alizer must be bypassed and de-energized.
GROUND MINIMUM
ACTUATING CURRENT
RESISTOR
PHASE MINIMUM
ACTUATING CURRENT
RESISTOR
COUNT-TO-OPEN
SELECTOR
Figure 3.
Operator Control Panel.
COUNT RESET
SELECTOR
115VAC BREAKER
SWITCH
ONE-COUNT-TOOPEN SWITCH
REMOTE CONTROL
SWITCH
LAMP TEST, CONTACT
POSITION SWITCH
MANUAL CONTROL
SWITCH
BATTERY LOAD
TEST SWITCH
BATTERY TEST
TERMINALS
911042KMA
5
Page 6

Type GWC Installation Instructions
Minimum Actuating Current
The minimum actuating current levels for both phase and ground
are determined by the selection of the proper plug-in resistors.
(Normally these settings are approximately 80 percent of the
minimum trip settings of the backup protective device.)
NOTE: If the backup device is not equipped for ground fault
sensing and tripping, the ground current sensing circuits of the sectionalizer can be de-activated by using
a shorting resistor labeled “BLOCK”.
Phase current resistors are identified with the phase symbol (ø) and the actuating current value in amps. Catalog
numbers for the available phase current resistors are listed
in Table 3.
Table 3
Minimum Actuating Resistor (Phase)
Label Value Resistance (ohms)
(amps) Minimum Maximum Catalog Number
16 264 270 KA176GV16
24 172 176 KA176GV24
40 94.3 96.3 KA176GV40
56 66.3 67.7 KA176GV56
80 47 48 KA176GV80
112 32.6 33.4 KA176GV112
160 22.9 23.5 KA176GV160
224 16.3 16.7 KA176GV224
256 13.8 14.2 KA176GV256
296 11.9 12.3 KA176GV296
320 11.1 11.5 KA176GV320
448 8.1 8.3 KA176GV448
480 7.4 7.6 KA176GV480
640 5.5 5.7 KA176GV640
Table 4
Minimum Actuating Resistor (Ground)
Label Value Resistance (ohms)
(amps) Minimum Maximum Catalog Number
3.5 6.91K 7.05K KA177GV3
7 1.168K 1.192K KA177GV7
16 379.0 387.0 KA177GV16
20 298.0 304.0 KA177GV20
28 200.0 204.0 KA177GV28
40 135.63 138.37 KA177GV40
56 94.3 96.3 KA177GV56
80 66.3 67.7 KA177GV80
112 47.0 48.0 KA177GV112
160 32.6 33.4 KA177GV160
224 22.9 23.5 KA177GV224
320 15.8 16.2 KA177GV320
BLOCK 0 0.1 KA177GVBLO
Ground current resistors are identified with the ground symbol ( ) and the actuating current value in amps. Catalog
numbers for the available ground current resistors are listed
in Table 4.
The minimum actuating current of the sectionalizer for
both phase and ground can be changed by merely
changing the appropriate plug-in resistor.
Counts-to-Open
The counts-to-open setting is determined by the position
of the COUNTS-TO-OPEN SELECTOR switch. Switch
positions 1, 2, and 3 correspond to 1, 2, or 3 counts to
open. Normally this setting is one less than the number
of operations to lockout of the backup protective device.
To change the number of counts-to-open setting, merely
change the position of the rotary switch.
Count Reset
The reset setting is determined by the position of the
COUNT RESET switch. Reset times of 15, 30, 60, 90,
120, and 180 seconds are available. This feature resets
to zero, and any accumulated counts are cancelled
whenever current, below the minimum actuation level,
flows through the sectionalizer without interruption for
longer than the time programmed.
The reset feature will operate with any current flow
from minimum load (5 amps) to values below phase or
ground pickup levels.
Count Restraint
The count-restraint feature blocks the sectionalizer from
generating a count pulse as long as 0.5 amps of load
current flows through the sectionalizer.
Inrush-Current Restraint
The inrush-current restraint feature blocks the phase
and ground actuating levels for three seconds after
current flow through the sectionalizer has been
restored and the overcurrent has been determined to
be inrush current.
The three-second time interval allows for system inrush
parameters to stabilize prior to allowing the sensitivity of
the sectionalizer to return to its programmed state.
Response Time
For backfed motor contribution and unsymmetrical clearing of upline faults, a response time is built into the sectionalizer control to eliminate unwanted counting of
these situations. Upon detection of any current above
the phase or ground actuating setting, the current must
exceed the response time characteristics as illustrated in
Figure 4. Total clearing time of reclosers and breakers
must exceed the response time characteristics of the
sectionalizer.
6
Page 7

0.1
.08
.06
.05
.04
.03
TIME (sec)
.02
.01
506080
100
CURRENT (percent of minimum value)
200
300
400
20 ms
Curve
500
600
Figure 4.
Maximum Response-Time Characteristic.
INSTALLATION
800
1000
S270-21-1
Lifting the Sectionalizer
Follow all approved safety practices when making
hitches and lifting the equipment. Lift the load
smoothly and do not allow the load to shift.
This unit has two lifting lugs - both must be used
when lifting the sectionalizer. Maximum strength
is attained with a vertical lift attached to the lugs.
Use a spreader bar with a fixed attachment point
for the hook at the load center.
If a sling is used, it must have a fixed attachment
point at the load center. Rig the load so that the
sling height is equal to, or greater than the distance
between lifting lugs. See Figure 4.
2000
WARNING: Follow all locally approved proce-
!
dures and safety practices when installing or
operating this equipment. Failure to comply may
result in death, severe personal injury, and/or equipment damage. G111.0
Preliminary Checks
Make sure the oil in the tank is at the proper level by
checking the vented dipstick in the head casting.
Replenish any loss with new, dry transformer oil.
If the switch has been stored for any length of time or is
being relocated, check the dielectric strength of the oil in
accordance with ASTM-approved testing procedures.
Physical properties of the oil used in Kyle®distribution
switchgear is found in Reference Data R280-90-1.
1. In new equipment, the oil must have a minimum
dielectric strength of 26kV. If less than 26kV, filter
the oil to restore its dielectric strength to an
acceptable level.
2. If the equipment has been in service and is being
relocated, the minimum dielectric strength of the
oil must be at least 22kV. If less than 22kV, or if
the oil is contaminated with carbon or sludge,
replace the oil.
3. Check that the actual settings agree with the sec -
tionalizer nameplate and are correct for the
planned installation.
Figure 4.
Lifting the Sectionalizer.
Mounting the Sectionalizer
Figure 5 shows installation using a Kyle mounting
frame. If other mounting means are used, support
the sectionalizer with the twelve 1/2-13 threaded
holes tapped into the sides of the casting.
7
Page 8

Type GWC Installation Instructions
Figure 5.
Type GWC Sectionalizer in KA146W3 Pole-Mounting Hanger.
Figure 6.
Standard Cabinet Mounting Dimensions.
8
Figure 7.
Double-size Cabinet Mounting Dimensions.
Page 9

S270-21-1
Mounting the Control
Remotely mounted, the Electronic Sectionalizer Control
can be located at any convenient, accessible location
near the sectionalizer. The 35-foot control cable limit
determines the maximum distance between the control
and sectionalizer.
1. For pole mounted installations, the control is normal-
ly mounted near the base of the pole.
2. For substation installations, brackets are available
as a mounting frame accessory for mounting the
control to the substation frame.
Outline, mounting, and knockout dimensions are
shown in Figure 6 for the standard control cabinet and
Figure 7 for the double-size control cabinet.
Grounding the Control
The control cabinet must be grounded. A grounding
connector on the underside of the cabinet will accommodate No. 14 solid through No. 4 stranded conductors
(Figures 6 and 7). Be sure to follow all locally approved
grounding procedures when installing the control.
NOTE: If the control is mounted on a sectionalizer frame,
which itself is grounded, a separate lead from the cabi-
net to earth ground is not required, but may be added.
The installation must include the following:
1. Protect sectionalizer and transformer with lightning
arresters.
2. Ground the transformer tank.
3.Ground the sectionalizer head.
4.Secondary cables must be Triplex or shielded cables.
spring charging motor, the closing solenoid, the battery
charger and the voltage restraint circuit.
Auxiliary power connections and connections from
remote operation are made on a 19-point terminal strip
mounted vertically on the back of the control. Figure 8
shows the customer connection terminals. However,
deviations may occur to accommodate certain combinations of accessories. All terminals for required connections are clearly marked.
CAUTION: Electrical shock hazard. Be sure the
!
grounded side of the 120 Vac auxiliary power circuit is connected to the terminal labeled COMMON AC
GND (usually terminal 5). A 120 Vac short-to-ground will
exist if the input connections are reversed. Failure to
comply could result in personal injury and equipment
damage. T219.0
Control Cable
A 7-foot cable is furnished as standard with the control
sectionalizer package. This length is sufficient for most
installations. For other installations, cable lengths, as
specified on the order are provided.
The cable is fabricated with connectors which mate
with the receptacles on the sectionalizer and the control.
NOTE: Adequately support the control cable along its length to
prevent repeated movement due to wind or other outside forces which can damage the cable.
CAUTION: This control is equipped with a volt-
!
age restraint feature which prevents the control
from counting overcurrent interruptions unless the
auxiliary voltage is also interrupted. Therefore, the
auxiliary power must be obtained from the load side of
the upline backup protective device so that the control
is energized only when the backup is closed. Failure
to follow this precaution will prevent proper operation
of the sectionalizer. T219.0
AUXILIARY POWER
All Type GWC sectionalizers require 120Vac auxiliary
power to operate. The 120Vac supply operates the
Figure 8.
Customer Connections Terminal Strip.
Main Wiring
It is desirable to provide the sectionalizer with switches
and protection as shown in Figure 9. Surge protection
on both sides of the sectionalizer is recommended.
The universal clamp-type terminals used for main line
connections accept No. 2 solid through 350-mcm copper
or aluminum cables.
The grounding clamp for the Type GWC sectionalizer
is located on the mounting frame; it accommodates 2/0
through 250-mcm cable.
9
Page 10

Type GWC Installation Instructions
Figure 9.
Main Wiring connections.
INTERCONNECTION WIRING
DIAGRAM
Figures 10 and 11 show the interconnection wiring of
both the sectionalizer and the sectionalizer control.
10
Page 11

S270-21-1
A Ø
CURRENT
PHASE SENSING
TRANSFORMERS
BLACK
WHITE
CONNECTOR
REF. GWA-17B
BLUE
BROWN
NOTE: CUT JUMPER (2)
GVA-197C-2
ORANGE
3
NC
LS1
4
NC
VIOLET
3
NC
LS2
4
NC
RED
A
WHITE
B
A
BROWN
BLACK
1
NO
2
NO
1
NO
2
NO
RED
D
RED
BLUE
B Ø
C
BLACK
F
GREEN
RED
WHITE
E
ORG
B
RED
GREEN
BLUE
CUSTOMER
INPUT TERMINALS
C Ø
BLACK
YELLOW
C
GND
GROUND
WHT
BLACK
YELLOW
ORANGE
115-VAC
YEL
G
C Ø
B ØA Ø
H
G
BLK
RED
VIOLET
VARISTOR
CAPACITOR
VARISTOR
CAPACITOR
BLACK
GROUND SENSING
CURRENT TRANSFORMERS
ASSEMBLY
ASSEMBLY
GREEN
2
4
NC
NO
LS-3
3
1
NO
NC
GREY
BLACK
67 89
6789
5
5
34
34
12
12
GND
BLACK
YELLOW
BLACK
RED
ORANGE
VIOLET
GREEN
A
C
B
E
BLUE
HEATER
GNDS
L
F
P
D
M
G
R
K
N
H
BLACK
GREEN
3
NC
2
NO
LS-4
1
COM.
WHITE
BLACK
WHITE
BLACK
BLACK
TC-1
TRIP
COIL
OPEN
24-VDC
Figure 10.
Type GWC sectionalizer interconnection diagram.
BLACK
BLACK
CLOSE
115 VAC
BLACK
BLACK
COIL
TC-2
BLACK
BLACK
BLACK
MOTOR
115-VAC
11
Page 12

Type GWC Installation Instructions
"HTR" HEATER ASSEMBLY
Term To Color
1 TB1-11 BRN
2 TB2-2 BRN
"BC" BATTERY CHARGER
Term To Color
1 TB2-2 WHT
1 BC-4 WHT
2 TB1-17 RED
2 BP(+) RED
3 TB1-10 BRN
3 X-3 BRN
4 BC-1 WHT
4 X-4 WHT
"X" TRANSFORMER
120/25 VAC
Term To Color
1 VC-A YEL
2 VC-B GRN
3 BC-3 BRN
4 BC-4 WHT
"TCB" 5A CIRCUIT
BREAKER
Term To Color
1 TB1-6 RED
2 TB1-11 BRN
"RB" RELAY BOARD
Term To Color
1 TB1-5 BRN
2 TB1-10 RED
3 TB1-14 ORG
4 TB1-13 YEL
5 TB1-17 GRN
6 TB1-2 BLU
7 TB1-15 VIO
8 TB1-12 GRY
9 TB1-16 WHT
10 TB1-18 BLK
11 TB2-10 WHT
12
13 TB1-19 WHT
/BRN
/RED
"RC" RECEPTACLE
Pin To Color
A SB-1 BRN
B SB-2 RED
C SB-3 ORG
D SB-4 YEL
E SB-5 GRN
F SB-16 BLU
G SB-14 GRN
H SB-6 BLU
K SB-7 VIO
L SB-13 YEL
M SB-12 ORG
N SB-8 GRY
P SB-11 RED
R SB-9 WHT
S SB-10 BRN
"SW1" REMOTE ON/OFF
Term To Color
2 CS-5 BRN
3 TB1-3 VIO
5 L2-1 RED
6 TB1-1 BLU
10 TB1-9 ORG
11 TB1-8 YEL
12 TB1-7 GRN
"SW3" "TCB"
WAFER 3 WAFER 2
"VC" VOLTAGE
CHARGING BOARD
Term To Color
A X-1 YEL
B X-2 GRN
C GND WHT
D EC-18 ORG
"BT" BATTERY
TERMINALS
Term To Color
1 Z-1 WHT
1 SW2-3 WHT
2 RES-2 BLK
3 SW4-2 RED
3 TB1-17 RED
"SW2" LMP. TEST and
CONTACTOR POS.
Term To Color
1 CS-6 BLK
2 L2-2 ORG
3 BT-1 WHT
3 SW2-6 WHT
4 TB1-12 GRY
5 L1-2 YEL
6 SW2-3 WHT
6 TB2-1 WHT
"CS" PISTOL GRIP SWITCH
Term Wafer To Color
1 2 L1-1 RED
1 2 SW4-2 RED
2 2 TB1-2 WHT
5 3 TB1-16 WHT
5 3 SW1-2 BRN
6 3 TB1-4 BLK
6 3 SW2-1 BLK
157
4810
2
11
2
369
3
"SW1"
12
12
2 5
3 6
"L2" "L1"
"SW2"
215
6
"CS"
1
"SW4"
1
2
2
"BT"
"RES"
12
1
2
/RED
/BRN
"Z"
"EC"
"RES" BATTERY TEST
RESISTOR
13
24
Term To Color
1 SW4-1 BRN
2 BT-2 BLK
2 BP(-) BLK
"EC" EDGE CONNECTOR
Term To Color
2 Z-4 RED
3 Z-1 WHT
7 TB2-4 WHT
8 TB2-5 GRY
14 TB2-8 VIO
15 TB2-7 BLU
16 TB2-6 GRN
17 TB2-3 YEL
18 VC-D ORG
19 TB1-18 RED
20 SW3-2 WHT
21 TB1-19 BRN
22 SW3-3 BLK
CUSTOMER CONNECTIONS
Function Term Supply
"SW1" T B1-8 ON-OFF
Motor, close TB1-6 120 Vac
Coil, Heater & TB1-5 Common AC
Battery Charger GND
REMOTE TB1-4
TRIP TB1-3 TRIP
REMOTE TB1-2
CLOSE TB1-1 CLOSE
TB1-9 REMOTE
TB1-7 STATUS
"BC"
12 34
A
B
C
"TB2"
1
D
E
2
F
"VC"
12345678 9 10 11 12
"BP" BATTERY PLUG
Term To Color
+ BC-2 RED
— RES-2 BLK
CABINET GROUND
From Color
Receptacle
Mtg. Screw GRN
SB-GND GRN
Back Panel GRN
"Z" ZENER DIODE
ASSEMBLY
Term To Color
1 EC-3 WHT
1 BT-1 WHT
2 Z-3 BLK
3 Z-2 BLK
4 EC-2 RED
4 TB2-10 RED
Customer
"TB1"
"RB"
3
"X"
4
120-VAC
TRIP
COMMON AC GND
2
CLOSE
1 34567891011 12 13 14 15 16 17 18 19
"BP"
"HTR"
"SB"
"RC"
CABINET
GROUND
"SB" SURGE BOARD
Term From To Color
1 RC-A TB2-1 BRN
2 RC-B TB2-3 RED
3 RC-C TB2-4 ORG
4 RC-D TB2-5 YEL
5 RC-E TB2-9 GRN
6 RC-H TB2-6 BLU
7 RC-K TB2-7 VIO
8 RC-N TB2-8 GRY
9 RC-R TB2-9 WHT
10 RC-S TB1-10 BRN
11 RC-P TB1-6 RED
12 RC-M TB1-12 ORG
13 RC-L TB1-13 YEL
14 RC-G TB1-14 GRN
15
16 RC-F TB1-15 BLU
GND CAB. GRN
GND
"TB2" TERMINAL BLOCK
Color Bottom Term Top Color
BRN SB-1 1 TB2-2 BLK
WHT SW2-6 1 TB1-5 BRN
BRN HTR-2 2 BC-1 WHT
RED SB-2 3 EC-17 YEL
ORG SB-3 4 EC-7 WHT
YEL SB-4 5 EC-8 GRY
BLU SB-6 6 EC-16 GRN
VIO SB-7 7 EC-15 BLU
GRY SB-8 8 EC-14 VIO
GRN SB-5 9 TB2-8 BLK
WHT SB-9 9
RED Z-4 10 RB-11 WHT
2 TB2-1 BLK
8 TB2-9 BLK
/BRN
Figure 11.
Type GWC control interconnection diagram.
12
Page 13

S270-21-1
ACCESSORIES
Auxiliary Switch (KA102GV1)
The auxiliary switch, mounted to the top of the operator
cabinet, in a weather-proof housing, is used for relaying or
interlocking schemes and for remote contact indication.
Two switch stages are provided. Each stage consists of
two independent contact assemblies with either “a” (normally open) or “b” (normally closed) contacts which can
be easily changed in the field. A data plate attached to
the switch cover shows the switch arrangement. Related
switch contact positions are shown in Table 5.
The switch is permanently wired to a multi-pin receptacle
in the bottom of the mechanism operator cabinet. Table 6
shows the pin arrangement of the the mating plug shown
in Figure 12.
Table 5
Related Switch Contact Positions
When Sectionalizer Contacts Are Closed Open
Auxiliary “a” contacts are.............. Closed Open
Auxiliary “b” contacts are.............. Open Closed
KEYWAY
PIN G
The switch contacts are insulated for 600 volts and have a
continuous current rating of 10 amps. Their interrupting ratings are shown in Table 7.
Switching positions can be changed from “a” or “b” operation by repositioning the cams inside each switch section.
To change any cam position:
1. Remove the auxiliary switch cover.
2. Detach the switch from the switch link by removing the
groove pin and C-rings.
3. Remove the machine screws attaching the assembly
to the cabinet.
4. With the switch removed, unfasten the two hex nuts
and lockwashers from the long machine screws that
hold the switch sections together.
5. Starting with the rear switch section, lift the cams off
the operating shaft, replacing the cams in one of the
positions shown in Figure 13.
6. Reassemble the switch sections, as removed, and
remount the switch on the sectionalizer.
G
F
E
A
H
B
D
C
Figure 12.
Auxiliary Switch Connector Plug.
Table 6
Switch Leads to Receptacle Terminals
Switch Receptacle Switch
Switch Stages Terminal Pin Contact
1A
2B
Stage 1 3C
4D
5E
6F
Stage 2 7G
8H
“b”
“a”
“b”
“a”
Table 7
Interrupting Ratings - Switch Contacts
Inductive Non-Inductive Inductive Non-Inductive
Volts ac ac dc dc
(amps) (amps) (amps) (amps)
24dc — — 15 20
48dc — — 7.5 10
120ac 60 80 — —
125dc — — 1.5 2
240ac 30 60 — —
250dc — — 0.45 0.5
13
Page 14

Type GWC Installation Instructions
Figure 13.
Cam Positions inside the Auxiliary Switch.
Bushing-Type, Multi-Ratio
Current Transformers
The multi-ratio current transformers have only one primary turn - the bushing rod. They are available with secondary windings that provide a primary/secondary-current ratio of 600:5. Different ratios can be obtained by
connection to appropriate taps on the secondary windings. See Table 8.
OPERATING INSTRUCTIONS
Automatic Operation
Under normal operating conditions, the sectionalizer
counts overcurrent interruptions. If the required number
of counts are registered within the selected memory time,
a relay contact closes, connecting the battery to a 24Vdc
trip solenoid in the sectionalizer. The trip solenoid breaks
the toggle latch mechanism, which releases the trip
springs and opens the sectionalizer contacts.
14
Table 8
Bushing-Type, Multi-Ratio Current Transformer
Ratios and Terminal Connection.
Ratio Terminals
600:5 X1—X5
500:5 X2—X5
450:5 X3—X5
400:5 X1—X4
300:5 X2—X4
250:5 X3—X4
200:5 X4—X5
150:5 X1—X3
100:5 X1—X2
50:5 X2—X3
The sectionalizer's opening operation closes a switch
which connects 115Vac power to the motor. The motor
operates a gear reduction and lever mechanism to
extend (charge) both the trip and closing springs and set
the toggle latch.
Page 15

S270-21-1
Type GWC motor-operated sectionalizers do not close
automatically. An electrical signal is required. The closing
signal is initiated by moving the manual control switch to
the “CLOSE” position, or closing a remotely located “dry”
contact connected to Terminals 1 and 2 on the customer
connection terminal strip.
The closing signal energizes a 115Vac solenoid which releases the charged closing springs to close the sectionalizer contacts.
Manual Electrical Operation
The sectionalizer can be electrically opened and closed by
operating the manual control switch, in the control cabinet,
to the “TRIP” or “CLOSE” position, or by closing remotely
located “dry” contacts.
CONTROL BATTERY
Power to operate the trip solenoid is provided by a 24volt, nickel-cadmium battery located in the back, upperright corner of the control cabinet. A 120Vac battery
charger provides a constant trickle charge to the battery.
Battery Connections
When shipped from the factory, the battery is disconnected from the control and its output connector is taped
to the side of the battery. Plug the connector into the
mating receptacle located just below the battery to complete the battery circuit.
Battery Check
Three battery test terminals in the lower right corner of
the panel (Figure 15) are used to check battery voltage
and charging rate. If abnormal test readings are encountered, refer to the sectionalizer maintenance instructions.
NOTE: The control does not need to be connected to a sec-
tionalizer for these battery check tests.
Figure 14.
Checking mechanism to manually charge the
closing springs.
88972KMA
Manual Non-Electrical Operation
Manual non-electrical opening is accomplished by pulling
down the manual trip lever located under the operator
housing of the sectionalizer. Once pulled down, the manual trip lever stays down until manually returned. While the
manual trip lever is down, manual and electrical closing is
blocked.
Manual non-electrical closing is accomplished by cranking the operator shaft (Figure 14). Remove the cover from
the operator housing, mount the crank handle (stored in
the bottom of the housing) on the shaft and crank clockwise. When the closing spring drive stud reaches the 7
o’clock position, the closing spring will be fully extended
and the mechanism will stop. Up to 42 cranking revolutions may be required. To close the sectionalizer, push the
closing solenoid plunger up, into the solenoid, to release
the closing spring.
Figure 15.
Battery Test Terminals.
The left hand pair of terminals (-V-) are connected
directly across the battery output to check battery voltage. The red terminal (far left) is plus (+). The output
voltage of a fully charged battery will normally be 26-28
volts. The BATTERY LOAD TEST switch on the control
front panel places a 10 ohm resistor over the battery
output. Press and hold this switch for approximately 5
seconds while observing battery voltage. Voltage must
not drop by more than 3 volts from the no load voltage
previously noted.
The right hand pair of terminals (-I-) are connected in
series with the negative battery lead to check charging
rate. Proceed as follows:
1. Make sure that the control is on by moving the manual control switch to “CLOSE”.
2. Plug-in a dc milliammeter into the current test terminals. Loosen both terminals slightly and disconnect
the shorting link from between the terminals.
3. With the battery charger energized, current will flow
in the direction shown by “CHG”. The charging rate
will be approximately 17mA.
86847KMA
15
Page 16

Type GWC Installation Instructions
4. Replace and tighten the shorting link between the
current terminals before removing the ammeter.
NOTE: Bypass diodes in the battery circuit prevent the control
from being disabled if the link is inadvertently left open.
TESTING
Type GWC sectionalizers are carefully tested at the factory prior to shipment. Well-equipped test facilities, a
detailed testing procedure, and trained test personnel
assure that the unit will operate according to published
data. Permanent records are kept of each sectionalizer's
test performance.
Each sectionalizer leaves the factory ready for installation. Pre-installation testing is not necessary. However,
should verification of operation prior to installation be
desired, the following procedures should be used.
120 V
R
60 HZ
S1
S2
Test Circuit and Equipment
A suggested test circuit is shown in Figure 16. In this
test setup, the test current is obtained by back-feeding a
600:5 amp current transformer (located in the primary
loop of one phase of the sectionalizer) from an
adjustable 120Vac source. The ammeter scales should
be selected to accommodate the appropriate range of
test currents.
Pre-Test Procedures
Before performing any of the test procedures that follow,
make sure the 120Vac power to the voltage charging
board is disconnected to disable the voltage restraint
feature. The sectionalizer will not count as long as the
voltage restraint feature (part of the voltage charging
board) is energized.
To disable the voltage charging board, disconnect X-3
and X-4 leads on the battery charger board.
Test Procedures
While performing the following tests, monitor the continuity between test points C and D, F and H. If no continuity exists between either set of test points upon closing of the sectionalizer, apply 6 amps of load current by
closing switch S1 for 3.5 seconds. Once continuity has
been restored, open S1 and proceed with the test procedures.
T1
A
T1— VARIABLE AUTO TRANSFORMER
T2— 600:5 CURRENT TRANSFORMER
S1— SPST TOGGLE SWITCH
S2— SPST PUSHBUTTON SWITCH
R1— DROPPING RESISTOR, 2K-10 WATT
A — AMMETER
Figure 16.
Test Circuit Schematic.
T2
The minimum actuating current can be verified by testing at the ± 10 percent values of the phase and ground
actuating current ratings. For example, the minimum
actuating resistor rated at 80 amps is tested at 72 amps
(no count) and at 88 amps (count registered).
Phase Minimum Actuating Current
When checking the phase minimum actuating current, the
ground fault sensing portion of the sectionalizer must be
disabled. Testing an individual phase without disabling the
ground sensing circuits will cause a false count.
The following procedure can be used:
1. Jumper the ground actuating current resistor with a
short lead to disable the ground sensing circuit.
2. Jumper terminals P and D together.
3. Program the sectionalizer for one-count-to-open by
setting the COUNTS-TO-OPEN selector switch to “1”.
4. Close the sectionalizer by operating the Manual
Control Switch to “CLOSE”.
5. With the test circuit connected to phase A of the sectionalizer and S1 open, hold S2 closed and slowly
raise the test current from zero to the appropriate
value shown in Column A of Table 9. Hold S2 closed
at this current for at least three seconds.
6. Release S2 to simulate a backup opening. The sectionalizer should not open.
Minimum Actuating Current
16
Page 17

S280-21-1
7. Close S2 and adjust the test current to the appropriate value shown in Column B of Table 9.
8. Release S2 to simulate a backup opening. The sectionalizer should count the overcurrent interruption and
open.
9. Repeat steps 3 through 7 for phases B and C.
10. Remove the jumper from terminals P and D.
11. Remove the jumper from across the ground actuating cur-
rent resistor upon completion of this portion of the test.
Ground Minimum Actuating Current
T o prevent the possibility of a false count, the phase sensing portion of the sectionalizer control circuit should be disabled when
the ground minimum actuating current is being checked.
The following procedure should be used:
1. Jumper the phase actuating current resistor with a
short lead to disable the phase sensing circuit.
2. Jumper terminals P and D together.
3. Check that the sectionalizer control is set for one-
count-to-open.
4. Close the sectionalizer by operating the Manual
Control Switch to “CLOSE”.
5. With the test circuit connected to phase A of the sectionalizer and S1 open, hold S2 closed and slowly raise
the test current from zero to the appropriate value
shown in Column A of Table 9. Hold S2 closed at this
current for at least three seconds.
Table 9
Test Circuit Operating Limits for Actuating Current
Settings
Column A Column B
Actuating Sectionalizer Must Sectionalizer Must
Current Setting Not Count Below Count At
(amps) (amps) (amps)
3.5 3 4
7 6.3 7.7
16 14.4 17.6
20 18 22
24 21.6 26.4
28 25.2 30.8
40 36 44
56 50.4 61.6
80 72 88
112 101 124
160 144 176
224 201 247
256 230 282
296 266 326
320 288 352
448 403 483
480 432 528
640 576 704
6. Release S2 and simulate a backup opening. The
sectionalizer should not open.
7. Close S2 and adjust the test current to the appropriate
value shown in Column B of T able 9.
8. Release S2 to simulate a backup opening. The sectionalizer should count the overcurrent interruption and open.
9. Repeat steps 3 through 7 for Phases B and C.
10. Remove the jumper from terminals P and D.
10. Remove the jumper from across the phase actua t-
ing current resistor.
Count Restraint
The count restraint feature prevents erroneous counts
of overcurrents interrupted by downline protective
devices by blocking the counting operation as long as
a minimum of 0.5 amps of uninterrupted line current
flows through the sectionalizer.
The operation of the count restraint can be verified by
superimposing an interruptible overcurrent on a constant
minimum line current. The sectionalizer will not count or
open on the interruption of the overcurrent as long as
the minimum line current is not interrupted. To check the
ground restraint feature, proceed as follows:
1. Jumper the ground actuating current resistor with a
short lead to disable the phase sensing circuit.
2. Jumper terminals P and D together.
3. Check that the sectionalizer control is set for one-
count-to-open.
4. Close the sectionalizer by operating the Manual
Control Switch to “CLOSE”.
5. With the test circuit connected to phase A of the
sectionalizer and S1 open, hold S2 closed (to simulate a constant load current of approximately 6
amps), hold S2 closed and raise the test current
slightly above the appropriate value shown in
Column B of Table 9. Hold S2 closed at this current
for at least three seconds.
6. Release S2 and simulate a downline device clearing
the overcurrent. The sectionalizer should not open,
verifying the operation of the count restraint feature.
7. Open S1 and again close and adjust S2 to simulate a
backup device clearing the fault. This time the sectionalizer should count the overcurrent interruption and open.
8. Remove the jumper from terminals P and D.
17
Page 18

Type GWC Installation Instructions
Voltage Restraint
When energized at 120Vac, the voltage charging board
provides fast charging times for the trip energy storage
capacitors. It also acts as a voltage restraint; the sectionalizer will not count an overcurrent interruption of
the protective device unless the voltage at the control is
also interrupted. To check the voltage restraint feature,
proceed as follows:
1. Reconnect X-3 and X-4 leads to the battery charging board.
2. Jumper the ground actuating resistor with a short
lead to disable the ground sensing circuit.
3. Jumper terminals P and D together.
4. Program the sectionalizer for one-count-to-open.
5. Close the sectionalizer by operating the Manual
Control Switch to “CLOSE”.
6. With the test circuit connected to phase A of the sectionalizer and S1 open, close S2 and raise the current
to slightly above the appropriate value shown in
Column B of Table 9. Hold S2 closed at this current
for at least three seconds.
7. Release S2 to simulate a downline device clearing the
overcurrent. The sectionalizer should not open.
8. Disconnect X-3 and X-4 leads on battery charger boards.
9. Again close and release S2. The sectionalizer
should open.
10. Remove the jumper from terminals P and D.
Number of Counts-to-Open
The number of counts-to-open can be verified by interrupting, the preset number of times, an overcurrent
through the sectionalizer. For example, with the control
set for three counts, the sectionalizer will open upon the
third overcurrent interruption. Proceed as follows:
1. Jumper the ground actuating current resistor
with a short lead to disable the ground sensing
circuit.
2. Program the sectionalizer for three counts-toopen by setting the COUNTS-TO-OPEN
SELECTOR switch to “3”
3. Close the sectionalizer by operating the Manual
Control Switch to “CLOSE”.
4. With the test circuit connected to phase A of the
sectionalizer and S1 open, close S2 and raise
the test current to slightly above the appropriate
value shown in Column B of Table 9. Hold S2
closed at this current for at least three seconds.
5. Open and close S2 a number of times. The sectionalizer should open upon the third opening of S2.
6. To verify the two-counts-to-open setting, set the
COUNTS-TO-OPEN SELECTOR switch to “2” and
repeat steps 3 through 5. The sectionalizer should
open upon the second opening of S2.
Count Reset
The count reset feature resets the sectionalizer count to
zero whenever current below the actuating level flows
through the sectionalizer for longer than the programmed reset time without interruption. The reset time
settings have a tolerance of ±10 percent.
It can be verified by interrupting an overcurrent flow
through the sectionalizer one time less than the
counts-to-open setting, then allowing load current to
flow for periods just under and just over the reset setting. The sectionalizer should open if the overcurrent
for the final count is interrupted within the reset time
period (count has reset to zero). The following procedures is used to verify the count reset:
1. Jumper the ground actuating current resistor
with a short lead to disable the ground-sensing
circuit.
2. Jumper terminals P and D together.
3. Program the sectionalizer control for two counts-
to-open and set the COUNT RESET SELECTOR
to 15 seconds.
4. Close the sectionalizer by operating the Manual
Control Switch to “CLOSE”.
5. With test circuit connected to phase A of the sectionalizer and S1 open, close S2 and raise the test
current to slightly above the appropriate value
shown in Column B of Table 9. Hold S2 closed at
this current for at least three seconds.
6. Release S2 to simulate a backup protective
device clearing the overcurrent. The sectionalizer
will register a count.
7. Close S1 for 13.5 seconds.
8. Momentarily close and then release switch S2. The
sectionalizer should open, verifying that the count
reset has not been activated.
9. Reclose the sectionalizer. Close and release S2
once to register one overcurrent interruption count.
10. Close S1 for slightly more than 16.5 seconds.
11. Momentarily close and release switch S2. The sec-
tionalizer should not open verifying that the count
reset has been activated and the first count has
been erased.
12. Again, close and release S2. The sectionalizer
should open.
13. Remove the jumper from terminals P and D.
18
Page 19

S270-21-1
Inrush-Current Restraint
The inrush-current restraint feature distinguishes
between fault currents and inrush currents. For fault
current interruptions, the sectionalizer counts and
opens normally. For an inrush-current condition, the
phase and ground minimum actuating current detection is blocked for 3 seconds to prevent counting the
inrush current.
The three-second time interval allows for system
inrush parameters to stabilize prior to allowing the
sensitivity of the sectionalizer to return to its programmed state.
The operation of the inrush-current restraint can be
verified by simulating a fault condition (the overcurrent is preceded by an overcurrent interruption) and
an inrush condition (the overcurrent is preceded by a
load current interruption).
The following procedure is used to verify the inrushcurrent restraint feature.
1. Jumper the ground actuating current resistor with a
short lead to disable the ground sensing circuit.
2. Set the COUNTS TO OPEN SELECTOR switch to “1”.
3. Close the sectionalizer by operating the Manual
Control Switch to “CLOSE”.
4. With the test circuit connected to phase A of the
sectionalizer and S1 open, hold S2 closed and
raise the test current to slightly below the appropriate value shown in Column A of Table 9.
5. Release S2 to simulate a backup opening with
only load current flowing through the sectionalizer when current was interrupted. The sectionalizer should not open.
6. Close S2 and, in no more than three seconds,
adjust the test current to just below twice the
appropriate value shown in Column A of Table 9
to simulate an inrush condition. Release S2. The
sectionalizer should not open, verifying that the
inrush restraint feature has been activated.
7. Reset the inrush restraint as follows:
A. Short test terminals D and P together.
B. Close S1 for 3.5 seconds.
C. Open S1 and remove short from test terminals D
and P.
8. Close S2 and raise the test current to slightly above
the appropriate value shown in Column B of Table 9.
9. Release S2 to simulate a backup opening with fault
current flowing through the sectionalizer when current was interrupted. The sectionalizer should open.
10. Close the sectionalizer by operating the Manual
Control Switch to “Close”.
11. Repeat step 9 to simulate a fault condition.
12. Release S2. The sectionalizer should open verify-
ing that the inrush restraint has not been activated.
Post-Test Procedures
After testing has been completed, make sure that the
control settings are programmed to the operating parameters as originally specified.
Reconnect X-3 and X-4 leads to battery charger board
terminals 3 and 4 respectively.
19
Page 20

Type GWC Installation Instructions
©1997 Cooper Power Systems, Inc.
®
Kyle
is a registered trademark of Cooper Industries, Inc.
KA2048-126
!
SAFETY
FOR LIFE
Printed on Recycled Paper
Cooper Power Systems
Quality from
Cooper Industries
P.O. Box 1640, Waukesha, WI 53187
http://www.cooperpower.com/
KOD
3/97
 Loading...