

Coolon CP24-ELV, CP24 Series, CP24-DIM User Manual
CP24 INDUSTRIAL LED MANUAL EDITION 0.6
Page 1 / 2
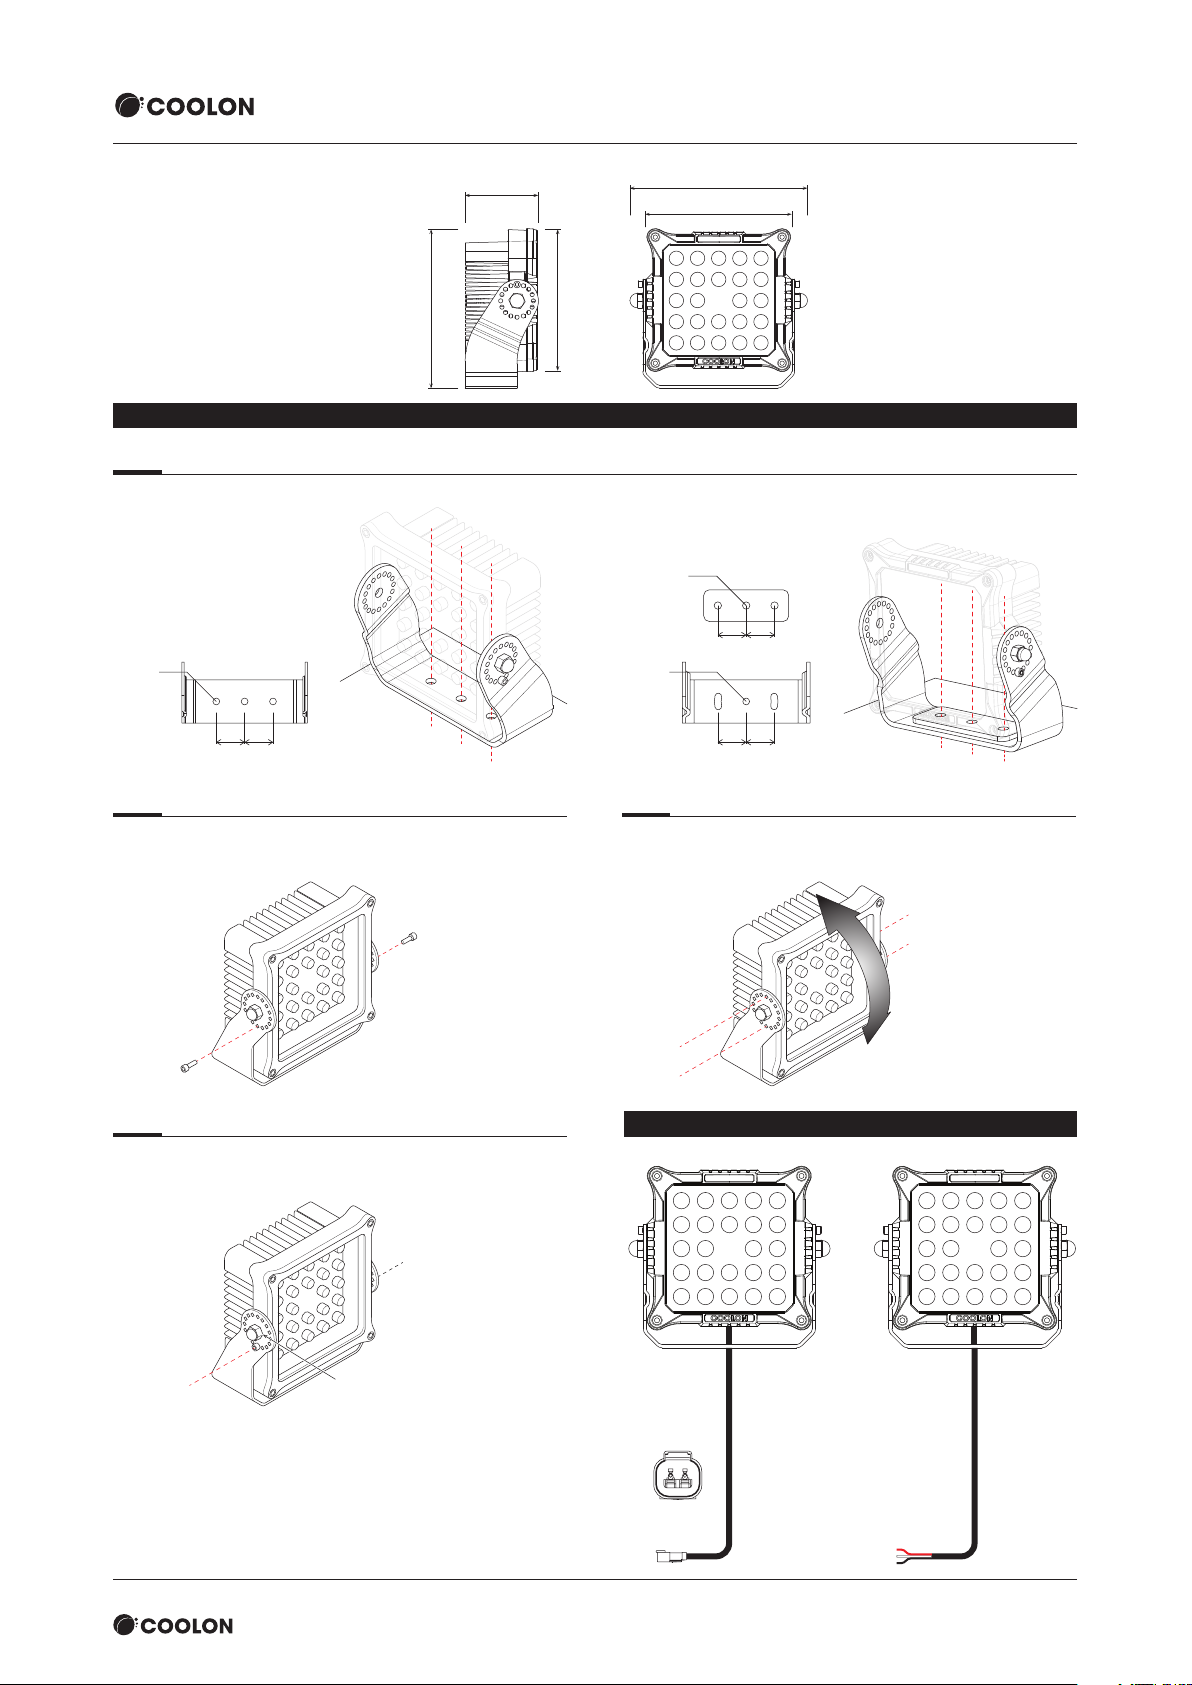
CP24 Luminaire w/ Standard Bracket
232mm
108m m
211m m
265mm
216m m
MOUNTING BRACKET INSTALLATION
Step 1
Mount light tting to appropriate location.
Fixed Plant Bracket Mobile Plant Bracket
Ø13mm
50mm 50mm
Ø12mm
50mm 50mm
Ø12mm
50mm 50mm
Step 2
To adjust the mounting angle, unscrew bolt and
loosen dome nut.
Step 4
Use Loctite® 222™ retaining compound (not included) to
secure the dome nut. Screw in and tighten bolts on both sides.
Use Loctite® 222™ retaining compound
(not incl uded) to s ecure th e dome nut .
Step 3
Adjust the angle of the light tting, and line up bracket holes
to either the top or bottom mounting holes.
WIRING INSTRUCTIONS
CP24-ELV CP24-DIM
24VDC IN
Steel Wi re
Braided Cable
24VDC IN
Steel Wi re
Braided Cable
+ –
Red (Positive)
White (Positive)
Black (Negative)
Product must be installed by a suitably qualied person. All documentation is subject to change without notice. Refer to our website for the latest information.www.coolon.com.au
Black (Negative)
White (0-10V Dimming)
Page 1 / 2support@coolon.com.au • aus. 1300 287 533 • intl. +613 8681 3633 • www.coolon.com.au
CP24 INDUSTRIAL LED MANUAL EDITION 0.6
Page 2 / 2
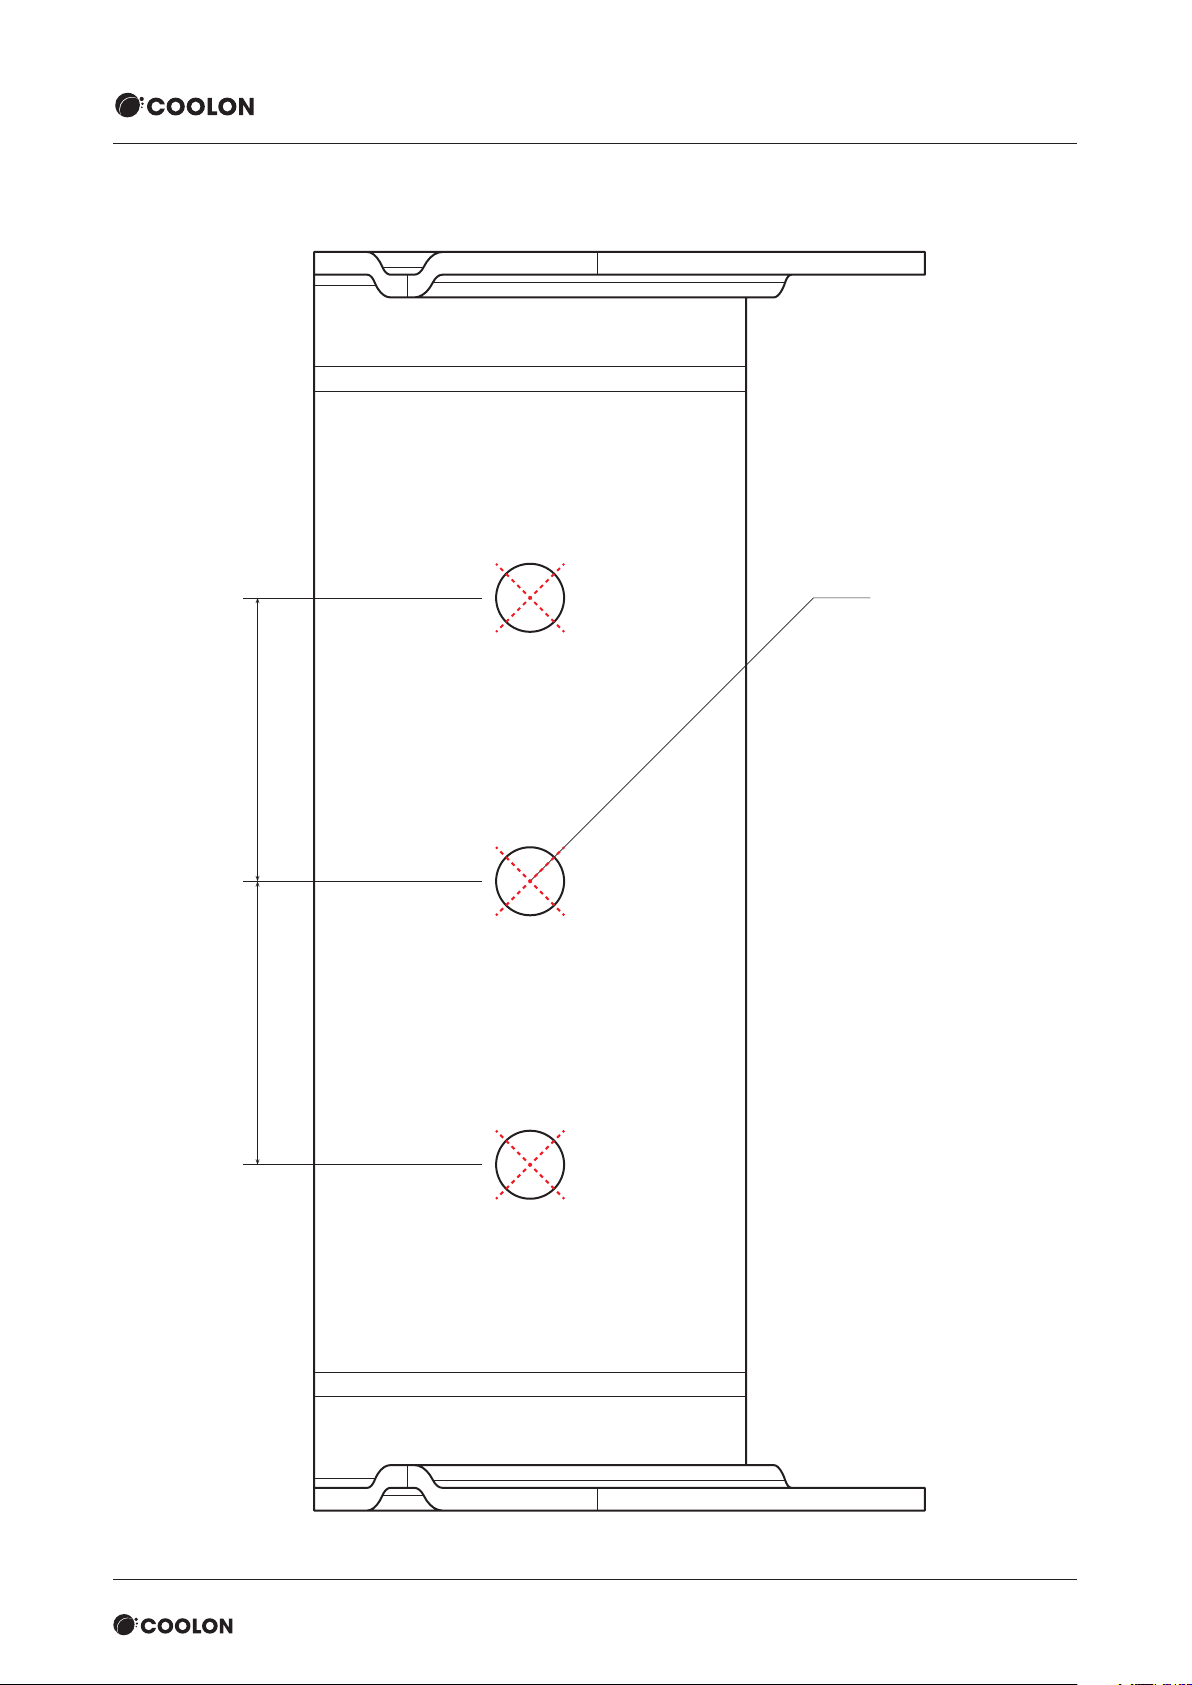
Ø12mm holes
50mm
spacings
Bracket - Actual Size
(1:1 when printed on A4 page)
support@coolon.com.au • aus. 1300 287 533 • intl. +613 8681 3633 • www.coolon.com.au
Product must be installed by a suitably qualied person. All documentation is subject to change without notice. Refer to our website for the latest information.www.coolon.com.au
Page 2 / 2
 Loading...