

Page 1
ASSEMBLY INSTRUCTION
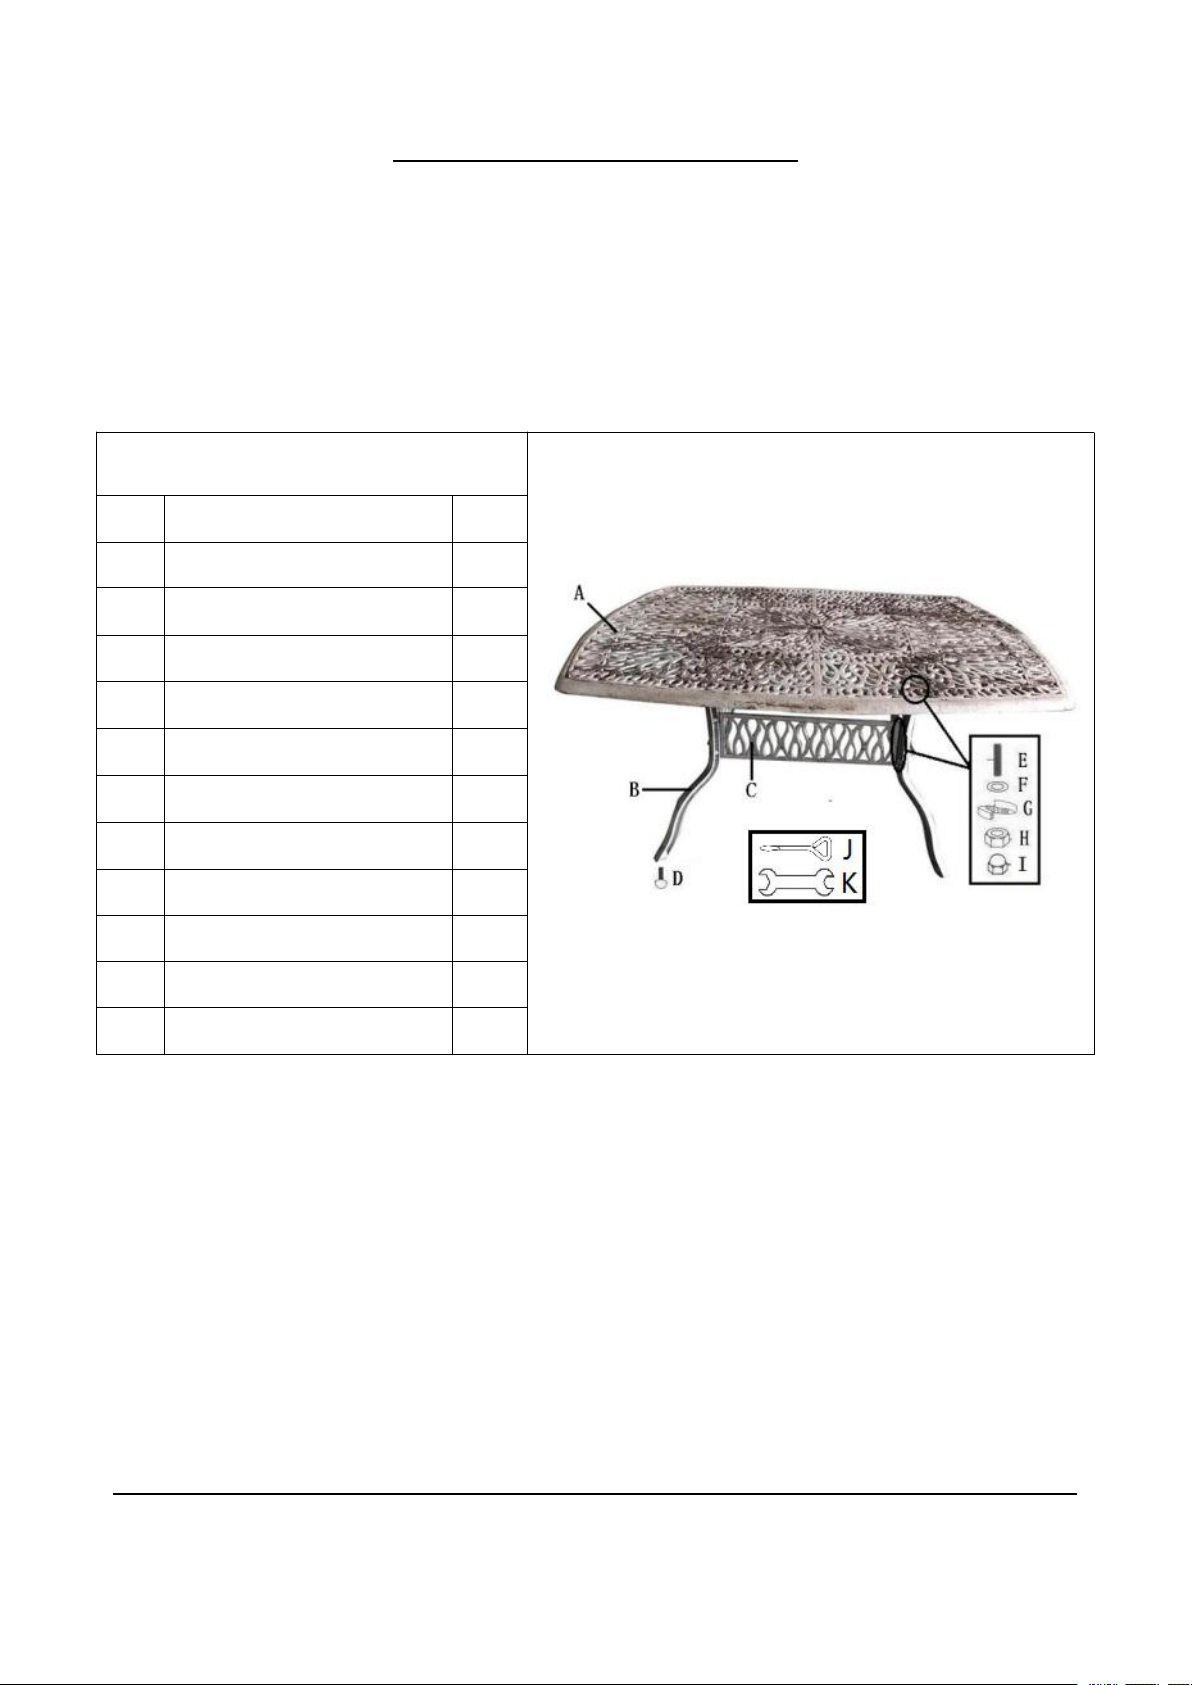
PARTS&HARDWARE LIST
NO.
DESCRIPTION
QTY
A
Table Top
1
B
Leg
4
C
Connecting Part
4
D
Adjustable Foot Pad
5
E
Headless Screw M8
13
F
Flat Washer M8
13
G
Spring Washer M8
13
H
Nut M8
13
I
Plastic Cap
13
J
Wrench
1
K
Screwdriver
1
CAUTION:
1. Please read this instruction carefully before assembly. Count and organize all parts before you
begin.
2. Assemble the product on a clean and soft surface, such as a piece of carpet, so as to prevent the
surface paint of parts from scratching off.
3. One more spare for each screw.
ASSEMBLY:
1. Attach the legs to the table top using M8 headless screws, flat washers, spring washers and nuts.
Do not tighten completely at this stage.
2. Attach the connecting parts to the table legs using M8 headless screws, flat washers, spring
washers and nuts.
3. Tighten all the screws after proper adjustment, then put the plastic caps on the nuts.
4. Turn over the table, adjust feet pads under legs if the table is unbalanced.
(Aluminum is a soft metal, over tightening may strip thread or break parts)
PLEASE DO NOT OVERTIGHTEN
 Loading...